The Train Department Talyllyn No1 User manual
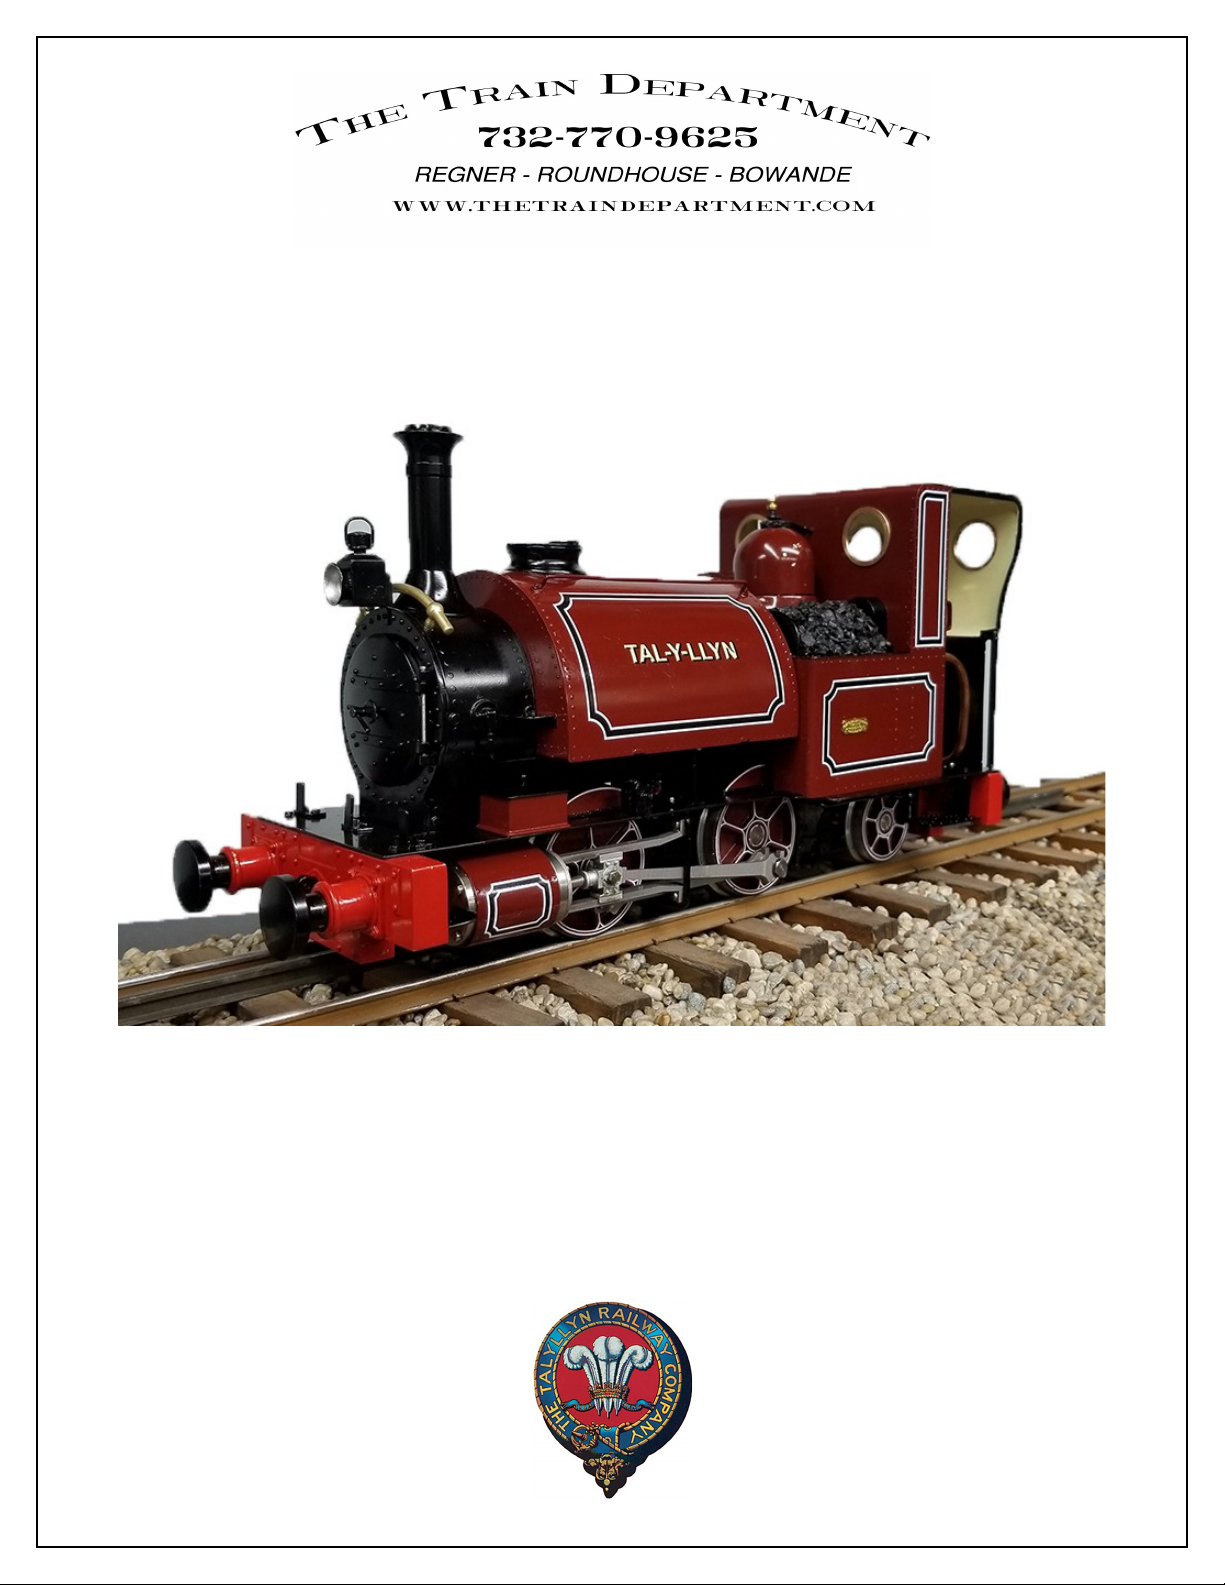
1/19 Talyllyn No1
Prototype model shown
Originally built in 1864 by Fletcher Jennings & Co. of Whitehaven as an
0-4-0ST “Talyllyn” had a short wheelbase and long rear overhang which led to its rapid
conversion to an 0-4-2ST.
The model built depicts the Fletcher Jennings rebuild of the 1950s

Instruction manual for the Talyllyn No1
Note: Please read the entire manual prior to operation
Unpacking and Assembly
Remove inner box from the shipping carton lift open and remove the
locomotive in its wrapper. Carefully cut open to unwrap the model. The inner box can
be reused with added foam padding for locomotive storage.
There is a small parts bag with the oil fill cover, headlamp and couplers.
eneral Information
Operating a live steam model is different from an electrically powered version. It is a hands on
interactive model. Never leave any working engines unattended once the burner is lit or if the
locomotive is under way. Always know where and how the locomotive is operating including the
boiler water levels.
•Always read and understand the manual prior to operation for the first time.
•Always maintain the lubrication on the motion parts and lubricator as it is designed for
extended run times. The lubricator will last for about 45-60mins.
•Never let the engine run completely out of water – if the locomotive suddenly stops and
there is still pressure or if the glass is empty shut down the burner. DO NOT ADD WATER
TO A HOT EMPTY BOILER
•When filing the gas tank keep away from any open flame or passing by locomotives
especially Alcohol fired locomotives.
•Do not carry the locomotive by any bodywork always carry by the front and rear buffers.
•Never stand or look directly over the chimney as hot water or oil can eject at any time.
•Use caution when opening the smokebox door when an engine is hot or burner is lit.
•Never touch the running gear while in operation as it can cause injury.
•Never allow children to operate without adult supervision.
General maintenance
As with all operating machinery model or full size wear will occur. Much can be done to prevent
wear and prolong the life of the model.
Keep the engine as clean as possible and the motion free of dirt and garden debris. When running
on a garden track always clean after each day of running to keep sand and dirt from damaging the
parts.

Routinely check for loose bolts/nuts and tighten as necessary. Do not over tighten these are small
model bolts and can shear or strip easily. Use of blue loctite is advised on any loose bolt.
To clean fill a spray bottle with hot water and a liquid dish detergent. Spray onto the cool
locomotive. It cuts the grease and oils used to lubricate. It also cleans the dirt and sand from the
small parts and motion points. Use a 2” soft bristle paint brush to wipe the loco down and get into all
the confined spaces. Using warm water rinse off the locomotive keeping the water away from any
R/C gear or electronics that may have been installed or a full gas tank. Allow to dry thoroughly then
lubricate as usual and store.
Using harsh cleaners may damage the paint.
Lubrication should be done prior to each run. All motion points require a light oil designed for our
steam trains. Green Velvet PBJ220 is designed just for that. It is designed to stick and not run. Just
a little is required on each point applied with a needle applicator. Do not flood parts with oil as that
will just attract dirt and run over the model and eventually onto the rails.
Steam oil should be a mid weight 460-600ISO Steam Oil for our low pressures. The use of a light
steam oil may cause adverse operation due to the inverted valve faces.
When filling the in-cab lubricator only fill to the bottom of the pipe that runs through the lubricator.
Overfilling will cause an excess of oil when starting out. Also use a drop of steam oil on the cylinder
crossheads piston rods and valve rods as these rods all enter the cylinders and are exposed to the
high temperatures of the steam. This will keep the O-Ring seals well lubricated and extend the life.
To drain the lubricator use a syringe.
Lubrication points for Steam Oil
Displacement lubricator – Under cab bump out
Piston rods
Valve rods
Crosshead guides
Lubrication points for lubricating oil
All valve gear linkages and pins or pivot points
Valve gear eccentrics
Main and connecting rod pins/bolts
Journal box to axle
Journal box to frame
Trailing truck and axle

Preparation to Running
Always service the engine fully for each run. Gas Oil and Water
1. To fill the gas tank Invert gas can onto filler valve through the roof and support the locomotive
whilst filling to prevent the loco from tilting. Be aware of your surroundings and other running
locomotives as Butane creates a puddle of gas that is invisible when filling. Gas will squirt out
of the valve when full at that time remove the can. Open the smokebox door to vent gas in the
next step. Open the gas valve (the brake staff handle) DO NOT LIGHT but listen for the gas
through the jet you should hear a smooth gas sound.
If there is any sputtering or squirting of gas allow it to pass until it is smooth. Shut the gas valve the
gas tank is now ready and full. Bleeding off the tank allows the liquid in the tank above the valve to
vent so lighting is easier and large fires are avoided.
2. Lubricate each motion point with a lubrication oil as discussed previously. Fill the
displacement lubricator in the cab until the oil is just below the steam pipe on the side of the
lubricator. Use a syringe or dispensing type bottle.
3. To fill the boiler flip open the water hatch and unscrew the goodall valve from the boiler
then remove the goodall atop the boiler and fill with distilled water only or filtered rain water never
use tap water. Fill to about 1/4” below the top of the sight glass OR fill to the top and remove 30-
40ml. Leaving a space will allow the steam to build and water to expand allowing for easier starting
when cold.
You can maintain the water level using a Goodall valve replacing the filler cap during operation. Re-
install the boiler filler or Goodall valve do not over tighten as damage to the O-ring will happen.

Lighting up
Be sure the throttle is closed and the Johnson bar is in neutral. Test roll the locomotive in gear to be
sure the motion is free. Open the smokebox door and slightly open the gas valve. Using a stick
lighter bring the flame to the smokebox door and light the gas. The burner should light and pop back
into the flue. Be sure the fire is not in the smokebox. Check the flame and make sure it is a strong
blue flame. As this is a ceramic burner you may need to open the gas valve more and then once a
flame lights close almost all the way to pop back to the ceramic. Once lit in the firebox you can
open the valve more. Keep the smokebox door open for 10-15 seconds to get the ceramic up to
temperature before closing the door. Be aware that once at pressure you will dial the gas down very
low to maintain pressure. These run almost silent.
Once the pressure is up to 50-60psi the safety valve should lift and you are ready to run and clear the
cylinders. Reverse works best for this as the boiler surges water away from the internal throttle
takeoff. Water and oil will eject from the chimney a cloth or towel will help deflect and keep the
loco clean. Once the cylinders are warm and cleared of condensate you are ready to set the
locomotive off onto the main line.
Adjust the burner level to suit the running conditions and keep as low as possible while maintaining
the needed steam supply. Excessive blowing of the safety is wasting fuel and water and shortens the
run time. Maintain the boiler level using the Goodall Valve. Never allow the water level to get
below the bottom of the glass as that exposes the flue from water inside the boiler.
This fuel tank will last about 25-30 mins on average. The boiler water level can run low if you are
running a very high burner setting. This is not healthy for the boiler when operating. Be aware of the
water level when running. Use caution when operating for the first time on less than perfect track-
work as it can derail with speed or on tighter curves. Also check clearances for height and width.
The chassis is sprung for a smooth operation on the track.
End of run
When the fire goes out or if you shut the gas down stop at a convenient place off the mainline to
cool down and drain or to refill for continued running. If shutting down close the gas and throttle
valves. Do not open the lubricator until you know the pressure is at 0 PSI on the gauge and has
cooled. The locomotive will be hot at first.
Once cooled the locomotive should be wiped down with a cotton cloth. Check the running gear for
dirt. Clean the motion as described earlier if dirty otherwise wipe and apply oil.
Always store in a temperature controlled environment unless completely drained of water as
freezing temperature will shatter the sight glass and may cause other damage to the boiler.
The locomotive may drip oil or water during storage so keep a cloth or towel underneath.

This model of the historic No1 is faithfully reproduced in scale thanks to the in person
measurements original works drawings and full assistance of the Talyllyn crew and Martin Fuller a
famed Talyllyn historian/author along with Mr Bate now retired from the Talyllyn Railway. A special
thanks to the Talylyn workshops for copies of the works drawings and full access to the locomotive
for full field detail data and photographs.
For the help on the development data both on Dolgoch and No1 I will be making a
donation to the Talyllyn Railway
An optional fuel tank is available to swap from the roof mounted for those that desire a open cab
look. The fuel tank is considerably smaller but is concealed in the left bunker forward of the doorway.
It is a direct swap and still retains the roof mounted fill point.
These are available on a request basis and are about a 25min swap.
eneral maintenance and notes on use
Gas jet cleaning – Working on a soft towel or foam pad remove the two phillips screws from below
the cab bunker front corners. Inside the cab rear wall remove the two phillips screws. Lift off the cab.
At the rear of the frames remove the 4 - 2mm bolts per side and remove the rear buffer beam casting
as a whole unit. Remove the jet holder by undoing the 5mm union nut at the gas valve remove the
jet clear and reinstall. You can use a thin wrap of teflon tape or a thin liquid teflon paste for gas and
steam. Reinstall the beam and cab in reverse.

Specifications
Scale 1/19 – SM32
Minimum radius 39”
Gauge 32mm or 45mm (non regaugeable)
Sprung buffers with Talyllyn style couplings and link
Copper boiler a locomotive firebox and Ceramic burner
Boiler fittings include 6mm Sight glass 1/2” Pressure gauge and Goodall
Throttle and Gas valve are TTD profile tapers for fine control
Chassis and running gear is bronze bushed
Slide valve cylinders with working Stephenson valve gear
Optional polished or painted steam dome for purchase.
All models are test run at the factory to break in and inspect each model. Should there be any
shipping damage please contact us as soon as possible and retain all packing material.
Fitting Radio Control – The bunker space on the left side can house a small AAA pack along with the
receiver you must insulate with a layer of insulation on the side of the boiler. A single servo for the
throttle can be located either to the roof or over the jet holder. To control the direction one would
remove the johnson bar and connect a servo directly to the linkage in place.
A stock of spare parts will be kept for routine service along with long term care. Please contact The
Train Department or Bowande UK for any needs.
Table of contents
Other The Train Department Toy manuals

Popular Toy manuals by other brands


Fisher-Price
Fisher-Price Imaginext DRM07 instruction sheet

AirfoilZ
AirfoilZ Bearcat 32 Warbird Series Assembly manual

Sapac
Sapac Viper Jet MKII Composite Assembly manual

MGA Entertainment
MGA Entertainment Little Tikes Shop ‘n Learn Smart Breakfast quick guide

Amewi
Amewi AFX180PRO manual

Playskool
Playskool Tonka Construction Kit On the Go 05513 instruction manual

Fisher-Price
Fisher-Price Shake 'n Go Flyers instruction sheet

LEGO
LEGO 70809 Building instructions

Fisher-Price
Fisher-Price POWER WHEELS BJH57 owner's manual

Viessmann
Viessmann kibri 36606 Mounting instruction

Chicco
Chicco 4-in-1 Ride On Car owner's manual

Eduard
Eduard Panther Ausf. D Zimmerit Horizontal quick start guide