ThermaGlass Modena MOD-6036-80 Operator's manual

Shower Wall System
Model Numbers:
MOD-6036-80 –MOD-3636-80 –MOD-6036-66
READ THE INSTRUCTIONS AND VIEW THE INSTALLATION VIDEO AT THERMA-GLASS.COM CAREFULLY,
Familiarize yourself with all the parts as shown in the exploded view. The exploded views provided will
also provide a helpful reference with relating to the installation of the Modena Wall System. The
installation video is available at:
therma-glass.com

Note: Optional Internal Corner Trim pieces are provided in the kit but are not necessary to complete the
application of the Therma-Glass Modena Wall System. Read through this instruction manual in its
entirety to understand how the wall panels can be installed to fit over your existing walls.
Supplied in Kit:
Recommended Tools:
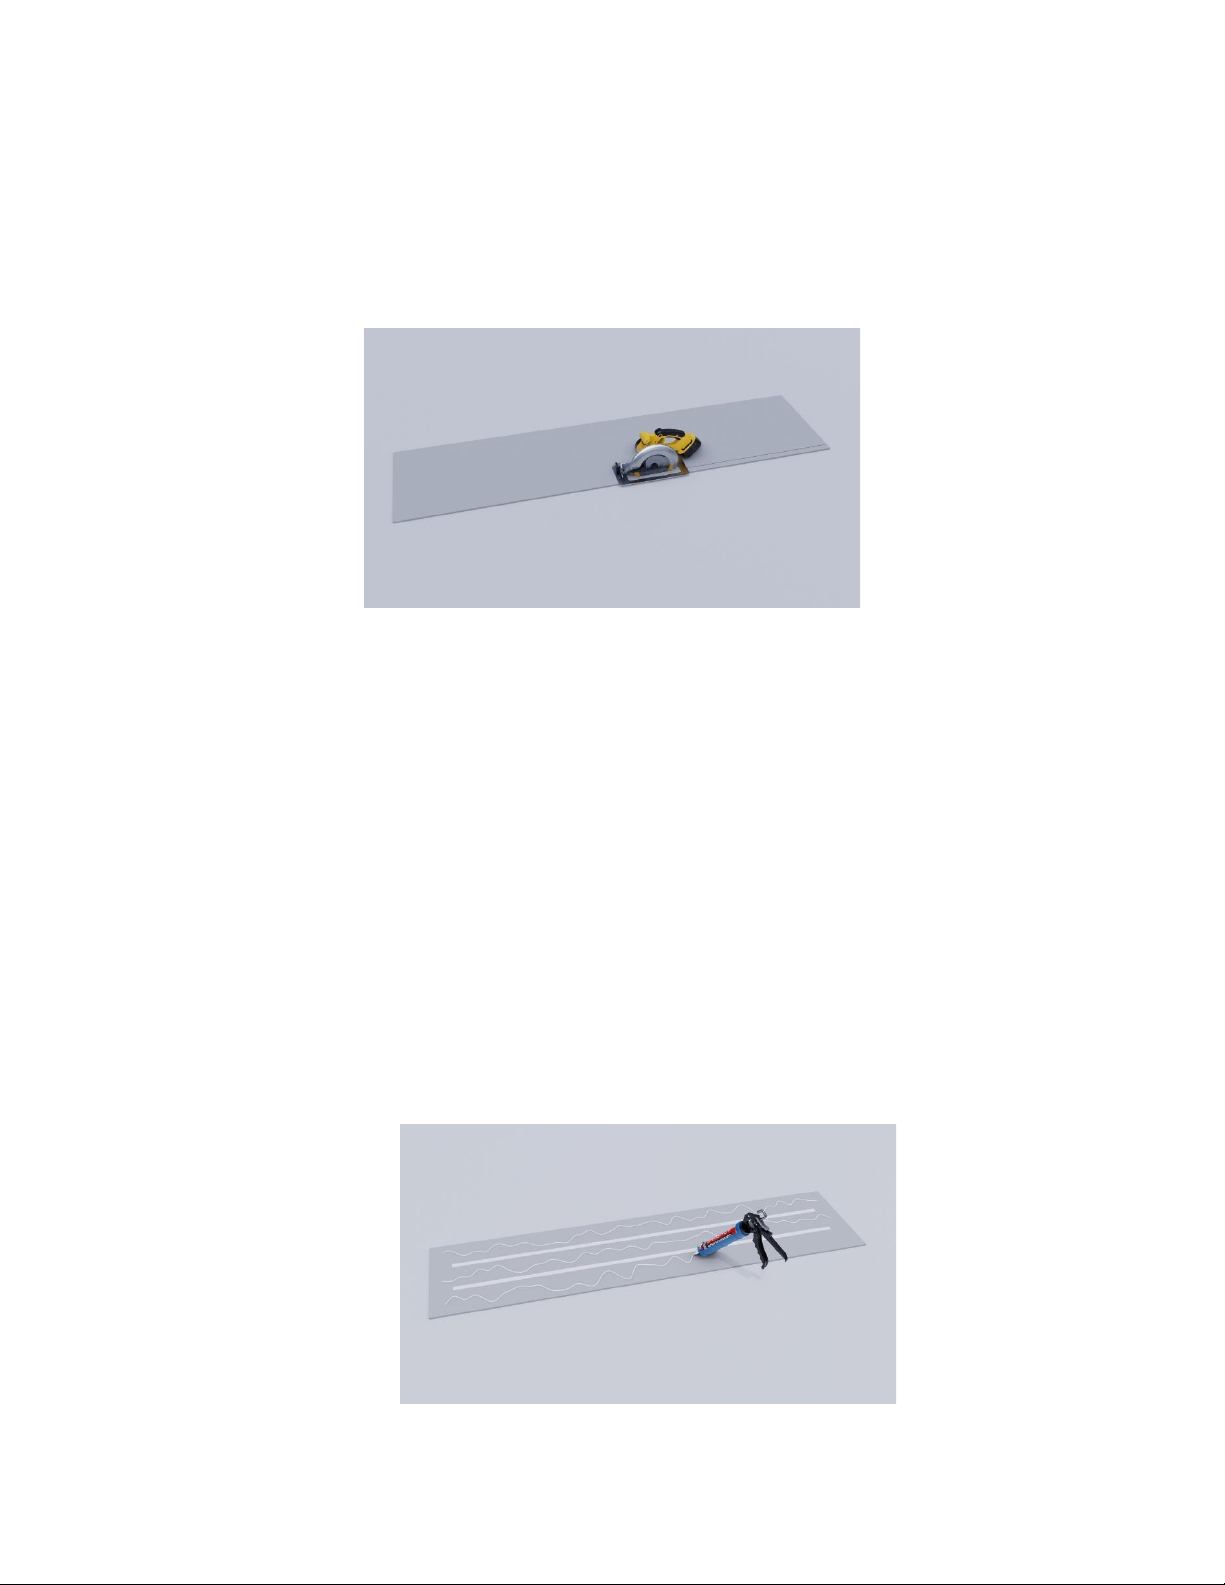
1. Measure the Installation area both back wall and sidewalls, from the top of the Alcove to the
shower tub or base to determine the cut dimensions for the walls (panels). Measure and cut
wall panels accordingly. Determine whether you are using the optional corner pieces prior to
cutting panels.
Measure and mark the location of the front side of the beveled edge wall panel of the handle,
showerhead, bath spout, and other components within your shower. Using the appropriate
sized hole saw, cut out plumbing fixture home from the front side of beveled edge wall panel.
Important: Drill chuck can damage wall panel. Drill holes from Front side of wall panel.
2. Install Internal Corner Trim (Optional) apply construction grade adhesive to the back side of the
corner trim and push in place.
3. Apply double-sided construction tape to all the back side of all wall panels. Apply construction
grade adhesive to the back wall panel in a circular pattern. The beads of adhesive should be 2”
apart and up to and no closer than 1” from panel edge. Repeat Step 3 for each wall panel prior
to placement.
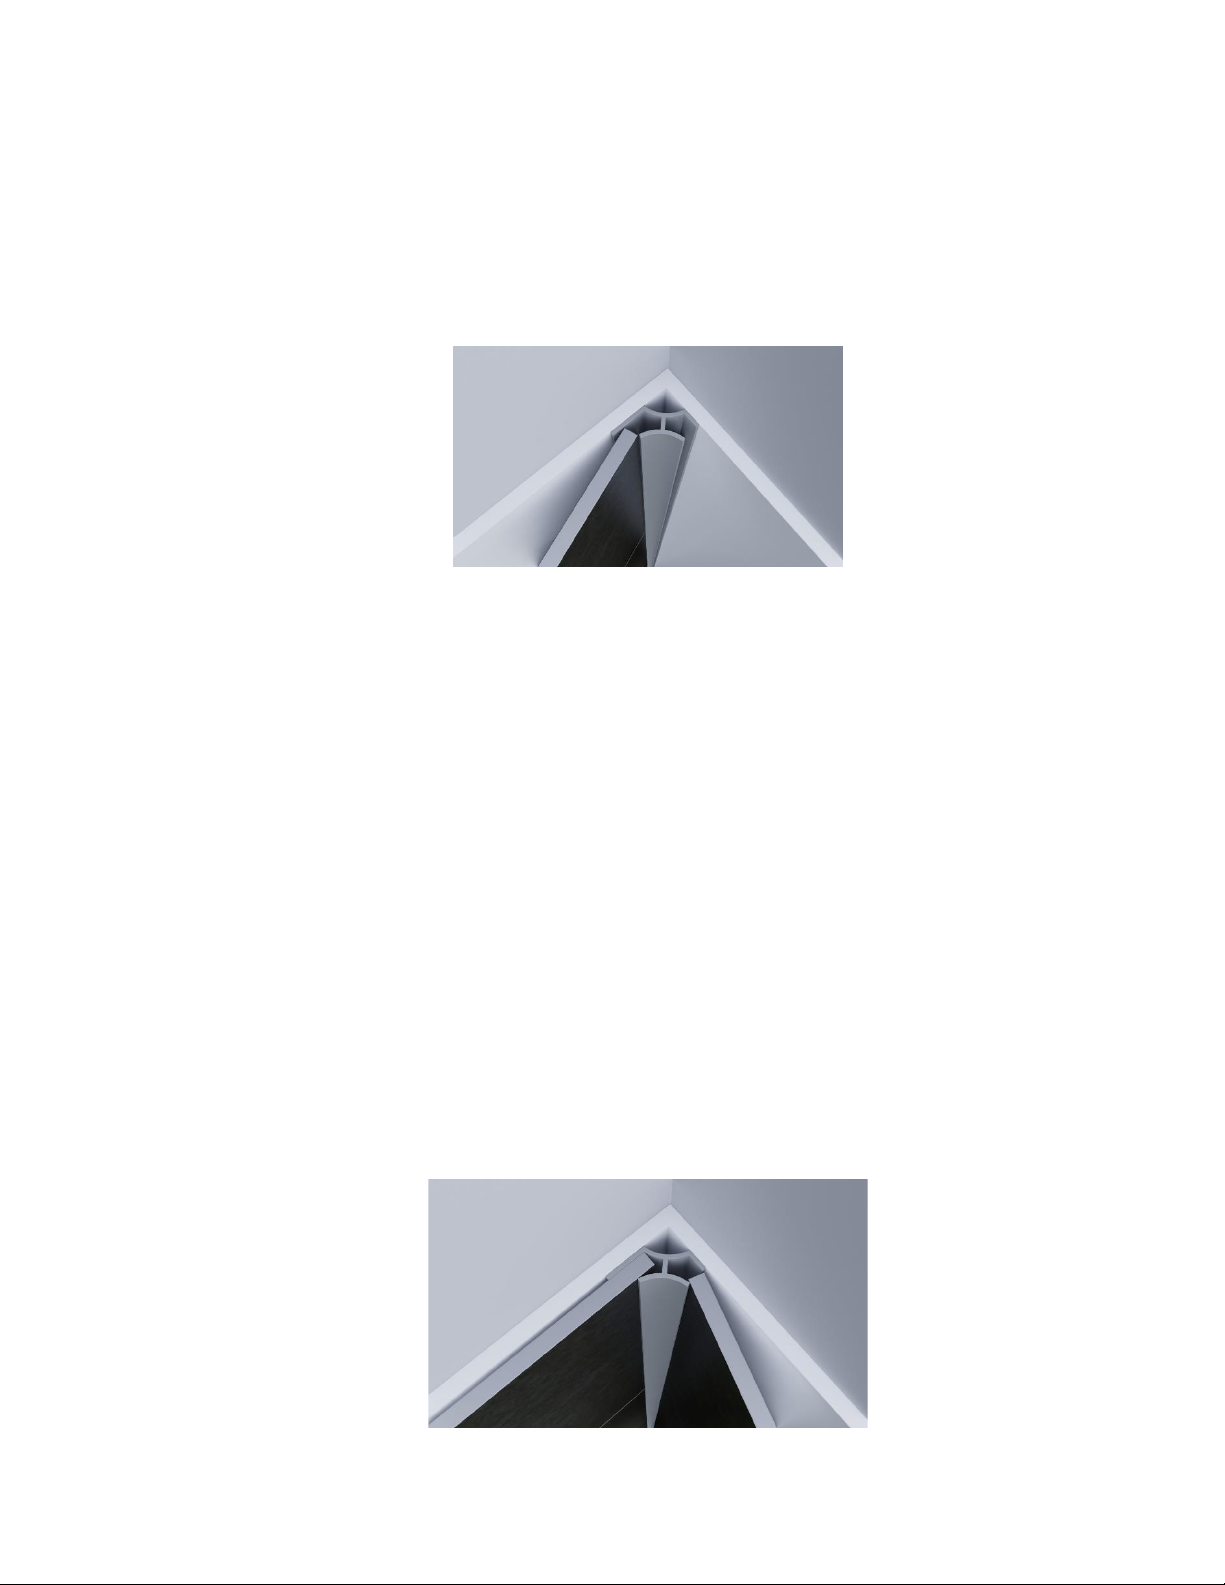
4. When using Optional Corner Piece:
Peel off the double side tape on the back of the first side wall panel and fill the gap of the
internal corner with silicone before installing the wall panel. Position the wall panel to be
installed at an angle of approximately 30 degrees, and carefully push it towards the back wall.
Lightly tap on wall panel with a rubber mallet from top to bottom to insure it is tightly connect
to the wall.
Without Optional Corner Piece:
Cut the tongue side of wall panel by applying forward pressure along the side of the tongue and
grove using either a circular saw or utility knife. Carefully repeat a couple of times and snap the
tongue off with a vise grip.
Peel off double sided tape on the back of the first side wall panel. Position the wall panel to be
installed at an angle of approximately 30 degrees and carefully push it towards the back wall.
Lightly tap on wall panel with rubber mallet from top to bottom to make sure it is tightly
connected to the wall.
5. Peel off double sided tape on back of the second side wall panel. Position the center tongue
and groove wall panel to be installed at an angle of approximately 45 degrees to the existing
tongue and groove wall panel. Move the panel gently while exerting forward pressure and
carefully push it towards the back wall. Lightly tap on wall panel with a rubber mallet from top
to bottom to make sure it is tightly connected to the wall.
6. Repeat steps 4 –5 for installation of the back wall pieces. (3 panels)

7. Repeat steps 4 –5 for installation of the second side wall pieces. (2 panels)
8. Apply construction grade adhesive to the back side of the first edge trim piece. Fill the gap of
the edge trim with silicone before installing it onto the wall panel. Position the edge trim and
push into place.
Note: Measure and cut edge trim fin to cover tile or existing wall material if necessary.
9. Properly caulk around the Modena Wall System to ensure a secure fit and finish. This includes
but not limited to: around the top, sides, bottom, and interior corners of the shower walls.
Please keep the entire area dry for a minimum of 24 hours before use.
Preparation Tips:
•Begin by measuring the width of the back wall after it has been cleaned and prepared for
installation. If this measurement exceeds the width of the Modena Shower Wall System back
panels that came with your kit, you will need to purchase additional wall panels.
•Measure the height of the back and side walls above the bathtub or shower base, if the height
of the walls is less than the height of the Modena Shower Wall System, they can be easily cut to
fit.
•Turn off the Water Supply.
•Remove all shower hardware and decorations, including but not limited faucet handles,
escutcheons, filler spouts, towel bars, and soap dishes.
•Measure the location of the plumbing cutouts, as stated in the instructions. To be sure of the
measurements, use a cardboard cutout to test the plumbing cutouts prior to cutting the panels.
•All plumbing and electrical work inside the walls must be finished prior to installing the wall
panels.
•Before trial fit the side panels. The unfinished back side of the panel should be placed against
the sub-wall.
•Wall should be sold, plumb, and square withing 1/8” inch of true. The Modena Shower Wall
System has been designed for trimming to accommodate minor alignment problems.
•The mounting surface should be cleaned and prepared according to the Installation Procedure.

•If you plan to install a recessed accessory, cut the panel accordingly after if has been fully
installed and had proper time to adhere to the wall. Remember to be considerate of wall studs
when positioning the accessary.
Caulking Tips:
•Follow the instructions on the tube of your chosen caulk.
•Once you have completed the project, inspect all of the areas that been caulked for gaps. Fill in
the areas as needed.
•Remove any excess caulk using denatured alcohol and a clean cloth. Use caution and do not
disturb any of the caulk joints.
Cement/Concrete:
•Additional Silicone may be required to properly secure the substrate and the wall panel,
depending on the condition of the existing wall.
•The complete area must be sealed with two coats of water or oil based sealer to ensure proper
adhesion to the Modena Shower Wall System.
•Complete the installation of the wall panels after the sealer has completely dried.
Masonite:
•Surface must completely clean. This includes but is not limited to soap scum, free of any dust or
other contaminates.
•Complete the installation of the wall panels after the sealer has completely dried.
Old Tile:
•All plastic tile must be removed. Old ceramic tiles do not need to be remove.
•Additional silicone may be required to properly secure the substrate and wall panel, depending
on the condition of the existing wall.
•Properly remove and reattach any loose ceramic tiles.
•Remove all tile accessories attached to the wall.
Plaster:
•Additional silicone may be required to properly secure the substrate and wall panel, depending
on the condition of the existing wall.
•Smooth all textured and/or swirled finished by sanding.
•Surface must be completely clean. This includes but is not limited to soap scum, free of any dust
or other contaminates.
Sheetrock/Greenboard/Cement Board/Wood:
•Surface must completely clean. This includes but is not limited to soap scum, free of any dust or
other contaminates.
Wallpaper:

•Properly remove all wallpaper from the area being covered. This includes but is not limited to
soap scum, free of any dust or other contaminates.
Limited Warranty:
Therma-Glass warrants to the original purchaser that this Modena Shower Wall System will be free from
manufacturing defects, which effect its performance as a bathing or shower fixture under the following
conditions and subject to the limitations contained in the “Remedies” and “Warranty Limitations”
sections.
The Limited Warranty applies for 10 years from the date of purchase if the fixture is used in a residential
owner-occupied building for non-commercial purpose, or for 2 years from the date of purchase if it is
used in any other building including any building used for rental, commercial, or business purposes.
•This Limited Warranty is void if the fixture is not installed in accordance with the installation
instructions available through Therma-Glass, or local building codes and ordinances, or if the
care and cleaning instructions supplied by Therma-Glass are not followed.
•The Limited Warranty is also void if the fixture is moved from the location of its initial
installation, or is subject to accident, abuse, or misuse.
•The Limited Warranty excludes normal wear and tear, and does not cover damage that can be
repaired by following the Scratch Removal Instructions.
•This Limited Warranty shall be void unless failure or non-conformance is discovered before the
expiration of this warranty, and is reported to Therma-Glass in writing, accompanied by the
original proof of purchase, within 30 days of discovery.
Remedies:
The original purchase remedy under this Limited Warranty is limited to the repair, replacement, or
refund of the purchase price of the fixture, at Therma-Glass sole option, of any part of the fixture which
has failed or does not conform to the manufacturer’s specifications.
In no event shall Therma-Glass be liable for lost profits, loss of use, incidental, special or consequential
damages including, but not limited to, damage to or loss of use of the building or its contents, arising
from any defect in the fixture: nor shall Therma-Glass be liable for any amount in excess of the original
purchase price of the fixture.
Therma-Glass reserves the right to require the return, at purchaser’s expense, of the damaged fixture
for repair or exchange before providing services under this Limited Warranty. If Therma-Glass elects to
replace the fixture, its obligations is limited to supplying a replacement unit or component part of
comparable size and style, and does not include the cost of removal, installation, or transportation,
which must borne by the purchaser.
Replacement parts provided under this Limited Warranty are warranted for the remainder of the
original warranty period applicable to the fixture, as if such parts were original components of that
fixture.

Warranty Limitations:
THERE ARE NO WARRANTIES WHICH EXTEND BEYOND THE DESCRIPTION ON THE FACE HEREOF.
IMPLIED WARRANTIES, INCLUDING THOSE, OF MERCHANTABILITY OR FITNESS FOR A PARTICULAR
PURPOSE, ARE ESPECIALLY DISCLAIMED. THERMA-GLASS DISCLAIMS ANY AND ALL LIABILITY FOR
SPECIAL, INCIDENTAL OR CONSEQUENTIAL DAMAGES. Some states or provinces, do not allow
limitations of incidental or consequential damages, so the able limitations and exclusions may not apply
to you. In such states or provinces, Therma-Glass’ liability shall be limited to the extent permitted by
state or provincial law. ANY IMPLIED WARRANTIES ARISING BY WAY OF STATE OR PROVINCIAL LAW,
INCLUDING ANY IMPLED WARRANTY OF MERCANTABILITY OR ANY IMPLIED WARRANTY FOR FITNESS
FOR A PARTICULAR PURPOSE, ARE LIMITED IN DURATION AND IN SCOPE OF COVERAGE TO THE TERMS
OF THE LIMITED WARRANTY, UNLESS A SHORT PERIOD IS AVAILABL BY LAW.
Therma-Glass
2300 SE Beta Street, Suite B
Milwaukie, Oregon 97222
(503) 653-2418
www.therma-glass.com
This manual suits for next models
2
Table of contents


