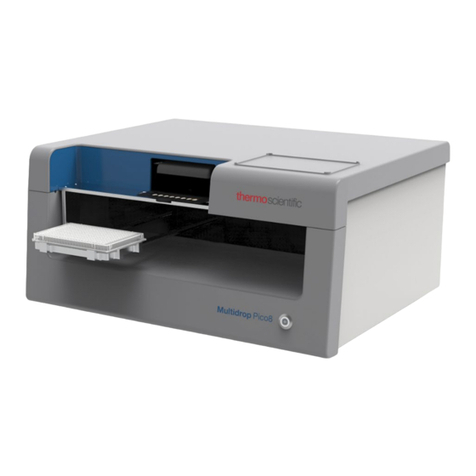
Thermo Scientific Multidrop Combi nL User manual

Thermo Scientific
Multidrop Combi nL
User Manual
Rev. 1.2, Cat. no. N07171

Copyright
Copyright 2019 Thermo Fisher Scientific Inc. All rights reserved. First edition published in 2007.
Reproduction of the accompanying user documentation in whole or in part is prohibited.
Trademarks
“FILLit” is a trademark and “Microtiter”, “Multidrop” and “Nalgene” are registered trademarks of Thermo
Fisher Scientific Inc. and its subsidiaries.
“Decon” is a registered trademark of Decon Laboratories Limited.
“Micro-90” is a registered trademark of International Products Corp.
“Microside SQ” is a registered trademark of Global Biotechnologies, Inc.
“Teflon” and “Virkon” are registered trademarks of E.I. du Pont de Nemours and Company or its affiliates.
All other trademarks and registered trademarks are the property of their respective holders.
Disclaimer
Thermo Fisher Scientific reserves the right to change its products and services at any time to incorporate
technological developments. This manual is subject to change without prior notice as part of continuous
product development. Although this manual has been prepared with every precaution to ensure accuracy,
Thermo Fisher Scientific assumes no liability for any errors or omissions, nor for any damages resulting from
the application or use of this information. This manual supersedes all previous editions.
Remarks on screenshots
Screenshots may be slightly different on your system depending on the firmware version.
No liability for consequential damages
Thermo Fisher Scientific shall not be liable for any indirect or consequential damages whatsoever arising out of
the use or inability to use this product.
Power failure
The system requires uninterrupted power supply in order to operate correctly. Thermo Fisher Scientific has no
responsibility whatsoever for system malfunctions arising from power failures.
Manufacturer
Life Technologies Holdings Pte. Ltd.
(a part of Thermo Fisher Scientific Inc.)
33, Marsiling Industrial Estate Road 3, #7-06,
Singapore 739256

Thermo Fisher Scientific Thermo Scientific Multidrop Combi nL User Manual 3
About This User Manual
This user manual is written for the actual end user, for example,
research scientist or laboratory technician, and provides information on
the Thermo Scientific Multidrop Combi nL, including the installation
and operating instructions.
This user manual is designed to give you the information to:
lReview safety precautions
lSet up the Multidrop Combi nL
lUse the Multidrop Combi nL internal software
lCarry out dispensing procedures
lPerform basic cleaning and maintenance procedures
lTroubleshoot the instrument performance
This user manual also describes all the features and specifications of the
Multidrop Combi nL instrument as well as ordering information.
Read the manual in its entirety before operating the instrument.
Keep the user manual for future reference. The user manual is an
important part of the instrument and should be readily available.
For PC software-related issues, refer to the Thermo Scientific FILLit
Software for Multidrop Combi nL User Manual (Cat. no. N17562).
For the latest information on products and services, visit our websites
at:
http://www.thermoscientific.com
http://www.thermoscientific.com/multidrop
In our efforts to provide useful and appropriate documentation, we
would appreciate any comments you may have on this user manual to
your local Thermo Fisher Scientific representative.
Intended users
How to use this
user manual
For more
information

About This User Manual
Safety symbols and markings
4Thermo Scientific Multidrop Combi nL User Manual Thermo Fisher Scientific
These symbols are intended to draw your attention to particularly
important information and alert you to the presence of hazards as
indicated.
The following symbols and markings appear on the type label and the
instrument itself.
Power ON s
Power OFF s
Serial number s
Catalog number s
Date of manufacture s
Consult instructions for use s
WEEE symbol This product is required to comply with the European
Union’s Waste Electrical & Electronic Equipment (WEEE) Directive
2012/19/EU. s
Safety symbols
and markings
Safety symbols and
markings
used on the
Multidrop Combi nL

About This User Manual
Safety symbols and markings
Thermo Fisher Scientific Thermo Scientific Multidrop Combi nL User Manual 5
The following symbols and markings appear in this user manual.
Warning Risk of electric shock. s
Warning Biohazard risk. s
Warning Risk of injury to the user(s). s
Caution Risk of damage to the instrument, other equipment or loss of
performance or function in a specific application. s
Note Marks a hint, important information that is useful in the
optimum operation of the system, or an item of interest. s
Warning and other
markings used in
the documentation

About This User Manual
Instrument safety and guidelines for use
6Thermo Scientific Multidrop Combi nL User Manual Thermo Fisher Scientific
lAlways follow basic safety precautions when using the Multidrop
Combi nL to reduce the risk of injury, biohazardous
contamination, fire, or electric shock.
lRead this user manual in its entirety prior to operating the
instrument. Failure to read, understand, and follow the instructions
in the manual may result in damage to the instrument, injury to
laboratory and operating personnel or poor instrument
performance.
lObserve all “Warning”, “Caution”, and “Note” statements as well as
safety symbols and markings on the instrument and in the
documentation.
lThe Multidrop Combi nL is intended for laboratory research use
only. Observe proper laboratory safety precautions, such as wearing
protective clothing and following approved laboratory safety
procedures.
lUse of the Multidrop Combi nL in ways other than those described
in the documentation supplied with the equipment may result in
injury to persons or damage to the property. Avoid unintended use
of the equipment, for example, using incompatible materials,
making unauthorized modifications, using incompatible or
damaged parts, using unapproved auxiliary equipment or
accessories, or operating equipment in excess of maximum ratings.
lDo not touch the dispensing valves or the tubing inlet to ensure
trouble-free dispensing. Thermo Fisher Scientific assumes no
liability for the use of third-party dispensing valves.
lPreventative maintenance instructions should be followed closely to
keep the instrument in the best condition for maximum reliability.
A poorly maintained instrument will not give the best results.
Instrument safety
and guidelines
for use

Thermo Fisher Scientific Thermo Scientific Multidrop Combi nL User Manual 7
Contents
Intended users...................................................................................3
How to use this user manual ............................................................. 3
For more information .......................................................................3
Safety symbols and markings.............................................................4
Safety symbols and markings used on the Multidrop Combi nL .... 4
Warning and other markings used in the documentation...............5
Instrument safety and guidelines for use............................................ 6
Introduction to the MultidropCombi nL................................................ 12
Intended use.................................................................................... 13
Principle of operation......................................................................13
Pressure/vacuum system ............................................................... 13
Dispensing applications................................................................13
Calibrations..................................................................................14
Advantages of using Multidrop Combi nL ...................................... 14
Functional Description ............................................................................... 15
Instrument layout............................................................................15
Front view.................................................................................... 15
Back view ..................................................................................... 16
Installation .................................................................................................... 17
Delivery check................................................................................. 17
Checking delivery......................................................................... 17
Unpacking ...................................................................................17
Requirements.................................................................................. 18
Precautions and limitations .............................................................18
Installation setups............................................................................18
Releasing the transport lock..........................................................19
Installing the priming vessel ......................................................... 20
Installing the pressure/vacuum system reservoir............................ 20
Operational check ...........................................................................23
Routine Operation........................................................................................ 26
Dispensing valves ............................................................................26
Calibration................................................................................... 27
Reagent reservoir............................................................................. 28
Control panel.................................................................................. 29
Keyboard...................................................................................... 29
Keys .......................................................................................... 29
Display.........................................................................................30
Navigating ................................................................................... 31
Dispensing ...................................................................................... 33
Chapter 1
Chapter 2
Chapter 3
Chapter 4

Contents
8Thermo Scientific Multidrop Combi nL User Manual Thermo Fisher Scientific
Using FILLit PC software ...............................................................34
Using internal software....................................................................34
Dispensing parameters ....................................................................34
Plate type .....................................................................................34
Dispensing volume and liquid...................................................... 36
Column/Row selection.................................................................37
Full plate...................................................................................37
Column selection ......................................................................38
Setting the column volume .......................................................38
Row selection............................................................................40
Setting the row volume .............................................................40
Selecting columns and rows (Selected wells)..............................41
Protocol settings.............................................................................. 42
Dispensing speed..........................................................................43
Shaking ........................................................................................ 44
Dispensing offsets.........................................................................45
Height.......................................................................................46
X/Y offset.................................................................................. 47
Predispensing volume................................................................... 47
Dispensing direction .................................................................... 48
Running a protocol .........................................................................50
Save and edit protocol..................................................................51
Select protocol..............................................................................54
Delete protocol ............................................................................54
Instrument options..........................................................................56
Device information ......................................................................56
Computer interface ......................................................................57
Startup protocol ...........................................................................58
Instrument settings.......................................................................59
Calibration................................................................................... 60
Liquid factor (standalone calibration)........................................ 60
Accuracy check..........................................................................61
Factor calculation...................................................................... 63
Screen saver..................................................................................... 65
Shutdown........................................................................................65
Emergency situations ......................................................................66
Maintenance .................................................................................................67
Maintenance checklist..................................................................... 67
Regular and preventive maintenance ...............................................68
How to clean the tubings .............................................................69
Daily maintenance ....................................................................69
Removing foreign particles........................................................69
Disinfecting the liquid path.......................................................72
Routine maintenance of the dispensing valves (tips).....................72
Daily maintenance ....................................................................72
Tip washing ..............................................................................73
Emptying ..................................................................................73
Periodic maintenance ................................................................73
Chapter 5

Contents
Thermo Fisher Scientific Thermo Scientific Multidrop Combi nL User Manual 9
How to clean a leaking dispensing valve.................................... 73
How to clean a clogged dispensing valve ................................... 75
Replacing a dispensing valve...................................................... 75
Replacing a tubing set and a manifold.......................................77
How to clean the reagent reservoir ...............................................78
How to clean the plate carrier....................................................... 79
How to clean the priming vessel................................................... 79
Disposal of materials .......................................................................80
Decontamination procedure............................................................80
How to refit the transport lock........................................................ 82
Packing for service........................................................................... 83
Service contracts.............................................................................. 84
Disposal of the instrument ..............................................................85
Technical Specifications ........................................................................... 86
General specifications...................................................................... 86
Safety specifications......................................................................... 87
Live parts .....................................................................................87
In conformity with the requirements............................................... 87
Remote control to Multidrop Combi nL......................................... 88
Frequently Asked Questions...................................................................... 89
Q&As ............................................................................................. 89
Troubleshooting Guide ............................................................................... 91
Error and warning codes .................................................................91
Hazards...........................................................................................93
Electrical ......................................................................................93
Mechanical................................................................................... 94
Environmental ............................................................................. 94
Defects and abnormal stresses.......................................................94
Ordering Information................................................................................... 95
Multidrop Combi nL......................................................................95
List of accessories ............................................................................ 95
Certificate of Decontamination................................................................. 97
Chapter 6
Chapter 7
Chapter 8
Chapter 9
Appendix A

Figures
10 Thermo Scientific Multidrop Combi nL User Manual Thermo Fisher Scientific
Figures
Figure 1–1. Multidrop Combi nL microplate dispenser .................................12
Figure 2–2. Multidrop Combi nL front view................................................... 15
Figure 2–3. Close-up of the Multidrop Combi nL keyboard and display.......16
Figure 2–4. Multidrop Combi nL back view...................................................16
Figure 3–5. Transport lock and transport lock tag present ...........................19
Figure 3–6. Removing the transport lock.......................................................19
Figure 3–7. Transport lock storage ................................................................20
Figure 3–8. Inserting the priming vessel .......................................................20
Figure 3–9. Removing the red luer plugs.......................................................21
Figure 3–10. Connecting the hosing to the pressure/vacuum system.......... 21
Figure 3–11. Connecting the hosing to the reagent reservoir.......................22
Figure 3–12. Close-up of the manifold ..........................................................22
Figure 3–13. Reagent reservoir connected to the instrument.......................23
Figure 3–14. Priming vessel inserted into place ...........................................24
Figure 4–15. Principle of the pressure/vacuum dispensing system .............26
Figure 4–16. Eight dispensing valves inserted into the manifold.................26
Figure 4–17. Reagent reservoir connected.................................................... 28
Figure 4–18. Removing the reagent filter......................................................29
Figure 4–19. Keyboard of the Multidrop Combi nL .......................................29
Figure 4–20. Main view on the display of the Multidrop Combi nL .............30
Figure 4–21. Example of dispensing with selected wells.............................42
Figure 4–22. Calibration curve vs. factor and volume changes ....................64
Figure 5–23. Removing the reagent filter......................................................70
Figure 5–24. Cleaning the tubings using a reagent basin.............................70
Figure 5–25. Detaching a dispensing valve tube end ...................................71
Figure 5–26. Reconnecting a dispensing valve tube end..............................72
Figure 5–27. Removing the reagent filter with tube .....................................74
Figure 5–28. Unfastening the dispensing valve ............................................76
Figure 5–29. Pulling the dispensing valve downwards.................................76
Figure 5–30. Replacing the dispensing valve ................................................ 77
Figure 5–31. Replacing the tubing set and manifold ....................................78
Figure 5–32. Unfastening the priming vessel................................................80
Figure 5–33. Transport lock storage location ................................................82
Figure 5–34. Refitting the transport lock.......................................................83
Figure 5–35. Transport lock fastened ............................................................83

Tables
Thermo Fisher Scientific Thermo Scientific Multidrop Combi nL User Manual 11
Tables
Table 4–1. Calibration point vs. dispensing volume and dispensing times . 27
Table 4–2. Icons in the main view................................................................. 32
Table 4–3. Default parameter values for different plate types .................... 35
Table 4–4. Relationship between dispensing speed and pressure .............. 44
Table 4–5. Speed settings vs. distance movement and frequency .............. 45
Table 5–6. Maintenance checklist................................................................. 67
Table 6–7. General specifications ................................................................. 86
Table 8–8. Error messages reported ............................................................. 91
Table 9–9. Instrument catalog number ......................................................... 95
Table 9–10. Codes for accessories................................................................ 95

Thermo Fisher Scientific Thermo Scientific Multidrop Combi nL User Manual 12
Chapter 1
Introduction to the Multidrop
Combi nL
The Multidrop Combi nL (Figure 1–1) is an automatic, programmable,
eight-valve microplate bulk reagent dispenser for nanoliter to microliter
volume dispensing. It covers the volume range 50 nl to 50 µl. It has a
pressure/vacuum based dispensing system for rapid and continuous
dispensing of liquids into 96, 384 and 1536-well plates. It can dispense
50 nl into the entire 384-well plate in 6 seconds or 50 nl into the entire
1536-well plate in 21 seconds.
The Multidrop Combi is lightweight, transportable and compact on a
laboratory bench.
Figure 1–1. Multidrop Combi nL microplate dispenser
The instrument model available is:
l5840400 Multidrop Combi nL, 100–240 V, 50/60 Hz
Each Multidrop Combi nL comes with a pressure/vacuum system
reservoir that has to be installed. Once the reagent reservoir is
connected, the instrument is ready for use.

Introduction to the Multidrop Combi nL
Intended use
Thermo Fisher Scientific Thermo Scientific Multidrop Combi nL User Manual 13
The Multidrop Combi nL is intended for professional research use by
trained personnel. It is intended for automated nanoliter to microliter
volume dispensing of reagent into a variety of microplates and strips in
96, 384 or 1536-well plate format. Use for self-testing is excluded.
The Multidrop Combi nL (Figure 1–1) can be:
1. Used as a standalone instrument with internal software using the
keyboard and display,
2. Controlled more flexibly with a PC, with FILLit™ Software, via an
RS-232 or a USB serial port, or
3. Used as part of an automation system.
The Multidrop Combi nL has a pressure/vacuum based dispensing
system that the instrument controls. The liquid is pushed through a
microsolenoid dispensing valve by means of compressed air into a well.
The reagent can be dispensed into rows, columns or wells.
The pressure system can also produce vacuum, which is used for the
backflush of reagents (Empty function).
Reliable low-volume dispensing can be carried out with the Multidrop
Combi nL.
With a volume range of 50 nl to 50 µl for 96, 384 and 1536-well plates
with dispensing heights from 5 to 55 mm, the Multidrop Combi nL
offers outstanding flexibility for a wide range of applications.
Multidrop Combi nL can be used, for example, in cell and bead-based
assays and to a greater extent in drug discovery screening processes for
dispensing protein solutions (BSA), detergents, dyes and different kinds
of solutions. Compounds of interest are often solubilized in DMSO
that is ready calibrated and in store in the instrument.
The viscosity of the solutions varies considerably. Viscosity describes a
fluid's internal resistance to flow and can be thought of as a measure of
fluid friction. Thus, water is "thin", having a lower viscosity, while
glycerol is "thick", having a higher viscosity. The instrument can
calibrate the valve open times and dispense with great accuracy liquids
with different viscosities. Enzyme or antibody solutions, which often
contain glycerol, can be reliably dispensed with the Multidrop Combi
nL.
Intended use
Principle of
operation
Pressure/vacuum
system
Dispensing
applications

Introduction to the Multidrop Combi nL
Advantages of using Multidrop Combi nL
14 Thermo Scientific Multidrop Combi nL User Manual Thermo Fisher Scientific
The standalone instrument has five calibrated liquids in store and is
immediately ready for use. The liquid factor feature can be used to
calibrate set volume points in instrument standalone use.
The instrument can easily calibrate a new liquid with the Multidrop
Combi nL PC software. Calibrations are created, calculated and
transferred with FILLit Software.
For more information, refer to the FILLit Software for Multidrop Combi
nL User Manual (Cat. no. N17562).
The Multidrop Combi nL microplate dispenser has several operational
advantages:
lFlexible low-volume range of 50 nl – 50 µl
lFlexible dispensing height of 5–55 mm
lHigh-speed dispensing of column, row and well-specific volumes
lSuperior precision covering the whole volume range
lEasy-to-use visual user interface
lPC software for increased flexibility
lBackflush feature for reagent recovery
lExcellent robot compatibility
Calibrations
Advantages of
using
Multidrop
Combi nL

Thermo Fisher Scientific Thermo Scientific Multidrop Combi nL User Manual 15
Chapter 2
Functional Description
This section shows the front and back views of the Multidrop Combi
nL instrument.
The front view of the Multidrop Combi nL instrument is shown in
Figure 2–2.
Figure 2–2. Multidrop Combi nL front view
Instrument
layout
Front view
Display
Protective cover
Dispensing valve head
Plate carrier
Priming vessel
Keyboard
Reagent reservoir
Dispensing valve (8)
Clamp
Light indicator

Functional Description
Instrument layout
16 Thermo Scientific Multidrop Combi nL User Manual Thermo Fisher Scientific
The close-up of the Multidrop Combi nL keyboard and display is
shown in Figure 2–3.
Figure 2–3. Close-up of the Multidrop Combi nL keyboard and display
The back view of the Multidrop Combi nL instrument is shown in
Figure 2–4.
Figure 2–4. Multidrop Combi nL back view
Back view
Display
Keyboard
Mains switch
Serial RS-232C connector
USB 1.1 (2.0 compatible)
Mains connector
Instrument label
Pressure/vacuum system
Pressure/vacuum
luer connector

Thermo Fisher Scientific Thermo Scientific Multidrop Combi nL User Manual 17
Chapter 3
Installation
This section covers the relevant procedures to be carried out on receipt
of the instrument.
Check the enclosed packing list against order. In case of any deviations,
contact your local Thermo Fisher Scientific representative.
Visually inspect the transport package, the instrument and the
accessories for any possible transport damage.
If the carton has been damaged in transit, it is particularly important
that you retain it for inspection by the carrier in case there has also been
damage to the instrument.
Neither the manufacturer nor its agents can be held responsible for any
damage incurred in transit, but the manufacturer will make every effort
to help obtain restitution from the carrier. Upon receipt of the carrier's
inspection report, arrangements will be made for repair or replacement.
If any parts are damaged, contact your local Thermo Fisher Scientific
representative.
Move the packed instrument to its site of operation. To prevent
condensation, the instrument should be left in its protective, antistatic
plastic wrapping until the ambient temperature has been reached.
Unpack the Multidrop Combi nL instrument and accessories carefully
with the arrows on the transport package pointing upwards. Remove
the instrument from the package and place it on a level surface. Refer to
the enclosed packing instructions.
The following notes and instructions are sent with the instrument and
are immediately available when you open the package:
lPacking instructions/Packing list
lTransportation discrepancy report
Retain the original packaging and packing material for future
transportation. The packaging is designed to assure safe transport and
minimize transit damage. Use of alternative packaging materials may
invalidate the warranty. Also retain all instrument-related
documentation provided by the manufacturer for future use.
Delivery check
Checking delivery
Unpacking

Installation
Requirements
18 Thermo Scientific Multidrop Combi nL User Manual Thermo Fisher Scientific
When you set up your Multidrop Combi nL, avoid sites of operation
with excess dust, vibrations, strong magnetic fields, direct sunlight or
UV light, draft, excessive moisture or large temperature fluctuations.
lMake sure the working area is flat, dry, clean and vibration-proof
and leave additional room for accessories, cables, and reagent
bottles.
lMake sure the ambient air is clean and free of corrosive vapors,
smoke and dust.
lMake sure the ambient temperature range is between +10°C (50°F)
and +40°C (104°F).
lMake sure the humidity is so low that condensing does not occur
(relative humidity is between 10% and 80%).
Leave sufficient space (at least 10 cm) on both sides and at the back of
the unit to allow adequate air circulation.
The Multidrop Combi nL does not produce operating noise at a level
that would be harmful. No sound level measurements are required after
installation.
Place the instrument on a normal laboratory bench. The net weight of
the entire equipment is approx. 9.6 kg (21.2 lbs.).
The instrument operates at voltages of 100–240 Vac and a frequency
range of 50/60 Hz.
lAlways ensure that the local supply voltage in the laboratory
conforms to that specified on the rating label on the back of the
instrument (Figure 2–4).
lDo not smoke, eat or drink while using the Multidrop Combi nL.
lWash your hands thoroughly after handling test fluids.
lObserve normal laboratory procedures for handling potentially
dangerous samples.
lWear proper protection clothing, such as disposable gloves and
laboratory coats, according to good laboratory practice.
lEnsure that the working area is well ventilated.
lNever spill fluids in or on the equipment.
This section describes the installation setups that you must carry out
before operating or relocating the instrument.
Requirements
Precautions and
limitations
Installation
setups

Installation
Installation setups
Thermo Fisher Scientific Thermo Scientific Multidrop Combi nL User Manual 19
Warning Ensure that the mains switch (Figure 2–4) at the left of the
back panel is in the OFF position. Also ensure that the mains supply
cable is disconnected. s
The instrument has a transport lock (Figure 3–5).
Make sure the red transport lock is released before operating the
instrument.
Figure 3–5. Transport lock and transport lock tag present
1. Unscrew the two screws marked 1 and 2 of the transport lock with
the hexagonal screwdriver supplied (Figure 3–6) so that the track
mechanism is loosened.
Figure 3–6. Removing the transport lock
2. Remove the screws, the transport lock piece and the transport lock
tag from the screw marked 1 (Figure 3–6). Keep the tag for future
relocation or transportation of the instrument. The transport lock is
now released.
Releasing the
transport lock
Screw 2
Screw 1

Installation
Installation setups
20 Thermo Scientific Multidrop Combi nL User Manual Thermo Fisher Scientific
3. After that fasten the red transport lock piece to the back panel of
the dispenser with the same screws for storage (Figure 3–7). Keep
the transport lock there until needed for future relocation or
transportation of the instrument.
Figure 3–7. Transport lock storage
To install the priming vessel:
1. Insert the blue priming vessel (Cat. no. N07271) into its slot on the
left of the plate carrier by pressing it over a snap lock (Figure 3–8).
Figure 3–8. Inserting the priming vessel
2. Insert a priming vessel tube assembly or cap (Cat. no. N05843) into
the drain of the priming vessel or a vessel underneath the drain.
To install the pressure/vacuum system reservoir, that is, the reagent
reservoir:
Installing the
priming vessel
Installing the
pressure/vacuum
system reservoir
Table of contents
Other Thermo Scientific Dispenser manuals
Popular Dispenser manuals by other brands

Kimberly-Clark
Kimberly-Clark 35370 Installation

lancer
lancer TD 1700 series Installation and service manual

Follett
Follett C25R5A/W Operation, service and parts manual

FONTANA SENSOR FAUCETS
FONTANA SENSOR FAUCETS FS9801G installation instructions

Axor
Axor Montreux 42019XX0 Features & dimensions

APW Wyott
APW Wyott Lowerator L-10 Specifications