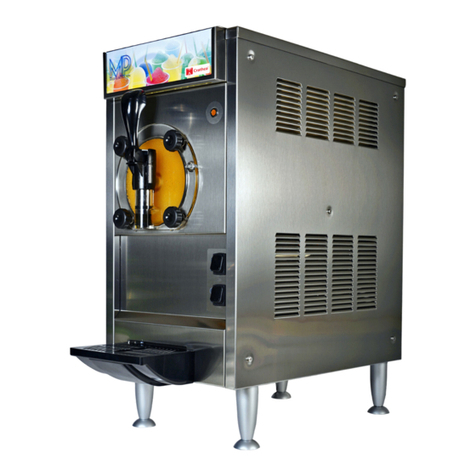
Crathco Simplicity Bubbler CS-3L User manual

Operator Manual
Grindmaster-Cecilware
4003 Collins Lane, Louisville, KY 40245 USA
Phone: 502.425.4776 Toll Free: 800.695.4500
Fax: 502.425.4664
Web: gmcw.com Email: info@gmcw.com
Thank you for purchasing this quality cold beverage dispenser. For your safety and the safety of
others, read all warnings and the operator’s manual before installing or using the product. Properly
instruct all operators. Keep training records. For future reference, record serial number here:
Table of Contents
Simplicity™Bubbler CS-3L
Crathco®Cold Beverage Dispensers
for Panera Bread®
Grindmaster-Cecilware provides the industry’s
BEST warranty. Visit gmcw.com for warranty
terms and conditions.
©2016 Grindmaster-Cecilware
Printed in Thailand
0816 Form # CC-331-01
Part # 390-00092
Model CS-3L-16_PANERA
Part # 1101-016
Safety Information ...................................................2
Specifications ............................................................3
Installation and Set-Up ............................................4
Installation - Agitator Function (Model CS-3L-XX).5
Product Preparation & Use ......................................6
Daily Cleaning...........................................................7
Maintenance .............................................................9
Troubleshooting .....................................................10
Basic Machine Parts ...............................................13
Spacer Bracket Installation ....................................15

2 Crathco®Simplicity CS-3L Panera Bubbler
Lifting hazard. Single person lift could cause injury. Use assistance when moving or lifting.
Sharp edges can cause personal injury. Handle with care.
The appliance is not to be used by persons with reduced physical, sensory or mental capabilities, or lack of
experience and knowledge, unless they have been given supervision or instruction. Be sure to provide supervision
or instruction concerning use of the appliance in a safe way and understand the hazards involved.
Children must be supervised to ensure they do not play with the appliance.
For safe and proper operation the appliance has to be placed in a stable horizontal position.
The appliance is only to be installed in locations where it can be overseen by trained personnel.
Safety Information
Observe machine voltage configuration. Do not apply improper voltage to machine or damage to machine will
occur.
Do not use extension cord.
Do not operate the appliance below 1.7°C (35°F) or above 40°C (104°F).
NOTICE
The appliance is not intended for outdoor use.
Do not clean with a water jet or use in an area where a water jet may be used.
Cleaning and maintenance shall be made only by properly trained persons with supervision.
Important Safety Information
This is the safety alert symbol. It is used to alert you to potential personal injury hazards. Obey all safety messages
that follow this symbol to avoid possible injury or death.
For your safety and the safety of others, read all warnings and the operator manual before installing or using
the product.
DANGER: This term warns the user of imminent hazard that will result in serious injury or death.
WARNING: This term refers to a potential hazard or unsafe practice, which could result in serious injury or death.
CAUTION: This term refers to a potential hazard or unsafe practice, which could result in minor or moderate
injury.
NOTICE: This term refers to information that needs special attention or must be fully understood.
CAUTION
WARNING

Simplicity CS-3L Panera Bubbler Crathco®3
Specifications
Model Description Dimensions (H x W x D) Electrical Certifications
CS-3L-16 (3) 4.75 gallon (18L) bowls, 31.0” x 20.4” x 17.7” 115V / 60 Hz / 8.5A C-UL US, NSF
agitator model.
CS-3L-16-S (3) 4.75 gallon (18L) bowls, 31.0” x 20.4” x 17.7” 115V / 60 Hz / 8.5A C-UL US, NSF
spray model.
(Height includes 4” legs)

4 Crathco®Simplicity CS-3L Panera Bubbler
Installation and Set-Up
1.
2.
Place machine on counter with proper spacing.
• The appliance must be placed in a horizontal position.
• The appliance is suitable for indoor use only.
• If legs are not attached, screw into base and level unit.
a. Place dispenser on
stable counter strong
enough to support
its weight.
b. Allow 5 cm (2”) on sides
and 13 cm (5”) on back
for proper ventilation.
Install power cord.
a.
Do not use extension cord.
Failure to follow proper installation
guidelines can damage equipment
and void warranty.
Plug cord into power outlet.
b.
Note proper voltage.
Observe machine voltage configuration.
Do not apply improper voltage to
machine or damage to machine will
occur.
1. This appliance is not intended for the use by persons (including children) with reduced physical, sensory, or
mental capabilities, or lack of experience and knowledge, unless they have been given supervision or
instruction concerning use of the appliance by person responsible for their safety.
2. Children should be supervised to ensure that they do not play with the appliance.
3. This appliance is only to be installed in locations where it can be overseen by trained personnel.
2”
(5 cm)
2”
(5 cm)
5”
(15 cm)
5” (13 cm) minimum
machine spacing from
wall
2” (5 cm) minimum
machine spacing from
wall or other machines
Recommended ambient temperature
75° F (25° C).
Top View
Front View
CAUTION

Simplicity CS-3L Panera Bubbler Crathco®5
Installation - Agitator Function (Model CS-3L-16)
1. 2.
4.
3.
5. 7.
8.
6.
9. 10.
Install mixing impeller.
Install bowl gasket.
Place o-ring on dispense valve
(check if nicked or twisted). Place in
bowl.
Install assembled bowl.
NOTICE:
Machine must be OFF.
Insert bowl lip underneath
of lock position on the back
of top tray.
Then, press down on the
front of the bowl until
you hear a click indicating
the bowl is locked proper-
ly in place.
Install handle. Flip out support bracket for
drip tray.
Place drip tray
cover on drip
tray.
Install drip tray.
Mix product in clean container.
Fill bowl with product.
Install bowl cover. Turn power “on”.
a. b.
a. b.
CAUTION
Sharp edges can cause personal
injury. Handle with care.
Replace axle if flange
thickness is less than
0.75mm
(0.03 inch)
thick.
Replace impeller if
bearing surface is
worn more than
0.5mm (0.02 inch).
Inspect for wear.
NOTICE:

Product Preparation & Use
1. Wash hands thoroughly when handling
dispenser and product. 2.
Pail
Wire whisk
Measuring pitcher
3. 4.
5.
Pour concentrate into dispenser and then add
remaining water per product label.
7.
Turn on main power
switch.
Correct way
to dispense.
Install lid.
8. 18L
Bowl
To ensure safe and quality beverage, use only
reliable, purified, or potable water source to
prepare the product.
Prepare concentrate by mixing powder with water
using wire whisk until completely dissolved. Follow
recommended dilution per product label.
Always observe minimum 3 liter fill level to prevent
foaming of product at low level.
Min.
(3L)
Max.
6.
Incorrect way
to dispense.
Mixing tools.
Use only clean mixing tools to prepare product.
9. PRODUCT PREPARATION AND USE
1. Prepare concentrate by mixing powder with water using wire whisk until completely
dissolved. Follow recommended dilution per product label.
2. Pour concentrate into dispenser and then add remaining water per product label.
3. Install lid and turn on main power switch.
4. 25~30° C (77~86° F) ambient temperature is suitable for the operation.
5. This machine maintains beverage temperature of 1~5° C (34~41° F).
6. The dispenser is not for dispensing potentially hazardous beverage.
6 Crathco®Simplicity CS-3L Panera Bubbler

Simplicity CS-3L Panera Bubbler Crathco®7
Daily Cleaning
Machine Disassembly
1. 2.
3. 4. 5.
6.
7. 9.
DAILY
12345
678910 11 12
13 14 15 16 17 18 19
20 21 22 23 24 25 26
27 28 29 30
FRAGILE!
8.
Turn power “off”. Remove drip tray and cover.
Rotate support brackets for
drip tray.
Drain bowl. Remove handle.
Remove bowl cover. Press release latch on front of the
machine before removing the bowl.
Do not drop.
Remove valve with seal. Remove bowl gasket. Remove mixing impeller.
NOTICE:

8 Crathco®Simplicity CS-3L Panera Bubbler
Daily Cleaning (cont.)
Cleaning Procedures
Cleaning Materials & Tools
Take parts to sink.
4.
Units with spray agitators:
Remove pump cover and spray
tube.
Lift out dispense valve and
remove o-ring.
Wash with detergent
and warm water.
2. 3. 50°C (122°F)
Maximum water
temperature for
cleaning.
75mm (3 inch)
Maximum
water level for
cleaning
Rinse with clean water. Wipe evaporator plate with
detergent and warm water.
6.
5.
8. 9.
liquid detergent
(do not use laundry bar/
powdered detergents)
long brush
foam/sponge
(do not use abrasive)
sprayer
toothbrush
NSF approved
sanitizer
paper towels
Clean front panel, exterior panels
and release latch.
7.
1.
a. b.
Clean counter and bottom part
of dispenser with paper towel.
ABRASIVES WILL SCRATCH PLASTIC PARTS. WASH
BOWL LIDS IN COOL OR LUKEWARM WATER TO AVOID LEAKS DUE
TO SEALED SURFACE BEING DAMAGED.
The appliance is not suitable for installation in an
area where a water jet could be used. The appliance must not be
cleaned by water jet.
THOROUGHLY CLEAN ALL PARTS IN WARM WATER USING A MILD
NON-ABRASIVE DETERGENT AND RINSE THOROUGHLY.
NOTICE:
NOTICE:

Simplicity CS-3L Panera Bubbler Crathco®9
2.
Daily Cleaning (cont.)
Cleaning Procedures
DAILY
12345
678910 11 12
13 14 15 16 17 18 19
20 21 22 23 24 25 26
27 28 29 30 Prepare 8L of chlorine-based
sanitizing solution (to 100 ppm) per
package instructions.
Submerge parts in solution for 15
minutes.
5.
Spray inside of lid with sanitizer.
3. 4.
Air dry parts overnight.
1.
Spray inside of bowl with sanitizer.
XII
Maintenance
1. If the supply cord is damaged, it must be replaced by the manufacturer, its service agent or a similarly
qualified persons in order to avoid a hazard.
2. When freezing occurs, the appliance must be powered off.
3. The appliance is suitable for liquid juice concentrate and beverage mixing powder.
4. Access to the service area is restricted to persons having knowledge and practical experience of the
appliance, in particular as far as safety and hygiene are concerned.

Leaking
No product agitation
1.
a. O-ring nicked,
deformed, or
twisted? Cracked bowl? Replace bowl.
1. 2.
Impeller and/or axle worn? Replace worn parts.
See routine maintenance.
?
Replace pump
axle if flange
thickness is
less than
.75mm
(0.03 inch)
thick.
Replace
impeller if
bearing
surface is
worn.
a.b.
5.
Valve securely in place? Push
and twist to seat.
Gasket secured in place? Push to
seat.
b. Foreign particles on
bowl valve seat?
2. 3.
Drain tray overflow? Empty tray.
4.
3.
Impeller installed correctly?
Pump motor magnet needs adjustment?
(Call for service.
Troubleshooting
10 Crathco®Simplicity CS-3L Panera Bubbler

Simplicity CS-3L Panera Bubbler Crathco®11
Troubleshooting (cont.)
No refrigeration
1.
Plugged in to wall outlet?
2.
3. Compressor does not operate;
fan does?
(Call for service.
4.
Poor refrigeration
1.
2. 3.
4. 5.
?
No product agitation?
See previous page.
Faulty thermostat?
Machine will not operate.
(Call for service.
Dirty condenser filter and condenser?
Clean condenser or (call for service.
Compressor does not operate;
fan does not operate.
Faulty fan motor?
(Call for service.
Impeller does not spin. Faulty
pump motor?
(Call for service.
Faulty thermostat or improper
setting?
(Call for service.
Power switch on?
Operator Manual
Grindmaster-Cecilware
4003Collins Lane, Louisville, KY 40245 USA
Phone: 502.425.4776 Toll Free: 800.695.4500
Fax:502.425.4664
Safety Information........................2
Specifications.................................3
Installation and Set-Up.................4
Installation - Agitator Function...5
Installation - Spray Function........6
Product Preparation & Use...........7
Daily Cleaning ...............................8
Maintenance...............................10
Troubleshooting..........................11
Basic Machine Parts ...................14
Thankyou for purchasing this quality cold beverage dispenser. For your safety and the safety of
others,read all warnings and the operator’s manual before installing or using the product. Properly
instructall operators. Keep training records. For future reference, record serial number here:
Table of Contents
Simplicity™Bubbler CS-3L
Crathco®Cold Beverage Dispensers
Grindmaster-Cecilware provides the industry’s
BEST warranty. Visit gmcw.com for warranty
terms and conditions.
©2014Grindmaster-Cecilware
Printedin Thailand
0816Form # CC-331-01
Part# 390-00092
(cULuscertification applies only to
UnitedStates and Canada models.)
Model CS-3L-16
(CEdeclaration applies only to
Internationalmodels.)
?

12 Crathco®Simplicity CS-3L Panera Bubbler
Troubleshooting (cont.)
Noisy machine
3.
2.
4.
Bowl or pump installed while unit in “on” position?
Turn unit off. Reinstall parts.
6. Fan blade bent?
Unplug unit, remove side panel, inspect fan blade.
Faulty pump motor bearings.
(Call for service.
5.
Impeller and/or axle worn? Replace worn parts.
See routine maintenance.
Broken impeller? Replace it.
1.
Impeller installed correctly in bowl?
Chattering impeller? Ensure
correct drive magnet height or
(Call for service.
Replace pump
axle if flange
thickness is
less than
.75mm
(0.03 inch)
thick.
Replace
impeller if
bearing
surface is
worn.
If you still need help, call Grindmaster-Cecilware Technical Service Department, (502) 425-4776 or (800) 695-4500
(USA & Canada only) (Monday through Friday 8 AM - 6 PM EST). Please have the model and serial number ready
so that accurate information can be given.
Prior authorization must be obtained from Grindmaster-Cecilware for all warranty claims.
Grindmaster-Cecilware provides the industry’s BEST warranty. Visit our website at GMCW.com for
warranty terms and conditions.

Simplicity CS-3L Panera Bubbler Crathco®13
Basic Machine Parts
(CS-3L)
44
4
5
4
6
49
50
43
51
52
42
4
7
4
8
41
3
7a
3
7
39
38
41
29
28
3
2
a
32b
3
1
2
5
33
30
26
c
26b
26a
2
6
27
26b
32c
4
0
35
34
32
24
26d
22
23
25
1
2
36
19
20
2
1
3
4
5
1
7
19
1
8
6
7
11
9
8
10
12
1
3
1
5
16
14
11
53

14 Crathco®Simplicity CS-3L Panera Bubbler
Basic Machine Parts (continued)
1Base Structure 200-00142
2Front Panel assembly with magnet, CS-3L231-00392
3Screw Truss Head SS. (Mat. 420)8-32 x 1/2"0069
6Screw, Support Drip Tray Bracket 220-00013
7Bracket, Support Drip Tray Lt. 200-00053
8Washer, Spring DIN 137B99299
9Sleeve, Bracket Support Drip Tray210-00119
10Bracket, Support Drip Tray Rt. 200-00052
11 Screw, TPH M4x15Plastite SS 99306
Leg, 2" Adjustable W/Rubber Pad 20-00021
Leg, 4" Adjustable W/Rubber Pad M005SA
13Screw,14x 1/2,Type "B",Hex Hd 0063
14Condenser Filter, CS-3L210-00585
15Bracket, Switch200-00058
16On-Off Switch Rocker 99066
17Right Side Panel, Simplicity 200-00056
18Temperature Control 1059
19Screw, M4x8mm,TH,PH,Trilobe,Blk 99059
20 Access Panel Screw 220-00021
21Back Panel 200-00145
22 Wire Saddle Locking Top Teardrop 354-00002
23 Dryer, D35, CS-4E1451
24 Compressor 3253
25 Nut, Hex, Lock, 1/4-20 "K" Type 0055
26 Pump Motor, Agitator models Assembly 231-00381
26a Magnet, Drive Assy 2049
26b Nut, M4, Nylon, A4SS 99406
26c Bracket, Pump Motor 200-00648
26d Pump Motor, Low Speed, 300 RPM 260-00027
27 Evaporator Assembly, CS-3L231-00405
28 Seal, Bearing Sleeve 290-00005
Bearing Sleeve, Agitator models 220-00305
Bearing Sleeve, Spray models 220-00295
30 Cam-Lock Remove Bowl Lt. Assembly (Double Cam - Lock) 231-00433
31Cam-Lock Remove Bowl Rt. Assembly (Single Cam-Lock) 231-00434
32 Fan Motor Assembly 3432
32a Fan blade1460
32b Fan Motor 3430
32c Bracket, Fan Motor 3429
33 Copper, Discharge 3763-2
34 Condenser 332-00003
35 Left Side Panel, Simplicity 200-00057
36 Grommet, for PlasticSides 2679
37 Pump Motor, Spray models Assembly 231-00382
37a Pump Motor, Spray models, 1500 RPM 260-00028
38 Drainage channel silicone, CS-4E290-00100
39 Drainage channel silicone, CS-3L290-00106
40 Wide Wire Saddle #WWS-A-2-01354-00001
BOWL ASSEMBLY PARTS
4Cover, Drip Tray200-00143
5Drip Tray210-00252
41 Impeller, Mixing 210-00130
42 Gasket, Bowl 18L, Tall 290-00089
44 Bowl 18Liters, Tall (4.8Gallon) 231-00404
45 Valve, Dispense with Seal99464
46 Bowl Cover, 18Liters, Tall 210-00495
47 Valve, Dispense 99463
48 Seal, Valve 99380
Push HandOH (Cup Activated)200-00063
29
12
5 %UDFNHW6SDFHU5HDU 200-0

Simplicity CS-3L Panera Bubbler Crathco®15
Spacer Bracket Installation
Installed Standoff Bracket Overview
Rear View
5 inch
rear distance
e
g
Left Rear Corner View
1 inch side spacing
allows 2 Bubblers to sit
side-by-side to allow a
total 2 inch clearance
Left Side View
Bracket extends
3.5 inches
down each side
Left Rear Corner View
Recommended Spacing:
Place Bubblers side-by-side in available
space then center them in total
available space.
1. 2. 3.
Tools needed:
Phillips head screw driver
Flathead screw driver
Rotate unit so that there is easy
access to each side and rear of unit.
(Recommended attaching spacer
during cleaning of unit during
closing or during opening).
Total attachment time is 15 minutes.
Orientation of bracket is with all 4
screw tabs against the base, as
shown.
Remove protective film from
bracket and discard film.

4. 5.
Orient bracket to base as before,
using a Phillips head screwdriver,
remove rear side panel screw from
either left or right side panel.
(Remove only the rear screw so that
the front screw holds side panel dur-
ing installation.)
Using a flat head screwdriver, remove rear thumb screw on the same
corner as the side panel screw that was removed. (Attach bracket at one
corner at a tome so that the other corner screw holds side and rear
panels.)
Spacer Bracket Installation (continued)
6. 7.
Lift panel into position with screw tabs aligned as indicated in the
images so that the tabs are on the outside of the existing side and
rear panels.
Drive the side panel screw first and
then drive the rear panel thumb
screw to attach the bracket at one
corner.
Side Panel View Rear Panel View
8. 9.
Repeat the same process for the
other rear corner of the product.
Place the two units back into
location, side spacer’s legs should be
contacting the other Bubbler and
then evenly space the two units
from the units on either side.
Grindmaster-Cecilware
4003 Collins Lane, Louisville, KY 40245 USA
Phone: 502.425.4776 Toll Free: 800.695.4500
Fax: 502.425.4664
Web: gmcw.com Email: info@gmcw.com
©2016 Grindmaster-Cecilware
Printed in Thailand
0816 Form # CC-331-01
Part # 390-00092
This manual suits for next models
1
Table of contents
Other Crathco Dispenser manuals
