2.2.3.
Battery
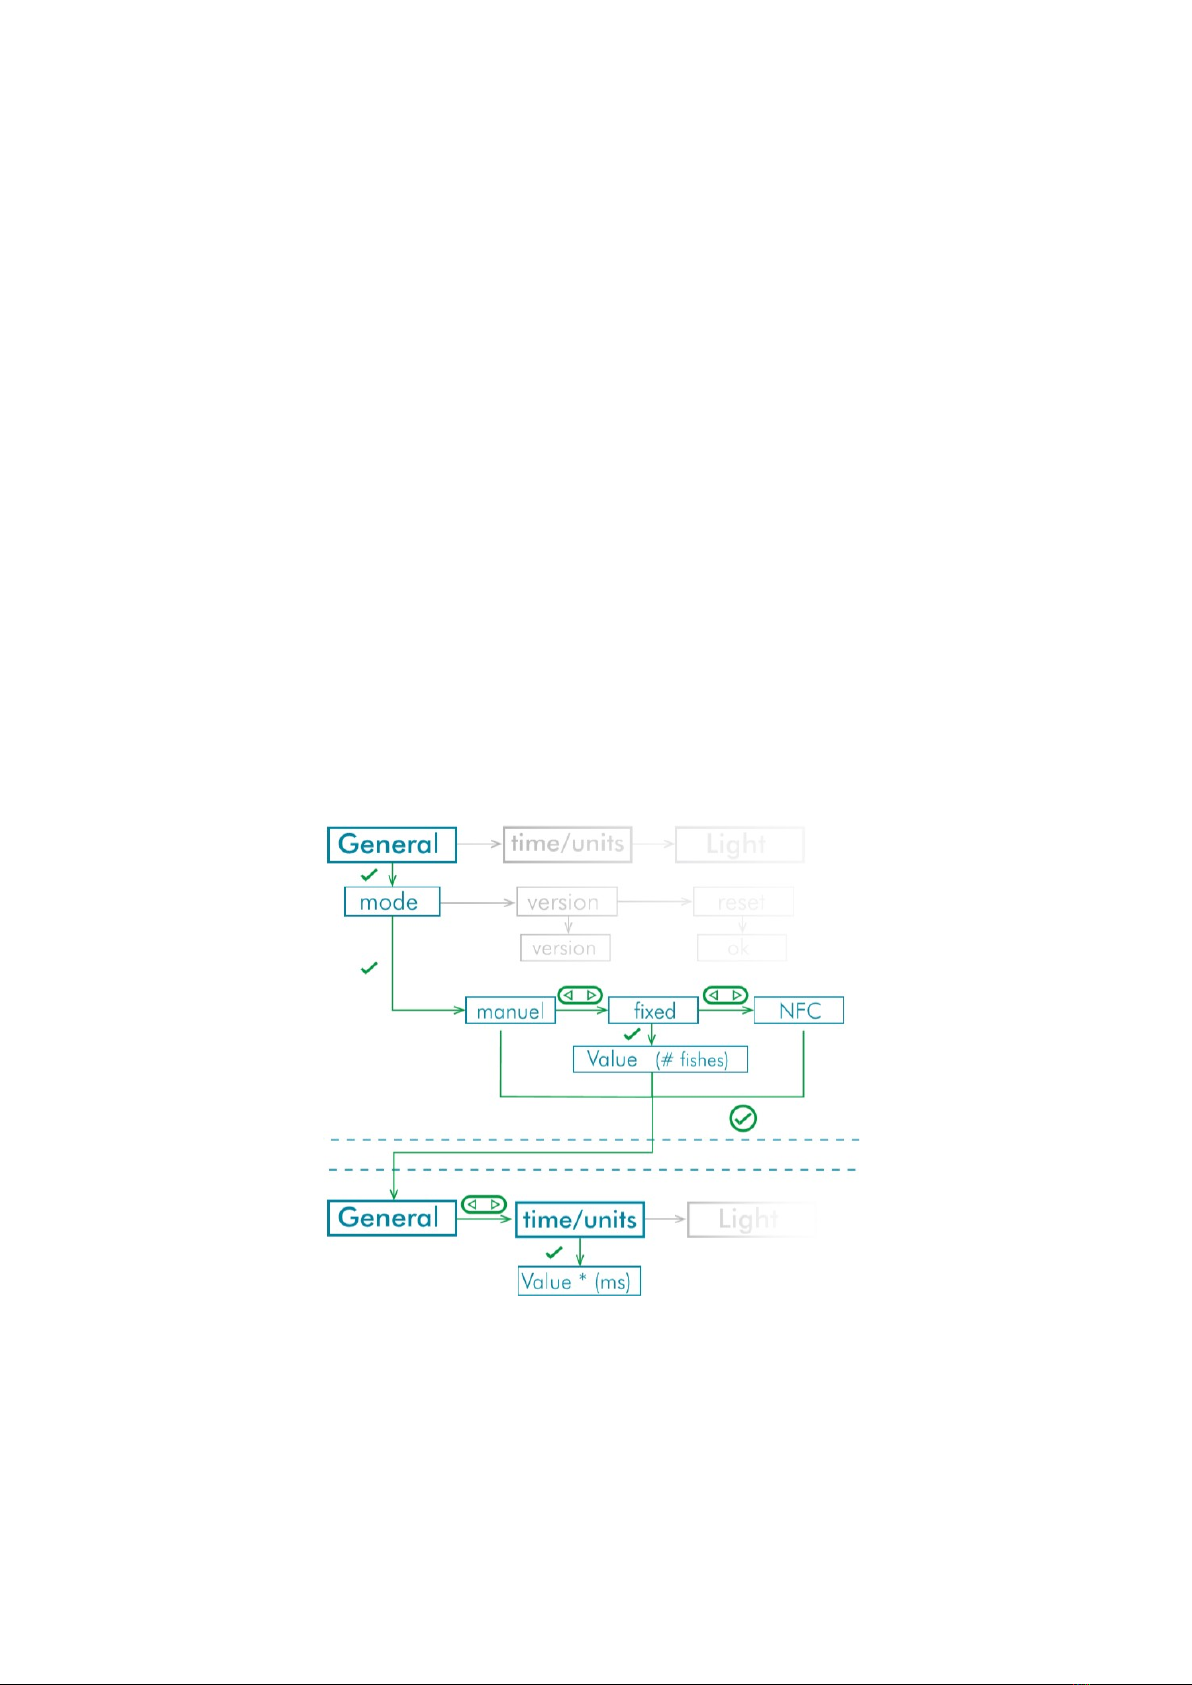
This submenu allows you to view the remaining battery voltage by selecting "Voltage".
Select "Low th.” (voltage threshold) to enter a value (in mv) below which the low battery
symbol will be displayed on the LCD screen. By default, this value is set to 3,000 mv,
which corresponds to the minimum voltage ensuring optimal accuracy of the FISHGUN
D2.
2.2.4.
Sleep
Scroll to “Delay” to enter the idle time (min) after which the FISHGUN D2 will enter
sleep mode.
Turn off the FISHGUN D2 by scrolling to "Enter" and pressing ✔to confirm.
2.2.5.
Light
This submenu allows you to set the color ("Color") and intensity ("Delivery") of the
indicator light at the front of the FISHGUN D2, that confirms each delivery of feed.
When the "Color" submenu is selected, these choices are available: Red, Magenta,
Yellow, White, Blue, Green, Cyan, or None.
In the "delivery" sub-menu, you can choose the intensity of a value of 1-100%.
III.
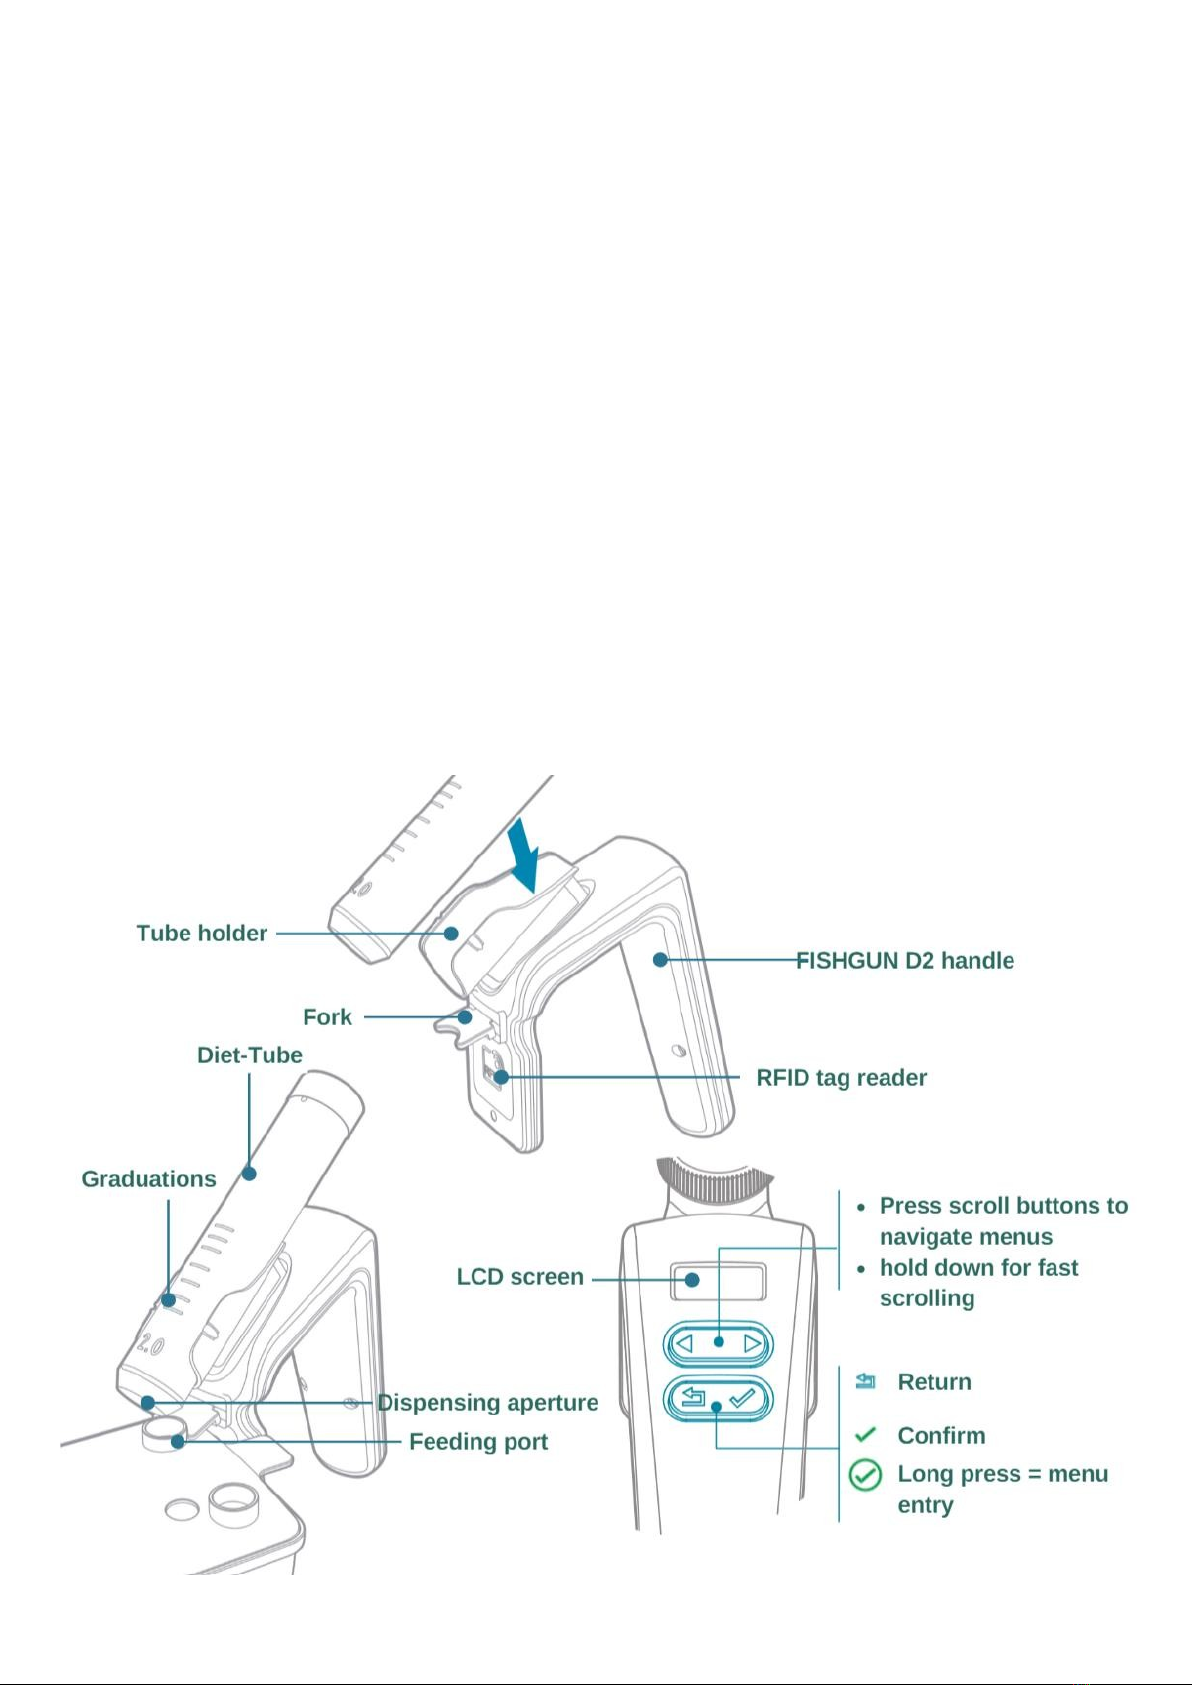
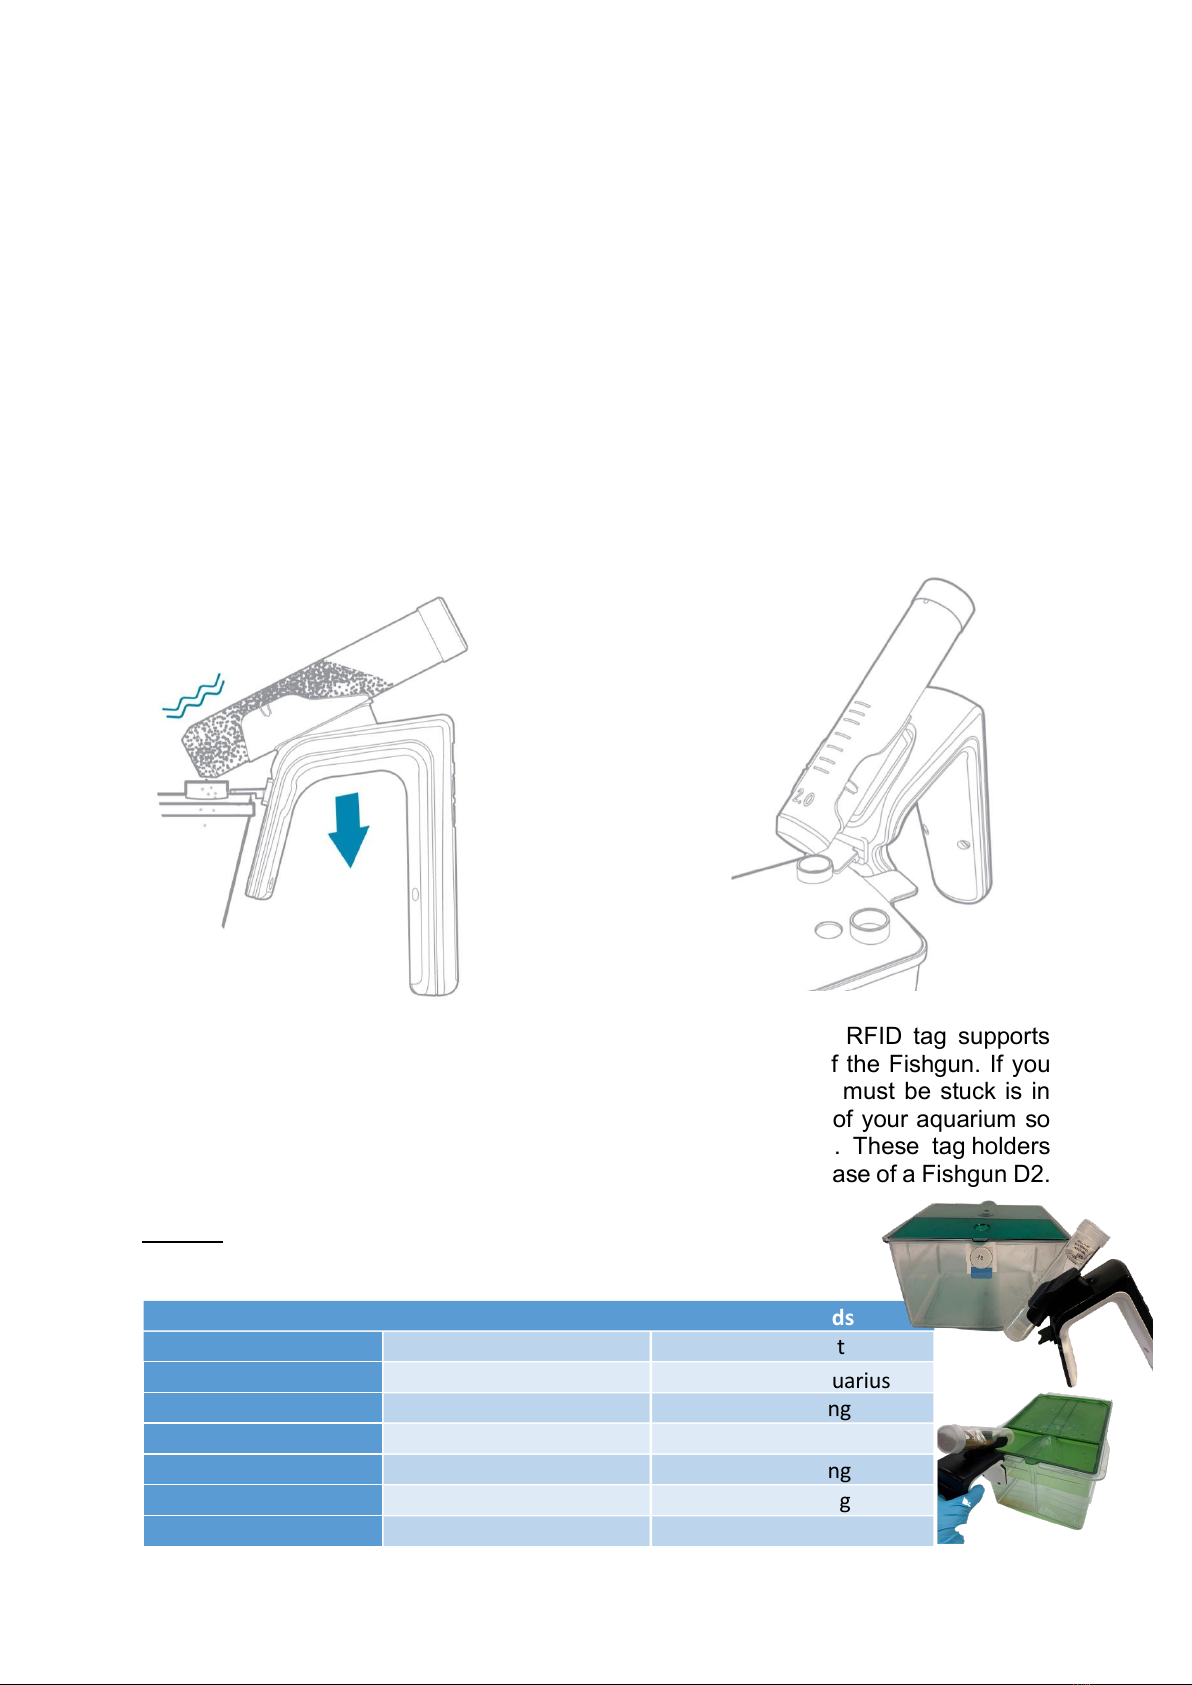
Installation of the tube
Remove the cap on the bottom of the tube and position
the filled tube on the tube holder, taking care to
place the graduations upward so that the dispensing
aperture points downward.
Note: The Diet-Tube has a hole in the tube cap, so it is
best not to seal the tube cap completely during the use so
that this hole is always visible to allow air to enter the tube.
WARNING:The Diet tubes can be cleaned and sterilized
using the following solutions only:
Ethanol up to a concentration of 10% ; Hydrochloric acid up
to a concentration of 10% ; Hydrogen peroxide up to a
concentration of 30%.
The plexiglass of the tubes becomes brittle on contact with
too concentrated cleaning agents. For a simple rinsing,
please use osmosis or distilled water to avoid any
accumulation of minerals in the tubes..
Do not autoclave the tubes.
IV.
Docking to the fish tank
Position the FISHGUN D2 dispensing aperture over the
aquarium’s feeding port, making sure to place the triggering fork on the feeding port.
The schemas below use a Techniplast aquarium as an example.