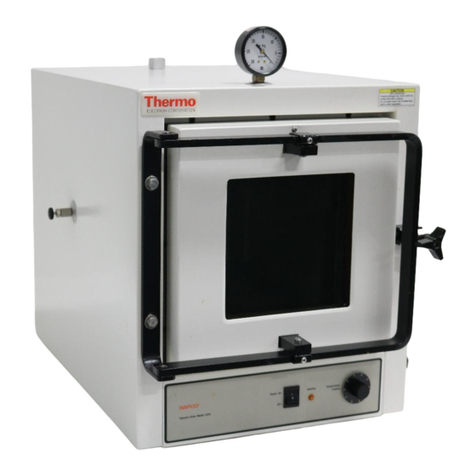
Thermo Scientific 625S User manual

User Manual
Model 625S (6055)
Freas Microprocessor-Controlled Heavy-Duty Safety Oven
Installation/Service Manual 3177898 Rev D 16JUN06

Thermo Scientific
MANUAL NUMBER
D 23496 6-06 Updated elec specs to UL report
C 6-05 New manual #, manuafacture location (was 36100133 [34001711])
B 11-01 Added ‘Plastic May Melt’ to Caution (6 pages)
A -- -- Initial release (new aesthetics
REV ECR/ECN DATE DESCRIPTION By
Preface
Freas Safety Oven i

Thermo Scientificii Freas Safety Oven
Preface
Important Read this instruction manual. Failure to read, understand and follow the instructions in this manual may result
in damage to the unit, injury to operating personnel, and poor equipment performance. s
Caution All internal adjustments and maintenance must be performed by qualified service personnel. s
Material in this manual is for information purposes only. The contents and the product it describes are subject to change
without notice. Thermo Fisher Scientific makes no representations or warranties with respect to this manual. In no event
shall Thermo be held liable for any damages, direct or incidental, arising out of or related to the use of this manual.
©2011 Thermo Fisher Scientific. All rights reserved.

Thermo Scientific Freas Safety Oven iii
Preface
Important operating and/or maintenance instructions. Read the accompanying text carefully.
Potential electrical hazards. Only qualified persons should perform procedures associated with this symbol.
Equipment being maintained or serviced must be turned off and locked off to prevent possible injury.
Hot surface(s) present which may cause burns to unprotected skin, or to materials which may be damaged by
elevated temperatures.
Marking of electrical and electronic equipment, which applies to electrical and electronic equipment falling
under the Directive 2002/96/EC (WEEE) and the equipment that has been put on the market after 13 August
2005.
This product is required to comply with the European Union’s Waste Electrical & Electronic Equipment
(WEEE) Directive 2002/96/EC. It is marked with the WEEE symbol. Thermo Fisher Scientific has contracted
with one or more recycling/disposal companies in each EU Member State European Country, and this product
should be disposed of or recycled through them. Further information on Thermo’s compliance with this
directive, the recyclers in your country and information on Thermo products will be available at
www.thermofisher.com.
4Always use the proper protective equipment (clothing, gloves, goggles, etc.)
4Always dissipate extreme cold or heat and wear protective clothing.
4Always follow good hygiene practices.
4Each individual is responsible for his or her own safety.

Thermo Scientificiv Freas Safety Oven
Preface
Do You Need Information or Assistance on
Thermo Scientific Products?
If you do, please contact us 8:00 a.m. to 6:00 p.m. (Eastern Time) at:
1-740-373-4763 Direct
1-800-438-4851 Toll Free, U.S. and Canada
1-877-213-8051 FAX
http://www.thermoscientific.com Internet Worldwide Web Home Page
service.led.marietta@thermofisher.com Tech Support Email Address
Certified Service Web Page
Thermo Fisher Scientific
401 Millcreek Road, Box 649
Marietta, OH 45750
Our staff can provide information on pricing and give you quotations. We can
take your order and provide delivery information on major equipment items or make
arrangements to have your local sales representative contact you. Our products are listed on the
Internet and we can be contacted through our Internet home page.
Our staff can supply technical information about proper setup, operation or
troubleshooting of your equipment. We can fill your needs for spare or replacement parts or
provide you with on-site service. We can also provide you with a quotation on our Extended
Warranty for your Thermo Scientific products.
Whatever Thermo Scientific products you need or use, we will be happy to discuss your
applications. If you are experiencing technical problems, working together, we will help you
locate the problem and, chances are, correct it yourself...over the telephone without a service
call.
When more extensive service is necessary, we will assist you with direct factory trained
technicians or a qualified service organization for on-the-spot repair. If your service need is
covered by the warranty, we will arrange for the unit to be repaired at our expense and to your
satisfaction.
Regardless of your needs, our professional telephone technicians are available to assist you
Monday through Friday from 8:00 a.m. to 6:00 p.m. Eastern Time. Please contact us by
telephone or fax. If you wish to write, our mailing address is:
International customers, please contact your local Thermo Scientific distributor.
Sales Support
Service Support
www.unitylabservices.com

Freas Safety Oven vThermo Scientific
Table of Contents
Introduction . . . . . . . . . . . . . . . . . . . . . . . . . . . . . . . . . . . . . . . . . . . . . . . . . . . . . . .1-1
Unpacking and Damage . . . . . . . . . . . . . . . . . . . . . . . . . . . . . . . . . . . . . . . . . . . . . . .1-2
General Information . . . . . . . . . . . . . . . . . . . . . . . . . . . . . . . . . . . . . . . . . . . . . . . .2-1
Installation . . . . . . . . . . . . . . . . . . . . . . . . . . . . . . . . . . . . . . . . . . . . . . . . . . . . . . . .3-1
Explanation of Controls . . . . . . . . . . . . . . . . . . . . . . . . . . . . . . . . . . . . . . . . . . . . .4-1
Operation . . . . . . . . . . . . . . . . . . . . . . . . . . . . . . . . . . . . . . . . . . . . . . . . . . . . . . . . .5-1
Maintenance . . . . . . . . . . . . . . . . . . . . . . . . . . . . . . . . . . . . . . . . . . . . . . . . . . . . . .6-1
Parts Replacement . . . . . . . . . . . . . . . . . . . . . . . . . . . . . . . . . . . . . . . . . . . . . . . . . . .6-2
Troubleshooting . . . . . . . . . . . . . . . . . . . . . . . . . . . . . . . . . . . . . . . . . . . . . . . . . . . .7-1
Assembly Drawings . . . . . . . . . . . . . . . . . . . . . . . . . . . . . . . . . . . . . . . . . . . . . . . . . .7-4
Wiring Diagram . . . . . . . . . . . . . . . . . . . . . . . . . . . . . . . . . . . . . . . . . . . . . . . . . . . .7-10
Warranty Information . . . . . . . . . . . . . . . . . . . . . . . . . . . . . . . . . . . . . . . . . . . . . . .8-1
Section 1
Section 2
Section 3
Section 4
Section 5
Section 6
Section 8
Section 7


Introduction
Your satisfaction and safety are important to Thermo and a complete
understanding of this unit is necessary to attain these objectives.
As the ultimate user of the apparatus, it is your responsibility to understand its
proper function and operational characteristics. This instruction manual should
be thoroughly read and all operators should be given adequate training before
attempting to place this unit in service. Awareness of the stated cautions and
warnings, and compliance with recommended operating parameters -- together
with maintenance requirements are important for safety and satisfactory
operation. The unit should be used for its intended application; alterations or
modifications will void the Warranty.
Warning As a routine laboratory precaution, always wear safety glasses when
working with this apparatus. s
This product is not intended, nor can it be used, as a sterile or patient-connected
device. In addition, this apparatus is not designed for use in Class I, II or III
locations as defined by the National Electrical Code.
Freas Safety Oven 1-1Thermo Scientific
11

1-2 Freas Safety Oven Thermo Scientific
Section 1 Introduction
Save all packing material if apparatus is received damaged. This merchandise was
carefully packed and thoroughly inspected before leaving our factory.
Responsibility for its safe delivery was assumed by the carrier upon acceptance of
this shipment; therefore, claims for loss or damage sustained in transit must be
made upon the carrier by the recipient as follows:
Visible Loss or Damage:
Note any external evidence of loss or damage on the freight bill, or express
receipt, and have it signed by the carrier's agent. Failure to adequately describe
such external evidence of loss or damage may result in the carrier's refusing to
honor your damage claim. The form required to file such a claim will be
supplied by the carrier.
Concealed Loss or Damage:
Concealed loss or damage means loss or damage which does not become
apparent until the merchandise has been unpacked and inspected. Should either
occur, make a written request for inspection by the carrier's agent within 15 days
of the delivery date; then file a claim with the carrier since the damage is the
carrier's responsibility.
By following these instructions carefully, we guarantee our full support of your
claim to be compensated for loss from concealed damage.
DO NOT — FOR ANY REASON — RETURN THIS UNIT WITHOUT
FIRST OBTAINING AUTHORIZATION. In any correspondence to Thermo,
supply the nameplate data, including catalog number and serial number.
Unpacking and Damage

Freas Safety Oven 2-1Thermo Scientific
General Information
This operating manual encompasses the above model and its specific electrical
characteristics. These safety ovens meet all of the requirements of ASTM D-2426,
ASTM E-145 (Type II A).
Note This is not an explosion-proof oven. s
Microprocessor-Controlled Safety Ovens combine all the features of the standard
Model 625 Oven with the additional safety of a positive door latch and a rear
safety panel with a guard. In the event of an internal explosion, the oven door
remains closed, while the rear safety panel drops into a steel framework guard,
thus relieving internal pressures.
These ovens utilize a motor-driven turbo blower to circulate heated air
throughout the working chamber. In operation, air is drawn into the chamber
through an intake port located at the left side of oven top, passed over the heater
bank where it is heated and forced into the working chamber through a
perforated panel known as a diffuser wall located on the right hand side of the
chamber. The air then passes across the working chamber and out through a
diffuser wall on the opposite side where it is again passed over the heater bank
and recirculated. During this continuous process, a portion of the heated air is
exhausted through a vent located at the top of the working chamber to eliminate
moisture and fumes which may arise from the material in the oven. The
exhausted air is replaced by new air being drawn in through the intake port.
Mechanical Convection Ovens provide the most efficient means of heat transfer
as well as the most reproducible test conditions for successive operations. They
provide rapid heat-up time for high density loads, shortened recovery period in
production operations where the door is frequently opened, and a minimum
difference in uniformity for extremely heat sensitive materials.
2
Model
No.
Catalog
No. Volts Hz Phase Total
Watts
Total
Amps
Blower
Motor
Maximum
Rated Temp
(in °C)
6055 3166781 230 50/60 13700 16.1 1/6 H.P. 32

2-2 Freas Safety Oven Thermo Scientific
Section 2 General Information
These ovens are microprocessor controlled. The temperature range of the oven is
ambient +15°C minimum to 325°C maximum.
These controllers cycle heat "On/Off" in split-second intervals based on input
from a Resistance Temperature Device (RTD) sensor. When this type of control is
combined with the appropriate inner chamber design, precise temperature control
from ambient +15°C to 325°C is achieved. The controller displays temperature in
°C.
Another backup - safety, is a separate adjustable "HIGH LIMIT" control which
turns the heater "Off", if the selected limit is attained. A glowing red light will
indicate this condition.
The timer, located on the front panel, is spring wound. It will allow the heater to
be turned "Off" after a preset time (maximum of 12 hours) or to continue to heat
at the desired chamber temperature by turning the timer knob to the "HOLD"
position.
Air continues to circulate within the chamber after the heater is turned "Off" as
the blower motor is still operating. Air changes per hour in this oven are 100-195.
Warnings and Limitations - Latches
1. If, for some reason, the cam is in the "closed" position while the front door is
open, the door will rebound rather than latching when closed. This could be
caused by a misaligned strike (all latches) and/or a loose handle or by the cam
being struck and rotated accidentally while in the open position.
2. If excessive force is used in closing (slamming) the front door, the tendency of
the door to rebound may be sufficient to cause the latch (and door) to
reopen.
A rebounding door would not normally cause a dangerous situation unless
some aggravating condition is present, such a violent slamming and/or
immobility of the person closing the door, but it is essential that operators are
aware of the possibility of rebound, and are warned against violent slamming.
It is also recommended that the operator should keep his hand between his
body and the outside of the door while closing it.
3. Both doors may open unexpectedly if material (such as a large casting) should
fall and strike the interior of the doors.
4. Closing, and especially slamming, of the front door with the handle up
increases the possibility of shearing the internal spring pin.

Freas Safety Oven 2-3Thermo Scientific
General Information Section 2
Warnings and Limitations - Latches (continued)
5. If the spring pin breaks, the handle becomes inoperative. Replacement of the
spring pin with one not identical to the original may cause a hazardous
condition by destroying the independence of the cam and handle.
Additionally, the bearing pin, handle is individually fitted.
6. Because of the rather large tolerances involved in castings, each latch-strike
combination must be individually aligned and alignment must be rechecked
whenever latches are replaced to avoid possible malfunctions.
7. In the event of a maximum violent explosion, the front door will open
rapidly and with little or no warning. It is therefore recommended that the
area in the arc of the door be marked as a danger area, perhaps by "red
striping".


Freas Safety Oven 3-1Thermo Scientific
Installation
Warning Installation should be completed by qualified personnel ONLY. s
Oven Location:
Best operation is obtained by choosing a location as free as possible from dust,
drafts, or severe temperature changes which can affect the performance of the
oven. All four legs of the oven are adjustable to compensate for any unevenness of
the installation site.
An electrical source of proper characteristics should be near at hand. The ambient
temperature should be between 10° and 40°C. Six inches of free space should be
provided around the oven for proper ventilation of the electrical compartment.
Electrical Connections: Important! Please read carefully.
Warning For personal safety, this apparatus must be properly grounded. s
This oven is equipped with a junction box located at the back of the oven. The
service wires should be connected to the three conductors inside the junction box
by a qualified electrician.
Warning National Electrical Code should be observed for proper fusing and the
size of the service wires. The green conductor should be properly grounded. The
electrical ratings of the model are stamped on a nameplate located on one side of
the oven toward the front. s
3

3-2 Freas Safety Oven Thermo Scientific
Section 3 Installation
Electrical Connection Check Points:
1. Have proper connections been made at the junction box?
2. Are all wire connections tight?
3. Are service wires size adequate to carry the load?
4. Is the oven properly grounded?
5. Is the oven connected to a properly fused branch circuit?

Freas Safety Oven 4-1Thermo Scientific
Explanation of Controls
Power "Circuit Breaker" Switch:
Controls all electrical power to the oven when energized. The blower motor will
always be in operation when the line switch is "On".
"High Limit" Control:
The function of this thermostat is to control the operation of the heater if either
the microprocessor or RTD should fail. During normal operation, the control is
set so that the pilot lamp, above the control knob, does not glow. A glowing lamp
indicates that the heater is not energized. When the control knob is rotated to its
maximum position (fully clockwise), the maximum chamber temperature will be
limited to 345°C.
"Temperature Control":
“TEMPERATURE” Controller: The microprocessor temperature controller
provided contains two digital displays - the upper display indicates chamber
temperature in °C and the lower display indicates the desired operating
temperature in °C.
4

“TEMPERATURE” Controller (continued)
1. Set (SET) key is used to
access the set values for
Temperature Control.
2. Setting digit shift left key -
moves to and highlights digit
to be changed.
3. Set-value decrement key is
used to decrease the value of
the number highlighted.
4. Set-value increment key is
used to increase the value of
the number highlighted.
5. Present Value (PV) is the
actual chamber temperature.
6. Set-value (SV) is the
Temperature Set Value
Display (setpoint or desired
temperature).
7. First control output (OUT(1) lamp lights up when control output (heat) is
turned ON.
8. Not Used
9. Not Used
10. Not Used
11. Not Used
"Timed Heat":
It is a 12-hour, spring-wound timer with a "HOLD" feature. It turns off the
heater after preset time of the timer has elapsed, but the blower motor stays
energized and continues to circulate air through the chamber. During normal
continuous operation of the oven at a desired temperature, the timer knob should
be turned to "HOLD" position.
"Air Volume Control":
It is a mechanical setting and controls the amount of heated air entering the
working chamber. The reference dial is numbered 1 through 9. The setting is
made by turning the knob slightly counterclockwise, sliding it to a desired
position on the scale and locking it by turning clockwise.
4-2 Freas Safety Oven Thermo Scientific
Section 4 Explanation of Controls
Figure 4-1. Control Locations

Freas Safety Oven 4-3Thermo Scientific
Explanation of Controls Section 4
“Air Volume Control” (continued)
Although the scale is numbered linearly, the air volume increase is not linear. The
air volume increases are relatively small at the lower end of the scale and large
when adjusted at the upper end. The "one" setting on the scale provides the
minimum airflow, and a setting of "nine" will supply the maximum airflow.
Note The air blower operates at all times when the "Power" switch is "On". s
Damper settings = 9- Fully open, 5-Mid Position, 1-Fully Closed
Table 4-1. Performance Specifications
Model No. Temp Setting (°C) Damper Setting Uniformity (±°C) Sensitivity (±°C)
625S
100
90.25 0.02
50.375 0.015
11.000 0.21
200
90.5 0.06
50.625 0.05
12.000 0.5
325
91.125 0.07
52.5 0.1
13.0 0.65


Freas Safety Oven 5-1Thermo Scientific
Operation
1. For nominal ventilation, open the exhaust vent and air intake vent shutter
caps approximately 50%. The air intake vent is to the left when facing the
front of the oven.
2. Set "Air volume" control to the midposition.
3. Turn the "High Limit" control fully clockwise.
4. Turn the "Timed Heat" knob to the "Hold" position for continuous
operation at a desired temperature setting. Set this knob to anytime up to 12
hours if it is desired to operate the heater on the timer.
Note If timer knob is at zero position, the heater will not operate. (The unit will
not heat.) s
5. Turn "On" line switch and observe operation.
6. Depress the appropriate "UP" or "DOWN" button until the desired setpoint
temperature is displayed in the lower display.
7. To set the temperature:
• Press the SET key once. The right digit will flash.
• Select a value for this digit by pressing the /\ or \/ key until the value is
displayed.
• Press the < key to select the next digit to be changed. Use the /\ or \/ key
until the desired value is displayed.
• Once the readout is displaying the desired temperature setpoint, press the
SET key to enter the value into the controller.
8. Allow the chamber to stabilize at the select "SP" temperature which can be
observed on the upper display. Depending on the selected "SP" temperature,
stabilization will require from 15-30 minutes.
5
This manual suits for next models
1
Table of contents
Other Thermo Scientific Oven manuals

Thermo Scientific
Thermo Scientific PRECISION 6502 Manual

Thermo Scientific
Thermo Scientific NAPCO 6508 User manual

Thermo Scientific
Thermo Scientific OGS 60 User manual

Thermo Scientific
Thermo Scientific OGH 60 Series User manual

Thermo Scientific
Thermo Scientific NAPCO 6506 User manual

Thermo Scientific
Thermo Scientific Lindberg/Blue M VO Series User manual

Thermo Scientific
Thermo Scientific 6253 User manual

Thermo Scientific
Thermo Scientific Lindberg Blue M 3055 Series User manual

Thermo Scientific
Thermo Scientific PR305225G User manual

Thermo Scientific
Thermo Scientific 3490M User manual