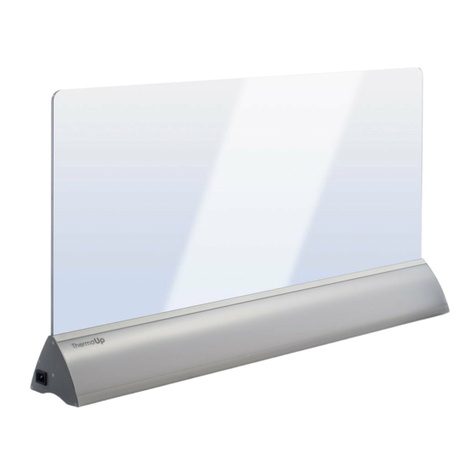
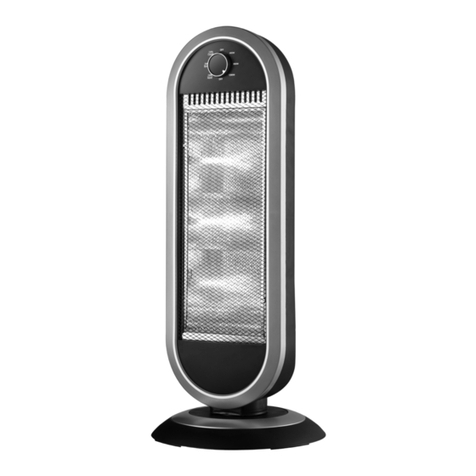
ThermoUp FLOOR User manual

TECHNICAL CERTIFICATE
ThermoUp FLOOR / LED / LED Plus
ThermoUp TOP 700 / 1100 / 1600
Thermop WALL
MODELS
Operating Manual
Before starting operation of the heater,
please take a close look at this Manual and keep handy

Introduction
Technical data
Safety measures
Floor-standing heater THERMOUP FLOOR/LED/LED PLUS
• Heater design
• Scope of supply
• I
nstallation and connection
Wall-mounted THERMOUP WALL
• Heater design
• Scope of supply
• Installation and connection
Ceiling heater THERMOUP TOP 700/1100/1600
• Heater design
• Scope of supply
• Installation and connection
Operation, storage and maintenance
Possible defects and remedies
Warranty
Product certification
Sale Certificate
Warranty card
INCORPORATED SYMBOLS
• In the case of damage of the power cable, in order to avoid the severe
inquiries, it must be replaced by manufacturer or authorized service or
another qualified specialist
• The heater must be installed in compliance with the current local rules and
operating procedures of the electrical networks.
• Upon installation of the heater, an electric plug must be in accessible
place.
• The heater’s power rating (it is shown on rating plate) is based upon test
conducted under specified load.
• Texts and digital notations of the Manual may include printing errors.
• If after reading the Manual, you still have the questions regarding
operation of device, please contact the seller or specialized service center
to obtain explanations.
• The item has the rating plate, which provides specifications and other
useful information on device.
NOTE
WARNING!
CAUTION!
Failure to comply with these requirements may result in severe injury or serious damage to equipment
Failure to comply with these requirements may result in severe injury or death
TABLE OF CONTENT
2
4
5
6
8
11
17
17
18
19
19
20

3
INTRODUCTION
ThermoUp is an innovative heating system for your home, office or business space.
The ThermoUp heaters warm quickly a space up to comfortable temperature regime and allow to conserve heat for a long
time, and thoughtful design with reliable control system will strike a chord with the most exacting customer. This is the ideal
solution for your home or office.
The ThermoUp heaters use in their operation a principle of combined heat irradiation: along with thermal radiation, the
heater is able to produce a convection flow that distributes heat air through specified area. An emitting surface is made of
hardened heat-strengthened glass and withstands sharp temperature fluctuations, and accidental mechanical influences
and loads.
Dear Customer!
Thank you for purchasing the ThermoUp heater!
Comfort
ThermoUp, faster than other kinds of
heater, creates comfortable temperature
conditions for all persons in a room
and allows to preserve required heat
for a long time. It warms up a space
throughout full volume uniformly and
proportionally. Possibility of zone and
spot heating of the necessary area is a
big plus.
Environmental compatibility
ThermoUp is a green and
environmentally friendly heating.
The glass heaters don’t burn an
oxygen, thus taking away draught
feeling and excluding headaches
which arise when the classic heaters
are applied. A total absence of
foul smell and irritative sound
during operation is an additional
advantage of our product line.
Cost effectiveness
Heat emission forms comfortable
feeling for human without rising air
temperature of whole space, and
energy saving is caused by this.
You warm up yourself but not cold
air. There is no irrational temperature
distribution, heat costs and losses are
decreased.
INTRODUCTION

4
INTRODUCTION
Safety
ThermoUp’s glass panel has
high shock resistance by virtue
of hardened glasses and triplex
structures, which withstand sharp
temperature fluctuations, and
accidental mechanical influences
and loads.
Operability
This is a device of new generation,
which combines both operability and
style. Smooth glass covering
is very stylish and looks presentably
within interior of offices, restaurants,
conference halls, art spaces, and
in home interior of various styles.
Several regimes of glass lighting, and
choice of possible color scores allow
the ThermoUp heaters to fit well
in interior of any space.
Usefulness
Reliable control system allows
simple and easy adjust the heater’s
temperature, it is possible to operate
through remote-control box. There are
user-friendly interface and detailed
installation and operating manuals.
The innovative ThermoUp heaters
have no any quick-wear parts that
require periodic replacement. Long
operational period
There are three kinds of heater in ThermoUp innovative line:
• Floor-standing – ThermoUp Floor / LED / LED Plus
• Wall-mounted – ThermoUp Wall
• Ceiling – ThermoUp Top 700/1100/1600

5
TECHNICAL DATA
GENERAL
TECHNICAL DATA
Table 1. Technical data of ThermoUp heaters
Name Dimension, mm Weight,
kg
Power,
W
Voltage,
V
Current
strength, A
Area to be
heated, m2
Maximum heating
temperature
of glass panel, °C
ThermoUp Floor/
LED / LED Plus
1010х569х148
15 600 220 2.7 До 12 80
ThermoUp Wall
1010х527х27
11 600 220 2.7 До 12 80
ThermoUp
Top 700
828х186х26 (190)
4.7 700 220 2.9 До 15 220
ThermoUp
Top 1100
828х278х26 (190)
6.5 1100 220 5 До 22 220
ThermoUp
Top 1600
828х368х26 (190)
8 1600 220 6.8 До 34 220

6
SAFETY MEASURES
SAFETY
MEASURES
1. The heater is an appliance and it should be protected against shocks, dust and moisture.
2. Use the heater for its designated purpose only.
3. The heaters must be located with due regard to requirements for installation specified in the Section
«Installation and connection» of this Manual.
4. Thermal element of ThermoUp Floor/ LED/ LED Plus and ThermoUp Wall is heated up to 80 °C, please try to
avoid long contact with heater during its operation. It is not recommended to leave running heater unattended
5. During operation, thermal element temperature of the ThermoUp Top 700/1100/1600 can reach 220 °C.
To avoid injury and burn, it is strongly prohibited to touch working surface of heater during its operation!
6. It is not recommended to operate ThermoUp 700/1100/1600 heater without earning, and without electric
protection from short current and overload. Connection of the heaters must be performed by skilled technician
according to Section «Installation and connection» of this operating manual.
7. Appliance must be placed away from easily combustible or deformable objects.
8. Power cord must not be in contact with hot surfaces of heater
9. It is not recommended to cover heater during its operation, it should not be used to dry clothes or any other
items – this may cause overheating or damaging the appliance. Damage of such kind will not be covered by warranty.
10. Don`t immerse heater within water or other liquids. It is possible to use the heaters in wet rooms without direct
contact of water with the heater’s surface.
11. Disconnect heater from mains when it is not used and before its washing.
12. Make sure that the heater became cool completely before placing it into package for long storage.
13. Don`t disassemble the appliance at your own discretion.
14. Don`t make alterations in the heater’s design! Any alterations result in loss of warranty.
15. In case of malfunction of the appliance, please contact the manufacturer’s service center for consulting and repair.

7
FLOOR-STANDING HEATER THERMOUP FLOOR/LED/LED PLUS
FLOOR-STANDING HEATER
THERMOUP FLOOR/LED/LED PLUS
Diagram 1. ThermoUp Floor heater
Heater design
Scope of supply
1. Heater
2. Detachable electric power cord for heater
3. Lighting control panel (for models ThermoUp Floor /
LED / LED Plus)
4. Operating manual and warranty card
Installation and connection
1. Unbox the appliance.
2. Place it on floor or any other level surface
3. Connect detachable electric power cord to appropriate
socket of appliance, then plug in wall outlet.
4. Push power button of the heater to place it into
operation mode.
5. Set required power of appliance by means of
regulator.
Recommendations for installation
Due to details of construction, when using the floor-
standing heater ThermoUp Floor a combine heat transfer
takes place. Besides infrared radiant flux, that heats the
objects within heating zone, in close proximity to the
thermal element of the heater air is heated that provides
additional convectional heat transfer

8
FLOOR-STANDING HEATER THERMOUP FLOOR/LED/LED PLUS
Figure 1. Radiated emission of ThermoUp Floor heater
In order to use the appliance with maximum efficiency and safety,
the following recommendations shall be considered:
• Install the heater close to objects that need to be heated additionally (within 3 m)
• In order to use the heater comfortably, it is recommended to install it at least 50 cm
from place of long stay of people and animals
• The appliance must not be covered, splash of water must not fall on it
• It is recommended to connect the appliance to power source directly, without extension cords

9
WALL-MOUNTED HEATER THERMOUP WALL
WALL-MOUNTED HEATER
THERMOUP WALL
Heater design
Diagram 2. ThermoUp Wall heater
1. Unbox the appliance
2. The heater is completed with the fasteners for wall-mounting
the appliance. Different walls require different holding
fixtures. Select screw nails, nailing plugs, self-tapping
screws etc. (outside the scope of supply) which are suitable
for your walls.
3. Select location for installation of the heater according to the
recommendations for installation and draw fixation scheme
using attached template.
4. Bore the holes in wall and fix 4 fasteners in order indicated
in Figure 2.
5. Secure the heater to wall using fastening elements included
to delivery set
6. Plug in the heater.
7. Press on/off button of the heater located on power cord to
set the appliance in operation mode.
Delivery set
1. Heater
2. Mounting set: 2 brackets, 2 butterfly bolts, 2 cylinders of upper fasteners
3. Operating manual and warranty card
Installation and connection

10
WALL-MOUNTED HEATER THERMOUP WALL
Figure 2. Installation of ThermoUp Wall heater

11
WALL-MOUNTED HEATER THERMOUP WALL
• Appliance shall be mounted on wall in the horizontal position
only.
• Objects that you want to be heated at first instance shall be
within 3 m from front panel of the heater.
• Take into account that an angel of the most effective radiation
is 120°.
• Make sure that the appliance will be mounted on wall close
to power source, that will allow to connect it directly, without
extension cords.
• The appliance must not be covered, splash of water must not
fall on it.
Recommendations for installation
Figure 3. Radiated emission of ThermoUp Wall heater

12
CEILING HEATER THERMOUP TOP 700/1100/1600
CEILING HEATER
THERMOUP TOP 700/1100/1600
Diagram 3 ThermoUp Top 700/1100/1600 heater
Heater design
Delivery set
1. Heater
2. Assembly kit
• 2 assembly brackets with changing tilt angle;
• 4 angles to hang up the appliance with chains (the chains are not included);
• 4 screws for fastening brackets to the heater.
3. Operating manual and warranty card

13
CEILING HEATER THERMOUP TOP 700/1100/1600
1. Unbox the appliance.
2. Locate position for heater according to the recommendations
on heater suspension height specified in Table 2 and taking
into consideration the distance to adjacent objects.
3. Choose suitable method of fastening the appliance. The
heater is completed with two options of fasteners for ceiling
mounting – two assembly brackets with changing tilt angle
and four angles for hanging up the appliance with chains
(are not included).
4. Two expanding nuts are placed in the ThermoUp heater’s
body. Use them to connect chosen type of fasteners (angles
or corresponding part of bracket). Fastening screws
are included.
5. Fix the remaining assembling parts on ceiling: chains or
second part of bracket and hang the heater from the ceiling.
6. When fixing with normal brackets, it is possible to choose
an angle of radiant flux. For this purpose, loosen slightly
the butterfly bolts that connect two parts of each bracket,
set required tilt angle of appliance and fix the brackets in
chosen position.
7. Strength of ceiling or structures, to which the heater is fixed
must be enough to withstand five-time weight of heater.
Installation of ThermoUp Top 700/1100/1600 heaters
Figure 4. Installation of ThermoUp Top heater

14
CEILING HEATER THERMOUP TOP 700/1100/1600
Figure 4. Installation of ThermoUp Top heater

15
CEILING HEATER THERMOUP TOP 700/1100/1600
Temperature of the ceiling-faced heater’s side in operation mode can reach 60 °C. When using included assembly
bracket, necessary thermal stability of ceiling coverage’s materials must be at least 80 °C. When using other
materials for ceiling coverage, it is recommended to increase distance between heater and ceiling using alternative
options for appliance suspension.
Figure 5. Radiated emission of ThermoUp Top heater
WARNING!
• Distance to ceiling must be at least 10 cm, and at least 50
cm to walls. Distance to objects which are located within the
heater’s coverage shall be at least 50 cm.
• When people or animals are staying within heating zone for
long time, distance between them and heater shall be
at least 80 cm.
• It is possible to use included assembly kit of ThermoUp
heater for wall-mounting under ceiling while meeting the
recommendations on suspension height.
Recommendations for installation
Recommended heater’s suspension height
Heater Dimensions
Suspension height, m
ThermoUp Top 700
828 х 186 2,3-3,5
ThermoUp Top 1100
828 х 278 2,5-3,5
ThermoUp Top 1600
828 х 368 2,7-3,5
Table 2

16
CEILING HEATER THERMOUP TOP 700/1100/1600
1. It is recommended to perform connection by qualified
technician.
2. Prior connection, it is necessary to remove voltage from
supply cable.
3. Connect ends of supply cable with power cord leaving
the heater though terminal strip (not included), observing
polarity.
4. It is recommended to make appliance grounding with using
expressly provided grounding screw. The screw is located on
heater’s body and has the following designation
5. The heater may be connected directly to 220 V mains that
have protective grounding wire by means of 2-core cable
with section at least 1.5 mm2, and via circuit breaker and/or
heat regulator (not included).
6. When installing two or more heaters, it must be provided for
their parallel connection to fixed wiring, installation of cables
and switch for total current, and installation of appropriate
circuit breaker.
Connection of ThermoUp 700/1100/1600 heaters
Diagram 4. Connection diagram with breaker
• Value of current strength of the heat regulator must be
15-20% higher than the same of heater. Connection of few
heaters to single heat regulator must be made via solenoid
starter (not included), which maximum current strength
value must be 15-20% below current strength value
permitted by heat regulator.
• It is recommended to install heat regulator at height of 1.5
m above floor. To avoid false triggering, the heat regulator
shall not be installed within directly affected area of any
heat sources including the heater itself, and on draft.
• In each separate room one heat regulator is installed. It is
possible to connect single heat regulator with few infrared
heaters installed in single room.
• In order to regulate temperature in a room, it is
recommended to select heat regulator with air temperature
sensor for heater.
• The heat regulator allows fine-tolerance control of heaters
to maintain specified temperature within premise. And the
heaters operate in maximum green mode which excludes
underheating or overheating the premise. The heaters
continue operate until temperature set by heat regulator
reaches, upon that they are disconnected till temperature
drops 23 degrees below specified one.
• In order to avoid freezing out the premises when there are
no people within them for long time, it is sufficing to set the
heat regulator on maintaining temperature of +5 degrees.
Diagram 4. Connection diagram with breaker
Connection of heater with heat regulator shall be made according to Diagram 5 and Diagram 6

17
CEILING HEATER THERMOUP TOP 700/1100/1600
During first heating, it is possible appearing off-odor connected with technological details of manufacturing
the heater. This odor will disappear in use of the appliance.
WARNING!
Diagram 6. Connection diagram with heat regulator and main circuit contactor
Diagram 5. Connection diagram with heat regulator

18
OPERATION, STORAGE AND MAINTENANCE
OPERATION, STORAGE
AND MAINTENANCE
POSSIBLE DEFECTS
AND REMEDIES
ThermoUp heaters don’t require special service.
The appliance’s body shall be wiped periodically with soft
cloth or wet sponge. Don’t use abrasive cleaners, pastes, metal
brushes or other hard objects.
The heaters of all models must be checked for operability and
integrity of power supply cable, and tightness of ThermoUp Top
heater’s clip connectors shall be also checked once per year.
Working life of appliance is over 10 years under observance
of regulations on installation and operation. Room where the
heater is used must have well heat insulation, because in a
case of permanent cold air intake, operation of heater may be
ineffective.
The appliance may be operated and stored under following
conditions:
• ambient air temperature is -50 °C to +70 °C
• relative humidity up yo 80% at temperature of +25 °C;
• the heater shall be stored in cold package.
It is necessary to protect appliance from shocks, dust and
moisture.
Upon expiration of service life, the appliance shall be disposed
according to standards, regulations and methods in force at
places of disposal.
Possible defects Remedy
There is no radiated heat
• Check for line voltage and integrity of power supply cable, replace
defective cable if necessary
• Check position of heat regulator dial, its operability
• Contact with authorized dealer for professional diagnostics
and repair of appliance
Temperature of heated surfaces is
below required level
• Check operable condition of the heat regulator
• Check value of voltage at terminals of the heater, during its operation
the voltage must be 220±10 V

19
WARRANTY
WARRANTY
1. Warranty shall be valid only upon presentation of the
original documents, confirming fact of purchase.
2. Warranty card must be dated, fully and correctly
completed and stamped by an official Seller. If the stamp
and date of sale (or cash register receipt with the date
of sale) are absent, warranty period of the appliance is
reckoned from the date of its manufacturing.
3. All claims relating to outside appearance and
completeness of appliance must be notified to the Seller
when buying the appliance.
4. In case of an appliance failure due to the fault of the
manufacturer, a Customer has a right to appeal to the
Seller. Liability for defect through the fault of the Company,
carried out installation of the appliance, shall be within the
sole responsibility of the installing company. In this case you
should address to the Company, carried out installation of
the appliance.
5. Appliance design, completeness or fabrication technique
may be amended in order to improve its technical
characteristics. Such modifications can be made without
prior notice to the buyers and don`t entail any obligations
for amendment/improving of the earlier made appliances.
6. This Warranty doesn`t give right to compensation and
cover of loss, resulting from the appliance`s renovation
without prior written consent of the manufacturer in order
to bring it into conformity with the local technical standards
and safety regulations.
7. Warranty repair is provided within 45 days. If during the
defect correction it become apparent that such defects will
not eliminate within the period, stipulated by the agreement
of the parties, Parties can enter into agreement about new
period of the appliance`s defect correction.
The manufacturer guarantees successful performance of the heater for 3 years as from the date of purchasing. If the defects in
the appliance are become apparent due to the fault of the manufacturer during the warranty period, the Seller, specified in the
Sale Certificate, shall provide free of charge repair or replacement for all products that suffer defects on the following terms.
• making alterations in the appliance`s design by the
Customer;
• improper operation, unintended use or out of
accordance with the manufacturer regulations for
operation and maintenance, and installing or running
the appliance with violation of the technical standards
and safety regulations;
• presence of mechanical damage on the appliance
(chips, cracks or etc.), exposure to excess force,
chemically aggressive agents, high temperatures,
high humidity/ dustiness, high-concentration vapors,
if something out of above-referenced leads to product
problems;
• repair, made by the authorized service centres or
dealers;
• accidents resulting in injuries, lightning stroke,
flooding, fire accident or other reasons outside control
of the manufacturer, which have caused damage to
the appliance;
• damage incurred during transportation of the
appliance by the Customer (except in cases in which it
is made by the authorized dealer or manufacturer);
• failures of system where the appliance were used;
• running on overvoltage (max. 10 % of the rated voltage)
and humidity max. 80 % at temperature +25 °С.
This limited warranty is void in case of:

20
PRODUCT CERTIFICATION, SALE CERTIFICATE
Product was certified on the Customs Union territory by the certification body
RA.RU.10АД75
PRODUCT CB «ExpertAutoTest» LLC «Certification of machines and equipment»
Address: RF, 156019, Kostroma, Stankostroitelnaya str., bldg. 3, prem. 1
Телефон: 8 (4942) 46-60-08
E-mail: [email protected]
Product conforms with requirements of regulatory documents
TR CU 004/2011
TR CU 020/2011
GOST IEC 60335-1-2015 (Part 1)
GOST IEC 60335-2-30-2013 (Part 2-30)
GOST 30805.14.1-2013
GOST 30805.14.2-2013
GOST 30804.3.2-2013
GOST 30804.3.3-2013
Certificate No.
№ТС RU C-RU.АД75.В.00437
Series RU №0633803
Term of validity: from 08.11.2017 to 07.11.2022
Manufacturer: Phototech LLC
Address: Russia, 152025, Yaroslavl Region, Pereslavl-Zalesky, Mendeleeva square, bldg. 2, facil. 34A
PRODUCT CERTIFICATION
SALE CERTIFICATE
Seller Company
Address
Date of sale Seller signature
M. П.
IP54
Other manuals for FLOOR
1
This manual suits for next models
6
Table of contents
Other ThermoUp Heater manuals

ThermoUp
ThermoUp Dry Side Mini User manual

ThermoUp
ThermoUp LED User manual

ThermoUp
ThermoUp TOP 700 User manual

ThermoUp
ThermoUp FLOOR User manual

ThermoUp
ThermoUp WALL User manual

ThermoUp
ThermoUp TOP S 800 User manual

ThermoUp
ThermoUp Wall Black User manual

ThermoUp
ThermoUp Dry Side User manual

ThermoUp
ThermoUp Dry Side S User manual

ThermoUp
ThermoUp Foor User manual