manuals.online logo
Brands
  1. Home
  2. •
  3. Brands
  4. •
  5. ThermoUp
  6. •
  7. Heater
  8. •
  9. ThermoUp Dry Side Mini User manual

ThermoUp Dry Side Mini User manual

1
ТЕХНИЧЕСКИЕ ДАННЫЕ
Таблица 1. Технические данные полотенцесушителей ThermoUp Dry Side Mini
Название Размер, мм Масса,
кг
Мощность,
Вт
Напряжение,
В
Сила тока,
А
Max.оt нагрева
стеклянной панели оС
ThermoUp Dry Side Mini 200x1350x8 8 138 220-230 0.6 55
Полотенцесушители ThermoUp Dry работают по принципу длинноволнового
инфракрасного излучения. Поверхность стеклянной панели нагревается
быстро и плавно и начинает испускать электромагнитные волны
в диапазоне от 3 мкм до 1 мм, несущие тепловую энергию.
Уважаемый покупатель!
Спасибо, что купили полотенцесушитель ThermoUp Dry Side Mini!
МЕРЫ БЕЗОПАСНОСТИ
1. Используйте прибор только по назначению и оберегайте от ударов,
попадания пыли и влаги.
2. Запрещается пользоваться полотенцесушителем, если нагревательная
панель или провод питания имеют механические повреждения.
3. Прибор может использоваться детьми от 8 лет и старше и лицами с
ограниченными физическими, сенсорными или умственными способностями,
если они находятся под контролем лица, ответственного за их безопасность
или были проинструктированы по безопасному использованию прибора
и понимают возможные опасности. В остальных случаях, использование
полотенцесушителя детьми и уязвимыми лицами возможно только под
наблюдением взрослых. Дети не должны играть с прибором.
4. Чтобы исключить опасность для маленьких детей прибор должен
устанавливаться так, чтобы высота от пола до нижнего крючка для сушки
была не менее 600 мм.
5. Полотенцесушители должны располагаться с учетом требований к монтажу,
указанных в соответствующем разделе данной инструкции.
6. Шнур питания не должен соприкасаться с горячими поверхностями
полотенцесушителя.
7. Прибор должен находиться вдали от легко воспламеняющихся или легко
деформируемых объектов.
8. Во избежание поражения электрическим током всегда до упора вставляйте
вилку от провода питания полотенцесушителя в электрическую розетку.
Вынимайте провод питания из электрической розетки, держась за вилку
электроприбора. Запрещается тянуть за сам провод.
9. Полотенцесушитель преднозначен исключительно для сушки текстильных
изделий, намокших в результате стирки или попадания воды (а не других
жидкостей).
10. Не размещайте на полотенцесушителе текстильные изделия общим весом
более 4 кг независимо от модели.
11. Не накрывайте полотенцесушитель во время его работы, для сушки
текстильных изделий используйте специальные крючки.
12. Термоэлемент полотенцесушителя во время работы может нагреваться до 55
градусов. Старайтесь избегать длительного контакта с прибором во время
его работы. Не рекомендуется оставлять включенный полотенцесушитель
без присмотра.
13. Не погружайте прибор в воду или другие жидкости.
14. Отсоединяйте прибор от электрической сети, когда он не используется, и
перед тем, как его мыть.
15. Удостоверьтесь, что прибор полностью остыл, прежде чем убирать его в
упаковку для длительного хранения.
16. Не разбирайте прибор самостоятельно. Не вносите изменения в
конструкцию полотенцесушителя. Любые изменения приводят к потере
гарантии.мсм
17. В случае нарушения правильной работы прибора обратитесь в ближайший
к вам авторизованный сервисный центр производителя для консультации и
ремонта.
Современный подход к организации комфорта
RU
1. Полотенцесушитель;
2. Комплект дистанционных держателей для крепления прибора
к стене (4 шт);
3. Комплект крючков для полотенец (2 шт.);
4. Упаковочная коробка с трафаретом для монтажа;
5. Руководство по эксплуатаци и гарантийный талон.
1. Прозрачный;
2. Зеркало;
3. Тёмное зеркало;
4. Цветной (белый).
Комплект поставки
Варианты цветовых решений
ВНИМАНИЕ!
ОСТОРОЖНО!
Требования, несоблюдение которых может привести к тяжелой травме или серьезному повреждению оборудования.
Требования, несоблюдение которых может привести к серьезной травме или летальному исходу.
Рисунок 1. Полотенцесушитель ThermoUp Dry Side Mini
PRODUCT WARRANTY, CERTIFICATION
INSTALLATION AND CONNECTION OF THE TOWEL
The manufacturer guarantees smooth functioning of the heater within 1 year from the moment of purchase.
WARRANTY
• the buyer changes design of the product;
• improper operation, use of the product for other than its intended purpose or in accordance with the
manufacturer’s operation and maintenance manual, as well as installation or operation of the product in
violation of technical standards and safety norms;
• mechanical damage of the item (chips, cracks, etc.), exposure to excessive force, to chemically aggressive
substances, to high temperatures, to high humidity / high dust level, to concentrated vapors (if any of the
above caused a malfunction of the product);
• repair performed by unauthorized service centers or dealers;
• accidents, lightning strikes, flooding, fire and other causes beyond the manufacturer’s control that caused
damage to the product;
• defects received during transportation of the device by the customer (except in the case of when defects were
produced by authorized dealers or manufacturer);
• defects of the system in which the product was used;
• operation at increased voltage (more than 10% of nominal) and humidity more than 80%
at temperature + 25 ° С.
This guarantee is invalid and void in case of:
Seller Company
Address
Date of sale Seller signature
SHTAMP
SALES CERTIFICATE
WARRANTY CARD 1-1
Filed by seller
Model
Date of sale
Sales organization
Date of transfer in
Service Center for repair
Date of receipt from Service Center
SHTAMP
4
Дистанционные держатели - 4 шт.
Термоэлемент (стекло) 55°С
Крючки
Электрический шнур
Коробка с 1 кнопкой включения
21 3
46
220
5
Fixing holders that are included with the heated
towel rail are supplied to secure the appliance
on the wall. Different wall mounts are available
for different types of walls. Select the suitable screws,
dowels, self-tapping screws, etc. for your walls.
Take device out of the box.
Choose a spot for the heater on the wall according
to the installation recommendations. Use the included
stencil to mark the fasteners. The stencil holes are marked
on the bottom of the heated towel rail packaging.
Drill the marked holes on the wall
and secure the bases of the four remote holders.
Attach the towel hooks to the appliance.
Fix the heated towel rail on the wall with the latch pin
(second part of the remote holders).
Plug the heated towel rail into the socket.
You can find full version
of the instruction on our website
www. thermoup.com
The instruction is available
in Russian, German, French, Italian.
PRODUCT CERTIFICATION
The product is certied within the territory of the Customs Union by the
certication body RA.RU.10HА75.
LLC «Certication Protection System»
Address: 86/1, Building 1, 2nd oor, Room No. 212, Room 1A, Ryazansky
Avenue, Moscow, 117420, Russia
Phone: +79670037962
Email: [email protected]
The product complies with the requirements of the following regulatory
documents:
TR CU 004/2011 «On the Safety of Low-Voltage Equipment»
TR CU 020/2011 «Electromagnetic Compatibility of Technical Means»
Certicate number:
EAEU RU C-RU.НА75.В.02027/22
Series RU No. 0376461
Validity period: from April 8, 2022, to April 7, 2027.
Manufacturer: LLC «KLV LAB»
Address: Ofce 206, Building 3, 4a General Tyulenev Street,
Moscow, 117465, Russia.
3
ENG
ГАРАНТИЯ, СЕРТИФИКАЦИЯ ПРОДУКЦИИ
МОНТАЖ И ПОДКЛЮЧЕНИЕ ПОЛТЕНЦЕСУШИТЕЛЯ
Производитель гарантирует исправную работу обогревателя в течение 1 года с момента покупки.
ГАРАНТИЙНЫЕ ОБЯЗАТЕЛЬСТВА
• внесения изменений в конструкцию изделия со стороны покупателя;
• неправильной эксплуатации, использования изделия не по назначению или не в соответствии
с руководством производителя по эксплуатации и обслуживанию, также установки или эксплуатации
изделия с нарушением технических стандартов и норм безопасности;
• наличия на изделии механических повреждений (сколов, трещин и т.д.), воздействий на изделие
чрезмерной силы, химически агрессивных веществ, высоких температур, повышенной
влажности/запыленности, концентрированных паров, если что-либо из перечисленного стало
причиной неисправности изделия;
• ремонта, произведённого не уполномоченными на то сервисными центрами или дилерами;
• несчастных случаев, удара молнии, затопления, пожара и иных причин, находящихся вне контроля
производителя, которые причинили вред изделию;
• дефектов, полученных во время транспортировки прибора заказчиком (за исключением случаев,
когда она производится уполномоченными дилерами или производителем);
• дефектов системы, в которой использовалось данное изделие;
• эксплуатации при повышенном напряжении (более 10% от номинального) и влажности более 80%
при температуре +25 °С.
Настоящая гарантия недействительна в случае:
Организация-продавец
Адрес
Дата продажи Подпись продавца
М. П.
СВИДЕТЕЛЬСТВО О ПРОДАЖЕ
ГАРАНТИЙНЫЙ ТАЛОН 1-1
Заполняется продавцом
Модель
Дата продажи
Организация-продавец
Дата передачи
в СЦ для ремонта
Дата получения из СЦ
М. П.
2
TECHNICAL DATA
Tabelle 1. Technical data heated rails ThermoUp Dry Mini
Model Size, mm Weight, kg Power, W Voltage, V Current, A Max.оt of glass panel
heating оС
ThermoUp Dry Side Mini 200x1350x8 8 138 220-230 0.6 55
ThermoUp Dry towel warmer work on the principle of long-wave infrared radiation.
The surface of the glass panel is heated quickly and smoothly and begins to emit
electromagnetic waves in the range from 3 mm to 1 mm, bearing thermal energy.
Dear customer!
Thank you for purchasing the ThermoUp Dry Side Mini towel warmer!
SECURITY MEASURES
1. Use the device only for the intended purpose and protect against impacts, ingress
of dust and moisture.
2. It is forbidden to use a towel dryer if the heating panel or power supply wire has
mechanical damage.
3. The device can be used by children aged 8 years and older and persons with
limited physical, sensory or mental abilities, if they are under the control of the
person responsible for their safety or have been instructed on the safe use of the
device and understand possible dangers. In other cases, the use of a towel dryer
by children and vulnerable persons is only possible under the supervision of
adults. Kids don’t have to play with the device.
4. In order to eliminate the danger to small children, the appliance should be
installed so that the height from the floor to the bottom drying hook is at least 600
mm.
5. Towels shall be located in accordance with the installation requirements specified
in the relevant section of this instruction.
6. The power cord shall not contact the hot surfaces of the towel dryer.
7. The device shall be away from easily flammable or easily deformable objects.
8. To avoid electric shock, always insert the plug from the towel supply wire into
the electrical socket until stop. Remove the power wire from the electrical outlet,
holding on to the plug of the electrical appliance. Do not pull the wire itself.
9. The towel dryer is intended exclusively for drying textiles that are wet as a result
of washing or ingress of water (and not other liquids).
10. Do not place textiles with a total weight of more than 4 kg on the towel dryer,
regardless of the model.
11. Do not cover the towel radiator while it is in operation, use the special hooks for
drying textiles.
12. The towel element may be heated to 55 degrees during operation. Try to avoid
prolonged contact with the device during its operation. It is not recommended to
leave the towel on unattended.
13. Do not immerse the device in water or other liquids.
14. Disconnect the device from the mains when it is not in use and before washing it.
15. Make sure that the device has cooled completely before removing it into a
package for long-term storage.
16. Do not disassemble the device yourself. Do not make changes to the towel
design. Any changes result in a loss of warranty.
17. If the device is not functioning properly, contact your nearest authorized
manufacturer service center for consultation and repair.
Modern approach to comfort management
1. Towel dryer;
2. Set of remote fasteners to fix the device to the wall (4 psc);
3. Set of towel hooks (2 pcs.);
4. Packing box with stencil for mounting;
5. Operating instructions and warranty card.
What’s included in the set
WARNING!
CAUTION!
Failure to comply with these requirements may result in severe injury or device damage.
Failure to comply with these requirements may result in severe injury or death.
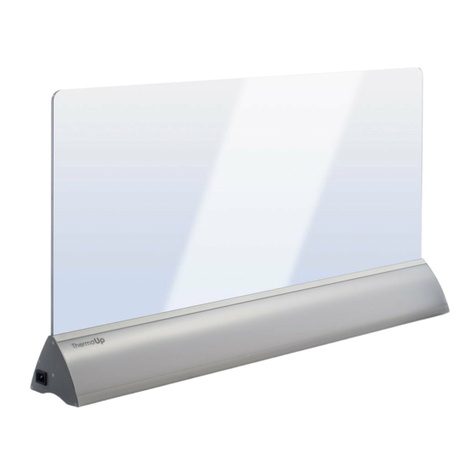
Figure 1. ThermoUp Dry Side Mini towel dryer
В комплекте с полотенцесушителем поставляются
держатели для фиксации прибора на стене.
Для разных стен идут различные крепежные
приспособления. Подберите подходящие
для Ваших стен шурупы, дюбели, саморезы и т. п
2
Полную версию инструкции
смотрите на сайте
www.thermo-up.com
Достаньте прибор из коробки.
1
Выберите место для размещения обогревателя
на стене, руководствуясь рекомендациями
по установке и нанесите разметку для крепежа
при помощи прилагаемого трафарета.
Отверстия трафарета размечены на дне
упаковочной коробки полотенцесушителя.
3
Просверлите на стене размеченные
отверстия и закрепите основания четырех
дистанционных держателей.
4
6
220
Закрепите при помощи фиксаторов
(второй части дистанционных держателей)
полотенцесушитель на стене. Включите шнур в розетку.
Прикрепите крючки для полотенец к прибору.
5
Distance holders - 4 pcs.
Thermocouple (glass) 55°C
Hooks - 2 pcs.
Power cord
Box with 1 power button
1. Transparent;
2. Mirror;
3. Dark mirror;
4. Colored (white).
Color options
СЕРТИФИКАЦИЯ ПРОДУКЦИИ
Товар сертифицирован на территории Таможенного Союза органом по
сертификации RA.RU.10HА75
ООО «Система Сертификационной Протекции»
Адрес: 117420, г. Москва, проспект Рязанский, дом 86/1, строение 1,
этаж второй, помещение № 212, комната 1А
Телефон: +79670037962
Email: [email protected]
Товар соответствует требованиям нормативных документов
ТР ТС 004/2011 «О безопасности низковольного оборудования»
ТР ТС 020/2011 «Электромагнитная совместимость технических средств»
№ сертификата
№ ЕАЭС RU С-RU.НА75.В.02027/22
Серия RU №0376461
Срок действия: с 08.04.2022 г. по 07.04.2027 г.
Изготовитель: ООО «КЛВ ЛАБ»
Адрес: 117465, Россия, г. Москва, ул. Генерала Тюленева, д. 4а, стр. 3,
офис 206

Other ThermoUp Heater manuals

ThermoUp FLOOR User manual

ThermoUp

ThermoUp FLOOR User manual

ThermoUp TOP 700 User manual

ThermoUp

ThermoUp TOP 700 User manual

ThermoUp Dry Side S User manual

ThermoUp

ThermoUp Dry Side S User manual

ThermoUp Dry Side User manual

ThermoUp

ThermoUp Dry Side User manual

ThermoUp WALL User manual

ThermoUp

ThermoUp WALL User manual

ThermoUp LED User manual

ThermoUp

ThermoUp LED User manual

ThermoUp FLOOR User manual

ThermoUp

ThermoUp FLOOR User manual

ThermoUp TOP S 800 User manual

ThermoUp

ThermoUp TOP S 800 User manual

ThermoUp Wall Black User manual

ThermoUp

ThermoUp Wall Black User manual

ThermoUp Foor User manual

ThermoUp

ThermoUp Foor User manual

Popular Heater manuals by other brands

Elenberg NDY Series user manual

Elenberg

Elenberg NDY Series user manual

Pro-Elec PEL00499 instructions

Pro-Elec

Pro-Elec PEL00499 instructions

Taurus Dubai 600 manual

Taurus

Taurus Dubai 600 manual

Brandson 303985 user manual

Brandson

Brandson 303985 user manual

Toolland TC78011 user manual

Toolland

Toolland TC78011 user manual

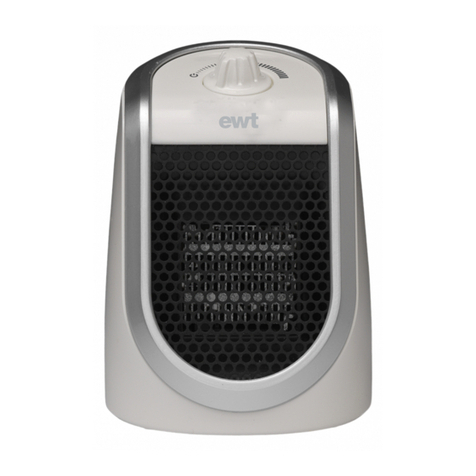
EWT Desk Friend DDF250B manual

EWT

EWT Desk Friend DDF250B manual

Hyperion IRT System Assembly, operation & Spares manual

Hyperion

Hyperion IRT System Assembly, operation & Spares manual

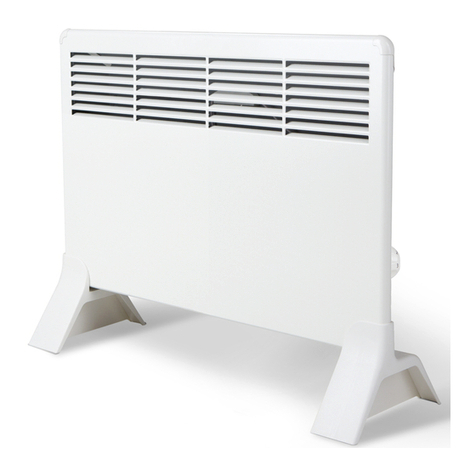
Kermi T. 10 Instruction and installation manual

Kermi

Kermi T. 10 Instruction and installation manual

DeLonghi HFS30 Series manual

DeLonghi

DeLonghi HFS30 Series manual

Superior Radiant Premier VS-VH Installation, operation and service instructions

Superior Radiant

Superior Radiant Premier VS-VH Installation, operation and service instructions

Claudgen HE7010W-30 Installation, operation and maintenance instructions

Claudgen

Claudgen HE7010W-30 Installation, operation and maintenance instructions

EdenPURE Classic A5275-SPI manual

EdenPURE

EdenPURE Classic A5275-SPI manual

HeatStar HS125NG Operating instructions and owner's manual

HeatStar

HeatStar HS125NG Operating instructions and owner's manual

Lasko 6405 Important instructions & operating manual

Lasko

Lasko 6405 Important instructions & operating manual

dyras PHW-3020W instruction manual

dyras

dyras PHW-3020W instruction manual

ensto BETA-MP Series Installation and operation instructions

ensto

ensto BETA-MP Series Installation and operation instructions

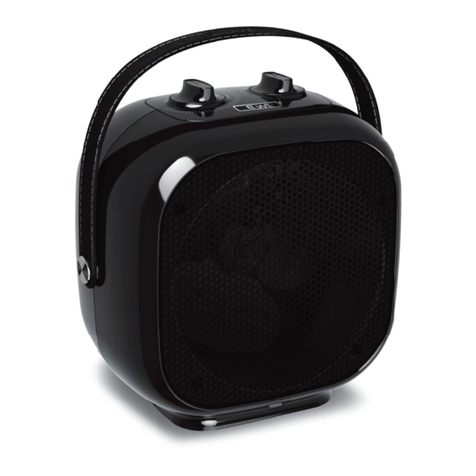
EWT Qube manual

EWT

EWT Qube manual

EOS IRS 35 Assembly and operating instruction

EOS

EOS IRS 35 Assembly and operating instruction

manuals.online logo
manuals.online logoBrands
  • About & Mission
  • Contact us
  • Privacy Policy
  • Terms and Conditions

Copyright 2025 Manuals.Online. All Rights Reserved.