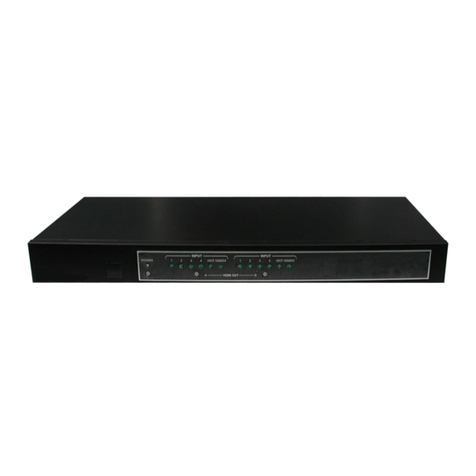
Thinklogical TXL24 User manual


Page ii
TLX24 Matrix Switch Product Manual thinklogical Rev. C, August, 2016
thinklogical®
Copyright Notice
Copyright © 2016. All rights reserved. Printed in the U.S.A.
Thinklogical, LLC®
100 Washington Street
Milford, Connecticut 06460 U.S.A.
Telephone: 1-203-647-8700
All trademarks and service marks are property of their respective owners.
Subject: TLX24 10G Matrix Switch Product Manual
Revision: Rev. C, August 2016
®
Website: www.thinklogical.com
Facebook: www.facebook.com/ThinklogicalUSA
LinkedIn: www.linkedin.com/company/thinklogical
Google+: http://plus.google.com/u/0/109273605590791763795/about
YouTube: www.youtube.com/user/thinklogicalNA
Twitter: @thinklogical

Page iii
TLX24 Matrix Switch Product Manual thinklogical Rev. C, August, 2016
Table of Contents
PREFACE................................................................................................................................................ v
About Thinklogical®...................................................................................................................... v
About This Product Manual..........................................................................................................vi
Note and Warning Symbols......................................................................................................vi
Class 1 Laser Information.........................................................................................................vi
SECTION 1: THE TLX SYSTEM FEATURES .........................................................................................1
Features of the TLX Matrix Switch and Extension System............................................................2
THE TLX24 MATRIX SWITCH DESIGN ......................................................................................6
Rear Panel Configurations.........................................................................................................7
DESIGN FEATURES ...................................................................................................................7
Desktop or Rack Mount.............................................................................................................7
The Front Panel.........................................................................................................................7
LCD and Navigation Buttons .................................................................................................7
Navigating the Menus............................................................................................................8
Alarms Displayed on the LCD................................................................................................8
The Button Panel...................................................................................................................8
The Power Supply Module.......................................................................................................10
The Processor - iMX6 Quad (Freescale) .................................................................................10
The Network Interfaces ...........................................................................................................10
SNMP Support ........................................................................................................................11
NTP Support............................................................................................................................11
System Log Files Support........................................................................................................12
Serial/RS-232 Interfaces .........................................................................................................12
Port Numbering.......................................................................................................................12
The Digital Crosspoint Switch.................................................................................................. 12
The TLX24 Matrix Switch Part Numbering...............................................................................13
THE TLX24 TECHNICAL SPECIFICATIONS ............................................................................13
SECTION 2: SET-UP AND INSTALLATION .........................................................................................14
Contents..................................................................................................................................... 14
Unpacking The TLX24 Matrix Switch..........................................................................................14
Connecting The TLX24 Matrix Switch......................................................................................... 14
External Control CPU Minimum Requirements...........................................................................15
Pluggable SFP Modules.............................................................................................................15
LC-Type Fiber-Optic Cables.......................................................................................................16
CATx Cables.............................................................................................................................. 16
TLX Extender Fiber-Optic Cable Configurations......................................................................17
TLX CATx Extender Cable Configurations...............................................................................18
Routing Thinklogical Extenders through the TLX24.................................................................... 19
Connecting To A Receiver.......................................................................................................19
Connecting To A Tranmitter.....................................................................................................19
Connecting To A Control CPU................................................................................................. 20
Firmware.................................................................................................................................21
On Screen Display (OSD) - Firmware Option.........................................................................21
Upgrades ...............................................................................................................................21
Order Of Installation Events ...................................................................................................21
How To Install And Replace A Power Supply............................................................................. 22
SECTION 3: REGULATORY & SAFETY REQUIREMENTS................................................................. 23
Symbols Found on Our Products................................................................................................ 23
Regulatory Compliance.............................................................................................................. 23

Page iv
TLX24 Matrix Switch Product Manual thinklogical Rev. C, August, 2016
North America ........................................................................................................................ 23
Australia & New Zealand........................................................................................................23
European Union .....................................................................................................................23
Declaration of Conformity...................................................................................................23
Standards with Which Our Products Comply..............................................................................23
Supplementary Information ........................................................................................................24
Product Serial Number........................................................................................................... 24
Connection to the Product......................................................................................................24
SECTION 4: THINKLOGICAL®SUPPORT ........................................................................................... 25
Customer Support......................................................................................................................25
Website..................................................................................................................................25
Email......................................................................................................................................25
Telephone.............................................................................................................................. 26
Fax......................................................................................................................................... 26
Product Support .........................................................................................................................26
Warranty................................................................................................................................. 26
Return Authorization...............................................................................................................27
Our Addresses .......................................................................................................................27
Appendix A: TLX24 QUICK START GUIDE......................................................................................... 28
Appendix B: FPGA PROGRAM UPGRADE PROCEDURE ................................................................. 29
Appendix C: FPGA DOWNLOAD INSTALLATION PROCEDURE ...................................................... 30
Appendix D: SECURE APPLICATIONS............................................................................................... 31
MADE IN USA

Page v
PREFACE
About Thinklogical
We, the Thinklogical team, are committed to understanding and
exceeding our customers’ requirements, the first time and every time.
Thinklogical is the leading manufacturer and provider of fiber optic and CATx KVM, video,
audio, and peripheral extension and switching solutions used in video-rich, big-data
computing environments.
Thinklogical offers the only fiber-optic KVM matrix switches in the world that are accredited
to the Common Criteria EAL4, TEMPEST Level B, and NATO NIAPC Evaluation Scheme: GREEN
information assurance standards. And Thinklogical Velocity products are the first system with
both KVM and video matrix switching capabilities to be placed on the Unified Capabilities
Approved Product List (UC APL) under the Video Distribution System (VDS) category.
Governments, entertainment, scientific and industrial customers worldwide rely on
Thinklogical’s products and solutions for security, high performance, continuous operation
and ease of integration. Thinklogical products are designed and manufactured in the USA
and are certified to the ISO 9001-2008 standard.
Thinklogical is headquartered in Milford, Connecticut and is privately held by Riverside
Partners, LLC, Boston, MA (http://www.riversidepartners.com). For more information about
Thinklogical products and services, please visit www.thinklogical.com.
Follow Thinklogical on LinkedIn at http://www.linkedin.com/company/thinklogical and on
Facebook at http://www.facebook.com/ThinklogicalUSA

Page vi
TLX24 Matrix Switch Product Manual thinklogical Rev. C, August, 2016
About this Product Manual
This product manual is divided into four sections: TLX System Features, Set-Up & Installation,
Regulatory & Safety Requirements and Thinklogical Support. These are sub-divided to help you find
the topics and procedures you are looking for. This manual also contains Appendices.
Section 1 –The TLX System Features:Page 1. Details the features and functions of your equipment.
Section 2 –Set-Up and Installation:Page 14. Contains all the requirements and procedures necessary
to connect and install your equipment, including FPGA upgrades.
Section 3 –Safety & Regulatory Requirements:Page 23. Thinklogical®strongly recommends that you
read this section prior to starting the hardware assembly.
Section 4 –Thinklogical Support:Page 25. Thinklogical provides the best customer support available.
If you have any questions or need to contact us for any reason, please refer to this section of the
manual.
Note and Warning Symbols
Throughout this manual you will notice certain symbols that bring your attention to important information.
These are Notes and Warnings. Examples are shown below.
Note: Important Notes appear in blue text preceded by a yellow exclamation point
symbol, as shown here.
A note is meant to call the reader’s attention to helpful or important information at a point in the text
that is relevant to the subject being discussed.
Warning! All Warnings appear in red text, followed by blue text, and preceded by a red
stop sign, as shown here.
A warning is meant to call the reader’s attention to critical information at a point in the text that is
relevant to the subject being discussed.
BEFORE STARTING ANY PROCEDURE, IT IS RECOMMENDED
THAT YOU READ THE INSTRUCTIONS THOROUGHLY!
Class 1 Laser Information
The
TL
X24, like all Thinklogical
®
products, is
designedand identified as a
Class 1 LASER product.
This means the maximum permissible exposure (MPE) cannot be exceeded when viewing the laser
with the naked eye or with the aid of typical magnifying optics (e.g. telescope or microscope).
CLASS 1 LASERS do not require any special
precautions under conditions of normal use.
SFP
Modules
Fiber-Optic
Cables
Class 1 Lasers

Page 1
TLX24 Matrix Switch Product Manual thinklogical Rev. C, August, 2016
Section 1: The TLX System Features
The Logical Solution
The TLX24 is an ultra-compact 10G high performance non-blocking matrix switch that supports
full, uncompressed 4K video with full color depth at 60Hz frame rate for complete, end-to-end
routing of video and peripheral signals over multi-mode or single-mode fiber optic cable in a
single 1 RU Chassis.
The TLX24 provides mission critical dependability and unrivalled signal integrity. Being protocol agnostic,
the switch supports DVI, SDI, HD-SDI, Dual-link DVI, Dual-link SDI, USB HID, USB 2.0 and audio.
Thinklogical’s TLX24 Matrix Switch®includes:
A 1 RU Chassis with either 24 fiber-optic, 24 CATx or 12 of each type Transmit/Receive Ports
Front Panel LCD and Navigation Buttons
Matrix Switch control via Front panel Push Buttons
Power Supply Module with over-voltage, over-current and over-temperature protection
Desktop or Rack-Mountable
The TLX24 Matrix Switch is available with 24 LC-type fiber connectors, 24 RJ45 CATx connectors, or 12
each of both connector types.

Page 2
TLX24 Matrix Switch Product Manual thinklogical Rev. C, August, 2016
Features of the TLX Matrix Switch & Extension System
Introducing Thinklogical’s newest family of switching and extension solutions, for
uncompressed, high resolution video and KVM systems over fewer cables.
Offering a higher bandwidth solution, the TLX product line provides 10Gbps
bandwidth per port to preserve signal integrity and provide uncompressed, high
resolution video with no artifacts, latency or lost frames.
The TLX product family offers these features to enhance ease of integration:
Hybrid switching solutions (fiber and CATx) start at 16 ports and scale up to 640 ports.
Offers a higher bandwidth solution to address new video resolutions and prepare for future
protocols.
The TLX reduces system cabling by half by enabling through higher bandwidth.
Extend and switch:
Single display up to 4096x2160 @ 30Hz with full 4:4:4 color depth, over a single fiber or
CATx cable
(or dual displays up to 1920x1200 @ 60Hz with full 4:4:4 color depth)
Single display up to 4096x2160 @ 60Hz with full 4:4:4 color depth, over two fibers or
CATx cables
(or dual displays up to 4096x2160 @ 30Hz with full 4:4:4 color depth)
Dual displays up to 4096x2160 @ 60Hz with full 4:4:4 color depth, over four fibers or
CATx cables
Dual connectors on TLX Extenders, offering support for both HDMI and DisplayPort, reduces
the number of extenders and converter cables required and enables users to future-proof
system designs.
DisplayPort Connector
HDMI Connector
Connector installed on every Video and KVM extender module.
Interoperability with Thinklogical’s Velocity family of switch and extension solutions, to
ensure an easy upgrade path and a smooth transition to Thinklogical’s next generation
solution.
HYBRID SWITCHING SOLUTION
For Uncompressed, High Resolution Video & KVM Systems
Thinklogical’s TLX Matrix Switches are high performance, non-blocking switches for complete end-to-
end switching of video, audio and peripheral signals over multi-mode or single mode fiber optic cable
or CATx cable.
TLX switches are protocol agnostic, supporting most video, audio and peripheral signals and allow users
to consolidate all of their system switching requirements in a single chassis. TLX Matrix Switches are
ideal for small or large system applications, with switch sizes ranging from 12 ports to 640 ports. Each
DisplayPort Connector
HDMI Connector

Page 3
TLX24 Matrix Switch Product Manual thinklogical Rev. C, August, 2016
port supports 10Gbps bandwidth, preserving signal integrity to provide uncompressed, high resolution
video with no artifacts, latency or lost frames. Thinklogical’s re-clocking technology ensures that every
video and data stream is delivered in perfect synchronization.
SECURITY
Creating physical separation between potential threats (users) and the target (secure data) is essential
to a secure system design. Thinklogical’s system permits users to access sources up to 80 kilometers
away, with no performance degradation. System administrators can safeguard sources in a
centralized location, allowing users to maintain remote access to the sources, but with no means to
breach the system, either accidentally or intentionally (such as downloading sensitive information onto a
USB drive).
PARTITIONED AND RESTRICTED SWITCHING
To protect data between multiple networks, partitioning allows the switch resources to be divided to
support more than one network without allowing switching between networks. Restricted switching
allows the administrator to manage access on a port-by-port basis. Partitioned and restricted switching is
enabled through the switch’s firmware, which means a threat would have to physically access the switch
to tamper with the settings.
Note: Partitioning and Restricted Switching security features are only available with
fiber-optic Matrix Switch applications. CATx Matrix Switching applications do not offer
the same level of security.
SYSTEM FUNCTIONALITY
TLX Extension Systems have a simple transmit and receive design. The TLX Transmitter connects to the
source to receive video, audio and peripheral data. Utilizing Thinklogical’s proprietary multiplexing
technology, the data is transmitted over fiber through 10Gbps SFP+ technology for up to 80
kilometers, or over CATx cable for up to 100m. At the TLX Receiver, Thinklogical de-multiplexes the
data stream to deliver uncompressed, high resolution video, audio and peripheral data at the end-user’s
workstation.
TLX extension systems are highly configurable to suit the requirements of any application. Extenders are
configurable to support up to 4K video (4096x2160) @ 60Hz, full duplex stereo audio, serial (RS-
232), USB HID, USB 2.0 (480Mbps) and 10/100/1000 Network. The TLX design offers support for both
HDMI 1.4 and DisplayPort 1.2 connector types in a single extender, with full support for HDCP
content.
Additionally, TLX extension systems support embedded audio, with the ability to de-embed audio at the
receiver. All extenders are equipped with an additional output for a local display, as well as an Ethernet
port for configuration management and updates.
For high-availability applications, redundant fiber path configurations are also available.
The TLX extension systems are compatible with a full line of scalable, non-blocking TLX
matrix switches, ranging from 12 to 640 ports.

Page 4
TLX24 Matrix Switch Product Manual thinklogical Rev. C, August, 2016

Page 5
TLX24 Matrix Switch Product Manual thinklogical Rev. C, August, 2016
FORM FACTOR
TLX extension systems are available in a modular form factor. The modular extenders are compact and
hot-swappable, so users can field-configure any modular chassis. For fiber extenders, the optical
modules, or SFPs, are also hot-swappable. The modular system promotes system flexibility,
scalability and reduced maintenance.
The TLX Modular Extender Chassis Line
Several chassis types are compatible with all TLX modular extenders, allowing users to mix-and-match
chassis types to reduce the overall footprint of the design. Users can choose from the resilient, rack
mount chassis (housing up to four video extenders or up to two KVM extenders in a single rack unit) with
redundant and hot-swappable power supplies, or from our more compact, space-saving designs for
desktop applications.
Each TLX Chassis accommodates the full line of TLX Extender Products.
The CHS-000004 is a rack-space-saving, high-reliability rack mount unit for up to 4 modules of
HDMI, DVI, RGB or SDI in a compact 1U chassis.
The CHS-000002 is a desktop solution that accommodates one 7.4” or two 3.7” modules of HDMI,
DVI, RGB or SDI in a compact, desktop chassis. Rack-mount attachments are available.
Ready for the challenges of demanding applications, both the CHS-4 and CHS-2 Chassis can combine a
variety of HDMI, DVI, RGB or SDI modules in transmit/receive units for a space-saving and cost-
effective solution.
The CHS-000001 stand-alone chassis will accommodate one 3.7” TLX video module.
All TLX Extender Chassis are powered by standard 100-240 VAC, 50-60 Hz.

Page 6
TLX24 Matrix Switch Product Manual thinklogical Rev. C, August, 2016
THE TLX24 MATRIX SWITCH DESIGN
The ultra-compact design of the TLX24 10G Matrix Switch (sometimes referred to as a Switch or Router)
supports up to 24 ports of full, uncompressed 4K video with full color depth at 60Hz frame rate in a single
1 RU chassis for complete, end-to-end routing of video and peripheral signals over multi-mode or single-
mode fiber optic cable or CATx cable, thus minimizing critical rack space.
Thinklogical’s TLX24 10G Matrix Switch includes:
A 1 RU Chassis with 24 fiber-optic or CATx Transmit/Receive Ports, or 12 of each
Front Panel LCD and Navigation Buttons
Front Panel Source, Destination and Control Buttons
Desktop or Rack Mountable
Power Supply Module with over-current, over-voltage and over-temperature protection
RS-232 and Console Serial Ports
RJ45 LAN Port
USB Mini-B Upgrade Port

Page 7
TLX24 Matrix Switch Product Manual thinklogical Rev. C, August, 2016
DESIGN FEATURES
Each TLX24 includes the following features:
Either 24 fiber, 24 CATx or 12 fiber & 12 CATx ports - In and Out, non-blocking matrix switching
Each connection supports 10Gbps / 6.25 Gbps with re-clocking input
Power Supply Module with over-current, over-voltage and over-temperature protection
Single-mode, multi-mode fiber and BNC coaxial capability
Comprehensive system setup and control via Thinklogical’s Configurator software (optional)
Multicasting and macros supported
SNMP control protocol
Controllable via LAN or serial connection
Desktop or Rack Mount
You may choose to place your TLX24 Chassis on or under a shelf or desktop (rubber feet included,
under-desk mounting brackets, Kit ENCA000797, available), or rack mount it using the supplied EIA 19”
mounting brackets. In any mounting configuration, the front panel should be visible and unobstructed so
that the navigation buttons and LCD display are accessible. All connections are made on the rear of the
chassis. The TLX24 chassis does not need to be opened or accessed. The sturdy metal case allows
units to be stacked as needed (maximum of four units per stack, with a minimum of two inches of
clearance between stacks for adequate ventilation).
The Front Panel
TLX24 FRONT PANEL
LCD & Navigation Buttons
Button Panel
LCD & Navigation Buttons
The LCD and Navigation Buttons are used to view and modify System and Network settings, assign IP
addresses, monitor the temperature and fans, and to reboot or power down the unit. The TLX24 front-
panel LCD should be visible and accessible for system setup.

Page 8
TLX24 Matrix Switch Product Manual thinklogical Rev. C, August, 2016
Navigating the Menus
Main Root Menus: Once the system is powered up, the initial chassis display is shown as follows:
Your chosen Host Name is listed on the first line of the display. The model and software version (VX.XX)
of the unit are displayed on the second line.
From the Main Menu, press enter, then or to:
View System Menu: FPGA Version, Ambient Temp, Physical Temp, Alarm Status
View Network Menu: IP Address. Network Mask, Gateway, MAC Address
Program Network: IP Address. Network Mask, Gateway
Reboot/Power Off
Alarms Displayed on the LCD
Temperature: 0= OK, 1= exceeds 70° Celsius
Card: 0= OK, 1= software or hardware failure
Fans: 00000= all five fans OK, 10000= Fan 1 failure, 00010= Fan 4 failure
The physical locations of Fans 1-5 inside the TLX24 Chassis
The Button Panel
The Button Panel is used to select sources and destinations, make new switch connections and to
review existing switch connections.
The Button Panel, located on the front of the TLX24, provides Matrix Switch control via the RS232
port’s API interface. The following pages provide a functional description of each of the 60
buttons:

Page 9
TLX24 Matrix Switch Product Manual thinklogical Rev. C, August, 2016
SOURCES 1-24 Used to select any one of the 24 Matrix Switch
inputs. Only one input can be selected per action. (Pressing a
button illuminates it to confirm the selection.) A previously selected
input will be deselected upon selecting a new input. To deselect,
simply press the illuminated button and the button shall no longer
be illuminated/selected. When an input is selected, all the
corresponding connected DESTINATION ports shall illuminate,
reporting the full connection map of the selected input. If no
DESTINATION ports illuminate, then the input is not connected.
DESTINATIONS 1-24 Used to select Matrix Switch outputs. If an
input and output(s) are illuminated, then selecting another
output will enable an additional output to the connection map. If
no prior input or output(s) are illuminated, then selecting an output
will illuminate the corresponding connected input and output(s). To
deselect, simply press the illuminated button and the button shall no
longer be illuminated/selected.
TAKE In MANUAL mode (as opposed to AUTO mode),
connections/disconnections require pressing the
TAKE button. After the connection/disconnection is
performed, the selected SOURCE and
DESTINATION(S) will no longer remain illuminated.
AUTO In AUTO mode, connections are made or broken immediately after a DESTINATION button
is selected (so the TAKE button will not be required) or deselected (so the DISCONNECT button will
not be required).
Any selection of an unilluminated DESTINATION while a SOURCE is selected (illuminated) will
cause that SOURCE to be connected to the DESTINATION.
Pressing a DESTINATION while illuminated (which means it is connected to the currently
illuminated SOURCE) will cause that DESTINATION to be disconnected and no longer illuminated.
LOCK OUT Press the LOCK OUT button to disable the following action buttons: MACRO,
SNAPSHOT, AUTO, TAKE, DISCONNECT and DESELECT. Selecting the SOURCE or DESTINATION
will continue to provide connection status information only. Creating MACRO(S) and SNAPSHOT(S) will
be performed in the LOCK OUT mode.
DISCONNECT In MANUAL mode, after illuminating a SOURCE and one or more DESTINATION (S),
press the DISCONNECT button to disconnect all illuminated DESTINATION (S) from the illuminated
SOURCE. After the disconnect is performed, the selected SOURCE and DESTINATION (S) will no
longer remain illuminated.
BIDIRECTIONAL This is a special TAKE button which supports full duplex connectivity. For
example, in MANUAL mode when SOURCE 1 and DESTINATION 2 are illuminated, pressing the
BIDIRECTIONAL button connects both the selected SOURCE 1 to DESTINATION 2 as well as
SOURCE 2 to DESTINATION 1.
LED TEST Runs an automatic test of all LEDs collectively and individually for color and functionality.
MACRO nWhen in LOCK OUT mode, holding one of the MACRO buttons for >5 seconds will capture
currently connected DESTINATION (s) (but not those that are disconnected). When in NORMAL mode,
selecting that MACRO button will ‘add’ the MACRO connections to the existing connection map.
Source 1 is connected to
Destinations 13, 14 & 15.
Pressing Destination 16 when
the LEDs are lit adds it to Source
1’s outputs.

Page 10
TLX24 Matrix Switch Product Manual thinklogical Rev. C, August, 2016
SNAPSHOT nWhen in LOCK OUT mode, holding one of the SNAPSHOT buttons for >5 seconds will
capture the full connection map including those DESTINATION(S) that are disconnected. When in
NORMAL mode, pressing that SNAPSHOT button will replace all the connections with the SNAPSHOT
connection map (not an additive action).
RESET The reset button is recessed behind the front panel and can be pressed with a fine tipped tool.
This will reset the entire unit and is used only in extreme cases. Preferred ways of resetting the unit
use the front panel menus.
THE POWER SUPPLY MODULE
The TLX24 Power Supply is a high efficiency, 650 watt supply
(100-240VAC, 50-60Hz input) with a 12V main output and a
12V standby. The supply may be hot plugged and includes an
internal cooling fan, status LEDs on the outer panel and over-
current, over-voltage and over-temperature protection. (See
How to Install and Replace a Power Supply, Pg.22)
THE PROCESSOR –i.MX 6 QUAD (Freescale)
The Processor platform key features:
ARM Cortex-A9 MPCore 4 x CPU
Memory Interfaces
64-Bit DDR3-1066
SD (Memory Card Specification, v3.0 including high-capacity SDHC cards up to 32 GB.
Serial NAND Flash (SPI)
SATA II, 3.0 Gbps HDD
EIM Bus (FPGA Parallel Bus I/F)
HDMI 1.4 port
USB 2.0 Host (2 ports)
UART (4 ports)
Gigabit Ethernet Controller (RGMII)
GPIO (32 bits)
I2C Masters (3 ports)
Internal 100 Megabit Ethernet Interface for Controller to Controller communications
THE NETWORK INTERFACES
The default subnet used by the TLX24 is 192.168.13.xxx. Users may change to their own subnet by
reconfiguring the switch’s network startup.
This is detailed in the document: How_To_Change_A_TLX_Matrix_Switch’s_IP_Address.pdf.
The switch uses several network ports for control and status. Port 17567 accepts commands to control
the switch.
The command API is described in the manual: TLX_Matrix_Switch_ASCII_API_V5.pdf.
There are other ports that can be read to access system configuration and operating data. The actual
data format varies by model and is described in the following sections. There are five blocks of data
available for reading.

Page 11
TLX24 Matrix Switch Product Manual thinklogical Rev. C, August, 2016
These ports are documented in the manual: TLX_Switch _Interfaces.pdf.
1. Switch connection status (broadcast over port 17564 every few seconds)
The primary CPU IP address
First port number in this block
Last port number in this block
'N' port number values
2. Port settings (UDP port 17565, matrix switch localhost only)
Port output level value
Port input enable status
Input port number (big-endian format)
3. Hardware sensor status (TCP port 17566)
Reserved for future use.
4. Inventory and Power Supply Status (TCP port 17600)
Card Inventory
Power Supply Status (internal TL use only)
Switch card temperature readings
5. I/O data (TCP port 17601)
Refer to the manual TLX_Switch _Interfaces.pdf.
6. Service Request (LOS) Signaling (UDP port 17560)
The TLX24 10G Matrix Switch can broadcast a message over the network when a remote receiver
requests attention. When enabled, the receiver will toggle its TX pin, causing a LOS (loss of signal)
event to occur at the switch. When detected, the switch broadcasts an 'Attention Request' message over
the network. This message contains the IP address of the switch and the port number that detected the
request. It is left up to an external system to detect, decode and act upon this request.
32-bits, switch 's primary IP address
16-bits, set to 0
16-bits, port number (list starts from 1, not 0)
16-bits, key code in bits 0 –7, 0x00 and 0xff are ignored
SNMP SUPPORT
The switch can be monitored via SNMP Simple Network Management Protocol (supports version V2c
and V3 USM). Please call our technical support staff at 1-203-647-8700 for downloadable MIB
Management Information Base definition files.
There are certain entries in the SNMP configuration file (/etc/snmp/snmpd.conf) that users may wish
to modify:
syslocation Text to aid in locating the unit
syscontact Name/ Phone/ Email address of a contact
trap2sink IP address/ Name of a system to receive SNMP traps
The default name used by trap2sink is 'snmp.trap' and is defined in the file /etc/hosts as pointing to
127.0.0.1. The easiest method to change the trap address is to modify the /etc/hosts entry and not
change the trap2sink setting in the configuration file. Users may have multiple trap2sink entries in the
configuration file to specify multiple trap destinations.
NTP SUPPORT
NTP, or Network Time Protocol, is used to keep the internal clock on the switch set to the correct
time. By enabling this service, users keep the switch’s clock synchronized to an external time reference.
In order to use the service users must have a time server running on their network or allow the switch to
access a public time server. NTP configuration is contained in the file /etc/ntp.conf
Details about NTP configuration may be found at:
http://tldp.org/LDP/sag/html/basic-ntp-config.html

Page 12
TLX24 Matrix Switch Product Manual thinklogical Rev. C, August, 2016
SYSTEM LOG FILES SUPPORT
The switch records system events into files located in the directory /var/log/. If you wish to preserve
log files, you may redirect the logs to another system(s). This is a standard feature of Linux's rsyslogd
program. Redirection is enabled by entries in rsyslog configuration files located in /etc/rsyslog.d/
Details about syslog configuration file entries may be found at: http://www.rsyslog.com/doc/
SERIAL/RS-232 INTERFACES
The TLX24 has two RS-232 serial ports. One is for the Linux command line interface (labeled
CONSOLE), and the other is for the switch's ASCII command interface (labeled RS232.
Linux Command Console (Console)
Baud Rate: 115200
Data Bits: 8
Parity: none
Stop Bits: 1
Flow Control: none
DB9 DCE
A straight cable is needed to connect to a PC (not a null-modem).
ASCII API (RS232)
Baud Rate: 9600
Data Bits: 8
Parity: none
Stop Bits: 1
Flow Control: XON/XOFF (Software)
DB9 DCE
A straight cable is needed to connect to a PC (not a null-modem).
PORT NUMBERING
Port numbering starts with Port 1 on the left. Each port has a number designation, 1 through 24, printed
below it for easy reference.
THE DIGITAL CROSSPOINT SWITCH
The Digital Crosspoint Switch is a non-blocking asynchronous switch that can connect any input to any
output of Thinklogical’s TLX, VX and MX Matrix Switches. Video and Data signals are routed in both
directions and the data stream is de-multiplexed at the receiver to deliver uncompressed, high resolution
video, audio and peripheral data at the end-user’s workstation.

Page 13
TLX24 Matrix Switch Product Manual thinklogical Rev. C, August, 2016
TLX24 Matrix Switch Part Numbering
TLX24 TECHNICAL SPECIFICATIONS
Chassis
Dimensions:
TLX24 Chassis
Rack Size: EIA 19.00" (482.6 mm)
Height: 1 RU-1.75” (44.45 mm)
Depth: 15.50" (393.7 mm) including PS handles: 16.90” (429.3 mm)
Width: 17.49" (437 mm)
Tolerance: ± .039"; (.991 mm)
Weight (Fiber):11.5 lbs. (5.22 kg)
Shipping Weight: 15 lbs. (6.80 kg)
Weight (Hybrid):11.4 lbs. (5.17 kg)
Shipping Weight: 15 lbs. (6.80 kg)
Weight (CATx):11.0 lbs. (5.00 kg)
Shipping Weight: 15 lbs. (6.80 kg)
Ports
24 fiber or 24 CATx or 12 fiber /12 CATx
Operating Temp
and Humidity
0° to 50°C (32° to 122 °F), 5% to 95% RH, non-condensing
Power
Requirements
AC Input: 100-240VAC, 50-60 Hz
Universal AC Power Supply
Power
Consumption
~75 Watts, fully loaded (Fiber)
~75 Watts, fully loaded (Hybrid)
~75 Watts, fully loaded (CATx)
Compliance
Approvals for US, Canada, and European Union
Warranty
1 Year from date of shipment. Extended warranties available.

Page 14
TLX24 Matrix Switch Product Manual thinklogical Rev. C, August, 2016
Section 2: Set-Up & Installation
Contents
When you receive your Thinklogical®TLX24 KVM Matrix Switch, you should find the following
items in the quantities specified in your order:
TLX24 Chassis (includes 1 Power Module)
Power Cord –PWR-000006-R (International connections may differ)
Product Manual CD
Product Quick Start Guide
Unpacking the TLX24 Matrix Switch
The TLX24 Matrix Switch is designed to be mounted in a standard EIA 19” rack. All physical
connections to the product use industry-standard connectors. Non-supplied cables that may be needed
are commercially available. All connections are found on the rear of the unit.
BEFORE STARTING ANY PROCEDURE, IT IS RECOMMENDED
THAT YOU READ THE INSTRUCTIONS THOROUGHLY!
Step 1Carefully remove the TLX24 from its shipping package and inspect it to make certain that it is
in good condition.
Step 2Ensure that all the SFP modules are sealed with a removable dust plug.
Step 3 Verify that the power supply is fully seated in the chassis and that the locking latch is
secure.
Step 4 When the device has been inspected and found to be in suitable condition, the installation
process can begin.
Connecting to the TLX24 Matrix Switch
Thinklogical’s line of TLX Extenders come in both fiber-optic cable and CATx cable versions.
Thinklogical’s proprietary multiplexing technology combines video, audio and peripheral data on a single
data stream for up to 80km over a single fiber or up to 100m over a single CATx cable.
TLX Matrix Switches are compatible with the following Thinklogical®products:
Compatible with Single & Multi-Mode TLX 10G KVM and Video Extenders (10G to 10G only)
Compatible with Single & Multi-Mode Velocity 6G KVM and Video Extenders (6G to 6G only)
Compatible with SDI Xtreme 3G+ Extenders
Compatible with the Configurator / Hot-Key Manager / System Management Interface
Compatible with the standard VX Router ASCII Interface (via RS-232 port or via Network port)
Compatible with the standard VX Router IP Address Configuration Procedure
Compatible with the standard VX Router SNMP Traps
Table of contents
Other Thinklogical Matrix Switcher manuals

Thinklogical
Thinklogical TXL 640 User manual

Thinklogical
Thinklogical MX48 User manual

Thinklogical
Thinklogical VX40 User manual

Thinklogical
Thinklogical MX48 User manual

Thinklogical
Thinklogical VX40 User manual

Thinklogical
Thinklogical MX48 User manual

Thinklogical
Thinklogical TLX1280 User manual

Thinklogical
Thinklogical TLX48 User manual