THINKWORK P550 User manual

HVLP Electric Paint Sprayer
User Manual
Model:P550

01
Important Safety Instructions
SAVE THESE INSTRUCTIONS: To reduce the risks of fire or explosion, electrical shock and the injury to
persons, read and understand all instructions included in this manual. Be familiar with the controls and the
proper usage of the equipment.
► Exhaust and fresh air introduction must be provided to keep the air within the spray area free from
accumulation of flammable vapors.
► Avoid all ignition sources such as static electricity sparks, open flames, pilot lights, hot objects, lit
tobacco products, and sparks from connecting and disconnecting power cords or working light switches.
► Fire extinguisher equipment shall be present and working.
► Keep area clean and free of paint or solvent containers,rags,and other flammable materials.
► Follow the material and solvent manufacturer’s safety precautions and warnings.
► Do not spray flammable or combustible materials near an open flame or sources of ignition such as lit
tobacco products, motors, and electrical equipment.
► Know the contents of the spray materials and their cleaning solvents. Read all Material Safety Data
Sheets (MSDS) and container labels provided with the spray materials and solvents. Follow the spray
material and solvent manufacturer’s safety instructions.
► Do not use materials with a flashpoint higher than 60ºC (140ºF). Flashpoint is the temperature (see
coating supplies).
► Do not use bleach.
► Do not use halogenated hydrocarbon solvents such as methylene chloride and trichloroethane. They
are not compatible with aluminum and may cause an explosion. If you are unsure of a material’s compati-
bility with aluminum, contact your coating supplier.
► Use a respirator or mask if vapors can be inhaled.
► Wear protective eyewear.
► Wear protective clothing as required by coating manufacturer.
► Always use appropriate gloves.
► Keep electrical cord plug and sprayer trigger free from spray material and other liquids. Never hold cord
at plug connections to support cord. Failure to observe may result in an electrical shock.
► Never immerse electrical parts in water or any other liquid. Wipe the exterior of the sprayer with a damp
cloth for cleaning. Always make sure the sprayer is unplugged before taking it apart for cleaning.
► Do not expose unit to rain or wet conditions.
► Do not abuse the cord. Never use the cord to carry the unit or pull the plug from an outlet. Keep cord
away from heat, oil, sharp edges or moving parts. Replace damaged cords immediately.
► Children should stay away from the sprayer to prevent them from eating metal and plastic parts by
accident.
► Oil-based paint contains harmful substances such as formaldehyde, which does not meet environmental
protection requirements. Please pay attention to protection during use.
► When using an extension cord, be sure to use one heavy enough to carry the current your product will
draw. An undersized cord will cause a drop in line voltage resulting in loss of power and overheating. If an
extension cord is to be used outdoors,it must be marked with the suffix W-A after the cord type designation.
For example, a designation of SJTW-A would indicate that the cord would be appropriate for outdoor use.
For proper size cords see the following data:
●
Up to 5 metres:2x 1.0 mm²
●
From 5 to 10 metres:2x 1.5 mm²
Technical Data
● Power Source:4.6A(550W), 120V~60Hz(US)
● Max. Atomisation Power:180W
● Motor Speed:35000 RPM
● Max. Viscosity:100 DIN-s(runout time: 100 seconds)
● Canister Capacity:35 fluid oz(1000 mL)
● Nozzle Size:Φ1.0mm,Φ1.5mm,Φ1.8mm,Φ2.0mm,Φ2.5mm
● Sound Pressure Output:80 dB
● Oscillation Level:< 2.5 m/s²
● Paint Fluid Delivery:10~14 fluid oz/min(300 ~ 400 mL/min)
● Water Flow Rate:30 fluid oz/min(900 mL/min)
● Performance:
27 ft²/min(2.5m²/min)
●
Power cord length: 60” (1.5m).

02
(Fig 1)
Sprayer Structure
► Part A:Spray gun unit:under its action, the sprayer transfers and atomizes the paint. This part is
relatively easy to block, please be sure to clean it after use. In addition, if the attachment is damaged or
accidentally lost, please contact us.
► Part B:Power unit:the motor can generate powerful airflow to drive paint flow and atomization.Please
note that electronic components should not be exposed to water and avoid storing in a humid environ-
ment.
●
1:Nut:it is used to fix the nozzle and air cup.
●
2:Air cup:it is used to adjust the direction of spraying: vertical, horizontal and circular.
●
3:Nozzle:different nozzles are used to spray different paints and do different projects.
●
4:Head seal:divide the air.
●
5:Spin tip:prevent and allow paint to enter the nozzle.
●
6:Trigger:control the spin tip to prevent and allow paint to enter the nozzle.
●
7:Body lock:lock and unlock Part A and Part B.
●
8:Flow control knob:used to adjust the flow rate of the paint.
●
9:Motor switch:turn the motor on and off.
●
10:Power cord:connect to a power outlet.
●
11:O-ring:avoid air leaks in the canister.
●
12:Paint channe:push the paint to the nozzle.
●
13:Canister:store paint.
●
14:Nozzles:gather the paint and prepare to start atomization.Size: 1.0mm, 1.5mm, 1.8mm, 2.0mm, 2.5mm.
Please note that one of the nozzles was already installed in the body.
●
15:Viscosity cup:used to measure the viscosity of paint. Under normal circumstances, the paint needs to be
mixed with a thinner to achieve a viscosity suitable for spraying. The thinner of water-based paint is water, and
the thinner of oil-based paint is banana oil, turpentine oil, gasoline, etc.
●
16:Nozzle spanner:used to replace the nozzle.
●
17:Cleaning Brush:used to clean the sprayer itself.
1 2 3 4
A
5
11
12
13 14 15 1716
78
B
9106

03
(Fig 2)
Applicable Accessories
In spraying projiect, these accessories are necessary, and you don’t need to buy them separately:(Fig 2)
●
A:Masking Paper: Before starting your project, please use it to cover the areas that do not need to be
sprayed. Size: 12”*66'(30cm*20m)*1; 22”*66'(55cm*20m)*1.
●
B:A pair of gloves:wear gloves before starting work.
●
C:Paint brush: there are some narrow corners that cannot be entered by the paint sprayer. however, the
brush is used anywhere.
●
D:Glasses:it can prevent dust and paint from getting into your eyes.
●
E:Filter funnel: it is used to filter impurities in paint. Specifications: 100 mesh, 170 microns.
●
F: Storage bag:it is used as a storage bag for sprayers and accessories.
Before Use the Paint Sprayer
1.Wear necessary protective equipment: goggles, gloves, masks, etc. They can protect you from dust, noise,
and paint.
2.Install the sprayer and put in water to test to see if the machine is normal. Does the motor rotate? Are the
airflow and paint channels blocked? Is the spiral pattern of the jar leaking? Are the flow trigger and direction
adjustment knob working properly?
3.Generally, paint needs to be diluted to a suitable viscosity before it can be loaded into the sprayer. The
product is equipped with a funnel specially used to test the viscosity of the paint. How to use the funnel:
temporarily block the bottom of the funnel and fill it with paint so that the lowest level of the paint is level with
the highest part of the test cup, loosen the funnel and start timing, let the paint flow out of the funnel naturally,
until the paint produces discontinuous drops Instead of a continuous "line", stop timing. The seconds of the
timer at this time are the viscosity of the paint, which we call: DIN-s. For example, if we fill the viscosity test
funnel with varnish, and the varnish runs out in 80 seconds, we call the viscosity of the varnish at this time is
80 DIN-s. The maximum viscosity of the paint that this paint sprayer can spray is 100 DIN-s, however,we
generally dilute the paint to 30-45 DIN-s to get a smoother finish. Please add 5% or 10% water or thinner
each time to dilute the paint.Generally, the proportion of thinner cannot exceed 30% of the paint.
4.Find and install the right size nozzle.The larger the diameter of the nozzle means the faster the sprayer
spray, the larger viscosity of paint it can spray, and the worse finish the project will be. please refer to the
sheet:Fig 3.
C
EF
D
AB

04
5.Polish the project to be sprayed to increase the smoothness of the object and the adhesion of the paint. For
example: wood, wall, metal rust, car surface, floor, etc.
6. Filter the paint to prevent impurities in the paint (usually use a 150~190 micron filter).
7. Use masking glue or plastic film to cover the areas that do not need to be sprayed to avoid paint contami-
nation. For example: floors, light switches, door handles, etc.
Use the Sprayer
Step 1:Wear necessary protective equipment:goggles, gloves, masks.
Step 2:Choose a suitable nozzle according to your project (refer to Fig 3), and install the paint sprayer (Fig 4).
Step 3: Test the viscosity of the paint(Fig 5), and add 5% or 10% water(thinner) each time to dilute the paint to
a certain viscosity(Fig 3).
Nozzles
Recommended
Materials
Recommended
Viscosity
Project
1.0 mm sealers,stains,enamel
,varnish
25 table,chair,doors,bicycle,car,shutter,cabininets,w oo
den toys,model
1.5 mm polyurethane,chalk
and milk type paint 30
railings,multi-frame w indow frames,heating
pipes,boats,yard furniture,garage doors,metal
garden fences
1.8mm low viscosity w all
paint
40 internal w alls,corridor
2.0 mm low viscosity primer
paint
45 w ooden garden fence,w ooden pile
2.5 mm
low viscosity latex
50
external w alls,outdoor floors
(Fig 3)
(Fig 4)
(Fig 5)

05
Step 4:Filter the paint with your Filter funnel and put it in the canister.(Fig 6)
Step 5:Cover cover the areas that do not need to be sprayed with the masking glue or plastic film.
Step 6:
S
tart to spray and adjust the flow control trigger &
air cup according to your needs. (
Fig 7
)
Step 7:Precautions during spraying.
●
It is advisable to keep the distance between the nozzle and the sprayed object between 8~10 inches
(20~25cm), and the maximum should not exceed 6~12 inches (15~30cm).
●
The spray gun should be moved at a constant speed and parallel, otherwise it will cause light coat and
heavy coat. Please overlap with the front 30% each time to correct the light coat on the edge.
●
If you feel the material is going on too thin, increase the material volume.If you feel the material is going
on too thick, decrease the material volume even further or move the spray gun further away from the
surface.
Besides adjusting the controls, other factors that should be considered when spraying:
●
Distance from the spray object - if you are too far from the spraying surface, the material will go on too
thin, and vice versa.
●
Material thickness - if the spray pattern runs and/or is too splotchy, the material may need to be thinned.
●
Spray gun movement - moving the gun too quickly will cause the spray pattern to be too thin and
excess overspray. Moving the gun too slowly will cause the spray pattern to be too coarse or thick.
(Fig 6)
Flow Control Trigger Horizontally Spray Vertically Spray Thick Spray
(Fig 7)
(Fig 8)
Light CoatKeep stroke smooth and at an even speed Heavy Coat Light Coat
-
+
15~30cm

06
Step 8:Clean sprayer. After the project is completed, or when the sprayer has been left for more than 24
hours, you need to clean the sprayer completely to prevent the paint from drying out and clogging the air
holes and paint passages.Note: the motor part should not be wetted, please wipe it clean with a dry towel.
●
Disassemble the Spray gun unit.(Fig 10-1 & Fig 11)
● Put the excess paint in the canister into the paint bucket.
(Fig 10-2)
● Fill some water to clean the canister.
(Fig 10-3)
● Clean all parts of the spray gun(
Fig 12-1
), drip some anti-rust oil (
Fig 12-2
),and spray again with clean water
to completely remove the paint in the pipeline(
Fig 12-3
). Dry them and put them in the bag for storage.
30% overlap
30% overlap
"S" type spraying route
(Fig 9)
(Fig 10-1) (Fig 10-2) (Fig 10-3)
(Fig 11)

07
Working Principle
Knowing how the product works can help you troubleshoot better. The electric HVLP sprayer uses a motor
and a fan blade to generate a powerful airflow. Part of the airflow enters the tank through the air channel and
drives the paint to flow upward to the nozzle; part of the airflow directly leads to the four atomizing air holes on
the outside of the nozzle to atomize the paint at the nozzle to achieve the effect of dispersing the paint.
(Fig 12-1)
(Fig 12-2) (Fig 12-3)
(Fig 13)

Shenzhen Lanniu Technology Co., Ltd
www.thinkworktools.com
www.facebook.com/Thinkwork.US
No.6, Fukang Road, Pinghu Street, Longgang
District, Shenzhen, Guangdong, China 518000
Table of contents
Popular Paint Sprayer manuals by other brands
Graco
Graco 231979 Instructions-parts list
WALTHER PILOT
WALTHER PILOT PILOT WA 900 operating manual
WAGNER
WAGNER EvoMotion 40-15 S-HE Translation of the original operating manual

Parkside
Parkside PFS 100 B2 Operation and safety notes translation of original operation manual
Titan
Titan Focus 500 operating manual
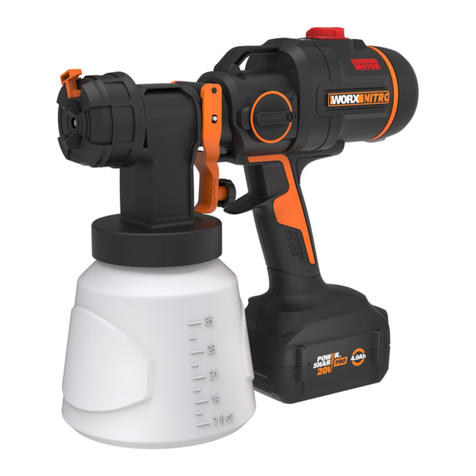
Worx Nitro
Worx Nitro WX020L manual

