20V Cordless Brushless Paint Sprayer EN
9
TABLE OF CONTENTS
1. SAFETY INSTRUCTIONS
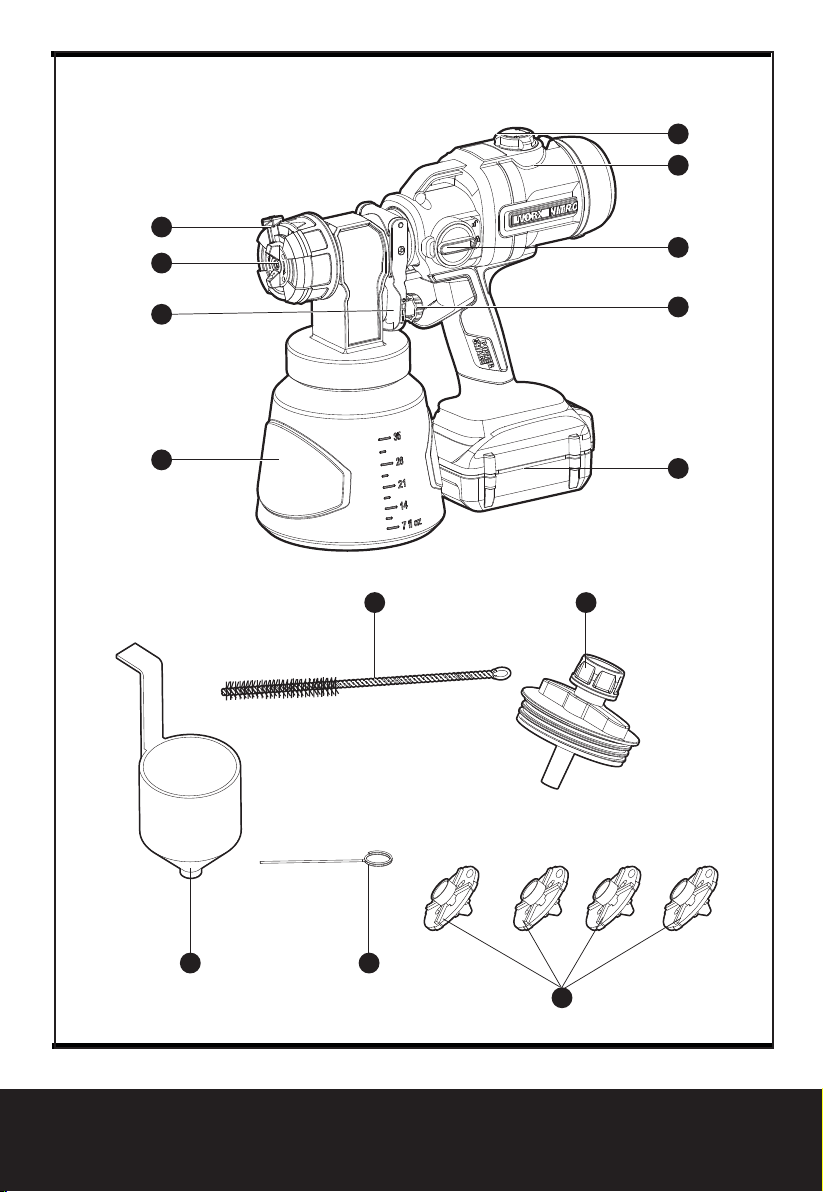
2. COMPONENT LIST
3. TECHNICAL DATA
4. CONTROLS AND FUNCTIONS
5. INTENDED USE
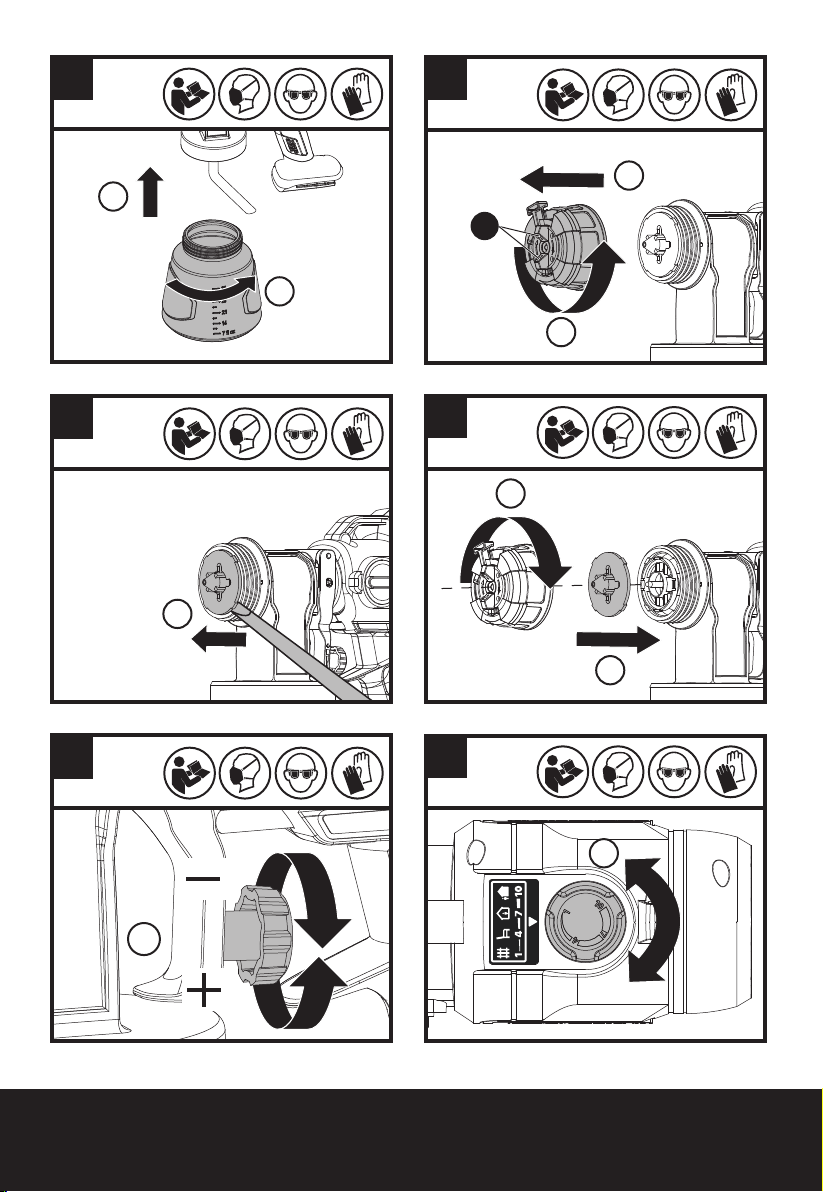
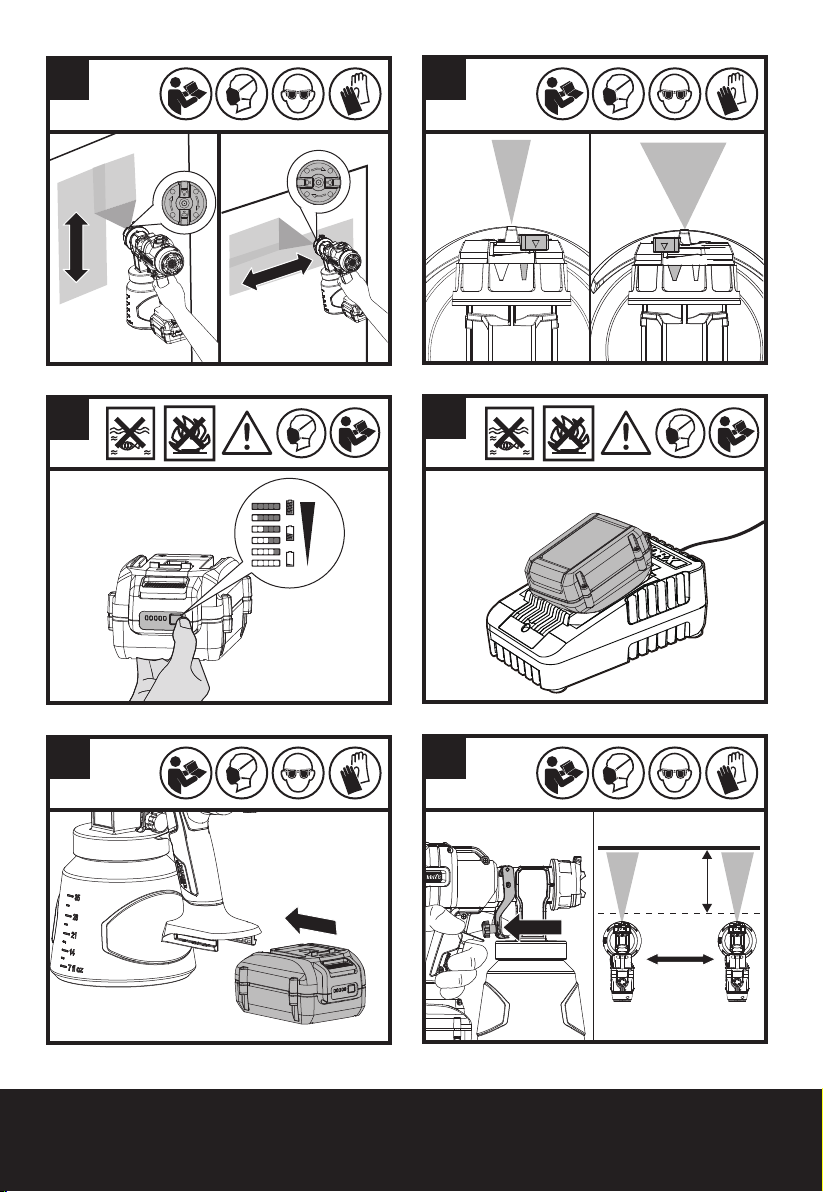
6. OPERATING INSTRUCTIONS
7. NOZZLE AND PRESSURE SELECTION
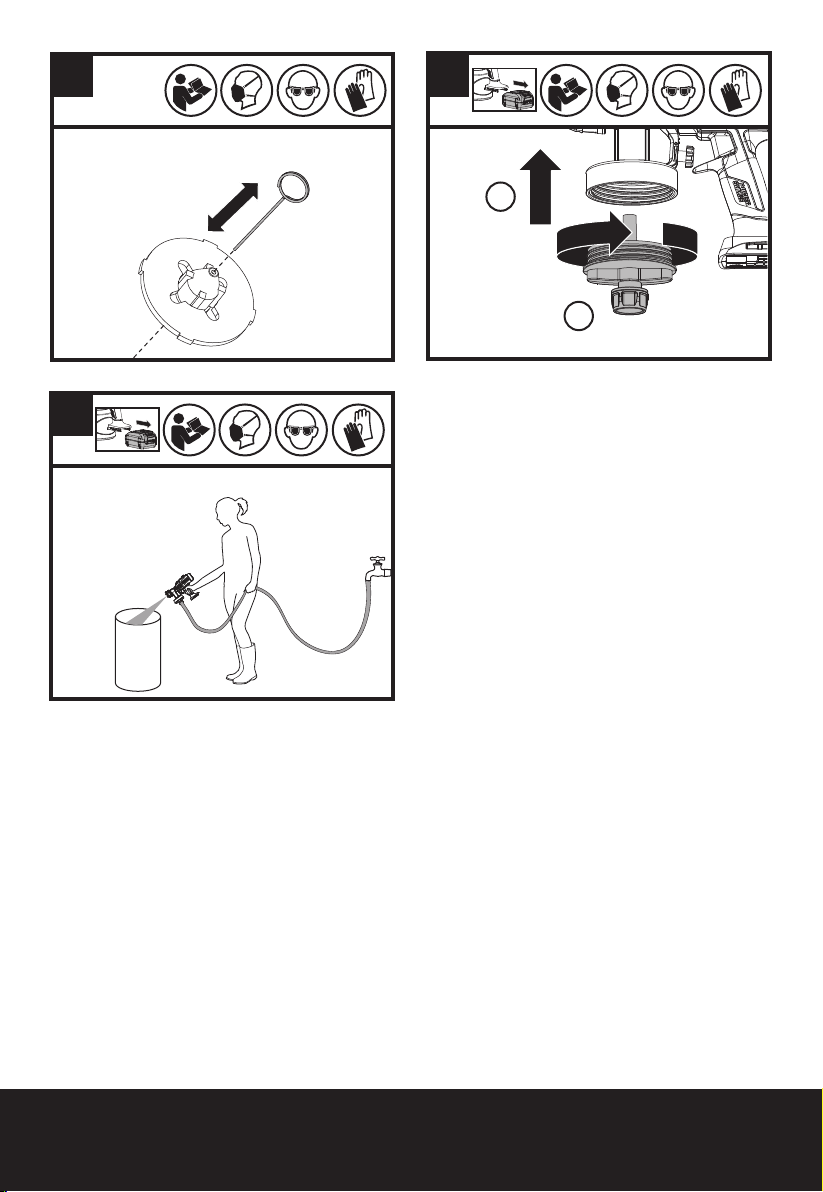
7. CLEANING
8. STORAGE
9. TROUBLESHOOTING
1. SAFETY INSTRUCTIONS
PRODUCT SAFETY
WARNING: This product can expose you
to chemicals including lead and Di(2-
ethylhexyl)phthalate (DEHP) which are known to
the State of California to cause cancer and birth
defects or other reproductive harm. For more
information go to www.P65Warnings.ca.gov.
WARNING Read all safety warnings and all
instructions. Failure to follow the warnings and
instructions may result in electric shock, fire and/or
serious injury.
Save all warnings and instructions for future
reference.
1. Hot Surface – To reduce the risk of burns, do not
touch.
2. To Reduce the Risk of Electric shock or Injury,
3. To reduce the risk of electric shock, Do not expose
to rain. Store indoors.
4. Household Use Only.
5. Risk of Injury – Do not direct air stream at body.
6. When a combustible liquid is sprayed there can be
danger of fire or explosion, especially in a closed
area. Read instruction manua before operating.
7. Risk of Explosion – Do not spray flammable liquids.
SAFETY WARNINGS FOR
BATTERY PACK
a) Do not dismantle, open or shred battery pack.
b) Do not expose battery pack to heat or fire.
Avoid storage in direct sunlight.
c) Do not short-circuit a battery pack. Do not
store battery packs haphazardly in a box or
drawer where they may short-circuit each
other or be short-circuited by other metal
objects. When battery pack is not in use, keep it
away from other metal objects, like paper clips,
coins, keys, nails, screws or other small metal
objects, that can make a connection from one
terminal to another. Shorting the battery terminals
together may cause burns or fire.
d) Do not subject battery pack to mechanical
shock.
e) In the event of battery leaking, do not allow the
liquid to come in contact with the skin or eyes.
If contact has been made, wash the affected
area with copious amounts of water and seek
medical advice.
f) Do not use any battery pack which is not
designed for use with the equipment.
g) Keep battery pack out of the reach of children.
h) Always purchase the battery pack
recommended by the device manufacturer for
the equipment.
i) Keep battery pack clean and dry.
j) Wipe the battery pack terminals with a clean
dry cloth if they become dirty.
k) Battery pack needs to be charged before use.
Always use the correct charger and refer to
the manufacturer’s instructions or equipment
manual for proper charging instructions.
l) Do not leave battery pack on prolonged charge
when not in use.
m) After extended periods of storage, it may
be necessary to charge and discharge the
battery pack several times to obtain maximum
performance.
n) Recharge only with the charger specified by
WorxNITRO. Do not use any charger other than
that specifically provided for use with the
equipment.
p) Retain the original product literature for
future reference.
q) Use only the battery pack in the application for
which it was intended.
r) Remove the battery pack from the equipment
when not in use.
s) Dispose of properly.
t) Keep the battery away from microwaves and
high pressure.