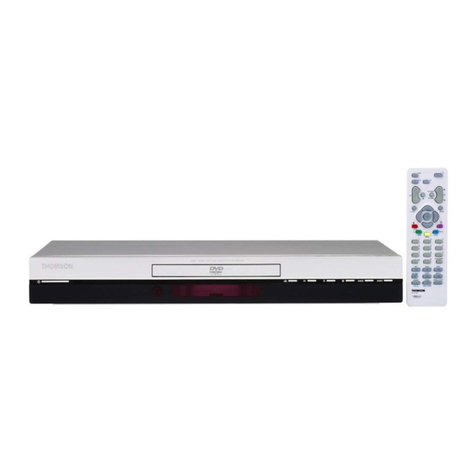
THOMSON etc011 User manual

1
Contents
EN
Getting started
Important information............................................................2
Safety........................................................................................2
Care ........................................................................................2
Demagnetisation ..................................................................2
Handling and care of discs..................................................3
Switching on ............................................................................4
Remote control........................................................................5
TV functions ..........................................................................5
DVD functions ......................................................................6
Using the remote control for other equipment......7
Channel set-up
Initial set-up ............................................................................8
Organiser ................................................................................8
Arranging channels in order ..............................................8
Deleting channels..................................................................8
Naming or renaming channels ..........................................9
Manual channel set-up ............................................................9
Operation
General operation ................................................................10
Switching the set on and off............................................10
Volume ..................................................................................10
Displaying status information ..........................................10
Accessing channels ............................................................10
Accessing AV programmes ..............................................10
Picture format ....................................................................11
Child lock ............................................................................11
Adjusting the sound ..........................................................11
SOUND menu ....................................................................11
GRAPHIC EQUALISER menu ........................................12
Adjusting the picture ............................................................12
Setting the time ....................................................................13
Setting the time ..................................................................13
Programming the wake-up timer....................................13
Programming the turn off timer ....................................13
Setting the date ................................................................13
Parental control ....................................................................14
Accessing the Parental control menu............................14
locking a channel ................................................................14
Locking the PR+/PR- buttons on the front of
the set ..................................................................................14
Changing your PIN code ..................................................14
Operation (TV mode) ......................................................14
Notepad function ..............................................................15
Creating a message............................................................15
Editing a message................................................................15
Deleting a message ............................................................15
Te letext ..............................................................................16
Accessing Teletext ..............................................................16
Navigation bar ....................................................................16
Changing the character set
temporarily ..........................................................................16
Other Teletext functions ..................................................17
DVD functions - Playing discs
Regional coding......................................................................18
Compatible discs and formats ............................................18
Note on DivX files ............................................................19
DVD copy protection........................................................19
Basic playback operations ....................................................20
Playback ................................................................................20
Accelerated play ................................................................20
Still image ............................................................................20
Frame advance ....................................................................20
Variable slow motion ........................................................20
Changing chapter................................................................20
Scene replay ........................................................................20
Playing mp3,WMA, JPEG, MPEG4, and DivX files ......20
Info menu ..............................................................................20
Direct access ......................................................................21
Title/Chapter/Track/Index ................................................21
Subtitles ................................................................................21
Audio ....................................................................................21
Play mode ............................................................................22
Repeat play ..........................................................................22
IntroScan ..............................................................................22
Camera angle ......................................................................22
PBC - PlayBack Control....................................................23
Info menu for mp3,WMA, JPEG, MPEG4, and DivX
files ........................................................................................23
DVD functions - Menus
Main menu..............................................................................24
Disc contents menu ..............................................................24
Disc options menu ................................................................24
TV menus ..............................................................................24
Play Mode / Disc menu..........................................................25
Start menu ............................................................................26
Lock menu..............................................................................26
Display menu..........................................................................27
Sound menu ..........................................................................28
Languages menu ....................................................................29
Memory Card menu ........................................................29
Other information
Sockets....................................................................................30
This publication is printed on recycled paper.
ETC011-EN 9/01/06 11:15 Page 1

2
Getting started
EN
Important information
Safety
Ensure that your domestic mains supply voltage
matches the voltage indicated on the
identification sticker located at the back of your
set.
Do not expose the set to an ambient
temperature exceeding 35° Celsius.Do not
cover the vents at the back or sides of the set.
Leave sufficient space around it to allow adequate
ventilation. Install the appliance away from any
source of heat (fireplace, ...) or appliances
creating strong magnetic or electric fields.
Moisture in rooms where the set is installed
should not exceed 85% humidity. If you have to
use the TV/DVD outdoors, do not expose it to
rain or splashing water.Moving the set from a
cold place to a warm one can cause
condensation on the screen (and on some
components inside the TV/DVD). Let the
condensation evaporate before switching the
TV/DVD on again.
You can use the switch on the front panel to
switch the TV/DVD on or put it into standby
mode. If you intend to be away for a long
period,switch the TV/DVD off completely by
removing the plug from the mains power socket.
During thunderstorms,disconnect the TV/DVD
from the mains and aerial so that it is not
affected by electrical or electromagnetic surges
that could damage it. For this reason, keep the
mains and aerial sockets easily accessible.
If an object or liquid enters inside the appliance,
or if you notice it giving off a smell of burning
or smoke, unplug it immediately and have it
checked by an authorised engineer. You must
never, under any circumstances, open the
TV/DVD yourself, as you run the risk of an
electric shock in doing so.
The TV/DVD is provided with adequate shielding
to avoid generating X-ray emissions externally.
Work carried out by unqualified persons,
modifications to the high voltage or replacement
of the tube with a model not complying with the
manufacturer’s recommendations may cause a
sharp increase in X-ray emissions.A set
modified in this way no longer meets the original
specifications and should not be switched on
again.
Never open the player or any of its
components. It can expose you or certain fragile
components to danger.You could receive an
electric shock or be exposed to the laser
beam.Do not look inside the player, through the
disc tray, slot or any other opening.
Care
Use a glass-cleaning product to clean the screen
and a soft cloth and mild detergent to clean the
rest of the set.
Dust the vents at the back and sides regularly. Do
not use solvents, abrasive or alcohol-based
products.
Demagnetisation
Speakers with poor magnetic insulation or the
presence of any other large magnetic field sources in
the vicinity may cause patches of colour to appear
on the screen.To get rid of this effect, move any
magnetic field source away from the TV/DVD, switch
the set off by removing the plug from the mains
power socket and wait 15 minutes before switching
it on again.
ETC011-EN 9/01/06 11:15 Page 2

3
Getting started
EN
Please respect the environment and the
relevant regulations. Before you dispose of
batteries (or accumulators), ask your dealer
whether they require special recycling and if
he is able to take them back.
Handling and care of discs
Handle your discs with care. Hold the disc with
your fingers at the edges or through the hole.
Always put discs back in their cases after use and
store them in a vertical position.
Insert the disc with the label facing up (for a
single-sided disc). Do not move the player when a
disc is being played. Do not try to play photo
CDs and discs with special shapes (star, etc.)
using this player.
Insert discs carefully into the holder on the tray.
Do not close the disc tray if it has two discs in it
or if the disc is not placed correctly in the holder.
The main menu indicates whether the player has
a disc or not. If you are unsure, do not hesitate to
refer to it.
Do not insert any objects into the player. But if an
object happens to become jammed in the player,
do not try to remove it. Contact your after-sales
department.
Do not play cracked, chipped or warped discs nor
try to repair them with adhesive tape or glue. Do
not write on discs. Do not scratch discs or store
them in places exposed to direct sunlight, high
humidity or high temperatures.
Use a soft damp cloth (water only) to clean the
discs, wiping the surface from the centre to the
edge and avoiding circular motions, which could
cause scratches and interference during play. Do
not use aerosols, benzene, anti-static liquids or
any other solution.
Important:If you hear any strange noise or feel any
vibration coming from the player once a disc has
started to play, press the STOP button immediately
on the remote control or player.
The manufacturer disclaims any liability if the
TV/DVD is not used in accordance with this
manual.
This manual applies to several models. Some features
may not be available on the model you purchased. Refer
to the feature table provided with this manual to find
out the main features of the relevant model.
Optional functions are indicated by the following
symbol:
The model number of your TV/DVD set is on a label at
the back of the set and on the cover of this manual.
In the interest of improving the quality of our products,
we reserve the right to modify their features.The
information in this manual is, therefore, subject to
change and does not represent any kind of contract.
This symbol means that your inoperative
electronic appliance must be collected
separately and not mixed with the household
waste.The European Union has implemented
a specific collection and recycling system for
which producers are responsible.
This appliance has been designed and manufactured with
high quality materials and components that can be
recycled and reused.
Electrical and electronic appliances are liable to contain
parts that are necessary in order for the system to work
properly but which can become a health and
environmental hazard if they are not handled or disposed
of in the proper way. Consequently, please do not throw
out your inoperative appliance with the household waste.
If you are the owner of the appliance, you must deposit it
at the appropriate local collection point or leave it with
the vendor when buying a new appliance.
- If you are a professional user, please follow your
supplier's instructions.
- If the appliance is rented to you or left in your care,
please contact your service provider.
Help us protect the environment in which we live!
ETC011-EN 9/01/06 11:15 Page 3

4
Getting started
EN
Switching on
1. Insert two LR03 / AAA or LR06/ AA batteries in the remote
control (depending on the model).
Precautions on using batteries:
- Only use the battery types specified.
- Make sure you use the correct polarity.
- Do not mix new and used batteries.
- Do not use rechargeable batteries.
- Do not expose batteries to excessive heat, throw them in a fire, recharge
them or try to open them, as this could cause them to leak or explode.
- Remove the batteries from the remote control if you are not using it for a
long period of time (several weeks).
2. Connect the TV/DVD to a mains socket.
Your TV/DVD should only be connected to a 220 - 240 V ~ 50/60 Hz AC
supply. It must not be connected to a DC supply. If the plug is detached
from the cable, do not, under any circumstances, connect it to a mains
socket, as there is a risk of electric shock.
Equipment for the UK and Ireland is supplied with a mains cable fitted
with a moulded plug.
This plug contains safety components and must not be replaced by one
sold by general retailers. It is fitted with a fuse that protects your appliance.
If your set has stopped working, the fuse may have blown. If it has, replace
it with an identical ASTA or BSI certified (BS1362) 5-amp fuse.
3. Connect the outside aerial or cable network to the
socket at the back of the TV/DVD.
The aerial socket (75 Ohms - VHF / UHF / cable) can be used for
connecting an external aerial or other equipment fitted with a modulator
(video recorder, satellite receiver, etc.).
We recommend that you do not connect other equipment (video recorder,
satellite receiver, etc.) to your TV/DVD set to begin with, so as not to
complicate the set-up procedure with the additional steps involved. Connect
them when you have finished setting up the channels by referring to
page 30 of this manual.
4. Switch the TV/DVD on by pressing the on/off button on the
front.
Then go to page 8 for information on the initial set-up, or to
page 9 for information on manual set-up (if the channels have
already been set-up on your TV/DVD).
220 - 240 V ~ 50/60 Hz
Mains socket in
continental Europe
5A
ETC011-EN 9/01/06 11:15 Page 4

5
Getting started
EN
Remote control
The remote control which is supplied with your TV/DVD can be used to navigate through the menus and
adjust all the routine settings.The remote control may vary according to the TV/DVD model.
TV functions
The buttons on the front of your TV/DVD have the same functions as the corresponding buttons on the
remote control.
Press the OPEN/CLOSE button on the front of the set or press the STOP button on the remote control for
several seconds to open and close the disc tray.
Standby / quit standby.
To access DVD mode.
To access VCR mode.
To access TV mode.
Press this button to control the television.
To control the volume.
To switch the sound off and back on again.
To return to the previous menu.
To change channels.
To close a menu.
To access the
OVERVIEW
menu.
To select menu options.
To set functions, change values, enable and disable functions.
4/3 models: to select the picture format.
16/9 models: to select the picture format or zoom.
To confirm a selection.
Coloured buttons:
(red button) picture preset settings
(green button) turn off timer
(yellow button) status information
(blue button) weather information
(purple button) Teletext
The coloured buttons can also be used for operating Teletext.
To select a channel by its number.
To input numeric values and alphabetic characters.
To select an appliance connected to an AV socket.
DVD
VCR
TV
+/-
RETURN
PR+/PR-
EXIT
MENU
OK
PRESETS
Zzz/LIST
INFO
GUIDE
TEXT
0-9
AV
ETC011-EN 9/01/06 11:15 Page 5

6
Getting started
EN
DVD functions
The buttons on the front of your TV/DVD have the same functions as the corresponding buttons on the
remote control.
Press the OPEN/CLOSE button on the front of the set or press the STOP button on the remote control for
several seconds to open and close the disc tray.
DVD
+/-
RETURN
PR+/PR-
EXIT
OK
MENU
DISC/PRESETS
Zzz/LIST
INFO
GUIDE
TEXT
0-9
REV
PLAY
FWD
REC
STOP
PAUSE
Standby / quit standby.
To access DVD mode.
Press this button to control the DVD player.
To control the volume.
This function is also available in TV and VCR mode.
To switch the sound off and back on again.
To exit TV menus.
To provide direct access to the following or previous chapter (DVD), track
(CD, audio), index (VCD), or file (mp3, JPEG).
To clear the Info menu.
To select menu options.To change a value.
To select an option for an Info menu function.
To change files (MPEG4, DivX).
To access a menu or return to the previous one.
To select an Info menu function.
To confirm a selection.
To access the TV menus.
(red button) to access the disc options menu.
(green button) to access the Info menu’s camera angle function.
(yellow button) to access the Info menu (see pages 20-23).
(blue button) to access the disc content menu.
(purple button) to access the Info menu’s subtitle function.
To enter numeric values.
Fast reverse, reverse accelerated play or reverse slow motion (see
page 20), return to previous file (mp3,WMA).
Play.
Fast forward, forward accelerated play or forward slow motion (see
page 20), go on to next file (mp3,WMA).
disabled in DVD mode.
Stop play, accelerated search or slow motion and access the main menu
(press twice to replay from the start).
When the player is stopped, press this button for several seconds to
open/close the disc tray.
Freeze frame, frame advance or slow motion, pause (see page 20).
ETC011-EN 9/01/06 11:15 Page 6

7
Getting started
EN
Important:
If the batteries in your remote control are run down, you can use
the buttons on the front of your set. In TV mode, they have the
same functions as those on the remote control. In the menus, they
have the following functions:
PR+
PR-
VOL+or OK
VOL-or OK
MENU To close a menu
Using the remote control for other equipment
Depending on the model of remote control supplied with your TV/DVD you will also be able to control most
video recorders and DVD players from the Thomson, Saba, Brandt, Ferguson and Telefunken brands.
VCR DVD
Press the
VCR
button Press the
DVD
button
On/Standby On/Standby
To display the main menu To display the main menu
Vertical scrolling in menus Vertical scrolling in menus
Horizontal scrolling in menus Horizontal scrolling in menus
To confirm an action To confirm an action
To close a menu To close a menu
To directly access channels or To enter numeric values or select options in
enter numeric values menus
To change channels To change chapters
To select av input
Rewind Rewind
Play Play
Fast forward Fast forward
Stop Stop
Pause picture Pause picture
Record
MENU
OK
EXIT
0-9
PR+/PR-
AV
REV
PLAY
FWD
STOP
PAUSE
REC
ETC011-EN 9/01/06 11:15 Page 7

8
Channel set-up
EN
Initial set-up
Initial set-up involves selecting all the settings
required to be able to search for and store all the
channels you can receive. Make sure that the
TV/DVD is switched on and follow all the steps in
turn specified on this page.
1. When you first switch the TV/DVD on, the
INSTALLATION menu appears and the
Language option is selected. Choose which
language you want the menus to appear in using
the buttons.When you select a language it
is applied to the menus immediately.
Note:To change the menu language another time, display
the Installation menu and select a language from the
list using the buttons.
2. Select the Auto. instal. option and press OK to
confirm.
3. The relevant menu appears with the Standard
option selected. Select a suitable standard using
the buttons.
Note:The following standards are available to choose
from: UK for the UK and Ireland, FR for France and
Luxembourg, DK for Eastern Europe, the Middle East
and Asia, EURO for Western Europe, Australia and New
Zealand.
4. Then select the Start option and press OK to
start the search. During this time the message
Running appears next to the Start option and
the Frequency and Programme options
appear, informing you of the installation
procedure’s progress.
If you press the EXIT button before the end of
the search the channels already found are stored.
Once the search has ended the ORGANISER
menu appears (see further).
To carry out the automatic set-up procedure again,
put the set in standby mode, then press the VOL-
button on the front of the set and the MENU button
on the remote control at the same time for five
seconds.The set comes on and the installation menu
appears.
Organiser
Using this menu you can change the order the
channels have been arranged in during automatic set-
up, name and rename channels and delete duplicate
channels or those with poor reception quality. Follow
the help messages at the bottom of the screen and
refer to a TV programme guide to help identify the
channels.
Arranging channels in order
Select the Select PR option. Use the or
numeric buttons to display the number of the
channel to be moved.The relevant channel appears.
Select the Swap with PR option. Use the or
numeric buttons to assign a different number to it
and press OK to confirm.The new channel number
appears on the right. Press OK to confirm.A message
appears confirming that the channels have been
swapped.
Follow the same procedure for the other channels.
Deleting channels
Select the Select PR option. Use the or
numeric buttons to display the number of the
channel to be deleted.The relevant channel appears.
Select the Delete option. Press the OK button to
delete the channel.A message appears confirming
that the channel has been deleted.
ETC011-EN 9/01/06 11:15 Page 8

9
Channel set-up
EN
Naming or renaming channels
Select the Select PR option. Use the or
numeric buttons to display the number of the
channel whose name you want to change.The
relevant channel appears. Select the Name option
and press the button to place the cursor on the
first character. Enter a character using the numeric
buttons.
The available characters are assigned as follows:
1:
space .
,?!‘- ( ) @ * / + = 1 6:M N O 6
2:A B C 2 7:P Q R S 7
3:D E F 3 8:T U V 8
4:G H I 4 9:W X Y Z 9
5:J K L 5 0:0
Go back to the previous character or on to the next
character using the buttons and start the
procedure again. Names can have a maximum of six
characters. Select another option or exit the menu
to confirm.
Press EXIT to close the menu.To return to the
INSTALLATION menu, select Return and press
OK.
To access the ORGANISER menu another time,
press the MENU button to display the OVERVIEW
menu, select Installation and press OK.Then select
Organiser from the INSTALLATION menu and
press OK.
Manual channel set-up
Follow this procedure given if you find that some
channels have not been stored during the initial set-
up.This can happen if you are setting up cable
network channels. Setting up channels manually
requires every setting for a particular channel to be
entered, one at a time.
Display the OVERVIEW menu by pressing the
MENU button. Select the Installation option and
press OK to confirm. Select the Manual instal.
option from the INSTALLATION menu and press
OK to confirm.
1. Select the Standard option and then the
relevant standard for your country using the
buttons.
Note:The following standards are available to choose
from: UK for the UK and Ireland, FR for France and
Luxembourg, DK for Eastern Europe, the Middle East
and Asia, EURO for Western Europe, Australia and New
Zealand.
2. Select the Frequency option. Use the or
button to start the search in descending or
ascending order.When a channel is found pictures
appear.
3. If the picture is not clear you can adjust the
setting.You do this by selecting the Fine tuning
option and adjusting it with the buttons.
4. If the channel is encrypted and you want to
connect a decoder, select the Decoder option
and check the box by pressing the OK button.
5. Then select the Character set option and
choose the character set that will be used for
Teletext on this channel using the buttons.
The following character sets are available:
1:Western Europe
2: Eastern Europe
3: Russian and Bulgarian
4: Greek
5:Arabic
6: Ukrainian
7: Belarussian
The character set selected determines how
characters are displayed on Teletext
screens.
6. Select the Programme option.Assign a number
to the channel using the or numeric
buttons. Press the OK button to confirm.
7. If some Teletext characters do not display
properly, select the TXT option and check the
box by pressing the OK button.
Important:
As soon as you change a setting in the MANUAL
INSTALLATION menu the channel number starts
flashing under the Programme option.To confirm your
change you must select the Programme option and
press OK.If you do not confirm the change it will be
cancelled when you change channels or put the TV/DVD
into standby mode.
Repeat this procedure to find other channels.
ETC011-EN 9/01/06 11:15 Page 9

10
Operation
EN
General operation
Switching the set on and off
To switch the TV/DVD on:
- press the on/off button located on the front of
the set, the , TV,OK or PR+/PR-buttons to
switch the television on at the last channel or
AV programme you were watching,
- press any numeric button on the remote
control to switch the television on at the
corresponding channel,
- press the AV button to switch the television on
at the last AV programme you were watching.
To put the set in standby mode, press the
button on the remote control or the on/off
button located on the front of the set.The set
remains powered up, but with low energy
consumption.
To switch off the TV/DVD, unplug the mains
socket from the mains outlet.
Volume
Volume control: use the VOL+/VOL-buttons on the
front of the TV/DVD or press the relevant buttons
on the remote control to increase or decrease the
volume.
Sound mute: press the or button (depending
on the model) to temporarily mute the sound. Press
this button again or the VOL+button on the front of
the set or the on the remote control to restore
it.
Displaying status information
In TV mode, press the yellow button (INFO) on the
remote control to display the number and name of
the channel you are watching, the time, the type of
sound and the zoom or format type. If the Parental
control is on or the sound is muted, the relevant
symbol is displayed.
When you switch on the television or change
channels, the number and name of the channel are
displayed if you entered its name under the
ORGANISER menu.
Accessing channels
Using the numeric buttons
- for channels 1 to 9, press the corresponding
button.
- for channels 10 to 99,
- quickly enter the channel number’s two digits,
- press the 0/-- button twice to display “--”, then
enter the two digits.
Using the PR+/PR-buttons
Scroll through the channels.Audiovisual
programmes are not included in the cycle unless
you use the buttons on the front of the TV/DVD.
Accessing AV programmes
Press the AV button to display the last selected audio-
visual programme and scan through the other audio-
visual programmes.
Important:The message No video signal! means
that the set is not receiving any signal on the
selected AV programme.
ETC011-EN 9/01/06 11:15 Page 10

11
Operation
EN
Picture format
In TV mode, you can change the display format and
use the zoom function via the buttons.The
formats and zoom functions vary according to the
screen format.
16/9 sets have the following formats and zoom
functions available:
- 4/3 format - picture in 4/3 format
- 14/9 zoom - picture in 14/9 letterbox format
- 16/9 zoom - picture in 16/9 letterbox format
- 16/9 zoom up - picture in 16/9 letterbox
format with subtitles
- Cinerama - picture in widescreen 4/3
format
- 16/9 format - picture in 16/9 format
If the format is detected (with the
INSTALLATION menu Auto. format option
checked) it is automatically applied.
When you change channels the format is not
retained. However, if you used the zoom function, the
setting will still apply.
4/3 sets have the following formats available:
- 4/3 format
- 16/9 format
If the format is detected (with the
INSTALLATION menu Auto. format option
checked) it is automatically applied.
The format you choose is only saved for AV
programmes.
Child lock
You can disable the front buttons so that your
children cannot switch the television on without
your permission. In this instance, you need to use the
remote control to switch the TV/DVD on.
To enable this function, press the standby button
on the remote control for five seconds.The TV/DVD
goes into standby mode.
Adjusting the sound
The settings described in this section are only
available for stereo models, and mono models which
can receive stereo sound via the AV sockets.
SOUND menu
Display the OVERVIEW menu by pressing the
MENU button. Select the Sound option and press
OK to confirm.The SOUND menu appears with
the following options:
Equaliser:this option provides access to the
GRAPHIC EQUALISER menu (see further).
Balance:use the buttons to balance the
sound between the right and left speakers.
Sound type:select a sound type from the list using
the buttons.
Note:The options available depend on the programme
you are watching.
Auto Vol Level:this function softens loud sound
effects. It is particularly useful when you are watching
television late at night, for instance. Check the box to
enable this setting by pressing OK.
Dynamic Bass:this function is used to
strengthen the bass. Check the box to enable this
setting by pressing OK.
Int speakers:the TV/DVD’s speakers are enabled
by default - the box is checked.
If your appliance is supplied with audio output RCA
sockets, you can connect amplified speakers or an
amplifier to them (see the “Other information”
chapter).You can then get the most out of the sound
using all the speakers or by disabling the internal
speakers. Uncheck the box to do this, by pressing
OK.
Broadcast Options
Mono Auto, Mono, Mono+
Nicam mono Nicam, Mono, Mono+
Nicam / IRT stereo Stereo, Stereo+, Mono, Mono+
Bilingual Nicam S1, S2, S3
Bilingual IRT S1, S2
AV Stereo, S1, S2
Stéréo+: stereo wide - Mono+: pseudo stereo
ETC011-EN 9/01/06 11:15 Page 11

12
Operation
EN
Dolby Virtual:check the box by pressing OK to
enable this setting. Uncheck the box to disable it.
This option is disabled by default.
Surround:this option is used to adjust the level of
the virtual surround effect.
Note: Adjusting this setting is only possible if you checked
the box under the Dolby Virtual option.
Press EXIT to close the menu. Select the option
Return and press OK to return to the
OVERVIEW menu.
GRAPHIC EQUALISER menu
Select Equaliser from the SOUND menu and
press OK to display the menu.This menu is used to
select a preset setting and define your own settings
using the graphic equaliser.
Preset:use the buttons to select the
appropriate setting for the programme you are
watching.The Personal setting stores your graphic
equaliser settings.
Freq. range:the graphic equaliser has five
frequency bands. Select each band in turn using the
buttons and make the necessary adjustments
using the buttons.
Note:When you are setting the graphic equaliser,
Personal appears under the Preset option and your
settings are stored as your new personal settings.
Press EXIT to close the menu.To return to the
SOUND menu, select Return and press OK to
confirm.
Adjusting the picture
The PICTURE menu can be used to adjust the
current settings, to apply preset settings and define
your own preferred settings.
Display the OVERVIEW menu by pressing the
MENU button. Select the Picture option and press
OK to confirm.The PICTURE menu appears with
the following options:
Preset:use the buttons to select from the
preset settings offered (Standard,Film,Sport,
Studio,Personal) the one which suits best the
programme you are watching.
The Personal option contains the values you have
defined for all the settings.
Note:Whenever you modify a value, the Preset option
displays Personal and your settings are stored as your
new personal settings.
Brightness,Colour,Contrast,Sharpness:
adjust these settings as required using the
buttons.
These settings are automatically stored under
Personal in the Preset option.
To n e :adjusts the colour temperature. Select an
option from the list using the buttons.
Pict. enhanc.:enhances the picture quality by
adjusting numerous settings, such as resolution,
contrast, colour rendering, skin tone, etc. Select an
option from the list using the buttons.
NTSC tint:this option is only available for NTSC
audio-visual sources. It can be used to adjust the
picture’s tint.
Pict. rotation:this option can be used to
compensate for the effects produced by the earth’s
magnetic field and achieve a perfectly aligned
horizontal picture.
Press the button to rotate the picture clockwise,
and the button to rotate it in the opposite
direction.
Press EXIT to close the menu. Select the option
Return and press OK to return to the
OVERVIEW menu.
In TV mode you can press the red button to access
directly the list of preset settings.You can then select
a preset setting by pressing the buttons. Press
EXIT to close the menu.
Manufactured under license from Dolby
Laboratories.
“Dolby”,“Pro Logic” and the double-D symbol are
trademarks of Dolby Laboratories.
ETC011-EN 9/01/06 11:15 Page 12

13
Operation
EN
Setting the time
Display the OVERVIEW menu by pressing the
MENU button. Select the Time option and press
OK to confirm.
Setting the time
1. Select the Time ref. PR option.
2. Select the channel which the time will use as a
reference point using the buttons.The time
is displayed after a few seconds if it is available on
the selected channel.To disable this function,
select the setting --.
If the time is not provided by the channel
selected under the Time ref. PR option, this
means the time is not set.To set the time
manually, select the Time option and enter the
time using the numeric or buttons. In this
case, the setting -- is automatically selected under
the Time ref. PR option.
Note: If the power supply is disrupted (i.e. the set is
unplugged or there is an electrical fault), the time will
disappear if it has been entered manually.You must reset
it.We therefore recommend you find the time on a
channel and check that it is correct.
Once the time has been set you can use the Wake
up timer and Turn off timer functions.
Programming the wake-up timer
This function can be used to set the time for the
TV/DVD to come on, for instance, for the television
to wake you up.
1. Select the Wake up timer option and press
OK to check the box, which enables this function
and provides access to the relevant options.
Note:The volume at wake-up will be set at the same
level as when you enabled this function.
2. Under the Wake up time option enter the
wake-up time using the numeric or
buttons.
3. Under the Wake up PR option enter the
number of the channel you want to wake you
using the or numeric buttons.
4. Under the Recurrence option select Daily
using the buttons for a daily wake-up.
Otherwise, save the Once option.
Note: If you have programmed a wake-up and are not
there when the appliance comes on, it will automatically
switch off after two hours if no activity using the buttons
on the front of the set or the remote control has been
detected.
Programming the turn off timer
1. Select the Turn off timer option and press OK
to check the box, which enables the function and
provides access to the relevant options.
2. Under the Turn off time option enter the turn
off time using the or numeric buttons.
3. Under the Recurrence option select Daily
using the buttons if you want the TV/DVD
turned off every day. Otherwise, save the Once
option.
Note: In TV mode you can access this function directly by
pressing the ZZZ/LIST button.
Press EXIT to close the menu. Select the option
Return and press OK to return to the
OVERVIEW menu.
Setting the date
Select Calendar from the TIME menu and press
OK to display the menu.
1. Under the Month option select the current
month from the list using the buttons.
2. Under the Year option select the current year
from the list using the buttons.
The calendar displays the selected month.
ETC011-EN 9/01/06 11:15 Page 13

14
Operation
EN
Parental control
The parental control functions allow you to limit
your children’s access to the television.This means
that you can lock the PR+/PR-buttons located on
the front of the set and/or some channels.These
functions are protected using a four-digit PIN code.
Accessing the PARENTAL
CONTROL menu
1. Display the OVERVIEW menu by pressing the
MENU button. Select the Parental Control
option and press OK to confirm.
2. If at least one parental control function is active,
the PIN CODE menu appears, prompting you
to enter your code. If no parental control
function is active, the PIN CODE menu
appears, inviting you to define a code. On the
screen the numbers are replaced by asterisks.
Enter your code again to confirm it.The
PARENTAL CONTROL menu appears.
Note: Choose a code that will be easy enough for you to
remember.
Locking a channel
1. Select the Settings option from the
PARENTAL CONTROL menu and press OK
to confirm.The relevant menu appears.
2. Select the Programme lock option and press
OK to confirm.The PROGRAMME LOCK
menu appears.
3. Select the Select PR option. Use the or
numeric buttons to select the channel to be
locked.
4. Select the Lock option and check the box by
pressing the OK button.
Repeat this procedure to lock any other channel.
5. Select the Return option and press OK to
return to the PARENTAL CONTROL
SETTINGS menu. Repeat to return to the
PARENTAL CONTROL menu.
6. Select the Lock option and check the box by
pressing the OK button to activate the lock.
The INSTALLATION and TIME menus are
also locked.
To unlock a particular channel, follow steps 1 to 3,
the select the Lock option and press the OK button
to uncheck the box.
Important:If you uncheck the box under the
Lock option of the PARENTAL CONTROL
menu, all parental control functions are then
deactivated.
Locking the PR+/PR- buttons on the
front of the set
1. Select the Settings option from the
PARENTAL CONTROL menu and press OK
to confirm.The relevant menu appears.
2. Under the F. panel PR+/- option select
Locked using the buttons.
3. Select the Return option and press OK to
return to the PARENTAL CONTROL menu.
4. Select the Lock option and check the box by
pressing the OK button to activate the lock.
The INSTALLATION and TIME menus are
also locked. In this case, the remote control will
be required to operate the television.
To unlock the PR+/PR-buttons, select Unlocked
under the Lock option.
Changing your PIN code
1. Select the New PIN code option from the
PARENTAL CONTROL menu and enter a
new four-digit code using the numeric buttons on
the remote control.
2. Enter the code again to confirm it. Press the
EXIT button to close the menu.
Operation (TV mode)
As soon as a function limiting access is enabled,
you have to enter your PIN code to be able to
access the PARENTAL CONTROL,TIME
and INSTALLATION menus.To unlock these
menus you have to disable the two functions
limiting access.
ETC011-EN 9/01/06 11:15 Page 14

15
Operation
EN
If you have forgotten your PIN code you can
reset it.You do this by putting the TV/DVD into
standby mode, then pressing the EXIT button on
the remote control and the VOL-button on the
front of the set at the same time for five seconds.
The TV/DVD will then come on.Then you can set
a new password.
This procedure is possible, even if you have
locked the buttons on the front of the TV/DVD.
Notepad function
Press the MENU button to display the OVERVIEW
menu. Select the Notepad option and press OK.
Creating a message
1. Select the Edit note option and press OK to
confirm.The EDIT screen appears.
2. Key in your message using the numeric buttons
on the remote control.The characters available
are assigned as follows:
1:space .,?!‘- ( ) @ * / + = 1
2:A B C 2 7:P Q R S 7
3:D E F 3 8:T U V 8
4:G H I 4 9:W XY Z 9
5:J K L 5 0:0
6:M N O 6
Use the button to make any corrections and
the button to insert a space.
Notes:
- You have eight lines for writing your message.
- Use the button to switch from capitals to small
letters and vice versa.
- You can only create a single message at a time.
3. Press OK to confirm.The NOTEPAD menu
appears.
4. Select Display note and check the box by
pressing OK.
5. a. Select At switch on and check the box by
pressing OK so that the message appears the
next time the set is switched on, or
b. Select On time and use the or
numeric buttons to enter the time at which
the message should appear.
Note:These options only display if you checked the box
under the Display note option.
The message will then appear at the specified time. If
the TV/DVD is in standby it will automatically come
on and if a menu was on the screen it will disappear.
To remove the message from the screen, press any
button on the front of the TV/DVD or on the
remote control.
Editing a message
1. Select Edit note and confirm by pressing OK.
The EDIT screen appears.
2. Edit the message and press OK to confirm.
3. Change the display options under the
NOTEPAD menu.
Deleting a message
1. Select Delete note and press OK to confirm.
2. The word Done appears once the message has
been deleted.
ETC011-EN 9/01/06 11:15 Page 15

16
Operation
EN
Teletext
The Teletext service is available in many countries
under a variety of names (TOP Text, Fastext, FLOF
text,Videotext). It is provided as a free service by
television broadcasters.This service provides a real
wealth of information, available at any time, on
weather, sports results, news, games, etc.The
information is presented in pages or organised in
topics specified in colour on the screen and you can
access this information by simply pressing the
buttons of the relevant colour on the remote
control.
Accessing Teletext
In TV mode press the TEXT button on the remote
control.Teletext will display the last page selected, or
if you have changed channels, the index page (usually
100).
To display a page, enter its 3-digit number or use the
PR+/PR-buttons.The entered number appears:
- in green during the search
- in white as soon as the page is found
- in red if the page does not exist.
The page appears after a few moments.
In Teletext mode the volume control and sound mute
functions are still available.
Navigation bar
The navigation bar, located at the bottom of the
screen, provides access to the next three pages and
the previous page by pressing the relevant colour
button on the remote control.
Press the MENU button to display the navigation bar
and access the following functions:
STOP:this function is used to stop pages from
following on in succession. Press the red button to
select this function.The word STOP appears in
place of the page number.
Press the red button again to allow the pages to
follow on again.
??? (hidden answers): press the green button to
reveal a hidden answer (for example, in games).
Press the green button again to hide the answer.
ZOOM:press the yellow button: once to zoom
in on the top part of the screen, a second time to
zoom in on the bottom part of the screen and a
third time to return to normal display.
MIX (mixed display): press the blue button to
display Teletext against a transparent background.
Press this button again to return to normal display.
Changing the character set
temporarily
You can change the character set used for Teletext, if
the existing one is not suitable for the channel you
are watching.You do this by pressing the MENU
button to display the navigation bar.Then press OK
to display the number of the character set currently
being used in place of ???. Use the green button to
select another character set.
The character set selected in the
INSTALLATION menu is restored when the
TV/DVD is switched off or enters standby mode, or
when you change channels.
ETC011-EN 9/01/06 11:15 Page 16

17
Operation
EN
Other Teletext functions
Newsflash
When a newsflash is detected, MIX is replaced by N
in the navigation bar. Press the blue button to display
the newsflash. In the case of an update, the Teletext
function is enabled and displays the new information.
This function is disabled if the TV/DVD enters
standby mode or is switched off.
Press the EXIT or RETURN button to quit the
Teletext function.
Subtitles
Some channels provide subtitles for some of their
programmes.The number of the relevant pages is
specified on the Teletext index page.
To display subtitles, enable the Teletext function, find
the number of the page displaying the subtitles and
enter it. Once the relevant page is found, the
subtitles appear in the TV picture.The navigation bar
disappears after a couple of seconds.To display the
top bar, press the purple (TEXT) button.
Press the EXIT or RETURN button to quit the
Teletext function.
Direct access to subpages
Some information is spread across more than one
page.To access subpages, press the or button.
“----” appears beside the page number. Enter the
subpage number using the numeric buttons.
To exit this mode allowing direct access to subpages,
display a new page, press the or button, or
change channels.
Alarm page
In some countries (Spain, Benelux, etc.), you can set a
time to display certain Teletext pages (alarm pages).
To do this, display the relevant alarm page and enter
subpage mode. Enter the time instead of the subpage
number (e.g. 1705 for 17:05) and press EXIT.The
page will disappear and will appear again at the set
time, as long as you do not change channels or
switch off the TV/DVD beforehand.
Fastext
If Fastext is available, direct access to previous and
subsequent pages is replaced by coloured bars (red,
green, yellow and blue), which provide links to the
topics you can access by pressing the relevant colour
button. Other topics accessible in the same way can
also be displayed.
Press the MENU button to go from these links to the
navigation bar.
TOPtext
TOPtext displays a bar at the bottom of the page
divided into two coloured sections (yellow and blue).
The blue section displays a topic you can access
directly by pressing the blue button.The next topic
will then appear in the blue section.The yellow
section displays an article you can access directly by
pressing the yellow button.The next article will then
appear in the yellow section.
Press the EXIT or RETURN button to quit the
Teletext function.
ETC011-EN 9/01/06 11:15 Page 17

18
DVD functions - Playing discs
EN
Regional coding
Your DVD player has been designed to process
regional management information that is stored on
DVD discs. DVD discs that have different regional
codes from that of your player cannot be played.The
regional code for your player is 2 (Europe, the Middle
East, South Africa, Japan).ALL means all regions.
When you buy a disc check that it has the correct
logo.
Compatible discs and formats
While advances have been made to ensure that your
disc player is compatible with the largest number of
discs possible, it cannot be guaranteed that you will
be able to play discs which might not be compliant
with audio CD,VCD and SVCD standards. In the case
of writable and rewritable discs, compatibility with
this player depends on the DVD writer, the burning
software and the disc used.
DVD-Video
DVDs are high-density optical discs on which high quality
picture and audio are recorded by means of digital signals.
8 and 12 cm DVDs, single or double sided, single or dual
layer.
DVD-R, DVD-RW, DVD+R,
DVD+RW
Most DVD-R and DVD+R (one recording only), DVD-RW
and DVD+RW discs (rewritable). Recordings using DVD-R
and DVD-RW discs must be made inVideo DVD mode.
Recordings on DVD+RW discs must be made in
accordance with the specifications for DVD+RW discs
with a 4.7 Gb capacity.
VCD - Video Compact Disc
CD on which you can record up to 74 minutes ofVHS-
quality video associated with still images, audio tracks and
interactive menus.
SVCD - Super Video Compact Disc
Most SVCDs comply with the IEC62107 standard. SVCDs
can be used to record up to 70 minutes of digital sound
and images in accordance with MPEG-2 standard for video
and MPEG-1 standard for audio.
Audio CDs
8 and 12 cm audio CDs.
CD-R, CD-RW
Most CD-R (one recording only) and CD-RW discs
(rewritable).
This player can play most CD-R discs. Multisession
recorded CD-Rs can also be played, provided that the
recording was closed as defined in the burning software.
However, depending on the software, computer and disc
used, you may find that not all discs will play successfully.
When playing a CD-R disc, it is completely normal for the
unit to take up to 20 seconds to recognise the disc before
starting to play. If the disc is not recognised after a period
of 20 seconds, remove the disc, and then insert it again.
• Irrespective of the actual recording capacity of the CD-R,
do not use its full capacity.
• CD-Rs should be preferably used instead of CD-RWs
(rewritable CDs) as, in certain cases, CD-RW playback
may be faulty.
• Use reliable, good-quality CD write software.
• Close all other applications on the computer to ensure
reliable CD-R disc recording.
mp3 files
CD-R and CD-RW discs containing audio files in mp3
format. As for CD-R mp3 discs, please follow all the
recommendations for CD-R discs above, along with the
comments below:
• Use exclusively the “ISO 9660” and “JOLIET” formats,
which are the most widely used.These formats are
compatible with DOS,Windows and Mac OS.
• mp3 filenames should not exceed 12 characters and
should have the “.mp3” extension (title.mp3).They
should not contain spaces or special characters such as (
.,/ , \ , = ,+).
• Sound quality with mp3 files basically depends on the
rate of compression / decompression.To obtain audio
CD quality sound, only record files with a rate of
compression between 128 kbps and 160 kbps
(kilobit/sec). Choosing higher rates, such as 192 kb/sec or
more, only rarely produces even better sound quality.
Conversely, files with sampling rates below 128 kb/sec
will not play properly.
• Do not try recording copyright-protected mp3 files.
These “securized” files are encrypted and code-
protected to prevent illegal copying.
Important:The above recommendations cannot be taken
as a guarantee that the DVD player will play mp3
recordings, or as an assurance of sound quality.You should
note that certain technologies and methods for mp3 file
recording on CD-Rs prevent optimal playback of these files
on your DVD player (i.e. degraded sound quality and even,
in some cases, inability of the player to read the file).
DVD+Rewritable
ETC011-EN 9/01/06 11:15 Page 18

19
DVD functions - Playing discs
EN
JPEG files
CD-R and CD-RW with JPEG files. Certain JPEG files,
including progressive JPEG files, cannot be read by this
player.
• The total number of files on a disc should be less than
650.
• This player can only read files with the “.jpg” extension.
WMA (Windows Media Audio)
files
CD-R with WMA files.
• WMA filenames should not exceed 8 characters, and
should have the “.wma” extension (Title.wma).They
should not contain spaces or special characters such as (.
,/,\,=,+).
• The total number of files on a disc should be less than
650.
NTSC playback
In addition to the PAL DVDs and VCDs, you can enjoy
your NTSC films as well.
DivX files
DivX is the name of a revolutionary new video codec
which is based on the new MPEG-4 compression standard
for video.The correct playback of DivX files on this player
depends on the preparation and production of the audio
and video files, the codec and type of recording equipment
used and on your computer’s parameters. It may therefore
happen that you cannot play a DivX file or that part or all
of it is defective. DivX disc compatibility with this player is
limited as follows:
• The maximum resolution of the DivX file is below
720x576
(W x H) pixels.
• DivX filenames should not exceed 56 characters.
• If the video and audio structure of the recorded file is
not interleaved, either video or audio is outputted.
• If the file is recorded with GMC, the unit supports only
1-point GMC. GMC is the acronym for Global Motion
Compensation. It is an encoding tool specified in the
MPEG4 standard. Some MPEG4 encoders, like DivX or
XviD, have this option.There are different levels of GMC
encoding, usually called 1-point, 2-point, or 3-point GMC.
Note on DivX files
Before making use of DivX files, please make sure
that you have legally purchased or rented the
content. Pirate copying is illegal and may result in
sanctions. Private copies of your own material for
your own use may be legal in some countries. Make
sure you are aware of applicable laws.
DVD copy protection
In accordance with the DVD standard, your TV/DVD
is equipped with a Copy Protection Device, which
can be switched on and off by the DVD disc itself, in
order to ensure that any recording of the relevant
DVD disc onto a videotape is of very poor picture
quality, if not impossible.
“This product incorporates copyright protection
technology that is protected by method claims of
certain U.S. patents and other intellectual property
rights owned by Macrovision Corporation and other
rights owners. Use of this copyright protection
technology must be authorized by Macrovision
Corporation, and is intended for home use only
unless otherwise authorized by Macrovision
Corporation. Reverse engineering or disassembly is
prohibited.”
+
NTSC
ETC011-EN 9/01/06 11:15 Page 19

20
DVD functions - Playing discs
EN
Basic playback operations
Playback
1. Press the OPEN/CLOSE button on the front of
the TV/DVD.
2. Put the disc in with the printed side upwards (in
the case of a single-sided disc).
3. Press OPEN/CLOSE again to close the disc tray.
•Play starts automatically, or
•The disc menu appears. One of its options can be
selected to start playing the disc. Select it and
press OK,or else
•The player’s main menu appears. Select the option
Play and press OK.
4. Press STOP to stop playback.
Notes:
- The player stores the point where playback was
interrupted. If you press PLAY again, playback resumes
from this point.To stop playback completely or to start
again from the beginning, press STOP twice.
- If the player is left in STOP mode for more than five
minutes without any user interaction, a screen saver is
activated.
Accelerated play
While the disc is playing, press the REV or FWD
button one or more times to vary the speed and
direction of the accelerated play.
Still image
While the disc is playing, press PAUSE once for
freeze frame.
Frame advance
1. Press the PAUSE button.
PAUSE is displayed.
2. Press the PAUSE button a number of times to
advance backward or forward image by image.
Variable slow motion
1. While the disc is playing, press the PAUSE button
once.
PAUSE is displayed.
2. Press the REV or FWD button a number of times
to vary the speed and direction of the slow
motion.
Changing chapter
While the disc is playing, press the PR+or PR-
button to go immediately to the next or previous
chapter, or to the next or previous track.
Scene replay (DVD)
While the disc is playing, press the RETURN button
on the remote control to replay the last seconds of
the film or sequence shown.
Playing mp3,WMA, JPEG, MPEG4
and DivX files
Select Play from the main menu and press OK.Then
select the file format that you want to play and
confirm with OK.
During playback, press the INFO button to access
the Info menu.
Info menu
The Info menu can be used to access information on
a disc being played, as well as particular functions.To
display all the information, press the PLAY button to
start playback and press the INFO button on the
remote control. Select the various options using the
buttons. Then follow the instructions which
appear on the screen and use the buttons on
the remote control to scroll through the options.
Press OK to confirm your selection.
Note:When one of the icons is greyed out, this means
that the relevant function is not available on the disc
being played.
The invalid symbol indicates that the function
selected or the button used is not available at
this stage.
ETC011-EN 9/01/06 11:15 Page 20
Table of contents
Other THOMSON DVD Player manuals

THOMSON
THOMSON DTH109E User manual

THOMSON
THOMSON DTH159E User manual

THOMSON
THOMSON DTH600 User manual

THOMSON
THOMSON DTH6350E User manual

THOMSON
THOMSON DTH 270 User manual

THOMSON
THOMSON DTH500B User manual

THOMSON
THOMSON DTH4200 User manual

THOMSON
THOMSON DVD115H User manual

THOMSON
THOMSON DTH175EL User manual

THOMSON
THOMSON DTH115E Instruction Manual

THOMSON
THOMSON DTH720 User manual

THOMSON
THOMSON DTH8657E User manual

THOMSON
THOMSON DTH500B User manual

THOMSON
THOMSON DTHI59E User manual

THOMSON
THOMSON DTH615 User manual

THOMSON
THOMSON DPL950 - RECEIVER User manual

THOMSON
THOMSON DPL 800VD User manual

THOMSON
THOMSON DTH160E User manual

THOMSON
THOMSON DTH6100 User manual

THOMSON
THOMSON DSA100 User manual