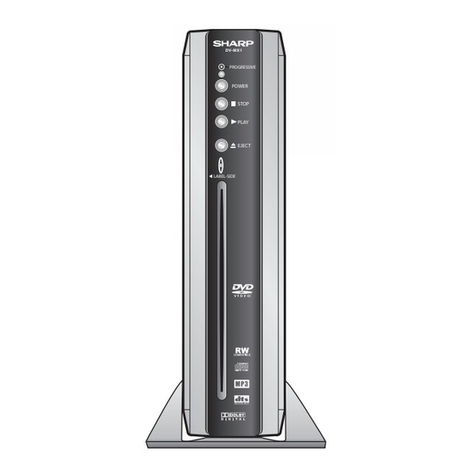
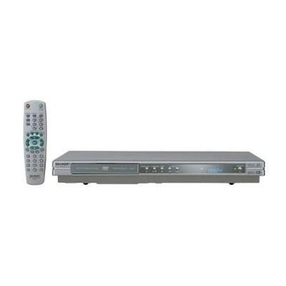
Sharp DV-SL85X User manual

POWER PLAYSTOP SKIP OPEN/CLOSE
REV FWD
The region number for this DVD player is 4.
4
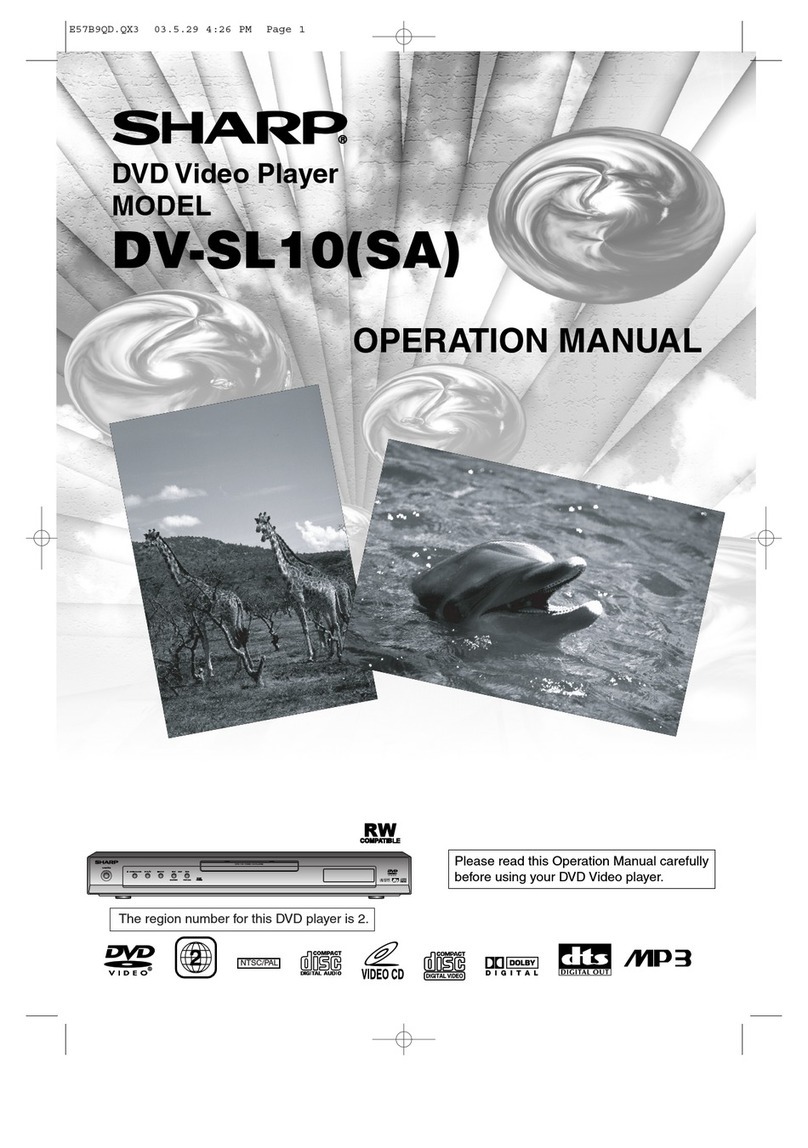
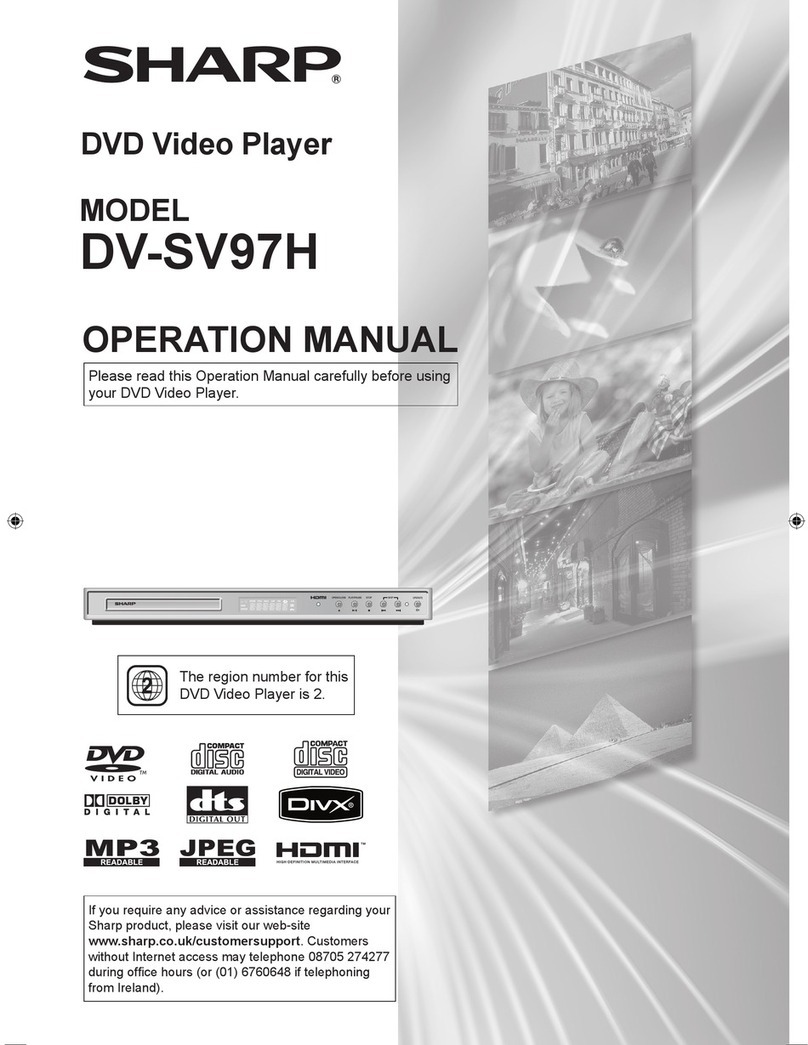
DVD Video Player
MODEL
DV-SL85X
OPERATION MANUAL
Please read this Operation Manual carefully
before using your DVD Video Player.
NTSC/PAL
Precautions
Information SetupFunctions
E6146AD_0523 5/23/05 3:21 PM Page 1

–2–
Precautions
EN
SAFETY INFORMATION
Precautions
Power Cord Protection
To avoid any malfunctions of the unit, and to protect against
electric shock, fire or personal injury, please observe the fol-
lowing.
• Hold the plug firmly when connecting or disconnecting the
AC power cord.
• Keep the AC power cord away from heating appliances.
• Never put any heavy object on the AC power cord.
• Do not attempt to repair or reconstruct the AC power cord
in any way.
• This unit is classified as a CLASS 1 LASER product.
• The CLASS 1 LASER PRODUCT marking is embossed on
the rear cover.
• This product contains a low power laser device. To ensure
continued safety, do not remove any cover or attempt to
gain access to the inside of the product. Refer all servicing
to qualified personnel.
NOTE:
This unit can be used only where the power supply is AC
220V-240V, 50/60Hz. It cannot be used elsewhere.
CAUTION:
USE OF CONTROLS OR ADJUSTMENTS OR
PERFORMANCE OF PROCEDURES OTHER
THAN THOSE SPECIFIED HEREIN MAY RESULT
IN HAZARDOUS RADIATION EXPOSURE.
AS THE LASER BEAM USED IN THIS unit IS
HARMFUL TO THE EYES, DO NOT ATTEMPT TO
DISASSEMBLE THE CABINET. REFER SERVIC-
ING TO QUALIFIED PERSONNEL ONLY.
WARNING:
TO REDUCE THE RISK OF FIRE OR ELECTRIC
SHOCK, DONOT EXPOSE THIS EQUIPMENT TO
RAIN OR MOISTURE.
TO REDUCE THE RISK OF FIRE OR ELECTRIC
SHOCK, AND ANNOYING INTERFERENCE, USE
THE RECOMMENDED ACCESSORIES ONLY.
Laser Diode Properties
Material: GaAs
Wave length: DVD: 655 nm
CD: 790 nm
Emission Duration: Continuous
Laser output: Max. 0.8 mW
AUDIO OUT
DIGITALAUDIO OUT
COAXIALOPTICAL
LY
VIDEO
OUT CB / PBS-VIDEO
OUT
CR / PRCOMPONENT
VIDEO OUT
R
4
CLASS 1
LASER PRODUCT
TO PREVENT FIRE OR SHOCK HAZARD, DO
NOT EXPOSE THIS APPARATUS TO DRIPPING
OR SPLASHING, NO OBJECTS FILLED WITH
LIQUIDS, SUCH AS VASES, SHOULD BE PLACED
ON THE APPARATUS.
• Remote control
with two AA size (R-6)
batteries
• Video/Audio cables
• Operation Manual
Supplied Accessory
POWER PLAY STOP SKIP OPEN/CLOSE
REV FWD
4
DV-SL85X
OPERATION MANUAL
NTSC/PAL
Manufactured under license from Dolby Laboratories.
“Dolby” and the double-D symbol are trademarks of
Dolby Laboratories.
“DTS” and “DTS Digital Out” are trademarks of Digital
Theater Systems, Inc.
“Kodak Picture CD COMPATIBLE” is a trademark of
Eastman Kodak Company.
is a trademark of DVD Format/Logo Licensing
Corporation.
For Customer Use:
Read carefully the information located at the bottom of your
unit and enter below the Serial No.
Retain this information for future reference.
Model No.: DVD Player: DV-SL85X
Serial No.: ______________________________________
The following symbols appear in some headings and notes in
this manual.
Description refers to playback of DVD Video discs
(including DVD-RW/-R and DVD+RW/+R discs
(Video mode only)).
Description refers to playback of VR mode (Video
Recording format).
The VR mode (Video Recording format) is a record-
ing mode to enjoy editing the program or manual
mode for recording in desired resolution and time.
Description refers to playback of Audio CDs.
Description refers to playback of Video CDs.
Description refers to playback of Video CDs without
PBC function.
Description refers to playback of MP3 discs.
Description refers to viewing of JPEG discs.
Symbols Used in This Manual
E6146AD_0523 5/23/05 3:21 PM Page 2

Precautions
–3–EN
Features Table of Contents
¡Progressive Scan System
¡Component Video Out Jacks
Jacks located on the back of the unit which are used to
send high-quality video to a TV via Component Video In
Jacks.
¡DTS (Digital Theater System)
You can enjoy 5.1 channel surround sound system devel-
oped by Digital Theater System, Inc. which reproduces
the original sound as truthfully as possible. External
decoder is required.
¡Dolby Digital Sound
This unit can handle Dolby Digital surround sound having
5.1 channels when connected to a Dolby Digital decoder.
¡Still/Fast/Slow/Step Playback
¡Rapid Play
Playback in slightly faster/ slower speed while keeping the
sound quality as in the normal playback.
Rapid Play is available only on discs recorded in the
Dolby Digital format.
¡Random Playback for Audio CD, MP3, JPEG and
Kodak Picture CD
¡Programmed Playback for Audio CD, MP3, JPEG and
Kodak Picture CD
¡DVD Menus in a Desired Language
¡Screen Saver/Auto Power-off Functions
The screen saver programme starts when there is no input
from the unit for 5 minutes in the stop mode. When the
screen saver programme is activated for 25 minutes, the
power is automatically turned off.
¡Subtitles in a Desired Language
¡Selecting a Camera Angle
¡Choices for Audio Language and Sound Mode
¡Parental Lock
¡Automatic Detection of Discs
This unit automatically detects if a loaded disc is DVD,
Audio CD, Video CD, MP3, JPEG and Kodak Picture CD.
¡Playing Disc with MP3 and JPEG Files.
¡Kodak Picture CD Playback
¡Dual Playback
You can make CD-RW/-R to put your favorite music (MP3)
and picture (JPEG) files in one disc with the computer to play
back simultaneously.
¡Folder Playback
This function lets you play all the files and tracks contained in
one selected folder automatically.
¡Direct Search
¡MPEG audio
This unit can handle a disc that supports MPEG audio
when it is connected to a MPEG decoder.
¡On-Screen Display
I
nformation about the current operation can be displayed on
a TV screen, allowing you to confirm the currently active
functions (such as Programmed playback), on the TV
screen using the remote control.
¡Search
Chapter search / Title search / Track search / Time search
¡Repeat
Chapter / Title / Track / Group / All / A-B
¡Zoom
¡Marker
The part designated by user can be called back.
¡Resume Play
¡Virtual Surround
¡Dimmer
The brightness of the Panel Display can be varied.
¡Bit Rate Indication
¡DRC (Dynamic Range Control)
You can control the range of sound volume.
¡Digital Gamma Setting
¡Video Out
When playing back an NTSC disc, select either PAL or
AUTO (NTSC) correspondingly to your TV set.
Precautions
■ SAFETY INFORMATION . . . . . . . . . . . . . . . . . . . . 2
Supplied Accessory . . . . . . . . . . . . . . . . . . . . . . . . 2
Symbols Used in This Manual . . . . . . . . . . . . . . . . 2
Features. . . . . . . . . . . . . . . . . . . . . . . . . . . . . . . . . 3
Ta b le of Contents . . . . . . . . . . . . . . . . . . . . . . . . . . 3
Location and Handling . . . . . . . . . . . . . . . . . . . . . . 4
Nonuse Periods . . . . . . . . . . . . . . . . . . . . . . . . . . . 4
No Fingers or Other Objects Inside. . . . . . . . . . . . . 4
Warning of Dew Formation . . . . . . . . . . . . . . . . . . . 4
Copyright . . . . . . . . . . . . . . . . . . . . . . . . . . . . . . . . 4
Copy Protection . . . . . . . . . . . . . . . . . . . . . . . . . . . 4
Notice for Progressive Scan Outputs . . . . . . . . . . . 4
If There Is Noise Interference on the TV
while a Broadcast Is Being Received . . . . . . . . . . 4
Maintenance . . . . . . . . . . . . . . . . . . . . . . . . . . . . . 4
Setup
■ About the Discs . . . . . . . . . . . . . . . . . . . . . . . . . . 5
Playable Discs . . . . . . . . . . . . . . . . . . . . . . . . . . . . 5
Unplayable Discs . . . . . . . . . . . . . . . . . . . . . . . . . . 5
■ Functional Overview . . . . . . . . . . . . . . . . . . . . . . 6
Front Panel . . . . . . . . . . . . . . . . . . . . . . . . . . . . . . 6
Display. . . . . . . . . . . . . . . . . . . . . . . . . . . . . . . . . . 6
Rear View . . . . . . . . . . . . . . . . . . . . . . . . . . . . . . . 6
■ About the Remote Control . . . . . . . . . . . . . . . . . . 7
Remote Control . . . . . . . . . . . . . . . . . . . . . . . . . . . 7
Installing the Batteries for the Remote Control . . . . 7
■ Connections . . . . . . . . . . . . . . . . . . . . . . . . . . . . . 8
Connection to a TV. . . . . . . . . . . . . . . . . . . . . . . . . 8
Basic TV connection. . . . . . . . . . . . . . . . . . . . . . . . 8
Connection to an Audio System . . . . . . . . . . . . . . . 9
Functions
■ Playback . . . . . . . . . . . . . . . . . . . . . . . . . . . . . . . 10
Zoom . . . . . . . . . . . . . . . . . . . . . . . . . . . . . . . . . . 11
Rapid Play . . . . . . . . . . . . . . . . . . . . . . . . . . . . . . 11
Playing the Disc Recorded in VR Mode
(Video Recording Format) . . . . . . . . . . . . . . . . . 11
■ MP3, JPEG Playback . . . . . . . . . . . . . . . . . . . . . 12
Kodak Picture CD. . . . . . . . . . . . . . . . . . . . . . . . . 12
Dual Playback . . . . . . . . . . . . . . . . . . . . . . . . . . . 13
Transition Mode . . . . . . . . . . . . . . . . . . . . . . . . . . 13
Adjustment of Picture Size . . . . . . . . . . . . . . . . . . 13
Folder Playback . . . . . . . . . . . . . . . . . . . . . . . . . . 13
■ On-Screen Display . . . . . . . . . . . . . . . . . . . . . . . 14
■ Search Function . . . . . . . . . . . . . . . . . . . . . . . . . 15
Track Search . . . . . . . . . . . . . . . . . . . . . . . . . . . . 15
Title / Chapter Search . . . . . . . . . . . . . . . . . . . . . 15
Time Search. . . . . . . . . . . . . . . . . . . . . . . . . . . . . 15
■ Marker Setup . . . . . . . . . . . . . . . . . . . . . . . . . . . 15
■ Repeat / Random / Programmed Playback . . . . 16
Repeat Playback . . . . . . . . . . . . . . . . . . . . . . . . . 16
Repeat A-B Playback . . . . . . . . . . . . . . . . . . . . . . 16
Random Playback . . . . . . . . . . . . . . . . . . . . . . . . 16
Programmed Playback . . . . . . . . . . . . . . . . . . . . . 16
■ Special Settings . . . . . . . . . . . . . . . . . . . . . . . . . 17
Subtitle Language . . . . . . . . . . . . . . . . . . . . . . . . 17
Audio Language . . . . . . . . . . . . . . . . . . . . . . . . . . 17
Camera Angles . . . . . . . . . . . . . . . . . . . . . . . . . . 17
Digital Gamma Setting . . . . . . . . . . . . . . . . . . . . . 17
Stereo Sound Mode . . . . . . . . . . . . . . . . . . . . . . . 18
Virtual Surround . . . . . . . . . . . . . . . . . . . . . . . . . . 18
■ DVD Setup . . . . . . . . . . . . . . . . . . . . . . . . . . . . . 18
LANGUAGE Setting . . . . . . . . . . . . . . . . . . . . . . . 19
DISPLAY Setting . . . . . . . . . . . . . . . . . . . . . . . . . 19
AUDIO Setting . . . . . . . . . . . . . . . . . . . . . . . . . . . 20
PARENTAL Setting . . . . . . . . . . . . . . . . . . . . . . . . 20
OTHERS Setting . . . . . . . . . . . . . . . . . . . . . . . . . 21
Reset to the Default Setting
(except for PARENTAL Setting) . . . . . . . . . . . . . 21
Information
■ Language List. . . . . . . . . . . . . . . . . . . . . . . . . . . 22
■ Specifications. . . . . . . . . . . . . . . . . . . . . . . . . . . 22
■ Troubleshooting Guide. . . . . . . . . . . . . . . . . . . . 23
E6146AD_0523 5/23/05 3:21 PM Page 3

Precautions
–4–EN
Copyright
No Fingers or Other Objects Inside
Do not put your fingers or objects on the disc tray.
Nonuse Periods
• When the unit is not being used, switch the unit to the
standby mode.
• When left unused for a long period of time, the unit should
be unplugged from the household AC outlet.
Copyright may exist in material you wish to record. Copying
such material without permission of the relevant licensee(s)
or owner(s) of the copyright is prohibited by law. SHARP is
not in a position to authorise the recording of copyright
works and nothing in this manual should be read or implied
as giving that authority.
• Do not stand the unit vertically. Install the unit in a horizon-
tal and stable position. Do not place anything directly on top
of the unit. Do not place the unit directly on top of the TV.
• Do not cover or place the unit in enclosed spaces to pre-
vent excessive temperature build up.
• Do not place the unit in direct sunlight, or near heat
sources.
• Depending on the environment, the temperature of the unit
may increase slightly. This is not a malfunction.
• Keep the unit away from strong magnetic objects.
• Do not place any object containing water or other liquids
on the unit. In the event that liquid should enter the cabi-
net, unplug the unit immediately and contact the retailer or
service centre approved by SHARP immediately.
• Do not remove the unit cabinet. Touching parts inside the
cabinet could result in electric shock and/or damage to the
unit. For service and adjustment inside the cabinet, call a
qualified dealer or service centre approved by SHARP.
• Be sure to remove a disc and unplug the AC power cord
from the output before carrying the unit.
Location and Handling
Servicing
1. Please refer to relevant topics in the “Troubleshooting
Guide” on page 23 before returning the product.
2. Do not attempt to service this unit yourself. Instead, unplug
it and contact a SHARP Approved Service Centre for
inspection. (Refer to page 23.)
3. Be sure the service technician uses authorised replace-
ment parts or their equivalents. Unauthorised parts may
cause fire, electrical shock, or other hazards.
4. Following any service or repair, be sure the service techni-
cian performs safety checks to certify that this unit is in
safe operating order.
Cleanning the cabinet
• Use a soft cloth slightly moistened with a mild detergent
solution. Do not use a solution containing alcohol, spirits,
ammonia or abrasive.
Cleaning discs
• When a disc becomes dirty, clean it with a cleaning cloth.
Wipe the disc from the centre out. Do not wipe in a circular
motion.
• Do not use solvents such as benzine, thinner, commercially
available cleaners, detergent, abrasive cleaning agents or
antistatic spray intended for analogue records.
Recommended measures for optimum picture excellence
This unit is a precision device constructed using extremely
accurate technology.
• The disc cannot be played if the disc drive component is
worn out or if the internal pick up lens is dirty.
• If this unit still does not perform properly although you refer
to the relevant sections and to “Troubleshooting Guide” on
page 23, the laser optical pickup unit may be dirty. Consult
a SHARP Approved Service Centre for inspection and
cleaning of the laser optical pickup unit.
Soiling or friction affecting the pickup lens or disc drive can
impair the image quality. At the worst, neither video nor audio
will be played back. To maintain optimum picture quality, the
Player should be serviced (cleaned and replacement of
some parts) every 1,000 hours. Note that this period varies
depending on the environment (temperature, humidity, dust,
etc.) in which the unit is used. Contact your authorised
SHARP supplier for details.
Disc handling
• When you handle a disc, hold it by its edge and try not to
touch the surface of the disc.
• Always store a disc in its protective case when it is not
used.
Maintenance
This unit supports Macrovision copy protection. On DVD
discs that include a copy protection code, if the contents of
the DVD disc are copied using a VCR, the copy protection
code prevents the videotape copy from playing normally.
Copy Protection
Consumers should note that not all high definition television
sets are fully compatible with this product and may cause
artifacts to be displayed in the picture. In case of picture
problems with 525 or 625 progressive scan output, it is rec-
ommended that the user switch the connection to the ‘stan-
dard definition’ output. If there are questions regarding your
TV set compatibility with this 525p or 625p DVD player,
please contact our customer service centre.
Notice for Progressive Scan Outputs
“Licensed under one or more of U.S. Pat. 4,972,484, 5,214,678,
5,323,396, 5,530,655, 5,539,829, 5,544,247, 5,606,618,
5,610,985, 5,740,317, 5,777,992, 5,878,080, or 5,960,037.”
Moisture may form inside the unit under the following condi-
tions:
• Immediately after a heater is turned on.
• In a steamy or humid room.
• When the unit is suddenly moved from a cold to warm
environment.
If moisture forms inside this unit, it may not operate properly.
In such case, turn on the power and waitfor more than 2
hours for the moisture to evaporate.
Warning of Dew Formation
This product incorporates copyright protection technology
that is protected by U.S. patents and other intellectual prop-
erty rights. Use of this copyright protection technology must
be authorized by Macrovision, and is intended for home
and other limited viewing uses only unless otherwise autho-
rized by Macrovision. Reverse engineering or disassembly
is prohibited.
U.S. Patent Nos. 4,631,603; 4,577,216; 4,819,098;
4,907,093; 5,315,448; and 6,516,132.
If There Is Noise Interference on the TV
while a Broadcast Is Being Received
Depending on the reception condition of the TV, interference
may appear on the TV monitor while you watch a TV broad-
cast and the unit is left on. This is not a malfunction of the
unit or the TV. To watch a TV broadcast, turn off the unit.
E6146AD_0523 5/23/05 3:21 PM Page 4

Setup
–5–EN
Setup
About the Discs
Playable Discs
DVD-Video
* 1, 2, 3 or
* 1, 3, 4, 5,
6, 8, 9
DVD-RW
DVD-R
* 3, 5, 10
Audio CD
* 3, 5
Video CD
Kodak
Picture
CD
Digital video
(MPEG2)
_
_
_
_
Digital audio
or
MP3
or
JPEG
JPEG
Digital audio
Digital video
with audio
Region code
Mark (logo)
Playable
discs
Recorded
signals Disc size Disc types
12 cm
or
8 cm
12 cm
or
8 cm
12 cm
12 cm
Example Title 1 Title 2
Chapter 1 Chapter 2 Chapter 1 Chapter 2
Chapter 3 Chapter 4
DVD+RW
DVD+R
* 1, 3, 4, 5,
7, 8, 9
_
_
* 3, 4, 5,
8, 9, 10
CD-RW
CD-R
Example
Tr a c k 1 Tr a c k 2 Tr a c k 5 Tr a c k 6
Tr a c k 3 Track 4
Video CD
or
Audio CD
Example Group 1 Group 2
Tra c k 1 Trac k 2 Tra c k 5 Tra c k 6
Tra c k 3 Tr a ck 4
MP3
or
JPEG
EN
If you cannot play back a disc which bears one of the marks above, check the following notes.
*1: This unit conforms to the PAL colour system. Also you can play back discs recorded with the NTSC system via a PAL sys-
tem TV set.
*2: Certain DVD-Video discs do not operate as described in this manual due to the intentions of the disc’s producers.
*3: Scratched or stained discs may not be played back.
*4: Some discs cannot be played back because of incompatible recording conditions, characteristics of the recorder or spe-
cial properties of discs.
*5: You can play back discs which bear the marks above. If you use nonstandardised discs, this unit may not play them back.
Even if they are played back, the sound or video quality will be compromised.
*6: Depending on the recording status of a disc, the disc may not be played back at all or normally (the picture or sound may not be
smooth, etc.). In this case, you need to finalise the disc with the DVD recorder. Refer to the manual accompanying the DVD recorder.
*7: Only the discs recorded in the video mode and finalised can be played back.
Unfinalised discs cannot be played back. Depending on the recording status of a disc, the disc may not be played back at
all or the picture or sound may not be smooth, etc.
*8: If the recorded portion of the disc is too small (less than 55 mm across), it may not play back properly.
*9: Do not glue paper or put stickers on to the disc. These may damage the disc, and the unit may not read it correctly.
*10: Also DTS CD is available when the unit is connected to the DTS decoder.
:This label indicates playback compatibility with DVD-RW discs recorded in VR mode (Video Recording Format).
NOTE:
• This unit cannot play back the DVD-RW/-R recorded of the once-copy programmes.
• This unit cannot play back the DVD-R discs recorded in VR mode (Video Recording Format).
• 8 cm disc is not available on some media.
Unplayable Discs
¡NEVER play back the following discs. Otherwise, malfunction may result:
DVD-RAM, CD-I, Photo CD, DVD with region codes other than 4 or ALL,
DVD-ROM for personal computers, CD-ROM for personal computers
¡On the following disc, the sound MAY NOT be heard.
Super Audio CD
¡Any other discs without compatibility indications.
Hint
Hint
• Only the sound recorded on the nor-
mal CD layer can be delivered.
The sound recorded on the high
density Super Audio CD layer can-
not be delivered.
ABOUT THE PBC FUNCTION OF VIDEO CD
This unit conforms to ver.1.1 and ver.2.0 of Video CD standard, with PBC function.
Ver.1.1 (without PBC function): You can enjoy playback picture as well as music CD.
Ver.2.0 (with PBC function): When using a Video CD with PBC function, “Pbc”
appears on the display.
What is PBC? “PBC” stands for
the Playback Control. You can
play interactive software using a
menu screens. Refer to instruc-
tions of Video CD.
E6146AD_0523 5/23/05 3:21 PM Page 5

Setup
–6–EN
Functional Overview
Front Panel
Display
Rear View
1. OPERATE
To switch the unit ON or OFF.
2. PLAY BB
To start or resume disc playback.
3. STOP CC
To stop playback.
4. SKIP jj/REV hh
Goes to previous chapter or track during playback; press
and hold for 1.5 seconds for a reverse search.
OPERATE
REV
243519768
AUDI O OUT
DIGITAL AUDIO OUT
COAXIALOPTICAL
LY
VIDEO
OUT CB / PBS-VIDEO
OUT
CR / PRCOMPONENT
VIDEO OUT
R
11 13 14 161512
10
4
5. SKIP /FWD gg
Goes to next chaper or track during playback; press and
hold for 1.5 seconds for a forward search.
6. OPEN/CLOSE AA
To open/close the disc tray.
7. Disc Tray
8. Remote Sensor Window
9. Display
jj
10. MAINS (AC Power Cord)
Connect to a standard AC outlet.
11. OPTICAL (DIGITAL AUDIO OUT)
Connect to digital (optical) audio equipment.
12. COAXIAL (DIGITAL AUDIO OUT)
Connect to AUDIO inputs of a digital (coaxial) audio equip-
ment.
13. AUDIO OUT
Connect to AUDIO inputs of an amplifier, receiver, or stereo
system.
14. VIDEO OUT
Connect to the Video Input of a TV.
15. COMPONENT VIDEO OUT
Connect to a TV with Component video in jacks.
16. S-VIDEO OUT
Connect to a TV with S-Video inputs.
CAUTION:
• Do not touch the inner pins of the jacks on the rear panel.
Electrostatic discharge may cause permanent damage to the
unit.
Lights up when the inserted
disc is being played back.
Displays a type of the disc
which is inserted on the tray.
• DVD: DVD
• CD : Audio CD, MP3, JPEG, Kodak Picture CD
• VCD: Video CD
Lights up when the
inserted disc comes
to a pause.
Lights up when the
A-B repeat function
is on.
Lights up when the
repeat function is on.
Lights up when playing back
in slow mode (DVD, Video CD).
Displays how long the current title
or track has been played back. When
a chapter or track is switched, the
number of a new title, chapter or
track is displayed.
Lights up when
the ALL repeat
function is on.
GROUP P.SCAN
DVD
VCD
Lights up when the
progressive scan
system is activated.
Power on
No disc inserted or
cannot read
Tray open
Tray closed
Loading the Disc
Power off
Lights up when the playback
control is activated (VCD).
E6146AD_0523 5/23/05 3:21 PM Page 6

Setup
EN
Button
(Alphabetical order)
Disc
• Press to select chapter or title
directly. •
Press to select track directly.
• (up/down/left/right) Press to
select an item in the menu and
to move the cursor.
• (up/down/left/right) Press to
select an item in the menu and
to move the cursor.
• Press to select a desired sound
mode (VCD, CD).
• Press to select a desired audio
language or sound mode.
• Press to skip chapters or titles.
• Displays the title menu.
• Enlarges part of a DVD-
reproduced image.
• Press to enter the setup mode
or to change setup items.
• Press to enter the setup mode
or to change setup items.
• Press to select a desired
subtitle language.
• Press to skip tracks.
• Press to return to the first hierarchy in
the programme and file list when the
file list is the second hierarchy or
deeper (MP3, JPEG).
• Press to clear the markers or
the incorrect input.
• Press to adjust the brightness
of the Panel Display.
• Press to adjust the brightness
of the Panel Display.
• Press to clear the markers or
the incorrect input.
• Press to display the current
playback mode.
• Press to display the current
playback mode.
•
Fast forwards playback to a desired point.
•
Press to begin slow forward playback
during the pause mode.
•
Fast forwards playback to a desired point.
•
Press to begin slow forward playback
during the pause mode (VCD).
• Press to adjust the black parts of
the picture brighter (VCD).
• Press to insert discs into or
remove them from the tray.
• Press to display the DVD
menus.
• Press to insert discs into or
remove them from the tray.
• Press to display the MP3 or
JPEG file lists.
• Press to turn the power on and
off.
• Press to turn the power on and
off.
• Fast reverse playback to a
desired point.
• Press to begin playback. • Press to begin playback.
•
Fast reverse playback to a desired point.
•
Press to begin slow reverse
playback during the pause mode.
• Press to pause playback or to
advance playback one frame at
a time. • Press to pause playback.
• Press to stop playback. • Press to stop playback.
• Enlarges part of a reproduced
image (VCD, JPEG).
• Repeats playback of a selected
section.
• Press to change the camera
angle to see the sequence
being played back from a
different angle (DVD Video).
• Press to search chapter, title or
time.
• Press to search track.
• Press to search time (VCD,CD).
• Activates Virtual Surround or
Rapid Play.
• Returns to the previous
operation.
• Returns to the previous
operation.
• Repeats playback of the
current disc, title or chapter.
• Press to adjust the black parts
of the picture brighter.
• Press to accept a setting.
• Press to call back the Marker
display.
• Repeats playback of a selected
section (VCD, CD).
• Repeats playback of the
current disc, group or track.
•
Activates programmed playback,
random playback or folder playback
mode (CD, MP3, JPEG).
•
Activates the 3D sound (VCD, CD).
• Press to accept a setting.
• Press to call back the Marker
display (VCD, CD).
ON
SCREEN
SETUP
MARKER
MODE
GAMMA
ZOOM
TITLE
MENU
A-B REPEAT
OPEN/
CLOSE
SUBTITLE
OPERATE
ENTER
1 2 3
6
54
7
0
+
10
8 9
AUDIO
ANGLE
REPEAT
SKIP
PLAY
REV
FWD
STILL/PAUSE
DIRECT SKIP
STOP
RETURN
CLEAR
C
DIMMER
–7–
About the Remote Control
STILL/PAUSEDIRECT SKIP
RETURN
ZOOM
MODE
SUBTITLE
MARKER
MENU
SKIP
REPEAT
A-B REPEAT
ANGLE AUDIO
CLEAR
TITLE
STOP
PLAY
FWD
REV
SETUP
DIMMER
ENTER
OPEN/
CLOSE
GAMMA
ON
SCREEN
OPERATE
1 2 3
6
54
7
0
+10
8 9
C
Remote Control
a
Installing the Batteries for the
Remote Control
OPERATE
RETURN
ZOOM
MODE
SUBTITLE
MARKER
MENU
SKIP
REPEAT
A-B REPEAT
ANGLE AUDIO
CLEAR
TITLE
SETUP
DIMMER
ENTER
OPEN/
CLOSE
GAMMA
ON
SCREEN
OPERATE
1 2 3
6
54
7
0
+10
8 9
C
REV
Install two AA size (R-6) batteries (supplied)
matching the polarity indicated inside battery
compartment of the remote control.
Keep in mind the following when using the
remote control:
• Make sure that there is no obstacle between
the remote control and the remote sensor on
the unit.
• The maximum operable range as follows;
Beeline: approximately 7 m (23 feet)
Either side of centre:
approximately 5 m (16 feet) within 30 degrees
Above:
approximately 5 m (16 feet) within 15 degrees
Below:
approximately 3 m (10 feet) within 30 degrees
Hint
Hint
• Do not mix alkaline and manganese batteries.
• Do not mix old and new batteries.
E6146AD_0523 5/23/05 3:21 PM Page 7

Setup
–8–EN
Connection to a TV
If your TV is compatible with 525 or 625 progressive scanning and you want to enjoy
that high quality picture;
You must select the connection Method 3 above and progressive scanning mode. To set the mode, set “PROGRESSIVE” to
“ON” in the DISPLAY menu so that “P.SCAN” will appear on the display of this unit. See pages 18, 19 for more details.
• You can set “PROGRESSIVE” to “OFF” either in the DISPLAY menu or by pressing and holding PLAY BBon the front of
the unit for more than 5 seconds.
• When “PROGRESSIVE” is “ON”, video signals from the unit’s VIDEO OUT and S-VIDEO OUT jacks will be distorted or
not be output at all.
If your TV is not compatible with progressive scanning;
Use this unit in interlace mode. Make sure that no “P.SCAN” is on the display of this unit. If so, set “PROGRESSIVE” to
“OFF” in the DISPLAY menu so that “P.SCAN” on the display of this unit will disappear.
CAUTION:
• Be sure to turn off the unit and equipment to be connected before connecting.
• Read through the Operation Manual for the equipment to be connected.
• Be sure that the colours of the jacks and plugs match up when connecting the cable.
• Be sure to keep the unit connection cables separate from the TV antenna cable when you install the unit, because it
may cause electrical interference when you are watching television programmes.
• DTS audio cannot be produced with an analogue connection.
Basic TV connection
CAUTION:
• Connect the unit directly to the TV. Do not connect the unit to a VCR,
then connect the VCR to the TV. Copyright protection in the VCR could
distort the picture playing on the unit.
VCR
This unit
TV
NOTES:
• If you want to listen to the audio through audio equipment, connect only the S-Video or Video cable to the TV.
• When the unit is connected to a TV using both a Video cable and an S-Video cable, only the S-Video connection is
enabled (the Video connection is disabled).
• You will not be able to hear all of the sound being output by the unit if you use the Video/Audio cable (supplied) to a
monaural TV that has only one AUDIO input jack.
Connections
AUDIO OUT
DIGITALAUDIO OUT
COAXIALOPTICAL
LY
VIDEO
OUT C
B
/ P
B
S-VIDEO
OUT
C
R
/ P
R
COMPONENT
VIDEO OUT
R
4
AUDIO IN
LR
AUDIO OUT L
R
VIDEO IN
Y
VIDEO
OUT
S-VIDEO
OUT
S-VIDEO IN
CB
Y
CR
COMPONENT
VIDEO IN
or
PB
Y
PR
Y
CB / PB
CR / PRCOMPONENT
VIDEO OUT
(Analogue) AUDIO OUT VIDEO OUT
TV
Method 1
Good pictureBasic Audio
Method 2 Method 3
Better picture Best picture
S-VIDEO OUT COMPONENT VIDEO OUT
Video
cable
(supplied)
Audio cable
(supplied)
S-Video
cable
(commercially
available)
Component
Video cables
(commercially
available)
This unit
E6146AD_0523 5/23/05 3:21 PM Page 8

Setup
–9–EN
Connection to an Audio System
DPCM OFF
BITSTREAM
SETUP > (QUICK) >
DOLBY DIGITAL
DTS MPEG
Connecting to the
other equipment
(an MD deck or
DAT deck etc.)
without Dolby
Digital decoder.
* To complete these settings, refer to pages 18, 20.
Hint
Hint
•The audio source on a disc in a Dolby Digital 5.1 chan-
nel surround format cannot be recorded as digital
sound by an MD or DAT deck.
•By hooking this unit up to a Multi-channel Dolby Digital
decoder, you can enjoy high-quality Dolby Digital 5.1
channel surround sound as heard in the movie theatres.
•By hooking this unit up to the DTS decoder, you can
enjoy 5.1 channel surround system which reproduces
the original sound as truthfully as possible. 5.1 channel
surround system is developed by the Digital Theater
System Inc.
•Playing back a DVD using incorrect settings may gener-
ate noise distortion and may also damage the speakers.
OFF DPCM
SETUP > (QUICK) >
DOLBY DIGITAL
DTS MPEG
Connecting to
Stereo System.
Setting
Connection
* To complete these settings, refer to pages 18, 20.
Hint
Hint
•Playing back a DVD using incorrect settings may gener-
ate noise distortion and may also damage the speakers.
Optical cable (not supplied)
•Optical cable (not supplied) may be damaged when bent at sharp angles. Ensure cables are coiled in loops with a diame-
ter of 15 cm or more when storing them.
•Use a cable which is 3 m or shorter.
•Insert cable plugs firmly into the connectors when making connections.
•If a plug has dust or is dirty, clean it with a soft cloth before inserting it into a connector.
AUDIO OUT
DIGITAL AUDIO OUT
COAXIALOPTICAL
LY
VIDEO
OUT C
B
/ P
B
C
R
/ P
R
COMPONENT
VIDEO OUT
R
LR
L
R
COAXIAL
AUDIO OUT
DIGITAL AUDIO OUT
COAXIALOPTICAL
LY
VIDEO
OUT C
B
/ P
B
C
R
/ P
R
COMPONENT
VIDEO OUT
R
OPTICAL
or
or
or
AUDIO
This unit
Method 1
Analogue audio
input jacks
Digital audio
input jack
(Analogue)
AUDIO OUT
DIGITAL AUDIO OUT
Method 2
Audio cable
(supplied) Audio Coaxial or
Optical Digital cable
(commercially
available)
Dolby Digital decoder, DTS decoder, MPEG
decoder, MD deck or DAT deck
Stereo system
DPCM
Connection
Setting
Connecting to a
Dolby Digital, DTS
decoder or MPEG
decoder for Dolby
Digital, DTS or
MPEG audio output.
DPCM
E6146AD_0523 5/23/05 3:21 PM Page 9

Functions
–10 –EN
Before:
Tu rn on the TV, amplifier and any other equipments
which are connected to this unit. Make sure the TV and
audio receiver (commercially available) are set to the cor-
rect channel.When you play NTSC recorded discs, the
default setting converts this to a modified PAL. (See page
19 “DISPLAY Setting”.)
1
12
2
3
3
Functions
4
4
OPERATE
DISC menu
Some discs contain menus which allow you to customise
disc playback.
Use Cursor KK/ LL/ ss/ BBor the Number buttons to select
an item, then press ENTER or PLAY B.
Calling up a Menu Screen (for playback of a DVD Video)
•Press MENU to call up the DVD menu.
•Press TITLE to call up the title menu.
Cancelling the PBC (for playback of a Video CD)
Insert a Video CD. (Playback will start automatically.)
Press STOP C.
Enter track number of your choice with the Number
buttons.
PBC is now cancelled and the playback of the Video CD
will start.
4
4
3
3
2
2
1
1
Paused and Step-by-Step Playback
Press STILL/PAUSE Fduring playback.
•Playback will be paused and sound will be muted.
•Press STILL/PAUSE Fonce during Dual/Folder Playback to
pause a JPEG file only. Press STILL/PAUSE Fone more
time to pause an MP3 track.
To continue playback, press PLAY B.
The disc goes forward by one frame each time
STILL/PAUSE Fis pressed during the pause mode.
To continue playback, press PLAY B.
(
page 12
)
Hint
Hint
•You can change the On-Screen language in “PLAYER MENU”
setting. (Refer to pages 18, 19.)
•When you play back MP3 or JPEG files, details are on page 12.
•A“prohibited icon” may appear at the top-right on
the TV screen when the operation is prohibited by
the disc or this unit.
•Some DVDs may start playback from title 2 or 3 due to specific
programmes.
•During the playback of a 2-layered disc, pictures may stop for a
moment. This happens while the 1st layer is being switched to
the 2nd layer. This is not a malfunction.
•ADVD-RW disc recorded in the VR mode may freeze momen-
tarily during playback depending on how the playlist was made
and edited (deleted titles, repeated recording).
Operations described after this section are mainly based on the remote control use. Some operations can be carried out on main unit.
Playback
Hint
Hint
•On DVDs, set “STILL MODE” to “FIELD” in the Display menu if pic-
tures in the pause mode are blurred. (Refer to pages 18, 19.)
Hint
Hint
•If the feature is not available, symbol may appear on the TV
screen.
•Menu operations may vary depending on the disc. Refer to the
manual accompanying the disc for more details.
Resume
Press STOP Cduring playback.
Resume message will appear
on the TV screen.
Press PLAY B, playback will
resume from the point
at which playback was stopped.
Hint
Hint
•To cancel resume, press STOP Cone more time during the stop
mode. On some discs, STOP Cwill not work while the Resume
message appears. Please wait until the message disappears.
•For MP3 and JPEG, playback will resume from the beginning of the
track at which playback was stopped.
•
The resume information will be kept even when the power is turned off.
Fast Forward/Reverse Search
Press FWD
g
or REV
h
repeatedly during
playback to select the required forward or
reverse speed.
To continue playback, press PLAY B.
E1
Hint
Hint
•On DVDs, set "STILL MODE" to "FIELD" in the DISPLAY menu if
pictures during fast forward and reverse search are blurred.
•For DVDs, fast forward or reverse search speed is different
depending on the disc.
•For DVDs, approximate speed is 1(x2), 2(x8), 3(x20), 4(x50) and
5(x100).
•For Audio CDs, Video CDs and MP3, approximate speed is 1(x2), 2(x8)
and 3(x30).
•For Audio CDs and MP3, sound will be output during Fast Forward
or Reverse Search.
•If you are using FWD gor REV hon the front panel, press
and hold it for more than 1.5 seconds. When you reach the desired
speed, release the button.
Insert a disc with
label facing up.
Press 'PLAY' to play from here.
To play the beginning,
press 'STOP' first and then 'PLAY'.
Resume ON
<Example : DVD>
OPERATE
REV
STILL/PAUSEDIRECT SKIP
RETURN
ZOOM
MODE
SUBTITLE
MARKER
MENU
SKIP
REPEAT
A-B REPEAT
ANGLE AUDIO
CLEAR
TITLE
STOP
PLAY
FWD
REV
SETUP
DIMMER
ENTER
OPEN/
CLOSE
GAMMA
ON
SCREEN
OPERATE
1 2 3
6
54
7
0
+10
8 9
C
1
1
4
4
3
3
1
1
1
12
2
3
3
To stop playback.
1
1
3
3
3
34
4
E6146AD_0523 5/23/05 3:21 PM Page 10

Functions
–11 –EN
4
4
3
3
Slow Forward/Slow Reverse
Press FWD
g
or REV
h
repeatedly during the
pause mode to select the required forward or reverse speed.
To continue playback, press PLAY B.
1
The zoom function allows you to enlarge the video image
and to pan through the enlarged image.
Hint
Hint
•Zooming function does not work while the disc menu is showing up.
•x4 zoom is not available on some discs.
•Only x2 zoom is available on Video CDs and JPEG.
•You may not be able to move zoomed JPEG pictures.
•Zooming function is also available during pause mode.
Rapid Play function is available only during playback.
Available only on discs recorded in the Dolby Digital format,
Rapid Play plays back in slightly faster/slower speed with
sound that is close to normal playback quality.
Hint
Hint
•Audio (language) setting cannot be changed while using this mode.
•Virtual Surround and Digital Gamma settings cannot be changed
while using this mode.
•Virtual Surround does not function while using this mode.
•This feature may not work at some point in a disc.
•When using digital audio connection, the DPCM sound will be out-
put.
Hint
Hint
•PLAYLIST will not be displayed when it has not been made.
•Resume playback will not be possible if you change the setting.
•When discs recorded in VR mode, changing the audio (MAIN, SUB
or MAIN+SUB) is effective only when using an analogue connec-
tion. Although you may be able to change the settings of the on-
screen display, it will not affect the sound when using a digital con-
nection.
1
1
OFF
3
3
During playback, press MODE.
• The current setting appears.
To continue normal playback.
2
2DVDs recorded in VR mode can have a PLAYLIST assigned
to alter the order or content to be played back. If a PLAYLIST
has been created, you can choose the ORIGINAL or
PLAYLIST option.
1
1
2
2
ORIGINAL PLAYLIST
1 PLAYLIST1
2 PLAYLIST2
3 PLAYLIST3
4 PLAYLIST4
5 PLAYLIST5
6PLAYLIST6
3
3
To select the desired title. To decide.
or
ORIGINAL: A list of titles which are recorded with a DVD recorder.
PLAYLIST : A list of titles which is made based on the ORIGINAL
edited list.
ORIGINAL PLAYLIST
1 ORIGINAL1
2 ORIGINAL2
3 ORIGINAL3
4 ORIGINAL4
5 ORIGINAL5
6ORIGINAL6
Press MENU in stop mode.
• The current setting screen will
appear.
• Pressing MENU during playback
is not valid.
or
ORIGINAL
1 ORIGINAL1
2 ORIGINAL2
3 ORIGINAL3
4 ORIGINAL4
5 ORIGINAL5
6ORIGINAL6
1
1
During playback, press ZOOM.
• The picture becomes twice as large.
Press ZOOM repeatedly to change
the zoom factor: “x2”, “x4” or “OFF”.
Once a desired zoom factor is set,
use Cursor K/ L/ s/ Bto slide the
zoomed picture across the screen.
To exit zoom function, press
ZOOM repeatedly to select “OFF”.
Rapid Play
Zoom
2
2
:
Plays back approximately at 0.8 times of normal playback.
:
Plays back approximately at 1.3 times of normal playback.
OFF : No effects.
Press ENTER or Cursor {/Bto switch among “ (x1.3)”,
“(x0.8)” and “OFF”.
oror
or
a
Playing the Disc Recorded in VR Mode
(Video Recording Format)
Hint
Hint
•Slow forward or reverse speed is different depending on the disc.
Approximate speed is 1(1/16), 2(1/8) and 3(1/2).
•On DVDs, set “STILL MODE” to “FIELD” in the Display menu if pic-
tures in the slow playback mode are blurred. (Refer to page 19.)
•If you are using FWD gor REV hon the front panel, press
and hold it for more than 1.5 seconds. When you reach the desired
speed, release the button.
•You cannot play back Video CDs in reverse slow motion.
E6146AD_0523 5/23/05 3:22 PM Page 11

Functions
–12 –EN
Kodak Picture CD
The unit can also run JPEG files stored
on Kodak Picture CDs. The Picture CD
is a service to convert photographs
taken by a conventional film camera
into digital data and write the data on a
CD. The user can enjoy picture images
on the television set by playing back
the Picture CDs.
For details of Kodak Picture CD, con-
tact a shop that deals with developing
service of Kodak Inc.
1
1
Picture 1 Picture 2 Picture 3
Picture 4
Current track number /
the number of total tracks
Picture 5 Picture 6
1/32
2
2
•
If all menu items cannot be displayed in
the screen scope, “
G
”appears at the
right bottom of the screen, indicating that
the user can view remaining items on
the next page. “
H
”appears, it indi-
cates that the user can view other items
on the previous page. The track number
of the currently highlighted item and the
total tracks are shown at the centre bot-
tom of the screen.
•If “G”is shown at the right bottom,
use SKIP Gto view the next page. If
“H”is shown at the left bottom, use
SKIP Hto view the previous page.
•It may take some time until all menu
items are displayed on the menu
screen.
•If a Kodak Picture CD file is select-
ed, an image will be played back
from the selected track and go to
the next one in turn.
or
To select a
desired track.
To playback.
Hint
Hint
•Atrack is displayed for 5 seconds and then
the next track is displayed.
•Every press on Cursor Bwill turn the
image clockwise by 90 degrees when an
image is displayed. A press on Cursor s
will turn the image counterclockwise by 90
degrees.
•If a group is selected, press Cursor K/ L
to select a desired group, then press
Cursor B, PLAY Bor ENTER to select a
track.
2
2
Hint
Hint
• Some selections may take a while to be recognised.
• Press TITLE to return to the 1st item.
• Press MENU or RETURN to go back to the opening display.
• Folders are known as Groups; files are known as Tracks.
• Folders, MP3 files and JPEG files are displayed respectively as , and .
• A maximum of 255 folders or 999 files may be recognised in one disc.
• Up to 8 hierarchies can be recognised in one folder. Files in the 9th or deeper hierarchies can-
not be played back.
• This unit can play back images and sounds from data recorded in MP3 and JPEG formats
on CD-RW/-R discs.
• A file with an extension of “.mp3 (MP3)” is called an “MP3 file” and a file with an extension
of “.jpg (JPG)” or “.jpeg (JPEG)” is called a “JPEG file”.
• The unit can run an image file conforming to the Exif specification. Exif is a file format,
Exchangeable Image File format established by Japanese Electronic Industry Development
Association (JEIDA).
• Files whose extension is other than “.mp3 (MP3)”, “.jpg (JPG)” and “.jpeg (JPEG)” will not
be listed in the MP3 or JPEG menu.
• If the file is not recorded in MP3 or JPEG format, noise may be produced even if the file
extension is either “.mp3 (MP3)”, “.jpg (JPG)” or “.jpeg (JPEG)”.
• The name of group and track can be displayed in up to 25 characters. Unrecognisable char-
acters will be replaced with asterisks.
• Unplayable groups or tracks may be displayed depending on the recording conditions.
• If TITLE is pressed when a FILE LIST is displayed, the 1st item will be highlighted.
• Progressive JPEGs (JPEG Files saved in the progressive format) will not play on this unit.
Refer to “Resume” on page 10.
MP3, JPEG Playback
Insert a MP3 or JPEG-format disc, then
press MENU to call up the FILE LIST
on the TV screen.
1
1
folder name 4
folder name 1
folder name 3
folder name 2
folder name 1
DISC NAME
FILE LIST
FOLDER
MP3
JPEG
ENTER
PLAY
file name 1
file name 2
file name 1
1/ 2
MP3 or JPEG is a method of compressing files. You can copy MP3 or JPEG files on CD-RW/-Rs from the computer and play
back the files on this unit.
When selecting the folder:
• Press Cursor BBwhen
you want to go to the
next hierarchy.
• Press Cursor sswhen
you want to go back to
the previous hierarchy
(except for the top hier-
archy).
or
Applicable MP3 file Remarks Applicable JPEG file Remarks
Sampling frequency:
44.1kHz or 48kHz
Constant bit rate:
32kbps ~ 320kbps
For MP3 file record-
ed in Variable Bit
Rate (VBR), the
unit may not display
the actual elapsed
time.
Normal playback
Upper limit: 6,300 x 5,100 dots
Lower limit: 32 x 32 dots
File size: Max. 5MB
Dual playback
Upper limit: 4,000 x 4,000 dots
Lower limit: 32 x 32 dots
File size: Max. 3MB
A JPEG image that
extends beyond the
screen is reduced
so that it will be dis-
played within the
screen.
This unit recommends the files recorded under the following circumstances:
E6146AD_0523 5/23/05 3:22 PM Page 12

Functions
–13 –EN
2
2
1
1
Dual Playback
Transition Mode
Adjustment of Picture Size
Folder Playback
You can switch to the Transition Mode
for JPEG files during playback.
This function lets you play back MP3 and
JPEG files simultaneously.
Available only when Dual Playback is ON.
See pages 18, 21 on how to set the Dual
Playback ON or OFF.
To switch “CUT IN/OUT”
or “FADE IN/OUT”.
CUT IN/OUT:
The entire image appears in one
time.
FADE IN/OUT:
The image appears gradually and
then disappears.
Hint
Hint
•To cancel Dual Playback, press MENU
again at step [1].
•If you press PLAY Bdirectly after you
inserted a disc which contains both MP3
tracks and JPEG files and if the
“DUAL PLAYBACK” setting is “ON”, Dual
Playback will start automatically.
•If you press FWD gor REV hduring
Dual Playback, a JPEG file will be paused.
•Zooming or rotating a JPEG file during
Dual Playback may cause an intermittent
sound.
•Depending on the data size of each file,
Dual Playback may not function properly.
(Refer to “Applicable JPEG file” on page 12.)
Hint
Hint
•The Transition mode cannot be switched
when it is stopped, or from the FILE LIST
screen or the Picture CD menu screen.
•The default setting is “CUT IN/OUT”.
1
1
folder name 4
folder name 1
folder name 3
folder name 2
folder name 1
DISC NAME
FILE LIST
FOLDER
MP3
JPEG
ENTER
PLAY
file name 1
file name 2
file name 1
1/ 2
2
2
or
To playback.To select a desired
MP3 or JPEG file
from the FILE LIST.
CUT IN/OUT
FADE IN/OUT
or
or
3
3
or
3
3
Hint
Hint
•The setting screen will not be displayed
while in the stop mode or from the FILE
LIST.
•This feature may have no effect on some
files (e.g. Files with a small picture size).
•The default setting is “NORMAL”.
2
2
1
1
To switch “NORMAL” or
“SMALL”.
NORMAL:
To display the image at 100% of the
picture size.
SMALL:
To display the image at 95% of the
picture size.
NORMAL
SMALL
This function lets you play all the files and
tracks contained in one selected folder
automatically.
If the folder contains both MP3 and JPEG
files, the Dual Playback will begin auto-
matically within that folder.
Available only when Dual Playback is ON.
See pages 18, 21 on how to set the Dual
Playback ON or OFF.
Depending on the TV connected to this
unit, the overall picture cannot be dis-
played and the edge of the picture can
be cut off. In this case, you can adjust
the size of the JPEG playback image
on screen.
1
1
folder name 4
folder name 1
folder name 3
folder name 2
folder name 1
DISC NAME
FOLDER LIST
FOLDER
ENTER
PLAY
ALL
1/ 1
2
2
To playback.
To select a desired folder
from the FOLDER LIST.
Hint
Hint
•To cancel Folder Playback, press MODE
again at step [1].
•If you press FWD gor REV hduring
Folder Playback, a JPEG file will be
paused.
•Zooming or rotating a JPEG file during
Folder Playback may cause an intermittent
sound.
•Depending on the data size of each file,
Folder Playback may not function properly.
(Refer to “Applicable JPEG file” on page 12.)
Press repeatedly until
“”appears.
Press repeatedly until
“”appears.
or
oror
E6146AD_0523 5/23/05 3:22 PM Page 13

Functions
–14 –EN
Current repeat setting
appears only when the repeat
setting is active.
C:Chapter repeat
T:Title repeat
AB:A-B repeat
A:All repeat
T (Track):
Current track number / Total
tracks
Current repeat setting
appears only when the
repeat setting is active.
T:Track repeat
A:All Tracks repeat
AB:A-B repeat
ALL:
Current track number / Total
tracks
Elapsed time of the current
track
Remaining time of the cur-
rent track
Elapsed time of the entire
disc
Remaining time of the entire
disc
Current playback status
4
4
4/12 0:03:21 - 0:02:15 T
4/12 0:13:45 - 0:45:40 T
C (Chapter):
Current chapter number /
Total chapters
T (Title):
Current title number / Total
titles
Current repeat setting
appears only when the repeat
setting is active.
C:Chapter repeat
T:Title repeat
AB:A-B repeat
11/16 0:00:00 - 0:03:30
1/3 0:00:00 - 1:23:45
TL1
BIT RATE: The amount of
audio and video data currently
being read.
Elapsed time of the current
chapter
Remaining time of the current
chapter
Elapsed time of the current
title
Remaining time of the current
title
Layer numbers, appears only
when playing back a two-lay-
ered disc.
L0: Layer 0 is playing.
L1: Layer 1 is playing.
Current playback status
1
1
2
2
3
3
1
1
2
2
3
3
Hint
Hint
•When the Dual Playback is ON, MP3 and JPEG file name will be
displayed.
Hint
Hint
•When you are playing back a disc in PROGRAM or RANDOM mode,
PROGRAM (or RANDOM) will be displayed instead of .
2
2
On-Screen Display
You can check the information about the current disc by pressing ON SCREEN on the remote control.
Angle icon, appears only
when available on the DVD.
A ORG
List status
ORG :Original is playing.
PL :Playlist is playing.
TRACK 01
1/36 0:01:15 T
The name of the file currently
in playback will be displayed.
Current Repeat setting, if
active
T:Track repeat
G: Group (folder) repeat
A: Disc repeat
Elapsed playing time of the
current track
PROGRAM RANDOM
or
T (Track):
Current Track number / total
tracks
Current playback status
1
1
2
2
3
3
4
4
(Only when you are playing back a disc in PROGRAM
or RANDOM mode.)
E6146AD_0523 5/23/05 3:22 PM Page 14

Functions
–15 –EN
Marker Setup
1
1
1
1
1
1
2
2
1
1
Search Function
Time Search
2
2
Within 30 seconds.
1:29:00
TOTAL
1:29:00
TOTAL
1
1
MARKER
2
2
3
3
To return to the marker later
2
2
3
3
At the desired marker
• Playback will restart from the specific
point which you set.
To exit the Marker display
1
1
or
Press repeatedly until
“”appears.
•For the discs with less than 10 tracks,
press the track number directly.
•+10 button can also bring up the Track
Search display.
•For discs with 10 or more but less
than 100 tracks, to play back a single-
digit track, press 0first, then the track
number (e.g. for track 3, press 0, 3).
To play back a double-digit track,
press the track number.
•For discs with 100 or more tracks, to
play back a single or a double-digit
track, press 0first, then the track num-
ber (e.g. for track 3, press 0, 0, 3, and
for track 26, press 0, 2, 6). To play
back a triple-digit track, press the
track number.
Track Search
Using DIRECT SKIP
Within 30 seconds.
/29
/29
Title / Chapter Search
Using DIRECT SKIP
1
1
2
2
Within 30 seconds.
/12
/12
Press once for the
Chapter Search.
Press twice for the
Title Search.
1
1
T 1 T 2 T 3 T 4
Current Track
(T)
SKIP SKIP
Using SKIP H/G
Using SKIP H/G
Hint
Hint
•When there is no need to enter a number,
“0” appears automatically.
For example, “0: 0-:--”appears in the Time
Search display if the total time of the title
or track is less than 10 minutes.
•Press CLEAR to erase the incorrect input
at step [2].
Hint
Hint
•Depending on the disc being played back,
this function can also be performed by
directly entering the desired chapter num-
ber with the Number buttons.Refer to the
manual accompanying the disc.
•For Audio CDs and MP3, Track Search is
not available for Programmed or Random
Playback.
Hint
Hint
•The Marker display will disappear in about
30 seconds when there is no input.
•To clear a marker, select the marker to be
cleared at step [2] in the section “To set a
marker” or “To return to the marker later,”
and then press CLEAR.
•Opening the disc tray or turning off the
power will erase all markers.
•Selecting “AC” at step [2] in the section “To
set a marker” or “To return to the marker
later” will also erase all markers.
•You can mark up to 10 points.
(If the disc has no chapters.)
C 1 C 2C3C4
Current Chapter
(C)
or
SKIP SKIP
T 1 T 2 T 3 T 4
Current Title
(T)
SKIP SKIP
This feature allows you to assign a specific
point on a disc to be called back later.
To set a marker
Hint
Hint
•SKIP H/Gare not available when
playback is stopped.
MARKER
or
E6146AD_0523 5/23/05 3:22 PM Page 15

Functions
–16 –EN
2
2
1
1
1
1
OFF
CHAPTER
TITLE
(repeat off)
(current chapter repeat)
(current title repeat)
Each time you press REPEAT, repeat
function changes as examples below.
Repeat function is available only during
playback.
At your desired starting point (A)
You may determine the order in which
tracks will play.
1
1
OFF
TRACK
ALL
(repeat off)
(current track repeat)
(entire disc repeat)
Repeat Playback Programmed PlaybackRepeat A-B Playback
1
1
Random Playback
A-
At your desired end point (B)
2
2
A-B
2
2
3
3
PLAY
CD-DA TOTAL 0:45:55
RANDOM PROGRAM
--no indication--
RANDOM
This function shuffles the playing order
of tracks instead of playback in the
sequence.
Press twice.
Press once.
PROGRAM
ENTER
PLAY
CLEAR
CD-DA TOTAL 0:00:00
1/ 1
1/ 3
T1 3:31
T2 4:28
T3 4:19
T4 3:58
T5 4:12
T6 4:02
T7 3:55
T1 3:31
PROGRAM
ENTER
PLAY
CLEAR
CD-DA TOTAL 0:08:22
1/ 1
3/ 3
T15 3:18
T16 4:24
ALL CLEAR
T 4 3:58
T 16 4:24
T16 4:24
OFF
CHAPTER
TITLE
ALL
(repeat off)
(current chapter repeat)
(current title repeat)
(entire disc repeat)
• Point B should be in the same title
or track as point A.
Hint
Hint
•Repeat setting will be cleared when mov-
ing to another title, chapter, track or group.
•Repeat playback may not function with
some discs or during Repeat A-B
Playback.
Hint
Hint
•To repeat the current track in the random
selections, press REPEAT repeatedly until
“TRACK” appears during playback.
•To repeat the entire random selections,
press REPEAT repeatedly until “
“ALL”
appears during playback.
•Random Playback of MP3 or JPEG is not
available while Dual Playback is ON.
Hint
Hint
•Press CLEAR at step [2] to erase the most
recently entered track.
•To erase all programmed tracks at once,
select “ALL CLEAR’’ and press ENTER at
step [2].
•While a programme is being played back,
STOP Cworks as follows;
⇒Press STOP Cand PLAY Bnext, so
that the programmed playback restarts.
(CD playback restarts from the current
point. MP3 or JPEG playback restarts
from the beginning of the current track.)
⇒Press STOP Ctwice and PLAY Bnext,
so that playback restarts from the first
track in the original order. However, your
programmed playback can be restarted
when you follow the above steps. (Your
programmes are still stored until either
the disc tray is open or power is turned
off.) On some discs, STOP Cwill not
work while the Resume message
appears. Please wait until the message
disappears.
•To repeat the current track in the pro-
gramme, press REPEAT repeatedly until
“TRACK’’ appears during playback.
•To repeat the entire programme, press
REPEAT repeatedly until “ ALL’’ appears
during playback.
•Programmed Playback of MP3 or JPEG is
not available while Dual Playback is ON.
Hint
Hint
•To exit the sequence, press A-B REPEAT
so that OFF appears.
•
To cancel Point A, press CLEAR.
•This function does not work in the other
repeat modes.
• Up to 99 tracks can be ordered.
• If 8 or more tracks were in a programme,
use SKIP
HH
/
GG
to see all the tracks.
• While a MP3 or JPEG folder is open:
–Press Cursor BBwhen you want to go to
the next hierarchy.
–
Press Cursor sswhen you want to go
back to the previous hierarchy (except for
the first hierarchy).
–
Press TITLE when you want to go back to
the first hierarchy.
OFF
TRACK
GROUP
ALL
(repeat off)
(current track repeat)
(current group repeat)
(entire disc repeat)
Repeat / Random / Programmed Playback
or
E6146AD_0523 5/23/05 3:22 PM Page 16

Functions
–17 –EN
1
1
1
1
Special Settings
Audio Language
This unit allows you to select an audio
language (if multiple languages are
available) during DVD playback.
1
1
1.ENG 3/2.1ch 48k/3
Current audio language
Audio can be varied on
the displayed number.
ENG
SPA
FRE
(English audio)
(Spanish audio)
(French audio)
Each time you press AUDIO, audio
language changes as example below.
This unit allows you to select a subtitle
language (if available) during DVD play-
back.
1.ENG/6
Current subtitle language
Subtitles can be varied on
the displayed number.
1.ENG/6
OFF
ENG
FRE
(no subtitles)
(English subtitles)
(French subtitles)
Each time you press SUBTITLE,
subtitle language changes as example
below.
Subtitle Language
2
2
OFF
1, 2, 3: Makes the dark parts brighter.
OFF : Shows the original picture as
recorded.
3
3
...
...
To set subtitle ON/OFF
2
2
OFF
Hint
Hint
•If your language is not shown after press-
ing SUBTITLE several times, the disc may
not have that language. However, some
discs allow you to change subtitle lan-
guages setting in the disc menu.
(Operation varies depending on the disc,
so refer to the manual included in the
disc.)
•When “NOT AVAILABLE” appears on the
TV screen, it means no subtitle is recorded
on the scene.
•If you choose a language that has 3-letter-
language code, the code will be displayed
every time you change the subtitle lan-
guage setting. If you choose any other lan-
guages, ‘---’ will be displayed instead. (Refer
to page 22.)
Hint
Hint
•The sound mode cannot be changed dur-
ing playback of discs not recorded in dou-
ble sound.
•Audio language selection cannot be made
during Rapid Play. (Refer to page 11.)
•If your language is not shown after press-
ing AUDIO several times, the disc may not
have that language. However, some discs
allow you to change multiple audio lan-
guages setting in the disc menu.
(Operation varies depending on the disc,
so refer to the manual included in the
disc.)
•When “NOT AVAILABLE” appears on the
TV screen, it means no audio is recorded
on the scene.
•If you choose a language that has 3-letter-
language code, the code will be displayed
every time you change the audio language
setting. If you choose any other languages,
‘---’ will be displayed instead. (Refer to page
22.)
For VR mode only:
•Pressing AUDIO cycles the sound mode
through MAIN, SUB, MAIN + SUB.
•DVD-RW discs recorded in double sound
(2 languages) can be played back in either
sound mode of MAIN, SUB or MAIN +
SUB.
•With discs recorded in VR mode, changing
the audio (MAIN, SUB or MAIN+SUB) is
effective only when using an analogue
connection. Although you may be able to
change the settings of the on-screen dis-
play, it will not affect the sound when using
a digital connection.
Display on
the TV screen
Mode
MAIN
SUB
MAIN
SUB
MAIN
SUB
MAIN+
SUB
Main Audio
Main Audio
Sub Audio
Sub Audio
Main Audio
Sub Audio
L
R
L
R
L
R
AUDIO OUTPUT
or
Camera Angles
Some DVD discs may con-
tain scenes which have been
shot simultaneously from var-
ious angles. You can change the cam-
era angle if “ ” appears on the
screen. If the “ANGLE ICON” setting is
“OFF” in the OTHERS menu, “ ” will
not appear. (Refer to pages 18, 21.)
1
1
ON
Digital Gamma Setting
DIGITAL GAMMA is a digital image
quality enhancement function that gives
a richer image by brightening the dark-
er and more obscure portions of the
image without altering the brightness of
the brighter portions thereby making
the entire image easier to see. Three
digital gamma settings are available to
allow for differences in the images
played back and in brightness of the
room.
or
or
Hint
Hint
•The setting will be kept even if the unit is
turned off.
•This function cannot be used during Rapid
Play.
1
1
1 / 8
E6146AD_0523 5/23/05 3:22 PM Page 17

Functions
–18 –EN
3
3
2
2
LANGUAGE
AUDIO
SUBTITLE
DISC MENU
PLAYER MENU
ORIGINAL
OFF
ENGLISH
ENGLISH
ENTER
Select
“(CUSTOM)”.
QUICK SETUP
PLAYER MENU
TV ASPECT
PROGRESSIVE
DOLBY DIGITAL
DTS
MPEG
ENGLISH
4:3 LETTER BOX
OFF
BITSTREAM
OFF
DPCM
ENTER
To select the desired item.
1
1
CUST
CUSTOM Men
OM Menu
u
AUDIO
DRC
DOWN SAMPLING
DOLBY DIGITAL
DTS
MPEG
ON
ON
BITSTREAM
OFF
DPCM
ENTER
DISPLAY
TV ASPECT
STILL MODE
PROGRESSIVE
VIDEO OUT
4:3 LETTER BOX
AUTO
OFF
PA L
ENTER
LANGUAGE
AUDIO
SUBTITLE
DISC MENU
PLAYER MENU
ORIGINAL
OFF
ENGLISH
ENGLISH
ENTER
1
1
QUICK SETUP
PLAYER MENU
TV ASPECT
PROGRESSIVE
DOLBY DIGITAL
DTS
MPEG
ENGLISH
4:3 LETTER BOX
OFF
BITSTREAM
OFF
DPCM
ENTER
Q
QUICK SETUP Men
UICK SETUP Menu
u
You can change the settings of the unit.
•
on pages 19, 20 indicates DVD Setup menus also accessible from the QUICK SETUP menu.
QUICK
<SETUP MENU>
<SETUP MENU>
Confirm that “ (QUICK)” is
highlighted.
You can select the “PLAYER MENU”, “TV ASPECT”, “PROGRESSIVE”, “DOLBY DIGITAL” , “DTS” or “MPEG” from the QUICK SETUP menu quickly.
LANGUAGE menu AUDIO menu
DISPLAY menu
DVD Setup
page 19
A
page 19
B
page 20
C
PARENTAL
ENTER
PARENTAL LEVEL
ALL
OTHERS
ANGLE ICON
AUTO POWER OFF
PA N E L DISPLAY
DUAL PLAYBACK
SLIDE SHOW
ON
ON
BRIGHT
OFF
5 sec
ENTER
PARENTAL menu OTHERS menu
page 20
D
page 21
E
To decide.
QUICK SETUP
PLAYER MENU
TV ASPECT
PROGRESSIVE
DOLBY DIGITAL
DTS
MPEG
ENGLISH
4:3 LETTER BOX
OFF
BITSTREAM
OFF
DPCM
ENTER
2
2
P19 (Step [5])
P19 (Step [5])
P19 (Step [5])
P20 (Step [5])
P20 (Step [5])
P20 (Step [5])
A
B
B
C
C
C
or
STEREO
L-ch
R-ch
(Right and left channels
are active.)
(Left channel is active.)
(
Right channel is active.
)
This unit allows you to select a sound
mode during CD playback.
1
1
STEREO
Each time you press AUDIO, sound
mode changes as example below.
Stereo Sound Mode
1
1
OFF
Virtual Surround
You can enjoy stereophonic virtual
world on your existing 2 channel stereo
system.
2
2
1
1:Natural effect.
2:Emphasised effect.
OFF : No effects (original sound).
3
3
Hint
Hint
•The setting will be kept even if the unit is
turned off.
•On Audio CDs and Video CDs, Virtual
Surround will not be effective if the sound
mode is set to something other than
“STEREO”. Refer to “Stereo Sound Mode”.
•Turn down the level or select “OFF” if the
sound is distorted.
•This function cannot be used during Rapid
Play.
Press repeatedly until
“”appears.
Hint
Hint
•Virtual Surround cannot be changed when
the sound mode is set to either L-ch or
R-ch.
•Stereo Sound Mode is not available on
DTS CD.
Select the desired item.
QUICK SETUP
PLAYER MENU
TV ASPECT
PROGRESSIVE
DOLBY DIGITAL
DTS
MPEG
ENGLISH
4:3 LETTER BOX
OFF
BITSTREAM
OFF
DPCM
• Refer to the sections
“PLAYER MENU”, “TV ASPECT” or “PROGRESSIVE” on page
19 and “DOLBY DIGITAL”, “DTS” or “MPEG” on page 20.
or
or
or
or
E6146AD_0523 5/23/05 3:22 PM Page 18

5
5
Functions
–19 –EN
Hint
Hint
∗1
• Language options are not available with
some discs.
• If OTHER is selected in the AUDIO,
SUBTITLE or DISC MENU screen,
press four-digit number to enter the
code for the desired language. (Refer to
the language code list on page 22.)
• Only the languages supported by the
disc can be selected.
∗2
• Language Setting for Audio and Subtitle
are not available with some discs. Then
use AUDIO and SUBTITLE.Details are
on page 17.
LANGUAGE Setting
Follow the steps [1] to [3]
in the “CUSTOM Menu”
section on page 18.
4
4
Select the
desired
item.
6
6 To exit the menu.
5
5
AUDIO: ∗∗1 ∗∗2
(Default: ORIGINAL)
Sets the audio language.
SUBTITLE: ∗∗1 ∗∗2
(Default: OFF)
Sets the subtitle language.
DISC MENU: ∗∗1
(Default: ENGLISH)
Sets the language in DVD
menu.
PLAYER MENU:
(Default: ENGLISH)
Sets the language for the
On-Screen Display.
QUICK
Select the desired
language.
ENGLISH
PLAYER MENU
AUDIO
ORIGINAL
ENGLISH
FRENCH
SUBTITLE
OFF
ENGLISH
FRENCH
ENGLISH
FRENCH
SPANISH
DISC MENU
A
LANGUAGE menu
LANGUAGE
AUDIO
SUBTITLE
DISC MENU
PLAYER MENU
ORIGINAL
OFF
ENGLISH
ENGLISH
ENTER
4
4
DISPLAY Setting
You can change the dis-
play functions. Follow the
steps [1] to [3] in the
“CUSTOM Menu” section
on page 18.
Select the
desired
item.
B
DISPLAY menu
DISPLAY
TV ASPECT
STILL MODE
PROGRESSIVE
VIDEO OUT
4:3 LETTER BOX
AUTO
OFF
PAL
ENTER
Hint
Hint
TV ASPECT:
• Select “4:3 LETTER BOX”,
so that black bars may
appear on the top and bot-
tom of the screen.
• Select “4:3 PAN & SCAN” for
a full height picture with both
sides adjusted.
• Select “16:9 WIDE” if a wide-
screen TV is connected to
this unit.
STILL MODE:
• Select “AUTO” usually.
• If you select “FIELD”, the
picture in the still mode will
be stabilised.
• If you select “FRAME”, the
picture in the still mode will
be highly defined.
VIDEO OUT:
When playing back an NTSC
disc
• If you have a PAL TV, select
PAL; the modified PAL signal
will be output.
• If you have an NTSC TV or
multi system TV, select AUTO;
the NTSC signal will be
output.
PROGRESSIVE:
•
You can set “PROGRESSIVE”
to “OFF” either in the DIS-
PLAY menu or by pressing
and holding PLAY Bon the
front of the unit for more than
5 seconds.
• When “PROGRESSIVE” is
“ON”, video signals from the
unit’s VIDEO OUT and S-
VIDEO OUT jacks will be
distorted or not be output at
all.
TV ASPECT:
(Default: 4:3 LETTER BOX)
See Hint to the right.
QUICK
TV ASPECT
4:3 LETTERBOX
STILL MODE
AUTO
PROGRESSIVE OFF
VIDEO OUT PAL
4:3
LETTER BOX
4:3
PAN & SCAN
16:9
WIDE
TV ASPECT
Select the
desired
setting.
STILL MODE:
(Default: AUTO) See Hint to the right.
TV ASPECT
4:3 LETTERBOX
STILL MODE
AUTO
PROGRESSIVE OFF
VIDEO OUT PAL
AUTO
FIELD
FRAME
STILL MODE
4:3 LETTERBOX
AUTO
OFF
AUTO
TV ASPECT
4:3 LETTERBOX
STILL MODE
AUTO
PROGRESSIVE OFF
VIDEO OUT PAL
6
6To exit the menu.
VIDEO OUT:
(Default: PAL) See Hint to the right.
PROGRESSIVE:
(Default: OFF) See Hint to the right.
QUICK
4:3 LETTERBOX
AUTO
ON
PAL
TV ASPECT
4:3 LETTERBOX
STILL MODE
AUTO
PROGRESSIVE OFF
VIDEO OUT PAL
6
6 To confirm the
PROGRESSIVE.
NO
YES
NO
YES
If you do not press any but-
tons for 15 seconds,
Progressive Scan will switch
to OFF.
5
5
Select
YES.
or
or
or
or
or
Select the
desired
setting.
or
Select
YES.
or
E6146AD_0523 5/23/05 3:22 PM Page 19

Functions
–20 –EN
5
5
PARENTAL Setting
Parental Control limits the disc viewing that exceed your settings. (An incorrect password will not play.)
This feature prevents your children from viewing inappropriate materials.
P
Parental
arental Le
Levels
vels
Parental Level allows you to set the rating levels of your DVD discs. Playback will stop if the ratings exceed the levels you set.
Follow the steps [1] to [3] in the “CUSTOM Menu” section on page 18.
Select “PARENTAL
LEVEL”.
D
PARENTAL LEVEL ALL
PASSWORD CHANGE
7
7
6
6Select the
desired level.
PARENTAL LEVEL
ALL
8
7
6
To exit
the menu.
CONTROL LEVELS
• ALL : All parental locks are cancelled.
• Level 8 : DVD softwares of any grades (adult/general/children) can be played back.
• Levels 7 to 2 : Only DVD softwares intended for general use and children can be played
back.
• Level 1 : Only DVD softwares intended for children can be played back, with those
intended for adult and general use prohibited.
Hint
Hint
•
DVD-Video discs may not respond to the parental lock settings. Make sure this func-
tion works with your DVD-Video discs.
4
4
PARENTAL
PASSWORD
Please enter a 4-digit password.
ENTER
PASSWORD
Please enter a 4-digit password.
Don’t forget the password.
Press ‘ENTER’ to activate password.
Enter your desired four-
digit password (except
for 4737).
PARENTAL menu
PARENTAL
Enter current password.
ENTER
or
If you have set a password
already, enter the current
four-digit password.
4
4
AUDIO
DRC
DOWN SAMPLING
DOLBY DIGITAL
DTS
MPEG
ON
ON
BITSTREAM
OFF
DPCM
ENTER
AUDIO Setting
Choose the appropriate audio
settings for your equipments.
It only affects during the play-
back of DVD discs. Follow the
steps [1] to [3] in the “CUS-
TOM Menu” section on page
18.
Select the desired item.
C
AUDIO menu
5
5DRC (Dynamic Range Control): (Default: ON)
Set to “ON” to compress the range between soft and loud sounds.
DOLBY DIGITAL: (Default: BITSTREAM)
Set to “BITSTREAM” when the unit is connected to a Dolby Digital receiver.
• BITSTREAM: Outputs a Dolby Digital Signals.
• DPCM: Convert the Dolby Digital into DPCM (2 channel).
QUICK
DRC ON
DOWN SAMPLING
ON
DOLBY DIGITAL BITSTREAM
DTS OFF
MPEG DPCM
OFF
ON
BITSTREAM
OFF
DPCM
DOWN SAMPLING: (Default: ON)
Set to “ON” when outputting in 48 kHz.
Set to “OFF” when outputting the original sound.
DRC ON
DOWN SAMPLING
ON
DOLBY DIGITAL BITSTREAM
DTS OFF
MPEG DPCM
ON
ON
DPCM
OFF
DPCM
DRC ON
DOWN SAMPLING
ON
DOLBY DIGITAL BITSTREAM
DTS OFF
MPEG DPCM
ON
OFF
BITSTREAM
OFF
DPCM
Hint
Hint
DRC:
• This function is available
only on the discs which
are recorded in the Dolby
Digital format.
DOWN SAMPLING:
• When playing back a disc
with copyright protection,
the sound will be down
sampled at 48kHz, even
if you set to “OFF”.
• This function is available
only on digital outputting
of a disc recorded in
96kHz.
DTS: (Default: OFF)
Set to “BITSTREAM” when the unit is connected to DTS decoder.
QUICK
MPEG: (Default: DPCM)
Set to “BITSTREAM” when the unit is connected to MPEG decoder.
• DPCM: Convert an MPEG into DPCM.
• BITSTREAM: Outputs the MPEG Signals.
QUICK
DRC ON
DOWN SAMPLING
ON
DOLBY DIGITAL BITSTREAM
DTS OFF
MPEG DPCM
ON
ON
BITSTREAM
BITSTREAM
DPCM
DRC ON
DOWN SAMPLING
ON
DOLBY DIGITAL BITSTREAM
DTS OFF
MPEG DPCM
ON
ON
BITSTREAM
OFF
BITSTREAM
6
6To exit
the menu.
or
or or
E6146AD_0523 5/23/05 3:22 PM Page 20
Table of contents
Other Sharp DVD Player manuals

Sharp
Sharp DV-760S User manual

Sharp
Sharp DV-SV 80 H User manual

Sharp
Sharp DV-SL10 User manual

Sharp
Sharp DV-SV97S(S) User manual

Sharp
Sharp QT-V5E User manual

Sharp
Sharp DV-SV97S(G) User manual

Sharp
Sharp DV-550U User manual

Sharp
Sharp CD-DV600W User manual

Sharp
Sharp DV-SV80S(RU) User manual

Sharp
Sharp DV-SL10H User manual

Sharp
Sharp DV-SL1500W User manual

Sharp
Sharp DV-SL2000W User manual

Sharp
Sharp DV-600S User manual

Sharp
Sharp DV-SL16H User manual

Sharp
Sharp DV-S1U User manual

Sharp
Sharp XL-E171DVH User manual

Sharp
Sharp DV-S11S(G) User manual

Sharp
Sharp DV-NC65H User manual

Sharp
Sharp DV-SV80S(G) User manual

Sharp
Sharp DV-700S User manual