Two Camera Mount Chapter 2: Alignment and Adjustment
Rev. B, July 23, 2018 Page 5
2.2. Alignment
Open the ThorCam Software. A small window will pop up telling you how many
cameras you have connected. It should register two available cameras; if they are
not both showing up, hit the refresh button. Make a note of the serial number
assigned to the two cameras so you can identify which is capturing the transmitted
image and which is capturing the reflected image. Click on each of the two
available cameras to open their image view windows. Hit the “Play” button in the
upper left corner of each window to start live image capture. Depending on the
light level used for excitation and the filter/mirror configuration used for your
application, the exposure time and contrast levels may need to be adjusted on
each camera to properly capture the desired image.
NOTE
Setting the exposure time too long will greatly decrease the frame rate capture
of the camera and make the output image choppy in real-time during alignment
and adjustment.
Now you will adjust each camera individually to properly focus the image onto the
image sensor. This is accomplished by making slight adjustments to the depth
that the ER1 cage rods are inserted into the CXY2 and the LCP02R. Start with the
cameras flush against their respective mounts (e.g. with the ER1 cage rods fully
inserted). Apply a light amount of pressure to the cage rods with the set screws,
just enough that there is a slight resistance to changing the inserted rod depth. By
using the embedded line profile tool in the toolbar of the ThorCam Software in
conjunction with visual inspection of the output image on the screen you can fine
tune the focus of each camera’s output image. Bring the image into focus by
incrementally sliding the camera away from its mount. When the image is in focus,
the peaks of the line profile histogram will be at their tallest and narrowest readings,
meaning the greatest amplitude and smallest variance. At this point the output
image should appear in its crispest form on the screen. Once this is done for both
cameras, tighten the cage rods; you are now ready to align the transmitted and
reflected images in overlay.
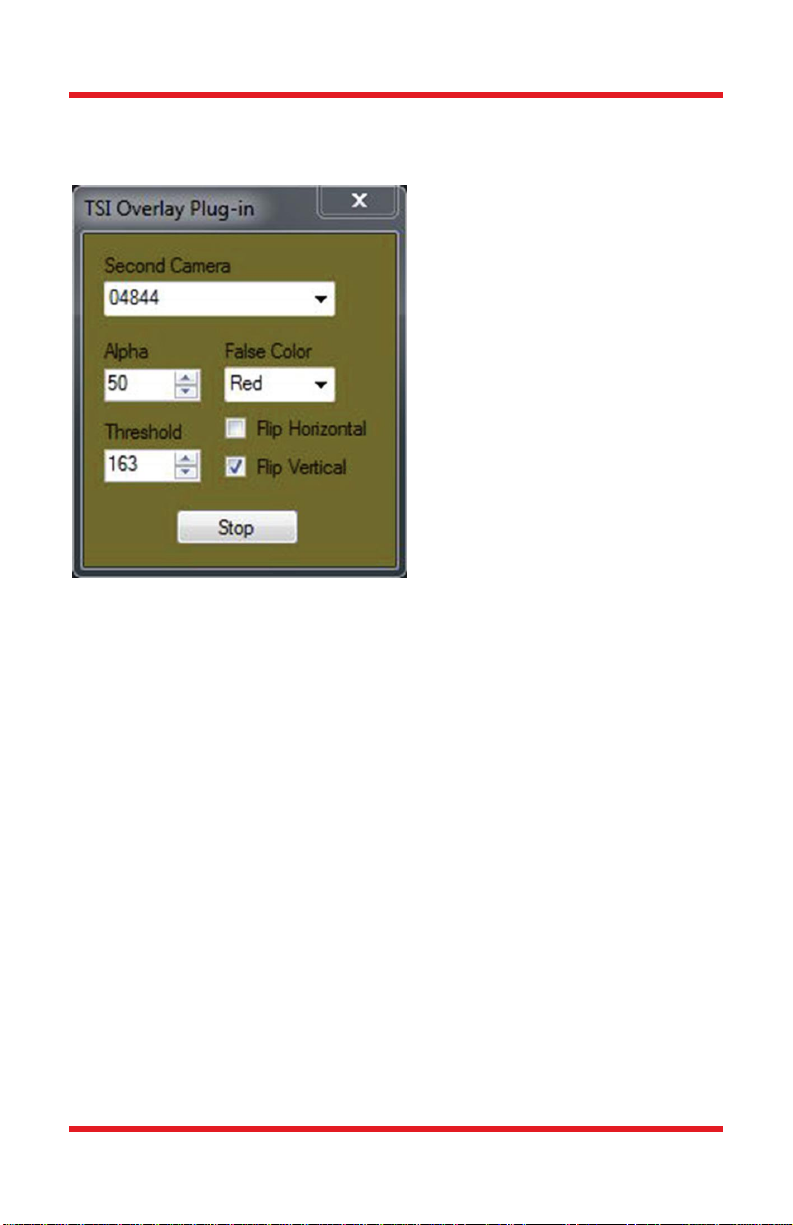
To overlay the images, click on the “Plug-In” button on the toolbar of the transmitted
image window and click on “Two Camera Overlay.” When this is done a “TSI
Overlay Plug-In” window will pop up. Choose the second camera from the drop-
down list and click on “Start.” Depending on how the reflected image is flipped,
you will need to click on either the “Flip Horizontal” or “Flip Vertical” box to orient
the two images in the same manner. Now, using the X & Y plane adjustment knobs
on the CXY2 and the rotation adjustment knob on the LCP02R, you can position
the two images so that they are perfectly overlayed.