Thrane&Thrane SAILOR Terratec S7 User manual

ACCREDITED SOLUTION
SAILOR Satellite TV – Terratec S7 DVB-S2 Portable USB Receiver

Accredited Solution Terratec S7 DVB-S2 Portable USB Receiver Page 2/4
Document Name: SAILOR Satellite TV – Terratec S7 DVB-S2 Portable USB Receiver Revision:
C
Introduction: This document describes the Terratec DVB-S2 Portable USB Receiver.
Typical Users: ►Yachts
►Luxury Yachts
►Merchant vessel
►Coast Guard
►Sailboats
►Oil rigs
►Patrol boats
►Service technicians
►Crew members
Product Description: The TerraTec S7 is a handy USB box with integrated receiver for satellite television (DVB-S2 and
DVB-S) as well as radio. Simply connect it to a free USB 2.0 port, and the discreet box transforms
notebook, laptop and desktop computers into a full-function television with full HDTV support
(including Dolby Digital)* and many additional features. Software for Windows and Mac computers
allows operation on all computers. Extensive accessories with a remote control and power adapter
are included in the shipping package.
The product is ideal for the installer/service technician that installs the SAILOR 60 & SAILOR 90
Satellite TV antennas because he can test and prove that the antennas are working well without the
need to have a satellite receiver and television.
The Terratec S7 has a slot supporting CI-card (Common Interface) in which you can insert CI-cards
supporting different encryption standards such as:
•BISS
•Conax
•Digicipher
•Irdeto
•Nagravision
•PowerVu
•Viaccess
•Videocipher
•VideoGuard
In the CI-card a CA-module (Conditional Access Module) from a certain service provider can be
inserted in order to watch pay TV channels.
Terratec
contact details:
Web http://www.terratec.net
Thrane & Thrane
contact details:
E-mail mailto:solutions@thrane.com
Thrane & Thrane Distributors http://www.thrane.com/Contact/Distributors.aspx
Tested on products: SAILOR 60 and SAILOR 90
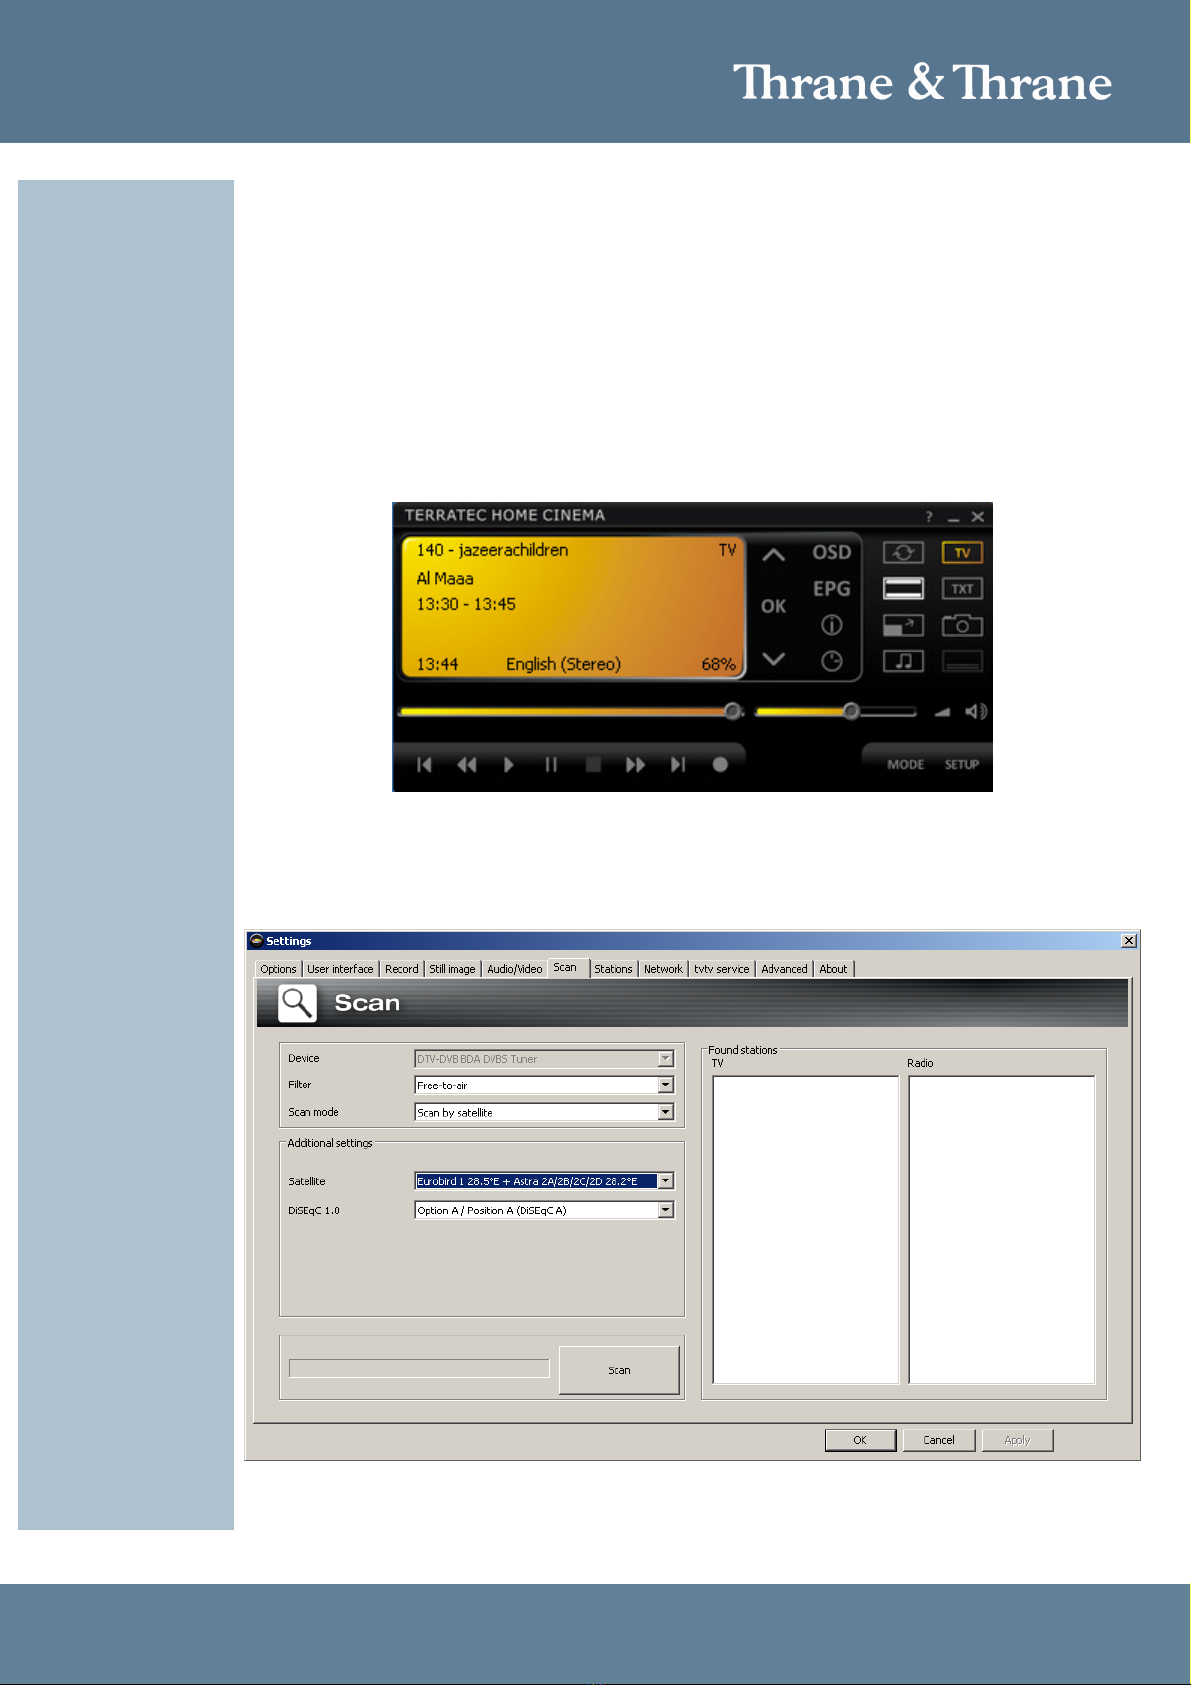
Instructions: Switch on your computer and wait until Windows has loaded completely.
1. Do NOT connect the TV stick to your computer until requested by the installation assistant on

Accredited Solution Terratec S7 DVB-S2 Portable USB Receiver Page 3/4
your screen. If you have already connected it, please disconnect it.
2. Insert the CD into the CD/DVD drive and follow the instructions on the screen.
3. If the systems Autostart is disabled and/or the CD does not start automatically, please open
the CD/DVD drive with the Windows Explorer and initiate the CD by making a double-click on
the “Autorun.exe” file on the CD.
You may get a message that the publisher of the driver software could not be verified. It is safe to
ignore this information and continue the installation by clicking “Install driver software anyway”.
Now insert the TV-Receiver and switch back to the installation menu and continue with the
installation of TerraTec Home Cinema. Simply follow the instructions provided.
After successful installation start the TerraTec Home Cinema and press the SETUP button on the
Terratec user interface. See figure 1 below.
Figure 1: Terratec User Interface
Go to the SCAN tab to setup the Filter (Free-to-air, Scrambled or No Filter), the Scan mode (Scan by
satellite or frequency) and select the appropriate satellite from the satellite list. See example in figure
2 below.
Figure 2: Scan tab
Press the Scan button to start the scanning for available TV channels on the chosen satellite.

Accredited Solution Terratec S7 DVB-S2 Portable USB Receiver Page 4/4
After the scan has finished use the Terratec Home Cinema user interface to navigate.
The software essentially consists of the TV window and the user interface. See figure 3 below.
Figure 3: TV Window and User Interface
The user interface contains:
•Display – a context-sensitive display for additional information
•Mode button (TV, radio, playback of recordings)
•Navigation buttons (station selection, menu navigation)
•Teletext button (open/close teletext, transparent teletext)
•Subtitles
•Display functions (open/close TV window, full screen)
•Recording navigation functions (playback, record, pause, etc.)
•Audio functions (audio channel / format, volume, mute)
•Still image function
•On-screen display functions (OSD)
•Show EPG
•Settings (basic configuration)
•Timer button
For more detailed operation please consult the accompanied user manual.
Tested: Tested on several satellites in Europe and in West Australia. The satellites in West Australia were not
in the factory default list so a scan was made using frequency band scan.
Information in this document is subject to change without notice and
does not represent a commitment on the part of Thrane & Thrane A/S.
©
2010
Thrane & Thrane A/S. All rights reserved. Printed in Denmark.