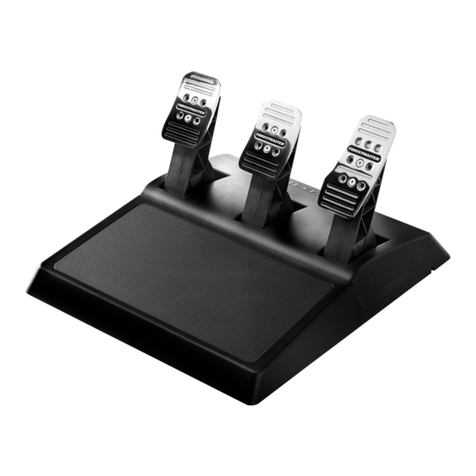
Thrustmaster T3PA User manual

- USER MANUAL
- MANUEL DE L’UTILISATEUR
- BENUTZERHANDBUCH
- HANDLEIDING
- MANUALE D’USO
- MANUAL DEL USUARIO
- MANUAL DO UTILIZADOR
- ИНСТРУКЦИЯ ПО ЭКСПЛУАТАЦИИ
- ΕΓΧΕΙΡΙΔΙΟ ΧΡΗΣΗΣ
- KULLANIM KILAVUZU
- INSTRUKCJA OBSŁUGI

1/11
For: PC – PlayStation®3 – PlayStation®4 – Xbox One™
Use r Manual

2/11
TECHNICAL FEATURES
1Metal support for conical stop
(not installed by default)
2Conical stop
3Attachment screw for metal support
42.5 mm Allen key (included)
5Position adjustment nut for conical stop
6Pedal arm
7Plastic head support
8Metal pedal head

3/11
WARNING
Before using this product, be sure to read these instructions carefully and save them for future reference.
For safety reasons, never use the pedal set with bare feet or while wearing
only socks on your feet.
THRUSTMASTER® DISCLAIMS ALL RESPONSIBILITY IN THE EVENT OF
INJURY RESULTING FROM USE OF THE PEDAL SET WITHOUT SHOES.
Warning – Pedal set pinching hazar d during gaming sessions
* Keep the pedal set out of the reach of children.
* During gaming sessions, never place your fingers or thumbs on or near the sides of the pedals.
* During gaming sessions, never place your fingers or thumbs on or near the rear base of the pedals.
* During gaming sessions, never place your fingers or thumbs on or near the front base of the pedals.
NEVER
NEVER
NEVER

4/11
AUTOMATIC CALIBRATION OF PEDALS
IMPORTANT:
- Never connect or disconnect the pedal set from the base of the wheel when the wheel is
connected to the console or PC, or during gaming sessions, to avoid calibration problems.
= Always connect the pedal set to the wheel before connecting the wheel to the console or PC.
- Once the wheel has self-calibrated and the game has started, the pedals automatically calibrate
themselves after being pressed a few times.
- Never press on the pedals when the wheel is self-calibrating or when your game is starting up, to
avoid calibration problems.
- If the pedals are not functioning correctly or appear to be improperly calibrated, power off your
console, completely disconnect your wheel, then reconnect all of the cables (including the power
supply cable and the pedal set cable), power the console back on and restart your game.
ATTACHING THE PEDAL SET TO A COCKPIT
- Attach the pedal set using the small screw threads located on the underside of the pedal set.
- Screw two M6 screws (not included) into the cockpit’s pedal support plate and into the two small
screw threads located on the underside of the pedal set.
Important: The length of the two M6 screws must not ex ceed the thickness of the cockpit’s pedal
support plate plus an additional 10 mm, to avoid damaging the pedal set’s internal components.

5/11
ADJUSTING THE PEDAL SET
Each of the three pedals includes:
- A metal head (8) with multiple perforations (nine for the accelerator – six for the brake – six for the
clutch).
- A plastic head support (7)(placed between the head and the arm) with four perforations.
- A pedal arm (6)with two perforations.
ATTENTION: To avoid any calibration problems, be sure to always disconnectyour wheel’s
USB cable from the console or PC befor e making any adjustments to your pedal set.
Adjusting the HEIGHT of the accelerator pedal
- Using the included 2.5 mm Allen key (4), unscrew the two screws holding the metal head (8)and
its support (7)in place.
- Select your preferred height position, then replace and re-tighten the screws so that the metal
head (8) and its support (7) are held firmly in place.
Low position (default)
High position

6/11
Adjusting the SPACING of the three pedals
- Using the included 2.5 mm Allen key (4), unscrew the two screws holding the metal head (8) and
its support (7) in place.
- Select your preferred position (to the left, centered, or to the right), then replace and re-tighten the
screws so that the metal head (8) and its support (7) are held firmly in place.
Examples illustrating the brake pedal:
Left position Centered position (default) Right position
Number of possible spacing positions per pedal:
- Three for accelerator pedal
- Three for brake pedal
- Three for clutch pedal
Adjusting the INCLINATION of the pedals
- Using the included 2.5 mm Allen key (4), unscrew the two screws holding the metal head (8) and
its support (7) in place.
- Turn the plastic head support (7) 180°, then replace and re-tighten the screws so that the metal
head (8) and its support (7) are held firmly in place.
Ex amples illustrating the accelerator pedal:
Less inclined position More inclined position (default)
Number of possible inclination positions per pedal:
- Two for accelerator pedal
- Two for brake pedal
- Two for clutch pedal

7/11
Installing the conical stop (“CONICAL RUBBER BRAKE” mod)
This modification (or “mod”) is not essential, and is not installed by default. This means that the
brake pedal functions perfectly even if the mod is not installed.
This mod lets you experience a different feeling and resistance when braking.
It’s up to you whether or not to install it, depending on your own preferences.
- Screw the conical stop (2) onto its metal support (1).
- Screw the position adjustment nut (5) onto the bottom (onto the conical stop’s screw thread).
- Position the unit at the back of the brake pedal’s arm.

8/11
- Using the included 2.5 mm Allen key (4), attach the unit using the attachment screw (3) and the
small central screw thread located on the underside of the pedal set.
The “CONICAL RUBBER BRAKE” mod is now installed!
Adjusting the brake pedal’s RANGE of travel and STRENGTH of resistance
By slightly unscrewing the nut (5), you can further strengthen the resistance of the brake pedal by
moving the conical stop (2) closer to the back of the pedal’s arm (if necessary, use a 14 mm wrench
or pliers to re-tighten the nut and maintain the selected position). The closer the conical stop is
positioned to the back of the pedal’s arm, the greater the strength of resistance will be.
Note: When the conical stop is very close to the back of the brake pedal’s arm, you may ex perience
difficulties in reaching the max imum calibration value. Should that be the case:
* Slowly, press very hard on the brake pedal so as to reach the max imum value (if necessary, stand
very briefly on the pedal – just for a second), then release the pressure; or else
* Move the conical stop a bit farther away from the back of the brake pedal’s arm.

9/11
Consumer warranty information
Worldwide, Guillemot Corporation S.A. (hereinafter “ Guillemot” ) warrants to the consumer that this
Thrustmaster product shall be free from defects in materials and workmanship, for a warranty period
which corresponds to the time limit to bring an action for conformity with respect to this product. In
the countries of the European Union, this corresponds to a period of two (2) years from delivery of
the Thrustmaster product. In other countries, the warranty period corresponds to the time limit to
bring an action for conformity with respect to the Thrustmaster product according to applicable laws
of the country in which the consumer was domiciled on the date of purchase of the Thrustmaster
product (if no such action ex ists in the corresponding country, then the warranty period shall be one
(1) year from the original date of purchase of the Thrustmaster product).
Notwithstanding the above, rechargeable batteries are covered by a warranty period of six (6)
months from the date of original purchase.
Should the product appear to be defective during the warranty period, immediately contact Technical
Support, who will indicate the procedure to follow. If the defect is confirmed, the product must be
returned to its place of purchase (or any other location indicated by Technical Support).
Within the contex t of this warranty, the consumer’s defective product shall, at Technical Support’s
option, be either repaired or replaced. If permitted under applicable law, the full liability of Guillemot
and its subsidiaries (including for consequential damages) is limited to the repair or replacement of
the Thrustmaster product. If permitted under applicable law, Guillemot disclaims all warranties of
merchantability or fitness for a particular purpose. The consumer’s legal rights with respect to laws
applicable to the sale of consumer goods are not affected by this warranty.
This warranty shall not apply: (1) if the product has been modified, opened, altered, or has suffered
damage as a result of inappropriate or abusive use, negligence, an accident, normal wear, or any
other cause unrelated to a material or manufacturing defect (including, but not limited to, combining
the Thrustmaster product with any unsuitable element, including in particular power supplies,
rechargeable batteries, chargers, or any other elements not supplied by Guillemot for this product);
(2) in the event of failure to comply with the instructions provided by Technical Support; (3) to
software, said software being subject to a specific warranty; (4) to consumables (elements to be
replaced over the product’s lifespan: disposable batteries, audio headset or headphone ear pads, for
ex ample); (5) to accessories (cables, cases, pouches, bags, wrist-straps, for example); (6) if the
product was sold at public auction.
This warranty is nontransferable.
Additional warranty provisions
In the United States of America and in Canada, this warranty is limited to the product’s internal
mechanism and ex ternal housing. In no event shall Guillemot or its affiliates be held liable to any
third party for any consequential or incidental damages resulting from the breach of any ex press or
implied warranties. Some States/Provinces do not allow limitation on how long an implied warranty
lasts or ex clusion or limitation of liability for consequential or incidental damages, so the above
limitations or ex clusions may not apply to you. This warranty gives you specific legal rights, and you
may also have other rights which vary from State to State or Province to Province.

10/11
Liability
If permitted under applicable law, Guillemot Corporation S.A. (hereinafter “ Guillemot” ) and its
subsidiaries disclaim all liability for any damages caused by one or more of the following: (1) the
product has been modified, opened or altered; (2) failure to comply with assembly instructions; (3)
inappropriate or abusive use, negligence, an accident (an impact, for ex ample); (4) normal wear. If
permitted under applicable law, Guillemot and its subsidiaries disclaim all liability for any damages
unrelated to a material or manufacturing defect with respect to the product (including, but not limited
to, any damages caused directly or indirectly by any software, or by combining the Thrustmaster
product with any unsuitable element, including in particular power supplies, rechargeable batteries,
chargers, or any other elements not supplied by Guillemot for this product).
FCC STATEMENT
1. This device complies with Part 15 of the FCC Rules. Operation is subject to the following two
conditions:
(1) This device may not cause harmful interference, and
(2) This device must accept any interference received, including interference that may cause
undesired operation.
2. Changes or modifications not ex pressly approved by the party responsible for compliance could
void the user's authority to operate the equipment.
COPYRIGHT
© 2015 Guillemot Corporation S.A. All rights reserved. Thrustmaster®is a registered trademark of
Guillemot Corporation S.A. “” , “ PlayStation” , “ ” and “ ” are registered
trademarks of Sony Computer Entertainment, Inc. “ ” is a trademark of the same company.
Xbox is a registered trademark of Microsoft Corporation in the United States and/or in other
countries. All other trademarks and brand names are hereby acknowledged and are the property of
their respective owners. Illustrations not binding. Contents, designs and specifications are subject to
change without notice and may vary from one country to another. Made in China.
ENVIRONMENTAL PROTECTION RECOMMENDATION
At the end of its working life, this product should not be disposed of with standard
household waste, but rather dropped off at a collection point for the disposal of
Waste Electrical and Electronic Equipment (WEEE) for recycling.
This is confirmed by the symbol found on the product, user manual or packaging.
Depending on their characteristics, the materials may be recycled. Through
recycling and other forms of processing Waste Electrical and Electronic Equipment,
you can make a significant contribution towards helping to protect the environment.
Please contact your local authorities for information on the collection point nearest you.
Retain this information. Colors and decorations may vary.
This product conforms to all standards regarding children 16 years of age and older. This product is
not suitable for use by children less than 16 years of age.
www.thrustmaster.com

11/11
TECHNICAL SUPPORT
http://ts.thrustmaster.com

1/11
Pour : PC - PlayStation®3 - PlayStation®4 - Xbox One™
Manuel de l’utilisateur

2/11
CARACTERISTIQUES TECHNIQUES
1Support métallique pour la butée conique
(non installée par défaut)
2Butée conique
3Vis de fix ation du support métallique
4Clé Allen 2,5 mm fournie
5Ecrou de réglage de position de la butée
conique
6Bras de pédale
7Support de tête plastique
8Tête métallique de pédale

3/11
AVERTISSEMENT
Avant d’utiliser ce produit, lisez attentivement cette documentation et conservez-la pour pouvoir la
consulter ultérieurement.
Pour des r aisons de sécurité, ne jouez pas pieds nus ou en chaussettes
lorsque vous utilisez le pédalier.
THRUSTMASTER®DECLINE TOUTE RESPONSABILITE EN CAS DE
BLESSURE SUITE A UNE UTILISATION DU PEDALIER SANS CHAUSSURES.
Avertissement – Risque de pincementau niveau du pédalier lor s des phases de jeu
* Laissez le pédalier hors de portée des enfants.
* Lors des phases de jeu, ne placez jamais vos doigts sur ou à prox imité des côtés des pédales.
* Lors des phases de jeu, ne placez jamais vos doigts sur ou à prox imité de la base arrière des
pédales.
* Lors des phases de jeu, ne placez jamais vos doigts sur ou à prox imité de la base avant des
pédales.
JAMAIS
JAMAIS
JAMAIS

4/11
CALIBRAGE AUTOMATIQUE DES PEDALES
IMPORTANT :
- Ne branchez ou débranchez jamais le pédalier de la base du volant lorsque celui-ci est connecté à
la console ou au PC, ou en cours de jeu, pour ne pas fausser la calibration.
= Branchez toujours le pédalier avant de relier le volant à la console ou au PC.
- Une fois le volant autocalibré et le jeu lancé, les pédales se calibrent automatiquement après
quelques pressions.
- Lors des phases d’autocalibration de la roue du volant et lorsque votre jeu se lance, n’appuyez
jamais sur les pédales, au risque de fausser la calibration.
- Si vos pédales ne fonctionnent pas correctement ou semblent mal calibrées, éteignez votre
console, déconnectez entièrement votre volant, reconnectez tous les câbles (y compris le câble
d’alimentation secteur et le câble du pédalier), redémarrez la console et relancez votre jeu.
FIXATION DU PEDALIER SUR UN COCKPIT
- Fix ez le pédalier via les petits pas de vis situés sous ce dernier.
- Vissez 2 vis M6 (non fournies) dans la tablette du cockpit et dans les 2 petits pas de vis situés
sous le pédalier.
Important : La longueur de ces 2 vis M6 ne doit pas dépasser l’épaisseur de votre support +10 mm
pour ne pas endommager les composants internes du pédalier.

5/11
REGLAGES DU PEDALIER
Chacune des 3 pédales comprend :
- Une tête métallique (8) avec plusieurs perforations (9 pour l’accélérateur – 6 pour le frein – 6 pour
l’embrayage).
- Un support de tête plastique (7)(placé entre la tête et le bras) avec 4 perforations.
- Un bras de pédale (6)avec 2 perforations.
ATTENTION : Pour éviter toutproblème de calibration, débranchez toujours le câble USB de
votre volant avant d’effectuer des réglages sur votr e pédalier.
Ajuster la HAUTEUR de la pédale d’accélérateur
- A l’aide de la clé Allen 2,5 mm fournie (4), dévissez les 2 vis maintenant la tête métallique (8) et
son support (7).
- Choisissez ensuite votre position en hauteur, puis revissez le tout.
Position basse (par défaut)
Position haute

6/11
Ajuster l’ECARTEMEMENT des 3 pédales
- A l’aide de la clé Allen 2,5 mm fournie (4), dévissez les 2 vis maintenant la tête métallique (8) et
son support (7).
- Choisissez ensuite votre position (à gauche, au centre ou à droite), puis revissez le tout.
Ex emples ici avec la pédale de frein :
Position à gauche Position au centre (par défaut) Position à droite
Nombre de positions en écartement possibles par pédale :
- 3 pour la pédale d’accélérateur
- 3 pour la pédale de frein
- 3 pour la pédale d’embrayage
Ajuster l’INCLINAISON des pédales
- A l’aide de la clé Allen 2,5 mm fournie (4), dévissez les 2 vis maintenant la tête métallique (8) et
son support (7).
- Retournez ensuite le support de tête plastique (7) de 180°, puis revissez le tout.
Ex emples ici avec la pédale d’accélérateur:
Position moins inclinée Position plus inclinée (par défaut)
Nombre de positions d’inclinaison possibles par pédale :
- 2 pour la pédale d’accélérateur
- 2 pour la pédale de frein
- 2 pour la pédale d’embrayage

7/11
Installer la butée conique (MOD « CONICAL RUBBER BRAKE »)
Ce MOD n’est pas obligatoire et n’est pas installé par défaut. Cela signifie que la pédale de frein
fonctionne parfaitement même si le MOD n’est pas installé.
Ce MOD permet d’apporter un feeling et une résistance différents lors des freinages.
Il appartiendra à chacun de l’installer ou non en fonction de ses préférences.
- Vissez la butée conique (2) sur son support métallique (1).
- Vissez l’écrou de réglage de position (5) à l’arrière (sur le pas de vis de la butée conique).
- Positionnez l’ensemble à l’arrière du bras de la pédale de frein.

8/11
- A l’aide de la clé Allen 2,5 mm fournie (4), fix ez l’ensemble en utilisant la vis de fix ation (3) et le
petit pas de vis central situé sous le pédalier.
Le MOD « CONICAL RUBBER BRAKE » est désormais installé !
Ajuster la COURSE dedébattement et la FORCE de résistance de la pédale de
frein
En dévissant légèrement l’écrou (5), vous pouvez également durcir davantage la résistance de la
pédale de frein en rapprochant la butée conique (2) de l’arrière du bras de la pédale (utilisez si
nécessaire une clé de 14 ou une pince pour resserrer l’écrou et maintenir la position souhaitée).
Plus la butée conique sera proche de l’arrière du bras de la pédale, plus la résistance sera élevée.
Remar que : Lorsque la butée conique est très proche de l’arrière du bras de la pédale de frein,
vous pouvez avoir des difficultés à atteindre la valeur max imale de calibration. Dans ce cas :
* Appuyez –lentement– très fortement sur la pédale de frein pour atteindre la valeur max imale (si
nécessaire, mettez-vous debout un court instant sur la pédale), puis relâchez la pression.
* Ou éloignez légèrement la butée conique de l’arrière du bras.
Other manuals for T3PA
1
Table of contents
Languages:
Other Thrustmaster Music Pedal manuals
Popular Music Pedal manuals by other brands
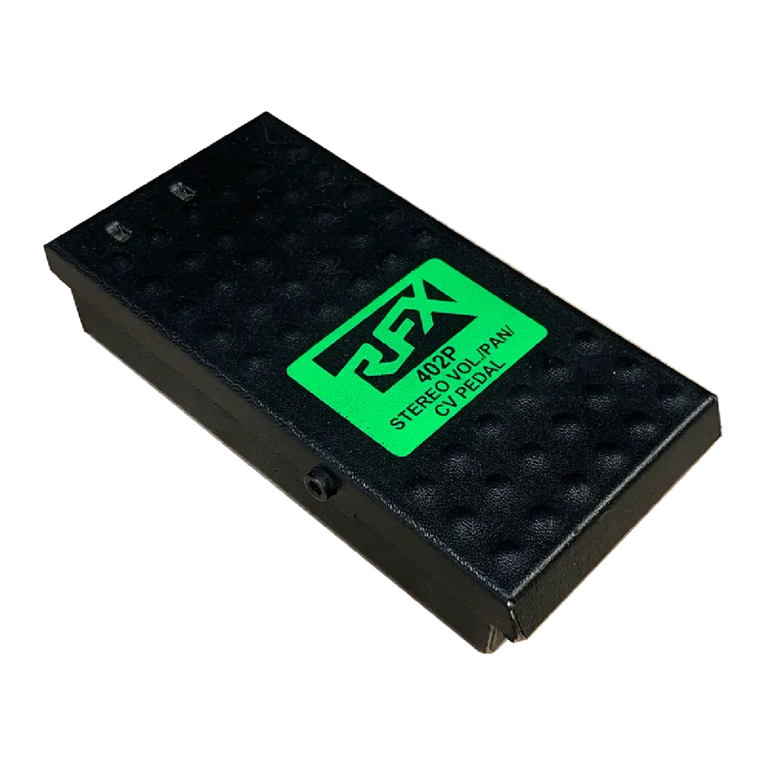
Rolls
Rolls RFX402P user manual

flight of harmony
flight of harmony Famine 500 manual

Rocktron
Rocktron Sweet Spot instruction manual
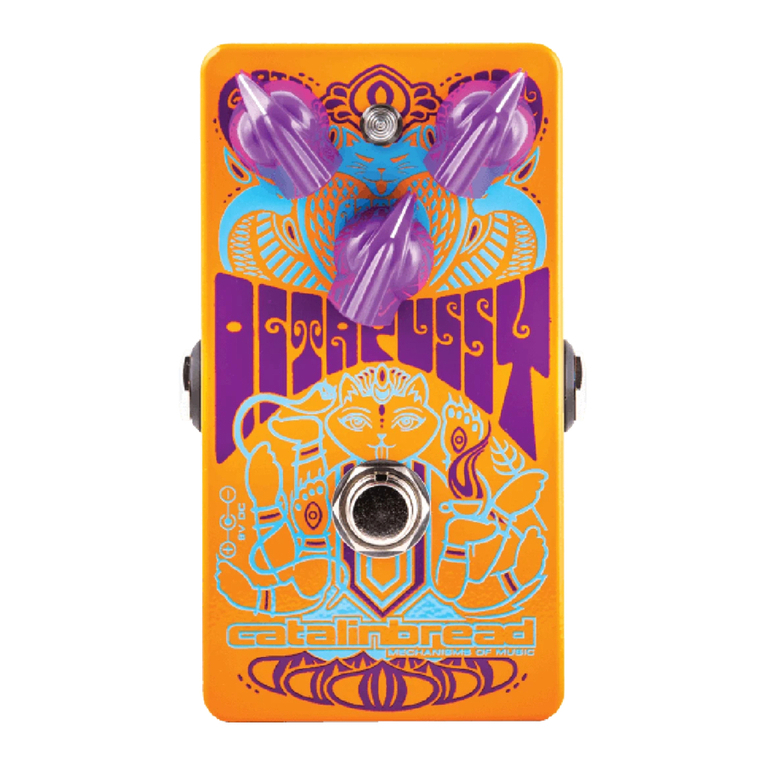
Catalinbread
Catalinbread Octapussy user guide

Two notes Audio Engineering
Two notes Audio Engineering Torpedo Captor X SE user manual
FuzzDog
FuzzDog 7 of Dwarves Auto Wah manual
