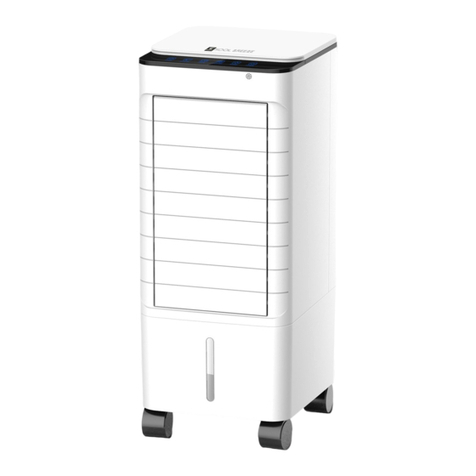
Thulos KOOL BREEZE TH-KB12 User manual

AIR COOLER
TH-KB12
MANUAL DE INSTRUCCIONES / INSTRUCTION MANUAL
Lea este manual atentamente antes de usar el aparato. Conserve este manual para
futuras consultas

ES
Estimado cliente
Agradecemos la confianza depositada en nosotros al adquirir este producto
THULOS®. Nuestro principal empeño es ofrecer artículos excelentes, manteniendo
los más estrictos controles de calidad y cumpliendo todas las normativas vigentes de
seguridad, con el objetivo de presentar un producto perfecto y seguro para el uso
doméstico.
INSTRUCCIONES DE SEGURIDAD
1. Lea todas las instrucciones de seguridad antes de usar el dispositivo.
2. No abra ni intente reparar la unidad, contacte con el Servicio Técnico Oficial.
3. Antes de usar por primera vez el dispositivo, verifique si su voltaje está de
acuerdo con la placa de identificación del refrigerador de aire.
4. Para protegerse contra descargas eléctricas, mantenga la unidad seca. No lo
sumerja en agua ni en ningún otro líquido.
5. Desenchufe de la red eléctrica el dispositivo mientras llena el depósito de agua,
antes de limpiar, mantener o mover la unidad.
6. Desenchufe de la red eléctrica el dispositivo cuando no esté en uso.
7. Nunca introduzca los dedos, lápices o cualquier otro objeto a través de los
oricios de la carcasa de plástico.
8. No cubra el aparato con papel, cartón, plástico, papel de aluminio ni ningún
otro material inflamable. De lo contrario, puede producirse un incendio.
Mantenga el aparato alejado de fuentes de calor.
9. Coloque la unidad sobre una superficie horizontal sólida a prueba de calor.
10. Asegúrese de que el nivel del agua debe estar entre la línea MIN y MAX.
11. Después de llenar con agua el depósito, no incline la unidad y evite moverla,
ya que puede provocar que el agua se desborde por los lados del tanque y se
produzcan fugas. Si la unidad necesita moverse un poco, empuje suavemente
hacia un lado.
12. Nunca ponga la unidad de costado.
13. No coloque ningún objeto en la parte superior de la unidad. La ventilación de
aire no debe obstruirse durante el funcionamiento.
14. No use productos abrasivos para limpiar el cuerpo de la unidad. Para retirar la
suciedad leve de la carcasa, límpiela con un paño suave y húmedo. Para retirar
manchas de grasa, ponga un poco de pasta de dientes o detergente suave
sobre un paño suave y húmedo, y luego limpie para retirar la mancha.
15. Mantenga la ventilación de aire (entrada o salida) lejos de obstáculos.
16. No golpee ni agite el cuerpo de la unidad durante el funcionamiento; de lo
contrario, dejará de funcionar automáticamente. En este caso, reinicie la
unidad.
17. No coloque la unidad debajo de la toma de corriente.
18. Vacíe el depósito de agua para evitar que se produzca olor cuando no esté en

uso.
19. No use la unidad después del mal funcionamiento. Envíe la unidad al Servicio
Técnico Oficial para su reparación.
20. No utilice la unidad para otro uso que no sea el previsto.
21. Si el cable de alimentación está dañado, debe ser reemplazado por el
fabricante o el Servicio Técnico Oficial. Si el cable está dañado deje de usar el
aparato inmediatamente.
22. Mantenga la unidad fuera del alcance de los niños. Se debe ejercer una
estrecha supervisión cuando haya niños cerca. ADVERTENCIA: No lo use donde
los niños puedan tocar la unidad, ni permita que los niños lo usen solos.
23. Mantenga el cable alejado de objetos afilados o calientes.
24. No limpiar la unidad con estropajos metálicos. Puede rayar la superficie o
provocar una descarga eléctrica.
25. No limpie la unidad con líquido inflamable.
26. Evite compartir una toma de corriente con cualquier otro electrodoméstico.
27. No use baterías nuevas y viejas al mismo tiempo en el control remoto.
28. Retire las baterías del control remoto cuando vaya a utilizarlo.
29. Este electrodoméstico puede ser utilizado por niños mayores de 8 años, niños
y personas con capacidades físicas, sensoriales o mentales reducidas o con
falta de experiencia y conocimientos solamente cuando están supervisados
en todo momento por un adulto, o si un adulto responsable le ha
proporcionado instrucciones sobre el uso de la unidad y le ha explicado los
riesgos implicados. Los niños no deben jugar con la unidad. La limpieza y
mantenimiento de usuario no deberán ser realizados por niños a menos que
sean mayores de 8 años y bajo la supervisión de un adulto.
30. Los niños deben ser supervisados para asegurarse de que no jueguen con el
aparato.
31. Este electrodoméstico está diseñado solo para uso doméstico y en interiores.
CARACTERÍSTICAS DEL PRODUCTO
•Enfriador: Hace circular el agua para soplar aire frío. Puede bajar la
temperatura ambiente y proporcionarle un ambiente confortable en verano.
•Humidificador: Humidifica el aire para evitar que la piel se seque y se agriete
en invierno.
•Ionizador: Libera iones negativos para refrescar el aire y cuidar la salud.
•Depósito de agua estilo cajón, rejilla de filtración desmontable. Fácil de
limpiar. El filtro elimina pequeñas sustancias nocivas, como el polvo y el
polen.
•Ahorro de energía, alta eficiencia, amigable con el medio ambiente. Cuenta
con una potencia de entrada es de 130W.
•Amplio rango de salida de aire de 100°.
•3 velocidades de ventilador: ALTA-MEDIA-BAJA
•Control remoto: Alcance de hasta 6 metros, receptor de gran angular de 120°.

•Configuración del temporizador de 1 a 24 horas.
DIAGRAMA
LISTA DE ACCESORIOS
Accesorio
Cantidad
(pcs)
Mando a distancia
1
Manual de instrucciones
1
Rueda con patín
2
Rueda sin patín
2
TECHNICAL PARAMETERS
MODELO
TH-KB12.
Voltaje y Potencia
220-240V/50Hz 130W.
Consumo máximo de flujo de aire
1130m³/h.
Volumen máximo de agua
10L.
Peso neto
6.5 Kg.
Dimensiones
32 x 29.5 x 72 cm.
Nota: Debido al desarrollo constante de nuestros productos en lo que respecta a las
especificaciones y el diseño, tomamos reservas para cambios sin previo aviso.

INSTRUCCIONES DE USO
1. Saque la unidad del cartón y colóquela sobre una superficie plana, sólida y
resistente al calor.
2. Compruebe que están todos los accesorios, revise el aparto “Lista de
accesorios”.
3. Coloque la unidad sobre una superficie horizontal sólida a prueba de calor.
Saque las ruedas y proceda a montarlas.
Nota: Las ruedas con patín son para los dos orificios frontales y las ruedas
sin patín son para los dos orificios traseros en la parte inferior de la unidad
(como se muestra en la figura 1).
4. Tire hacia arriba del tanque de agua y tire hacia afuera unos 10 cm hacia el
pasador de bloqueo, luego agregue agua. (como se muestra en la figura 2)
Nota:
•El nivel del agua debe estar entre la línea MIN y MAX. (como se
muestra en la figura 3)
•Después de un tiempo de funcionamiento, puede haber polvo y
suciedad en el tanque de agua. Se recomienda cambiar el agua y
limpiar el tanque de agua con frecuencia.
5. Utilice la unidad solo con una toma de CA correcta.
6. Enchufe la unidad en una toma de corriente y encienda desde el interruptor.
Se puede escuchar un pequeño pitido y el indicador de encendido se
encenderá.
Nota:
•Para protegerse contra descargas eléctricas, no quite el enchufe de la
toma con la mano mojada.
•Desenchufe la unidad de la toma de corriente si la va mover.
•Asegúrese de que el enchufe se encuentra correctamente conectado a la
toma de corriente.
7. Presione el botón “HUMIDIFICADOR” para mejorar la humedad del aire y así
evitar la piel seca y agrietada en invierno.

PANEL DE CONTROL
(Mando a distancia con funciones del panel de control de la unidad)
Conecte el enchufe en una toma de corriente y encienda el interruptor de
alimentación que está a un lado de la unidad. Se puede escuchar un pequeño pitido y
el indicador de encendido se iluminará.
ON/OFF: Presione una vez este botón para preparar la unidad para trabajar.
Comenzará con velocidad media en 3 segundos y luego volverá a trabajar bajo el
estado memorizado. Si se usa por primera vez, se iniciará con velocidad media en 3
segundos y luego funcionará en velocidad baja. Presione nuevamente este botón para
apagar.
SPEED (VELOCIDAD): Presione este botón para seleccionar la velocidad del ventilador
deseada, LOW->MID->HIGH->LOW, a su vez. Al mismo tiempo, a pantalla digital
mostrará 1.2.3.
MODE (MODO): Presione este botón para seleccionar el modo de viento deseado,
NATURE->SLEEP->NORMAL->NATURE, a su vez. Se mostrará el indicador del modo
correspondiente.
(1) NORMAL: Funciona según la velocidad del ventilador seleccionada (ALTA, MEDIA,
BAJA).
(2) NATURE: Funciona según el programa de computadora preestablecido, imitando el
viento natural irregular.
(3) SLEEP: Funciona según el programa de computadora preestablecido, alternando

entre diferentes velocidades del ventilador.
•Si se selecciona HIGH, la unidad funcionará en el modo de viento HIGH
NATURE durante media hora, luego volverá a trabajar en el modo de
viento MID NATURE durante media hora y luego volverá al modo de viento
LOW NATURE.
•Si se selecciona MID, la unidad funcionará en modo de viento MID
NATURE durante media hora, luego volverá al modo de viento LOW
NATURE.
•Si se selecciona LOW, la unidad funcionará en modo de viento LOW
NATURE.
SWING (OSCILACIÓN): Presione una vez este botón para hacer oscilar horizontalmente
las rejillas verticales, se mostrará el indicador de OSCILACIÓN. Presione nuevamente
para una dirección de aire fija. Para dirigir el flujo de aire vertical, ajuste las rejillas
horizontales manualmente.
COOL (ENFRIAMIENTO): Presione una vez este botón para iniciar la función de
enfriamiento por evaporación. Presione nuevamente este botón para cancelar.
IONIZER (IONIZADOR): Presione una vez este botón para liberar iones negativos en el
aire, refrescar el aire y cuidar la salud. Presione nuevamente este botón para cancelar.
HUMIDIFIER (HUMIDIFICADOR): Durante la operación, presione este botón para
humedecer el aire, mejorar la humedad del aire, evita la piel seca y agrietada.
Presione nuevamente este botón para cancelar.
TIMER (TEMPORIZADOR): Se puede configurar entre 24 horas, incrementado en
intervalos de 1 hora.
MANTENIMIENTO Y LIMPIEZA
Nota: Después de una operación prolongada, la rejilla de filtración se obstruye con
polvo y suciedad, lo que afectará en gran medida el rendimiento de la unidad. Se
recomienda limpiar la malla de filtración con frecuencia.
Limpieza de la malla de filtración.
1. Retire el enchufe de la toma de corriente.
2. Tome el asa de la malla de filtración y tire hacia arriba (como se muestra en la
figura 4).
3. Limpie la malla de filtración con detergente suave y un cepillo suave.
4. Asegúrese de que la malla de filtración esté completamente seca antes de
instalar.
Limpieza del depósito de agua
1. Retire el enchufe de la toma de corriente.
2. Extraiga el depósito de agua (como se muestra en la figura 5).

3. Limpie el depósito de agua con un poco de detergente suave sobre un paño y
luego enjuague con agua.
4. Coloque el depósito de agua en su lugar después de la limpieza.
Limpieza del cuerpo
Limpie el cuerpo con un poco de detergente suave sobre un paño suave.
Nota:
• Desenchufe la unidad de la toma de corriente antes de limpiarlo.
• No hay agua en el panel de control.
SOLUCIÓN DE PROBLEMAS
Si nota un malfuncionamiento durante el uso, puede que no sea el problema de la
unidad. Puede consultar la siguiente lista antes de enviarla a reparar.
Problema
Causa posible
Solución
No funciona
1. El enchufe no está bien
insertado en la toma o no
está bien conectado.
2. No se ha presionado el
botón “ON/OFF”
1. Asegúrese de que el
enchufe está bien
conectado a la toma de
corriente.
2. Presione el botón
“ON/OFF” tras enchufar la
unidad.
La Humidificación no
tiene el efecto deseado
1. No hay suficiente agua
en el depósito.
2. La bomba de agua está
obstruida.
1. Agregue agua para
asegurarse de que haya
suficiente agua para
bombea
2. Limpie las impurezas del
depósito de agua.
Nota:
1. Si el problema no se puede encontrar en la lista o persiste, comuníquese con
nuestro Servicio Técnico Oficial.
2. NO abra y repare la unidad usted mismo.

MEDIO AMBIENTE
¡Usted también puede contribuir a la conservación del medio ambiente!
Este aparato no debe desecharse con la basura doméstica al final de su vida
útil, sino que se debe depositar en un punto de recogida para el reciclaje de
aparatos eléctricos y electrónicos. Este símbolo en el aparato, manual de
instrucciones y embalaje quiere atraer su atención sobre esta importante cuestión.
Los materiales utilizados en este aparato se pueden reciclar. Mediante el reciclaje de
electrodomésticos, usted contribuye a fomentar la protección del medioambiente.
Solicite más información sobre los puntos de recogida a las autoridades locales.
CONDICIONES DE GARANTÍA
1. Este aparato está cubierto contra cualquier defecto de fábrica.
2. El aparato se cambiará siempre y cuando esté dentro del plazo de cambio y se
devuelva con todos sus accesorios y embalaje.
3. la garantía será válida siempre y cuando el aparato vaya acompañado de su
factura o ticket de compra donde salga reflejado el aparato, o también su tarjeta
de garantía debidamente cumplimentada y sellada.
4. El aparato estará exento de garantía (no cubierto) cuando:
4.1. El aparato tenga señales de golpes y/o caídas.
4.2. El aparato presente signos de mal uso.
4.3. El aparato presente signos de uso excesivo.
4.4. EL aparato esté manipulado inadecuadamente.
4.5. No tiene documento acreditativo (tarjeta, ticket o factura compra).
4.6. El aparato no se ha usado según las instrucciones de uso

EN
Dear Customer
We appreciate the trust placed in us when purchasing this THULOS® product.
Our main effort is to offer excellent articles, maintaining the strictest quality controls
and complying with all current safety regulations, with the aim of presenting a perfect
and safe product for domestic use.
IMPORTANT SAFEGUARDS
1. READ ALL INSTRUCTIONS BEFORE USING.
2. Do NOT open and repair the unit. Please contact the Technical Service.
3. Using it the first time, please check if your voltage is accord with the
nameplate for air cooler.
4. To protect against electric shock, keep the unit dry. Do not immerse in water or
any other liquid.
5. Unplug from outlet while filling water, before cleaning, maintaining or moving
the unit.
6. Unplug from outlet when not in use.
7. Do not insert foreign objects into the grid of air vent (intake or outlet) during
operation.
8. Do not cover the appliance with paper, cardboard, plastic, metal foil, or any
other flammable material. Otherwise, a fire may occur. Keep the appliance
away from any hot sources.
9. Place the unit on a solid hot-proof horizontal surface.
10. Water level must be between the MIN and MAX line.
11. After filling with water, do not tilt the unit and avoid moving it, which may
cause water to overflow the sides of the tank and leak. If the unit needs to be
moved a little, push on the side gently.
12. Never turn the unit on its sides.
13. Do not place any objects on the top of the unit. The air vent must not be
obstructed during operation.
14. Do not use abrasive products to clean the unit body. For slight dirt on the body,
wipe it off with a soft damp cloth. For greasy dirt, squeeze a little toothpaste
or mild detergent on a soft damp cloth, and then wipe the dirt off.
15. Keep the air vent (intake or outlet) away from obstacles.
16. Do not strike or shake the unit body during operation, otherwise, it will stop
working automatically. In this case, restart the unit.
17. Do not put the unit under wall socket.
18. Empty water tank to avoid odor occurring when not in use.
19. Do not use after the unit malfunctions. Send to service center for repair.
20. Do not use the unit for other than its intended use.
21. Do not use the unit when the power cord is damaged. Send to service center

for repair. If the supply cord is damaged, it must be replaced by the
manufacturer or its service agent or a similarly qualified person in order to
avoid a hazard.
22. Keep the unit out of children’s reach. Close supervision should be exercised
when children are nearby. WARNING: Please do not use where children can
touch the unit, nor let children use the unit by themselves.
23. Keep cord away from sharp or hot objects.
24. Do not clean with metal sourcing pads. It may scratch the surface or cause
electrical shock.
25. Do not clean the unit with flammable liquid.
26. Avoid sharing a power outlet with any other appliances.
27. Do not use new and old batteries at the same time in remote controller.
28. Take off batteries from remote controller when not in use.
29. This appliance is not intended for use by persons (including children) with
reduced physical, sensory or mental capabilities, or lack of experience and
knowledge, unless they have been given supervision or instruction concerning
use of the appliance by a person responsible for their safety.
30. Children should be supervised to ensure that they do not play with the
appliance.
31. This appliance is intended for household and indoor use only.
PRODUCT FEATURES
Cool: It cycles the water to blow cool air. It can lower the surrounding
temperature and provide you a comfortable environment in hot summer.
Humidifier: It humidifies the air to avoid skin dry and spall in winter.
Ionizer: It releases negative ions to freshen the air and care health.
Drawer style water tank, detachable filtration mesh. It is easy to clean. Filter
removes harmful tiny substances, such as dust and pollen.
Energy saving, high-efficiency, friendly environment. The input power is 130W.
Wide range of air output, 100 angle wide range of air output. The outlet will
close when the power supply is off. 3 fan speeds: HIGH-MID-LOW
Remote Control.
6 meters remote control, 120 angle wide range receiver.
1 to 24 hours timer setting.

CONSTRUCTION DRAWING
ACCESSORIES LIST
Accessory name
Quantity(pcs)
remote controller
1
instruction manual
1
caster with skid
2
caster without skid
2
TECHNICAL PARAMETERS
MODEL
TH-KB12.
Ratings
220-240V/50Hz 130W
MAX Air Flow Consumption
1130m³/h
MAX Water Volume
10L
Net Weight
6.5 KGS
Measurements
32 x 29.5 x 72 cm.
Note: Due to constant development of our products in regards to specification and
design, we take reservation for changes without prior notice.

OPERATION INSTRUCTION
1. Pull the unit outwards from the carton and place it on a solid hot-proof horizontal
surface.
2. Check if the accessories are complete, same as the accessories list.
3. Place the unit on a solid hot-proof horizontal surface. Take out the casters and
caster wrench to assemble.
Note: Casters with skid are for the two front holes and casters without skid
are for the two back holes at the bottom of the unit. (shown as fig.1)
4. Pull upwards the water tank and pull outwards about 10cm to the locking pin,
then add water. (shown as fig.2)
Note:
Water level must be between the MIN and MAX line. (shown as fig.3)
After some time operation, dust and dirt may occur in water tank. It is
recommended to change water and clean water tank frequently.
5. Only use the unit with correct AC outlet.
6. Insert the plug pin into a wall socket and turn on the power switch which is at the
side of the unit. A small beep sound can be heard and the power indicator will be
on.
Note:
To protect against electric shock, do not remove plug from wall outlet by wet
hand.
Unplug from outlet while moving the unit.
Insert the plug pin into the wall socket and make sure it is connected well.
7. Press “HUMIDIFIER” button to improve the air damp, avoid skin dry and spall in
winter.

CONTROL PANEL
(Remote controller control panel with the same function as the unit control panel)
Insert the plug pin into a wall socket and turn on the power switch which is at the side
of the unit. A small beep sound can be heard and the power indicator will be on.
ON/OFF: Press once this button to make the unit ready for working. It will start up
with MID in 3 seconds and then revert to work under the memorized status. If for first
time use, it will start up with MID in 3 seconds and then work with LOW. Press again
this button to turn OFF.
SPEED: Press this button to select desired fan speed, LOWMIDHIGHLOW, in
turn. At the same time can digital display 1.2.3.
MODE: Press this button to select desired wind mode,
NATURESLEEPNORMALNATURE, In turn. The corresponding wind mode
indicator will be displayed.
(1) NORMAL: It works as per the selected fan speed (HIGH, MID, LOW).
(2) NATURE: It works as per the presetted computer program, imitating the
natural irregularly wind.
(3) SLEEP: It works as per the presetted computer program, alternating between
different fan speed.
If it is selected HIGH, the unit will work under HIGH NATURE wind mode
for half an hour, then revert to work under MID NATURE wind mode for
half an hour and then revert to LOW NATURE wind mode.
If it is selected MID, the unit will work under MID NATURE wind mode for
half an hour, then revert to LOW NATURE wind mode.

If it is selected LOW, the unit will work under LOW NATURE wind mode.
SWING: Press once this button to make horizontal swing of vertical louvers, the SWING
indicator will be displayed. Press again for fixed air direction. To directing vertical
airflow, adjust the horizontal louvers manually.
COOL: Press once this button to start the evaporative cooling function. Press again this
button to cancel.
IONIZER: Press once this button to release negative ions into the air, to freshen the air
and care health. Press again this button to cancel.
HUMIDIFIER: During operation, press this button to humidify the air, improve the air
damp, avoid skin dry and spall. Press again this button to cancel.
TIMER: It can be set between 24 hours, increased by 1 hour intervals.
MAINTENANCE AND CLEANING
Note: After long time operation, the filtration mesh becomes clogged with dust and
dirt, which will greatly affect the unit’s performance. It is recommended to clean the
filtration mesh frequently.
Cleaning the filtration mesh
1. Remove plug from wall outlet.
2. Catch the filtration mesh handle and pull upwards.(shown as fig.4)
3. Clean filtration mesh with mild detergent and soft brush.
4. Make sure filtration mesh is completely dry before installing.
Cleaning the water tank
1. Remove plug from wall outlet.
2. Pull out the water tank.(shown as fig.5)
3. Clean the water tank with a little mild detergent on a towel and then rinse in
water.
4. Put the water tank in place after cleaning.
Cleaning the body
Clean the body with a little mild detergent on a soft cloth.
Note:
Unplug from outlet before cleaning.
No water on the control panel.

TROUBLE SHOOTING
If there is something wrong during operation, it may not be the unit’s problem. You
may check against the following list before send for repair.
Problems
Possible reasons
Solutions
Not working
1. The plug is not
securely inserted into
the socket or not
connected well.
2. The “ON/OFF” button
is not pressed.
1. Insert the plug pin into
the wall socket and
make sure it is
connected well.
2. Press “ON/OFF”
button after plugged.
Humidify cool effect not
good
1. Water tank not
enough water
2. Water pump is
obstructed.
1. Add water to ensure
there is enough water for
pumping
2. Clean water tank
discharge impurities.
Notice:
1. If the problem cannot be found in the list or it persists, please contact our service
center or a qualified technician for further inspection.
2. Do NOT open and repair the unit by yourself.
ENVIRONMENT
This appliance should not be put into the domestic garbage at the end of
its durability, but must be offered at a central point for the recycling of
electric and electronic domestic appliances. This symbol on the
appliance, instruction manual and packaging puts your attention to this
important issue. The materials used in this appliance can be recycled. By recycling of
used domestic appliances, you contribute an important push to the protection of our
environment. Ask your local authorities for information regarding the point of
recollection.

WARRANTY CONDITIONS
1. This appliance is covered against any factory defects.
2. The device is changed for a new one as long as it is within the change period
and is returned with all accessories and packaging in good condition.
3. The guarantee will be valid as long as the appliance is accompanied by your
invoice or purchase ticket where the exact device and model, or your warranty
card duly completed and sealed, is reflected.
4. THE APPLIANCE WILL BE EXEMPT FROM WARRANTY WHEN:
4.1. The appliance has signs of knocks and / or falls.
4.2. The appliance shows signs of misuse.
4.3. The appliance has signs of overuse.
4.4. The appliance is improperly handled.
4.5. No supporting document. (Card, ticket or invoice).
4.6. The appliance has not been used in accordance with the instructions for
use.
Table of contents
Languages:
Other Thulos Air Conditioner manuals
Popular Air Conditioner manuals by other brands

intensity
intensity IDUFCI60KC-3 installation manual

Mitsubishi Electric
Mitsubishi Electric Mr.Slim MSZ-A24NA operating instructions
NEC
NEC RIH-6867 user manual
Johnson Controls
Johnson Controls York VIR 40A installation instructions
Hisense
Hisense 7K Use and Installation Instructions
GE
GE AHE18 Series Owner's manual and installation instructions

