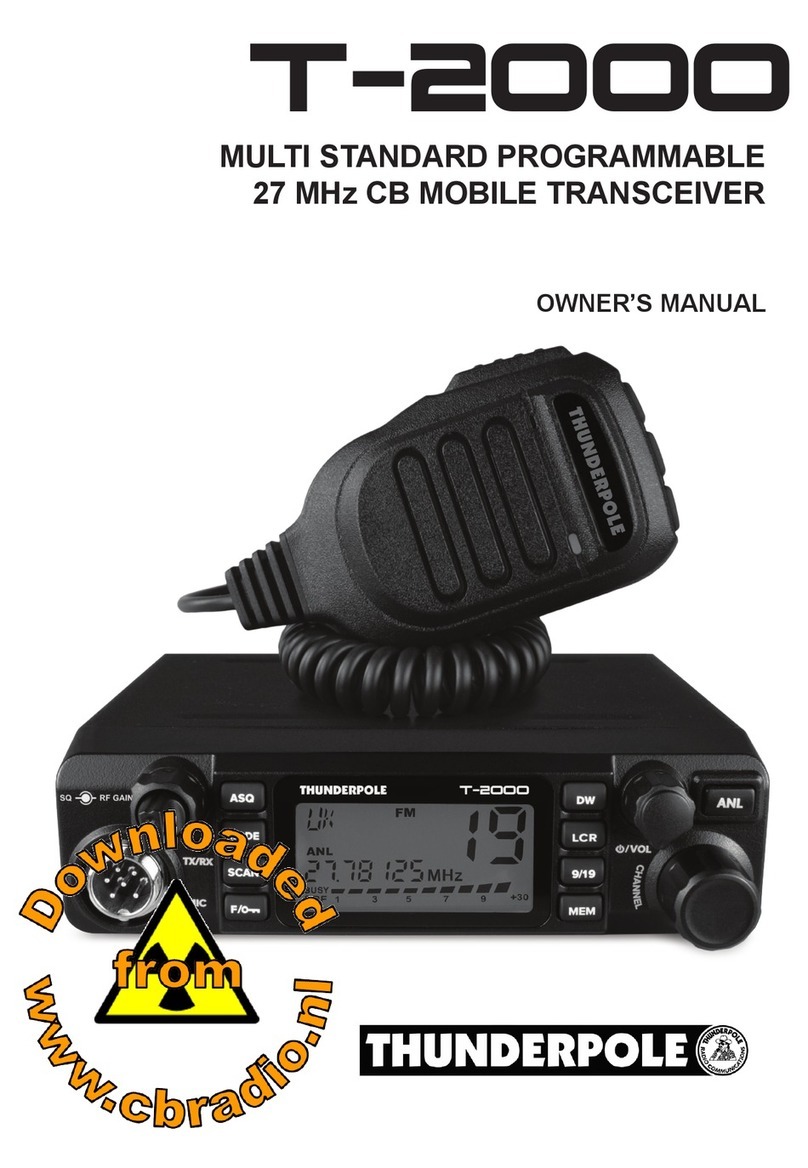
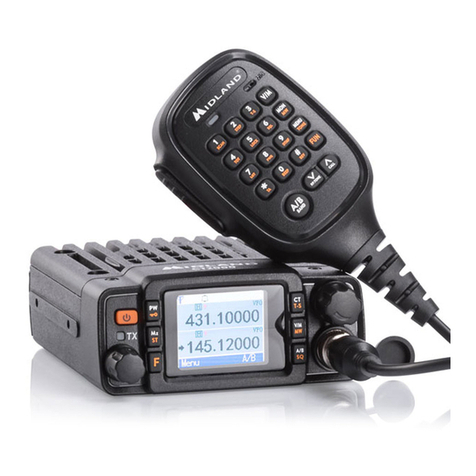
THUNDERPOLE T-1000 User manual

MULTI STANDARD PROGRAMMABLE
27 MHz CB MOBILE TRANSCEIVER
OWNER'S MANUAL
GEBRUIKSAANWIJZING

0678
NOTICE !
It is recommended to carefully read this owner’s manual before using the product. This will also help the user to
prevent using the radio in violation of the regulations valid in the country where the product is used, as well as to
avoid any possible interference with other services.
CH
Declaration of Conformity
With the present declaration, we certify that the following products :
comply with all the technical regulations applicable to the above mentioned products
in accordance with the EC Directives 2006/95/EC, 2004/108/EC, 99/5/EC.
Type of product : CB Transceiver
Details of applied standards : EN 300 433-1/-2, EN 300 135-1/-2
EN 301 489-1, EN 301 489-13
EN 60065
Manufacturer : THUNDERPOLE
1Hartburn Close, Crow Lane Ind Est
Northampton, NN3 9UE, England
Tel. +44 1604 402403 / Fax. +44 1604 416919
Notified Body : EMCCert Dr. Rasek
Boelwiese 5, 91320 Ebermannstadt
Germany
Identification Number : 0678
Contact Reference : Alan Crumpton
Tel. +44 1604 402403 / Fax. +44 1604 416919
Northampton, 2008/05/23 Mr. Alan Crumpton
(General Manager)
DECLARATION OF CONFORMITY
EC Certificate of Conformity
(to EC Directive 2006/95, 2004/108, 99/5)
RoHS
2002/95/EC
THUNDERPOLE T-1000

car mounting bracket accessories (hardware, knobs, etc.)
microphone bracket
owner’s manual
Index - Introduction - Contents of the box
- 1 -
Index - Introduction - Contentsof the box . . . . . . . . . . . . . . . . . . . . . . . . . . . . . . . . . . . . . . . . . . . . . . . 1
Controls and operation . . . . . . . . . . . . . . . . . . . . . . . . . . . . . . . . . . . . . . . . . . . . . . . . . . . . . . . . . . . 2 - 4
Installation . . . . . . . . . . . . . . . . . . . . . . . . . . . . . . . . . . . . . . . . . . . . . . . . . . . . . . . . . . . . . . . . . . . . . . . . 5
Frequency bands table - User Information . . . . . . . . . . . . . . . . . . . . . . . . . . . . . . . . . . . . . . . . . . . . . . 6
Frequency band selection / programming . . . . . . . . . . . . . . . . . . . . . . . . . . . . . . . . . . . . . . . . . . . . . . 7
Table of restrictions on the use of CB transceivers . . . . . . . . . . . . . . . . . . . . . . . . . . . . . . . . . . . . . . . 7
Specifications . . . . . . . . . . . . . . . . . . . . . . . . . . . . . . . . . . . . . . . . . . . . . . . . . . . . . . . . . . . . . . . . . . . . . . 8
Table of restrictions on the use of CB transceivers . . . . . . . . . . . . . . . . . . . . . . . . . . . . . . . . . . . . . . . I
PCB - Main Board & Front Board . . . . . . . . . . . . . . . . . . . . . . . . . . . . . . . . . . . . . . . . . . . . . . . . . . . II-III
Diagram . . . . . . . . . . . . . . . . . . . . . . . . . . . . . . . . . . . . . . . . . . . . . . . . . . . . . . . . . . . . . . . . . . . . . . . . IV-V
Block Diagram . . . . . . . . . . . . . . . . . . . . . . . . . . . . . . . . . . . . . . . . . . . . . . . . . . . . . . . . . . . . . . . . . .VI-VII
Notes . . . . . . . . . . . . . . . . . . . . . . . . . . . . . . . . . . . . . . . . . . . . . . . . . . . . . . . . . . . . . . . . . . . . . . . . .VIII-IX
NOTICE !
Before using this transceiver, please check it has been programmed on the correct frequency band
and operating mode allowed by the regulations valid in the country where the product is used. If not, please
change the frequency band(see page 7).
NOTE: This transceiver is factory pre-programmed on the CE European frequency band(CEPT 40CH FM 4W).
Congratulations!
Congratulations for selecting and purchasing a quality THUNDERPOLE product. This transceiver includes a number of
advanced functions and systems, therefore it is important to carefully read this owner’s manual before using the radio.
With the correct use of this product in accordance with the operating method described in this manual, the product
will offer a trouble free use for many years. THUNDERPOLE is constantly engaged to develop and provide quality
products meeting the customers requirements, however any suggestionsor comments on this product that might help us to
improve quality are warmly welcome. The THUNDERPOLE T-1000 is a CB transceiver using advanced hardware and
software design, it includes a special multi-standard programmable circuit, which allows you to program the
frequency band and operating mode in compliance with the regulations valid in the various European countries.
Therefore this product can be used in any country of the European Community.
The radio is delivered factory pre-programmed on the CE European frequency band (CEPT 40CH FM 4W).
Contentsof the box
Please check that all the following items are contained in the box :
main unit (transceiver)
DC power cord with fuse holder and fuse
condenser microphone
car mounting bracket
English

- 2 -
Controls and operation
Front Panel
1. AM / FM Selector
This switch allows you to select the operating mode AM or FM, in both TX and RX, if the desired operating mode is enabled
by the programmed frequency band.
2. CH9 / CH19 Selector
This 3-position switch allows you to select the emergency channels CH9 and CH19 in the programmed frequency band. If
the switch is set to its center position, radio will operate on the normal selected channel.
3. TX Indicator
This red colour LED indicator is lit when the radio is intransmit mode.
4. RX Indicator
This green colour LED indicator is lit when the radio is in receive mode.
5. LED Display
The large size 3-digit LED display indicates the operating channel and the programmed frequency band code.
6. DN (Down) Key
This key allows you to change the operating channel downwards. By keeping this key pressed, the quick channel selection
mode will be enabled.
7. UP (Up) Key
This key allows you to change the operating channel upwards. By keeping this key pressed, the quick channel selection mode
will be enabled.
1
9 8 7 610
2 3 4 5
TX
CH
RX
VOLUME
MULTISTANDARD CB RADIO
OFF AS UP DN
SQUELCH
AM FM CH9 CH19
English

- 3 -
English
Controls and operation
Rear Panel
8. AS/SQUELCH Control
SQUELCH CONTROL (SQUELCH manual adjustment)
The SQUELCH control allows you to silence the receiver by cutting out the background noise when no signals are
being received. Turn the knob clockwise until the background noise is cut. Turn the knob counter clockwise
(SQUELCH opening) in order to listen to the weakest signals.
AS CONTROL (SQUELCH fixed setting)
The AS function allows you to automatically silence the receiver, avoiding SQUELCH manual adjustment.
A fixed SQUELCH threshold is factory pre-set. To enable the fixed SQUELCH function, turn the knob fully counter
clockwise to the AS position, until a click noise is heard.
9. ON/OFF / VOLUME Control
Use this knob to switch radio ON and OFF, as well as to adjust the receiver volume to the desired level. To adjust the
receiver volume when no signals are being received on the operating channel, open the SQUELCH and then adjust the
receiver volume using the background noise as a reference.
10. Microphone Connector
Connect the microphone to this connector and turn the connector ring to lock it.
11. EXT (External Speaker) Jack
This jack is for connecting an external speaker (optional).
12. ANTENNA Connector
Antenna connector. Refer to the section INSTALLATION OF THE ANTENNA.
13. 13.2VDC POWER CORD
13.2VDC power cord input.
ANTENNA
EXT
DC
13.2V
11
13
12

Controls and operation
- 4 -
English
Microphone
14. PTT (Push-to-Talk) Key
Transmitter key. Press the PTT key to transmit and release it to return to the receive mode.
15. MICROPHONE Plug
4-pin microphone connector with locking ring. Connect it to the microphone connector on the front panel of the radio.
14
15
IMPORTANT !
Never attempt to open the cabinet of the transceiver. No user serviceable parts inside. Internal modifications or
tampering may cause damage to the product, modifying its technical specifications will void all warranty rights.
If service or repair is required, please go to an authorised service centre or specialized technician.
THUNDERPOLE

Installation
- 5 -
English
Installation
Before installing the main unit in the vehicle, check and select the most convenient location, in order that the radio will be
easy to reach and comfortable to operate, without obstructing any of the vehiclescontrols. Use the supplied
bracket and hardware to install the radio. The bracket screws must be well tightened in order to not become loose with
the vehiclesvibrations. The car mounting bracket can be installed over or below the radio and the radio may be inclined
as desired(whether under dashboard or truck cabin roof installation).
Installation of the Main Unit
Before connecting the radio to the vehicleselectric system, make sure that radio is switched off, with the OFF/VOLUME (9)
knob completely turned counter clockwise at OFF position. The DC power cable (13) of the radio is complete with a fuse
holder with fuse located on the red positive (+) wire. Connect the DC power cable to the vehicleselectric system, with
special attention to correct polarity. Connect the red wire to the positive (+) pole and the black wire to the negative (-) pole
of the vehicleselectric system. Make sure that the wires and terminals are firmly and stably connected, in order to prevent
cables from disconnecting or causing short circuits.
Installation of the
A specific 27MHz CB antenna must be used. Please make sure to carefully install the antenna mount on the vehicle with
Antenna
a good connection to ground. Before connecting the antenna to the radio, it is necessary to check the correct operation
of the antenna with low standing wave ratio (S.W.R.), using an SWR meter. If not, the transmitter circuit of the
radio could be damaged. The antenna should be installed on the highest part of the vehicle, free from obstacles
and as far away as possible from any source of electric or electromagnetic noise. The RF antenna coaxial cable must
not be damaged or pressed on its way between antenna and the radio. The correct operation of the antenna and the low
standing wave ratio (S.W.R.) must be checked periodically. Connect the RF antenna coaxial cable to the antenna
connector (12), located on the rear side of the radio.
Checking Operation of the Radio
Once the radio has been connected to the vehicleselectric system and to the antenna, the correct operation of the system
may be checked. Please proceed as follows :
1) Check that the power cable is correctly connected.
2) Check that the RF antenna coaxial cable is correctly connected.
3) Connect the microphone to the connector (10), located on the front side of the radio.
4) Rotate the AS/SQUELCH (8) knob counter clockwise.
5) Turn the radio on using the ON/OFF/VOLUME (9) knob and adjust the volume to the desired level.
6) Select the desired channel, using the channel selector keys (6, 7).
7) Rotate the AS/SQUELCH (8) knob clockwise, to cut the background noise.
8) Press the PTT (14) key to transmit and release it to receive.
The transceiver will work correctly.

Frequency bands table - User Information
- 6 -
Frequency Bands Table
The THUNDERPOLE T-1000 includes an advanced multi-standard programmable circuit, which allows to
program different frequency bands and operating modes, in conformity with the regulations in the country
where the product is used. 8 programmable frequency bands are available, as per the below table :
Attention ! This radio has been factory pre-programmed on the CE frequency band (CEPT 40CH FM 4W), since this
standard is currently accepted in all the European countries. Please refer to the information table at page I(Restrictions
on the use of CB transceivers).
User Information
in accordance with art. 13 of the Legislative Decree of 25th July 2005, no. 15 ”Implementation of Directives 2002/95/EC,
2002/96/EC and 2003/108/EC, relative to reduction of the use of hazardous substances in electrical and electronic
equipment, in addition to waste disposal”.
The crossed bin symbol shown on the equipment indicates that at the end of its working life the product must
be collected separately from other waste.
The user must therefore take the above equipment to the appropriate differentiated collection centres for
electronic and electro technical waste, or return it to the dealer when purchasing a new appliance of
equivalent type, in a ratio of one to one.
Appropriate differentiated waste collection for subsequent recycling, treatment and environment-friendly disposal of the
discarded equipment helps to prevent possible negative environmental and health effects and encourages recycling of
the component materials of the equipment.
Illegal disposal of the product by the user will be punished by application of the administrative fines provided for by the
legislative decree no. 22/1997 (article 50 and following of the legislative decree no. 22/1997).
FREQUENCY BAND
ID CODE COUNTRY SPECIFICATIONS
(Channels, Operating Modes, TX Power)
E1 ITALY/SPAIN
40CH AM / FM 4W
I2 ITALY
36CH AM / FM 4W
dE GERMANY
80CH FM 4W - 12CH AM 1W
d2 GERMANY
40CH FM 4W - 12CH AM 1W
EU EUROPE/FRANCE
40CH FM 4W - 40CH AM 1W
CE CEPT
40CH FM 4W
UUK
40CH FM 4W UK FREQUENCIES
40CH FM 4W CEPT FREQUENCIES
PL POLAND
40CH AM / FM 4W POLISH FREQUENCIES
English

Frequency band selection / programming
- 7 -
Frequency Band Selection / Programming
This two-way CB radio must be programmed and exclusively used on a frequency band allowed in the country where
the product is used. When radio is switched ON, the current programmed frequency band code will be displayed
(blinking) for about 3 seconds. To program a different frequency band, proceed as follows :
1) Turn OFF the radio.
2) Press and keep pressed the UP key (7), then turn ON the radio using the ON/OFF/VOLUME knob (9).
3) The current frequency band code will blink on the display (5), now let go of the UP key.
4) Now select the new desired frequency band code by pressing the UP (7) or DN (6) key; during the frequency
band selection process, the frequency band code will blink at a faster speed.
5) Press the PTT (14) key or wait for about 2 seconds to confirm and store the new selected frequency band
code.
UK/CE CHANNELS SELECTION (FREQUENCY BAND "U")
If the UK Frequency band has been selected, all 80 channels can be scrolled through using the channel keys. When a
UK frequency channel is selected the display (5) will show the channel number and the indication "U". When a
CEPT frequency channel is selected the display (5) will show the channel number and the indication "C".
Table of Restrictions on the Use of CB Transceivers (page I)
The following information is to be considered only as an indication. They are believed to be correct at the time of
printing this operating manual. It is however the user’s responsibility to check that, in the country where radio is used, the
regulations for the use of CB transceivers hasnot been modified. The user is therefore suggested to contact the local
dealer or local authority, in order to check the current regulations for the use of CB transceivers, before operating this
product. The manufacturer does not take any responsibility if the product is used in violation of the regulations of the
country where the product is used.
Addendum (Updated information on national restrictions)
BELGIUM, SPAIN, SWITZERLAND
In order to use this transceiver in Belgium, Spain and Switzerland, residents must have an individual licence. Users
coming from abroad may freely use the radio in FM mode, while in order to use it in AM mode they must hold a licence
released in their own country.
ITALY
Foreigners arriving in Italy must get an Italian authorization.
AUSTRIA
Austria does not allow using multi standard programmable CB radios. It is recommended
to carefully follow this directives and not to use the product in the Austrian territory.
GERMANY
Along some border areas in Germany, the radio can not be used as a base station from
channel 41 to channel 80. Refer to local authority (notification office) for details.
English

Specifications
- 8 -
Specifications
General
Channels 40 FM (refer to the frequency bands table at page 7)
Frequency range 27 MHz Citizen Band
Frequency control P.L.L.
Operatine temperature -10°/+55°C
DC input voltage 13.2Vdc ±15%
Size 140 (L) x 37 (H) x 190 (D) mm
Weight 750 gr.
Receiver
System Double conversion, CPU controlled super-eterodine
IF 1° 10.695 MHz / 2° 455 KHz
Sensitivity 0.5uV for 20dB SINAD (FM)
0.5uV for 20dB SINAD (AM)
Audio output 2.5W
Audio distorsion <8% at 1 KHz
Image rejection 65dB
Adjacent channel 65dB
Signal/noise ratio 45dB
Current drain 325mA (stand-by)
Transmitter
System CPU controlled P.L.L. systhesizer
Maximum RF power 4W at 13.2Vdc
Modulation 85% to 90% (AM)
1.8 KHz ±0.2 KHz (FM)
Impedance 50 ohm unbalanced
Current drain 1300mA (at no modulation)
English

Inhoud-inleiding-inhoud van de verpakking
- 9 -
Inhoud-Inleiding-Inhoud van de verpakking . . . . . . . . . . . . . . . . . . . . . . . . . . . . . . . . . . . . . . . . . . . . .9
Bediening . . . . . . . . . . . . . . . . . . . . . . . . . . . . . . . . . . . . . . . . . . . . . . . . . . . . . . . . . . . . . . . . . . . . . 10-12
Installatie.. . . . . . . . . . . . . . . . . . . . . . . . . . . . . . . . . . . . . . . . . . . . . . . . . . . . . . . . . . . . . . . . . . . . . . . . 13
Tabel van de frequentieband –Gebruikersinformatie . . . . . . . . . . . . . . . . . . . . . . . . . . . . . . . . . . . . 14
Selectie van de bandfrequentie / programmering . . . . . . . . . . . . . . . . . . . . . . . . . . . . . . . . . . . . . . . 15
Tabel met beperkingen voor het g ebruik van CB zend /ontvangst apparatuur . . . . . . . . . . . . . . . 15
Specificatiese . . . . . . . . . . . . . . . . . . . . . . . . . . . . . . . . . . . . . . . . . . . . . . . . . . . . . . . . . . . . . . . . . . . . . 16
Tabel met beperking en voor het gebruik van CB zend /ontvangst apparatuur . . . . . . . . . . . . . . . . . I
PCB –Voorkant en achterpaneel . . . . . . . . . . . . . . . . . . . . . . . . . . . . . . . . . . . . . . . . . . . . . . . . . . . II-III
Schema . . . . . . . . . . . . . . . . . . . . . . . . . . . . . . . . . . . . . . . . . . . . . . . . . . . . . . . . . . . . . . . . . . . . . . . . IV-V
Blokschema . . . . . . . . . . . . . . . . . . . . . . . . . . . . . . . . . . . . . . . . . . . . . . . . . . . . . . . . . . . . . . . . . . . .VI-VII
Notities . . . . . . . . . . . . . . . . . . . . . . . . . . . . . . . . . . . . . . . . . . . . . . . . . . . . . . . . . . . . . . . . . . . . . . .VIII-IX
OPGELET !
Controleer voor het gebruik van de zend /ontvangst apparatuur of de radio op de juiste
bandfrequentie en volgens de specificaties en bedieningmodus voor het betreffende land is
geprogrammeerd. Indien dit niet het geval is, volg de aanwijzingen in de gebruiksaanwijzing om de
programmering van bandfrequentie aan te passen . Dit zend/ontvangst apparaat is door de fabriek
voorgeprogrammeerd volgens de CE Europese bandfrequentie (CEPT 40CH FM 4W).
Gefeliciteerd !
Gefeliciteerd met de aanschaf van een THUNDERPOLE kwaliteitsproduct. Dit zend/ontvangst apparaat bevat
een aantalgeavanceerde functies en systemen. Daarom is het noodzakelijk om de gebruiksaanwijzing zorgvuldig door
te lezen voordat u de radio in gebruik neemt. Door een juist gebruik van het product in overeenstemming met de
werkingswijze zoals die in deze gebruiksaanwijzing beschreven staat, kunt u jarenlang probleemloos plezier hebben van dit
product. THUNDERPOLE is voordurend bezig met het ontwikkelen en maken van kwaliteitsproducten die voldoen aan
de eisen van de klanten. Wij staan echter altijd open voor suggesties en opmerkingen die de kwaliteit van ons product kunnen
verbeteren. De THUNDERPOLE T-1000 is een CB zend/ontvangst apparaat dat gebruik maakt van geavanceerde
hardware en software en bevat een multi-programmeerbaar circuit, dat het mogelijk maakt om de specificaties
van de radio (bandfrequenties, werkingsmodus en vermogen) te programmeren in overeenstemming met de regels die van
kracht zijn in verschillende Europese landen. Daarom kan dit product worden gebruikt in alle landen van de EU. De radio
wordt standaard afgeleverd met de door de fabrikant geprogrammeerde CE Europese bandfrequentie (CEPT 40CH FM 4W).
Inhoud van de verpakking
Controleer of alle onderdelen aanwezig zijn:
het zend/ontvangst apparaat
DC snoer met zekeringhouder en zekering
condens microfoon
bevestigingssteun voor de auto
accessoires voor de bevestigingssteun
(hardware, schakelaars, etc..)
microfoonsteun
gebruiksaanwijzing
Nederlands

1
9 8 7 610
2 3 4 5
TX
CH
RX
VOLUME
MULTISTANDARD CB RADIO
OFF AS UP DN
SQUELCH
AM FM CH9 CH19
Bediening
- 10 -
Voorkant
1. AM / FM Keuzeschakelaar
Met deze schakelaar selecteert u de AM of FM modus, zo wel in TX als RX, indien de gewenste modus beschikbaar is
volgens de geprogrammeerde bandfrequentie.
2. CH9 / CH19 keuzeschakelaar
Deze schakelaar met 3 posities selecteert de hulpkanalen CH 9 en CH19 van de geprogrammeerde bandfrequenties. In
de middelste positie zal de radio gewoon volgens het geselecteerde kanaal werken.
3. TX controlelampje
Dit rode LED lampje licht op als de radio in de zend modus staat.
4. RX controlelampje
Dit groene LED lampje licht op als de radio in de ontvangst modus staat.
5. LED Display
De grote 3-digit LED display geeft aan welk kanaal wordt gebruikt en de geprogrammeerde bandfrequentie code.
6. DN (omlaag) toets
Met behulp van deze toets kunt u kanalen selecteren met een lagere frequentie. Als u de toets langer indrukt zal de
snelle kanaal selectie modus worden geactiveerd.
7. UP (omhoog) toets
Met behulp van deze toets kunt u kanalen selecteren met een hogere frequentie. Als u de toets langer indrukt zal de
snelle kanaal selectie modus worden geactiveerd.
Nederlands

Bediening
- 11 -
8. AS/SQUELC H regelaar
SQUELCH Regelaar (SQUELCH handmatige afstelling)
De SQUELCH regelaar stelt u in staat om het achtergrondgeluid van de ontvanger uit te schakelen als er geen signaal
wordt ontvangen. Draai de knop volgens de wijzers van klok totdat u geen geluid meer hoort. Draai de knop tegen de
wijzers van de klok (SQUELCH openen) om zwakke signalen te ontvangen.
AS regelaar (SQUELCH vaste stand)
De AS functie zorgt ervoor dat het ontvangstapparaat automatisch achtergrondgeluid uitschakelt, zonder handmatige
afstelling. Door de fabriek is een vaste SQUELCH stand ingesteld. Om de vaste SQUELCH functie in te stellen moet de
knop in de richting van de wijzers van de klok worden gedraaid tot de AS stand en u een duidelijke klik hoort.
9. OFF / VOLUME regelaar
Met deze knop kan de radio Aan en Uit worden gezet en kan ook de geluidssterkte worden geregeld. Om het
geluidsniveau aan te passen als een signaal wordt opgevangen van het openstaande kanaal, de SQUELCH aanzetten
en de geluidssterkte afstellen met de achtergrondruis als referentie.
10. Microfoonaansluiting
Sluit de microfoon aan op de betreffende ingang en zet hem vast door aan de ring te draaien.
11. EXT (Externe Speaker) aansluiting
Deze ingang is om een externe speaker aan te sluiten (optioneel)
12. ANTENNA aansluiting
Antenne aansluiting. Zie verder de hoofdstukken ‘INSTALLATIE VAN DE ANTENNE’.
13. 13.2VDC kabel
13.2V DC kabel ingang.
Achterpaneel
ANTENNA
EXT
DC
13.2V
11
13
12
Nederlands

Bediening
- 12 -
BELANGRIJK
Probeer het toestel nooit ope n te maken. Er bevinden zich geen onderdelen in die door de gebruiker kunnen
worden vervangen of afgesteld. Veranderingen kunnen het toestel beschadigen, de technische specificaties
verstoren en de garantiebepalingen doen vervallen. Reparaties en onderhoud alleen door een erkend
onderhoudscentrum of een gespecialiseerde technicus.
Microfoon
14. PTT (Push-to-Talk: druk om te spreken ) toets
Zendtoets. Druk op de PTT toets om te zenden en laat de knop los om de ontvangst modus in te schakelen.
15. MICROFOON stekker
Microfoonstekker met 4 pinnen en een afsluitring. Aansluiten op de microfooningang op de voorkant van de radio.
14
15
Nederlands
THUNDERPOLE

Installatie
- 13 -
Installatie
Voordat het apparaat in de auto wordt geïnstalleerd bepaalt u wat de handigste plek is, zodat de radio gemakkelijk
bereikt en bediend kan worden, zonder dat u daarbij gehinderd wordt bij het rijden. Gebruik de meegeleverde steun en
onderdelen om de radio te installeren. De schroeven van de steun moeten goed worden vast gedraaid zodat ze niet los
trillen. De autosteun kan boven of onder de radio worden bevestigd en de radio mag schuin worden geplaatst,
afhankelijk van de wijze van installeren (onder het dashboard of onder het dak van de cabine).
Installatie van de radio
Voordat u de radio aansluit op het elektrische circuit controleren of de radio uitstaat, door de OFF/VOLUME knop (9)
volledig tegen de wijzers van de klok in op OFF te draaien. De DC kabel (13) van de radio wordt geleverd met
zekeringhouder en zekering aan de rode positieve (+) draad. Sluit het DC snoer aan op het elektrische systeem, waarbij
u goed oplet dat de pool op de juiste wijze worden aangesloten, ook al is de radio beveiligd tegen het verwisselen van
de polen. Sluit de rode draad op de positieve (+) pool aan en de zwarte op de negatieve (-) pool van het elektrische
systeem van de auto. Zorg ervoor dat alle draden en aansluiting stevig vastzitten om te voorkomen dat de draden los
gaan zitten of kortsluiting veroorzaken.
Installatie van de Antenne
U hebt een specifieke mobiele antenne nodig die geschikt is voor 27 MHZ frequentie bandbreedte. De antenne
aansluiting moet worden gedaan door een specialist of een technische dienst. Let op dat de antenne zorgvuldig op het
voertuig wordt geïnstalleerd met veen goede aansluiting voor de aarde. Voordat u de radio en de antenne verbin dt moet
de juiste werking van de antenne worden getest met een lage standing wave ratio (S.W.R.), met behulp van de juiste
instrumenten. Zo niet, dan kan het zendcircuit van de radio worden beschadigd. Normaal gesproken moet de antenne
op het hoogste deel van het voertuig worden bevestigd, zonder obstakels en zover mogelijk verwijderd van alle bronnen
die elektrische of elektromagnetische ruis veroorzaken. De RF coaxkabel tussen de radio en de antenne mag niet
worden beschadigd of ingedrukt worden. De juiste werking van de antenne en de lage standing wave ratio (S.W.R.)
moeten regelmatig worden gecontroleerd. Sluit de coaxkabel van de RF antenne aan op de antenne aansluiting (12),
aan de achterkant van de radio.
Controleren van de werking van de Radio
Als de radio is aangesloten op het elektrische systeem van de auto en de antenne, moet de juiste werking van het
systeem worden gecontroleerd. Ga als volgt te werk:
1) Controleer of de stroomdraad juist is aangesloten.
2) Controleer of de coaxkabel van de RF antenne goed is aangesloten.
3) Sluit de microfoon aan op de aansluiting (10) aan de voorkant van de radio.
4) Draai de AS/SQUELCH (8) knop tegen de wijzers van de klok.
5) Zet de radio met behulp van de OFF/VOLUME (9) knop aan zet het volume op de gewenste sterkte.
6) Selecteer het gewenste kanaal met behulp van de afstemtoetsen (6,7)
7) Draai de AS/SQUELCH (8) knop in de richting van de wijzers van de klok om het achtergrondgeluid uit te
schakelen.
8) Druk op de PTT (14) toets om te zenden en laat hem los om te ontvangen.
Het zend/ontvangst toestel moet nu correct werken.
Nederlands

- 14 -
Tabel met bandfrequenties - Gebruikersinformatie
Tabel met bandfrequenties
Het zend/ontvangst apparaat THUNDERPOLE T-1000 bevat een aantal voorgeprogrammeerde multi-
standaard circuits, die het mogelijk maken om verschillende bandfrequenties, specificaties en de functie
modus te programmeren, in overeenstemming met de regelgeving in het land waar de radio gebruikt
wordt. Er zijn 8 bandfrequenties beschikbaar, zie onderstaande tabel:
Opgelet! Deze radio is in de fabriek voorgeprogrammeerd met de CE band frequentie (CEPT 40CH FM
4W), omdat deze standaard in alle Europese landen wordt geaccepteerd. Zie ook de informatietabel op
pagina I (Beperkingen betreffende het gebruik van CB zend/ontvangst apparatuur).
Gebruikersinformatie
in overeenstemming met art. 13 van Decreet no. 15 van 25 juli 2005 ”invoering van Richtlijnen 2002/95/EC, 2002/96/EC
en 2003/108/EC, met betrekking tot het terugdringen van het gebruik van gevaarlijke stoffen in elektrische en
elektronische apparaten en afvalverwerking ”.
Het teken van de afvalbak met een kruis op het apparaat betekent dat het aan het toestel als het wordt
afgedankt, gescheiden van het overige afval moet worden weggegooid.
Het apparaat moet naar een afvalinzamelingscentrum dat geschikt is voor elektronisch afval worden
gebracht, of worden ingeleverd bij de leverancier indien opnieuw een soort gelijk apparaat wordt
aangeschaft, in een 1 op 1 ratio.
Het goed scheiden van afval voor hergebruik en milieuvriendelijke verwerking na het afdanken van het apparaat, helpt
mogelijke milieuschade en gezondheidsproblemen te beperken en bevordert het hergebruik van de verschillende
componenten van het apparaat.
Het illegaal dumpen van dit product door de gebruiker kan worden bestraft met een boete volgens Decreet no. 22/1997
(artikel 50 en volgende van Decreet no. 22/1997).
BANDFREQUENTIE
ID CODE LAND
SPECIFICATIES
(kanalen, Functie Modus, TX vermogen)
E1 ITALIË/S PANJE
40CH AM / FM 4W
I2 ITALIË
36CH AM / FM 4W
dE DUITSLAND
80CH FM 4W - 12CH AM 1W
d2 DUITSLAND
40CH FM 4W - 12CH AM 1W
EU EUROPA/FRANKRIJ
40CH FM 4W - 40CH AM 1W
CE CEPT
40CH FM 4W
UUK
40CH FM 4W UK FREQUENTIES
40CH FM 4W CEPT FREQUENTIES
PL POLEN
40CH AM / FM 4W POOLSE FREQUENTIES
Nederlands

Selectie van de bandfrequentie en programmering
- 15 -
Selectie van de bandfrequentie / Programmering
Deze CB radio met zend- en ontvangstinstallatie moet worden geprogrammeerd en mag alleen worden gebruikt op de
bandfrequentie die is toegestaan in het betreffende land. Als de radio op ON staat zal de op dat moment
geprogrammeerde bandfrequentie code gedurende 3 seconden op de display zichtbaar (knipperen) zijn.
Ga als volgt te werk om andere bandfrequentie te programmeren:
1) Zet de radio uit (OFF).
2) Druk de UP toets (7) in en houd hem ingedrukt en zet de radio vervolgens met de OFF/VOLU ME knop (9) op
ON.
3) De actuele bandfrequentie zal gaan knipperen op de display (5).
4) Selecteer nu de nieuwe bandfrequentie code door op de UP (7) of DN (6) toets te drukken; tijdens het
bandfrequentie selectie proces zal de bandfrequentie code sneller beginnen te knipperen.
5) Druk op de PTT (14) toets en wacht ongeveer 2 seconden om de nieuw geselecteerd bandfrequentie code te
bevestigen en op te slaan
UK/CE KANAAL SELECTIE (BANDFREQUENTIE "U")
Als de “U” (UK band) bandfrequentie geselecteerd is, kunt u de kanalen langslopen met behulp van het kanaaltoetsen.
Wanneer en UK bandfrequentie is geselecteerd ziet u op de display (5) het nummer van het kanaal en de indicatie “U .
Wanneer een CEPT bandfrequentie is geselecteerd ziet u op de display (5) het nummer van het betreffende kanaal en
de indicatie “C”.
Tabel met beperking betreffende het gebruik van CB zend/ontvangst toestellen (pag. I)
De volgende informatie is alleen indicatief. De informatie was zo correct als mogelijk bij het printen van deze
gebruiksaanwijzing, maar het is aan de gebruiker om te controleren of de regels met betrekking tot het gebruik van CB
zend/ontvangst apparatuur in het betreffende land niet veranderd zijn. De gebruiker kan hiervoor bijvoorbeeld contact
opnemen met de lokale leverancier of de lokale overheid. De fabrikant neemt geen enkele verantwoordelijkheid als het
toestel wordt gebruikt in strijd met de regelgeving van het land waarin het toestel gebruikt wordt.
Addendum (Herziening informatie ten aanzien van nationale beperkingen).
BELGIË, UK, SPANJE EN ZWITSERLAND
In België, de UK, Spanje en Zwitserland moeten gebruikers van CB zend/ontvangst apparatuur over individuele
vergunning beschikken. Buitenlandse gebruikers kunnen de radio in de FM modus gebruiken, maar hebben een
vergunning uit hun eigen land nodig om het toestel in de AM modus te gebruiken.
ITALIË
Buitenlandse gebruikers hebben een Italiaanse toestemming nodig.
OOSTENRIJK
In Oostenrijk is het gebruik van multi standaard programmeerbare CB radio´s verboden
Het wordt aangeraden om de toestellen niet in Oostenrijk te gebruiken.
DUITSLAND
In sommige grensgebieden van Duitsland mag de radio niet worden gebruikt als basisstation voor de kanalen 41 tot 80.
Vraag bij de lokale overheid om nadere informatie.
Nederlands

Specificaties
- 16 -
Specificaties
Algemeen
Kanalen 40 FM (hebben betrekking op de bandfrequenties van de tabel op pag. 14)
Frequentie bereik 27 MHz Citizen Band
Frequentie sturing P.L.L.
Gebruikstemperatuur -10°/+55°C
DC invoerspanning 13.2Vdc ±15%
Afmetingen 140 (L) x 37 (H) x 190 (D) mm
Gewicht 750 gr.
Ontvanger
Systeem Dubbele conversie, CPU gestuurde super-eterodine
IF 1° 10.695 MHz / 2° 455 KHz
Gevoeligheid 0.5uV bij 20dB SINAD (FM)
0.5uV bij20dB SINAD (AM)
Audio output 2.5W
Audio vervorming <8% bij 1 KHz
Spiegelonderdrukking 65dB
Aangrenend kanaal 65dB
Signaal/ruis ratio 45dB
Stroomverbruik 325mA (stand-by)
Zender
Systeem CPU gestuurde P.L.L. synthesizer
Maximaal RF vermogen 4W bij 13.2Vdc
Modulatie 85% tot 90% (AM)
1.8 KHz ±0.2 KHz (FM)
Impedantie 50 ohm unbalanced
Stroomverbruik 1300mA (zonder modulatie)
Drukfouten voorbehouden.
Raadpleeg altijd uw dealer als u iets niet begrijpt.
Nederlands

Table of restrictions on the use of CB transceivers
- I -
CE
CE
CE
CE
CE
CE
CE
CE
CE
CE
CE
CE
CE
CE
CE
CE
COUNTRY
CB Introd.
AUSTRIA
DENMARK
BELGIUM
FRANCE
FINLAND
GERMANY
NO Not allowed
40 CH - 4W FM - Individual license is required
40 CH - 1W AM - Individual license is required
40 CH - 4W FM - Free use
40 CH - 4W FM - Free use
e 1W AM - Free use
40 CH - 4W FM - Free use
40 CH - 1W AM - Free use
12 CH - 1W AM - Free use
40 CH - 4W FM - Free use
12 CH - 1W AM - Free use
REGTP Vfg41 issued on September 10, 2003
40 CH - 4W FM - Free use
40 CH - 4W AM - Free use
T/R 20-02
40 CH - 4W FM - Free use
40 CH - 4W AM - Free use
P.N.F. issued on DM 08.07.02 Notes: 49 A/B/C/D/E/G
40 CH - 4W FM - Free use
40 CH - 4W FM - Free use
40 CH - 1W AM - Free use
40 CH - 4W FM - Individual licence is required
40 CH - 1W AM - Individual licence is required
40 CH - 4W FM - Free use
UK-RA-MPT 1382/MPT1320; UK-R&TTE -S.IL. 2000:730
40 CH - 4W FM - Individual licence is required
40 CH - 4W AM - Individual licence is required
40 CH - 4W FM - Free use
40 CH - 1W AM - Individual licence is required
40 CH - 4W FM - Individual licence is required
40 CH - 1W AM - Individual licence is required
S.I. No 436 of 1998. WIRELESS TELEGRAPHY ACT, 1926 (SECTION3)
(EXEMPTION OF CITIZENS' BAND (CB) RADIOS)
ORDER, 1998
YES
IRELAND YES
NORWAY YES
NETHERLANDS YES
PORTUGAL YES
UNITED
KINGDOM YES
SWEDEN YES
SWITZERLAND YES
SPAIN YES
ITALY YES
LUXEMBOURG YES
YES
YES
GREECE YES
YES
YES
34 CH - 4W FM, 1W AM (erp). Nota: AM mode allowed on CH1-CH23 only.
General authorisation is required (art. 104 - dl259 of 01/08/2003)
Ministerial decree of 18th November 2002 issued by "Secretaría de Estado
de Telecomunicaciones y para la Sociedad de la Información"
40 CH - 4W FM - Free use. (Following frequencies are not allowed :
29.995, 27.045, 27.095, 27.145, 27.195 MHz)
40 CH - 1W AM
Free use
(only CH 4-15 allowed)
80 CH - 4W FM - Free use (restrictions for use as a base station on
channels 41-80 in some border areas)
40 CH 1W AM - A Declaration to the Italian Ministry is required
(art. 145 - dl 259 of 01/08/2003)
40 CH - 4W FM - A Declaration to the Italian Ministry is required
(art. 145 - dl 259 of 01/08/2003)
Use restrictions and other comments Settings
EU FR
EU FR
EU
DE
EU
D2
FR
EU FR
EUSP
SP EU FR I0
FR
EU FR
EU FR
I0
I2
UK
EUSP FR
EU FR
EU FR

PCB - Main Board & Front Board
- II -
Table of contents
Languages:
Other THUNDERPOLE Transceiver manuals
