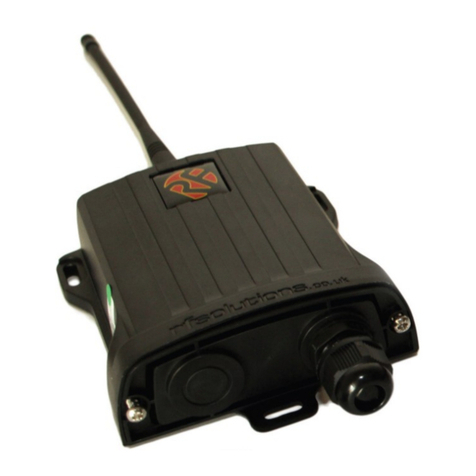
Thunderstone Thunder 7000 User manual

April 18st 2020
3400 West O Street
Lincoln, NE 68528
402-435-4249
(Fax) 402-438-3918
www.thunderstonemfg.com
REMOTE PROGRAMMING &
OPERATION INSTRUCTIONS
For:
Thunder Electric Tarp System
EZ Flow Hydraulic Trap System
EZ Flow Hydraulic Trap & Hatch System For Roughneck Trailers
Remote Lift Axle System

Page 2 www.THUNDERSTONEMFG.com 402.435.4249
Programming Remote to work with the Thunder Electric Tarp System
1. Power on the keypad controller on the front of the trailer by holding the
“Open” and “Close” buttons on the keypad simultaneously for 5 seconds
or until the white light illuminates to indicate the system is active.
2. Open the lid on the flip style remote and observe the buttons illuminate
indicating the remote is active.
3. Repeat step 2 for each remote to be programmed. Up to four remotes
can be programmed. Have all remotes ready for steps 4 & 5. Ignore if
only one remote is to be programmed.
4. Press and hold the small Program & “Open” buttons on the keypad
mounted on the trailer simultaneously until the light turns green.
Release the buttons which will cause the status LED to quickly flash
red/orange.
5. Press and hold the “TARP OPEN”button on the remote for 2 seconds OR until
the red/orange flashing light momentarily turns white on the keypad, then
release the button. Keypad light should then continue blinking red/orange.
6. Repeat step 6 for up to four remotes to be programmed. Ignore if only
programming one remote.
7. Once all remotes are programmed press and release the program button to exit
programming mode or keypad will also time-out after 10 seconds.
8. The keypad status LED will blink twice red indicating the remote(s) have been
saved to memory.
If above steps do not result in the remote being programmed, unplug the trailer
from power, wait 15 seconds, replug power, then repeat the programming steps.
Operating Remote with the Thunder Electric Tarp System
Powering on or off the electric tarp system.
Open the lid on the remote and observe the buttons illuminate
indicating the remote is active.
Press and hold the “TARP OPEN” and “TARP CLOSE” buttons
simultaneously on the remote for 3-5 seconds or until the keypad
status LED on the front of the trailer has illuminated.
Repeat the steps above to turn off the tarp system.
One Touch Operation - The one touch function is fully automated. The
system will stop when fully opened or closed.
Press and hold the desired directional button on the remote for 1 ½
seconds or until the keypad status light turns solid green on the front
of the trailer. Release the button and the keypad status light will start
flashing green indicating one touch operation. The tarp will travel in
that direction automatically and stop when it is fully open or closed.
Incremental Operation
To inch the tarp in either direction, press then release the desired directional button on the keypad or remote for
less than 1 –1 ½ seconds intermittently to inch the tarp in that direction.
Press and Hold operation
Press and hold the desired directional button on the remote for more than 2 ½ seconds or until the status light
turns from solid green to solid white on the front of the trailer. The tarp will continue to travel in that direction
until you release the button.
When any button on the remote is pressed, the status LED will flash rapidly indicating it is transmitting a signal.
The status LED on the remote will flash continuously when the remote batteries have 25% charge left.
Never travel with the tarp in a partially covered position. The trailer should always be covered when traveling.
Always close the remote lid when not in use to prevent accidental button presses that can cause unwanted operation
of the tarp or trap systems. When flip lid is in the closed position the remote is deactivated.
TARP
OPEN
Button
Open &
Program
Buttons
Open & Close
Buttons
Status
LED
Open
Close
KEYPAD
REMOTE
Status
LED
TARP
OPEN
Button
TARP
CLOSE
Button
REMOTE

402.435.4249 www.THUNDERSTONEMFG.com Page 3
Programming Remote to work with the EZ Flow Trap System
1. Power on the keypad controller on the trailer by holding the
“FRONT OPEN” and “FRONT CLOSE” buttons on the
keypad simultaneously for 3-5 seconds or until the blue
light illuminates to indicate the system is activated.
2. Open the flip lid on the remote and observe the
illuminated buttons to indicate the remote is active.
3. Repeat step 2 for each remote to be programmed. Up to four
remotes can be programmed. Have all remotes ready for
steps 4 & 5. Ignore if only one remote is to be
programmed.
4. Press and hold the two “AUX” buttons on the keypad
controller simultaneously for 10 seconds until the blue
flashing light stays solid then release. The light on the keypad controller
should start flashing violet.
5. Press and hold the “FRONT OPEN”button on the remote for 2 seconds
or until the blue flashing light on the keypad turns white then
release the button. The keypad light on the trailer should then
continue blinking violet.
6. Repeat step 5 for up to four remotes to be programmed. Ignore if
only one remote is being programmed.
7. Once all remotes are programmed press the top “AUX” button to exit
programming or let the system timeout after 10 seconds. The keypad
controller light will flash twice red indicating the remotes have been
saved.
Operating Remote with the EZ FlowTrap System
Powering up or down the system
Open the remote flip lid and observe the buttons illuminate
indicating the remote is active.
Press and hold the “FRONT OPEN” and “FRONT CLOSE”
buttons on the remote simultaneously for 3-5 seconds or until
the blue light on the keypad controller illuminates to indicate the
system is activated.
Repeat the above steps to turn off the EZ Flow Trap System.
To use the front hopper doors
Press and hold the desired directional button to open or close the front
doors. The hopper door will travel in that directuion until the button is
released.
To use the rear hopper doors
Press and hold the desired directional button to open or close the
rear doors. The hopper door will travel in that direction until the
button is released.
To control work lights (optional) Automatically configured –no programming necessary.
On the trailer keypad press and release the top “AUX”button to turn on or off the worklights.
On the remote press the “WORKLIGHT ON/OFF” button to turn on or off the worklights.
If worklight & AUX buttons are reversed, unplug worklight from dual plug harness and plug into secondary plug.
When any button on the remote is pressed, the status LED will flash rapidly indicating it is transmitting a signal.
The status LED on the remote will flash continuously when the remote batteries have 25% charge left.
Always close the remote lid when not in use to prevent accidental button presses that can cause unwanted operation
of the tarp or trap systems. When flip lid is in the closed position the remote is deactivated.
FRONT
OPEN
Button
REMOTE
Status
LED
FRONT
OPEN
Button
FRONT
CLOSE
Button
AUX
Buttons
KEYPAD
Status
LED
FRONT
OPEN
Button
FRONT
CLOSE
Button
WORKLIGHT
ON
Button
REAR
OPEN
Button
REAR
CLOSE
Button
REMOTE
WORKLIGHT
OFF
Button

Page 4 www.THUNDERSTONEMFG.com 402.435.4249
Programming Remote to work with the EZ FlowTrap & Hatch System
1. Power on the keypad controller on the trailer by holding
the “HOPPER OPEN” and “HOPPER CLOSE” buttons on
the keypad simultaneously for 3-5 seconds or until the
blue light illuminates to indicate the system is activated.
2. Open the flip lid on the remote and observe the
illuminated buttons to indicate the remote is active.
3. Repeat step 2 for each remote to be programmed. Up
to four remotes can be programmed. Have all remotes
ready for steps 4 & 5. Ignore if only one remote is to be
programmed.
4. Press and hold the “WORK LIGHT” & “AUX” buttons on
the keypad controller simultaneously for 10 seconds
until the blue flashing light stays solid then release.
The light on the keypad controller should start flashing violet.
5. Press and hold the “HOPPER OPEN”button on the remote for 2 seconds
or until the blue flashing light on the keypad turns white, then release
the button. The keypad light on the trailer should then continue
blinking violet.
6. Repeat step 5 for up to four remotes to be programmed. Ignore if
only one remote is being programmed.
7. Once all remotes are programmed press the top “WORK LIGHT”button
to exit programming or let the system timeout after 10 seconds. The
keypad controller light should flash twice red indicating the remotes
have been saved.
Operating Remote with the EZ FlowTrap & Hatch System
Powering up or down the system
Open the remote flip lid and observe the buttons illuminate
indicating the remote is active.
Press and hold the “HOPPER OPEN” and “HOPPER CLOSE”
buttons on the remote simultaneously for 3-5 seconds or until the
blue light on the keypad controller illuminates to indicate
the system is activated.
Repeat the above steps to turn off the EZ Flow Trap &
Hatch System.
To use the hopper doors
Press and hold the desired directional button to open or
close the hopper doors. The hopper door will travel in that
directuion until the button is released.
To use the top hatch door
Press and hold the desired directional button to open or close the top hatch
door. The hatch door will travel in that direction until the button is released.
To control work lights (optional) Automatically configured –no programming necessary.
On the trailer keypad press and release the top “WORKLIGHT”button to turn on or off the worklights.
On the remote press the “WORKLIGHT ON/OFF” button to turn on or off the worklights.
If worklight & AUX buttons are reversed, unplug worklight from dual plug harness and plug into secondary plug.
When any button on the remote is pressed, the status LED will flash rapidly indicating it is transmitting a signal.
The status LED on the remote will flash continuously when the remote batteries have 25% charge left.
Always close the remote lid when not in use to prevent accidental button presses that can cause unwanted operation
of the tarp or trap systems. When flip lid is in the closed position the remote is deactivated.
Status
LED
HOPPER
OPEN
Button
HOPPER
CLOSE
Button
AUX
Buttons
KEYPAD
HOPPER
OPEN
Button
REMOTE
Status
LED
HATCH
OPEN
Button
HATCH
CLOSE
Button
WORKLIGHT
ON
Button
HOPPER
OPEN
Button
HOPPER
CLOSE
Button
WORKLIGHT
OFF
Button
REMOTE

402.435.4249 www.THUNDERSTONEMFG.com Page 5
Programming Remote to work with the Remote Lift Axle System
1. Locate the remote lift axle relay enclosure in the nose of
the trailer.
2. Open the enclosure and locate the remote programming
button on the bottom side of the relay module.
3. Open the remote flip lid and observe the buttons
illuminate indicating the remote is active.
4. Press and hold the program button on the relay module
for 5 seconds until you hear an audible “beep” indicating
it is ready to accept programming.
5. On the remote, press the “AXLE UP” button five times.
With each press of the remote you should hear and audible “beep”
from the relay module. After the fifth press, the relay will beep
twice confirming programming.
Operating Remote with the Remote Lift Axle System
Open the remote flip lid and observe the buttons illuminate
indicating the remote is active.
Press and release the “AXLE UP” button to raise the tag axle of the
trailer.
Press and release the “AXLE DOWN” button to lower the tag axle
of the trailer.
If “AXLE UP”& “AXLE DOWN”buttons have reverse operation,
locate the 2 weatherpack connectors outside of the lift axle control
box on the side of the trailer. Unplug, then reverse and replug the
connectors together.
Program
Button
RELAY MODULE
AXLE
UP
Button
AXLE
DOWN
Button
REMOTE
Table of contents
Popular Remote Control manuals by other brands
CopterX
CopterX CX-CT6A instruction manual

Daikin
Daikin BRC1D71 Operation manual
Carson
Carson Reflex Wheel ultimate touch 2.0 instruction manual
Regency Fireplace Products
Regency Fireplace Products Onyx Remote Control manual
Map
Map KF297 Programming instructions
Carrera RC
Carrera RC 370301010 Assembly and operating instructions
