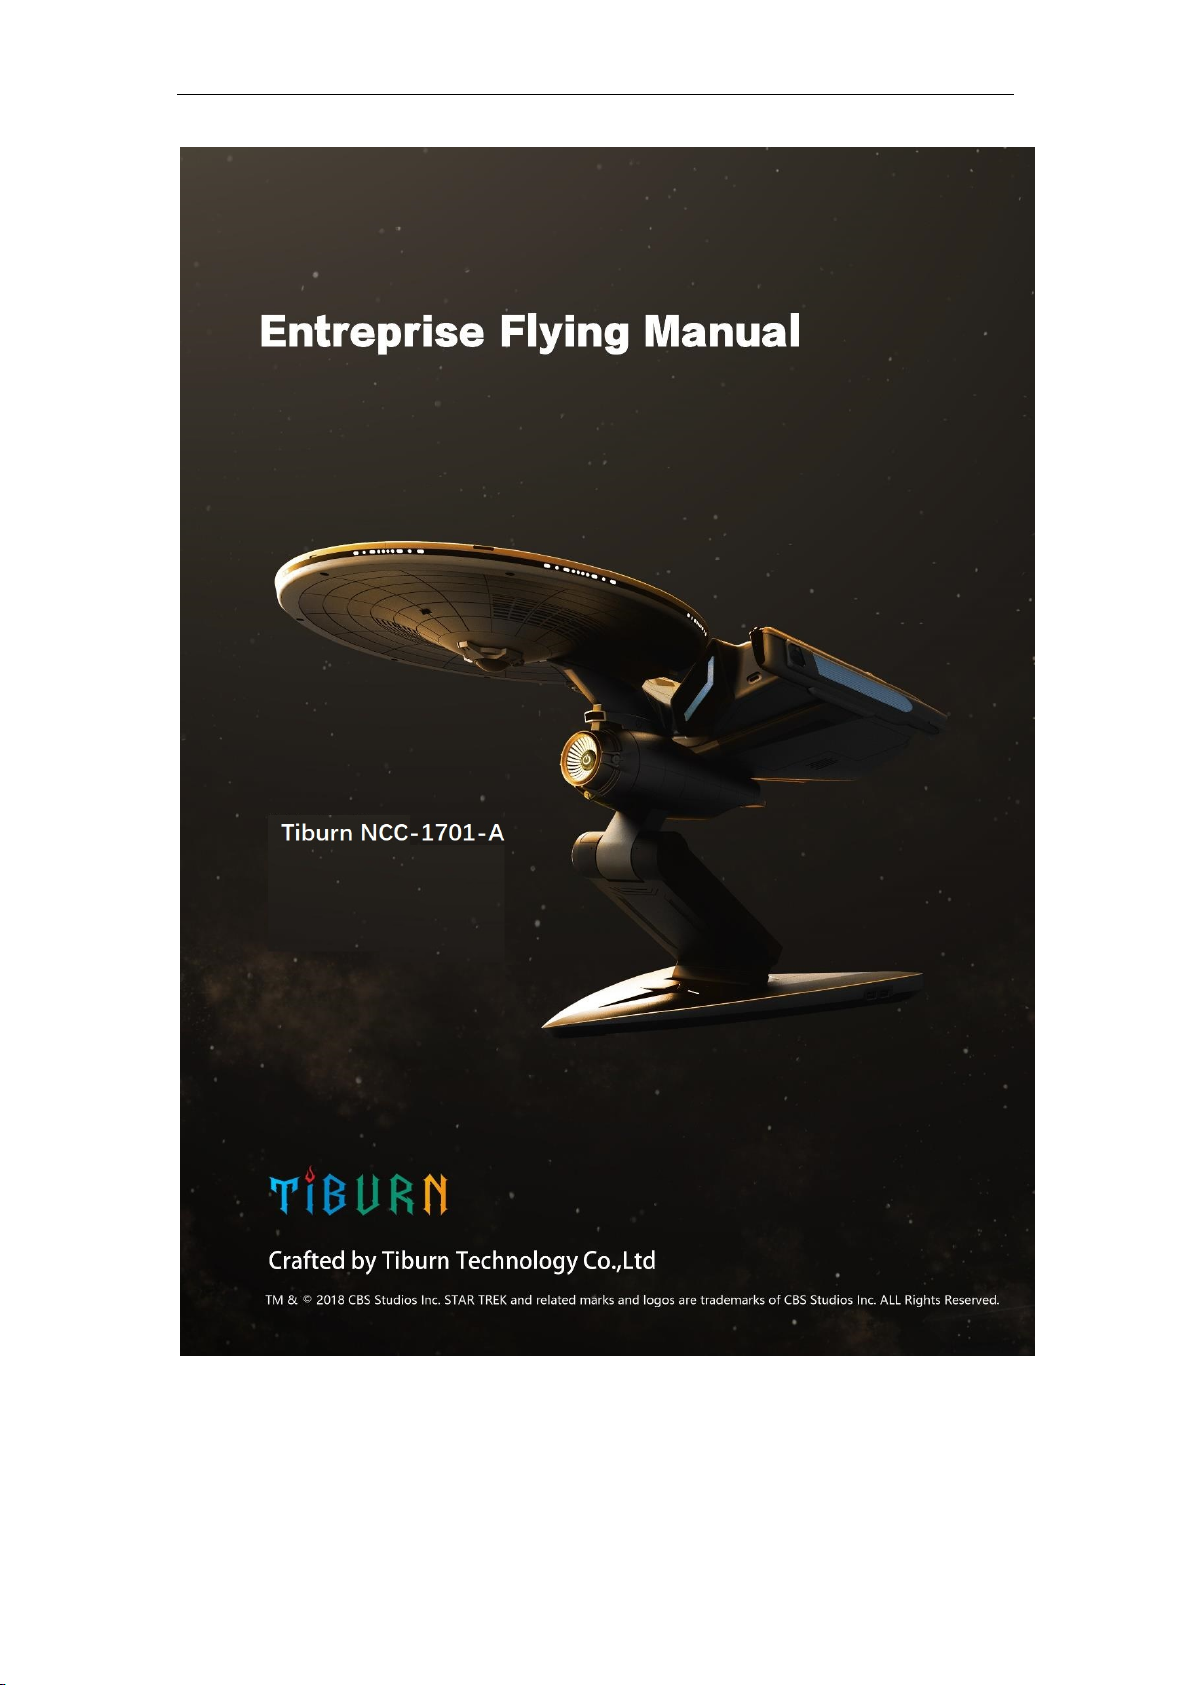
TIBURN Entreprise Flying User manual
1/ 25
Enterprise 进取号
Crafted by Tiburn Technology.

2/ 25
Important Safety Information
Before using this manual, it is important that you read and understand all of
the related safety information for this product. Refer to the
Safety and
Warranty Guide
that you received with this product for the latest safety
information. Reading and understanding this safety information reduces the
risk of personal injury or damage to your product.
Danger: Be aware of extremely hazardous or lethal situations.
Attention: Be aware of possible damage to programs, devices, or data.
Note: Pay attention to this important information.

3/ 25
Content
Important Safety Information
Chapter 1 Using the Computer Hardware -------------------------------4
1.1 Front view -------------------------------------------------------------------5
1.2 Top view ---------------------------------------------------------------------6
1.3 Rear view --------------------------------------------------------------------7
1.4 Installing the disk ----------------------------------------------------------8
1.5 Connecting your computer ----------------------------------------------9
1.6 Computer stand instruction ---------------------------------------------10
1.7 Connecting your computer-----------------------------------------------11
Chapter 2 Using the disk -----------------------------------------------------13
2.1 Using the Bluetooth speaker -------------------------------------------14
2.2 Using the projector --------------------------------------------------------15
2.3 Removing the disk --------------------------------------------------------16
2.4 Tips for using disk --------------------------------------------------------17
Chapter 3 Troubleshooting --------------------------------------------------18
3.1 Troubleshooting display problems ------------------------------------19
3.2 Troubleshooting audio problems --------------------------------------20
3.3 Troubleshooting software problems ----------------------------------21
3.4 Troubleshooting problems with hard disks --------------------------22
3.5 Special considerations for troubleshooting Windows -------------23
3.6 Windows help system ----------------------------------------------------23
3.7 Performing daily maintenance tasks. ---------------------------------25

4/ 25
Chapter 1 Using the Computer Hardware
This chapter contains the following topics:
Computer hardware introduction
Information on computer connections
Note: The descriptions in this chapter might vary from your computer,
depending on computer models and configurations.

5/ 25
1.1 Front view
1.
System indicator ring
2.
Power button
3.
USB 3.1 Gen1 connector
4.
USB 2.0 connector
5.
USB 3.1 Gen2 Type C connector

6/ 25
1.2 Top view
1
Volume up¹
2
Previous¹
3
Phone answering key¹
4
Next¹
5
Volume down¹
6
HDMI-in connector
7
Disk power connector
8
Disk lock
9
Projector power button
Note:
¹Functions available only when using the disk Bluetooth speaker.
7/ 25
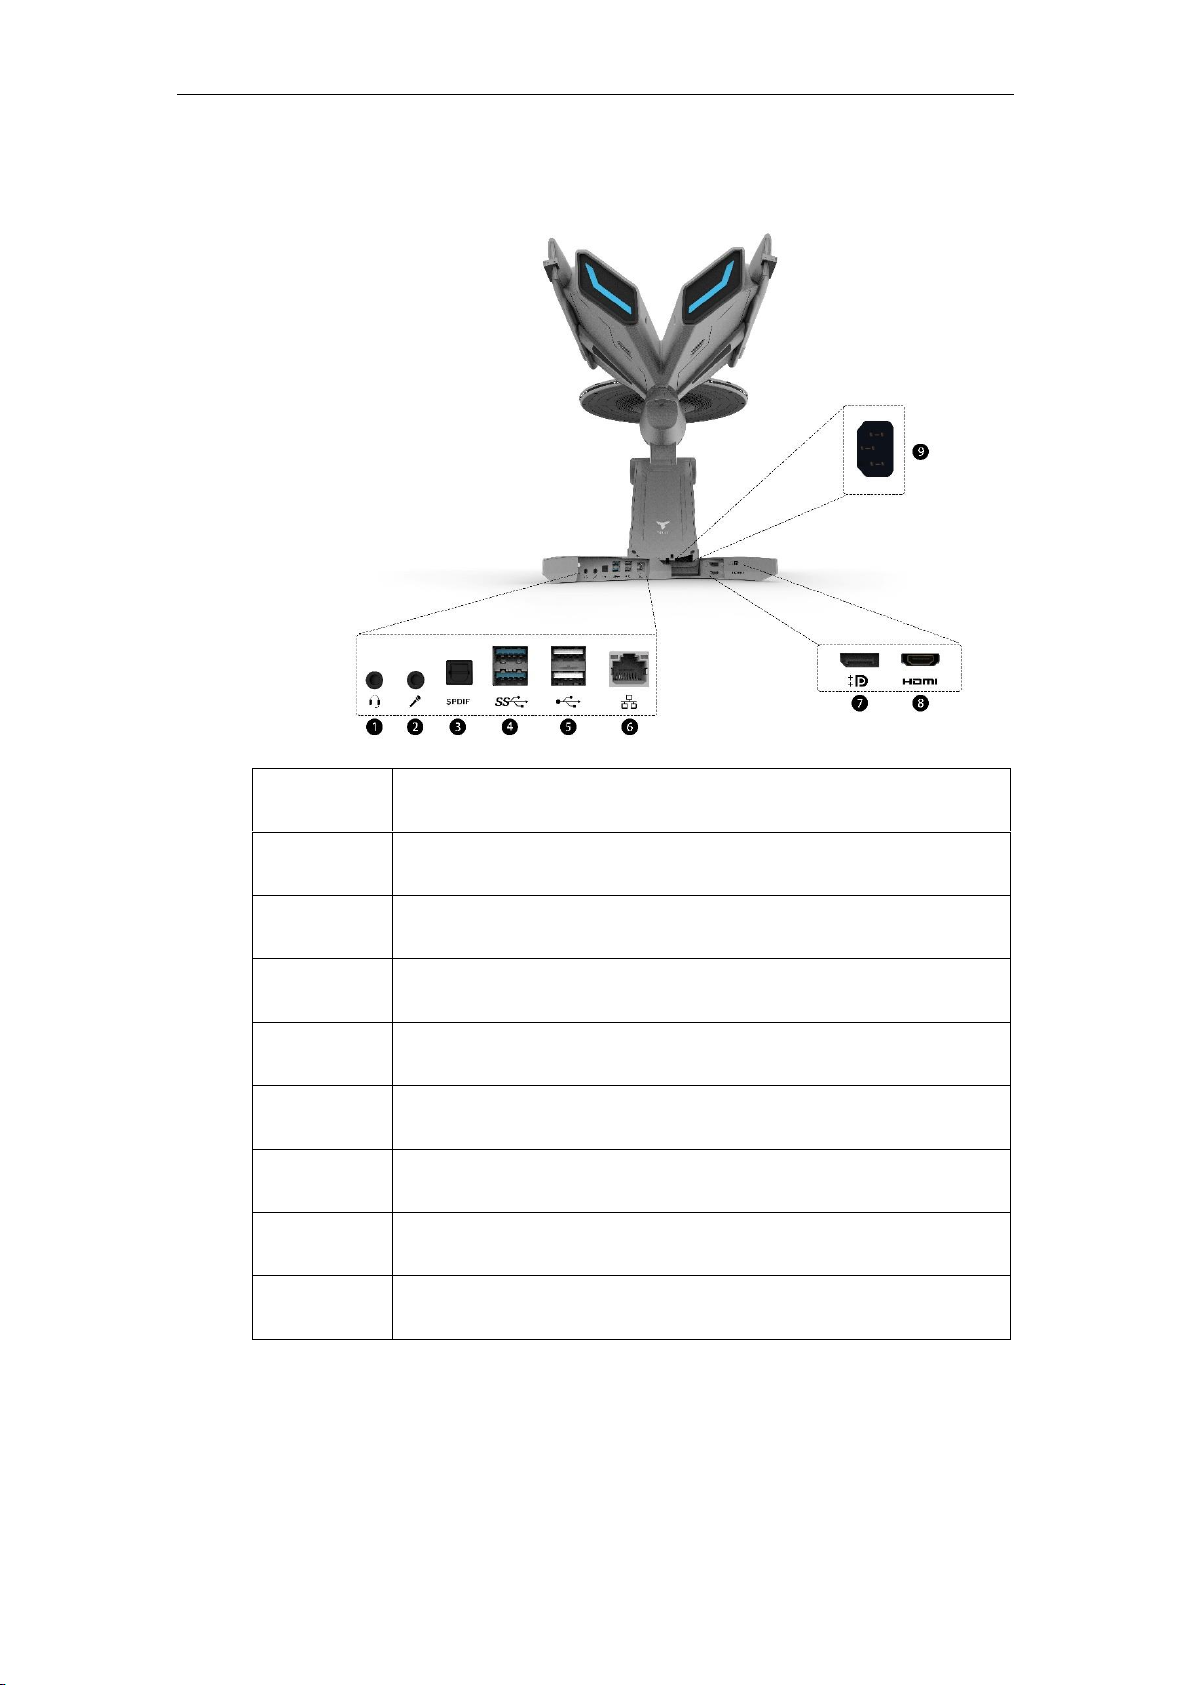
1.3 Rear view
1
Headphone connector
2
Microphone connector
3
SPDIF connector
4
USB 3.1 Gen1*2 connector
5
USB 2.0*2 connector
6
Ethernet connector
7
DP connector
8
HDMI-out connector
9
Power connector

8/ 25
1.4 Installing the disk
Align the guiding track at the bottom of the disk with the mounting track on the
computer, then slowly push the disk into the lock position till you hear a snap
sound.
Notice:
1. When installing the disk to the computer, make sure you align the
guiding track properly aligned with the mounting track on the
computer, using two hands to install the disk till the disk is properly
mounted to the computer.
2. Turn off the computer to install the disk, installing disk when the
computer is power on may damage the disk.

9/ 25
1.5 Connecting the computer
The computer power connector is located at the rear part of your computer
(Fig. 1), press the down the computer to help to connecting.
10 / 25
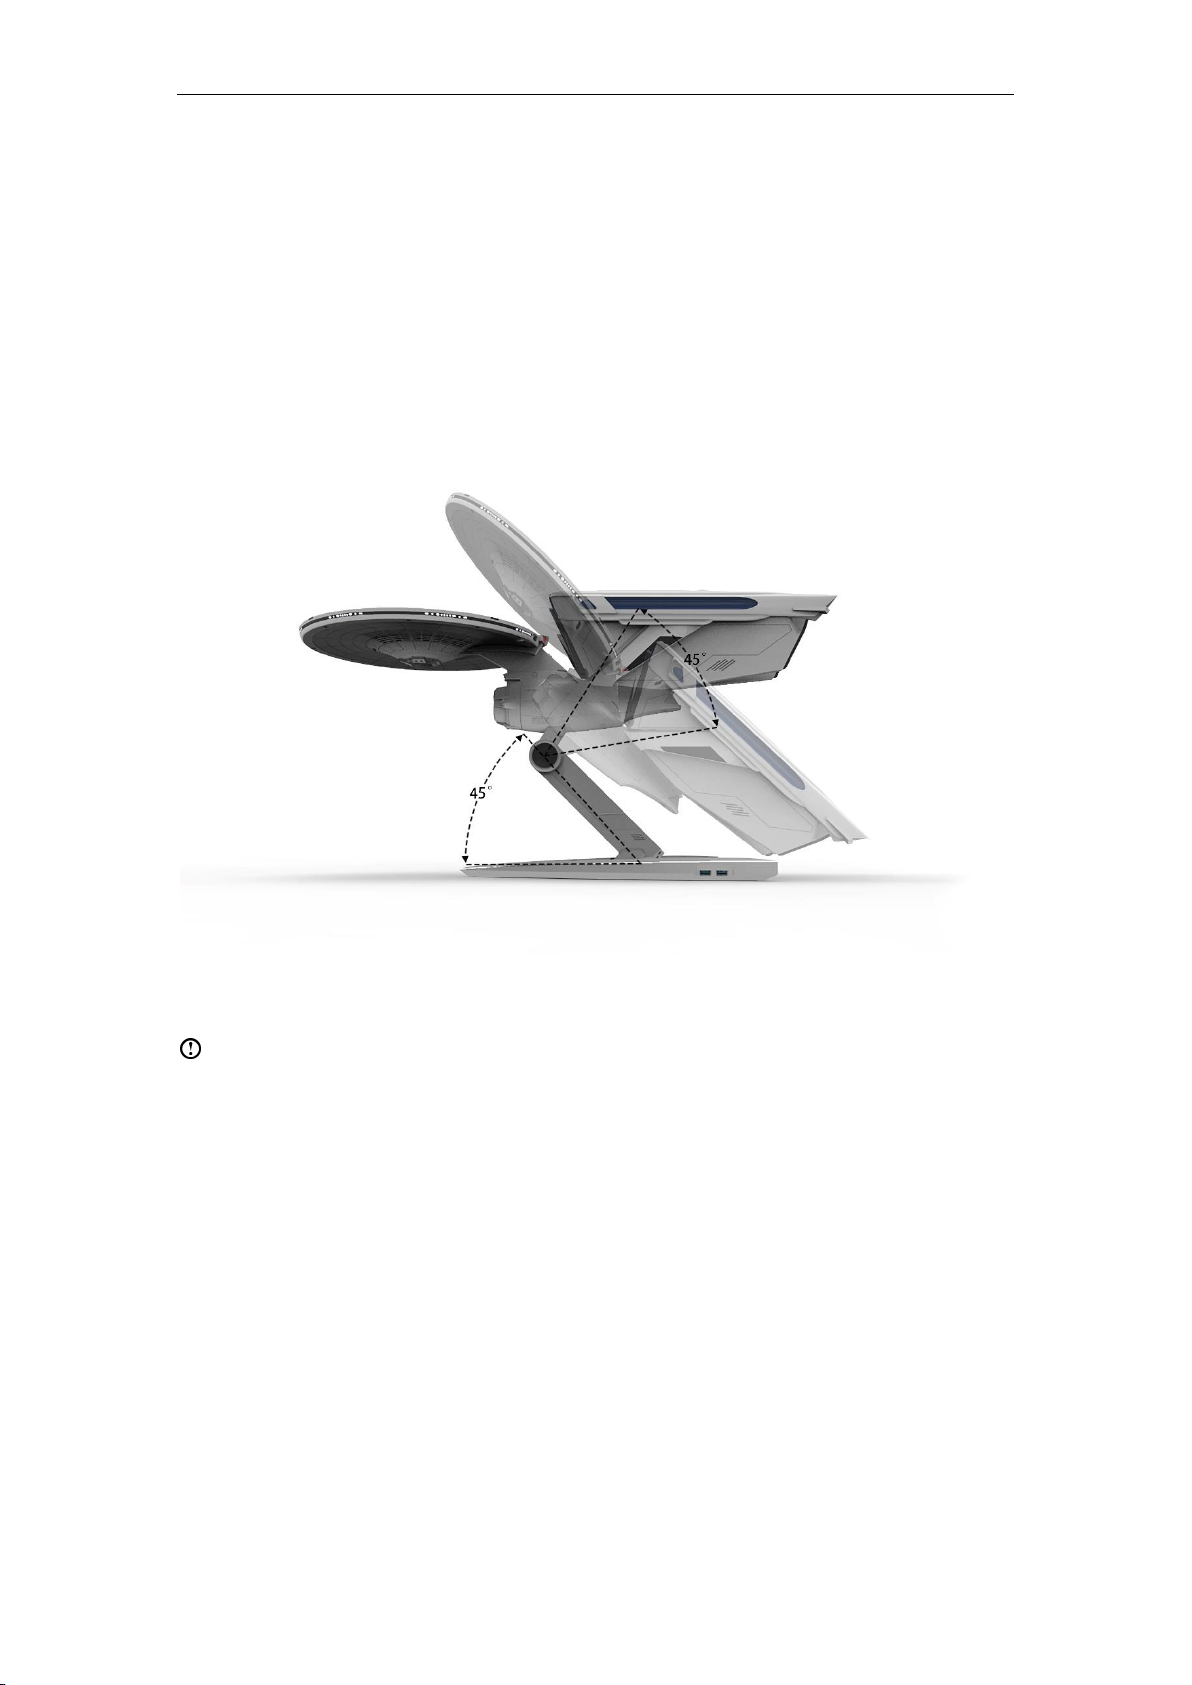
1.6 Computer stand
Use the stand to position the computer to your preference.
The maximum adjust angle between the base and the hinge:45°
The maximum adjust angle between the hinge and the body: 45°
Notice:
1. Adjust the computer to a suitable angle can help avoiding tip-over damage
to the computer.
2. The computer may cause harm to children if it is not located in an
appropriate place. Place your computer or monitors on a sturdy furniture
with a low base or furniture that has been anchored. Push your computer or
monitors as far from the edge of the furniture as possible.
3. Keep the computer or monitor cables out the reach of the children.

11 / 25
1.7 Connecting your computer
1. Connect the keyboard and mouse to your computer
2. Connect the monitor and your computer with a HDMI or DP cable.
3. Connect your monitor and computer to a power source with the power
cables.
4. Press the monitor power button to turn on the monitor.
5. Press your computer power button to turn on your computer.

12 / 25
Notice for moving your computer:
When moving your computer, it is advised to use one hand hold the base and
the other hand to hold the computer hinge.

13 / 25
Chapter 2 Using the disk
This chapter contains the following topics:
Using the Bluetooth speaker
Using the projector
Removing the disk
Notice: Do not remove the disk when system is powered on.

14 / 25
2.1 Using the Bluetooth speaker
The computer disk comes with a built-in Bluetooth speaker, you can connect
other smart device with the Bluetooth speaker, follow the below instructions:
1. When the disk in installed to the computer and your computer is turned
on:
Follow your smart device instruction and find the Bluetooth option, then
choose “TIBURN Speaker “from the device list, following the on screen
instruction to pair your smart device with the Bluetooth speaker.
2. Using disk separately, follow the below instructions:
1. Connect the disk adapter with a power source, then connect the disk
with the adapter.
2. Follow your smart device instruction and find the Bluetooth option,
then choose “TIBURN speaker”from the device list, following the on
screen instruction to pair your smart device with the Bluetooth
speaker.
Notice:The disk Bluetooth speaker can only connect one device one
time, disconnect the connected device before connecting a new device.

15 / 25
2.2 Using the projector (Optional)
When using the projector, follow the below instructions:
1. Open the projector cover on top of the disk.
2. Press the projector power button to turn on the projector.
3. Adjust the computer to the desired projecting angle.
16 / 25
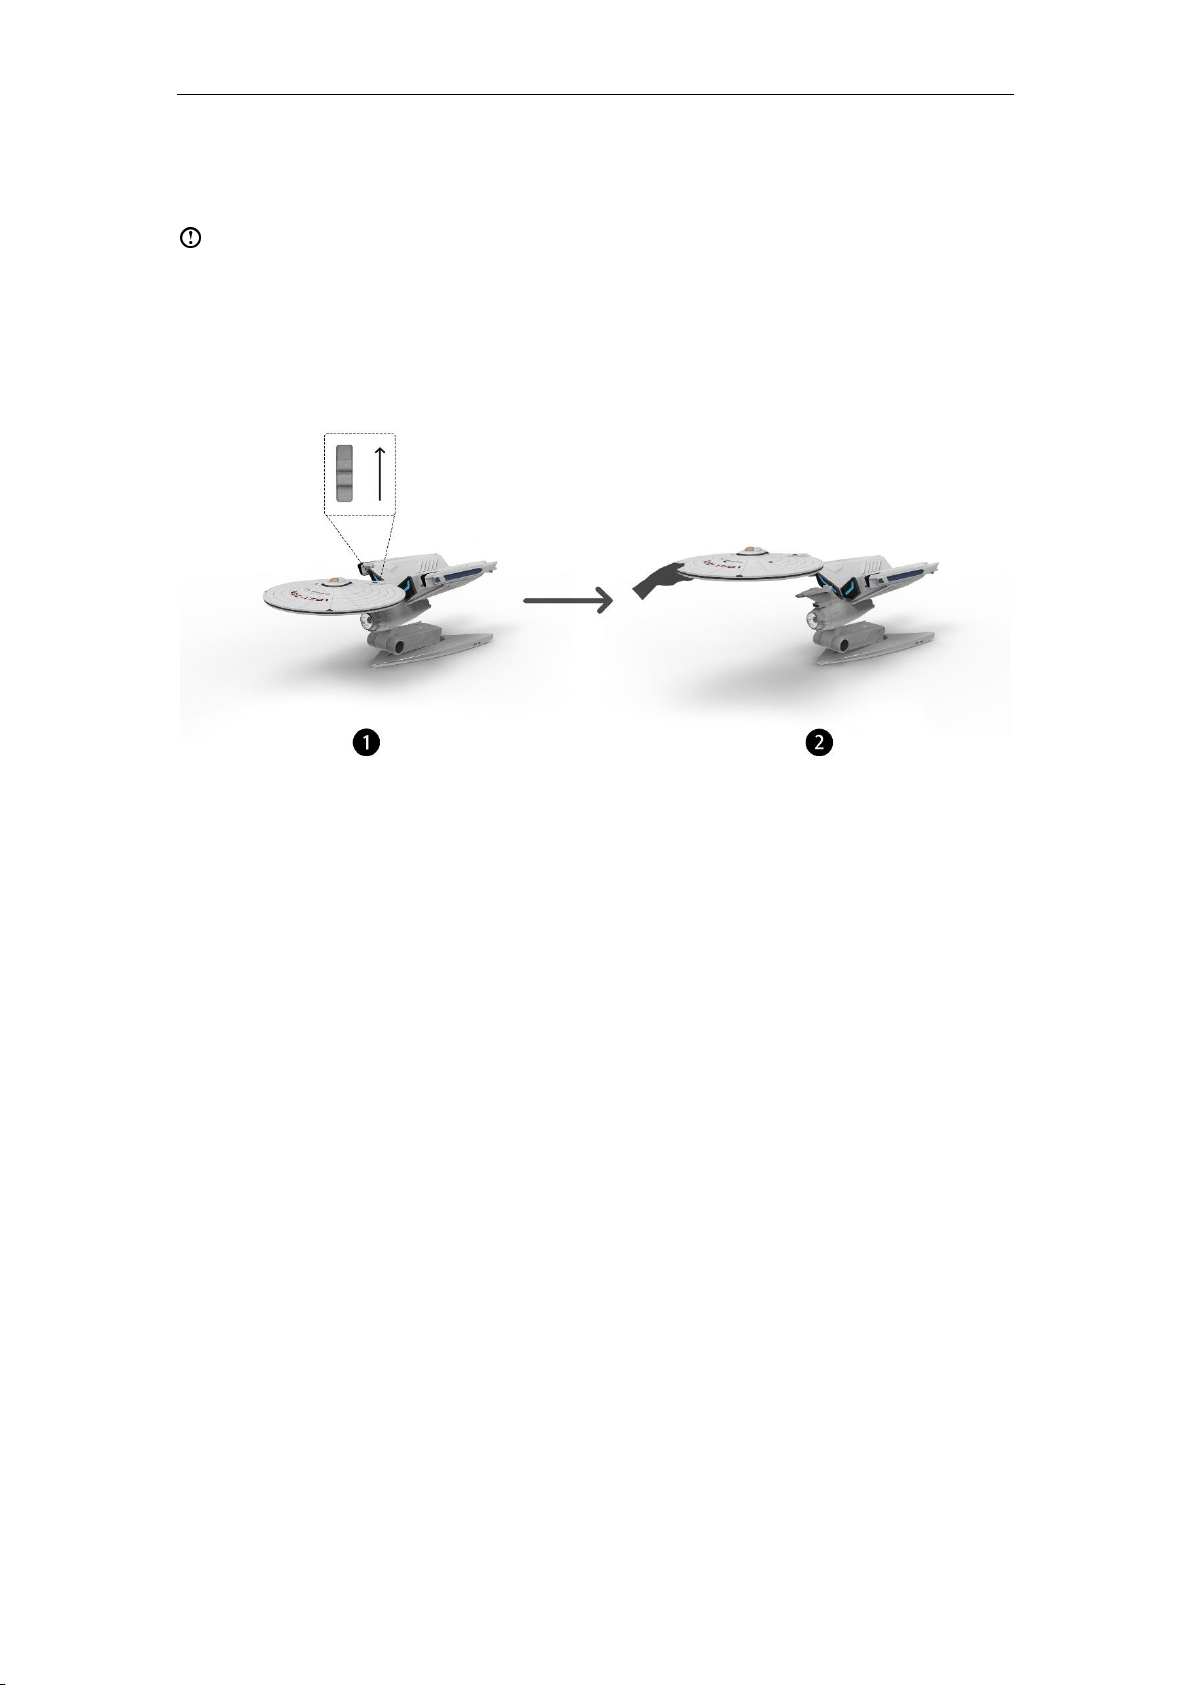
2.3 Removing the disk
Notice: Do not remove the disk when the system is powered on.
Push up the disk lock upward to unlock the disk, then gently detach the disk
from the computer.

17 / 25
2.4 Tips for using disk
1. When using the disk separately, make sure the disk is connected to a
power source.
2. When using the disk separately, do not place the disk at the edge of the
furniture. Push the disk as far from the furniture edge as possible. Tip-
over may cause danger to children. Make sure the disk placed without the
reach of children.
3. Make sure your computer is turned off before remove the disk. Remove
the disk when the system is powered on make cause permanent damage
to the disk.

18 / 25
Chapter 3 Troubleshooting
This chapter contains the following topics:
Troubleshooting and Problem Resolution
Notice:The illustration and drawings in this chapter may varies from the
actual interface, follow actual interface instruction if there is difference.

19 / 25
Solving problems
Follow these tips when troubleshooting your computer:
If you added or removed a part before the problem started, review the
installation procedures to ensure that the part is correctly installed.
If a peripheral device does not work, ensure that the device is properly
connected.
If an error message appears on the screen, write down the exact
message. This message may help support personnel diagnose and fix the
problem(s).
If an error message occurs in a program, see the help document of that
program.
Troubleshooting display problems
Problem: Blank screen or no image is displayed on the monitor.
Troubleshooting and problem resolution:
1. Check to see if the monitor has been turned on; if not, press the Power
button.
2. Check to see if the monitor power cord is loose; if so, plug the power cord
securely into the monitor.
3. Check to see if the signal cable to the monitor is securely connected to
the connector on the computer graphics card; if not, shut down the
computer then connect the signal cable of the monitor securely to the
connector on the computer graphics card.

20 / 25
Problem: You need to change the display property settings.
Setting display background and icon properties:
1. Right-click the desktop anywhere except over an icon, then select
Personalize from the pop-up menu.
2. From here, select the appropriate options to:
Change the desktop background
Select a screen saver
Select Windows color options for borders and taskbar
Select a theme
3. Right-click the desktop anywhere except over an icon, then select Display
settings from the pop-up menu to change the appearance.
Problem: Ripple on screen.
Troubleshooting and problem resolution:
1. Check to see if any of the following devices are located less than one meter
from the computer: refrigerators, electric fans, electric dryers, UPS systems,
regulators, fluorescent lamps or other computers that may be generating
magnetic interference.
2. Move any interfering devices away from the computer. 3. If the problem
persists, contact Lenovo Service.
Troubleshooting audio problems
Problem: No sound from the integrated speakers.
Troubleshooting and problem resolution:
This manual suits for next models
1
Table of contents
Popular Desktop manuals by other brands

Kontron
Kontron KBox F-300-V1K user guide

HP
HP EliteOne 1000 G1 Maintenance & service guide

Digital Electronics Corporation
Digital Electronics Corporation Pro-Face PL-6900 Series user manual

Adam Hall
Adam Hall STABLE1 Assembly instructions

Sony
Sony VAIO PCV-RX670 user guide

Lenovo
Lenovo IdeaCentre Q110 3016 Specifications


HP
HP A320m - Pavilion - 256 MB RAM manual

dynabook
dynabook dynaEdge DE200 Series Maintenance manual

spo-comm
spo-comm spo-book EXPANDED Q170 quick guide

HP
HP Pavilion u1100 - Desktop PC Getting started guide

Sinclair Research
Sinclair Research ZX Spectrum Hardware manual

Altos
Altos BrainSphere P330 F6 user manual