manuals.online logo
Brands
  1. Home
  2. •
  3. Brands
  4. •
  5. Tiffen
  6. •
  7. Camera Accessories
  8. •
  9. Tiffen Camera Filters User manual

Tiffen Camera Filters User manual

Other Tiffen Camera Accessories manuals

Tiffen STEDICAM Steadimate-RS User manual

Tiffen

Tiffen STEDICAM Steadimate-RS User manual

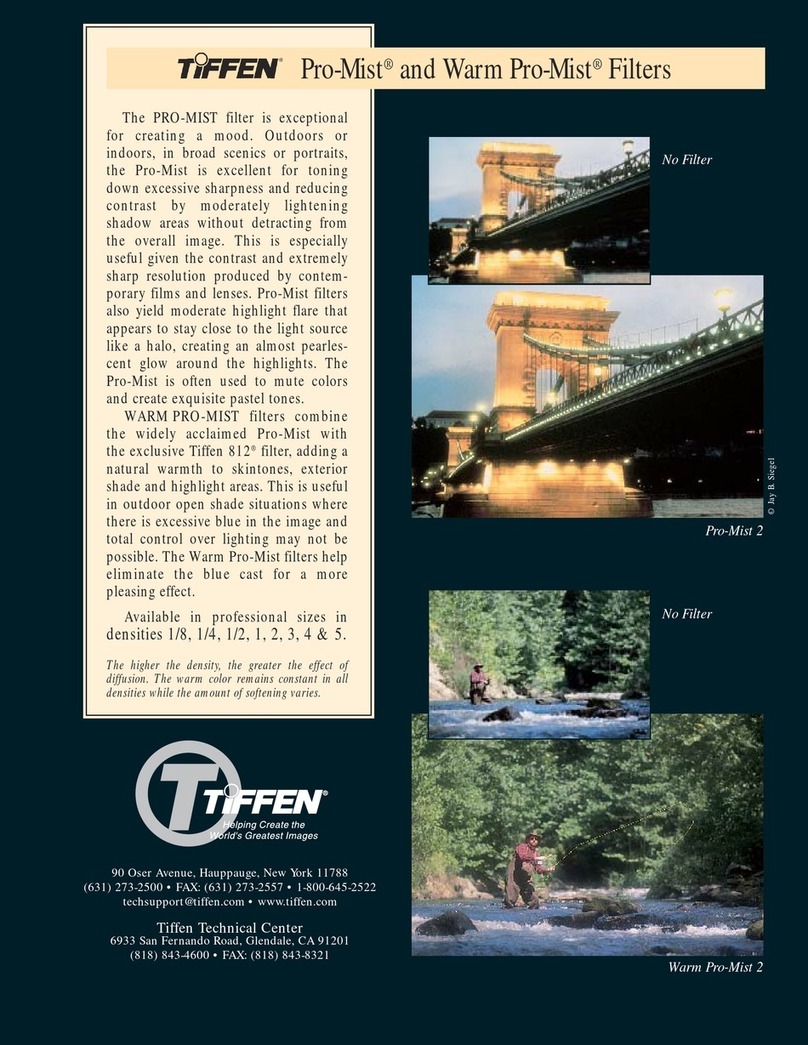
Tiffen Pro-Mist and Warm Pro-Mist Filter User manual

Tiffen

Tiffen Pro-Mist and Warm Pro-Mist Filter User manual

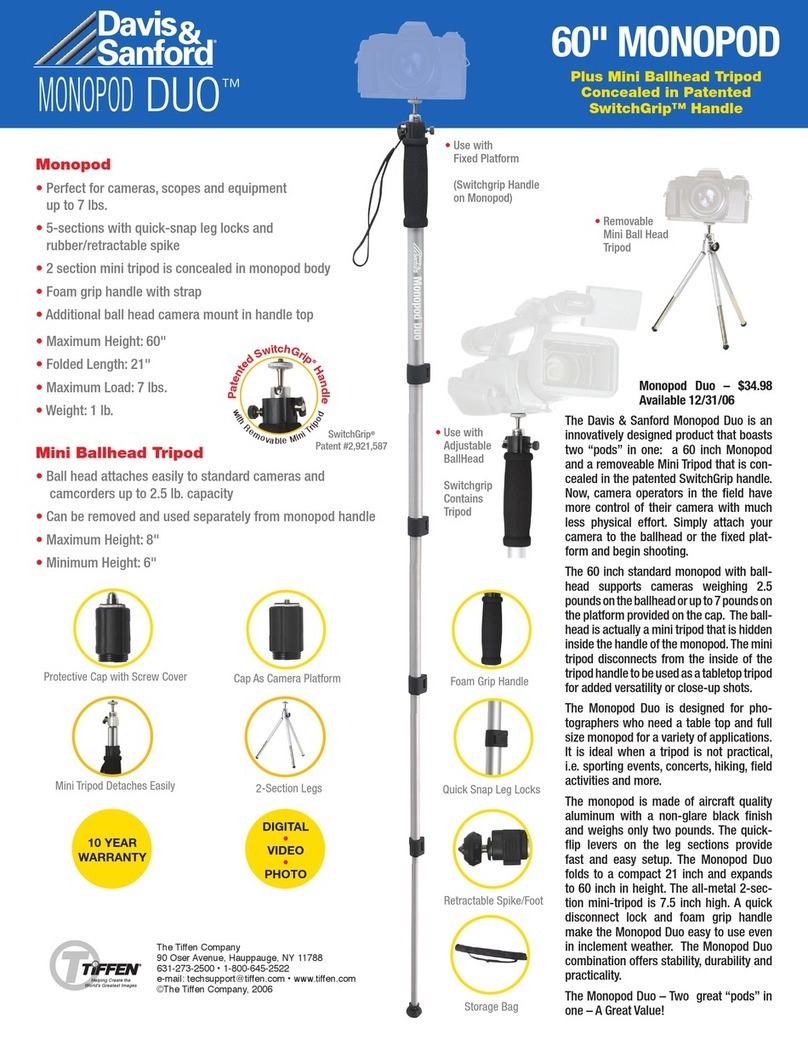
Tiffen Monopod Duo 60" Monopod User manual

Tiffen

Tiffen Monopod Duo 60" Monopod User manual

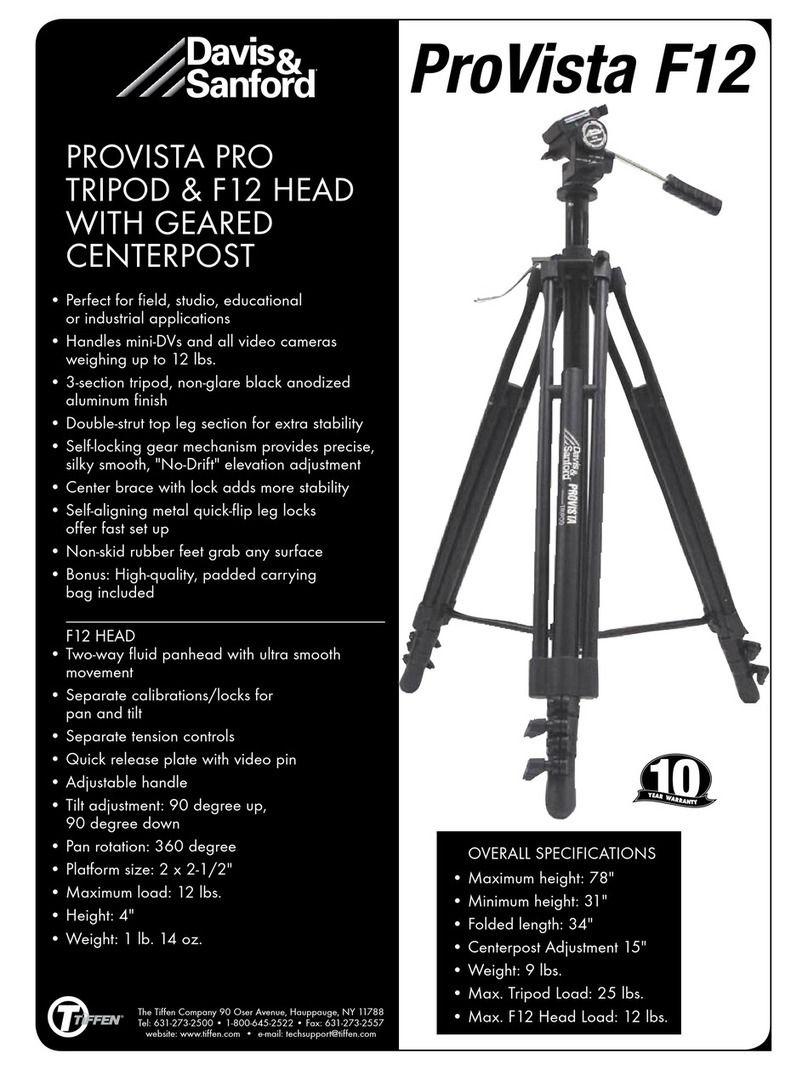
Tiffen Provista F12 User manual

Tiffen

Tiffen Provista F12 User manual

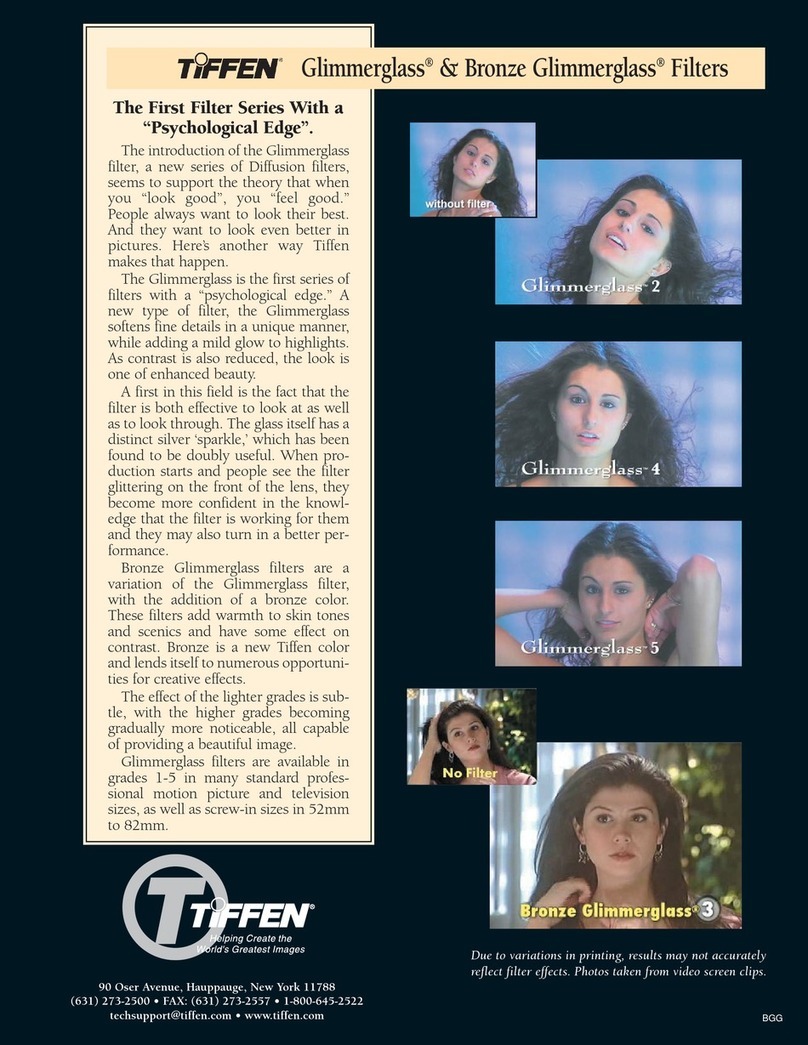
Tiffen Glimmerglass & Bronze Glimmerglass Filters User manual

Tiffen

Tiffen Glimmerglass & Bronze Glimmerglass Filters User manual

Tiffen Smoque User manual

Tiffen

Tiffen Smoque User manual

Tiffen steadicam aero User manual

Tiffen

Tiffen steadicam aero User manual

Tiffen Domke Chocolate Brown F-2 User manual

Tiffen

Tiffen Domke Chocolate Brown F-2 User manual

Tiffen Davis & Sanford ATPXT User manual

Tiffen

Tiffen Davis & Sanford ATPXT User manual

Tiffen Steady Stick User manual

Tiffen

Tiffen Steady Stick User manual

Tiffen STEADICAM FLYER LE User manual

Tiffen

Tiffen STEADICAM FLYER LE User manual

Tiffen Digital HT 0308-30M BDHTFILT User manual

Tiffen

Tiffen Digital HT 0308-30M BDHTFILT User manual

Tiffen Steadicam Steadimate User manual

Tiffen

Tiffen Steadicam Steadimate User manual

Tiffen Steadicam Volt User manual

Tiffen

Tiffen Steadicam Volt User manual

Tiffen Contrast Filters Owner's manual

Tiffen

Tiffen Contrast Filters Owner's manual

Tiffen steadicam solo User manual

Tiffen

Tiffen steadicam solo User manual

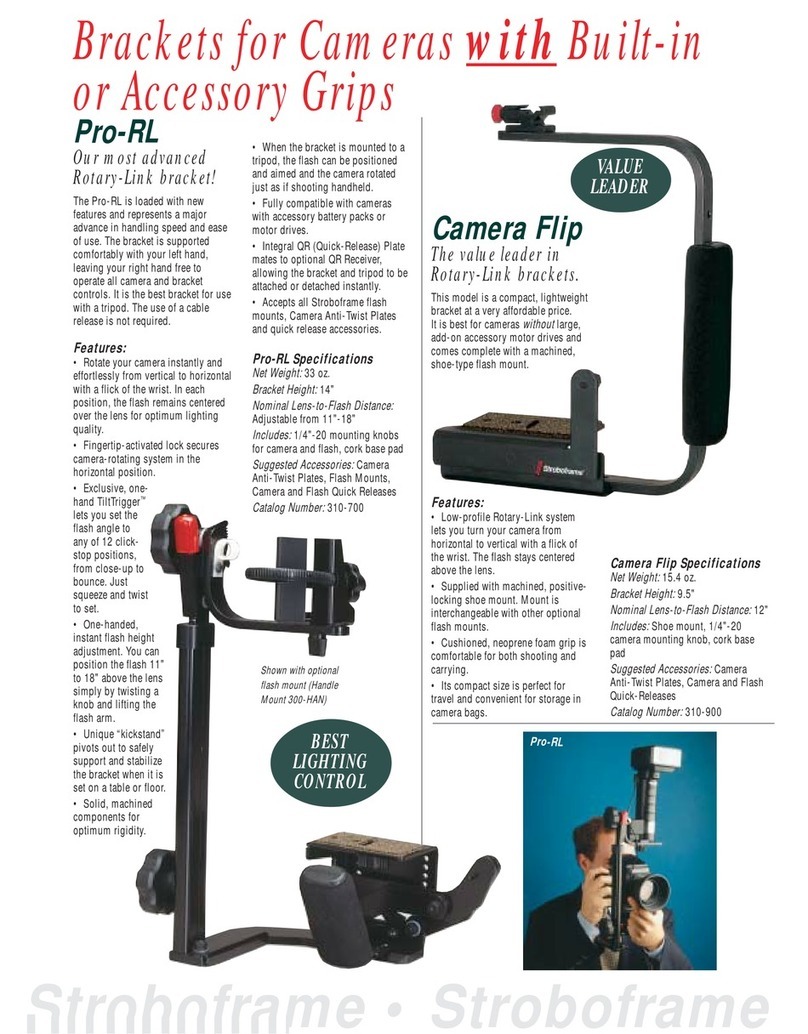
Tiffen Pro-RL User manual

Tiffen

Tiffen Pro-RL User manual

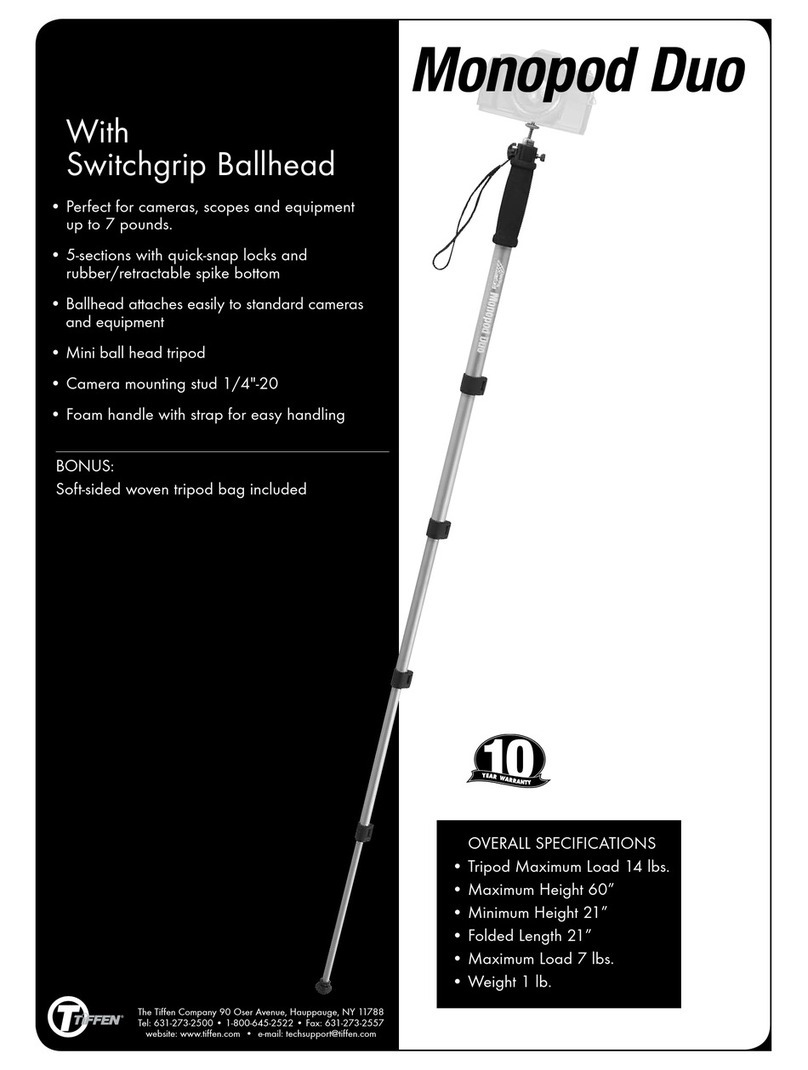
Tiffen Monopod Duo User manual

Tiffen

Tiffen Monopod Duo User manual

Tiffen Steadicam M-2 User guide

Tiffen

Tiffen Steadicam M-2 User guide

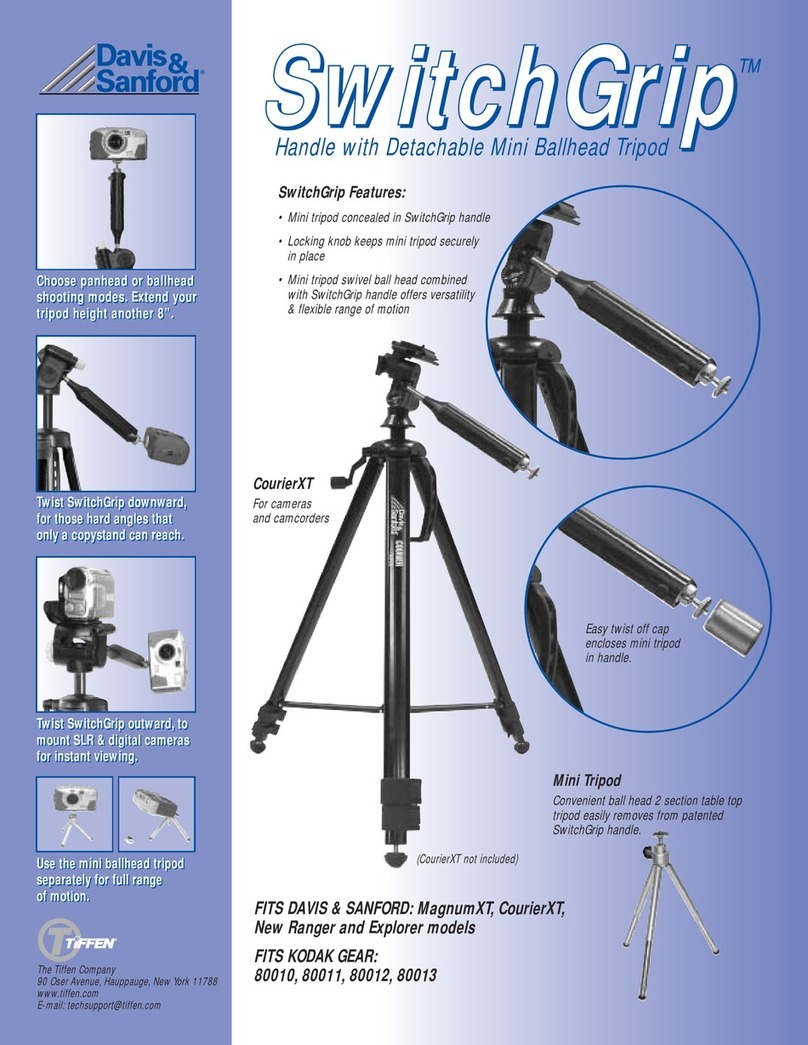
Tiffen SwitchGrip 80010 User manual

Tiffen

Tiffen SwitchGrip 80010 User manual

Tiffen Domke User manual

Tiffen

Tiffen Domke User manual

Tiffen Steadicam Zephyr User manual

Tiffen

Tiffen Steadicam Zephyr User manual

Tiffen Soft/FX & Warm Soft/FX Filters User manual

Tiffen

Tiffen Soft/FX & Warm Soft/FX Filters User manual

Tiffen Warm Polarizer Filter User manual

Tiffen

Tiffen Warm Polarizer Filter User manual

Popular Camera Accessories manuals by other brands

CamRanger CamRanger user manual

CamRanger

CamRanger CamRanger user manual

Custom Brackets HDV CAGE KIT Instructions for use

Custom Brackets

Custom Brackets HDV CAGE KIT Instructions for use

Aegis ABL052010P user manual

Aegis

Aegis ABL052010P user manual

Saft SRA Series Installation and operating instructions

Saft

Saft SRA Series Installation and operating instructions

Kodak TIB5200 technical information

Kodak

Kodak TIB5200 technical information

Videotec HEG instruction manual

Videotec

Videotec HEG instruction manual

Ikelite 6171.11 manual

Ikelite

Ikelite 6171.11 manual

Pentax Auto Bellows Slide Copier K user manual

Pentax

Pentax Auto Bellows Slide Copier K user manual

Nikon UT-1 user manual

Nikon

Nikon UT-1 user manual

dji RONIN 4D quick start guide

dji

dji RONIN 4D quick start guide

SLIK ABLE 300DX user manual

SLIK

SLIK ABLE 300DX user manual

Rebelcell 36V70 user manual

Rebelcell

Rebelcell 36V70 user manual

Trojan GC2 48V quick start guide

Trojan

Trojan GC2 48V quick start guide

Calumet 7100 Series CK7114 operating instructions

Calumet

Calumet 7100 Series CK7114 operating instructions

Ropox 4Single Series User manual and installation instructions

Ropox

Ropox 4Single Series User manual and installation instructions

Cambo Wide DS Digital Series Main operating instructions

Cambo

Cambo Wide DS Digital Series Main operating instructions

Samsung SHG-120 Specification sheet

Samsung

Samsung SHG-120 Specification sheet

Ryobi BPL-1820 Owner's operating manual

Ryobi

Ryobi BPL-1820 Owner's operating manual

manuals.online logo
manuals.online logoBrands
  • About & Mission
  • Contact us
  • Privacy Policy
  • Terms and Conditions

Copyright 2025 Manuals.Online. All Rights Reserved.

CAMERA FILTERS
By Ira Tiffen
© Ira Tiffen
THE TIFFEN COMPANY
HAUPPAUGE, NEW YORK
CAMERA FILTERS © Ira Tiffen
2
CAMERA FILTERS
by Ira Tiffen
INTRODUCTION
Camera filters are transparent or translucent optical elements that alter the
properties of light entering the camera lens for the purpose of improving the image being
recorded. Filters can affect contrast, sharpness, highlight flare, color, and light intensity,
either individually, or in various combinations. They can also create a variety of "special
effects." It is important to recognize that, even though there are many possibly confusing
variations and applications, all filters behave in a reasonably predictable way when their
properties are understood and experienced. Most of these properties related similarly to
filter use in both film and video imaging. The following will explain the basic optical
characteristics of Tiffen and certain other types of camera filters, as well as their
applications. It is a foundation upon which to build by experience. Textual data cannot fully
inform. There is always something new out there.
In their most successful applications, filter effects blend in with the rest of the image
to help get the message across. Use caution when using a filter in a way that draws
attention to itself as an effect. Combined with all the other elements of image-making,
filters make visual statements, manipulate emotions and thought, and make believable
what otherwise would not be. They get the viewer involved.
Filter Planning
Filter effects can become a key part of the "look" of a production, if considered in the
planning stages. They can also provide a crucial last-minute fix to unexpected problems, if
you have them readily available. Where possible, it is best to run advance tests for pre-
conceived situations when time allows.
Filter Factors
Many filter types absorb light that must be compensated for when calculating
exposure. These are supplied with either a recommended "filter factor" or a "stop value."
Filter factors are multiples of the unfiltered exposure. Stop values are added to the stop to
be set without the filter. Multiple filters will add stop values. Since each stop added is a
doubling of the exposure, a filter factor of 2 is equal to a one stop increase. Example: three
filters of one stop each will need three additional stops, or a filter factor of 2x2x2= 8 times
the unfiltered exposure.
When in doubt in the field about compensation needed for a filter that you have no
information on, you might use your light meter with the incident bulb removed. If you have
a flat diffuser, use it, otherwise just leave the sensor bare. Aim it at an unchanging light
source of sufficient intensity. On the ground, face up at a blank sky can be a good field
situation. Make a reading without the filter. Watch out for your own shadow. Make a
reading with the filter covering the entire sensor. No light should enter from the sides. The
CAMERA FILTERS © Ira Tiffen 3
difference in the readings is the compensation needed for that filter. You could also use a
spot meter, reading the same bright patch, with similar results. There are some exceptions
to this depending on the filter color, the meter sensitivity, and the target color, but this is
often better than taking a guess.
Filter Grades
Many filter types are available in a range of "grades" of differing strengths. This
allows the extent of the effect to be tailored to suit various situations. The grade numbering
range can vary with the effect type, and generally, the higher the number, the stronger the
effect. Unless otherwise stated, there is no mathematical relationship between the
numbers and the strengths. A grade 4 is not twice the strength of a grade 2. A grade 1
plus a grade 4 doesn't add up to a grade 5.
CAMERA FILTERS FOR BOTH COLOR AND BLACK-AND-WHITE
Ultraviolet Filters
Film, as well as video, often exhibits a greater sensitivity to what is to us invisible,
ultraviolet light. This is most often outdoors, especially at high altitudes, where the UV-
absorbing atmosphere is thinner; and over long distances, such as marine scenes. It can
show up as a bluish color cast with color film, or it can cause a low-contrast haze that
diminishes details, especially when viewing far-away objects, in either color or black-and-
white. Ultraviolet filters absorb UV light generally without affecting light in the visible region.
It is important to distinguish between UV-generated haze and that of air-borne
particles, such as smog. The latter is made up of opaque matter that absorbs visible light
as well as UV, and will not be appreciably removed by a UV filter.
Ultraviolet filters come in a variety of absorption levels, usually measured by their
percent transmission at 400 nanometers (nm), the visible-UV wavelength boundary. Use a
filter that transmits zero percent at 400 nm, such as the Tiffen Haze 2, for aerial and far-
distant scenes; the Tiffen Haze 1, transmitting 29% at 400 nm, is fine for average
situations.
Infra-Red Filters
Certain special situations call for the use of black-and-white or color infra-red
sensitive films. For aerial haze penetration, recording heat effects, and other purposes
they are invaluable. Their color and tonal renditions are very different, however, from other
film types (consult film manufacturers for further details). Various filters are used to reduce
unwanted visible light. Red, orange, and yellow filters, as used for panchromatic black-and-
white film can enhance contrast and alter color. Total visible light absorption transmitting
only infra-red, as with the Wratten #87 or #89 series of filters, can also be useful. The
results will vary with film type and other factors. Prior testing for most situations is a must.
Neutral Density Filters
CAMERA FILTERS © Ira Tiffen
4
When it is desirable to maintain a particular lens opening for sharpness or depth-of-
field purposes, or simply to obtain proper exposure when confronted with too much light
intensity, use a neutral density (ND) filter. This will absorb light evenly throughout the
visible spectrum, effectively altering exposure without requiring a change in lens opening
and without introducing a color shift.
Neutral density filters are denoted by (Optical) Density value. Density is defined as
the log, to base 10, of the Opacitance. Opacitance (degree of absorption) of a filter is the
reciprocal of (and inversely proportional to) its Transmittance. As an example, a filter with a
compensation of one stop has a Transmittance of 50%, or 0.5 times the original light
intensity. The reciprocal of the Transmittance, 0.5, is 2. The log, base 10, of 2 is
approximately 0.3, which is the nominal density value. The benefit of using density values
is that they can be added when combined. Thus two ND .3 filters have a density value of
0.6. However, their combined transmittance would be found by multiplying 0.5 x 0.5 = 0.25,
or 25% of the original light intensity.
Neutral density filters are also available in combination with other filters. Since it is
preferable to minimize the number of filters used (see section on multiple filters), common
combinations such as a Wratten 85 (daylight conversion filter for tungsten film) with a ND
filter are available as one filter, as in the 85N6. In this case, the two stop ND .6 value is in
addition to the exposure compensation needed for the base 85 filter.
Color-Grad® Graduated ND Filters
Often it is necessary or desirable to balance light intensity in one part of a scene with
another, in situations where you don't have total light control, as in bright exteriors.
Exposing for the foreground will produce a washed-out, over-exposed sky. Exposing for
the sky will leave the foreground dark, under-exposed.
Color-Grad ND filters are part clear, part neutral density, with a smoothly graded
transition between. This allows the transition to be blended into the scene, often
imperceptibly. A ND .6-to-clear, with a two-stop differential, will most often compensate the
average bright sky-to-foreground situation.
These filters are also available in combination colors, as where the entire filter is, for
example a Wratten 85, while one half also combines a graded-transition neutral density, as
in the 85-to-85N6. This allows the one filter to replace the need for two.
Color-Grad filters generally come in three transition types. The most commonly
used is the "soft" gradation. It has a wide enough transition area on the filter to blend
smoothly into most scenes, even with a wide angle lens (which tends to narrow the
transition within the image). A long focal length, however, might only image in the center
of the transition. In this case, or where the blend must take place in a narrow, straight area,
use a "hard" gradation. This is ideal for featureless marine horizons. For situations where
CAMERA FILTERS © Ira Tiffen 5
an extremely gradual blend is required, an "attenuator" is used. It changes density almost
throughout its length.
The key to getting best results with a Color-Grad filter is to help the effect blend in as
naturally as possible. Keep it close to the lens, to maximize transition softness. Avoid
having objects in the image that extend across the transition in a way that would highlight
the existence of the filter. Don't move the camera unless the transition can be maintained
in proper alignment with the image throughout the move. Make all positioning judgments
through a reflex viewfinder at the actual shooting aperture, as the apparent width of the
gradation is affected by a change in aperture.
Color-Grad filters are best used in a square, or rectangular format, in a rotating,
slidable position in a matte box. This will allow proper location of the transition within the
image. They can be used in tandem, for example, with one affecting the upper half, the
second affecting the lower half of the image. The center area can also be allowed to
overlap, creating a stripe of the combination of effects in the middle, most effectively with
gradated filers in colors (see section on "Color-Grad Gradated Color Filters).
Polarizing Filters
Polarizers allow color and contrast enhancement, as well as reflection control, using
optical principles different from any other filter types. Most light that we record is reflected
light that takes on its color and intensity from the objects we are looking at. White light, as
from the sun, reflecting off a blue object, appears blue because all other colors are
absorbed by that object. A small portion of the reflected light bounces off the object without
being absorbed and colored, retaining the original (often white) color of its source. With
sufficient light intensity, such as outdoor sunlight, this reflected "glare" has the effect of
washing out the color saturation of the object. It happens that, for many surfaces, the the
reflected glare we don't want is polarized while the colored reflection we do want isn't.
The waveform description of light defines non-polarized light as vibrating in a full 360
degree range of directions around its travel path. Polarized light is defined as vibrating in
only one such direction. A polarizing filter passes light through in only one vibratory
direction. It is generally used in a rotating mount to allow for alignment as needed. In our
example above, if it is aligned perpendicularly to the plane of vibration of the polarized
reflected glare, the glare will be absorbed. The rest of the light, the true-colored reflection,
vibrating in all directions, will pass through no matter how the polarizing filter is turned. The
result is that colors will be more strongly saturated, or darker. This effect varies as you
rotate the polarizer through a quarter-turn, producing the complete variation of effect, from
full to none.
Polarizers are most useful for increasing general outdoor color saturation and
contrast. Polarizers can darken a blue sky, a key application, on color as well as on black-
and-white film, but there are several factors to remember when doing this. To deepen a
blue sky, it must be blue to start with, not white or hazy. Polarization is also angle-
CAMERA FILTERS © Ira Tiffen
6
dependent. A blue sky will not be equally affected in all directions. The areas of deepest
blue are determined by the following "rule of thumb." When setting up an exterior shot,
make a right angle between thumb and forefinger. Point your forefinger at the sun. The
area of deepest blue will be the band outlined by your thumb as it rotates around the
pointing axis of your forefinger, directing the thumb from horizon to horizon. Generally, as
you aim your camera either more into or away from the sun, the effect will gradually
diminish. There is no effect directly at or away from the sun. Do not pan with a polarizer,
without checking to see that the change in camera angle doesn't create undesirable
noticeable changes in color or saturation. Also, with an extra-wide-angle view, the area of
deepest blue may appear as a distinctly darker band in the sky. Both situations are best
avoided. In all cases, the effect of the polarizer will be visible when viewing through it.
Polarizers need approximately 1-1/2 to 2 stops exposure compensation, usually
without regard to rotational orientation or subject matter. They are also available in
combination with certain standard conversion filters, such as the 85BPOL. In this case,
add the polarizer's compensation to that of the second filter.
Certain camera optical systems employ internal surfaces that themselves polarize
light. Using a standard (linear) polarizer will cause the light to be further absorbed by the
internal optics, depending on the relative orientation. A Circular Polarizer is a linear one
to which has been added, on the side facing the camera, a quarter wave "retarder." This
"corkscrews" the plane of polarization, effectively depolarizing it, eliminating the problem.
The Circular Polarizer otherwise functions in the same manner.
Polarizers can also control unwanted reflections from surfaces such as glass and
water. For best results, be at an angle of 33 degrees incident to the reflecting surface.
Viewing through while rotating the polarizer will show the effect. It may not always be
advisable to remove all reflections. Leaving some minimal reflection will preserve a sense
of context to a close-up image through the reflecting surface. A close-up of a frog in water
will appear as a frog out of water without some tell-tale reflections.
For relatively close imaging of documents, pictures, and small three-dimensional
objects, in a lighting-controlled environment, as on a copy stand, large plastic Polarizers
mounted on lights aimed at 45 degrees to the subject from both sides of the camera will
maximize the glare-reducing efficiency of a polarizer on the camera lens. The camera, in
this case, is aimed straight at the subject surface, not at an angle. The lighting Polarizers
should both be in the same, perpendicular orientation to the one on the lens. Again, you
can judge the effect through the polarizer.
SPECIAL EFFECT FILTERS
General Information
The following filter types are available in a wide range of grades useful in both color
CAMERA FILTERS © Ira Tiffen 7
and black-and-white imaging. They have no recommended filter factors, but may require
exposure compensation based on several things. Filters that lower contrast or create flare,
where contrast and/or light intensity is higher, will do more for any given grade. Working
with light, the more they have, the more they can do. The same filter, in two different
lighting conditions, may produce two different effects. With diffusion, or image softening
filters, higher contrast scenes appear sharper, needing more diffusion, than scenes of lower
contrast. Diffusion requirements will also vary with other conditions. Smaller film formats
will allow less diffusion, as will large-screen projection. Color may allow less diffusion than
black and white. Producing for television may require a greater degree of diffusion to
survive the transition. These relationships should cause you to choose exposure and filter
grade based on the situation and personal experience. Prior testing is always
recommended, when possible.
Diffusion Filters
Many different techniques have been developed to diffuse image-forming light.
Stronger versions can blur reality for a dream-like effect. In more subtle forms, diffusion
can soften wrinkles to remove years from a face. The optical effects all involve bending a
percentage of the image-forming light from its original path to defocus it.
Some of the earliest "portrait" diffusion filters still in use today are "nets." Fine mesh,
like a stocking, stretched across the lens, has made many a face appear youthful, flawless.
More recently, these can be obtained as standard-sized optical glass filters, the Tiffen
Softnet series. These function through "selective diffusion." They have a greater effect on
small details, such as wrinkles and skin blemishes, than on the rest of the image. The clear
spaces in the mesh transmit light unchanged, preserving the overall sharp appearance of
the image. Light striking the flat surface of the net lines, however, is reflected or absorbed.
A light-colored mesh will reflect enough to tint shadows, either lighter, which lowers
contrast, or also adding its color, while leaving highlight areas alone. The effect of
diffusion, however, is produced by the refraction of light that just strikes the edges of the
mesh lines. This is bent at a different angle, changing its distance to the film plane, putting
it out of focus. It happens that this has a proportionately greater effect on finer details than
on larger image elements. The result is that fewer wrinkles or blemishes are visible on a
face that otherwise retains an overall, relatively sharp appearance.
The finer the mesh, the more the image area covered by mesh lines, and the greater
the effect. Sometimes, multiple filters are used to produce even stronger results.
As with any filter that has a discrete pattern, be sure that depth of-field doesn't cause
the net filter lines to become visible in the image. Using small apertures, or short focal
length lenses make this more likely, as will using a smaller film format, such as 16mm vs.
35mm, given an equal field of view. Generally, mid-range or larger apertures are suitable,
but test before critical situations.
When diffusing to improve an actor's facial appearance, it is important not to draw
CAMERA FILTERS © Ira Tiffen
8
attention to the presence of the filter, especially with stronger grades, when diffusion is not
required elsewhere. It may be desirable to lightly diffuse adjacent scenes or subjects, not
otherwise needing it, to ensure that the stronger filtration, where needed, is not made
obvious.
In diffusing faces, it is especially important that the eyes do not get overly soft and
dull. This is the theory behind what might be called circular diffusion filters. A series of
concentric circles, sometimes also having additional radial lines, are etched or cast into the
surface of a clear filter. These patterns have the effect of selectively bending light in a
somewhat more efficient way than nets, but in a more radial orientation. This requires that
the center of the circular pattern is aligned with one of the subject's eyes, not always an
easy, or possible, task, to keep it sharp. The rest of the image will exhibit the diffusion
effect.
A variation on the clear-center concept is the Center-Spot filter. This is a special
application filter that has a moderate degree of diffusion surrounding a clear central area
that is generally larger than that of the circular diffusion filter mentioned previously. Use it
to help isolate the main subject, held sharp in the clear center. while diffusing a distracting
background, especially in situations where a long lens and depth-of-field differentiation
aren't possible.
Another portrait diffusion type involves the use of small "dimples," or clear refracting
shapes dispersed on an otherwise clear optical surface. They can be round or diamond-
shaped. These are capable of more efficient selective diffusion than the net type, and have
no requirement to be aligned with the subject's eye. They don't lower contrast, as by tinting
shadows, as light-colored nets do. These dimples refract light throughout their surface, not
just at the edges. For any given amount of clear space through the filter, which is relative
to overall sharpness, they can more efficiently hide fine details than net filters. A more
recent development, the Tiffen Soft/FX® series involves a minutely detailed series of
patterns, made up of tiny "lenslets," each with a greater degree of curvature, with more
optical power, than that developed by the dimples previously mentioned. This produces a
maximum of selective diffusion efficiency for any given amount of overall sharpness.
Taking diffusion to yet another level, where keeping the existence of the filter from
being readily apparent to the viewer is of paramount importance, is the Diffusion/FX®
Series of filters. Available in Black and Gold Series, these are a combination of finely
etched surface texture, with a unique pattern that maximizes the ability to reduce wrinkles
and other fine details, with an internal pattern of very fine dots, which add subtle edge-
diffraction effects. In addition, the Gold Diffusion/FX also incorporates a mild reduction of
contrast, and a subtle gold “warming” tint, for improved skin tones.
The Glimmerglass is the first series of filters with a ‘psychological edge.’” Tiffen has
developed the Glimmerglass series of filters for “making people look their best.” A new
type of diffusion filter, the Glimmerglass subtly softens fine details in a unique manner,
while adding a mild glow to highlights. As contrast is also reduced, the look is one of
CAMERA FILTERS © Ira Tiffen 9
enhanced beauty. A first in this field is the fact that the filter is both effective to look at
as well as to look through. The filter has a distinct silver sparkle that has been found to
be doubly useful. When production starts and people see the glittering on the front of
the lens, they become more confident in the knowledge that the filter is working for them
and they may also turn in a better performance.
The above types of filters, though most often used for "portrait" applications, also
find uses wherever general sharpness is too great, and must be subtly altered.
Sliding Diffusion Filters
When attempting to fine-tune the application of diffusion within a sequence, it can be
invaluable to be able to vary the strength of the effect while filming. This can be
accomplished by employing an oversized filter that has a gradated diffusion effect
throughout its length. It is mounted to allow sliding the proper grade area in front of the
lens, which can be changed "on-camera." When even more subtle changes are required,
maintaining consistent diffusion throughout the image while varying the overall strength, a
dual "opposing gradient" filter arrangement can be used.
Fog, Double Fog and Pro-Mist®
A natural fog causes lights to glow and flare. Contrast is generally lower, and
sharpness may be affected as well. Fog filters mimic this effect of atomized water droplets
in the air. The soft glow can be used to make lighting more visible, make it better felt by the
viewer. The effect of humidity in, say, a tropical scene can be created or enhanced. In
lighter grades, these filters can take the edge off excess contrast and sharpness. Heavier
grades can create unnatural effects, as for fantasy sequences. In general, however, the
effect of a strong natural fog is not produced accurately by Fog filters in their stronger
grades That is because they are too fuzzy, with too much contrast, to faithfully reproduce
the effect of a thick natural fog. For that, Double Fog filters are recommended.
Double Fog filters have milder flare and softening characteristics than standard Fog
filters while exhibiting a much greater effect on contrast, especially in the stronger grades.
A very thick natural fog will still allow close-up objects to appear sharp. So will a Double
Fog filter. They key to the effect is the much lower contrast combined with a minimal
amount of highlight flare.
Pro-Mist® filters generally produce highlight flare that, by staying closer to the
source, appears more as a "halo" than will the more outwardly extended flare of a fog filter.
They create an almost pearlescent glow to highlights. The lighter grades also find uses in
toning down the excessive sharpness and contrast of modern film and lens combinations
without detracting from the image. Black Pro-Mist filters also create moderate image
softening and modest-to-strong highlight flare, but without as much of a lightening effect on
shadows.
CAMERA FILTERS © Ira Tiffen
10
Smoque® filters create the look of smoke without the hassle. Mechanical
generators are often used to add atmospheric haze to a scene. This could be for enhanced
realism in places where smoke is normally encountered like a nightclub, or the scene of a
fire. Most often, the smoke is added to create a certain “look”. The difficulty and cost of
using this equipment and the fact that it is less desirable to work in a smoke-filled
environment, make the Smoque filters valuable as a way to get a similar look without the
need for the generator or the smoke it produces. The Smoque filters can be used to create
the look alone or in addition to a more modest application of real smoke. They allow
greater base level consistency, especially outdoors in the wind, and you don’t have to wait
for it to settle or be replenished, as with real smoke.
Contrast Control Filters
There are many situations, such as bright sunlit exteriors, where proper contrast is
difficult to maintain. Exposing for either highlights or shadows will leave the other severely
under or over exposed. Tiffen Low Contrast filters create a small amount of "localized"
flare near highlight areas within the image. This reduces contrast by lightening nearby
shadow areas, leaving highlights almost unchanged. Tiffen Soft Contrast filters include a
light absorbing element in the filter which, without exposure compensation, will reduce
contrast by also darkening highlights. Use this latter filter when lighter shadows are not
desired. In both cases, the mild flare produced from bright highlights is sometimes used as
a lighting effect.
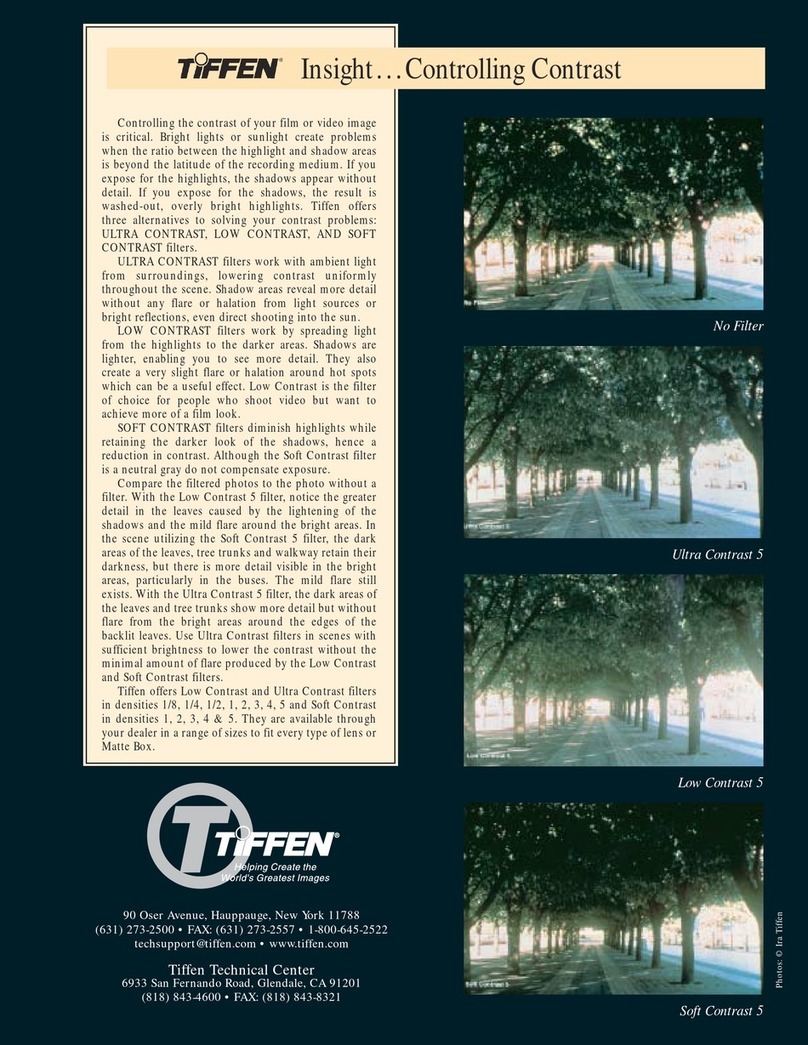
Another, more recently developed type of filter reduces contrast without any
localized flare. The Tiffen Ultra Contrast filter series uses the surrounding ambient light,
not just light in the image area, to evenly lighten shadows throughout. Use it where
contrast control is needed without any other effect on sharpness or highlight flare being
apparent.
Star Effect Filters
Lighting can be enhanced in ways that go beyond what exists in nature. Star filters
create points of light, like "stars," streaking outward from a central light source. This can
make lighting within the scene take on a more glittering, glamorous appearance. This
effect is produced by a series of thin lines etched into the flat optical surface of a clear filter.
These lines act as cylindrical lenses, diffracting light points into long thin lines of light
running perpendicular to the etched lines. Lines on the filter positioned horizontally
produce vertically oriented star lines.
The size and brightness of the star lines produced are first a function of the size,
shape, and brightness of the light source. You have additional control through the choice of
a particular spacing between the lines on the filter. Generally these spacings are measured
in millimeters. A 1mm spacing has twice as many lines per unit area as a 2mm spacing. It
will produce a brighter star for any given source. Spacings offered generally range from
1mm to 4mm, as well as both narrower and wider for specialty effects.