Tim Sistem DIANA User manual

1
DIANA
Owners’s manual
INSTALATION, ADJUSTMENT AND OPERATING INSTRUCTION
Available in ceramic and metalsheet version.
EN 13240

2
INTRODUCTION
Congratulations!
You have invested in energy efficient and high quality product - DIANA wood burning stove.
Your purchase will provide you years of clean and comfortable heating with minimal maintenance.
Please read this manual in its entirety. Its purpose is to familiarize you with your stove safe installation,
operation and maintenance. It contains information that will be useful to you now and in years to come, so
keep it handy and refer to it as needed.
Be sure to maintain the designated stovepipe and stove clearances to walls, ceilings, hearth, and other
combustible surfaces. This will help reduce the risk of fire.
Failure to follow these instructions can result in property damage, bodily injury, and even death!
Locate your stove in a safe, convenient, open area; away from traffic flow, doors, and hallways; and near a
chimney and chimney connector.
PURPOSE
DIANA wood burning stove is designed for heating.
TECHNICAL DATA
DIANA is produced in ceramic tiles and metal sheet tiles version.
Fire box dimensions (W x D x H)
(mm)
200 x 250 x 360
Nominal thermal output
(KW)
10
Appliance efficiency
%
89
Exhaust diameter
(mm)
0
Fuel type
wood, wood briquettes
Temperature of the gases
C
108
Dust content of exhaust gases
mg/m3
D=68
CO (13%O2)
%
0.0808
Net weight
(kg)
54,00
Brutto weight
(kg)
55,00

3
APPEARANCE AND PARTS
1.
Top plate
2.
Fume outlet
3.
Secondary air
4.
Tertiary air
5.
Firebox doors
6.
Grid carrier
7.
Grid
8.
Primary air regulator
9
Ash pan

4
DIMENSIONS
A
B
C
D
E
F
195mm
435mm
785mm
120mm
390mm

5
INSTALLING OF WOOD BURNING STOVE
Unpacking
TIM SISTEM is packing your stove with care so it could be savely transported. However, some damage can
occur during transport.
When you receive your stove, unpack it carefully, inspecting your stove and all parts for damage. Make
sure that all parts are included in the box. If any parts are damaged or missing, please contact your dealer
immediately.
Installing
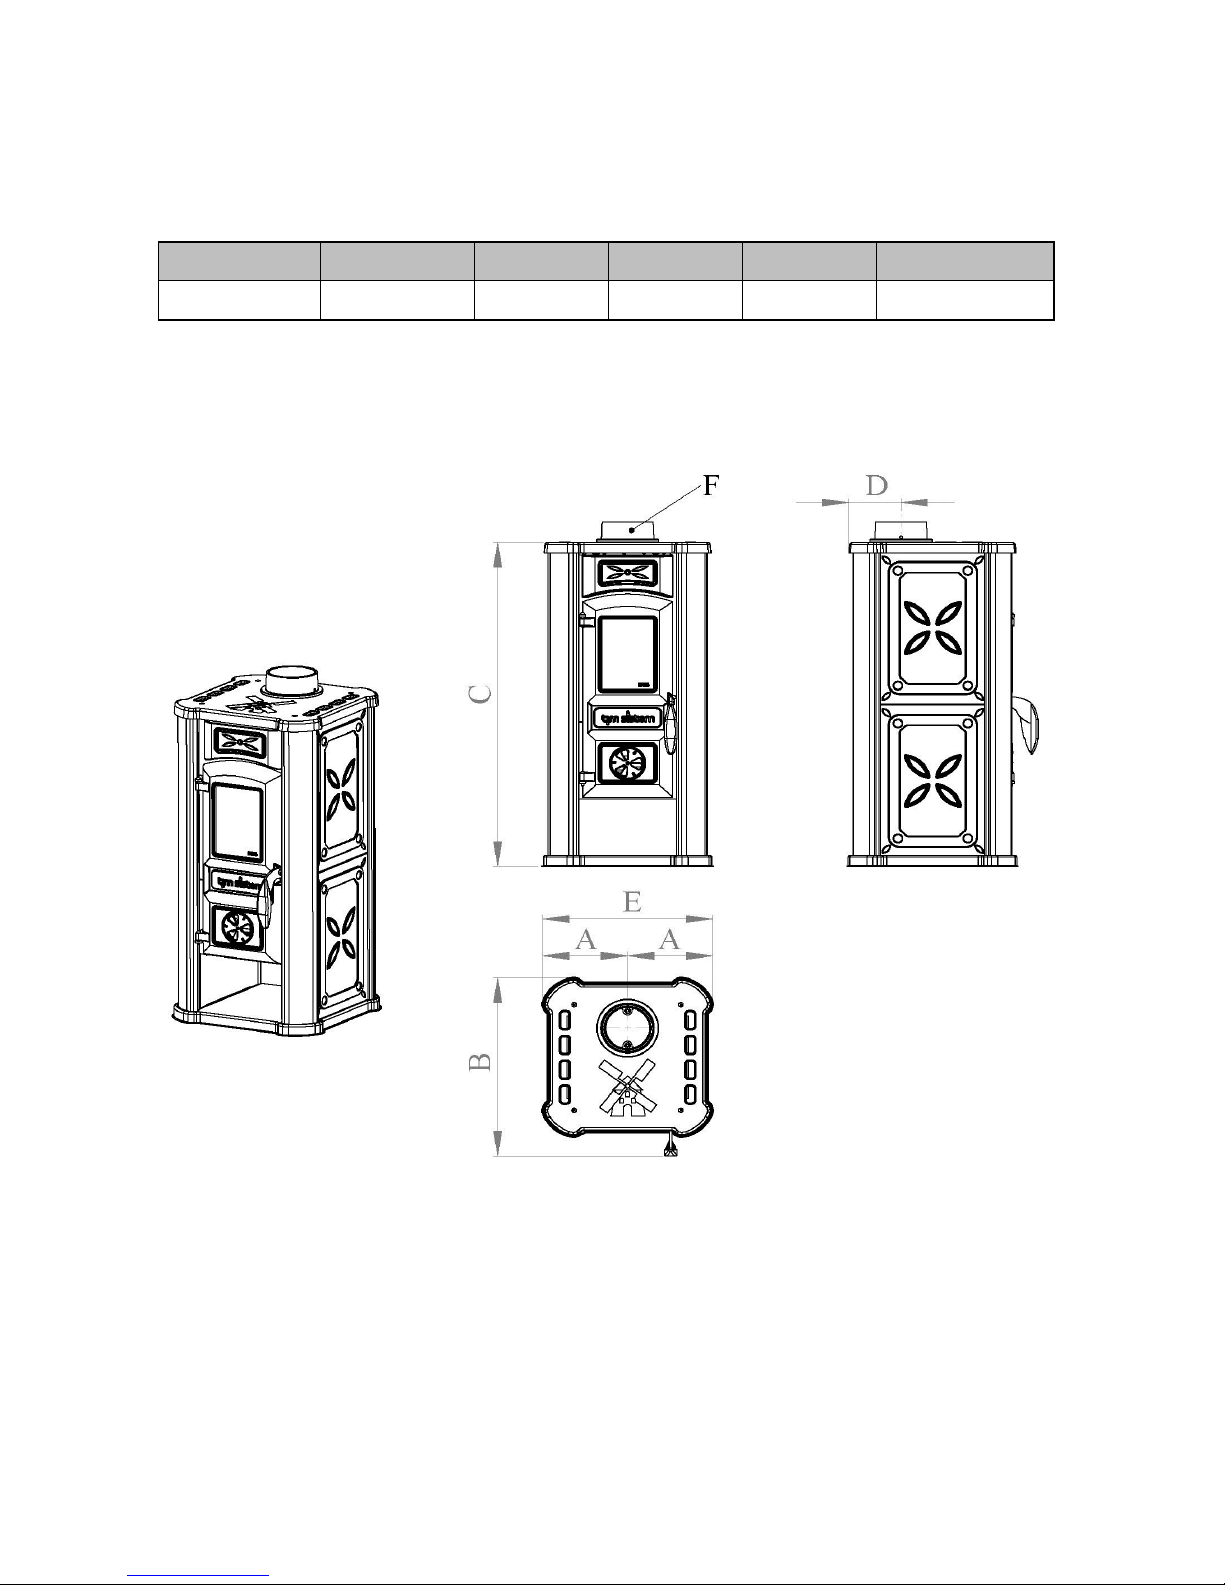
After choosing an appropriate spot, inspect this location to make sure that the stove will have enough
clearance to combustible materials. These combustibles can include walls, floor, ceiling, cabinets, fireplace,
and chimney. You must carefully consider the clearances to all of these combustibles before actually
connecting your cook stove. When considering these clearances, also decide the kind of floor the stove will
rest on. Depending on your floor, you can install your stove as it is, or use a floor protector, some types of
flooring may require additional floor protection. A floor protector is any noncombustible surface laid on the
floor underneath the stove that extends, 50cm beyond the fuel loading door and 10cm beyond each side of
the cook stove
PRECAUTION MEASURES
Read and understand this Owner's Manual thoroughly before installing and using DIANA wood stove.
Make sure to install your stove:
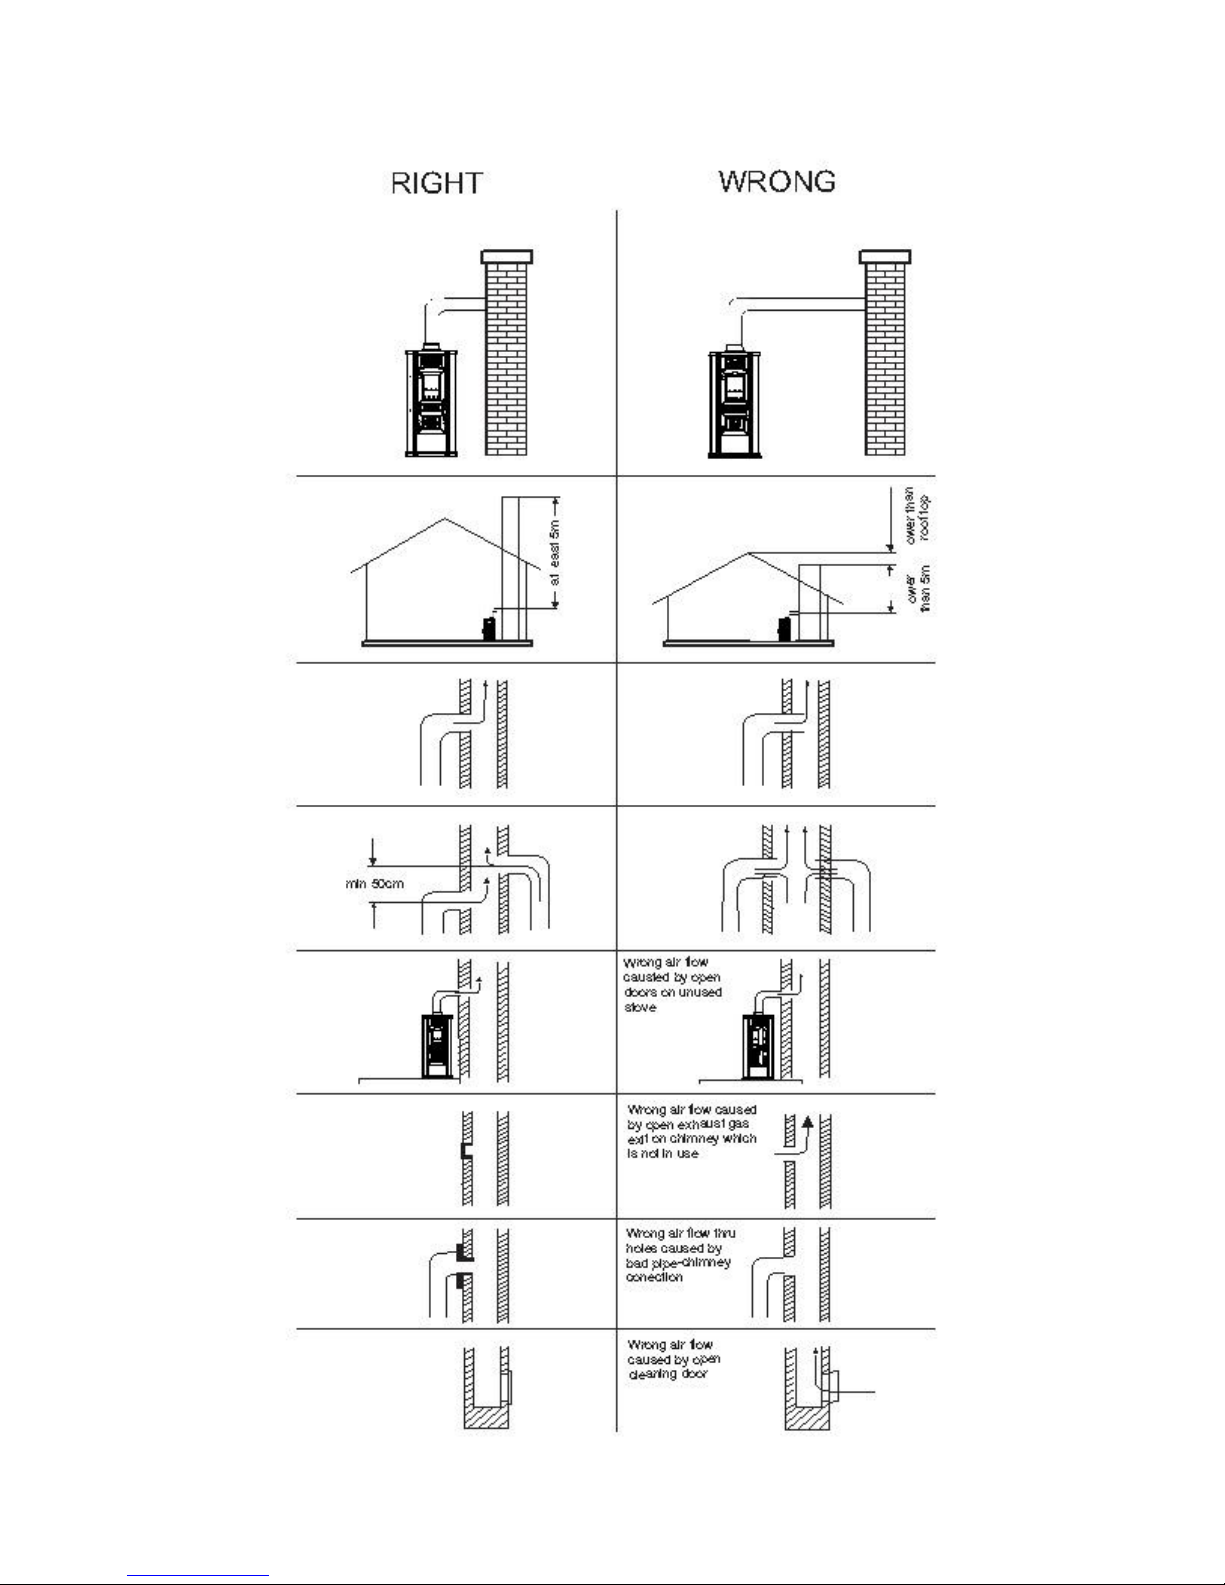
According to the manufacturer's recommendations.
In accordance with all applicable codes.
With the proper sized chimney
When using your cooker:
Warn children and others unfamiliar with wood-fired stoves about the danger of touching hot,
radiating surfaces of your stove. For your additional safety, obtain hearth and stove guards through
your local dealer.
Keep pets away from the stove to prevent unnecessary hazards.
Burn natural wood or briquttes only. Higher efficiencies and lower emissions result when burning air-
dried, seasoned wood, as compared to green or freshly cut wood.
Use caution when loading firewood into a hot stove.
Keep the fuel loading door closed at all times except when loading wood.
Keep the ash pan tray fully inserted.
Avoid grease build-up when cooking on the top surface. Clean the surface regularly after using the
cook top surface.
Never modify this stove in any way.

6
Never burn kiln dried wood, painted or treated wood, solvents, trash, plywood, colored or
glossy paper, artificial logs, cardboard, coal, garbage or driftwood.
Especially, do not burn coal in this stove
.
CONNECTION TO CHIMNEY
After getting familiar with your stove and its part and before you connect it to a chimney, check the quality of
the chimey. If the chimeny is not highest quality we recommend that stove pipe sections should be attached
to the cooker throught fume exit on the top side . Attach the stove pipe to the stove's flue collar, with sheet
metal screws.
Exhaust pipes and connection to chimney must go up ways
Horizontal parts of fumepipes should not be longer than 0,5m and they should always rise away
from stove a minimum of torward chimeny.
Fume pipes diameter should not get smaller.
All connections must be tight , pipes and chimney must be clean and without any kind of dirt.
Chimney must be protected from cold (insulated) especially in the case of metal chimney and in
the case of exterior masonry chimney.
Non vertical fume pipes which dont have insulation should not be longer than 1,25m
Chimney must fulfill the following conditions:
Chimney goes above roof minimum 0,5m.
Chimney should be higher than the firs house next to it, higher than tree or any other obstacle.
Interior chimney is preferable and exterior chimney must be well insulated.
Chimney must be clean of any kind of dirt, bird nests or any kind of
Stovepipe must not be attached to deep in to chimney because it decrease fuming out .
All unnecessary holes or cleaning doors on the chimney must be closed.

7

8
BUILDING A FIRE
Once you understand the controls of your wood stove and have chosen the appropriate firewood, you are
ready to start a fire.
When you light your first fires, the wood stove will emit some smoke and fumes. This is normal "off-gassing"
of the paints and oils used when manufacturing the wood stove. If you find it necessary, open a few
windows to vent your room. The smoke and fumes will usually subside after 10 to 20 minutes of operation.
The odor and smoke will end once the stove is "cured".
Starting fire
1. Open the door and place sheets of tightly twisted newspaper in the center of the firebox. Arrange
kindling in a crisscross pattern over the newspaper. Kindling should be approximately ten pieces. Open
the flue bypass system by pulling the handle out completely
2. Fully open the primary air control
3. Light the paper under the kindling
4. Close the door and allow the fire to burn.
5. Once the kindling is burning, open the door and add logs.
6. Put airflow control handle in starting position only in the case that you want to use oven.
Otherwise,handle is always pulled out.
7. Once the fire is burning well, use the primary air control to regulate the desired rate of burn.
WARRANTY STATEMENT
Warranty is valid from the day of purchase which buyer can prove with verified and signed warranty protocol.
Protocol include details about buyers address, date of purchase, signature and stamp of dealer or his
service representative. Detailed warranty protocol must be made and verified by TIM SISTEM dealer.
Warranty will be acknowledged under following conditions:
Product was handled according to instructions
Product was not damaged
Warranty protocol is verified by TIM SISTEM dealer or his representative
Name of product
Serial No.
Date of purchase
Signature and stamp of dealer or
his service representative
DIANA
Table of contents
Other Tim Sistem Wood Stove manuals