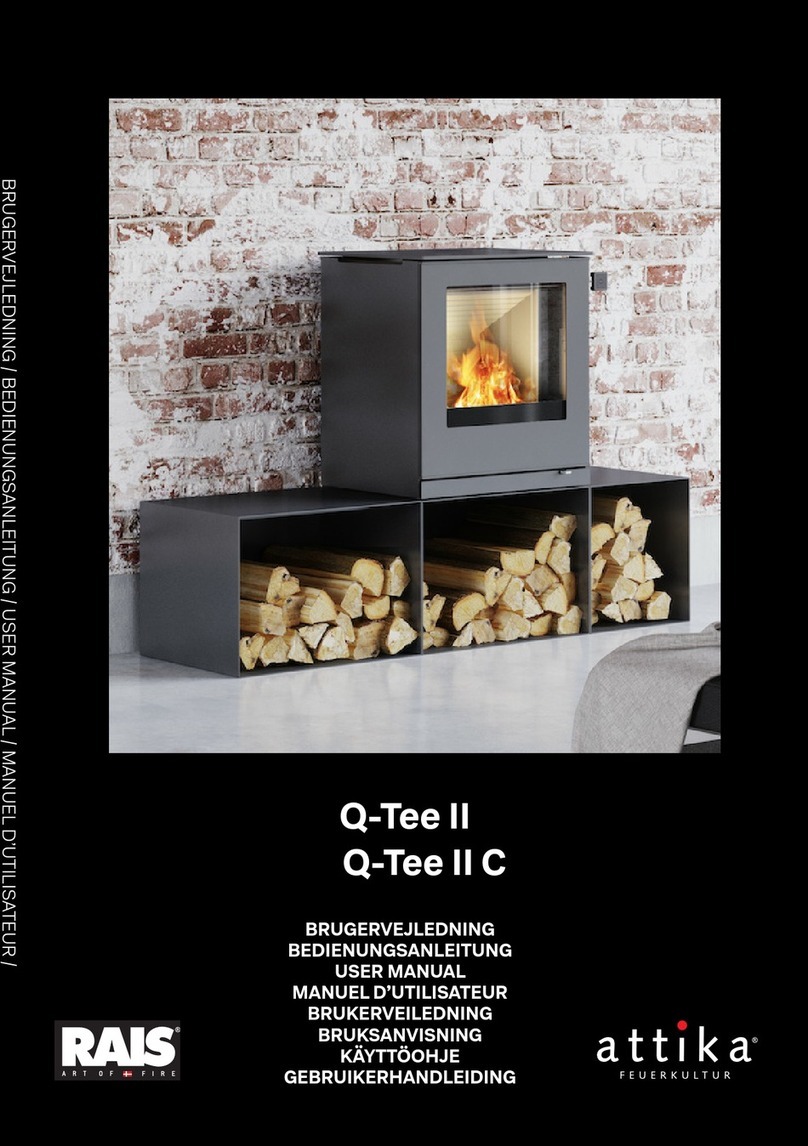
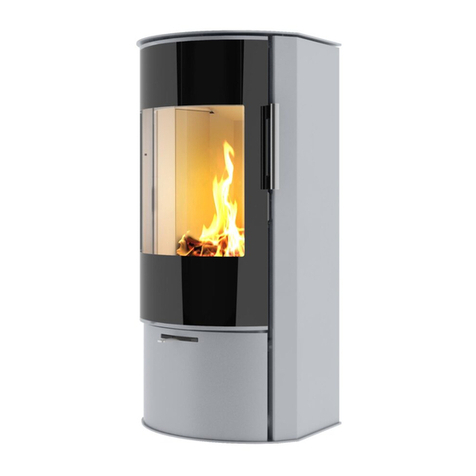
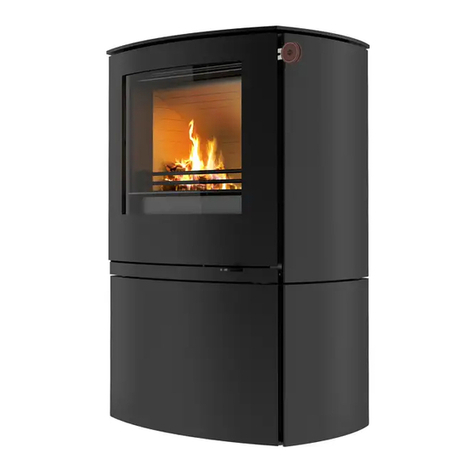
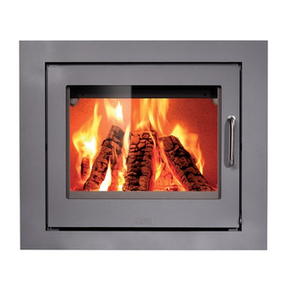
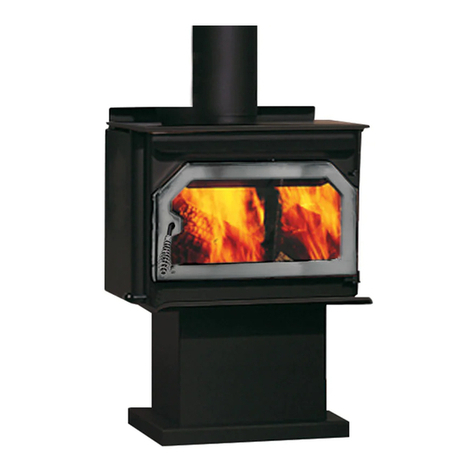
RAIS Q-Tee II USA User manual

USER MANUAL
MANUEL D’UTILISATEUR
Q-Tee II USA
Q-Tee II C USA
POSITIV
OUTLINE
NEGATIV

2
ENG
RECYCLING:
The oven is wrapped in packaging that is recyclable. This
must be disposed of according to national rules regard-
ing the disposal of waste.
The glass can not be reused.
The glass should be discarded along with the residual
waste from ceramics and porcelain.
Pyrex glass has a higher melting temperature and
therefore can not be reused.
If discarded you make an important positive contribu-
tion to the environment.
FIRE ENVIRONMENTALLY FRIENDLY!
5 Eco-friendly advices for sensible heating
- common sense both environmentally and economically.
1. Effective lighting. Use small pieces of wood (fir tree) and a
suitable fire lighter, for example paraffined wood wool/saw-
dust. Open the air damper, so plenty of air is fed to the stove
and the gases from the heated wood can burn rapidly.
2. Light the fire with only little wood at a time - this gives the
best combustion. Remember plenty of air for every time new
wood is added.
3. When the flames are diminished, adjust the air damper so
that the air supply is reduced.
4. When only glowing embers remain, air flow can be reduced
further, so heating demand is just covered. With a lower
air supply the charcoal will burn slower and the heat loss
through the chimney is reduced.
5. Use only dry wood - ie. wood with a humidity of 15 to 20%.
We cannot be held responsible for any misprints

3
Q-Tee II USA
Q-Tee II C USA
: # 23-202
: # 300-ELAB-2635-EPA Rev 1
: 18
: 18-09-2023
ENG
Report no.
Revision
Date (DMY)
INTRODUCTION .........................................................6
WARRANTY ..............................................................6
SPECIFICATIONS ........................................................7
DIMENSIONAL SKETCHES ..........................................8
NAME TAG ........................................................10
TO PREVENT HOUSE FIRES ........................................12
CONVECTION .....................................................13
GLASS AND REPLACEMENT OF GLASS.............................13
PRODUCTION NUMBER & NAME TAG ..............................14
DELIVERY PACKAGING ............................................15
HEIGHT ADJUSTMENT.............................................16
FITTING/CHANGING THE HANDLE ................................. 17
INSTALLATION OF FLUE COLLAR...................................18
MOUNTING OF HEAT SHIELD ......................................19
INSTALLATION .........................................................21
CHIMNEY ...............................................................22
CHIMNEY CONNECTOR PASS-THROUGHS IN COMBUSTIBLE WALL....24
MASONRY CHIMNEY ..............................................26
FACTORY BUILT CHIMNEY .........................................27

4
ENG
FLOOR PROTECTION ..............................................28
CLEARANCES TO COMBUSTIBLE WALLS Q-TEE II USA ...............32
CLEARANCES TO COMBUSTIBLE WALLS Q-TEE II C USA .............34
CLEARANCES TO NON-COMBUSTIBLE WALL.........................36
REDUCED CLEARANCES (CANADA ONLY)..........................37
FIREWOOD .............................................................38
DRYING AND STORING............................................38
ADJUSTING THE COMBUSTION AIR ................................39
USING THE STOVE .................................................... 40
ADJUSTING THE AIR CONTROL ....................................... 40
CARBON MONOXIDE DETECTORS ......................................41
CONTROL .........................................................41
FIRST FIRE ..............................................................41
LIGHTING AND STOKING ..............................................42
FUEL CAUTION ....................................................44
CARE AND MAINTENANCE ............................................44
MAINTAINING THE INSTALLATION.......................................45
REMOVING THE COMBUSTION CHAMBER LINING..................46
LUBRICATING THE HINGES & LOCK ................................47
CLEANING THE SMOKE/BAFFLE SYSTEM .............................48
DISPOSAL OF ASHES ..............................................49
TROUBLE SHOOTING ..................................................50
SPARE PARTS...........................................................52
AIR KIT...................................................................56

5
ENG
Introduction
Congratulations on the purchase of your new RAIS woodburning stove.
A RAIS woodburning stove is more than just a source of heat, it is a symbol of the
emphasis you put on decorating your home with superiorly designed high-quality
products.
PLEASE READ THIS ENTIRE MANUAL BEFORE YOU INSTALL AND USE YOUR NEW
RAIS STOVE. FAILURE TO FOLLOW INSTRUCTIONS MAY RESULT IN PROPERTY
DAMAGE, BODILY INJURY, OR EVEN DEATH. SAVE THIS MANUALAND KEEP IT
HANDY FOR EASY REFERRAL.
“DO NOT INSTALL IN TRANSPORTABLE BUILDINGS”
Do NOT install the wood heater in a factory-built fireplace.
The wood heater is NOT to be installed in a structure constructed on skids or run-
ning gear.
“WARNING: Do not overfire. If the stovetop or chimney connector pipe glow red,
you are overfiring”.
“Warning: Do not use other, than the specified original Rais components!
Safety and environmental testing
The Stove is listed to UL 1482-2022 and ULC S627-2023. It is also EPA certified.
Space heaters meeting the requirements of CAN/ULC-S627
are suitable for installation on a combustible floor and do not require radiant floor
protection. Note. see page 31!
Warranty
We offer a five-year warranty on your RAIS stove. The warranty covers any defects
in materials or workmanship. However, it does not cover damage from misuse or
neglect, and the glass, gaskets and firebricks are not covered either. Warranties are
void if the unit is used to burn any materials other than wood or not operated in ac-
cordance with this owner’s manual

6
ENG
Distributor:
Date:
For future reference, please write down the production number of your RAIS wood-
burning stove here. The number must be stated in all inquiries or complaints con-
cerning this product.

7
ENG
RAIS Q-Tee II USA Rais Q-Tee II C USA
Weight of Stove
Weight of stove with socket 275 lbs (125 kg)
324 lbs (147 kg) 308 lbs (140 kg)
381 lbs (173 kg)
Stove exterior: Width/
depth/height (inches) 22.9 / 16.1 / 23.5 26 / 18,9 / 23,8
Firebox interior Width/
depth/height (inches) 17.5 / 10.9 / 10.4 17.5 / 10.9 / 10.4
Heating capacity at -20°C/-
4°F App. 100 m² / 1100
Square Feet App. 100 m² / 1100 Square
Feet
Recommended amount
of wood when fueling (kg)
wood: 2-3 logs of wood of
app. 25-33cm 1,8(kg) / 4(lbs) 1,8(kg) / 4(lbs)
Intermittent operation: Refuelling should be
undertaken within 60
minutes.
Refuelling should be un-
dertaken within 60 min-
utes.
Energy Efficiency (%) 73 73
Emission of CO (g pr. min.) 0,8 0,8
Single wall connector stove
pipe: 6” (15 cm) 6” (15 cm)
Chimney pipe - class A, UL-
103 HT: 6” (15 cm) 6” (15 cm)
Min./Max. output (BTU/hr): 11600-20005 11600-20005
Minimum stove draft pres-
sure at above output: 0.048”WC (12 Pa) 0.048”WC (12 Pa)
Tested EPA emission par-
ticulate rate: 0.7 g/hr 0.7 g/hr
Specifications:
U.S. ENVIRONMENTAL PROTECTION AGENCY Certified to comply with 2020 par-
ticulate emission standards using crib wood. 0.7 g/hr, Method 28R
This wood heater needs periodic inspection and repair for proper operation. It is
against federal regulations to operate this wood heater in a manner inconsistent
with operating instructions in this manual.
This wood heater has a manufacturer-set minimum low burn rate that must not be
altered. It is against federal regulations to alter this setting or otherwise operate this
wood heater in a manner inconsistent with operating instructions in this manual.

8
A-A
A
595 [23.4 in]
150 [5.9 in]
245,2 [9.7 in]
140 [5.5 in]
n
110 [
n
4.3 in]
n
130 [
n
5.1 in]
n
164 [
n
6.5 in]
582 [22.9 in]
429 [16.9 in]
8426541USA
Q-Tee II USA
603 [23.7 in]
694,2 [27.3 in]
110 [4.3 in]
475 [18.7 in]
A-A
A
595 [23.4 in]
150 [5.9 in]
245,2 [9.7 in]
140 [5.5 in]
n
110 [
n
4.3 in]
n
130 [
n
5.1 in]
n
164 [
n
6.5 in]
582 [22.9 in]
429 [16.9 in]
8426541USA
Q-Tee II USA
603 [23.7 in]
694,2 [27.3 in]
110 [4.3 in]
475 [18.7 in]
A-A
A
595 [23.4 in]
150 [5.9 in]
245,2 [9.7 in]
140 [5.5 in]
n
110 [
n
4.3 in]
n
130 [
n
5.1 in]
n
164 [
n
6.5 in]
582 [22.9 in]
429 [16.9 in]
8426541USA
Q-Tee II USA
603 [23.7 in]
694,2 [27.3 in]
110 [4.3 in]
475 [18.7 in]
A-A
A
595 [23.4 in]
150 [5.9 in]
245,2 [9.7 in]
140 [5.5 in]
n
110 [
n
4.3 in]
n
130 [
n
5.1 in]
n
164 [
n
6.5 in]
582 [22.9 in]
429 [16.9 in]
8426541USA
Q-Tee II USA
603 [23.7 in]
694,2 [27.3 in]
110 [4.3 in]
475 [18.7 in]
A-A
A
595 [23.4 in]
150 [5.9 in]
245,2 [9.7 in]
140 [5.5 in]
n
110 [
n
4.3 in]
n
130 [
n
5.1 in]
n
164 [
n
6.5 in]
582 [22.9 in]
429 [16.9 in]
8426541USA
Q-Tee II USA
603 [23.7 in]
694,2 [27.3 in]
110 [4.3 in]
475 [18.7 in]
ENG
Q-Tee II USA
Dimensional sketch

9
A-A
B
A
B
603 [23.7 in]
595 [23.4 in]
660 [26 in]
330 [13 in]
479 [18.9 in]
110 [4.3 in]
475 [18.7 in]
695 [27.4 in]
159 [6.3 in]
179 [7 in]
8346531USA
Q-TEE II C USA
499 [19.6 in]
328 [12.9 in]
656 [25.8 in]
179 [7 in]
258 [10.1 in]
ENG
Q-Tee II C USA
Dimensional sketch

10
D
Adjacent wall
Adjacent wall
Back wall
Side wall
Clearances to combustible surfaces
**Rear/Top vent option
Ceiling
**
FLOOR PROTECTOR
USA
See further floor protection
requirements at bottom of this label.
Floor protection for
Canada: 30" (76 cm)
from unit to front of floor protector.
Floor protector must be under the pipe and 2"
(5cm) beyond each side for back venting.
U.S. ENVIRONMENTAL PROTECTION AGENCY
Certified to comply with 2020 particulate emission
standards using crib wood. 0.7 g/hr, Method 28R
MINIMUM CLEARANCE Rear Vent
With Pedestal With Pedestal No pedestal
A: SIDE WALL TO UNIT 14"/356mm 14"/356mm 15"/381mm
B: BACK WALL TO UNIT 12"/305mm 12"/305mm 15"/381mm
C: CORNER WALL TO UNIT 11"/280mm N/A 13"/331mm
D: CEILING HEIGHT 45"/1143mm 45"/1143mm 45"/1143mm
E: FRONT WALL / FURNISHING: 36"/915mm 36"/915mm 36"/915mm
F: Back Wall to Pipe 15"/381mm N/A 18"/458mm
G: Side Wall to Pipe 22,5"/572mm 22,5"/572mm 23,5"/597mm
H: Corner Wall to Pipe 20"/508mm N/A 22"/559mm
Do not store wood logs or combustible materials underneath the room heater
Écartement minimum Évent arrière
Avec piédestal Avec piédestal Sans piédestal
A: Mur latéral - Appareil 14"/356mm 14"/356mm 15"/381mm
B: Mur arriére - Appareil 12"/305mm 12"/305mm 15"/381mm
C: Mur de coin - Appareil 11"/280mm N/A 13"/331mm
D: Plafond - Lappareil 45"/1143mm 45"/1143mm 45"/1143mm
E: Distance meuble devant 36"/915mm 36"/915mm 36"/915mm
F: Paroi arrière de cheminée 15"/381mm N/A 18"/458mm
G: Paroi arrière de cheminée 22,5"/572mm 22,5"/572mm 23,5"/597mm
H: Coin mur pour cheminée 20"/508mm N/A 22"/559mm
Ne pas stocker les journaux de bois ou des matériaux combustibles sous le radiateur de la chambre
FLOOR PROTECTION:
Floor protection requirements are dependent upon whether the optional High
Socket Base, Rais part number 838040590 is used; Floor protection must be
non-combustible material extending beneath the stove, and to the front and
sides from door opening and to the rear as indicated. The floor protection
needed on the floor when used WITHOUT the base is required to have thermal
protection with an R value of 3.19 Btu*in/Hrs*ft2*°F (equal to 0.46 w/mk in SI
units). with the base, the floor protection is not required to have thermal
protection (R=0)
** Not Tested - NFPA Guidelines in USA, CAN/CSA B365-M91 in Canada
** Non testé - NFPA Guidelines au USA, CAN/CSA
B365-M91 au Canada
La protection de sol doit être au moins de 3/8 inch
matériel non combustible placé sous le foyer
s'étendant vers l'avant, les côtés les ouvertures et
l'arriére comme induqué.
Manufactured by:
RAIS A/S
Industrivej 20, DK-9900 Frederikshavn, Denmark
Model: Q-Tee II USA
Solid Fuel Room Heater
Tested to:
UL 1482-2022
ULC-S627:2023
For Use With Solid Wood Fuel Only
Model
Modéle
Date of manufacture Month
Date of fabrication Mois
Year
Année
Serial no.
N° de série
Safety Report No. # 23-202
Emissions Report No. # 300-ELAB-2635-EPA Rev 1
Made in Denmark
Fabriqué au Danemark
This wood heater needs periodic inspection and
repair for proper operation. Consult the owner's
manual for further information. It is against federal
regulations to operate this wood heater in a manner
inconsistent with the operating instructions in the
owner's manual.
H
H
C
C
B
F
A
G8"
24"
8"
1,9"
39"
2"
8"
8" 8"
30"
39"
54,9"
49"
8,1"
FLOOR PROTECTOR
Canada
To be installed as a freestanding room heater with the clearances
in the manufacturer's installation instructions. Not to be installed
in any factory-built fireplace. Do NOT obstruct the space beneath
the heater! Combustion air openings are NOT to be obstructed!
Replace glass with only Rais authorized dealer supplied ceramic
glass
À installer comme radiateur d'ambiance autonome avec les
dégagements indiqués dans les instructions d'installation du
fabricant. Ne doit pas être installé dans un foyer préfabriqué.
N'obstruez PAS l'espace sous le radiateur ! Les ouvertures d’air
de combustion ne doivent PAS être obstruées !
Remplacez le verre par du verre céramique fourni uniquement par
un revendeur agréé Rais.
E
E
Q-Tee II USA
ENG
11
D
Adjacent wall
45° to Wall
Adjacent wall
Parallel to Wall.
Back wall
Side wall
Clearances to combustible surfaces **Rear/Top vent option
Ceiling
**
FLOOR PROTECTOR
USA
See further floor protection
requirements at bottom of this
label.
Floor protection for
Canada: 30" (76 cm)
from unit to front of floor protector.
Floor protector must be under the pipe and 2"
(5cm) beyond each side for back venting.
U.S. ENVIRONMENTAL PROTECTION AGENCY
Certified to comply with 2020 particulate emission
standards using crib wood. 0.7 g/hr, Method 28R
MINIMUM CLEARANCE Rear Vent
With Pedestal With Pedestal No pedestal
A: SIDE WALL TO UNIT 14"/356mm 14"/356mm 15"/381mm
B: BACK WALL TO UNIT 12"/305mm 12"/305mm 15"/381mm
C: CORNER WALL TO UNIT 13.5"/343mm N/A 15.5"/394mm
D: CEILING HEIGHT 45"/1143mm 45"/1143mm 45"/1143mm
E: FRONT WALL / FURNISHING: 36"/915mm 36"/915mm 36"/915mm
F: Back Wall to Pipe 17"/432mm N/A 20"/508mm
G: Side Wall to Pipe 24"/610mm 24"/610mm 25/635mm
H: Corner Wall to Pipe 22.5"/572mm N/A 24.5"/622mm
Do not store wood logs or combustible materials underneath the room heater
Écartement minimum Évent arrière
Avec piédestal Avec piédestal Sans piédestal
A: Mur latéral - Appareil 14"/356mm 14"/356mm 15"/381mm
B: Mur arriére - Appareil 12"/305mm 12"/305mm 15"/381mm
C: Mur de coin - Appareil 13.5"/343mm N/A 15.5"/394mm
D: Plafond - Lappareil 45"/1143mm 45"/1143mm 45"/1143mm
E: Distance meuble devant 36"/915mm 36"/915mm 36"/915mm
F: Paroi arrière de cheminée 17"/432mm N/A 20"/508mm
G: Paroi arrière de cheminée 24"/610mm 24"/610mm 25"/635mm
H: Coin mur pour cheminée 22.5"/572mm N/A 24.5"/622mm
Ne pas stocker les journaux de bois ou des matériaux combustibles sous le radiateur de la chambre
FLOOR PROTECTION:
Floor protection requirements are dependent upon whether the optional High Socket
Base, Rais part number 838040590 is used;
Floor protection must be non-combustible material extending beneath the stove,
and to the front and sides from door opening and to the rear as indicated.
The floor protection needed on the floor when used WITHOUT the base is required to have
thermal protection with an R value of 3.19 Btu*in/Hrs*ft2*°F (equal to 0.46 w/mk in SI units).
with the base, the floor protection is not required to have thermal protection (R=0)
Replace glass with only Rais authorized dealer supplied ceramic glass
** Not Tested - NFPA Guidelines in USA, CAN/CSA B365-M91 in Canada
** Non testé - NFPA Guidelines au USA, CAN/CSA
B365-M91 au Canada
La protection de sol doit être au moins de 3/8 inch
matériel non combustible placé sous le foyer
s'étendant vers l'avant, les côtés les ouvertures et
l'arriére comme induqué.
Manufactured by:
RAIS A/S
Industrivej 20, DK-9900 Frederikshavn, Denmark
Model: Q-Tee II C USA
Solid Fuel Room Heater
Tested to:
UL 1482-2022
ULC S627-2023
For Use With Solid Wood Fuel Only
Model
Modéle
Date of manufacture Month
Date of fabrication Mois
Year
Année
Serial no.
N° de série
Safety Report No. # 23-202
Emissions Report No. # 300-ELAB-2635-EPA Rev 1
Made in Denmark
Fabriqué au Danemark
8"
8"
24"
This wood heater needs periodic inspection and
repair for proper operation. Consult the owner's
manual for further information. It is against federal
regulations to operate this wood heater in a
manner inconsistent with the operating
instructions in the owner's manual.
C
C
H
H
F
B
A
G
E
0"
2"
FLOOR PROTECTOR
Canada
8"
8" 8"
30"
2"
57,7"
42"42"
43,7"
To be installed as a freestanding room heater with the clearances
in the manufacturer's installation instructions. Not to be installed
in any factory-built fireplace. Do NOT obstruct the space beneath
the heater! Combustion air openings are NOT to be obstructed!
Replace glass with only Rais authorized dealer supplied ceramic
glass
À installer comme radiateur d'ambiance autonome avec les
dégagements indiqués dans les instructions d'installation du
fabricant. Ne doit pas être installé dans un foyer préfabriqué.
N'obstruez PAS l'espace sous le radiateur ! Les ouvertures d’air
de combustion ne doivent PAS être obstruées !
Remplacez le verre par du verre céramique fourni uniquement par
un revendeur agréé Rais.
E
Q-Tee II C USA
ENG
12
CAUTION:
HOT WHILE IN OPERATION-DO NOT TOUCH
KEEP CHILDREN AND CLOTHING AWAY-
CONTACT MAY CAUSE SKIN BURNS.
SEE NAMEPLATE AND INSTRUCTIONS.
KEEP FURNISHINGS AND OTHER COMBUSTIBLE
MATERIALS A CONSIDERABLE DISTANCE AWY
FROM THE APPLIANCE.
Do not overfire - if heater or chimney
connector glows, you are overfiring.
DO NOT REMOVE THIS LABEL / NE PAS ENLEVER CETTE ÉTIQUETTE
ATTENTION:
CHAUD PENDANT LE FONCTIONNEMENT - NE
PAS TOUCHER ECARTE LES ENFANTS ET
LES VETEMENTS- LE CONTACT PEU CAUSER
DES BRULURES. CONSULTE LA PLAQUE ET
LES INSTRUCTIONS. TENIR LES MEUBLES ET
AUTRES MATIERES COMBUSTIBLES A
GRANDE DISTANCE DE LAPPAREIL.
Évitez de surshauffer-si le feu ou la cheminée
rougeoie, vois surchauffez.
T
T
O
O
P
P
R
R
E
E
V
V
E
E
N
N
T
T
H
H
O
O
U
U
S
S
E
E
F
F
I
I
R
R
E
E
S
S
Contact local Building or Fire officials about restrictions and installation inspection in your area.
Install and use only in accordance with manufacture's installation and operating instructions and
local codes.
In absence of any local codes, installation must meet minimum requirements of NFPA 221 in
USA and B365 in Canada.
Refer to manufacture's instruction and local codes for precautions required for passing chimney
through a combustible wall or ceiling.
Inspect and clean chimney system frequently in accordance with manufacture's instruction. Do
not connect this stove to a chimney flue serving another appliance.
Do not use grate or elevate fire.
Build wood fire directly on hearth.
Flue connector pipe must be 6 inch diameter, minimum single wall 24
msg black or 25 msg blued steel. (Rais part number 61-110)
Chimney must be factory built 6" diameter Class "A" 103HT, or masonry.
TO PREVENT CREOSOTE FIRES
Inspect and clean chimney frequently - Under certain conditions
of use, creosote buildup may occur rapidly.
For Use With Solid Wood Fuel Only".
CAUTION: Fully open combustion air control before opening the
fuel feed door.
CAUTION: Only operate the wood heater with the doors closed.
To be installed as a freestanding room heater with the clearances in the manufacturer's
installation instructions. Not to be installed in any factory-built fireplace.
P
P
O
O
U
U
R
R
É
É
V
V
I
I
T
T
E
E
R
R
L
L
E
E
S
S
I
I
N
N
C
C
E
E
N
N
D
D
I
I
E
E
S
S
D
D
O
O
M
M
E
E
S
S
T
T
I
I
Q
Q
U
U
E
E
S
S
Contactez les autorités locales des bâtiments et des sapeurs-pompiers concernant les
restrictions et les inspections d’installation dans votre région.
Installez et utilisez cet appareil uniquement conformément aux instructions d’installation
et d’utilisation du fabricant, et aux codes locaux.
En l’absence de code local, l’installation doit satisfaire aux exigences minimales de la
NFPA 221 aux États-Unis et de la B365 au Canada.
Reportez-vous aux instructions du fabricant et aux codes locaux pour connaître les
précautions à prendre pour l’installation d’une cheminée à travers un mur ou un plafond
inflammable.
Inspectez et nettoyez fréquemment le système de cheminée conformément aux
instructions du fabricant. Ne raccordez pas ce poêle à un conduit de cheminée
desservant un autre appareil.
N’utilisez pas de grille et ne faites pas monter le feu.
Disposez un feu de bois directement sur le foyer.
Le tuyau de raccordement au conduit doit avoir un diamètre de 6 pouces (152 mm), une
paroi simple minimale de 24 msg noir ou 25 msg acier bleui. (N° de pièce Rais 61-110)
La cheminée doit être un modèle préfabriqué de 6 pouces (152 mm) de diamètre Classe
« A » 103HT ou en maçonnerie.
POUR ÉVITER LES INCENDIES DE CRÉOSOTE
Inspectez et nettoyez fréquemment la cheminée. Dans certaines conditions d’utilisation,
la créosote peut s’accumuler rapidement.
À utiliser exclusivement avec du bois massif comme combustible.
ATTENTION : Ouvrez complètement le contrôle d’air de combustion avant d’ouvrir la
porte du foyer.
ATTENTION : Utilisez le poêle à bois avec les portes fermées uniquement.
À installer comme appareil de chauffage autonome avec les dégagements indiqués
dans les instructions d’installation du fabricant. Ne pas installer dans un foyer
préfabriqué
ENG
13
ENG
Convection
All RAIS stoves are convection stoves, which means that the sides of the stove never
get too hot. Convection works by pulling cold air into the system at the base of the
stove and up through the convection duct that is located along the combustion
chamber of the stove. The heated air is released from the top of the stove, creating
rapid air circulation in the room.
Glass and replacement of glass.
All RAIS stoves are supplied with Robax® glass in the door. Robax® glass is a ceramic
glass type suitable for stoves. The glass is installed from RAIS as an integral part of
the door and stove.
Inspect the glass for cracks prior to the first fire.
Abuse may cause damage to the glass and door.
Do not strike the door or glass nor slam the door
Do not build the fire close to the glass or opening.
Do not use the stove if the glass is broken - contact your local authorized dealer.
In case of broken glass during use of stove - let the stove slowly burn the remaining
firewood under supervision. Do not close the chimney baffle if installed. Contact your
local authorized dealer
The glass is supplied as an integral part of the door for spare part. The Robax® glass
may only be replaced by genuine spare parts from RAIS. Do not use substitute mate-
rial. Replacement of the glass as separate component is only for authorized person-
nel.

14
14-6501
Produktionsnummer placering
8426510
Godkendelseslabel
ENG
Production number.
The production number can be found on the back of the stove.
Name tag.
The name tag can be found on the back of the stove.

15
Q-Tee II
Skum klodser
8426503
1
A
B
A
B
Q-Tee II
Transportsikring
8426502
Q-Tee II
Skum klodser
8426503
1
A
B
A
B
Q-Tee II
Transportsikring
8426502
A
B
A
B
Q-Tee II
Transportsikring
8426502
ENG
DELIVERY PACKAGING
Upon delivery, the stove is secured to a transport pallet using four transport safety
fittings, one in each corner (A).
The safety fittings are secured with screws, which must be unscrewed. The safety fit-
tings can then be removed (B).
The top of the wood-burning stove has two polystyrene blocks (1), which protect the
combustion chamber lining in transit. These must be removed before starting a fire
in the stove.

16
Q-Tee II
Adjustable feet
8426504
1
ENG
HEIGHT ADJUSTMENT
The stove is equipped with four adjustment screws (1) under the stove.
Use the adjustment screws to ensure the wood-burning stove stands level.

17
1
1 2
23
Q-Tee II
Mounting of the door handle
8426505
1
1 2
23
Q-Tee II
Mounting of the door handle
8426505
1
1 2
23
Q-Tee II
Mounting of the door handle
8426505
ENG
FITTING/CHANGING THE HANDLE
The wood-burning stove comes with a temporary han-
dle (1). To remove it, undo the nuts (2). The new handle
(3) can now be fitted to the stove using the nuts (2).

18
Q-Tee II
Røgstuds ved bagafgang
8426509
2
1
3
1
23
Q-Tee II
Røgstuds ved bagafgang
8426509
2
1
3
1
2
3
Q-Tee II
Røgstuds ved bagafgang
8426509
2
1
3
1
2
3
Q-Tee II
Røgstuds ved bagafgang
8426509
2
1
3
1
23
ENG
INSTALLATION OF FLUE COLLAR.
The stove is prepared for top outlet on delivery.
Mount the flue collar (61-110) with the delivered
M6 nuts and bolts.
Rear outlet
The stove can be changed to rear outlet in the following
way.
1. On the back of the stove there is a knock-out form that
must be knocked free of the back. It is attached via four
small pins.
2. Remove the knock-out form with a hammer or similar.
3. Remove the cover (1) and gasket (2) from the rear outlet
and mount it on the top outlet.
4. Mount the smoke connection (3) on the rear exit.

19
ITEMTITLEPART NUMBER
QTY
1
BN726 Skive plan - M6/6.4/11/1.60110-M6 Skive Plan
4
2BN3318 Afstandsstag 6kt0110-M6X20 AFST.STAG4
3Reflector plate83941011
4BN19 RH skrue m/indv 6kt
0110-M6X10 RH RÅ
4
8428606
Reflector plate mounting
1
2
3
4
ITEMTITLEPART NUMBER
QTY
1
BN726 Skive plan - M6/6.4/11/1.60110-M6 Skive Plan
4
2BN3318 Afstandsstag 6kt0110-M6X20 AFST.STAG4
3Reflector plate83941011
4BN19 RH skrue m/indv 6kt
0110-M6X10 RH RÅ
4
8428606
Reflector plate mounting
1
2
3
4
ENG
Mounting of Heat shield Q-Tee II
The Heat shield is not mounted to the stove on delivery, and must be mounted before
the stove is put into use.
Step 1: Mount the washer (1) with the distance piece (2) to the back of the wood stove.
Step 2: Mount the Reflector plate (3) with the four M6 bolts (4) to the distance pieces (2)

20
TITLEPART NUMBERQTYITEM
Reflector - Curved834410112
BN3318 Afstandsstag 6kt0110-M6X20 AFST.STAG
4
1
BN19 RH skrue m/indv 6kt
0110-M6X10 RH RÅ
4
3
1
2
3
8348624
Q-Tee II C Mounting of reflector plate
ENG
Mounting of Heat shield Q-Tee II C
The Heat shield is not mounted to the stove on delivery, and must be mounted be-
fore the stove is put into use.
Step 1: Mount the distance piece (1) to the back of the wood stove.
Step 2: Mount the Reflector plate (2) with the four M6 bolts (3) to the distance pieces
(1)
Other manuals for Q-Tee II USA
1
This manual suits for next models
1
Table of contents
Languages:
Other RAIS Wood Stove manuals
Popular Wood Stove manuals by other brands

SCAN
SCAN 38 Instructions for installation and use

ADURO
ADURO 8 user manual

Traditions
Traditions T150C Installation and operation manual

Cadel
Cadel KOOK 60 4.0 Installation, use and maintenance manual

Dovre
Dovre 250CB Installation instructions and operating manual

Drolet
Drolet Optima DB03210 Installation and operation manual