TIPTEL Ergophone 6160 User manual
User Guide (en)
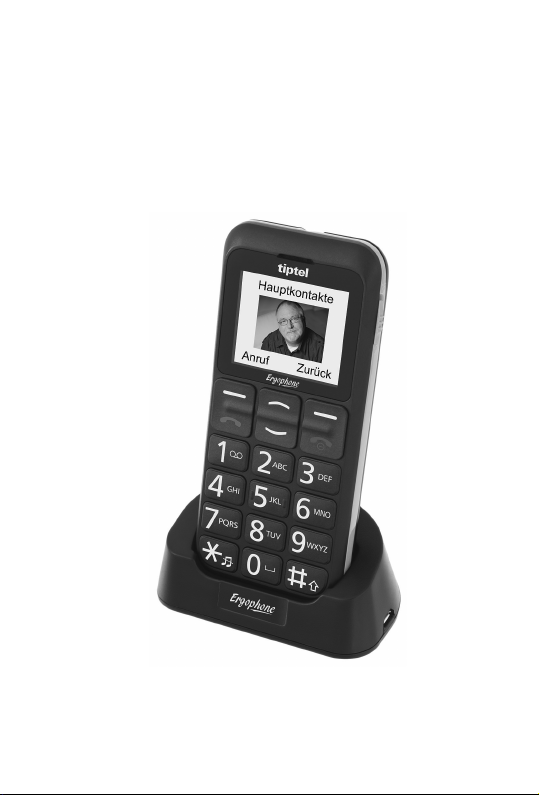
tiptel Ergophone 6160
tiptel

Important information
This phone is intended for inexperienced users. The
factory settings only make available the functions
that are generally used most often. This manual
therefore concentrates primarily on these basic
functions.
Use menu option "User level settings" in the "Set-
tings" menu to switch the phone from "Beginner
mode" to "Advanced mode". Additional functions
then become available to you.
Note: If you change phone settings in "Ad-
vanced mode", these changes remain
available even if you later revert back to
"Beginner mode".
All options in the Main menu described in this man-
ual are in the factory settings for the device. You
can mask the main menu options that you do not
intend to use via menu option "Visibility main menu"
in the "Settings" menu.

3
Contents
Important information ........................................ 2
Contents ............................................................. 3
Safety information .............................................. 8
Initial use .......................................................... 10
Installing the SIM card(s),
memory card and battery.............................10
Charging the battery ....................................12
Switching on the phone ...............................13
Setting the date and time.............................13
Display symbols ............................................... 14
General information on using the phone ........ 15
Keypad lock ...................................................... 16
Custom setup ................................................... 17
Using the phone as you want to..................17
Call signalling as you want it........................18
Making calls as you want to.........................20
Making and accepting calls ............................. 20
Accepting calls .............................................20
Rejecting calls ..............................................21
Calling with direct dial..................................21
Dialling with redial function..........................21
Dialling from Contacts..................................21

4
Dialling via the Photo
Speed Dial Contacts ....................................22
Dialling with speed dial ................................22
During a call .................................................23
Contacts............................................................ 23
Options .........................................................24
Call.............................................................24
Send text message ...................................24
View ...........................................................24
Edit.............................................................24
Add new contact .......................................24
Delete ........................................................26
Additional options .....................................26
Main contacts ...............................................26
Messages (SMS) .............................................. 27
Viewing received messages.........................27
Sending messages.......................................28
Writing message text....................................29
More message options .............................29
Silent mode....................................................... 30
Call histories..................................................... 30
Displaying missed calls................................31
Camera.............................................................. 31
Image settings..............................................32
Storage .........................................................32

5
Image viewer ................................................33
Transferring photos to a computer...........33
FM radio............................................................ 33
Radio mode options.....................................34
Channel list................................................34
Auto search ...............................................34
Additional options .....................................34
Sound recorder ................................................ 35
Recorder options..........................................35
New record................................................35
List .............................................................35
Settings .....................................................36
Alarm................................................................. 36
Calculator ......................................................... 37
Tasks................................................................. 38
Bluetooth .......................................................... 38
Settings............................................................. 39
Phone settings .............................................39
Time and date ...........................................39
Tone settings.............................................40
Talking keys ...........................................40
Number announcement.........................40
Volume ......................................................40
Language ..................................................41
Additional phone settings .........................41

6
Alert type ................................................41
Ring type ................................................41
System alert ...........................................41
Answer mode .........................................41
Display settings......................................42
User level settings ........................................42
Security settings...........................................42
Additional settings ........................................... 43
Call settings..................................................43
Visibility main menu .....................................43
Order main menu .........................................44
Network settings...........................................45
Emergency settings .....................................45
Connectivity..................................................45
Restore factory settings ...............................46
Connection to a computer ............................... 46
SOS call ............................................................ 47
Testing the SOS function .............................49
Emergency call configuration ......................50
Emergency button on/off ..........................50
Emergency numbers.................................51
Emergency volume ...................................52
User information........................................52
Confirmed emergency call On/Off............52
Cancelling an emergency call......................52

7
Important information on
emergency functions....................................53
Appendix........................................................... 54
Warranty .......................................................54
Guarantee.....................................................54
Declaration of conformity.............................54
Disposal........................................................55

8
Safety information
Only use the phone at places where it is
permitted. As a rule, use of mobile phones
is prohibited in hospitals, aircraft and at fill-
ing stations.
Do not open the device yourself, and do not
attempt repairs on your own. Repairs may
only be performed by qualified specialists.
Do not expose the phone to smoke, chemi-
cals, humidity, dust or excessive heat (di-
rect sunlight).
Keep the phone and accessories away from
children.
The phone's speaker can be
set to a very loud volume.
Check the volume before use
to avoid damaging your hear-
ing. Loud noises over longer periods can
result in hearing damage.
When driving, only use this phone with an
approved hands-free set. Observe the legal
regulations specific to the country of use.
Keep the phone 20cm from any implanted
pacemaker. Switch off the phone immedi-
ately if you feel or suspect any impairment.

9
Do not use any power supply unit other
than the one supplied.
Only use original accessories and batteries.
The phone is not waterproof. Avoid contact
with liquids.
Do not rely exclusively on your mobile
phone's emergency function in emergen-
cies. Establishing an emergency connec-
tion may not always be possible for tech-
nical reasons.
Dispose of the device and the battery in line
with environmental guidelines. Your local
waste disposal provider offers collection
points for electronic waste and batteries. Do
not dispose of the device or battery in
household rubbish or throw into a fire.
Please dispose of packaging materials in
line with local regulations.

10
Initial use
Installing the SIM card(s), memory card and battery
A SIM card, available from your mobile
phone supplier, is required to use the
phone.
The SIM card(s), battery and memory card must be
installed before the phone is used for the first time.
A memory card (not included) is required
to send multimedia messages (MMS), to
save photos with the integrated camera
and to record voice notes with the integrated re-
corder. The Ergophone 6160 supports Micro SD
memory cards with a capacity of up to 8 GB - these
can be purchased on the accessories market and at
electronics shops.
Fig. 1 Fig. 2
Table of contents


