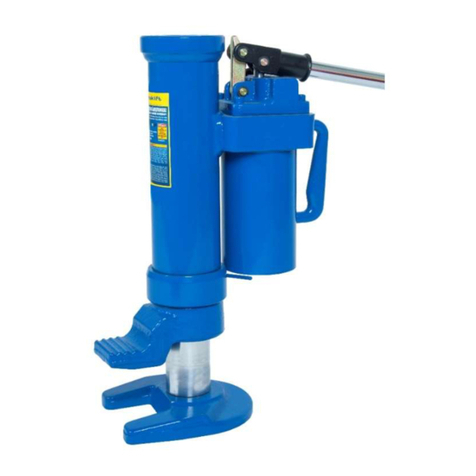
Titan Pro 14361 User manual

INSTRUCTION MANUAL
#14361
4 TON HEAVY DUTY
FLAT TOP JACK STANDS
!WARNING!
Save This Manual Keep this manual for the safety warnings and precautions, assembly, operating,
inspection, maintenance and cleaning procedures. Write the product’s serial number in the back of the man-
ual near the assembly diagram (or month and year of purchase if product has no number).
Keep this manual and the receipt in a safe and dry place for future reference.
Read this material before using this product. Failure to do so can result in serious injury.
SAVE THIS MANUAL.

14361 INSTRUCTION MANUAL
!WARNING!
To avoid serious personal injury, always wear proper protective gear, such as hard hats,
safety glasses, gloves, and steel toe shoes when using hydraulic equipment. Failure to
chock the wheels and crib the vehicle can result in Serious injury or death. Always deate
tires before removing a wheel, a rim, or part of a rim clamp or nut. If you do not deate the
tire, the tire could explode, causing serious injury or death.
Safety Information
Visuallyinspectallpartsforshippingdamage.Ifyoundshippingdamage,notifythecarrierat
once. Shipping damage is not covered by your warranty. The carrier is responsible for all costs of replace-
ment or repair caused by shipping damage.
Warrantyofthisunitwillbevoidonanypartiftheunitissubjectedtomisuseduetooverloading,
abuse,lackofmaintenanceandunauthorizedmodications.Nowarranty(verbal,writtenorimplied)other
thantheofcial,publishedAMEnewmachineryandequipmentwarrantywillbevalidwiththisunit.Inaddi-
tion,itisyourresponsibilitytobeawareofexistingFederal,StateandLocalcodesandregulationsgovern-
ing the safe use and maintenance of this unit.
Toavoidpersonalinjuryorpropertydamagewhileusingthisproduct,readandfollowallDANGERS,
WARNINGS, CAUTIONS, and INSTRUCTIONSthatareattachedto,orincludedwith,thisproduct.
1. Study,understand,andfollowallinstructionsbeforeoperatingthisdevice.
2. Donotexceedratedcapacity.
3. Useonlyonhard,levelsurfaces.
4. Center load on saddle.
5. Use as matched pair to support one end of a vehicle only.
The14361JackStandshavea4toncapacityeachpair(2toncapacityperstand).Thejackstands
haveaminimumheightof13-13/16″.Andamaximumheightof21-13/16″.
2
Important Receiving Information
Product Description

3
14361 INSTRUCTION MANUAL
6. WearANSI-approvedsafetygogglesandheavy-dutyworkglovesduringuse.
7. Do not use for aircraft purposes.
8. Support vehicle only at manufacturer-recommended locations.
9. Inspect before every use; do not use if parts loose or damaged.
10.ExamineJackStandsforcracksordamagebeforeeachuse.Donotuseifevenaminorcrack,
bendorotherdamage/deformationappears.DiscardJackStandifdamagedordeformed.
11.Keepworkareaclean.Clutteredareasinviteinjuries.
12.Observeworkareaconditions.Keepworkareawelllighted.
13.Keepchildrenaway.Childrenmustneverbeallowedintheworkarea.
14.Storeidleequipment.Whennotinuse,toolsmustbestoredinadrylocationtoinhibitrust.Always
lockuptoolsandkeepoutofreachofchildren.
15.There are certain applications for which this tool was designed. Do not modify this tool and do not
use this tool for a purpose for which it was not intended.
16.Dress properly. Do not wear loose clothing or jewelry as they can be caught in moving parts. Pro-
tective,electricallynon-conductiveclothesandnon-skidfootweararerecommendedwhenworking.
Wear restrictive hair covering to contain long hair.
17.Maintaintoolswithcare.Keeptoolscleanforbetterandsaferperformance.Followinstructionsfor
lubricating and changing accessories.
18.Stayalert.Watchwhatyouaredoing,usecommonsense.Donotoperateanytoolwhenyouare
tired.
19.Donotoperatetoolifundertheinuenceofalcoholordrugs.Readwarninglabelsonprescriptions
todetermineifyourjudgmentorreexesareimpairedwhiletakingdrugs.Ifthereisanydoubt,do
not operate the tool.
20.Onlyuseonpropersurface.OnlyusetheJackStandsonadry,level,atsurface,whichisfreeof
grease or debris. The surface to be used must be capable of supporting the combined weight of the
vehicleandtheJackStands.
21.Thewarnings,precautions,andinstructionsdiscussedinthismanualcannotcoverallpossiblecon-
ditions and situations that may occur. The operator must understand that common sense and cau-
tionarefactors,whichcannotbebuiltintothisproduct,butmustbesuppliedbytheoperator.
22.AMEInternationalcannotbeheldresponsiblefordamageorinjuryresultingfromunsafeuseofthis
product;lackofmaintenance;orincorrectproductandsystemapplication.
23.ContactAMEInternationalwhenindoubtaboutsafetyprecautionsorapplications.

1. MakesurethevehicledoesnotexceedthecapacityoftheJackStands.Note:Checkthattheweightis
evenlydistributedbetweentheJackStands.YoumustevenlydistributetheweightortheJackStands
mayfail,causingsevereinjuryordeath.Onlyapplytheloadvertically.
WARNING! TO PREVENT SERIOUS INJURY:IfavehicledropsontheJackStands(evenifitisunder
theweightcapacitylimit),theprincipleof“dynamicloading”takesaffect.Theforceoftheweightfalling
maycausetheJackStandstofail.AvehicleweighingmuchlessthantheJackcapacitymaycausethe
JackStandstofailifdroppedonthem.
2. ExamineJackStandsforcracksordamagebeforeeachuse.Donotuseifevenaminorcrack,bend,or
otherdamage/deformationappears.DiscardJackStandifdamagedordeformed.
3. Ifyourareraisingonlyoneendofthevehicle,blockthetiresthatremainontheground.
4. LowertheJackStandstothelowestheight.SecurethepositionbyinsertingtheLockingPinthrough
the Post.
5. Followingtheinstructionsinyouroorjackmanual,raiseyourvehicletojustabovetheminimumheight
ofyourJackStands.
6. SlideyourJackStandstotheproperpositionpointsreferredtointhevehicleowner’smanual.Make
suretheJackStandsareonthesamepointoneachsideofthevehicle.RaisePostuntilCirclePadis
justbelowthejackcontactpointonthevehicle.CentertheloadontheCirclePadofthePost.
7. SecurePostpositionbyinsertingLockingPinthroughPost.
8. SecureLockingPinbyinsertingSafetyPinthroughtheopeningattheendoftheLockingPin.
9. Gentlylowerthevehiclewiththeoorjack.Itmaydropdownaverysmallamountuntiltheratchet
catchesonthePawl.Repeatonotherside.
WARNING! TO PREVENT SERIOUS INJURY:SetboththeJackStandstothesameheight.
10.Determineifthevehicleisstable.Ifnot,raisethevehicleandrepositiontheJackStands.
SeeFigureC.
Operating Instructions
!WARNING!
To avoid serious personal injury, always wear proper protective gear, such as hard
hats, safety glasses, gloves, and steel toe shoes when using hydraulic equipment.
Supporting a Vehicle
14361 INSTRUCTION MANUAL
Figure C: Locking Pin and Safety Pin

5
DANGER
Do not use Jack Stands as a permanent stand for the vehicle. Use them only while
making repairs, then immediately lower vehicle to the ground.
1. RaisethevehiclewithaoorjacktotaketheloadoffoftheJackStands.
2. RemoveSafetyPinfromtheLockingPin.RemovetheLockingPinfromthePost.
3. LowerthePostandremoveJackStandfromunderneathvehicle.
4. Usetheoorjacktosafelylowerthevehicletotheground.
WARNING: Procedures not specically explained in this manual must be performed only by a
qualied technician.
DANGER
TO PREVENT SERIOUS INJURY FROM TOOL FAILURE:
Do not use damaged equipment.
If abnormal noise or vibration occurs, have the problem corrected before further use.
1. PeriodicallycleanthebottomoftheBasesandtopofPostsofanydirt,grease,ordebris.
2. Beforeeachuse,inspectthegeneralconditionoftheJack.Checkforbroken,cracked,orbentparts,
looseormissingparts,andanyconditionthatmayaffecttheproperoperationoftheproduct.Donot
usedamagedequipment.DiscardJackStandifdamagedordeformed.
Removing the Jack Stands
AME INTERNATIONAL
2347 Circuit Way, Brooksville, Florida USA 34604
Phone: (+1) 352.799.1111 • Toll Free (+1) 877.755.4AME (4263)
Fax: (+1) 352.799.1111 • E-mail: [email protected]
14361 INSTRUCTION MANUAL

Parts Breakdown
14361 INSTRUCTION MANUAL
Item: Part Number: Description: Quantity:
1 14361-001 Rubber Cushion 1
2 14361-002 Post 1
3 14361-003 Safety Pin 1
4 14361-004 Chain 1
5 14361-005 Locking Pin 1
6 14361-006 Base 1
Table of contents
Popular Jack manuals by other brands

Pro-Lift
Pro-Lift B-033D Operating instructions & parts manual

Clarke
Clarke STRONG-ARM VPJ300 Installation and maintenance instructions
Compac
Compac A10T-C User's guide & instructions
Sealey
Sealey AJS10000 instructions

Sealey
Sealey 3000HL instructions

Clarke
Clarke Strong-Arm CTJ1500QULP Operation & maintenance instructions
