TM Electronics ThermoBarScan User manual

1
ThermoBarScan
TM Electronics UK Ltd
INSTRUCTION BOOKLET

2
PC Setup
Installing the Software –What you need
TME Software CD
Bluetooth dongle
(we recommend the Belkin dongle with Widcom stack)
OR
Bluetooth enabled PC or laptop
How to install your TME software
If you need to install a Bluetooth dongle, please install this before
installing the software CD.
Place the CD into the CD drive of your PC or laptop.
The CD should ‘Autorun’ and install. If not, please select ‘setup’ and
follow these instructions-
Click ‘next’ to install the software
You will then be asked to install the software to C drive directory under
‘C:\Program Files\TME’ - click ‘next’ to accept this.
The TME software will automatically create a shortcut icon on your
desktop so the software can be easily accessed.
Start the ThermoBarScan software by clicking on the desktop icon

3
Switching your ThermoBarScan
instrument into Bluetooth Mode
(For USB version please skip to USB SETUP)
Turn on your ThermoBarScan instrument and press the Bluetooth
Button, the word BLUE will be displayed in the top right hand corner.
This means that the instrument is now in Bluetooth mode and ready to
connect to your TME software. The instrument must remain with the
Bluetooth enabled (showing ‘BLUE’) during discovery and
communication.
To disable Bluetooth mode, simply press the Bluetooth button again.

4
Discovering your instrument
Select the Discovery tab and then Click Here to Start
Discovery and Select Instrument
The instruments within Bluetooth range and previously
connected instruments will be displayed and their
Bluetooth addresses shown. The software will try to
connect to each in turn, retrieving their name and serial
number, these will be marked as ‘Found’. If the connection
isunsuccessful, the instrument will be marked ‘Not
Found’. To connect with your chosen instrument, select
the Bluetooth address.
The instrument will automatically connect. There is no
need to select the Connect button unless you wish to re-
connect.
To swap between ThermoBarScan devices, simply click on
another instrument.

5
Pairing your instrument to a TME
Bluetooth Printer
You are able to print data (print header, time, date, temperature and barcode
information) directly from your instrument to a TME Bluetooth Printer. To do
this, you must firstly pair the two devices-
Discover the instrument and printer you wish to pair in the software.
When discovered, highlight the address of the instrument and printer and
press Link Printer to Instrument. This will pair the two devices together. To
check that the devices are paired, click the Read Printer Linked to
Instrument. The printer address will appear in the field below to indicate that
the devices are paired.
The devices are now ready for use.
Note: you can create a print header in the Setup tab.
Printing from your paired instrument and printer
You have the option of printing either the last reading or all data from the
instrument.
To print single data, firstly ensure that you printer is on and instrument is in
Bluetooth mode.
Press the Scale (SCL) button on the instrument. You will find that the display
will show the letter S release the button
The printer will print out your latest scan data
To print all data, press and hold the Scale (SCL) button. You will find that the
display will change from the letter S (single) to the letter A (all)
The printer will print out all your data.

6
USB Setup
Click on the USB tab.
Turn instrument on and connect to computer with the cable provided.
Press the Bluetooth button. ‘USB’ will appear on display.
Click on the Discover Serial Ports Button.
Select the appropriated ‘USB Serial Port’ and the instrument will
automatically connect. The Name and Serial Number will be displayed.

7
Setting instrument parameters
Using the TME software, under Setup tab, you are able to set the
instrument’s parameters. These are:
1. Set Time and Date –the time and date is read from your PC. To set
the time and date, select Read Time/Date and then Set Time/Date to
System
2. Set Sensor Type –sets the thermocouple type e.g. K/T
3. Set Temperature Scale –sets the temperature scale e.g. °C / °F
4. Set Instrument Name –allows you to identify the instrument with its
own specified name
5. Set Print Header –allows you to assign a heading for the print
reports when using the Bluetooth Printer
Other features include:
Autoswitch on? –allows you to check to see if the autoswitch on/off
function has been enabled
Battery power? –allows you to monitor battery life
Once you have set your parameters, you can check that the settings have been
stored by using the Read functions. The instrument is now ready for use.

8
To generate Barcodes
There are a number of websites offering free utilities to convert text into
Barcodes. We recommend using the following website which will give you a
step-by-step guide for generating your barcodes:
www.barcodesinc.com/generator/index.php
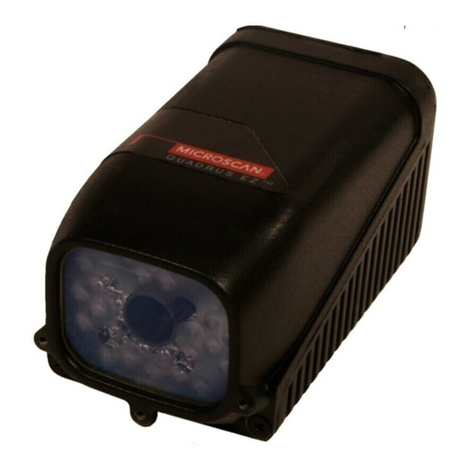
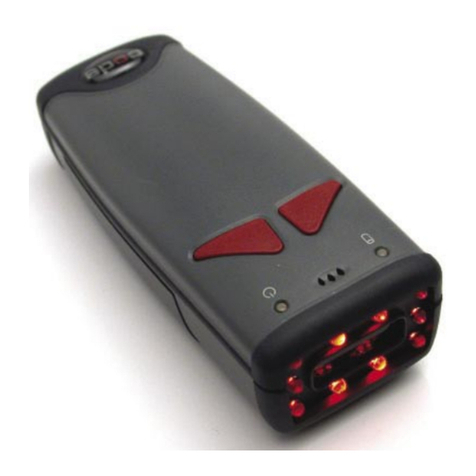
Your MM7000-2D instrument can read both 1D and 2D barcodes in the
following barcode formats:
All UPC/EAN/JAN Codes
EAN28 Codes
Code 39, Code 128
Interleave 25
PDF417
QR Code
Data Matrix
GS1-DataBarTM
RSS, RSS Limited. RSS-14
RSS-14 Stacked, RSS-Expand
For generating 2D or QR Codes:
https://www.barcodesinc.com/generator/qr/
Alternatively many office products now come with a Barcode font. Please
note that your MM7000-2D instrument can read a 1D barcode with a
maximum of 32 characters including spaces.
You can generate the barcodes yourself or use the print barcode tab in the
software if you have the TME Barcode printer.

9
To take a reading
The new 1D and 2D scanner can read barcodes on virtually any medium –
paper, plastic cards, mobile phones and LCD displays.
To take a reading, connect a thermocouple sensor to the top of the
instrument and wait for the temperature reading to stabilize. Once the
reading has stabilized, press the Scan button.
This will activate the Barcode Scanner and freeze the temperature
measurement.
Scan the barcode, when read the instrument will Bleep.
When the Barcode has been read the temperature, Barcode information,
Date and Time will be logged to the internal memory. Up to 1000 readings
can be stored on the instrument.
Whilst in SCAN mode the instrument will show the total number of readings
taken at the top of the instrument display. After scanning, the display will
revert to showing the time and temperature.
If the scanner is unable to read a barcode, it will automatically time-out after
30 seconds.
To cancel the Scanner
To cancel the scanner, simply press the Scan button again.

10
To Retrieve the information
Use the software to discover and connect as before.
When connected select the Download Data tab and then select the Get
Data button.
The data stored on the instrument will then appear as a numbered list.
Other functions within the Download Data tab
1. Clear Screen Data –clears downloaded data from software
2. Latest scan –displays the latest scan
3. Live data –displays the instruments data in real time (scan no,
serial number, time, date temperature, temperature scale, alarms,
barcode)
4. Clear instrument –clears all data stored within the instruments
memory
5. Print preview –allows you to preview your data before printing
6. Print setup –allows you to set up your print
7. Print –print data directly from software
8. Save Data –saves your data as a ‘CSV’ file

11
Saving your data
To save your data, select the Download Data tab and download your data
as before.
Select Save File button.
In the box that appears, select where you wish to save the data, type in a
file name and click save.
Your data will be saved as a CSV (comma separated value) file which can be
readily imported to spreadsheets.

12
Retrieving information - Translating Barcodes
Your TME software has the ability to ‘translate’ your barcodes to a user
specified description. This is particularly useful if your barcodes are coded
to represent a product or location.
To translate the Barcodes select the Translate Barcode Tab
You can either load a CSV file with barcodes or enter the barcode
information manually. To enter manually, type in the barcode followed by
the product description
When complete this information may be saved to a file and reloaded for
subsequent downloads.
Once you have listed your information, press the Open File button to load
the information to the software.
You are now ready to download and translate your barcode information
from the instrument.
Select the Download Data tab and then tick the Translate Barcodes box
and press the GET DATA button.
You will now find that the barcode information will be replaced with the
description you have provided.

13
Printing your Barcodes using the TME Barcode
Printer
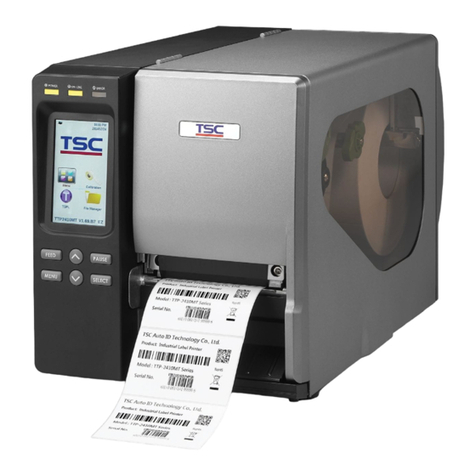
You are able to print your barcodes directly from the software to the TME
Barcode Printer.
To do this, you will firstly need to connect your Barcode Printer to the
software.
Select the Print Barcodes tab and click the Discovery button. You will find
that the printer’s address has been listed in the Printer Address field -
highlight this and select the Connect button.
The printer is now connected and you will have the option
of creating single barcodes or multiple barcodes.

14
Setting High and Low Alarms
The MM70000-2D uses barcodes to identify a location or product for a
temperature measurement; you can now assign alarm values to these
barcodes. The MM7000-2D will then give a visual warning of Low or High
alarm for a barcode.
When the MM7000-2D scans a barcode an alarm indication will be shown.
Alarms can be set to reflect critical temperature points. Each alarm barcode
includes a unique alpha/numeric code which represents high and low alarm
values. If these alarm values are exceeded a visual alarm will be shown on the
thermometer display.
For example, if a barcode represents a cooked chicken then set the low alarm
value to 73°C and the high to 80°C. When the user takes the temperature and
scans the chicken, they will see an indication of whether temperature is in the
acceptable range.
If the equipment is used for monitoring Legionella temperature, a barcode can
be used which gives the critical temperature range at which the legionella
bacterium multiplies. When the user scans the barcode, the display will give an
indication of whether the temperature is safe (see the following information on
generating your barcodes)

15
High and Low Alarms –Generating your Alarms
in TME software
You can generate your alarm parameters for existing product barcodes within
your TME software.
Firstly, discover and connect your instrument.
Select the Alarms tab and enter your product barcode text which you would
like to assign the alarms to, followed by the high alarm limit and low alarm
limit. Select Upload Alarms to Instrument
The alarm values are now assigned to this barcode and you are ready to use
your instrument. When you scan this Barcode any alarm condition will be
displayed on the instrument.
Alternatively, you can open an existing csv file and upload the alarms to the
instrument.

16
Generating your Alarms in TME software –
Setting Global Alarms
The Global Alarms feature allows the user to set a master alarm to the
instrument.
Select Click Here To Set Global Alarm. This will display the Global alarm
fields.
Enter the high alarm and low alarm field, and select Upload Global Alarm to
Instrument
The instrument has now been set with these alarm values and is ready to use.

17
Generating your Alarms in TME software –Using
your MM7000 for water temperature testing
(Legionella)
Your TME software includes a feature which will set your instrument to the
alarm limits for legionella temperature testing as recommended by the health
and safety executive. The legionella bacterium multiplies at temperatures
between 20.0°C to 50.0°C.
To use this feature, select the Click Here to Set Global Alarm. Under the High
Alarm field, enter the capital letter ‘G’ and then Upload Global Alarm to
Instrument
Your instrument will now be set to alert you if the temperature falls between
20°C and 50°C by displaying ‘LEG’
Other functions in the Alarms tab
1. Open Alarm File –opens an existing csv file
2. Save Alarm File –Saves your barcode and alarm data
3. Upload Alarms to Instrument –uploads your barcode and alarm data to
your instrument
4. Download Alarms from Instrument –downloads any pre-programmed
barcodes and their alarms from your instrument
5. Check Alarms –checks the alarms which have been listed for any errors
6. Download Global Alarm from Instrument –downloads the global alarms
which have been set to the instrument
7. Delete Global Alarm –deletes the global alarm set to the instrument

18
High and Low Alarms –Using Barcodes to set
alarm limits
To generate your alarm barcode you must use the following code template-
*--H____L____*
“H”stands for the high alarm limit and “L”stands for the low alarm limit. Each
of the 4 digit spaces after the defining limits are laid out in this order-
Hundreds, Tens, Units, Decimal
For example,
60°C High Alarm Limit and 30°C Low Alarm Limit will be entered as
*--H0600L0300*
250°C High Alarm Limit and 100°C Low Alarm Limit will be entered as
*--H2500L1000*
5°C High Alarm Limit and 1.2°C Low alarm Limit will be entered as
*--H0050L0012*
You can generate barcodes on your PC and print or use the TME Barcode
Printer.
.
.
.
.
.
.
.
.
.
.
.
.
.
.
.
.
.
.
.
.
.
.
.
.
.
.
.
.
.
.
.
.
.
.
.
.
.
.
.
.
.
.
Demo
.
.
.
.
.
.
.
.
.
.
.
.
.
.
.
.
.
.
.
.
.
Demo

19
High and Low Alarms –Printing Alarm Barcodes
from your TME Bluetooth Printer
Users of the TME Barcode Printer may print alarm barcodes from the software.
Discover your printer as previously (after selecting your system Bluetooth)
Go to the Print Barcodes tab, highlight the printer address and connect. Your
printer will now be connected.
Select Click here to Generate Alarm Barcodes. This will display the fields
required for generating your alarms.
To generate a barcode with high and low alarms, enter your high limit and low
limit and then select Generate Barcode for Alarms above
The information will appear in the Single Barcode Text field.
To print the alarm barcode, select Print.
If you wish to generate a Legionella alarm barcode, select Generate
Legionella Alarm Barcode
To print the Legionella alarm barcode, select Print
The process will be the same for generating and printing the delete barcode.

20
Manually generating your Alarm Barcodes –Pre-
set Alarm Codes
There is a pre-set alarm barcode for Legionella temperature monitoring. This
is pre-set with the temperature limits of 20.0°C to 50.0°C –the temperature
range at which the legionella bacterium multiplies. This Barcode is:-
*--HLEG*
Manually generating your Alarm Barcodes -
Global Alarms
To set alarms to all readings use the following format:-
*--A____B____*
The capital A stands for the high alarm limit and the capital B stands for the
low alarm limit. Each of the 4 digit spaces after the defining limits are laid out
in this order-
Hundreds, Tens, Units, Decimal
To set Legionella Alarm limits to all readings use:
*--ALEG*
Manually generating your Alarm Barcodes -
Assigning Alarm values to a Barcode
Once you have generated your alarm barcodes, you will need to assign them to
your product or location barcode.
To assign barcodes, firstly scan your product/location barcode and then scan
your alarm barcode. The device will then store this information and the
barcodes will now be assigned to the chosen alarm values.
.
.
.
.
.
.
.
.
.
.
.
.
.
.
.
.
.
.
.
.
.
Demo
.
.
.
.
.
.
.
.
.
.
.
.
.
.
.
.
.
.
.
.
.
Demo
Table of contents
