TMC VM2000 User manual
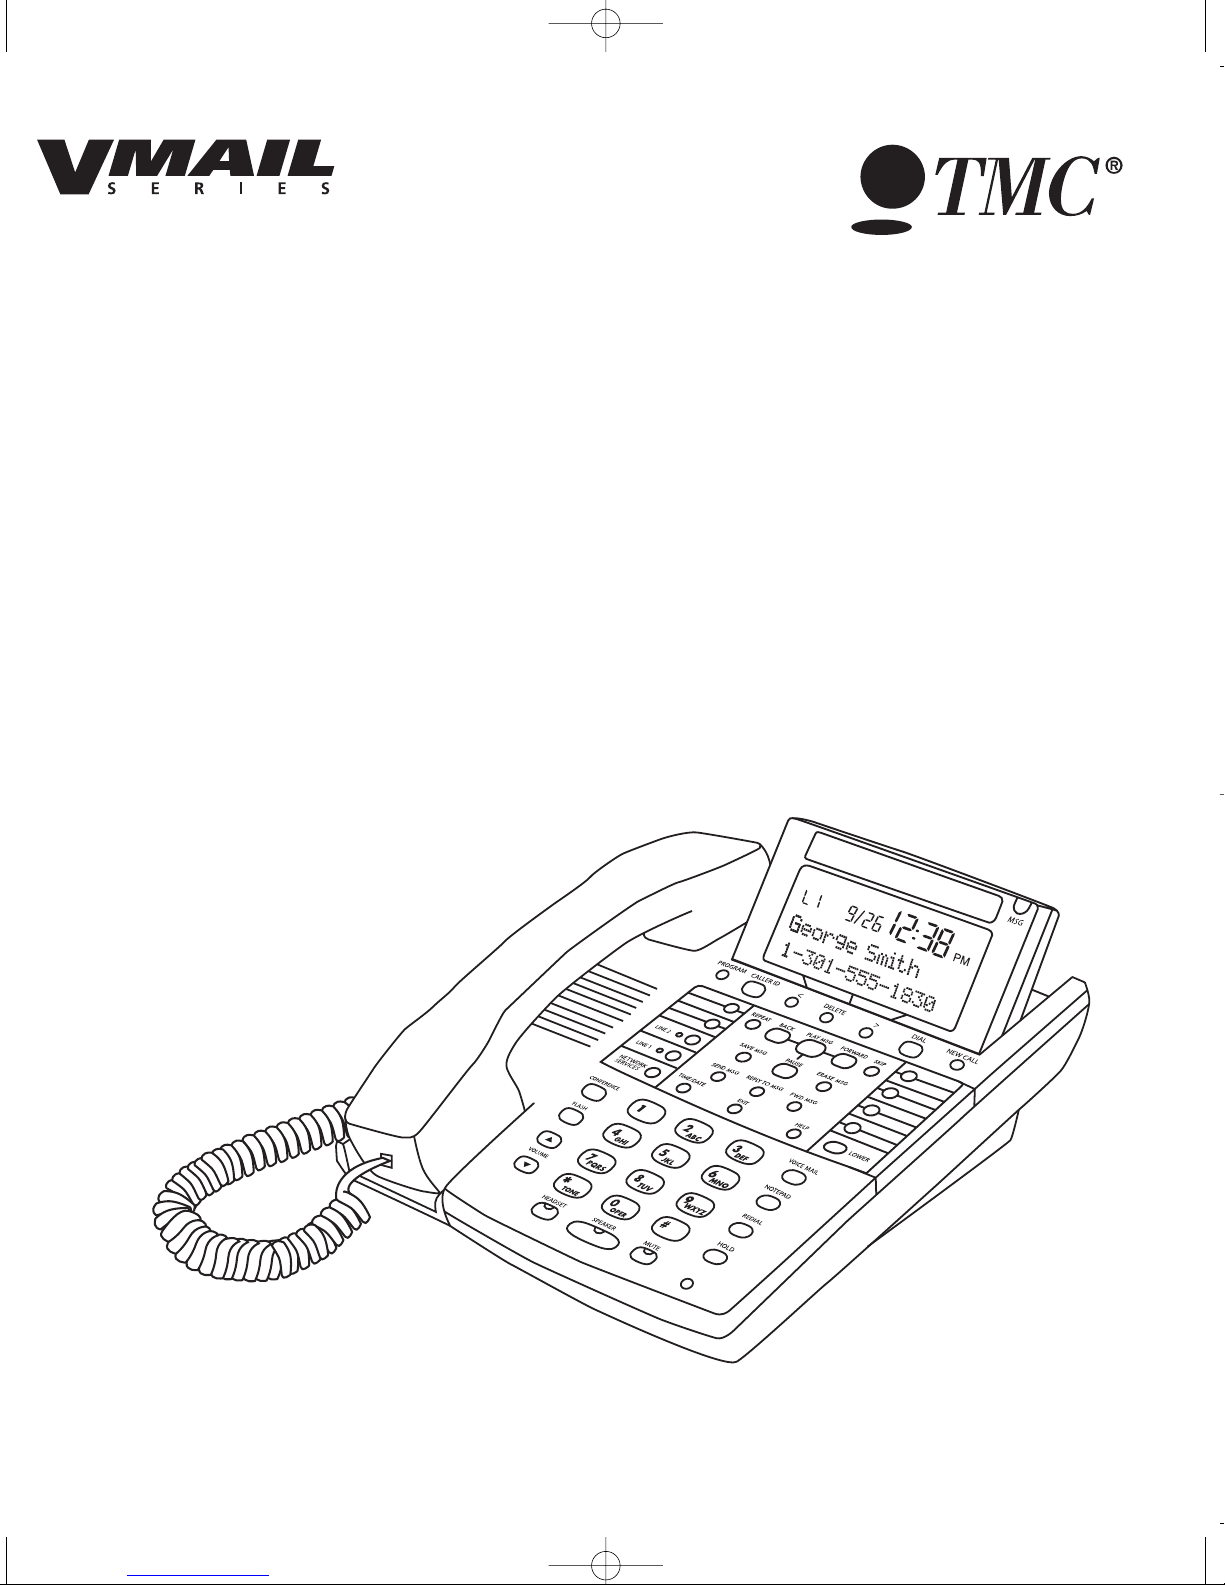
Model VM2000
2-Line Jumbo Display Speakerphone
with Telephone Company Voice Mail Buttons
and Caller ID
Network Services Ready
Built-in DSL Filter
User’s Guide
Please read before using telephone.
VM2000 UG for PDF v58 for PDF 061406.qxd 6/14/2006 4:15 PM Page 1

Getting Started
Congratulations! You’ve purchased a VM2000 Speakerphone that meets the
highest standards for quality and convenience. To get the most from your tele-
phone, please take time to read this guide thoroughly.
i
IMPORTANT SAFETY INSTRUCTIONS
When using your telephone equipment, basic safety precautions should always
be followed to reduce the risk of fire, electric shock and injury to persons, includ-
ing the following:
1.
2.
3.
4.
SAVE THESE INSTRUCTIONS
Do not use this product near water, for example, near a bath tub, wash bowl,
kitchen sink or laundry tub, in a wet basement or near a swimming pool.
Avoid using a telephone (other than a cordless type) during an electrical
storm. There may be a remote risk of electric shock from lightning.
Do not use the telephone to report a gas leak in the vicinity of the leak.
Use only the power cord and batteries indicated in this manual. Do not dis-
pose of batteries in a fire. They may explode. Check with local codes for pos-
sible special disposal instructions.
VM2000 UG for PDF v58 for PDF 061406.qxd 6/14/2006 4:15 PM Page 2

ii
Getting Started
Built-in DSL Filter
Please note that your VM Series telephone has a built-in DSL filter on
Line 1. So there is no need to connect this phone to an external DSL
filter.
Routine care of this product:
Wipe the telephone with a soft cloth.
Do Not use benzine, thinner, or any abrasive powder.
Avoid dropping the telephone or subjecting it to rough treatment.
When you leave the telephone unused for a long period of time, unplug the AC
adapter from the outlet.
Avoid putting the telephone near appliances and devices that generate electrical
noise or RF interference, for example motors, flourescent lamps, cordless phone
base units and wireless equipment.
Do Not expose the telephone to direct sunlight or moisture.
VM2000 UG for PDF v58 for PDF 061406.qxd 6/14/2006 4:15 PM Page 3

The VM Series Speakerphone is designed for easy installation. However, it is important that you
follow these few simple guidelines:
- Take a few minutes to read this manual so that you thoroughly understand the instructions to
be followed for proper installation of your telephones.
- This User’s Guide provides easy to understand directions for operation of your system. Please
retain these instructions for future reference when adding stations or making changes to your
system.
Packing List
Remove the unit from the package and check this list to be certain all parts are included:
Telephone Base Unit
Wall Mount
Bracket/Desk Pedestal
Handset Coiled Handset Cord This User’s Guide
User’s Guide
Getting Started
Before you begin . . .
/
AC Adapter Two Desk Pedestal
Feet
Optional Accessories:
25-foot handset cord headset25-foot line cord
iii
Telephone Line Cords
1 long and 1 short.
VM2000 UG for PDF v58 for PDF 061406.qxd 6/14/2006 4:15 PM Page 4

Location of Controls
/
iv
MEMORY Buttons (p.32)
LINE Buttons
and Indicators
VOLUME Buttons (p.10)
SPEAKER Button and Indicator (p.12)
VOICE MAIL NAVIGATION Buttons (p.27)
NETWORK SERVICES
Button (p.26)
VOICE MAIL Button (p.25)
NOTEPAD Button (p.34)
REDIAL Button (p.13)
HEADSET Button and Indicator (p.30)
MUTE Button and Indicator (p.17)
PROGRAM button
CALLER ID Button
(pp.20-23)
<, >and DELETE Buttons
Note that these buttons are also used as soft keys.
MESSAGE Lamp (p.24)
DIAL Button (p.21)
NEW CALL Lamp (p.20)
CONFERENCE
Button (p.15)
LOWER Button (p.32)
FLASH Button (p.18)
HOLD Button (p.16)
VM2000 UG for PDF v58 for PDF 061406.qxd 6/14/2006 4:15 PM Page 5

Table of Contents
Getting Started . . . . . . . . . . . . . . . . . . . . . . . . . . . . . . . . . . . . . . . . . . . . . .i
Location of Controls . . . . . . . . . . . . . . . . . . . . . . . . . . . . . . . . . . . . . . . . .iv
Installing Your Telephone . . . . . . . . . . . . . . . . . . . . . . . . . . . . . . . . . . . . .vii-1
Install Desk/Table Top Phone . . . . . . . . . . . . . . . . . . . . . . . . . . . . . .vii
Install Wall Mounted Phone . . . . . . . . . . . . . . . . . . . . . . . . . . . . . . . .1
Setting Up Your Telephone . . . . . . . . . . . . . . . . . . . . . . . . . . . . . . . . . . . .2-9
Using the Desk Pedestal/Wall Mount Bracket . . . . . . . . . . . . . . . . . .2
Setting Ringers On/Delayed/Off . . . . . . . . . . . . . . . . . . . . . . . . . . . .3
Setting Automatic Line Selection . . . . . . . . . . . . . . . . . . . . . . . . . . . .4
Setting Distinctive Ringing . . . . . . . . . . . . . . . . . . . . . . . . . . . . . . . .5
Setting Up Toll Restriction . . . . . . . . . . . . . . . . . . . . . . . . . . . . . . . . .6-9
Operating Your Telephone . . . . . . . . . . . . . . . . . . . . . . . . . . . . . . . . . . . .10-31
Adjusting Volume Levels . . . . . . . . . . . . . . . . . . . . . . . . . . . . . . . . . .10
Making a Tone/Pulse Selection . . . . . . . . . . . . . . . . . . . . . . . . . . . . .11
Making and Answering a Call . . . . . . . . . . . . . . . . . . . . . . . . . . . . . .12
Using Redial . . . . . . . . . . . . . . . . . . . . . . . . . . . . . . . . . . . . . . . . . . .13
Using Another Line During a Conversation . . . . . . . . . . . . . . . . . . . .14
Conferencing Calls . . . . . . . . . . . . . . . . . . . . . . . . . . . . . . . . . . . . . .15
Using Hold . . . . . . . . . . . . . . . . . . . . . . . . . . . . . . . . . . . . . . . . . . . . .16
Using Mute . . . . . . . . . . . . . . . . . . . . . . . . . . . . . . . . . . . . . . . . . . . .17
Using Flash . . . . . . . . . . . . . . . . . . . . . . . . . . . . . . . . . . . . . . . . . . . .18
Using Do Not Disturb . . . . . . . . . . . . . . . . . . . . . . . . . . . . . . . . . . . .19
Using Caller ID . . . . . . . . . . . . . . . . . . . . . . . . . . . . . . . . . . . . . . . . .20-23
Using Telephone Company Voice Mail . . . . . . . . . . . . . . . . . . . . . . .24
Using the Voice Mail Button . . . . . . . . . . . . . . . . . . . . . . . . . . . . . . .25
Using the Network Services Button . . . . . . . . . . . . . . . . . . . . . . . . .26
Using the Voice Mail Navigation Buttons . . . . . . . . . . . . . . . . . . . . .27
Using Toll Restriction . . . . . . . . . . . . . . . . . . . . . . . . . . . . . . . . . . . . .28
Using the Call Timer . . . . . . . . . . . . . . . . . . . . . . . . . . . . . . . . . . . . .29
Using a Headset with Your Telephone . . . . . . . . . . . . . . . . . . . . . . .30
Adjusting Your Telephone’s Time and Date . . . . . . . . . . . . . . . . . . .31
v
VM2000 UG for PDF v58 for PDF 061406.qxd 6/14/2006 4:15 PM Page 6

Table of Contents
Memory Dialing . . . . . . . . . . . . . . . . . . . . . . . . . . . . . . . . . . . . . . . . . . . . .32-35
Using Memory Dial . . . . . . . . . . . . . . . . . . . . . . . . . . . . . . . . . . . . . .32
Using Directory Dial . . . . . . . . . . . . . . . . . . . . . . . . . . . . . . . . . . . . .33
Special Memory Features . . . . . . . . . . . . . . . . . . . . . . . . . . . . . . . . .34-35
Centrex Operation . . . . . . . . . . . . . . . . . . . . . . . . . . . . . . . . . . . . . . . . . . .36-39
Using Centrex with your Telephone . . . . . . . . . . . . . . . . . . . . . . . . .36
Storing the Dial Prefix . . . . . . . . . . . . . . . . . . . . . . . . . . . . . . . . . . . .38
Storing the Centrex Prefix . . . . . . . . . . . . . . . . . . . . . . . . . . . . . . . . .39
Additional Information . . . . . . . . . . . . . . . . . . . . . . . . . . . . . . . . . . . . . . . .40-51
Using the Data/Fax Jack . . . . . . . . . . . . . . . . . . . . . . . . . . . . . . . . . .40
Replacing Your Batteries . . . . . . . . . . . . . . . . . . . . . . . . . . . . . . . . . .41
Adjusting the Display Contrast . . . . . . . . . . . . . . . . . . . . . . . . . . . . .42
Adjusting Held Call Reminder . . . . . . . . . . . . . . . . . . . . . . . . . . . . . .43
Adjusting Auto Hold Drop Time . . . . . . . . . . . . . . . . . . . . . . . . . . . . .44
Adjusting Flash Length . . . . . . . . . . . . . . . . . . . . . . . . . . . . . . . . . . .45
Erasing All Feature Settings . . . . . . . . . . . . . . . . . . . . . . . . . . . . . . .46
Troubleshooting Guide . . . . . . . . . . . . . . . . . . . . . . . . . . . . . . . . . . .47
FCC Information . . . . . . . . . . . . . . . . . . . . . . . . . . . . . . . . . . . . . . . .48-49
Warranty Information . . . . . . . . . . . . . . . . . . . . . . . . . . . . . . . . . . . . .50-51
vi
VM2000 UG for PDF v58 for PDF 061406.qxd 6/14/2006 4:15 PM Page 7

Install Desk/Table Top Phone
Installing Your Telephone
1 Connect Line Cord
Connect one end of a long telephone line cord
to the LINE jack on the bottom of the tele-
phone. Connect the other end to the wall jack.
2 Connect Handset
Plug either end of the coiled handset cord into
the handset and the other end into the jack on
the side of the telephone. Place the handset in
the cradle.
3 Connect Power Cord
Plug the AC power cord into the adapter jack
on the bottom of the telephone. Thread the
power cord into the recessed groove. Plug the
AC adapter into an electrical outlet not con-
trolled by a wall switch.
4 Install Batteries for AC Power Fail
Operation (Optional)
It is not necessary for you to install batteries in
your telephone for it to function normally. In
fact, batteries are not even needed to preserve
your memory dial numbers in the event of a
power failure. This is because all memory dial
numbers are stored in a static memory which
retains its contents even with no electrical
power. The only purpose of having a battery
installed is so that the telephone itself can func-
tion for up to twenty-four hours talking time,
and up to one year standby time, in the event
of a power failure.
vii
VM2000 UG for PDF v58 for PDF 061406.qxd 6/14/2006 4:15 PM Page 8
Install Wall Mounted Phone
The steps are similar to those for
Desk/Table Top Phone, except for the
following points:
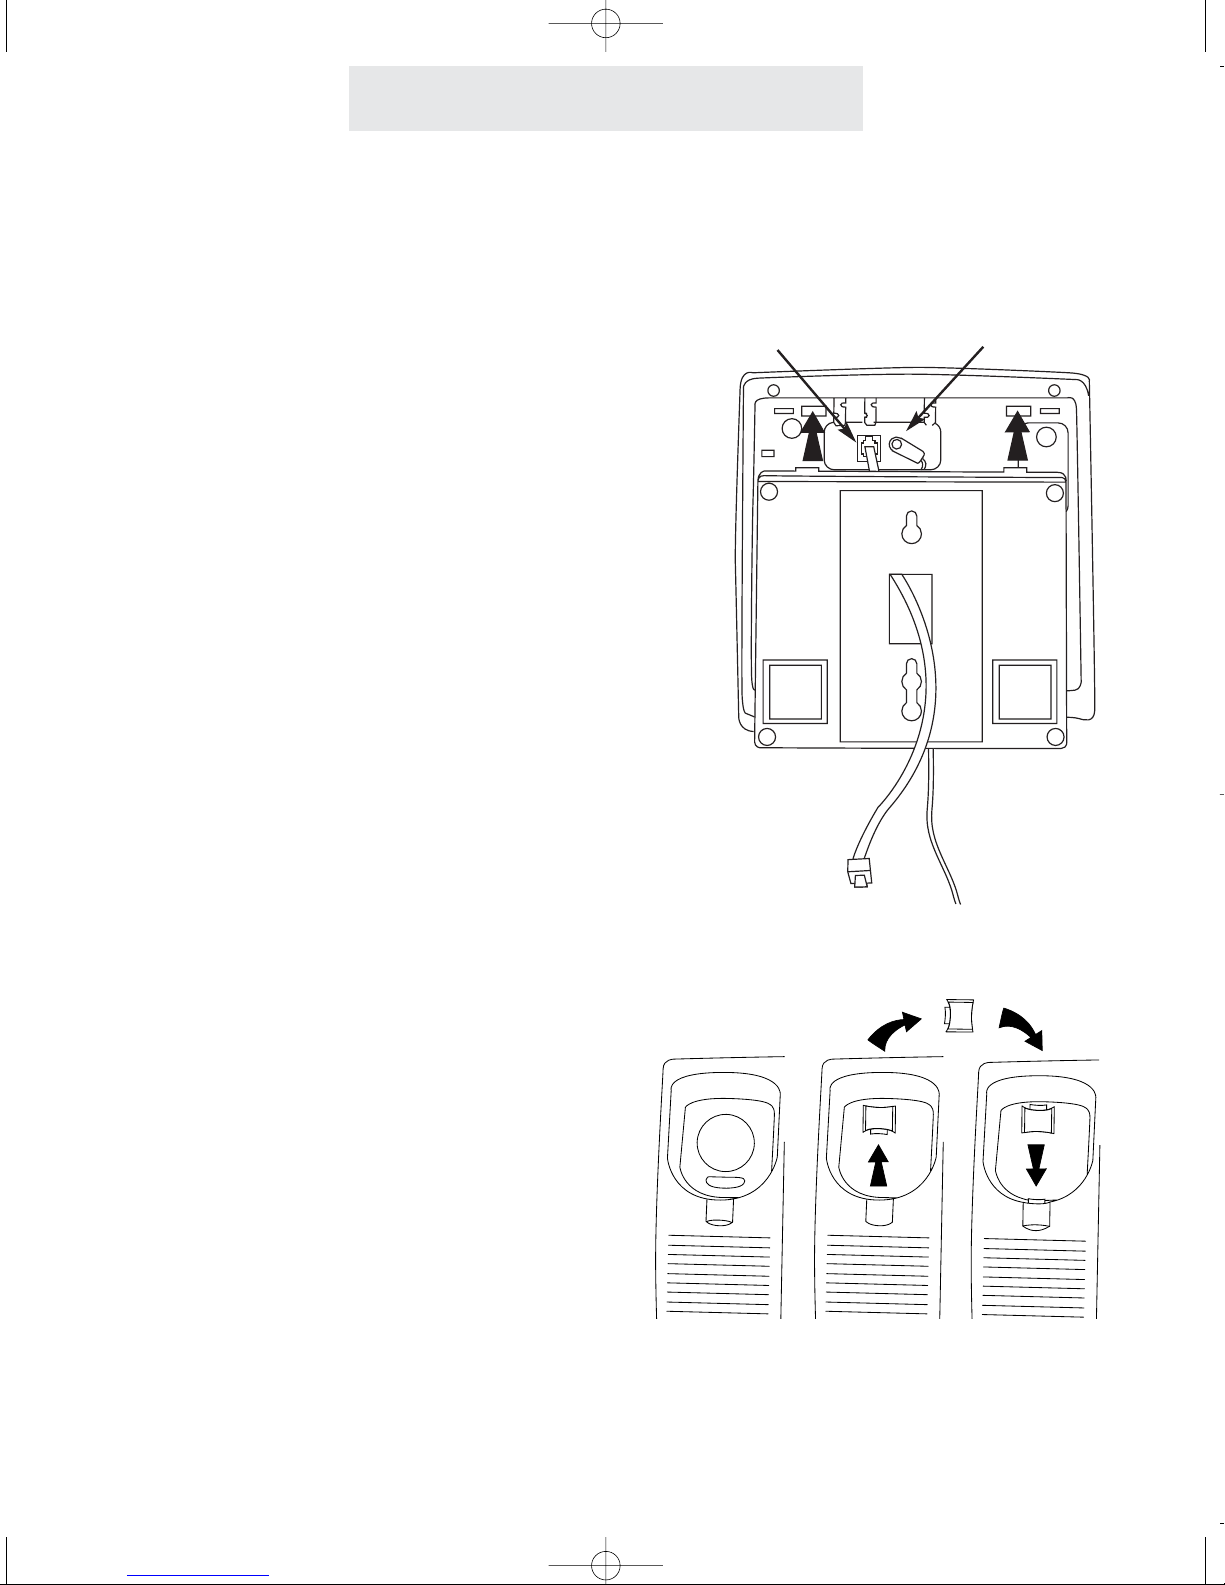
1 Connect Cords to Telephone
Plug the AC power cord into the adapter jack
on the bottom of the telephone, threading the
power cord through its long groove on the bot-
tom of the phone.
Connect the short telephone line cord to the
jack on the telephone. Thread the short tele-
phone line cord through the square hole in the
center of the wall mount bracket, and then
attach the wall mount bracket to the base of the
telephone.
2 Reverse Handset Hook
Slide the telephone hook out of the cradle,
rotate it 180 degrees so that its tab faces
upward, and then slide it back into the cradle.
Installing Your Telephone
Line cord AC power cord
1
VM2000 UG for PDF v58 for PDF 061406.qxd 6/14/2006 4:15 PM Page 9

Setting Up Your Telephone
Your telephone can be placed
on a desk or mounted on a
wall.
If you would like to wall mount your tele-
phone, please refer to the instructions
on page 1.
A wall mount template is printed on this
page for your convenience.
The wall mount bracket can also be
used as a desk pedestal. Simply attach
the bracket in the opposite direction that
you would for wall mounting, pressing
firmly upward to snap it in place, and
clip in the two supplied desk pedestal
feet.
Many people prefer the extra tilt provid-
ed by the pedestal, especially when the
phone is placed on a large desk.
You may choose to place your telephone
on a desk without the desk pedestal. If
you do so, set the desk pedestal/wall
mount bracket aside in case you want to
use it in the future.
2
Using the Desk Pedestal/Wall Mount Bracket
WALL MOUNT TEMPLATE
VM2000 UG for PDF v58 for PDF 061406.qxd 6/14/2006 4:15 PM Page 10

Setting Up Your Telephone
To choose how the phone will
ring:
1 Press PROGRAM .
- The display will read “Program...”
2 Press >repeatedly, until “Ringer
Settings” appears in the display, and
then press DELETE .
3 The display will show the current ringer
setting for Line 1.
4Press DELETE repeatedly, until the
desired ringer setting for Line 1 is dis-
played.
The choices are:
L1 Ringer: ON (factory setting)
L1
Ringer:
DELAY
L1 Ringer: OFF
5 Press >to see the current ringer setting
for Line 2, and repeat step 4 if you wish
to change the ringer setting for Line 2.
6 Press PROGRAM to exit.
Setting Ringers On/Delayed/Off
The ringers for each outside line are controlled
individually at each telephone. There are three
possible settings for each telephone’s ringer:
RINGER ON: The line will ring normally.
DELAYED RING: The line will start ringing after
the first 20 seconds. This is useful for an office
where a secretary usually answers the phone.
RINGER OFF: The line will not ring.
In all these cases, the line indicators will flash
normally to signal an incoming call, and you can
always answer that line, whether or not it is ring-
ing at your telephone, by pressing the corre-
sponding flashing LINE button.
3
Note: If you set a ringer to ON or DELAY, and a call comes in on that line while you are having a
conversation on another outside line, a double ring will sound every 15 seconds to alert you of the
incoming call. This feature, called “off-hook ringing”, can be turned off if you prefer. To do this,
press PROGRAM , then press >repeatedly until “Off
Hook
Ring” appears in the display, along
with the current setting. Press DELETE if you wish to change the setting, and press PROGRAM
to exit.
VM2000 UG for PDF v58 for PDF 061406.qxd 6/14/2006 4:15 PM Page 11
Setting Up Your Telephone
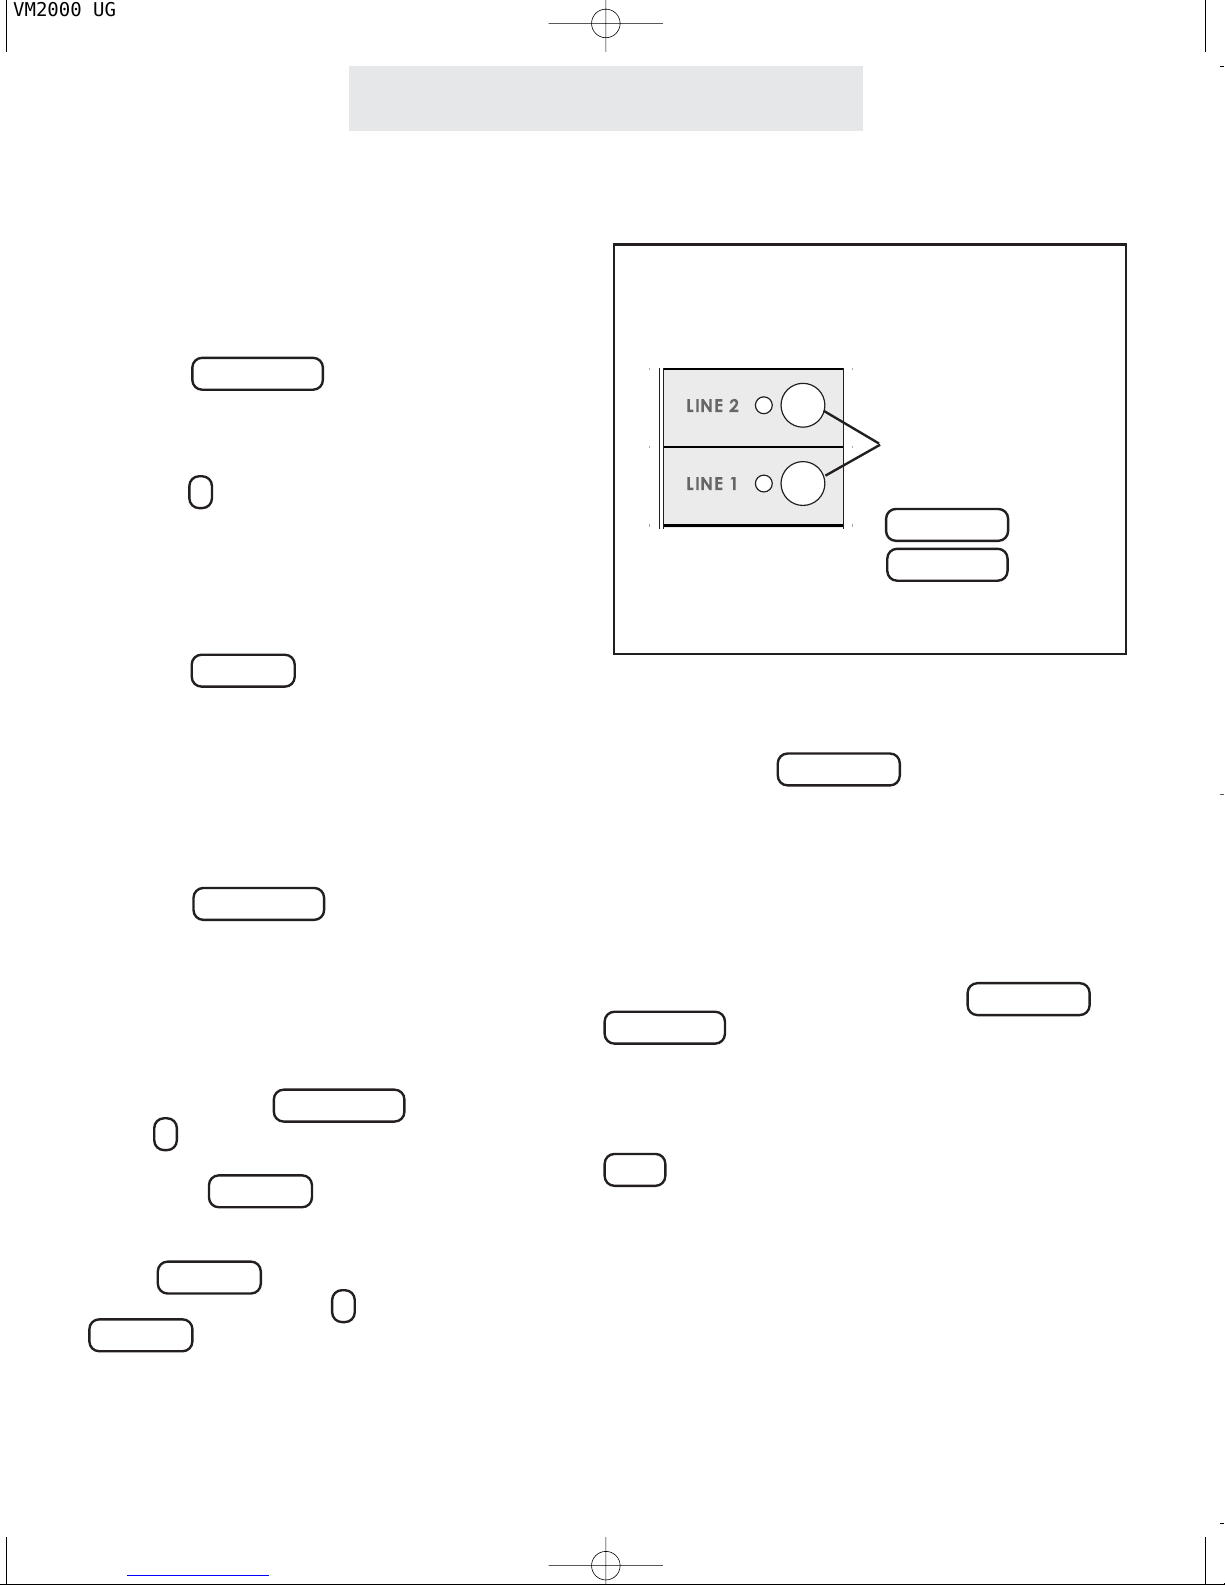
Setting Automatic Line Selection
To choose which line will be
automatically selected:
1 Press PROGRAM .
- The display will read
“Program...”
2 Press >repeatedly, until ”Auto
Seize” appears in the display.
The display will show the current
auto seize setting.
3 Press DELETE repeatedly, until the
desired auto seize setting is dis-
played.
The choices are:
Auto
Seize:L1 (factory setting)
Auto
Seize:L2
4 Press PROGRAM to exit.
Note: If you decide to use this tele-
phone as a single-line phone, you may
set the other line as UNCONNECTED,
which will deactivate that Line button.
To do this, press PROGRAM , then
press >repeatedly until “LINE
CON-
NECTIONS” appears in the display, and
then press DELETE . The display will
show the current setting for Line 1. The
choices are NORMAL or UNCONNECTED.
Press DELETE if you wish to change
the setting, then press >and then
DELETE if you wish to change the set-
ting for Line 2.
This feature allows you to choose which line will
be selected automatically when you lift the hand-
set or press the SPEAKER button.
You may choose any of the outside lines . If your
chosen line is in-use, the telephone will auto-
matically select the next available line.
Note: An incoming call that is ringing at your
telephone will be selected automatically when
you lift the handset or press the SPEAKER or
HEADSET button, regardless of the choices you
have made for automatic line selection.
If you wish to select a different line while your
phone is ringing, you must press the desired
LINE button before lifting the handset.
You may choose
any of the outside
lines to be selected
automatically when
you lift the handset
or press the
SPEAKER or
HEADSET button
VM2000 UG for PDF v58 for PDF 061406.qxd 6/14/2006 4:15 PM Page 12
Setting Distinctive Ringing
Setting Up Your Telephone
To assign a distinctive ring to
your line:
1 Press PROGRAM .
- The display will read
“Program...”
2Press >repeatedly, until
”Distinctive Ring” appears in
the display, and then press DELETE
3Press DELETE repeatedly, until the
desired distinctive ring setting for
Line 1 is displayed.
The choices are:
L1:RING SOUND #1 (factory setting)
through RING SOUND #8
4Press >to see the current setting for
Line 2, and repeat step 3 if you wish
to change the setting for Line 2.
5Press PROGRAM to exit.
Note: At any time when you have a
particular distinctive ring setting dis-
played, you may press <to hear an
example of that distinctive ring.
All lines are initially set to ring with Ring Sound
#1. If you prefer, you may assign each line one
of seven other distinctive ringer tones.
Note that this feature is particularly useful in
Centrex environments, enabling you to easily dif-
ferentiate the ringing of your telephone from
other nearby phones.
5
VM2000 UG for PDF v58 for PDF 061406.qxd 6/14/2006 4:15 PM Page 13

Setting Up Your Telephone
To set the phone’s toll restric-
tion access code:
1 Press PROGRAM .
- The display will read “Program...”
2 Press >repeatedly, until “Toll
Restriction” appears in the display,
and then press DELETE .
- The display will read “Enter
Code.”
3The code is factory-set as “1234.” If
you wish to enter a different code,
simply enter that new code, and the
display will ask you if you want to
change the code. Press DELETE .
4 Press PROGRAM to exit.
The Toll Restriction feature enables you to con-
trol outgoing calls and helps you prevent unau-
thorized long distance calls.
The toll restriction access code is needed when
you wish to change any toll restriction settings or
when you wish to turn toll restriction on or off at
a particular phone.
If you ever forget the access code, simply set a
new code. Until you set the access code, the
code will be the one set at the factory, which is
“1234”.
Setting the restricted numbers and
the allowed exceptions at a particu-
lar telephone:
Follow the instructions on the following three
pages for setting toll restrictions at particular
phones. After you set a phone’s toll restrictions,
the settings will not be erased, even in the event
of a power failure. So you do not need to worry
about ever having to re-enter the toll restriction
settings at any of the stations. If you ever do
wish to erase all the toll restriction settings
stored at a particular phone, follow the instruc-
tions on page 35.
Turning toll restriction on/off at a
particular telephone:
Follow the instructions on page 28 for turning
toll restriction on and off at a particular phone.
Note: After setting a station’s restrictions, its toll
restriction is automatically ON. In the future, you
may temporarily override its toll restriction or turn
its toll restriction off for a longer period without
affecting the settings stored in the telephone.
Setting Up Toll Restriction
6
VM2000 UG for PDF v58 for PDF 061406.qxd 6/14/2006 4:15 PM Page 14
Setting Up Your Telephone
To set the restricted numbers
at a particular telephone:
1 Press PROGRAM .
- The display will read
“Program...”
2 Press >repeatedly, until “Toll
Restriction” appears in the dis-
play, and then press DELETE .
- The display will read “Enter
Code:”
3 Enter the 4 digit toll restriction
access code (See preceding page).
- You will hear a confirmation beep
and the display will read “Set
Restricted #”
4 Press DELETE .
- The display will show the currently
stored Restriction #1, or indicate
“1:” if there is no
Restriction #1 yet stored.
5Press DELETE if you wish to store
a new Restriction #1, then dial
desired restricted number, up to 6
digits.
6Press <.
7 Press >and repeat steps 5-6 if you
wish to store any additional restric-
tions at this phone.
7
Setting Up Toll Restriction (Continued)
Toll restriction numbers are set individually at
each telephone, so the restrictions can vary from
phone to phone.
Some examples of popular restrictions:
“1” ... to restrict all numbers starting with “1”.
“01” ... to restrict all international calls.
“0” ... to restrict all operator-assisted calls.
“#976” ... to restrict all “0976” and “1976” calls.
(When you enter restricted numbers, “#” is a
wildcard that stands for the number “0” or “1”.)
Note: Restrictions are usually just a few digits,
since they prevent the dialing of all numbers
starting with those digits.
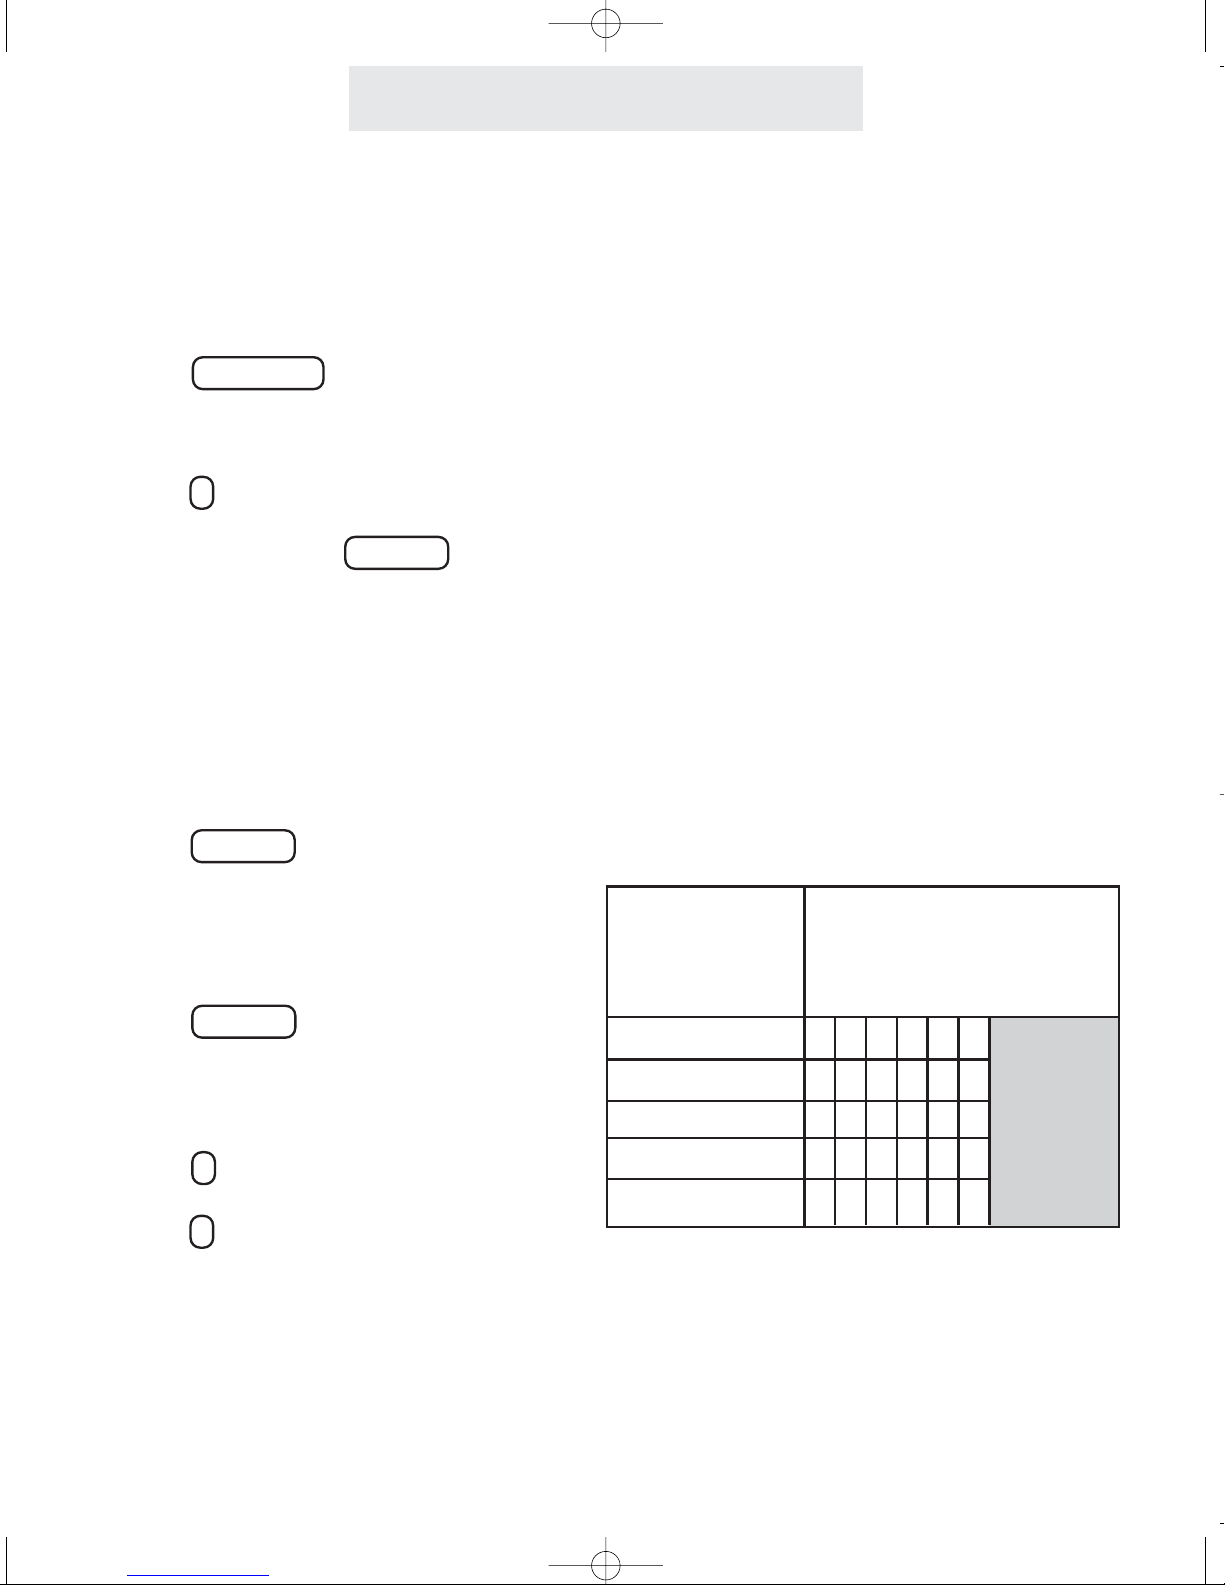
Use the Worksheet below to plan your choice of
restricted numbers. If you plan to set any sta-
tions with a different set of restrictions, then use
additional copies of this worksheet.
You can set as
many as five
restricted numbers
at each telephone.
Enter the restricted numbers
exactly as you would dial them
out. Each restriction can be up
to 6 digits long.
1st Restriction
2nd Restriction
3rd Restriction
4th Restriction
5th Restriction
Worksheet
VM2000 UG for PDF v58 for PDF 061406.qxd 6/14/2006 4:15 PM Page 15
Setting Up Your Telephone
To set the allowed numbers
at a particular telephone:
1 Press PROGRAM .
- The display will read “Program...”
2 Press >repeatedly, until “Toll
Restriction” appears in the dis-
play, and then press DELETE .
- The display will read “Enter Code:”
3 Enter the 4 digit access code.
- You will hear a confirmation beep
and the display will read “Set
Restricted #”
4 Press >.
- The display will read “Set Allowed
#”
5 Press DELETE .
- The display will show the currently
stored Allowed #1, or indicate
“1:” if there is
no Allowed #1 yet stored.
6Press DELETE if you wish to store a
new Allowed #1, then dial desired
allowed number, up to 10 digits.
7Press <.
8 Press >and repeat steps 6-7 if you
wish to store any additional allowed
numbers at this phone.
If you set restrictions at a particular phone, you
will most likely also want to store some allowed
exceptions at that telephone.
For example, if you restrict long-distance calls,
you will probably want to store some allowed
area codes, such as “1301”. Or, for example,
you may wish to store “1800”, to allow all “1800”
calls. Or “1*******” to allow all “1+7 digit”
calls.
(When you enter allowed numbers, “*” is a
wildcard that stands for any number from 0-9.)
You may also want to store some specific
allowed numbers, for example other company
offices.
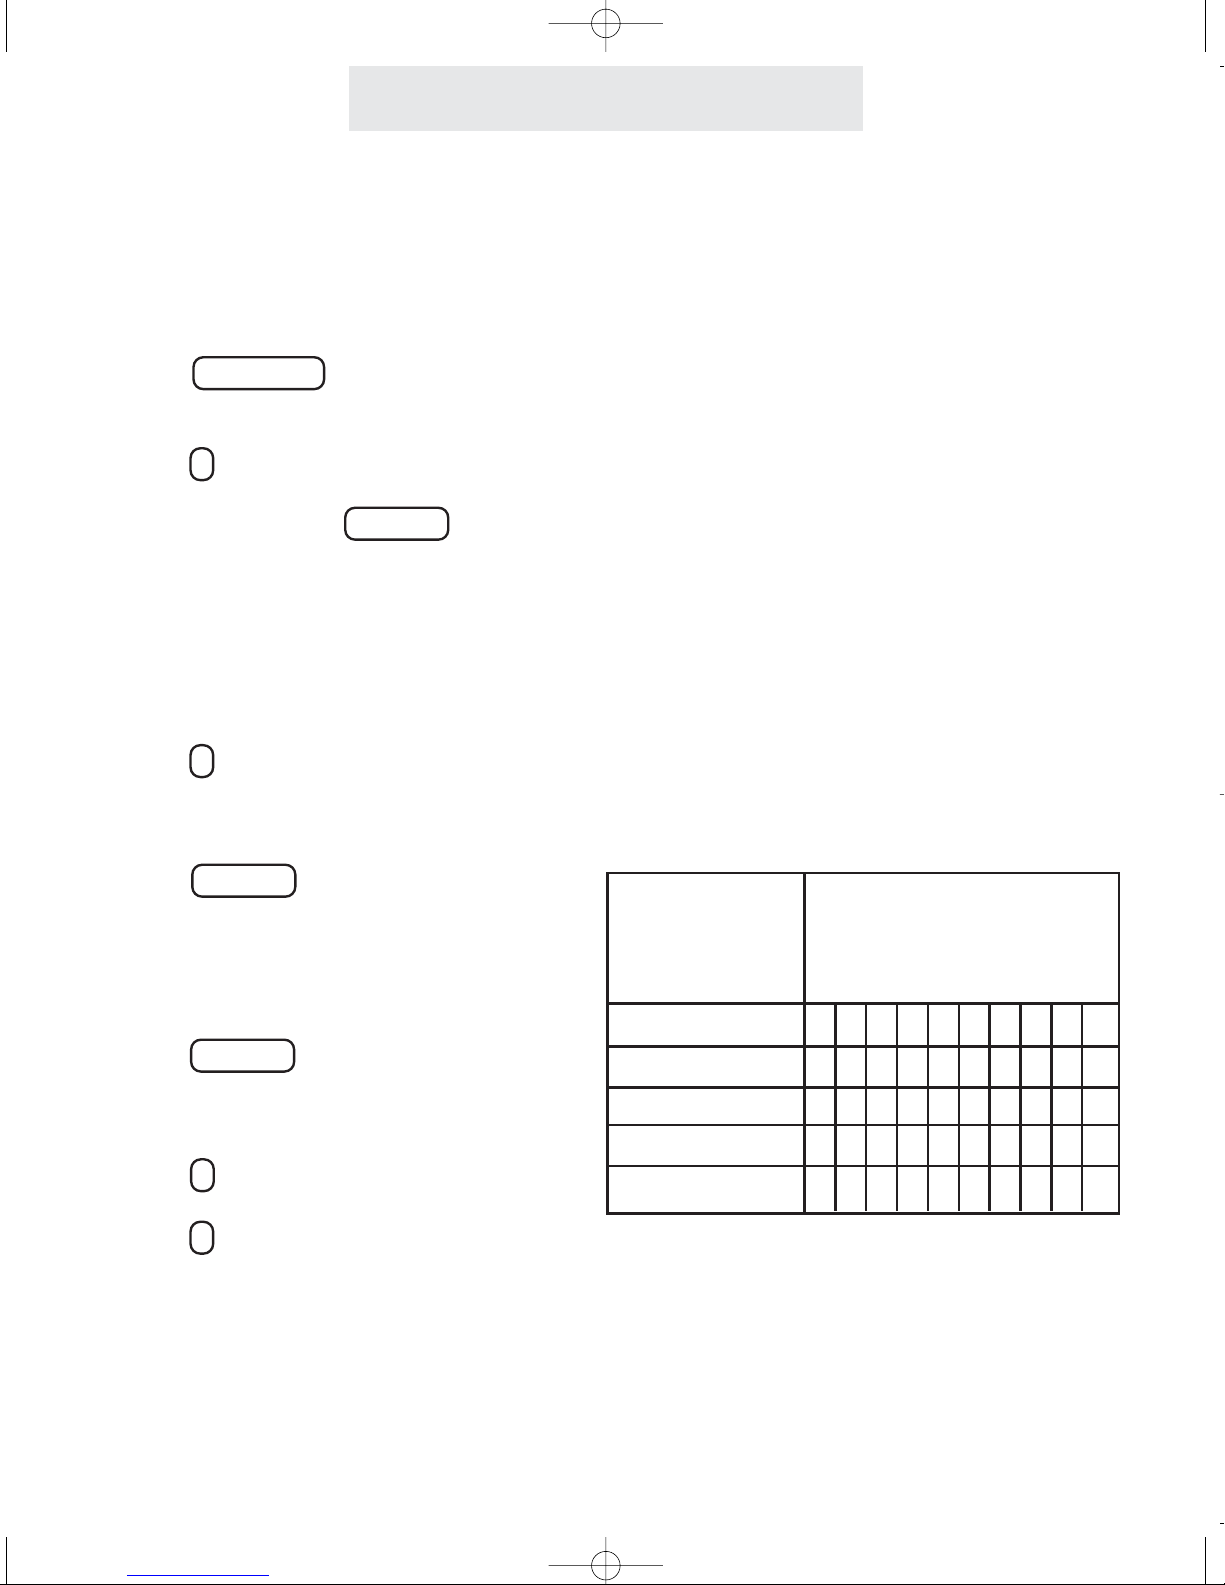
Use the Worksheet below to plan your choice of
allowed numbers. If you plan to set any stations
with a different set of allowed numbers, then use
additional copies of this worksheet.
Setting Up Toll Restriction (Continued)
You can set as
many as five
allowed numbers
at each telephone.
Enter the allowed numbers
exactly as you would dial them
out. Each allowed number can
be up to 10 digits long.
1st Allowed
2nd Allowed
3rd Allowed
4th Allowed
5th Allowed
Worksheet
8
VM2000 UG for PDF v58 for PDF 061406.qxd 6/14/2006 4:15 PM Page 16

9
Setting Up Toll Restriction (Continued)
Setting Up Your Telephone
To completely restrict a
telephone:
1 Press PROGRAM .
- The display will read “Program...”
2 Press >repeatedly, until “Toll
Restriction” appears in the dis-
play, and then press DELETE .
- The display will read “Enter
Code:”
3 Enter the 4 digit toll restriction access
code.
- You will hear a confirmation beep
and the display will read “Set
Restricted #”
4 Press >repeatedly, until “Line
Restriction” appears in the dis-
play, and then press DELETE .
5Press DELETE repeatedly, until the
desired Line 1 Restriction setting is
displayed.
The choices are:
L1:
NORMAL (factory setting)
L1:
RESTRICTED
6Press >to see the current setting for
Line 2, and repeat step 5 if you wish
to change the setting for Line 2.
7 Press PROGRAM to exit.
In addition to setting specific restrictions at a par-
ticular phone, you may completely restrict a par-
ticular phone.
People will not be able to make any outgoing
calls on any phones that are completely restrict-
ed, with the exception of the allowed numbers at
that phone and calls to “911”. However, they will
still be able to receive incoming calls and take
calls off hold.
VM2000 UG for PDF v58 for PDF 061406.qxd 6/14/2006 4:15 PM Page 17
To adjust the ringer volume:
While the phone is on-hook and idle:
1Press the and VOLUME but-
tons to set desired ringer volume.
With each press, the phone will ring
once at the new volume.
To adjust the handset volume:
While using the handset:
1 Listen to dial tone or voice.
2 Press the and VOLUME but-
tons to set desired handset
volume.
To adjust the speakerphone
volume:
While the speakerphone is activated:
1Listen to dial tone or voice.
2Press the and VOLUME but-
tons to set desired speakerphone
volume.
To adjust the discrete alert vol-
ume:
While the phone is on-hook and idle:
1Press HOLD .
2Press the and VOLUME buttons
to set desired discrete alert volume.
With each press, the phone will ring
once at the new discrete alert volume.
The discrete alert volume setting gov-
erns the volume of the held call reminder.
Operating Your Telephone
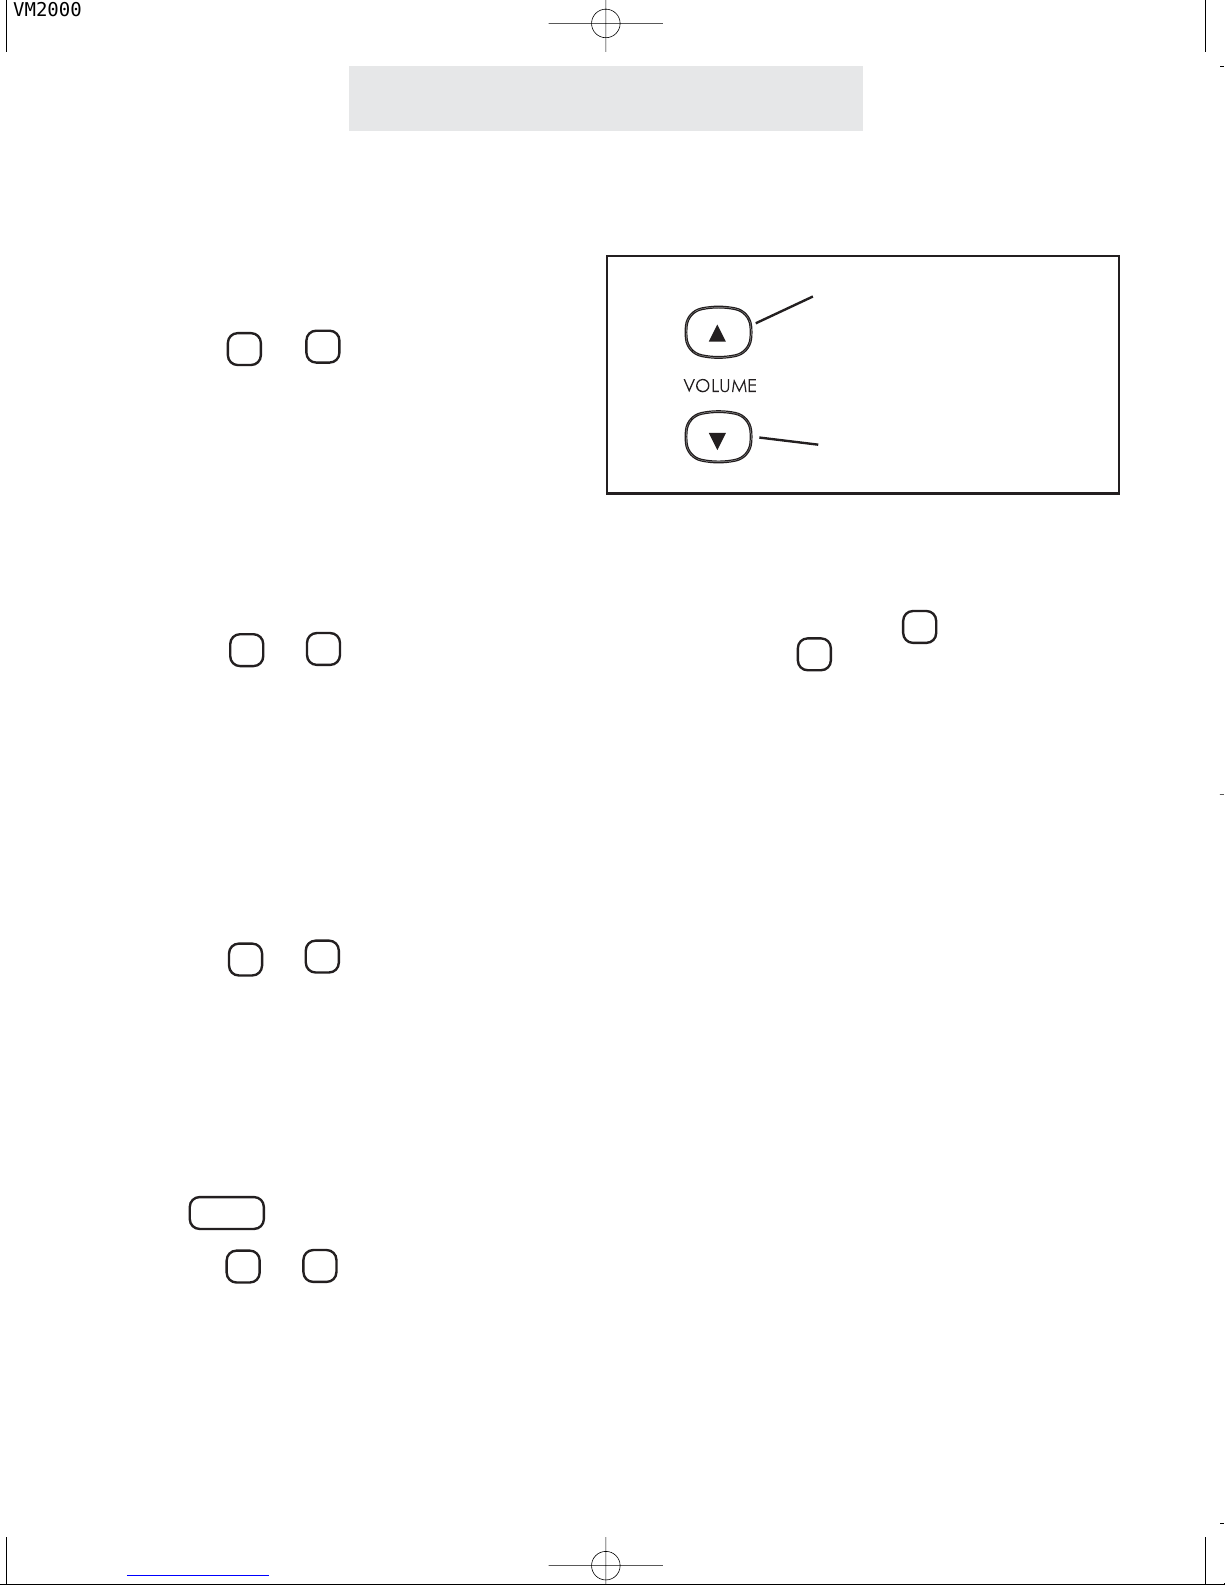
Adjusting Volume Levels
The Ringer, Handset, Speakerphone and
Discrete Alert Volumes can all be set independ-
ently by using the VOLUME buttons. To
increase the volume, press
. To decrease
the volume, press
. Eight ringer, three hand-
set, eight speakerphone, and eight discrete alert
volumes are available.
Press to raise volume
Press to lower volume
VM2000 UG for PDF v58 for PDF 061406.qxd 6/14/2006 4:15 PM Page 18

Operating Your Telephone
11
To set your telephone to Tone
or Pulse Dialing:
1 Press PROGRAM .
- The display will read
“Program...”
2 Press >repeatedly, until “Advanced
Setting” appears in the display,
and then press DELETE .
3 Press >until “Tone/Pulse”
appears in the display, and then
press DELETE .
The display will show the current
tone/pulse setting
4 Press DELETE repeatedly, until the
desired tone/pulse setting is dis-
played.
The choices are:
Tone/Pulse: TONE
Tone/Pulse: PULSE
5 Press PROGRAM to exit.
If your system is set to Pulse Dialing, you may
press the *button to change the dialing mode
temporarily to tone during a call.
This feature is useful if you have to send tone
signals for access to telephone banking, long
distance or other special services. Dialing mode
will revert to pulse when you hang up.
Making a Tone/Pulse Selection
Press the *button to send
tone signals if your system is
set to Pulse Dialing
(factory setting)
VM2000 UG for PDF v58 for PDF 061406.qxd 6/14/2006 4:15 PM Page 19
To make and answer calls
using the handset:
1Lift the handset.
If you wish to override automatic line
selection, press desired LINE button
before lifting the handset.
2Replace the handset in the cradle to
hang up.
To make and answer calls
using the speakerphone:
1 Press SPEAKER to activate the
speakerphone.
If you wish to override automatic line
selection, press the desired LINE
button instead of pressing
SPEAKER , and you will be con-
nected to that line on speakerphone.
2 Press SPEAKER again to hang up.
Operating Your Telephone
12
Making and Answering a Call
When you lift the handset to make a call, the
phone selects a line according to its automatic
line selection setting. (See page 4.) If you lift the
handset while your phone is ringing, your phone
will automatically select the ringing line. If you
wish to override automatic line selection, press
the desired LINE button before lifting the hand-
set.
You can use the speakerphone to make or
answer an incoming call. Simply press
SPEAKER instead of lifting the handset.
When you press SPEAKER to make a call, the
phone selects a line according to its automatic
line selection setting. (See page 4.) If you press
SPEAKER while your phone is ringing, you will
automatically answer the ringing line. If you wish
to override automatic line selection, press the
desired LINE button instead of pressing
SPEAKER , and you will be connected to that
line on the speakerphone.
During a call, you may switch back and forth
between handset and speakerphone as much as
you like. Simply press SPEAKER while using
the handset to activate the speakerphone and
then hang up your handset. To switch back to a
handset call, lift the handset.
Note that whenever the SPEAKER indicator is
on, you may hang up the handset without dis-
connecting your call.
Note: You may make calls on either
handset or speakerphone using the
“predialing” feature. Many people find
this a convenient and relaxing method
of placing calls. See page 35 for details
on using the predialing feature.
VM2000 UG for PDF v58 for PDF 061406.qxd 6/14/2006 4:15 PM Page 20
Table of contents
Other TMC Telephone manuals


