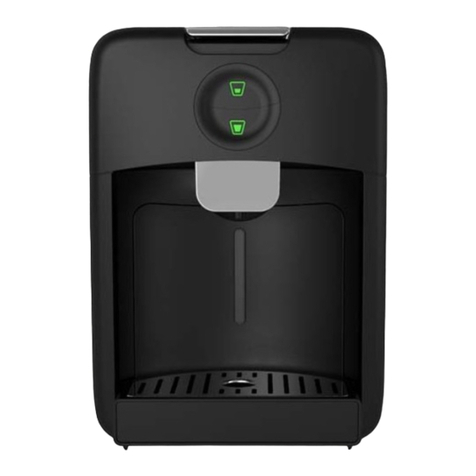
Todd English TEKB505 User manual

TODD ENGLISH
SINGLE SERVE COFFEE BREWER
Model TEKB505
INSTRUCTION MANUAL

CONGRATULATIONS
Congratulations on purchasing your Todd English Single Serve Coffee Brewer! As a chef and
traveler, coffee has always been a great passion of mine. This brewer is the culmination of
years of research and sourcing the world to find the highest quality, consistent and efficient
brewer. I am thrilled to bring our new beautiful design from my kitchen to yours. Your new
Todd English Single Serve Coffee Brewer is compatible with all K-Cup®packs*, in addition to
my capsules of hand-picked, small batch artisan roasted coffee from around the world (not
included). I am proud to bring you individual coffee capsules that are environmentally friendly
and can be recycled.
* K-Cup®is a registered trademark of Keurig Green Mountain, Inc. Use of the K-Cup®trademark
does not imply any affiliation with or endorsement by Keurig Green Mountain, Inc.
SMALL BATCH ARTISAN ROASTED SINGLE SERVE COFFEE

3
MEET
CHEF ENGLISH
Todd English is a celebrated chef, restaurateur, author, and television personality. He has
opened innovative and award-winning restaurants around the globe. Among his numerous
accolades from the culinary world, Chef English is a four-time James Beard Foundation Award
winner and was named Bon Appétit’s Restaurateur of the Year. He has authored four critically
acclaimed cookbooks, including his most recent, Cooking In Everyday English. Chef English
has also created the record-breaking housewares line, The Todd English Collection, and
hosted the Emmy-nominated PBS travel series Food Trip with Todd English.
Todd English Kitchen is an exceptional range of high-performance countertop appli-
ances. Todd’s passion for the creative process results in these products delivering extraor-
dinary blending, cooking, frying, mixing, and ease of use. As Todd continues pushing the
limits of imagination, his attention to detail and progressive design intrinsically allows endless
possibilities that heighten the delicious world that surrounds us.

4
TODD ENGLISH
SINGLE SERVE COFFEE BREWER
machine parts & controls
1Brewer Head Handle 9Drip Tray Base
2Brewer Head 10 Reservoir Lid
3Water outlet 11 Reservoir
4Capsule 12 On /Off Button
5Capsule Housing 13 Serving Size: Small
6Water Level Indicator 14 Serving Size: Medium
7Drip Tray Plate 15 Serving Size: Large
8Drip Tray

5
Please read ALL the instructions in this manual carefully before you use this appliance. Proper
care and maintenance will ensure a long life and trouble-free operation. Please save these
instructions and refer to them for cleaning and care tips.
IMPORTANT SAFEGUARDS
When using electrical appliances, basic safety precautions should be followed, including the
following:
• This appliance must be properly installed and placed in accordance with these instruc-
tions before it is used.
• Do not place on or near a hot gas or electric burner, or in a heated oven.
• Do not let the cord hang over the edge of the table or counter, or touch hot surfaces.
• Do not use outdoors.
• This product is for household and hopitality use only.
• Do not use appliance for other than intended use.
• Close supervision is necessary when any appliance is used by or near children.
• To protect against re, electric shock, and injury, do not immerse cords, plug or the
appliance in water or any other liquid.
• Do not operate any appliance with a damaged cord or plug or after the appliance mal-
functions or is damaged in any manner. Contact Customer Care to arrange for replace-
ment or repair.
• Use only water in this appliance. Do not put any other liquids or foods in the Reservoir.
• Do not operate without water, or when there is less than the Minimum Level of water in
the Reservoir.
• Hot water can drip while the appliance is pre-heating. Do not put hands under the
Capsule Housing after it is turned on.
• Do not touch hot surfaces. Use handles and knobs when available. Scalding may occur
if the appliance is moved or opened or the capsule is disturbed during the brewing cycle.
• Do not open the appliance while brewing is in progress.
• Do not open the Brewer Head or take away the capsule until the serving size button
stops flashing.
• To disconnect, turn any control to “off,” then remove plug from wall outlet.
• Unplug power cord when not in use and before cleaning. Allow to cool before putting on
or taking off parts, and before cleaning the appliance.
• The use of accessory attachments not recommended by the appliance manufacturer
may result in re, electrical shock or injury.
CAUTION: There are two sharp needles that puncture the capsule, one above and one below
the Capsule Housing. To avoid risk of injury, do not put your ngers in the Capsule Housing.
CAUTION: There is extremely hot water/steam in the Capsule Housing during the brew
process. To avoid risk of injury, do not lift the Handle or open the Capsule Housing during the
brewing process.
WARNING: To reduce the risk of fire or electric shock, do not remove the bottom cover. There
are no user serviceable parts inside. Repair should be done by authorized personnel only.

6
BEFORE FIRST USE
Initial Cleansing Brew—To ensure that it works perfectly, this brewer was factory tested with
water. A small amount of water may still be in the brewer when it is first unpacked. After
removing all packaging and before using your Brewer for the first time, run clean water
through the brew cycle without using a capsule, following the instructions that follow.
BREWING INSTRUCTIONS
1. Place brewer upright on a flat surface, and plug into outlet.
2. To turn on the brewer, press the On /Off button. That button, and the three Serving Size
buttons will start to blink. Once the brewer is ready to heat water, the lights will stay lit
but stop blinking.
3. Remove Reservoir and Reservoir Lid. Fill Reservoir with water to the MAX fill line. The
brewer will not function if water falls below the MIN level.
4. Return Reservoir with Reservoir Lid to the brewer. NOTE:
There is a hook along the top edge of the Reservoir. It
must align with the corresponding space on the brewer
base so that the Reservoir is seated properly, which pre-
vents water from leaking during operation.
5. Lift the Brewer Head Handle and insert a capsule into the
Capsule Housing. DO NOT peel off the foil cover of the
capsule.
CAUTION: Avoid coming into contact with the sharp piercing
pin inside the Brewer Head, even though it is not visible when
the handle is lifted.

7
6. Close by pressing down on the Brewer Head Handle. NOTE: Capsule will be punctured
when the Brewer Head is closed.
7. Place a coffee cup on the drip tray. NOTE: The Drip Tray and Drip Tray Plate can be
removed to accommodate larger travel mugs. (Cups and mugs are not included.)
8. Select a serving size by pressing the appropriate button, which will begin blinking.
NOTE: The process can be stopped manually by pressing the same Serving Size button until
2 beeps are heard.
9. When the brewing process is done, the brewer stops automatically. The Serving Size
button stops blinking and 2 beeps will sound.
NOTE: While the internal water pump stops during the brewing process, that does not mean
the process is complete. The button will continue to blink for 20 seconds to allow time for
steam and/or residual water to escape. Do not lift the handle while the button is blinking.
The buttons will stay lit—without blinking—until the brewer is turned off by pressing On/Off.
10. Your delicious beverage is ready. Gently slide the cup or mug horizontally off the Drip
Tray, or carefully lift it out of the Drip Tray Base (if Drip Tray is not used).
11. Prior to opening the Brewer Head, always allow residual drips/steam to escape com-
pletely, and collect in the Drip Tray.
12. Remove the used capsule from the brewer with two fingers
by lifting on either side, and keeping your hands clear of the
Water Outlet on the underside of the Brewer Head.
CAUTION: NEVER lift the Brewer Head Handle while the machine
is brewing. If the unit is opened while brewing, the pump will stop
operating, all illuminated buttons will flash, and a beep will sound,
all to warn of the danger of scalding from hot water coming out of
the Brewer Head. IMMEDIATELY close the Brewer Head by lower-
ing the Brewer Head Handle.
NOTE: The brewer will automatically turn off when not in use after 15 minutes. See page 8 to
change the default to 1 or 2 hours after last use.

8
HELPFUL HINTS
• A World of Flavors—The Todd English Brewer is compatible with K-Cup®* single-serve
capsules, including my English Tea & Coffee Co. Small Batch Artisan Roasted Single-
Serve beverages.
• The Right Water Makes a Difference—For the best tasting gourmet coffee, tea or hot
cocoa, we recommend using bottled or filtered water. Using distilled or reverse osmosis
water is not recommend. Water quality varies from place to place. If you notice an unde-
sirable taste in your cup of coffee, such as chlorine or other mineral taste, bottled water or
water from a filtration system will eliminate them.
• The Drip Tray—Any liquid overow (from your cup or the Brewer Head) will collect in the
Drip Tray. Be sure to empty the Drip Tray.
• De-Scaling—Mineral content in water varies from place to place. Depending on the
mineral content of the water in your area, calcium deposits or scale may build up in your
Brewer. The Brewer should be de-scaled every 3–6 months, or when there are white
deposits in the reservoir. See instructions on page 10.
• Storing—When storing your Brewer, carefully empty the Drip tray and water reservoir.
Store your Brewer upright in a safe, dry, frost-free environment.
CHANGING THE DEFAULT SETTINGS
Chaging the Serving Size Defaults
The preset volumes for the three Serving Sizes are 6, 8, and 10 ounces. If you prefer volumes
that are consistently different from the those presets, the defaults can be easily reprogrammed.
1. With the machine unplugged, press the Small Serving Size button and keep it pressed.
2. While pressing the Small button, plug the maching into a wall socket.
3. The Middle Serving Size button will be steadily lit, indicating the factory default setting.
4. Press the Small button to change the default volumes to 4 oz., 6 oz. and 8 oz.
5. Press the Large button to change the default volumes to 8 oz., 10 oz. and 12 oz.
6. After making your selection, press the On/Off button to set your preference. All lit buttons
will turn off.
7. Turn on the brewer by pressing the On/Off button. The new preset sizes are now pro-
grammed as the defaults.
* K-Cup®is a registered trademark of Keurig Green Mountain, Inc. Use of the K-Cup®trademark
does not imply any affiliation with or endorsement by Keurig Green Mountain, Inc.

9
Changing the Automatic Shut-Off Time
The automatic shut-off preset for the brewer is 15 minutes after last use. This time can be
changed to either 1 or 2 hours.
1. With the machine unplugged, press the Middle Serving Size button and keep it pressed.
2. While pressing the Middle button, plug the maching into a wall socket.
3. The light on the water tank will flash twice and one beep will emit. The Small button will
be lit, indicating the default time of 15 minutes.
4. Press the Middle button to change the default time to 1 hour.
5. Press the Large button to change the default time to 2 hours.
6. After making your selection, press On/Off to turn off the brewer and to memorize the new
setting.
To Reset the Default Settings
1. With the machine unplugged, press the Large Serving Size button and keep it pressed.
2. While pressing the Large button, plug the maching into a wall socket.
3. The light on the water tank will flash twice and beeping sounds will emit when the reset is
completed.
4. The volume setting is returned to 6, 8, and 10 ounces, and the automatic shut-off time
returns to 15 minutes.
CLEANING AND MAINTENANCE
IMPORTANT: Make sure the brewer is unplugged before cleaning. Regular cleaning of the
Brewer’s external components is recommended. Allow to cool before performing any cleaning
tasks.
• Never immerse the Brewer in water or other liquids. The Housing and other external
components may be cleaned with a soapy, damp, non-abrasive cloth.
• The Drip Tray can accumulate liquids. The Drip Tray and Drip Tray Plate should be peri-
odically inspected and cleaned with a damp, soapy, nonabrasive lint-free cloth. The Drip
Tray and Drip Tray Plate should not be put into the dishwasher. To remove the Drip Tray
Assembly, simply slide it toward you, keeping it level at all times to avoid spilling accumu-
lated liquids.
• Remove the Reservoir and its Lid from the brewer, take off the Lid and turn the Reser-
voir upside down over a sink to pour out any remaining water. Always empty the Reservoir
between uses and use fresh water for each brew.

10
DE-SCALING THE BREWER
Mineral content in bottled or filtered water varies. Depending on the mineral content of the wa-
ter, calcium deposits or scale may build up in your Brewer. Scale is non-toxic but can hinder
Brewer performance. Descaling your Brewer helps maintain the heating element and other
internal parts of the Brewer that come in contact with water.
The Brewer should be de-scaled every 3–6 months, or when there are white deposits
in the reservoir. It is possible for calcium deposits to build up faster, making it necessary to
de-scale more often.
Instructions assume the brewer is using the default serving sizes. If you have reset the
sizes, adjust the amounts of liquids given here.
1. You will need 8 ounces of undiluted white vinegar, a 10-ounce (or larger) cup or other
container, and access to a sink.
2. Fill reservoir with 8 ounces of undiluted white vinegar, and close the Brewer Head WITH-
OUT placing a capsule in the Capsule Housing.
3. Place the cup or other container on the Drip Tray Plate.
4. Start a brew by pressing the middle Serving Size button, but power off the Brewer just
after it starts to dispense the vinegar by pressing the same button until the unit beeps
twice. Allow the brewer to sit for at least 30 minutes.
5. After the prescribed period of time, fill the Reservoir to the Max line with water. Perform a
brew by pressing the Large serving size button and without adding a capsule. Empty the
contents of the cup or container into the sink, being extremely careful, as contents will be
hot.
6. Repeat Step 5 four more times, adding water to the Reservoir when necessary and emp-
tying the cup each time. This process will rinse the internal plumbing and get rid of any
residual vinegar. The Brewer is now ready to return to normal use.
STORAGE
• Always empty the reservoir before storing.
• Store Brewer in the upright position in a safe and frost-free environment.
• If the Brewer is stored in a cold environment, there is the risk of condensation freezing
inside the Brewer and causing damage.
• If the Brewer has been in a below-freezing environment, let it warm to room temperature
for 2 hours before using.
• After removing the Brewer from storage, wipe the reservoir with a damp, lint-free cloth
and run three Cleansing Brews (see Helpful Hints, page 8) before brewing with a capsule.

11
TROUBLESHOOTING
problem cause solution
Brewer does not
have power
• Not fully connected to
electrical source
• Check to be sure that cord
is plugged in securely to a
working outlet.
• Plug into a different outlet.
Brewer does not
brew
• No water, or not enough
water, in the reservoir.
• The brewer head is not
closed.
• Add water to the reservoir to
the MIN level or higher.
• Close the lid by pushing the
handle down. The 3 serving
buttons will ash if the handle
is not all the way down.
Brews only a partial
cup
• There is not enough
water to brew the selected
size.
• Calcium or scale is built
up inside the brewer.
• Add enough water in the
reservoir to brew the selected
serving size
• De-scale the brewer (see
page 10)
Water remains in
reservoir base after
brewing
• The reservior was
removed before it was
completely emptied.
• Place a cup on the Drip
Plate. Remove the Reservoir
and turn off the brewer by
pressing the On/Off button.
Keep it pressed for 3 seconds.
This will cause the pump to
drain the water out of the
base.
• Use a dry sponge to absorb
small amounts of water.
Water spews from
the outlet of the
brewer head
• The brewing is stopped
manually.
• The Brewer Head Handle
was lifted while the button
was ashing.
• Allow the steam/residual
water to escape completely—
at least 20 seconds from
the time the process was
interrupted. After cooling,
remove the capsule.

LIMITED ONE YEAR WARRANTY
This warranty covers all defects in workmanship or materials in the mechanical and electrical
parts, arising under normal usage and care; in this product for a period of 12 months from the
date of purchase provided you are able to present a valid proof-of-purchase. A valid proof-
of-purchase is a receipt specifying item, date purchased, and cost of item. A gift receipt with
item and date of purchase is also an acceptable proof-of-purchase. Product is intended for
household use only. Any commercial use voids the warranty.
This warranty covers the original retail purchaser or gift recipient. During the applicable war-
ranty period within normal household use, we will repair or replace, at our discretion, any
mechanical or electrical part which proves defective, or replace unit with a comparable model.
To obtain service under the terms of this warranty, call our customer care department at 312-
526-3760 (Monday–Friday 9 am–4:30 pm CST) or send an email to customercare@alliedrich.
net. Please provide the model number listed on the bottom of this page when contacting us.
THIS LIMITED WARRANTY COVERS UNITS PURCHASED AND USED WITHIN THE
UNITED STATES AND DOES NOT COVER:
• Damages from improper installation.
• Defects other than manufacturing defects.
• Damages from misuse, abuse, accident, alteration, lack of proper care and mainte-
nance, or incorrect current or voltage.
• Damage from service by other than an authorized dealer or service center.
This warranty gives you special legal rights and you may also have other rights to which you
are entitled, which may vary from state to state.
Manufacturer does not assume responsibility for loss or damage for return shipment. We
recommend that you keep your original packaging should you require repair service. Before
returning product please contact our customer care department for return authorization. When
returning product for repair please include your full name, return address, and daytime phone
number. Also include a brief description of the problem you are experiencing and a copy of
your sales receipt or other proof of purchase in order to validate warranty status.
model number: TEKB505
Table of contents
