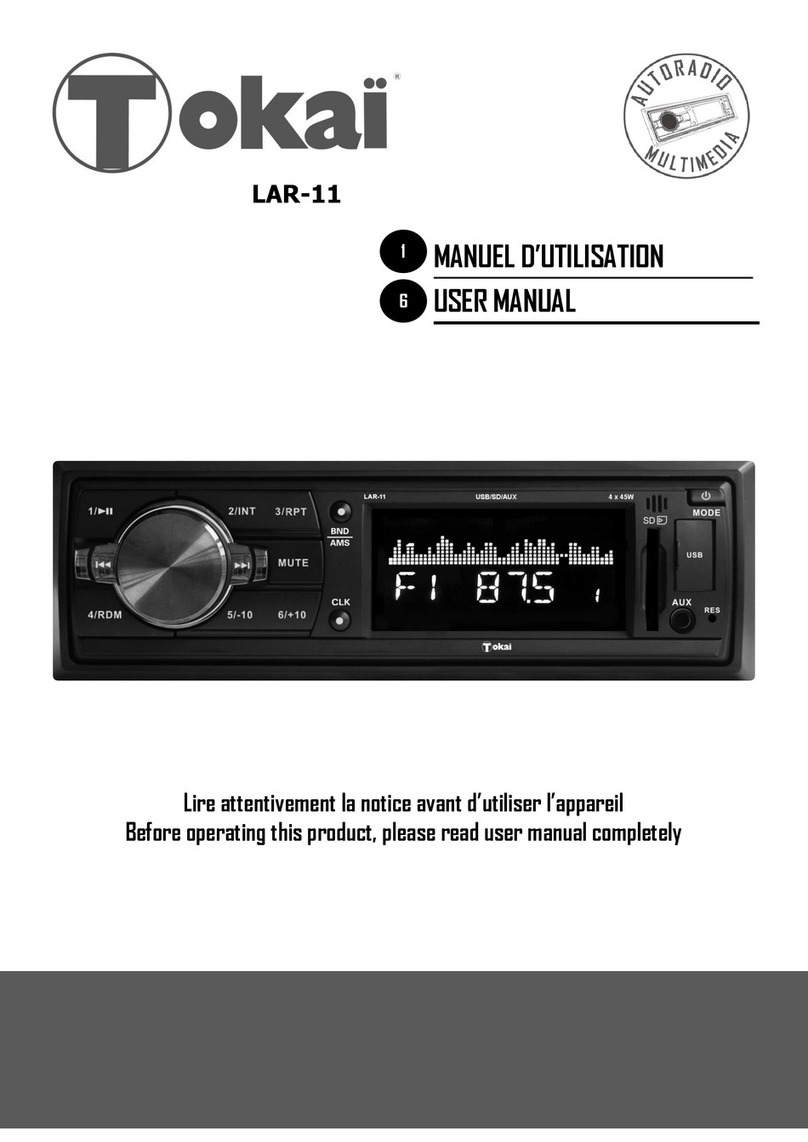
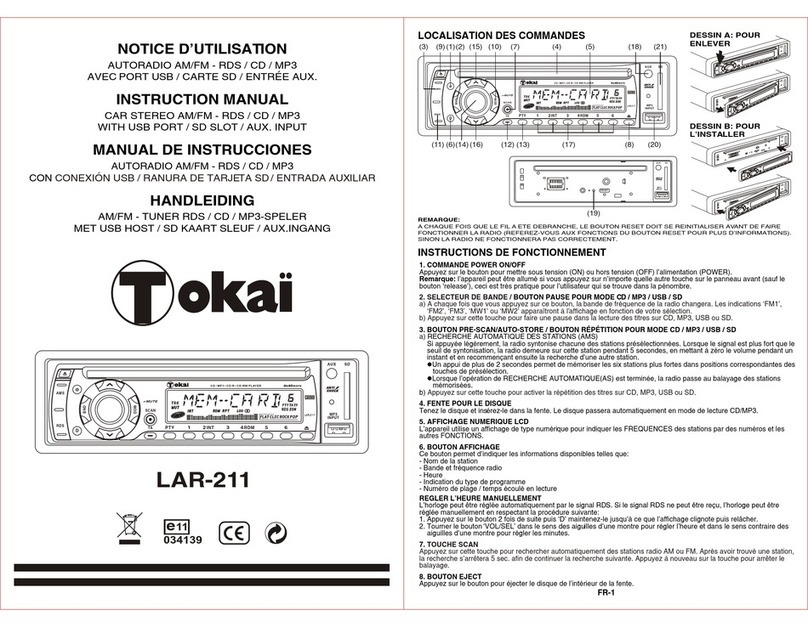
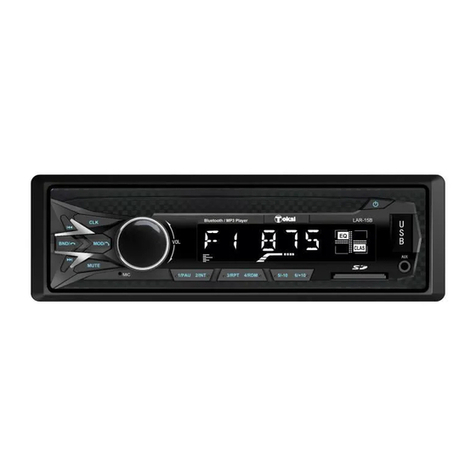
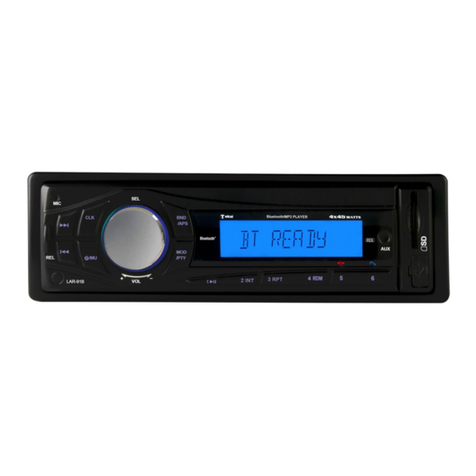
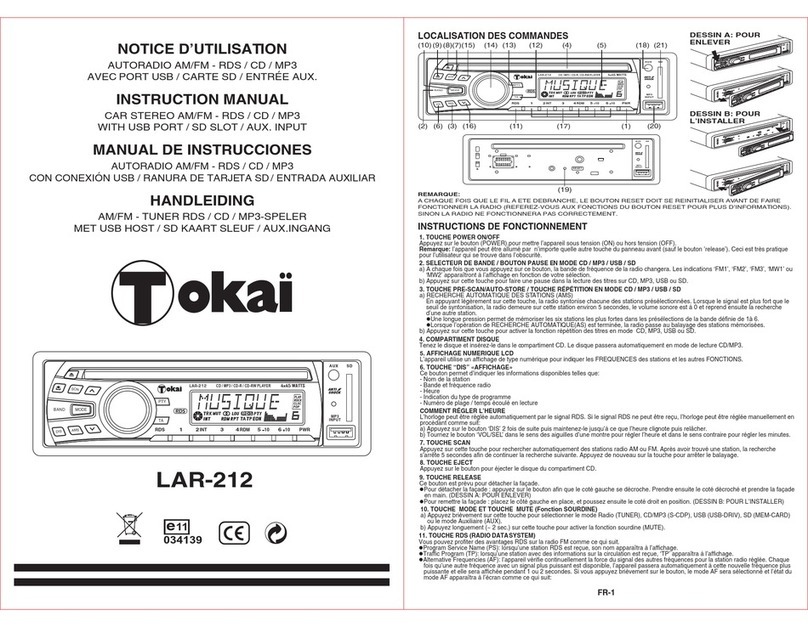
Tokai LAR-380 B User manual

R
AUTORADIO BLUETOOTH
AUTORADIO AM/FM CD/CDR/CDRW/MP3/WMA-RDS
ENTRÉE COMPATIBLE USB / SD/MMC
ENTRÉE AUXILIAIRE EN FAÇADE
Français
English
Español
Dutch
LAR-380 B
MANUEL D’INSTRUCTIONS
R

FR-2
1. TOUCHE MARCHE/ARRET ( ) / SOURDINE (MU)
2. TOUCHE SELECTION : REGLER LA BASSE/AIGUS/BALANCE/FADER / CALL LIST / DISPLAY /
INITIAL VOLUME / ADJ / TA VOL / EON / AF / TA / PTY / DSP / TA SEEK / PI SOUND / RETUNE /
MASK DPI
3. TOUCHE VOLUME +/- : REGLER LA BASSE/AIGUS/BALANCE/FADER / CALL LIST / DISPLAY /
INITIAL VOLUME / ADJ / TA VOL / EON / AF / TA / PTY / DSP / TA SEEK / PI SOUND / RETUNE /
MASK DPI
4. TOUCHES DE PRESELECTION RADIO (1,2,3,4,5,6)
5. MODE (MD) / FONCTION LOUDNESS (LD)
6. TOUCHE BANDE (BAND) / ENTRER (ENT)
7. RÉGLAGE AUTOMATIQUE OU MANUEL DES STATIONS
(RECH AVANT / RECH ARRIÈRE
)
(SAUT/RECHERCHE CD)
8.
RECHERCHE ET MEMORISATION AUTOMATIQUE (A/PS)
9. AFFICHEUR LCD
10. LOGEMENT CD
11. TOUCHE EJECTION CD ( )
12. TOUCHE PAUSE (PAU)
13. TOUCHE DE REPETITION CD (RPT)
14. TOUCHE FONCTION “INTRO” CD
15. TOUCHE RANDOM (LECTURE ALEATOIRE CD)
16, 17. DOSSIER PRECEDENT/SUIVANT
(SEULEMENT POUR LES FICHIERS MP3/WMA)
18. CONNECTEUR USB
19. LOGEMENT SD CARTE
20. ENTRÉE « AUX » (auxiliaire) EN FAÇADE
21. DECROCHER UN APPEL ( )
22. FINIR UN APPEL ( )
23. MICROPHONE
24. RESET
TOUCHES DE FONCTION
RESET
USB
AUX
181924 25141312 320 17 16 157
4(4-6)
4(1-3)
1023916 22 21 11 8

FR-3
BRANCHEMENT
Sortie Préampli:
Rouge (Droit) Blanc (Gauche)
ANTENNE ÉLÉCTRIQUE:
FIL BLEU
ENTRÉE AUX: EN FAÇADE
CONNECTEUR A
4. MEMOIRE (+12V)
7. BATTERIE (+12V)
8. MASSE (-)
NOTE: (CONNECTEUR A N°7) doit
être connecté à la clef de contact du
véhicule afin d’éviter le déchargement
de la batterie lorsque l’appareil est utilisé
pendant une période prolongée.
CONNECTEUR B
1. HP ARRIERE DROIT (+)
2. HP ARRIERE DROIT (-)
3. HP AVANT DROIT (+)
4. HP AVANT DROIT (-)
5. HP AVANT GAUCHE (+)
6. HP AVANT GAUCHE (-)
7. HP ARRIERE GAUCHE (+)
8. HP ARRIERE GAUCHE (-)
Si votre voiture n’a pas de connecteur ISO, vous pouvez l’acquérir dans n’importe quel magasin d’accessoires de
voiture.
INSTALLATION
A
B
8642
7531
84
7
CONNECTEUR
ANTENNE G (BLANC)
D (ROUGE)
SORTIE PRÉAMPLI CONNECTEUR ISO
ANTENNE ELECTRIQUE (BLEU)
FUSIBLE 10A

FR-4
Utilisation
1. 1. ALLUMER /ETEINDRE L’APPAREIL / SOURDINE (MU)
Appuyez longuement sur la touche afin de mettre l’appareil en marche ou hors tension. Vous pourrez allumer
l’appareil en appuyant sur n’importe quel autre bouton situé sur le panneau avant.
Appuyez brièvement sur la touche afin d’activer le mode SOURDINE: le son est coupé. Pour rétablir le son, appuyez
de nouveau sur la touche .
2. SELECTION
Utiliser ce bouton pour régler VOL/BASS/TREB/BAL/FAD. Pour sélectionner les autres fonctions pressez légèment
la touche SEL jusqu’à ce que la fonction choisie soit visualisée sur l’afficheur. Appuyer successivement sur la touche
“SEL”pour accéder aux fonctions VOL /BASS / TREB/ BAL/ FAD.
Puis ajuster en tournant le bouton ”VOLUME” vers la droite ou la Gauche. La figure 1 montre la sélection des fonctions.
1 3
24
25
26
22
Fig. 1 Sélection des fonctions
1. VOLUME 2. SELECT(ION) 3. GRAVES 4. AIGUS 5. BALANCE 6. FADER
3. Contrôle du volume
Ajuster le volume sonore en tournant le bouton VOLUME vers la droite ou la gauche pour augmenter ou diminuer
VOLVOL
/
VOLVOL
CALL LIST
SEL
2 sec.
SELDISP SELIN VOLSELADJ
SEL
PTY OFF
SEL
DSP NONE
SEL
TA VOL
SEL
TA OFF
SEL EON ON SEL AF ON
SEL
TA ALARM
SEL
RETUNE L
SEL
MASK DPI SEL
PI MUTE
Le bouton SEL vous permet par ailleurs de régler le CALL LIST, DISP, volume d’allumage, l’heure, le volume du ra-
dioguidage, la fonction EON, AF, TA, PTY, Equalizer, TA SEEK, PI SOUND, RETUNE et MASK DPI.
• MaintenezlatoucheVOLenfoncéependantenviron2secondes,puisappuyezsurlatoucheplusieursfoispouraf-
ficher les paramètres suivants :
LISTE DES APPELS (voir page 7)
DISP - Afficheur
• Informationsd’affichagetellesquedesradiofréquences,l’horloge,lavoieetd’autresinformationsselonleMODEde
jeu.
IN VOL - Volume d’allumage:
• TournezlatoucheVOLpourdéfinirlevolumeauquell’autoradios’allumera.
ADJ - Heure
L’horloge se règle automatiquement.
•TournezleboutonVOLdanslesensdel’aiguilled’unemontrepourréglerlesheures“versladroite”,etpourrégler
les minutes en sens inverse de l’aiguille d’ une montre c’est à dire “vers la gauche”.
TA VOL - volume du radioguidage
• TournezleboutonVOLpourdéfinirlevolumeauquellesinformationssurl’étatdutraficroutiers’allumera.
Fonction EON
• TournezleboutonVOLpouractiverlafonctionEON(EONON)oudésactivez-le(EONOFF).
LA FONCTION RDS. QU’EST-CE QUE LE SYSTEME RDS?
RDS (Radio Data System) est un système d’informations numériques radio développé et introduit par l’EBU (European
Broadcasting Union). Transmis sur le canal des émissions normales FM, Le RDS offre une variété d’informations telles
le nom des stations, le programme et les informations sur le trafic, ainsi que des fonctions utiles comme la syntonisation
automatique des meilleurs signaux disponibles dans le programme choisi.
Fonction ‘AF-REG’
Lorsque la modalité AF/REG est sélectionnée, la fonction est activée.
– Fonction “REGIONALE ACTIVEE”
La commutation AF ou la Recherche PI SEEK est effectuée sur toutes les stations diffusant le même type de programme
que la station en cours d’écoute.
– Fonction “REGIONALE DÉSACTIVÉE”
Cette fonction n’est plus prise en compte lorsqu’une recherche de station est effectuée.
Fonction ‘TA’
Lorsque cette modalité est activée les annonces trafic interrompent la lecture du CD/MP3 qui reprend après le flash
infos trafic.
Si le volume est trop faible, le niveau sonore sera augmenté lors du flash infos.
Lorsque l’on reçoit une station compatible, le logo correspondant “TP” s’affiche.
Fonction PTY (programme type)
Vous pouvez sélectionner le mode PTY en tournant le bouton de volume comme ci-dessous.
PTY OFF/NEWS/AFFAIRS/INFO/SPORT/EDUCATE/DRAMA/CULTURE/SCIENCE/VARIED/POP M/ROCK M/EASY M/
LIGHT M/CLASSICS/OTHER M/WEATHER/FINANCE/CHILDREN/SOCIAL/RELIGION/PHONE IN/TRAVEL/LEISURE/
JAZZ/COUNTRY/NATION M/OLDIES/FOLK M/DOCUMENT

FR-5
DSP - Equalizer
• TournezlleboutonVOLpoursélectionnerl’undesparamètres:CLASSIC,ROCK,POP,FLAT.
Recherche TA
• Mode Recherche TA:
Lorsque la station radio écoutée ne reçoit pas d’informations Trafic “TP”, cette fonction permet de passer automatique-
ment une autre station qui n’a pas les mêmes types de programmes mais diffuse des Annonces Trafic “TA”
• Mode ALARME TA:
Si vous sélectionnez ce système, quand il n’y a pas le signal TP, la radio ne recherche aucune station alternative mais
elle émet un signal (ALARME) pour signaler l’absence du signal TP.
PI SON
Action lorsque les 2 stations avec identification de programme différente (PI) codes sont sur la même fréquence:
SON: La radio passe à la nouvelle chaîne pendant quelques secondes et retourne ensuite à nouveau
MUTE: La radio est coupée
RETUNES
Retunes L: temps de recherche automatique pour les Infos Trafic: 90 sec.
Retunes S: temps de recherche automatique pour les Infos Trafic: 30 sec.
MASK DPI
MASK DPI: masque les stations avec des types de programmes différents
MASK ALL: masque les stations avec des types de programmes différents et non RDS.
4. PREREGLAGE DES STATIONS (1, 2, 3, 4, 5, 6)
Vous pouvez mémoriser 6 stations de radio dans chaque bande de fréquence radio et pour rappeler une station
mémorisée appuyez une fois sur la touche numérique correspondante pour rappeler la station.
Pour mémoriser une station de radio:
1. Sélectionnez une bande de fréquence radio si nécessaire.
2. Réglez une station de radio sur la bande en cours.
3. Appuyez longuement sur l’une des touches numériques de 1 à 6 pour effectuer la mémorisation. Lorsque la station
est mémorisée le numéro de la mémorisation s’affiche.
Rappeler une station radio:
1. Sélectionnez une bande de fréquence radio si nécessaire
2. Appuyez brièvement sur touche de présélection pour rappeler la station de radio mémorisé au préalable.
Note: Cet appareil est équipé d’une mémoire intégrée C. I. (Circuits intégrés) pour enregistrer les paramètres de
l’utilisateur tels que les préréglages des stations et les réglages des paramètres audio.
Pour annuler ces réglages, passer en mode radio, appuyez longuement sur le bouton “1” (sans relâcher), suivie de la
touche MODE. L’appareil redémarre automatiquement après 5 secondes.
5. MODE/ TOUCHE LOUDNESS (MODE)
• MODE: Vous pourrez régler le mode d’opérations en sélectionnant: AUX/TUNER/CD-MPMP3/USD/SD/A2DP.
• LOUDNESS: en appuyant sur cette touche plus de deux secondes, vous pourrez sélectionner le mode LOUDNESS.
6. SÉLECTEUR DE BANDES (BAND)
Chaque bande est sélectionnée en appuyant successivement sur FM1/FM2/FM3/MW(AM)1/MW(AM)2.
7. RÉGLAGE DES STATIONS AUTOMATIQUE OU MANUEL
(RECHERCHE AVANT OU RECHERCHE ARRIÈRE )
(A) FONCTION RADIO
Légèrement appuyées; ces touches font fonction de Recherche Automatique.
Une pression de plus de 1 seconde active la Recherche Manuelle.
(B) FONCTION LECTEUR CD/ MP3/ WMA
Maintenues enfoncées, ces touches font fonction de “SAUT DE PLAGE AVANT” ou “SAUT DE PLAGE ARRIERE”.
Une pression de plus de 2 secondes active la RECHERCHE EN AVANT ou EN ARRIERE.
8. RECHERCHE AUTOMATIQUE DES STATIONS (A/PS)
Légèrement appuyée, la radio syntonise chacune des stations présélectionnées.
Lorsque le signal est plus fort que le seuil de syntonisation, la radio demeure sur cette station pendant 5 secondes, en
mettant à zéro le volume pendant un instant et en recommençant ensuite la recherche d’une autre station.
Un appui de plus de 1 seconde permet de mémoriser les six stations plus fortes dans les positions correspondantes
des touches de présélection.
Lorsque l’opération de RECHERCHE AUTOMATIQUE (AS) est terminée, la radio passe au balayage des stations
mémorisées.
9. AFFICHEUR LCD
L’afficheur à cristaux liquides indique les fonctions activées et en cours.

FR-6
CONTROLES DU LECTEUR CD/MP3/WMA
11. TIROIR CD
Insérez le CD avec soin, vérifiez que le label est
bien au dessus. Le CD démarre automatiquement.
12. TOUCHE EJECTION CD
Appuyer sur la touche d’éjection pour retirer le CD.
13. TOUCHE PAUSE
Durant la lecture, appuyer sur la touche PAUSE ‘PAU’
pour arrêter momentanément la lecture. Appuyer de
nouveau pour retourner à la lecture normale.
FONCTION SAUT DE PLAGE / RECHERCHE RAPIDE AVANT
OU ARRIERE (7)
Appuyer sur la touche SKIP ( o ) durant la lecture
pour aller au morceau désiré.
....REVERSE ....AVANT
Appuyer sur ces touches en cours de lecture pour accéder à la plage musicale précédente ou suivante.
Maintenir la touche enfoncée permet d’effectuer une recherche rapide dans la plage musicale.
La lecture normale reprend
une fois la touche relâchée.
14. TOUCHE REPEAT ‘RPT’
L’appui sur cette touche affiche l’indication ‘RPT’ et la lecture du morceau actuel est répétée jusqu’à ce que le mode
répétition soit effacé en appuyant à nouveau sur la touche ‘RPT’.
15. TOUCHE INTRO
L’appui sur cette touche affiche l’indication ‘INT’ et lance la lecture des 10 premières secondes de chaque morceau.
16. TOUCHE RANDOM “RDM”- lecture en mode aléatoire
L’appui sur cette touche affiche l’indication ‘RDM’ et chaque morceau du disque est lu dans un ordre aléatoire et non
dans la séquence normale. Pour désactiver le mode lecture aléatoire, appuyer à nouveau sur la touche ‘RDM’.
17. Touche de station 5/répertoire précédent
18. Touche de station 6/répertoire suivant
Comment sélectionner un fichier MP3/WMA
RECHERCHER PAR TITRES:
• AppuyersurlatoucheA/PSlafonctionestactivée.
• TournerleboutonVOLducôtédroitouducôtégaucheetsélectionnerlepremierchiffresouhaité.
• AppuyersurSELle1er chiffre est fixé et le second clignote.
• TournerleboutonVOLetsélectionnerlesecond,etletroisièmerespectivement.
• AppuyersurBANDetletitresélectionnédémarreimmédiatement.
RECHERCHER PAR CARACTÈRES:
• Appuyerune2eme fois sur A/PS la fonction est activée.
• TournerleboutonVOL(verslagaucheouversladroite)etsélectionnerlalettresouhaitée.
• AppuyersurSELetrépéterlesétapespourunsecondetuntroisièmecaractère.
• Lestitrescommençantsparlemêmecaractèresontaffichés.
• TournerleboutonVOLafindesélectionnerletitresouhaité.
• AppuyersurBANDdémarrerlalecture.
RECHERCHER PAR NOM DE FICHIER:
• Appuyerune3eme fois A/PS, ensuite la recherche par fichier est activée.
• TournerleboutonVOLcelavouspermetdesélectionnerlefichiersouhaité.
• AppuyersurlatoucheBANDpourconfirmerlasélectionetlalecturedupremiertitredufichierdémarre.
Branchement à un lecteur portable MP3
RESET
USB
AUX
Logement SD carte
USB port
AUX EN
RESET
USB
AUX
14 10 111312 17 16 157
LAR-380B
4x45
WATTS

FR-7
20,21. Lecteur de carte mémoire compatible SD & Port compatible USB
Votre autoradio est équipé d’un port USB et un lecteur de carte mémoire SD. Les fichiers MP3 ou WMA stockés sur
ces supports multimédia seront mis en lecture par votre autoradio.
1. Branchez votre support de stockage USB dans le port compatible USB.
2. Si vous utilisez une carte mémoire, insérez-la dans le lecteur de carte mémoire..
3. Le lecteur passe automatiquement à la source utilisée et démarre la lecture.
4. PourlecontrôledelalecturedesfichiersMP3-WMAcontenusdansvotresupportUSBoucarteSD,veuillezvous
référer à la section précédente «Comment sélectionner un fichier MP3/WMA».
Note:
• Enraisond’unegrandediversitédecléUSBetdecartesSD/MMCquiontparfoisdesfonctionsspécifiquesau
fabricant,nousnepouvonspasgarantirquetouslessupportsserontreconnusetquetouteslesfonctions,enthéorie
possible,fonctionnerontcorrectementaveccetappareil.
• NepasutiliserdesdisquesdursUSBsurl’appareil.
22. ENTRÉE « AUX » (auxiliaire) EN FAÇADE
Cette Entrée AUX permet de connecter facilement et simplement la plupart des lecteurs portables et lecteurs MP3.
Mode Bluetooth
Raccordez le microphone à l’autoradio afin d’utiliser les fonctions Bluetooth. De plus, votre téléphone portable doit soutenir
la transmission de données Bluetooth.
Couplage et connexion
• Survotretéléphoneportable,activezlafonctionBluetooth&entrezenmoderecherched’appareilsBluetooth.Unefois
la recherche effectuée, votre téléphone mobile affichera les appareils Bluetooth trouvés. Sélectionnez votre autoradio
qui apparaitra sous le nom «CarBT».
• Unefenêtres’affichevousdemandantd’entrerunmotdepasse.Entrezlemotdepassesuivant:“1234“
Lorsque le couplage est réussi «CONNECT OK» apparait brièvement sur l’écran de l’appareil.
Décrocher / raccrocher
Lorsqu’il y a un appel entrant vous entendrez le signal d’appel via votre téléphone mobile, tandis que le numéro d’appel
s’affichera sur l’écran de votre autoradio.
•
Pour prendre un appel, appuyez sur le bouton “ ” de l’appareil.
• Pourterminerunappelappuyezsurlebouton“ ” de l’appareil.
Rejeter un appel
• Lorsqueletéléphonesonne,appuyezbrièvementsurlatouche“ ” pour rejeter l’appel.
Pour appeler
• L’autoradioetvotretéléphonemobiledoiventêtreconnectés.
• Composerlenumérodetéléphonequevoussouhaitezappeleravecvotretéléphonemobile.
• Leconducteurpeututiliserl’appareilcommeunkitmainlibres.
Bis
• Maintenezenfoncéelatouche
“ ”
sur l’appareil pendant env. 2 secondes.
• Siauparavantaucunnumérod’appelaétésélectionnéparlestouchesnumériquessurledispositiflederniernuméro
d’appel du téléphone mobile sélectionné est composé.
• Siauparavantun numérod’appelaété sélectionnéparlestouchesnumériquesdel’appareilcenuméro d’appelest
composé.
Listes des appels
• Appuyezetmaintenezlebouton [SEL] pour sélectionner le mode «Liste d’appels».
• Pressezlebouton BAND (ENTRER). EN APPEL: Affiche les 20 derniers appels entrants.
• PressezleboutonBAND (ENTRER) à nouveau. APPEL À: Indique les 20 derniers appels sortants.
Remarque:Lafonction«Listed’appels»seraactivéeunefoisqueletéléphonemobileestconnectéàl’autoradioviaBluetooth.
Liste de contacts
Vous pouvez sélectionner jusque 20 contacts de votre répertoire téléphonique et les transférer du téléphone portable à
l’autoradio via Bluetooth. Ainsi vous pourrez appeler vos contacts à partir de votre autoradio.
Remarques:
• Vous ne pouvezpas transférer via Bluetoothvos contacts depuis votre mobileconnecté à votre autoradioavec les
téléphonesAPPLE®.
• Veuillez suivrelesinstructionspourtransférervoscontactsvia Bluetooth dans lemoded’emploidevotretéléphone
portablecarceladiffèreselonlesmarquesdetéléphones.
• Chaquecontacttransféréestdéposéàlasuiteàpartirdel’emplacementdemémorisationPB01àPB20.
• Appuyezlonguementsurlebouton[SEL] pour sélectionner le mode «liste d’appels». “Call list” s’affiche sur l’écran LCD.
• Tournerleboutondevolumepoursélectionner“PH BOOK”.
• Appuyezsurlebouton [BADE] ENTER pour confirmer.
• Tournerleboutondevolumepourfaireapparaîtrelenometlenuméroducontact(dePB01àPB20).
• Appuyezsurlebouton
“ ” de l’appareil pour sélectionner et composer le numéro d’appel.
FR-8
Suppression de la liste des appels et Liste de contacts
Lorsque votre téléphone mobile et votre autoradio sont connectés, appuyez à plusieurs reprises sur le bouton [MODE]
pour sélectionner “BT Mode“.
Appuyez et maintenez enfoncé le bouton “ ” situé sur l’appareil jusqu’à ce que RESET s’affiche à l’écran. La con-
nexion Bluetooth de votre téléphone mobile est coupée et la liste des appels et la liste des contacts contenus dans votre
autoradio seront supprimées.
Fonction Audio-Streaming (A2DP)
• VotreautoradiopossèdelafonctionA2DP(AdvancedAudioDistributionProfile)etpeutainsidiffuserlesdonnéesaudio
de votre téléphone portable sur votre autoradio.
• Assurez-vousquevotremobileetl’autoradiosontconnectés.
Sur votre téléphone portable, sélectionnez un fichier audio et démarrez la lecture.
A2DP s’affichera sur l’écran de votre autoradio. Le fichier est mis en en lecture via les hauts parleurs de votre l’autoradio.
AVERTISSEMENT:
• Surletéléphonemobile,ilpeutéventuellementêtrenécessairedebasculerlalecturevialecasquestéréoBluetooth.
Pourplusd’informations,consultezlemanuelfonctionnementdevotretéléphonemobile
• Aveccertainstéléphonesmobiles,l’appareilnecommutepasautomatiquementsurlemodeA2DP.Danscecas,vous
passezenmodeA2DPenappuyantsurlatoucheMODEàplusieursreprisesjusqu’àlamentionBT MUSIC ou A2DP
s’afficheàl’écran.
Fonction AVRCP (Audio Video Remote Control Profile) : Profil de contrôle audio/vidéo à distance
L’appareilutiliseleprofilAVRCPfacilitantainsilecontrôledelalecturedesfichiersaudio.
• AvecleboutonPreset 1 (12) sur l’appareil, vous pouvez arrêter et / ou redémarrer la lecture des fichiers audio du télé-
phone mobile.
• Aveclesboutons ou de votre autoradio, vous pouvez sélectionner le fichier audio précédent ou suivant du
téléphone mobile.
24. TOUCHE RESET
La touche Reset (24) se trouve sur la façade interne. Utilisez la pointe d’un stylo à bille ou d’un autre objet métallique
pour l’actionner. La touche Reset doit être utilisée dans les cas suivants:
• installationinitialedel’appareil,aprèsavoirbranchétouslescâbles,
• défautdefonctionnementdetouteslestouches,
• symboled’erreuraffiché.
Note: si l’appareil ne fonctionne pas parfaitement, même si vous avez pressé la touche Reset (25), nettoyez la prise der-
rière la façade avec du coton imbibé d’alcool.
SPECIFICATIONS TECHNIQUES
LECTEUR CD/MP3/WMA
Rapport Signal/Brouillage > 60 dB
Séparation Canal > 50 dB (1KHz)
Réponse en fréquence 20Hz - 20 KHz
SYNTONISATEUR FM
Gamme fréquence 87.5 – 108 MHz
Pas Canal 50 kHz
Sensibilité 2.8 µV
Séparation Stéréo 30 dB
Rapport Signal/Brouillage 50 dB
SYNTONISATEUR MW(AM)
Gamme fréquence 522 – 1620 KHz
Pas Canal 9 KHz
Sensibilité 32 dB
SORTIE PREAMPLIFIEE
Sortie 1.5 V (max.)
Impédance 10k Ohm
GENERALITES
Voltage alimentation
12V DC (10.8-15.6V),
Negative à la masse
Impédance haut-parleurs
4 ou 8 Ohms
Puissance maximale de sortie 45W x 4 canaux
Fusible 10A
Sujet à modification sans préavis

EN-1
LOCATION OF PARTS AND CONTROLS
1. POWER ON/OFF ( ) / MUTE (MU)
2. FUNCTION SELECT BUTTON: CONTROLS FOR BASS/TREBLE/BALANCE/FADER /
CALL LIST / DISPLAY / INITIAL VOLUME / ADJ / TA VOL / EON / AF / TA / PTY / DSP / TA SEEK /
PI SOUND / RETUNE / MASK DPI
3. VOL UP/VOL DOWN BUTTON: CONTROLS FOR BASS/TREBLE/BALANCE/FADER /
CALL LIST / DISPLAY / INITIAL VOLUME / ADJ / TA VOL / EON / AF / TA / PTY / DSP / TA SEEK /
PI SOUND / RETUNE / MASK DPI
4. PRESET STATIONS (1,2,3,4,5,6)
5. MODE/LOUDNESS BUTTON (MD/LD)
6. BAND/ENTER BUTTON (BD/ENT)
7. AUTOMATIC OR MANUAL TUNING
(FREQ UP OR FREQ DOWN /CD TRACK/SEARCH BUTTON)
8. AUTO SEEK SEARCH TUNING (A/PS)
9. LCD DISPLAY
10. CD SLOT
11. CD EJECT BUTTON ( )
12. PAUSE BUTTON
13. REPEAT BUTTON
14. INTRO BUTTON (Preview all Tracks)
15. RANDOM BUTTON
16, 17. FOLDER DOWN/UP (MP3/WMA Files only)
18. USB PORT
19. SD CARD SLOT
20. FRONT AUX IN
21. ANSWER A CALL ( )
22. END A CALL ( )
23. MICROPHONE
24. RESET BUTTON
RESET
USB
AUX
181924 25141312 320 17 16 157
4(4-6)
4(1-3)
1023916 22 21 11 8

EN-2
WIRE CONNECTION
LINE OUT:
RED (RIGHT) WHITE (LEFT)
ANTENNA WIRE: BLUE
FRONT AUX IN
CONNECTOR A
4. MEMORY +12V
7. +12V (TO IGNITION KEY)
8. GROUND
Note: (connector A no. 7) must be connected by car ignition
key in order to avoid that car battery being drained when the
car will be not used for long period.
CONNECTOR B
1. REAR RIGHT SPEAKER (+)
2. REAR RIGHT SPEAKER (-)
3. FRONT RIGHT SPEAKER (+)
4. FRONT RIGHT SPEAKER (-)
5. FRONT LEFT SPEAKER (+)
6. FRONT LEFT SPEAKER (-)
7. REAR LEFT SPEAKER (+)
8. REAR LEFT SPEAKER (-)
Note: If your car does not have ISO connector, you can procure it from any car accessory shop
INSTALLATION
A
B
8642
7531
84
7
ANTENNA
CONNECTOR L (WHITE)
R(RED)
LINE OUT ISO CONNECTOR
ANTENNA WIRE (BLUE)
FUSE 10A

EN-3
OPERATION
1. POWER ON/OFF / MUTE (MU)
Press and hold this key to switch the unit on and off. Also this unit can be turned on by pressing any key.
If you just press this key briefly, it will turn to MUTE. To return to sound, press it briefly again.
2. SELECT
3. VOLUME UP/DOWN
Turning the VOL knob Right or Left (3), you can adjust VOL/BASS/TREB/BAL/FAD. To select other functions,
press the “SEL” button shortly until the desired functions is shown on the display. Figure 1 shows how control
functions are selected using the “VOL” knob.
1 3
24
25
26
22
Fig. 1 Selection of sound control functions
1. VOL 2. SEL 3. BAS 4. TRE 5. BAL 6. FAD
Turning the VOL knob Right or Left. Increase or decrease the volume by turning
VOLVOL
or
VOLVOL
. These buttons
can be used to adjust the BASS, TREBLE, BALANCE and FADER.
CALL LIST
SEL
2 sec.
SELDISP SELIN VOLSELADJ
SEL
PTY OFF
SEL
DSP NONE
SEL
TA VOL
SEL
TA OFF
SEL EON ON SEL AF ON
SEL
TA ALARM
SEL
RETUNE L
SEL
MASK DPI SEL
PI MUTE
Press and hold SEL button to adjust CALL LIST/DISPLAY/INITIAL VOLUME/ADJUST TIME/TA VOLUME/EON/
ALTERNATIVE FREQUENCIES/TRAFFIC ANNOUNCEMENT/PROGRAM TYPE/DSP SOUND/TA ALARM/
PI MUTE/RETUNE/ MASK DPI
CALL LIST (see page 6)
DISPLAY
Display informations such as radio frequencies, clock, track and other informations depending on the playing
MODE.
IN VOL
Turn VOL knob to adjust Initial Volume level using this mode.
ADJ
Can adjust clock time. Turn VOL knob clockwise to set hours and counter clockwise to set minutes.
TA VOL
Turn VOL knob to adjust TA Volume (The volume level when Traffic announcement is transmitted).
EON
Turn VOL knob to select EON condition, ON or OFF.
USING THE RDS FUNCTION
What is RDS?
The RDS (Radio Data System) is a digital information system developed by the EBU (European Broadcast Union).
Piggy-backed on normal FM broadcasts, RDS offers a variety of information services and automatic retuning func-
tions for RDS-compatible car stereos.
In 1988, RDS became available in the United Kingdom, France, West Germany, Ireland and Sweden. Test trans-
missions are being conducted in many other European countries. It is expected that RDS will be available in most
western European countries in the near future.
‘AF/REG’ function (ALTERNATIVE FREQUENCIES)
When AF/REG mode is selected, the radio checks the signal strength of the AF all the time.
– Regional mode ON:
AF switching or PI SEEK is implemented to the station which have all PI codes same as current station. REG
segment is turned on, in LCD display.
– Regional mode OFF
The regional code in the format of PI code is ignored when AF switching or PI SEEK is implemented.
‘TA’ function (TRAFFIC ANNOUNCEMENT)
When pressed momentarily, it is activated as TA mode on or off
When TA mode is on and traffic announcement is transmitted
– When the unit is in CD/MP3 mode, it will switch to radio mode temporarily.
– If the volume level was under the threshold point, it will be raised to the threshold point.
– When TP station is received, TP segment is turned on in LCD display.

EN-4
‘PTY’ function (PROGRAM TYPE)
You can select PTY mode by turning Volume knob as below.
PTY OFF/NEWS/AFFAIRS/INFO/SPORT/EDUCATE/DRAMA/CULTURE/SCIENCE/VARIED/POP M/ROCK M/
EASY M/LIGHT M/CLASSICS/OTHER M/WEATHER/FINANCE/CHILDREN/SOCIAL/RELIGION/PHONE IN/
TRAVEL/LEISURE/JAZZ/COUNTRY/NATION M/OLDIES/FOLK M/DOCUMENT
DSP
Turn VOL knob to select DSP mode (Classic, POP, Rock, Flat)
TA ALARM/SEEK
TA SEEK mode:
When newly turned station does not receive TP information for 5 sec., the radio retunes to next station which
has not the same station (PI) as the last station, but has the TP information.
In TA seek mode, the current station can be changed to the completely different station because the unit searches
TP station when the field strength of the current station is very weak, or the current station has no TP signal.
TA ALARM mode:
Any automatic retune mode is not activated, just can hear Beep sound.
PI MUTE/SOUND
Action when 2 stations with different programme identification (PI) codes are on the same frequency:
SOUND: The radio switches to the new channel for a few seconds and then switches back again
MUTE: The radio is muted
RETUNE L/S
RETUNE L: Select 90 seconds as the initial time of automatic TA search.
RETUNE S: Select 30 seconds as initial time.
MASK DPI/ALL
MASK DPI: masked only the AF which has different PI.
MASK ALL: masked the AF which has different PI and NO RDS signal with field strength.
4. PRESET STATIONS (1,2,3,4,5,6)
Six numbered preset buttons store and recall stations for each band.
Storing a station:
1. Select a band (if needed)
2. Select a station
3. Hold a preset button longer than one second. Preset station number appears in the display when station is
saved.
Recall a station:
1. Select band (if needed)
2. Press a preset button for less than one second to select stored station.
Note: This unit is equipped with built-in memory I.C. (Integrated Circuits) to save user settings such as tuner
preset stations and audio control settings. To cancel these settings, switch to Radio mode, press and hold
button “1” for 2 seconds (do not release button) followed by pressing MD button. Unit will automatically
restart after 5 seconds.
5. MODE/LOUDNESS BUTTON (MODE)
By pressing this key, user can select. AUX/TUNER/CD-MP3/USB/SD/A2DP mode.
LOUDNESS: By pressing this key longer than 2 sec., you can select LOUDNESS mode.
6. BAND BUTTON (BAND)
Each band is toggled cyclically by pressing this key FM1---FM2---FM3---MW(AM)1---MW(AM)2.
7. AUTOMATIC OR MANUAL TUNING (FREQ UP OR FREQ DOWN )
(A) RADIO MODE
When pressed momentarily, these keys are operated as SEEK tuning mode.
When pressed longer than 1 sec., they are operated as MANUAL tuning mode.
(B) CD/MP3/WMA PLAYER MODE
When pressed momentarily, they are operated as TRACK UP or TRACK DOWN mode.
When pressed longer than 1 sec., they are operated as CUE or REVIEW mode.
8. AUTO SEEK SEARCH TUNING (A/PS)
By pressing shortly, the radio searches for each preset station.
When field strength level is bigger than the threshold level of stop level, the radio is holding at that preset number
for 5 sec. with releasing mute, and then searches again.
By pressing longer than 1 sec, and then 6 strongest stations are preset to the corresponding preset number.
When AS operation is finished, the radio executes the preset scan.
9. LCD DISPLAY
The Liquid Crystal Display will display the current state of the unit.

EN-5
CD/MP3/WMA CONTROL LOCATION OF PARTS
10. CD SLOT
Carefully insert the CD into the disc slot with the
label side uppermost. The CD starts automatically
play.
11. CD EJECT BUTTON
Press the button to remove the CD.
12. PAUSE BUTTON
During “PLAY”, press (12) ‘PAU’ button to “PAUSE”.
Press it again to resume play.
TRACK/SEARCH BUTTON (7)
FORWARD AND REVERSE TRACK SEARCH (or
changing songs)
Press the SKIP button ( or ) during play to go
to the desired track(song).
....REVERSE ....FORWARD
Press and hold the SKIP button ( or ) during play to scan the disc at high speed. When the desired music
section of the disc is found, release the button. Normal play will resume.
13. REPEAT BUTTON
When this button is pressed, ‘RPT’ indication is displayed and play of the selected track will be continually repeated
until the Track repeat mode is cancelled by pressing ‘RPT’ button again.
14. INTRO BUTTON (Preview all Tracks)
When this button is pressed, ‘INT’ indication is displayed and the first several seconds of each track of the disc
are played. Press again to stop intro and listen to track.
15. RANDOM BUTTON
When this button is pressed, ‘RDM’ indication is displayed and each track of the disc are played in random
instead of normal progression. To cancel RANDOM mode, press ‘RDM’ button again.
16, 17. FOLDER DOWN/UP (In case of MP3/WMA files)
M5: Folder down / M6: Folder up
HOW TO SELECT MP3/WMA FILES
Searching by Track:
• Press“A/PS”,thensearchtrackisactivated.
• Turn“VOL”knobtoleftorright,selectfirstdigitdesired.
• Press“SEL”button,thenthefirstdigitisfixedandseconddigitwillflash.
• Turn“VOL”knobtoleftorright,select2’nd3’rdrespectively.
• Press“BAND”,thesongselectedwillstart.
Searching by Character:
• Press“A/PS”twice,thencharactersearchmodeisactivated.
• Turn“VOL”knobtoleftorright,youcanselectthedesiredletter.
• Press“SEL”button,repeatstepsabovefor2’nd3’rdcharacter.
• Thesongswiththesamecharacterthatyouselectedisdisplayed.
• Turn“VOL”knobtoleftorright,youcanselectthedesiredsong.
• Press“BAND”, then the song selected will start.
Searching by File Name:
• Press“A/PS”3times,thenfoldersearchisactivated.
• Turn “VOL” knob to left or right, you can select the desired folder.
• Press“BAND”,thenthefolderisfixedandthefirstfilewillbeplayed.
RESET
USB
AUX
14 10 111312 17 16 157
LAR-380B
4x45
WATTS

EN-6
Connecting it to Portable MP3 Player
RESET
USB
AUX
SD card slot
USB port
AUX IN
20,21. USB PORT / SD MEMORY CARD
The device is equipped with a USB interface and a memory card reader for SD cards. MP3 or WMA files stored
on these media can be played.
1. Plug your USB storage medium into the USB port.
2. If you use a memory card, insert it into the memory card reader.
3. The player automatically switches to the input used and starts playback.
4. See the section on operations common for audio files on how to control USB or memory card playback.
Note:
• DuetothegreatvarietyofdeviceswithUSBandSDcardinterfacesthatsometimeshavemanufacturer-
specific functions, we cannot guarantee that all media will be recognized and that all operational functions
will be available with this device.
• YoucannotoperateUSBharddrivesonthedevice.
22. FRONT AUX IN
Convenient easy to use front “AUX IN” input jack, allows easy connection of Portable Media and digital MP3
Players.
HOW TO USE BLUETOOTH IN YOUR CAR AUDIO
The microphone unit must be connected to the device in order to use the Bluetooth functions. In addition a mobile
phone is required that supports the Bluetooth data transmission.
Connecting the telephone to the device
• ActivatetheBluetoothfunctiononyourmobilephoneandconductasearchforBluetoothdevices.Afterasuc-
cessful search the entry CarBT appears for the device in the display of the mobile phone.
• Selectthisentryfortheconnectionandforthesubsequentpasswordrequestenterthepassword1234 for the
device. You may possibly have to confirm the connection structure once more.
After a successful coupling CONN OK appears briefly in the device’s display.
Call accept/end
With an incoming call you hear the call signal via your mobile phone, whilst in the device’s display is shown the
call number.
•
You accept an incoming call by the “ ” button on the device.
• Youendthecallbypressingthe“ ” button on the device.
Rejecting a call
• Withanincomingcallpressthe“ ” button on the device to reject the call.
To call
• Thedeviceandthemobilephonemustbeconnected.
• Dialthetelephonenumberthatyouwanttocallfromyourmobilephone.
• Thedrivercanusethedeviceashands-freekit.
Redial
• Holddownthe
“ ”
button on the device for approx. 2 seconds.
• Ifpreviouslynocallnumberwasselectedviathenumberbuttonsonthedevicethelastselectedmobilephone
call number is dialled.
• Ifpreviouslyacallnumberwasselectedviathenumberbuttonsonthedevicethiscallnumberisdialled.
Caller lists
• Pressandhold [SEL] button to select Call list mode.
• PresstheBAND(ENTER) button. IN CALL: Shows the last 20 incoming calls.
• PresstheBAND(ENTER) button again. OUT CALL: Shows the last 20 outgoing calls.
Note:
• TheCallListfeaturewillbeactivatedoncethemobilephoneisconnectedwiththecarradioviaBluetooth.

EN-7
Telephone book:
You can transfer up to 20 contacts (Telephone book entries) from the connected mobile phone to the device and
thus dial and call the contact from the device.
Notice:
• YoucannottransferviaBluetoothyourcontactsfromyourconnectedmobiletoyourcarradiowithAPPLE®
phones.
• DetailsforthetransferenceofthecontactviaBluetoothcanbeobtainedfromtheoperatinginstructionsofyour
mobile phone.
• EachtransferredcontactisfiledinthememoryslotPB01. The contacts that have already been transferred are
automatically filed one memory slot further (PB02, etc).
• Pressandhold [SEL] button to select Call list mode. “Call list” shows on LCD. Rotate the volume knob to select
“PH BOOK”. Press [BAND]ENTER button to confirmed.
• RotatetheVolumeknobtoappearsthenameandnumber(PB01-PB20).
• Pressthe
“ ”
button on the device to select the dialled call number.
Deleting the caller lists and telephone book entries
When the mobile phone’s bluetooth was connected with device, press [MODE] button repeatedly to select “BT
mode”. Press and hold the “ ” button on the device until RESET appears in the display. The Bluetooth con-
nection to the mobile phone is severed and all telephone book entries and caller lists on the device are deleted.
Audio streaming (A2DP)
The device uses the A2DP profile (Advanced Audio Distribution Profile) and therefore can playback your mobile
phone’s audio data.
• Selectanaudiofilefromyourmobilephoneandstarttheplayback.
In the device’s display appears the entry A2DP and the audio data will be played back via the speakers connected
to the device.
NOTICE:
• OnthemobilephoneitmaypossiblybenecessarytoswitchplaybackviatheBluetoothstereoheadset.Consult
the operating manual of your mobile phone for more information.
• WithafewmobilephonesthedevicedoesnotautomaticallyswitchtotheA2DPmode.Inthiscaseyouswitch
totheA2DPmodebypressingtheMODE button several times until the notice BT MUSIC or A2DP appears in
the display.
AVRCP (Audio Video Remote Control Profile)
The device uses the AVRCP profile thus facilitating the control of audio devices.
• WiththePreset 1(12) button on the device you can stop and/or restart the playback of audio files on the mobile
phone.
• Withthebuttons or on the device you can access the previous or next audio file on the mobile phone.
24. RESET
Reset button (24) is placed on the housing.
The reset button is to be activated for the following reason:
• Initialinstallationoftheunitwhenallwiringiscompleted.
• Allthefunctionbuttondonotoperate.
• Errorsymbolonthedisplay.

EN-8
TECHNICAL SPECIFICATIONS
CD/MP3/WMA PLAYER SECTION
Signal to noise ratio > 60 dB
Channel separation > 50 dB (1kHz)
Frequency response 20Hz - 20 kHz
TUNER (FM)
Frequency range 87.5-108 MHz
Sensitivity 2.8 µV
Stereo separation 30 dB
Signal to noise ratio 50 dB
Channel step 50 kHz
TUNER MW(AM)
Frequency range 522-1620 KHz
Channel step 9 KHz
Sensitivity 32 dB
LINE-OUT
Output 1.5V (max.)
Impedance 10k Ohm
GENERAL
Power supply 12V DC (10.8-15.6V allowable)
Speaker impedance 4 or 8 ohm
Output power 45W x 4CH
Fuse 10A
Note: Specification and the design are subject to possible modification without notice due to improvements.

ES-1
1. TECLA ENCENDIDO/APAGADO ( ) / SILENCIAMIENTO (MU)
2. TECLA SELECCIÓN FUNCIONES: CONTROLES PARA BAJOS/AGUDOS/BALANCE/FADER /
CALL LIST / DISPLAY / VOLUMEN INICIAL / ADJ / TA VOL / EON / AF / TA / PTY / DSP / TA SEEK
/ PI SOUND / RETUNE / MASK DPI
3. CONTROL VOLUMEN: CONTROLES PARA BAJOS/AGUDOS/BALANCE/FADER /
CALL LIST / DISPLAY / VOLUMEN INICIAL / ADJ / TA VOL / EON / AF / TA / PTY / DSP / TA SEEK
/ PI SOUND / RETUNE / MASK DPI
4. BOTONES DE PRESELECCION (1,2,3,4,5,6)
5. TECLA MODE / LOUDNESS (MD/LD)
6. TECLA BANDA / ENTER (BD/ENT)
7. TECLAS SINTONIA AUTOMATICA Y MANUAL
( / ) -SALTO/BUSQUEDA CD
8. TECLA SINTONIA AUTOMATICA Y MEMORIZACION (A/PS)
9. PANTALLA LCD
10. RANURA DEL CD
11. TECLA EJECCION CD ( )
12. TECLA PAUSA CD (PAU)
13. TECLA REPETICION CD (RPT)
14. TECLA INTRO CD (INT)(pre visualizar todas las pista)
15. TECLA RANDOM CD (REPR. ALEATORIA) (RDM)
16,17. CARPETA ABAJO/ ARRIBA (solamente en MP3/WMA)
18. PUERTO COMPATIBLE USB
19. RANURA TARJETA SD
20. ENTRADA AUXILIAR DEL PANEL FRONTAL
21. RESPONDER A UNA LLAMADA ( )
22. TERMINAR UNA LLAMADA ( )
23. MICRÓFONO
24. RESET
LOCALIZACION DE TECLAS
RESET
USB
AUX
181924 25141312 320 17 16 157
4(4-6)
4(1-3)
1023916 22 21 11 8

ES-2
INSTALACION
CONEXIÓN DEL CABLEADO
Salida jack RCA:
Blanco (izquierdo) Rojo (derecho)
Antena Electrica: Azul
Entrada jack: Panel Frontal
CONECTOR A
4. Constante Memorla +12V
7. +12V (Accesorios)
8. MASA
Nota: (conector A no. 7) debe estar conectado a la salida
de encendido del vehículo para impedir que la batería se
descargue cuando el vehículo no se utiliza por largos periodos.
CONECTOR B
1. Altavoz Trasero Dcho (+)
2. Altavoz Trasero Dcho (-)
3. Altavoz Delant Dcho (+)
4. Altavoz Delant Dcho (-)
5. Altavoz Delant Izq (+)
6. Altavoz Delant Izq (-)
7. Altavoz Trasero Izq (+)
8. Altavoz Trasero Izq (-)
Si su coche no dispone de conector ISO, puede adquirirlo en cualquier tienda de accesorios para vehículos.
A
B
8642
7531
84
7
CONECTOR
DE ANTENA Izq (Blance)
Dcho (Rojo)
LÍNEA DE SALIDA CONECTOR ISO
ANTENA ELECTRICA (AZUL)
FUSIBLE 10A

ES-3
MANEJO DEL APARATO
1. ENCENDIDO / APAGADO / SILENCIAMIENTO (MU)
Presione y mantenga esta tecla para conmutar la unidad a encendido y apagado. Esta unidad también se
puede encender presionando cualquier tecla.
Si presiona brevemente esta tecla, se conectará el MUTE. Para recuperar el sonido, presiónela brevemente
de Nuevo.
2. SELECCION - VOLUMEN (3)
Gire este control para ajustar VOL/BASS/TREB/BAL/FAD. Para seleccionar las demás funciones presione
ligeramente la tecla SEL hasta que la función deseada aparezca en el display. La fig. 1 muestra como se
seleccionan las funciones.
1 3
24
25
26
22
Fig. 1 Selección de las funciones audio
1. VOLUMEN 2. SELECT 3. BAJOS 4. AGUDOS 5. BALANCE 6. FADER
Las teclas
VOLVOL
y
VOLVOL
aumentan o disminuyen al girarse. Estas teclas sirven para regular los tonos graves,
los tonos agudos, el balance y el fader, cuando pulsamos la tecla VOL.
CALL LIST
SEL
2 sec.
SELDISP SELIN VOLSELADJ
SEL
PTY OFF
SEL
DSP NONE
SEL
TA VOL
SEL
TA OFF
SEL EON ON SEL AF ON
SEL
TA ALARM
SEL
RETUNE L
SEL
MASK DPI SEL
PI MUTE
Presione el botón SEL y manténgalo presionado para ajustar CALL LIST / DISPLAY / INIT VOL / ADJ / TA VOL
/ EON ON / AF / TA / PTY / DSP / TA SEEK /PI SOUND / RETUNE / MASK DPI.
CALL LIST (see page 7)
DISPLAY
Información que se presenta en la pantalla como frecuencias de radio, reloj, pista de música y otra información
según el MODO de funcionamiento.
IN VOL
Gire la perilla de volumen para ajustar el nivel de volumen inicial.
ADJ
con esta función puede ajustar la hora. Gire el botón VOL en el sentido de las agujas del reloj para poner las
horas y en sentido contrario para poner los minutos.
TA VOL
Gire la perilla de volumen para ajustar el volumen TA (el nivel de volumen cuando se transmiten avisos de
tráfico).
EON
Gire la perilla de volumen para seleccionar las condiciones de EON, ON u OFF.
LA FUNCIÓN RDS. EL SISTEMA RDS
RDS (Radio Data System) es un sistema de informaciones digitales de radio desarrollado e introducido por EBU
(European Broadcasting Union). Transmitido en el canal de emisiones normales FM, el RDS ofrece una variedad
de informaciones como el nombre de las emisoras, el programa y le informaciones sobre el tráfico y funciones útiles
tipo la sintonización automática de las mejores señales disponibles en el programa escogido.
Función ‘AF/REG’ (FRECUENCIAS ALTERNATIVAS)
Cuando se selecciona la modalidad AF/REG la radio controla continuamente el nivel de la señal AF.
– Modalidad Regional ENCENDIDO:
La conmutación AF o la Búsqueda PI SEEK está implementada a todas las emisoras que tienen el mismo
código PI que la emisora actual. En el display aparece REG.
– Modalidad Regional APAGADO:
El código Regional en el formato PI es ignorado cuando la conmutación AF o la Búsqueda PI SEEK está
implementada.
Función ‘TA’ (ANUNCIOS DE TRÁFICO)
Cuando se selecciona la modalidad TA y se transmite un anuncio en el tráfico:
– cuando el aparato está en modalidad CD/MP3, cambia a radio temporalmente.
– si el nivel del volumen estaba debajo del umbral bien oíble, se alza al nivel bien oíble.
– Cuando se recibe emisora TP, en el display aparece TP.

ES-4
Función ‘PTY’ (TIPO de PROGRAMA)
Puede seleccionar el modo PTY girando la perilla de volumen de la siguiente manera.
PTY OFF/NEWS/AFFAIRS/INFO/SPORT/EDUCATE/DRAMA/CULTURE/SCIENCE/VARIED/POP M/ROCK M/
EASY M/LIGHT M/CLASSICS/OTHER M/WEATHER/FINANCE/CHILDREN/SOCIAL/RELIGION/PHONE IN/
TRAVEL/LEISURE/JAZZ/COUNTRY/NATION M/OLDIES/FOLK M/DOCUMENT
DSP
Gire la perilla de volumen para seleccionar el modo DSP (música clásica, pop, rock, flat)
TA ALARM/SEEK
Modalidad TA SEEK:
Cuando una recién sintonizada emisora no recibe información TP por 5 seg, la radio resintoniza la siguiente
emisora que no tiene la misma PI que la anterior pero tiene la información TP.
En modo Busqueda (SEEK) TA, la emisora actual puede cambiarse a una emisora completamente diferente
porque la unidad investiga que TP estacionan cuando la fuerza del campo de la emisora actual es muy débil,
o la emisora actual no tiene ningún signo de TP
Modalidad TA ALARM:
Si seleccionamos este sistema, faltando la señal TP, no es buscada ninguna estación alternativa sino que se
emite una señal (ALARMA) para avisar de la ausencia de la señal TP.
PI SOUND/MUTE
SOUND: La radio cambia al nuevo canal de unos segundos y luego vuelve otra vez
MUTE: La radio se silencia
RETUNE L/S
RETUNE L: Selecciona 90 segundos como el tiempo inicial de búsqueda de TA automática.
RETUNE S: Selecciona 30 segundos como el tiempo inicial.
MASK DPI/ALL
Modo MASK DPI: Se cubre sólo la señal AF que tiene distinto PI.
Modo MASK ALL: Se cubre la señal AF que tiene diferente PI y sin señal RDS lo suficientemente fuerte.
4. EMISORAS PRESELECCIONADAS (1,2,3,4,5,6)
Seis botones numerados de almacenamiento de preselecciones y rellamada de emisoras para cada banda.
Almacenamiento de una emisora:
1. Seleccione una banda (si fuese necesario)
2. Seleccione una emisora
3. Mantenga presionado un botón de preselección durante algo más de un segundo. El número de la emisora
preseleccionada aparece en la pantalla cuando la emisora se haya guardado.
Llamar a una emisora:
1. Seleccione banda (si fuese necesario)
2. Presione un botón de preselección menos de un Segundo para seleccionar la emisora almacenada.
Nota: Esta unidad está equipada con una memoria integrada (Circuitos Integrados) para guardar los ajustes
del usuario tales como las emisoras sintonizadas preseleccionadas y el control de los ajustes de audio Para
cancelar estos ajustes, conmute al modo Radio, presione y mantenga el botón “1” durante 2 segundos (no libere
el botón) continúe presionando el botón MODE. La unidad automáticamente se restaurará tras 5 segundos.
5. BOTÓN MODE/LOUDNESS (MODO/INTENSIDAD) (MODE)
Pulsando esta tecla, puede seleccionarse: Modalidad AUX / TUNER / CD-MP3 / USB / SD / modo A2DP.
LOUDNESS: si presiona este botón durante más de 2 segundos, podrá seleccionar el modo intensidad sonora.
6. TECLA BAND (BAND)
Cada banda se conmuta pulsando consecutivamente esta tecla FM1--FM2--FM3--MW(AM)1--MW(AM)2.
7.
SINTONIZACIÓN AUTOMÁTICA O MANUAL (FREQ ARRIBAO FREQ ABAJO )
(A) MODALIDAD RADIO
Si se pulsa ligeramente esta tecla hace de Búsqueda Automática.
Pulsando por más de 2 segundos, se activa la Búsqueda Manual.
(B) MODALIDAD LECTOR CD/MP3/WMA
Si se pulsa ligeramente, esta tecla hace de SALTO DE PIEZAS ARRIBA o ABAJO.
Pulsando por más de 2 segundos, se activa la BÚSQUEDA ADELANTE o ATRÁS.
8. SINTONIZACIÓN AUTOMÁTICA (AUTO SEEK SEARCH) (A/PS)
Si se pulsa ligeramente, la radio sintoniza cada una de las emisoras preseleccionadas.
Cuando la señal es más fuerte que el umbral de sintonización, el radio se mantiene en esa emisora por 5
segundos, poniendo en cero el volumen por un momento y partiendo para la búsqueda de otra emisora.
Pulsando más de 1 segundo, las seis emisoras más fuertes serán memorizadas en las corresondientes posi-
ciones de las teclas de preselección.
Table of contents
Languages:
Other Tokai Car Receiver manuals

Tokai
Tokai LAR-72 User manual

Tokai
Tokai LAR-212 User manual

Tokai
Tokai LAR-100B User manual

Tokai
Tokai LAR-211 User manual

Tokai
Tokai LAR-11 User manual

Tokai
Tokai LAR-91B User manual

Tokai
Tokai LAR-354B User manual

Tokai
Tokai LAR-15 User manual

Tokai
Tokai LAR-352 B User manual

Tokai
Tokai LAR-75 Installation and operation manual
Popular Car Receiver manuals by other brands

Panasonic
Panasonic CQ-RDP383N operating instructions

Sony
Sony CDX-L550X - Fm/am Compact Disc Player Service manual

Pioneer
Pioneer DEH-P490IB - Premier Radio / CD Operation manual

Jensen
Jensen VM9225BT operating instructions

RetroSound
RetroSound Retro Classic user manual

Kenwood
Kenwood KDC-BT948HD quick start guide