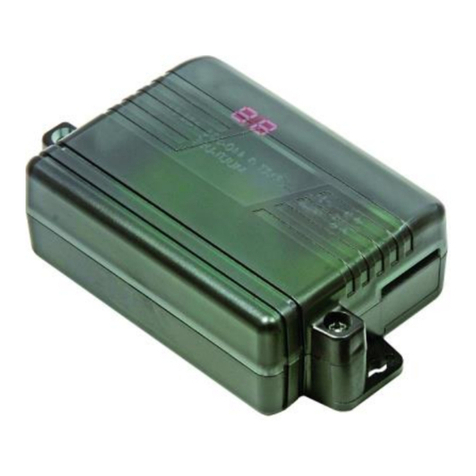
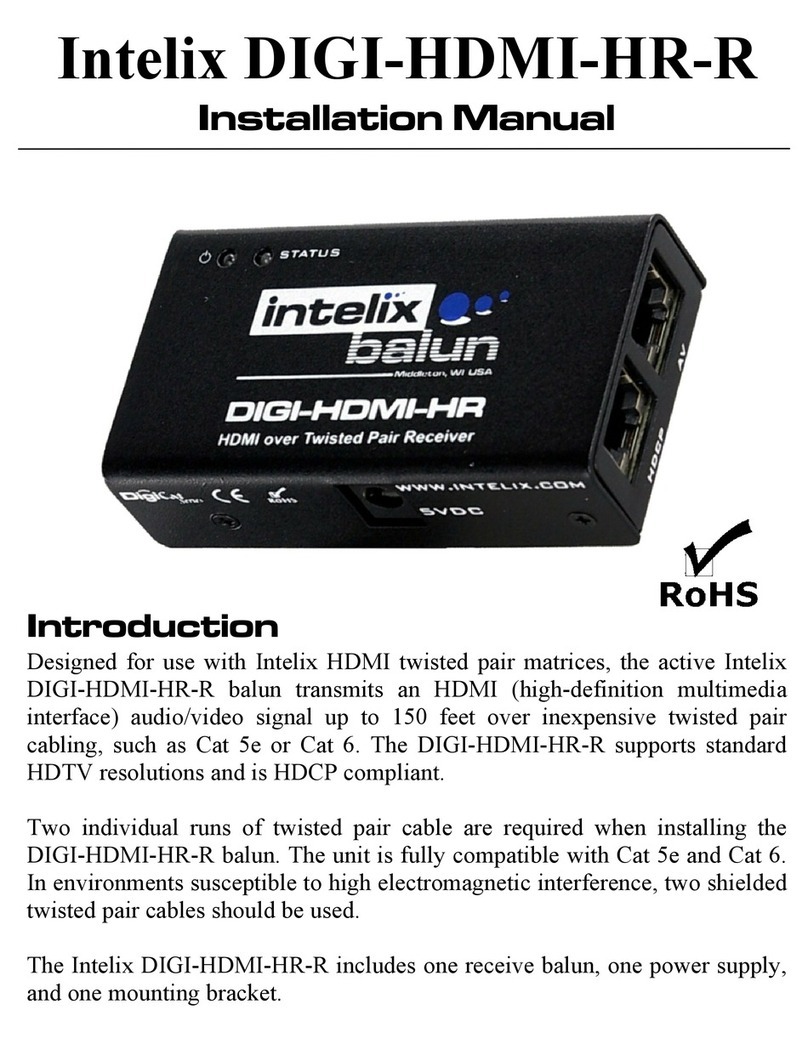
Tomek RX01 User manual

lm - DERXPE001 11/03
Model with burner or solenoid valve control in wireless
temperature control systems
Modèle avec commande pour chaudière ou électro-
vanne en systèmes de réglage thermique sans fils
Modell mit drahtloser Steuerung für Durchlauferhitzer
oder Elektroventil in Heizanlagen
Modello con comando per caldaia o elettrovalvola in
impianti con sistema di termoregolazione senza fili
Modelo para controlar calderas o electroválvulas en
instalaciones de termorregulación sin cables
1 ZONE WALL MOUNTING RADIO RECEIVER
RECEPTEUR RADIO 1 ZONE POUR MONTAGE EN SAILLIE
FUNKEMPFÄNGER 1 ZONE WANDMONTAGE
RICEVITORE RADIO 1 ZONA DA PARETE
RECEPTOR RADIO DE 1 ZONA DE PARED

2
D - Deutsch
F - Français
GB - English
TECHNICAL SPECIFICATIONS - INSTRUCTIONS FOR
THE INSTALLER - PUTTING INTO OPERATION AND USE
DONNÉES TECHNIQUES - INSTRUCTIONS POUR
L’INSTALLATEUR - MISE EN MARCHE ET UTILISATION
TECHNISCHE DATEN - NORMEN FÜR DIE INSTALLATION
- INBETRIEBNAHME UND GEBRAUCH
Page 3
Page 13
Seite 23

TECHNICAL SPECIFICATIONS
3
G
B
ENGLISH
Supply voltage: 230 V~ 50-60 Hz
Device Absorption: 2,5 VA max
Type of action, disconnection and appliance: 1/B/Electronic
Type of Output: 1 relay with unipolar changeover contact NC/NO/COM,
voltage-free 5(2) A / 250 V~
Wire section at terminals: min. 1 mm ÷ max. 2.5 mm
Reception frequency (carrier): 868.35 MHz
Maximum signal capacity in free air: 120 m
Maximum signal capacity in the presence of walls: 30 m (according to the chap. 1.1 and to the chap. 1.4)
Signal reception mode: antenna internal to the receiver
Type of insulation: Class II
Protection degree: IP30 / wall-mounted
Pollution: normal
Operating temperature limits: -20 °C ÷ +70 °C
Storage temperature limits: -25 °C ÷ +85 °C
Reference standards : LVD EN 60 730-1 EMC EN 301 489-3 RADIO EN 300 220-3
22
(R&TTE DIRECTIVE 1999/5/CE)
PERFORMANCE DATA
!
!
!
!
!
!
!
!
Coupling transmitters in self-learning mode, facilitated by luminous and audio signals.
It is possible to erase a transmitter coupling to the zone even in the event of transmitter failure.
Manually forcing the state of the output to test the system (5 minutes, resettable).
“RESET“ command to erase temporary data in memory and deactivate commands.
Permanent modifiable memory for transmitter couplings.
Luminous signals indicating malfunctions due to the absence of transmission or an almost dead battery.
Highly reliable communications thanks to the
Lighted and/or audio signal, on 3 levels, of the TEST signal to verify the presence and capacity of the signal (VMETER)
double transmission of data.

1 - INSTRUCTIONS FOR THE INSTALLER
DIMENSIONS
RESET
ON
133
90
25
RESET
ON
Burner
Receiver
Chronothermostat
Fig. 1.i
INSTALLATION EXAMPLE
OK
RESET
ON
RESET
ON
INSTALLATION
Fig. 2.i
4
G
B
G
B
1.1 - INSTRUCTIONS AND REQUIREMENTS FOR INSTALLING THE RECEIVER
Install the receiver at a height that allows the antenna to stick up above any nearby metal container (boiler, expansion tanks, metal
cabinets); avoid positioning the antenna near cables and electrical panels (fig. 1.i - fig. 2.i)
Cabinets, walls and slabs containing metal can limit the operation of the product
This system is incompatible with radio products a working on the same frequency
(868,35 MH) using permanent emission mode.
.
Instructions relative to the structure of realizable systems and the assignment of areas to individual timer-thermostats or
thermostats are shown in the technical documentation for the transmitter devices (chronothermostats and/or thermostats).
Important: installation and electrical connections of devices and appliances must be carried out by skilled people and in com-
pliance with current regulations. The manufacturer declines any liability in connection with the use of products subject to spe-
cial environmental and/or installation standards. Exemples given in the manual are purely indicative.

Fig. 3.i
RESET
ON
RESET
ON
Fig. 4.i
AA
CC
BB
Fig. 5.i
D= Catches for locking the
front to the base
Removable area for the
passage of wires
(Installation with built-in box)
Removable areas for
installation with trunking
system.
DD
5
G
B
1.2 - INSTALLING THE BASE ON THE WALL
Installing the device: INDEPENDENT - FIXED
ATTENTION: INSTALLATION MUST BE PERFORMED AFTER SECTIONING
THE MAINS SUPPLY - 230 V .~
For installation, it is necessary to separate the front part, complete with
electronic card, from the base.
!
!
First on one side and then on the other, insert a screwdriver in the slots
located on the sides of the product, exerting light pressure on the locking
catch, then, with a small forward rotation of the screwdriver (as shown in
figure 3.i), lift the front.
Remove the front from the base (the resistance to removal is due to the
coupling pin on the terminal strip) fig. 4.i.
From the base, remove the parts prepared for the passage of the connection wires shown in fig. 5.i.
Pass the connection wires through the opening you have made.
Attach the base to the wall (or built-in box), with 2 screws using the pairs of holes provided (fig. 5.i).
Make the electrical connections to the terminals located on the base as shown in the next chapter.
!
!
!
()A-A, B-B, C-C

N
Open
Close
L1 L2N
L1 L2N
L1 L2N
L
L
L
230 V~
230 V~
230 V~
N
N
N
14
2536
14
2536
14
2536
N
Example of a motorized
solenoid valve connection
- 3-wire
Example of a solenoid
valve connection - 2-wire
Example of a burner
connection
Burner
Solenoid valve
Solenoid valve
Receiver
Receiver
Receiver Fig. 8.i
Fig. 7.i
Fig. 6.i
6
1.3 - ELECTRICAL CONNECTIONS
G
B
SWITCH MAINS SUPPLY OFF230 V~
With reference to figures 6.i, 7.i and 8.i
1
2
:
terminal = NEUTRAL
terminal = LINE
Make the connection to the mains supply
Make the connections to the device to be controlled
(Such as: a burner, pump, or 2 or 3-wire motorized solenoid valve, servomotor)
Terminal = line, available for controlling the load
terminal = contact normally closed
terminal = contact normally open
terminal = common
3
4
5
6
NOTES AND INSTRUCTIONS FOR THE INSTALLER
!
!
!
!
Also pay careful attention to the instructions for the device being
controlled.
In the presence of loads with absorption higher than the data on the
product rating plate, interpose a power relay or a suitably
dimensioned contactor. In the presence of highly inductive loads
we recommend connecting an RC filter in parallel with the load.
When making the electrical connections, in the case of a wall
installation without built-in box, pay particular attention that the
cabling is properly placed and does not interfere with the correct
closing of the front on the base.
In the case of installing the receiver on a metal wall, use double
insulated cables for the electrical connections.

Fig. 9.i
RESET
ON
Semi-hole: seat for vertically placed antenna
Fig. 10.i
Antenna factory position
RESET
ON
7
G
B
1.4 - ATTACHING THE FRONT WITH CARD TO THE BASE
!
!
Reinsert the front part with card on the base being careful to correctly
insert the pins connecting the card to the terminals.
Push the front on to the base using both hands as shown in figure 9.i ,
until the catches click and lock the front to the base.
ATTENTION: IN THE EVENT THAT, DUE TO ENVIRONMENTAL CONDITIONS, YOU DETECT AN EXCESSIVELY LOW RADIO
SIGNAL, WE RECOMMEND MOVING THE ANTENNA OUTSIDE THE RECEIVER AND POSITION IT VERTICALLY.
With reference to the installation procedure (chapter 1.2):
Open the receiver
Move the antenna wire from its seat (upper inside part of the
front) and rotate it vertically
Pass the wire through the small semi-hole provided for the
purpose (fig. 10.i)
Carefully reclose the receiver (fig. 9.i - fig. 10.i).
!
!
!
!
!
SWITCH MAINS SUPPLY OFF230 V~
Power the receiver and attempt to operate it and couple the
transmitter, as shown in chapter 2 “PUTTING INTO OPERATION
AND USE.”

8
G
B
2 - PUTTING INTO OPERATION AND USE
2.1 - SIGNAL AND COMMAND LEGEND
RESET
ON
LED ON:
lit = power present
intermittent = transmitter malfunction
VMETER:
LED indicating the intensity of
the received radio signal
Key “ ” - Command
- Channel
“RESET” key
Fig. 1
Place for label
Fig. 2
1 s
on
on off
on off
Off
Fixed on
Fixed off
1 prolonged impulse
Intermittent (t on = t off)
every second
LED
Appearance of the lighted signals
Prolonged sound
Short sound
Audible signal
n° s
LED ““- Command status
- Channel status

9
G
B
5 s
5 minutes
Fig. 3 Fig. 4
RESET
Fig. 5
2.2 - NEW DEVICE
When turned on, the receiver has only the lit.
there may be a weak lighted signal on the of the , due to the presence of radio interference.
ON LED
LED VMETERN.B.: lower
2.3 - TEMPORARILY FORCING THE STATE OF THE CONTROL OUTPUT (for example, to test the system)
B) TRANSMITTER COUPLED AND HEAT REGULATION ACTIVE
key
The above-indicated operations can also be performed, using the same methods, during normal heat regulation operation; in this case,
the temporary forced control will cause the transmitter to be excluded and the reversal of the command status: if active, it will be
deactivated and vice versa. During the forced state, the “ ” is not functional.
Cancelling the temporary forcing of the control
Reset key
N.B.: Reset
!Briefly press the ; when released the temporary forced control is
cancelled (fig.5).
Before performing this operation, consult chapter 2.9
“”
“”
A) TRANSMITTER NOT YET COUPLED OR NOT ACTIVE
key LED
key
Hold down the “ ” until there is a brief audible signal, then release it: the control is activated and the corresponding is
steady on (fig.3).
The control will remain activated for 5 minutes, at the end of which, an audible signal will continue for to alert the operator of
its imminent deactivation (fig.4): if you wish to keep it active, press the “ ” again while the audible signal is sounding;
otherwise, when the signal ceases, the control will be deactivated.
!
5 seconds

10
G
B
2s
Fig. 6
2s
Fig. 7
2s
Fig. 8
2.4 - COUPLING TO A TRANSMITTER
Activate the “Test” state on the transmitter to be coupled, as explained in the chapter in the
transmitter manual.
“”Coupling to the receiver
ON THE RECEIVER
ON THE TRANSMITTER
The “ ” is off
the will
flash
LED
key LED
Deactivate “Test” mode
(receiver not coupled)
Hold the “ ” pressed until you hear a single audible signal; then let go:
(fig.6).
The transmitter is coupled to the receiver.
, as explained in the specific chapter of
the transmitter manual.
!
Deactivate “Test” mode
ATTENTION: Reset
N.B.:
ON THE TRANSMITTER, as explained in the specific chapter of the transmitter manual.
the coupling status is stored in permanent memory and is not erased by the command or by a power failure.
test mode on the transmitter automatically terminates 3 minutes from activation.
A) - FIRST COUPLING TO A TRANSMITTER
ATTENTION: LED
Test
Test
key
LED Test
if the “ ” is flashing at the beginning of the operation it means
that the transmitter in “ ” mode has already been coupled to the receiver. To confirm
the coupling: deactivate “ ” mode on the transmitter.
To cancel the coupling: hold down the “ ” until you hear a single beep; then
release it; (fig.7).the is off Deactivate “ ” mode on the TRANSMITTER.
ON THE RECEIVER
(receiver already coupled to another transmitter)
Hold the ” pressed until you hear a single beep; then release it:
(fig. 8).
(in “Test” mode)
The “ ” is steady on
“ the is
flashing
The new transmitter is coupled to the receiver.
LED
key LED!
B) - SUBSEQUENT TRANSMITTER COUPLINGS (such as: replacing the transmitter)

11
G
B
Fig. 9
LOW MEDIUM HIGH
SIGNAL INTENSITY
ON ON ON
Fig. 10
Command
activated
Command
deactivated
ON
2.5 - CHECKING THE INTENSITY OF THE RECEIVED SIGNAL - VMETER
ON THE TRANSMITTER
!Activate the as explained in the specific chapter of the transmitter manual.“check the intensity of the radio signal mode”,
ON THE RECEIVER
!
!
The intermittent “ ” indicates the coupling condition of the
transmitter.
The , together with the , indicate the
intensity of the radio signal received, as illustrated in the figures to the
side.
Verification mode on the transmitter automatically terminates 3
minutes after activation.
If you wish to interrupt the verification, deactivate mode
, as explained in the instruction manual.
LED
3 LEDs VMETER
N.B.:
on the
transmitter
on the audible signal
“Verify”
ATTENTION:
key LEDs VMETER
even in it is possible to check the intensity of the last radio signal received (the last signal is always
stored):
Press the “ ” for about 2 seconds, then let go: the will show the intensity of the last signal received for 5
seconds.
“normal operation”
on the!
2.6 - NORMAL OPERATION
The transmitter controls heat regulation and sends commands and control signals to the receiver, which
implements them on the burner or solenoid valve.
:
In the event the transmitter is set to (system excluded), the receiver deactivates the load and remains
in this state until it receives a new instruction from the transmitter.
The operational safety of the control is assured by the
double sending of commands, a short time apart, and by an effective self-diagnostic system.
lit
“ ” lit with command activated, off with command deactivated
: brief lighting of 1, 2 or all the at each radio signal received.
!
!
!
ON LED
LED
VMETER LED LEDs
OFF

12
G
B
ON
Fig. 11
4
s
6 s 4 s 1 s 1 s 1 s
RESET
ON
2s
Fig. 12 Fig. 13
2.7 - SIGNALING A TRANSMITTER MALFUNCTION
The receiver reports two types of transmitter anomalies:
In both cases, the signal is given by the intermittent,
in the case of the lack of a radio signal, the control of the load is also
deactivated (Burner control deactivated).
!
!
Failure to receive a radio signal for more than 30 minutes
Transmitter battery almost dead
ON
LEDs
ATTENTION:
simultaneous lighting of the and
channel .
2.8 - DELETING A TRANSMITTER COUPLING FROM THE RECEIVER(even in a state of malfunction)
It is possible to delete a transmitter coupling even if it is not able to transmit the Test signal.
Press and hold the “ ” until the end of the sequence of beeps shown in the figure; then release it. The transmitter
coupling is erased from the memory of the receiver and the channel is free.
!key
ATTENTION:
RESET Key
in the event the key is released before the
beginning of the long beep, the operation is automatically
cancelled and the command output is set to
(see paragraph 2.3).
Press to return to normal operation.
“Temporary
Forced”
“”
2.9 - RESET
When the key is released during this period of
time, the operation is cancelled
The command on the receiver cancels all the data stored in the device
except for the transmitter coupling.
Briefly press the : when it is released, will light together
with a and the will be steady lit.
RESET
all the!RESET key LEDs
beep ON LED

DONNÉES TECHNIQUES
FRANÇAIS
13
Tension d'alimentation: 230 V~50 ÷ 60 Hz
Absorption du dispositif: 2,5 VA maxi
Type d'action, déconnexion et appareil: 1 / B / Electronique
Type de sortie: 1 relais avec contact unipolaire en échange, sans potentiel
NF/NO/COM - 5(2) A / 250 V~
Section des fils aux bornes: mini. 1 mm ÷ maxi. 2,5 mm
Fréquence de réception (porteuse): 868,35 MHz
Portée maximale du signal à l'air libre: 120 m
Portée maximale du signal en présence d'obstacles: 30 m (en accord avec le chap. 1.1 et le chap. 1.4)
Mode de réception du signal: antenne intégrée dans le récepteur
Type d'isolation: Classe II
Degré de protection: IP 30 / montage mural
Pollution: normale
Limites de la température de fonctionnement: -20 °C ÷ + 70 °C
Limites de la température de stockage: -25 °C ÷ + 85 °C
Normes de référence : LVD EN 60 730-1 EMC EN 301 489-3 RADIO EN 300 220-3
22
(Directive R&TTE 1999/5/CE)
PERFORMANCES
!
!
!
!
!
!
!
!
Accouplement des transmetteurs en auto-apprentissage, facilité par des indications lumineuses et sonores.
Possibilité d' effacement de l'accouplement du transmetteur à la zone même en cas de panne de transmission.
Forçage manuel de l'état de la sortie pour le test de l'installation (5 minutes, reprogrammables).
Commande“RESET“ pour effacement des données temporaires stockées en mémoire et désactivation commandes.
Mémoire permanente, modifiable, pour l'accouplement du transmetteur.
Signalisation lumineuse de l'état de panne due à l'absence de transmissions et à la batterie presque épuisée.
Fiabilité élevée de la communication grâce à la
Indication lumineuse et/ou sonore, sur 3 niveaux, du signal de TEST pour la vérification de la présence et du débit du signal
(VMETER).
double transmission des données.
F

DIMENSIONS EXEMPLE D’INSTALLATION INSTALLATION
F
14
1.1- INDICATIONS ET PRESCRIPTIONS POUR L'INSTALLATION DU RÉCEPTEUR
Installer le récepteur à une hauteur qui permet à l'antenne de dépasser la chaudière et les conteneurs métalliques avoisinants
(chauffe-eau, vases d'expansions, armoires métalliques); éviter la présence de câbles et de tableaux électriques à proximité de
l'antenne (fig. 1.i - fig. 2.i).
Armoires, murs et sols en matière métallique peuvent limiter le fonctionnement du produit
Ce système est incompatible avec les produits radio fonctionnant sur la mème bande de fréquence
(868,35 MHz) utiliant un mode d’émission permanente.
.
Les indications concernant la structure des installations réalisables et la répartition par zones des chronothermostats ou
thermostats sont reportées dans la documentation technique spécifique des différents dispositifs transmetteurs
(chronothermostat et/ou thermostat).
Important: l’installation et le branchement èlectrique des dispositifs et appareils doivent être effectués par du personnel qualifié et
conformément aux normes et aux réglementations en vigueur. Le constructeur décline toute responsabilité en ce qui concerne
l’utilisation de produits devant respecter des normes particulières quant au milieu ambiant et/ou à l’installation. Les exemples
présentés dans cette documentation sont indicatifs.
RESET
ON
133
90
25
RESET
ON
Fig. 1.i
OK
RESET
ON
RESET
ON
Fig. 2.i
Chronothermostat
Récepteur
Chaudière
1 - INSTRUCTIONS POUR L’INSTALLATEUR

Fig. 5.i
15
Fig. 3.i
RESET
ON
RESET
ON
Fig. 4.i
F
1.2 - INSTALLATION DE LA BASE AU MUR
Installation du dispositif: INDEPENDANT - FIXE
Pour l'installation il est nécessaire de séparer la partie avant, qui contient
la carte électronique, de la base.
ATTENTION: L'INSTALLATION DOIT ÊTRE EXÉCUTÉE APRÈS AVOIR COUPÉ
L'ALIMENTATION DE 230 V~.
!
!
D'abord sur un côté puis sur l'autre, insérer un tournevis dans les feintes
appropriées situées aux côtés du produit, exercer une lègere pression sur le
crochet de verrouillage, par une petite rotation en avant du tournevis (comme
indiqué dans la figure 3.i), soulever la partie avant.
Extraire la partie avant de la base (la résistance à l'extraction est due aux broches
d'accouplement aux bornes) fig.4.i.
Enlever de la base les parties prévues pour l'acheminement des fils de connexion illustrées dans la fig. 5.i.
Faire passer les fils de connexion à l'installation par l'ouverture obtenue.
Fixer la base à la paroi (ou boîtier à encastrement), avec 2 vis en utilisant les couples de trous ( )
préconfigurés (fig. 5.i).
Exécuter les branchements électriques aux bornes situées sur la base comme indiqué au chapitre suivant.
!
!
!
A-A, B-B, C-C
AA
CC
BB
D= Crochets pour les verrouil-
lages de la partie avant à
la base.
Zone amovible pour l'achemine-
ment des fils (installation avec
boîtier à encastrement).
Zones amovibles pour la
installation avec conduites.
DD

N
Ouvre
Ferme
L1 L2N
L1 L2N
L1 L2N
L
L
L
230 V~
230 V~
230 V~
N
N
N
14
2536
14
2536
14
2536
N
Exemple de raccordement
à l’électrovanne motorisée
- 3 fils
Exemple de raccordement
à l'électrovanne - 2 fils
Exemple de raccordement
à la chaudière.
Chaudière
Electrovanne
Electrovanne
Récepteur
Récepteur
Récepteur Fig. 8.i
Fig. 7.i
Fig. 6.i
16
F
1.3 - BRANCHEMENTS ÉLECTRIQUES
DÉSACTIVER L'ALIMENTATION DE RÉSEAU 230 V~.
Avec référence aux figures 6.i, 7.i e 8.i :
1
2
3
4
5
6
Effectuer la connexion à l'alimentation réseau
Exécuter les branchements électriques au dispositif à commander
borne n° = NEUTRE
borne n° = LIGNE
borne n° = ligne disponible pour la commande de la charge
borne n° = contact normalement fermé
borne n° = contact normalement ouvert
borne n° = commun
(ex. : chaudière, pompe, électrovanne motorisée à 2 ou 3 fils, servomoteur)
!
!
!
!
Respecter scrupuleusement les indications qui sont indiquées dans les
instructions des dispositifs commandés.
En présence de charges de consommation supérieures aux données de la
plaque de produit, intercaler un relais de puissance ou un contacteur de
dimensions opportunes. En présence de fortes charges inductives il est
conseillé de raccorder un filtre RC en parallèle à la charge.
Lors de l'exécution des branchements électriques, en cas d'installation au
mur sans boîtier à encastrement, faire notamment attention à ce que le
câblage soit bien disposé sans entraver la bonne fermeture de la partie
avant sur la base.
Si l'on installe le récepteur sur une paroi métallique, utiliser les câbles
double isolation pour les branchements électriques.
NOTES ET PRESCRIPTIONS POUR L'INSTALLATEUR

Fig. 9.i
RESET
ON
Demi-trou : logement pour antenne en verticale
Fig. 10.i
Position de l'antenne
en usine
RESET
ON
17
F
1.4 - FIXATION DE LA PARTIE AVANT ÉQUIPÉE DE CARTE À LA BASE
!
!
Réinsérer dans la base la partie avant avec la carte en faisant attention
à la bonne introduction des broches de connexion de la carte aux
bornes.
Pousser avec les deux mains la partie avant sur la base, comme illustré
dans la figure 9.i, jusqu'au déclic de verrouillage des crochets
appropriés de la base.
Alimenter le récepteur et veiller à la mise en service et à
l'accouplement au transmetteur comme indiqué au chapitre 2
“MISE EN MARCHE ET UTILISATION”.
ATTENTION: SI LE SIGNAL RADIO DÉTECTÉ EST EXTRÊMEMENT FAIBLE, DU FAIT DE CONDITIONS AMBIANTES TRÈS
PARTICULIÈRES, IL EST CONSEILLÉ DE PORTER L'ANTENNE À L'EXTÉRIEUR DU RÉCEPTEUR ET DE LA POSITIONNER À
LA VERTICALE.
En référence à la procédure d'installation (chapitre 1.2):
!
!
!
!
!
DÉSACTIVER LA TENSION DE RÉSEAU 230 V~
Ouvrir le récepteur
Déplacer le fil d'antenne de son logement (partie
supérieure interne du devant) et le tourner à la verticale
Faire passer le fil dans le petit trou prévu approprié
(fig. 10.i)
Refermer attentivement le récepteur (fig. 9.i - fig.10.i).

18
F
Fig. 2
1 s
on
on off
on off
Off
Allumée fixe
Eteinte fixe
1 impulsion prolongée
Intermittente (t on = t off)
toutes les secondes
LED
Aspect des indications lumineuses
Tonalité prolongée
Tonalité courte
Indications sonores
n° s
2 - MISE EN MARCHE ET UTILISATION
2.1 - LÉGENDE DES INDICATIONS ET COMMANDES
RESET
ON
LED ON:
allumée = alimentation présente
intermittente = panne du transmetteur
VMETER:
LED indicateurs d'intensité
du signal radio reçu
Touche “ ” - Commande
- Canal
Touche “RESET”
Fig. 1
Logement porte-étiquette
LED “ “ - É de la commande
- É du canaltat
tat

19
F
5 s
5 minutes
Fig. 3 Fig. 4
RESET
Fig. 5
2.3 - FORÇAGE TEMPORAIRE DE L'ÉTAT DE LA SORTIE DE COMMANDE (ex.: pour le test du système)
A) TRANSMETTEUR PAS ENCORE ASSOCIÉ OU PAS ACTIF
touche LED
touche
!Maintenir la pression sur la “ ” jusqu'à entendre une légère tonalité , et relâcher : la commande est activée et la
correspondante est allumée fixe (fig. 3).
La commande restera activée pendant 5 minutes au bout desquels une indication sonore continue de avertira
l'opérateur de la désactivation imminente (fig. 4): pour tenir la commande active, appuyer de nouveau, dans les délais du signal
sonore, sur la “ ” ; dans le cas contraire, la commande est désactivée à la fin du signal sonore.
5 secondes
Annullation du forçage temporaire de la commande
!Appuyer brièvement sur la “ ” ; au relâchement le forçage temporaire
sera annulé (fig.5).
avant d' exécuter cette opération consulter le paragraphe 2.9 “ ”
touche Reset
N.B.: Reset .
B) TRANSMETTEUR ASSOCIÉ ET RÉGLAGE THERMIQUE ACTIF
touche
Les opérations indiquées ci-dessus peuvent être exécutées de la même façon même pêndant le fonctionnement normal du réglage
thermique ; dans ces cas, le forçage temporaire déterminera l'exclusion du transmetteur et l'inversion du statut de la commande :
s'il est activé il sera désactivé et vice versa. Pendant l'état de forçage, la “ ” n'est pas opérationnelle.
2.2 - APPAREIL NEUF
À l'allumage du récepteur, seule la est allumée.
de faibles signaux lumineux sont possibles sur la du , en raison des interférences radio.
LED ON
N.B.: LED VMETERinférieure

20
F
2s
Fig. 6
2s
Fig. 7
2s
Fig. 8
2.4 - ACCOUPLEMENT À UN TRANSMETTEUR
Activer, sur le transmetteur à accoupler l'état de “Test”, comme indiqué au chapitre
du manuel du transmetteur.
“”Accouplement au récepteur
A) - PREMIER ACCOUPLEMENT À UN TRANSMETTEUR
SUR LE RÉCEPTEUR
SUR LE TRANSMETTEUR:
La “ ” est éteinte
la est clignotante
LED
touche
LED
désactiver l'état de “Test”
(récepteur non accouplé)
Maintenir la pression sur la “ ” jusqu'à l'émission d' un simple signal
sonore; puis la relâcher: (fig.6).
Le transmetteur est accouplé au récepteur.
, comme indiqué dans le
chapitre spécifique du manuel du transmetteur.
!
ATTENTION LED
Test
Test
touche
LED
Test
: si au début de l'opération la “ ” est clignotante cela signifie que le
transmetteur est sous “ ” et qu'il a déjà été accouplé au récepteur.
Pour confirmer l'accouplement: désactiver l'état de “ ” sur le transmetteur.
Pour annuler l'accouplement: maintenir la pression sur la “ ” jusqu'à l'émission
d'un simple signal sonore; puis la relâcher: (fig.7).la est éteinte
Sur le transmetteur, désactiver l'état de “ ”.
SUR LE RÉCEPTEUR
La “ ” est allumée fixe
la est clignotante
Le nouveau transmetteur (sous “Test”)est accouplé au récepteur.
LED
touche
LED
(récepteur déjà accouplé à un autre transmetteur)
Maintenir la pression sur la “ ” jusqu'à l'émission d'un simple signal sonore;
puis la relâcher: (fig.8).
!
ATTENTION: Reset
N.B.:
l'état d'accouplement, mémorisé dans la mémoire permanente, n'est pas effacé ni par la commande de ni
par l'absence d' alimentation.
l'état de test sur le transmetteur cesse automatiquement au bout de 3 minutes de l'activation.
B) - ULTÉRIEURS ACCOUPLEMENTS AUX TRANSMETTEURS (ex.: remplacement du transmetteur)
SUR LE TRANSMETTEUR: désactiver l'état de “Test”, comme indiqué dans le chapitre spécifique du manuel du transmetteur.
Table of contents
Languages:
Popular Receiver manuals by other brands

Spektrum
Spektrum AR6335 user guide
Harman Kardon
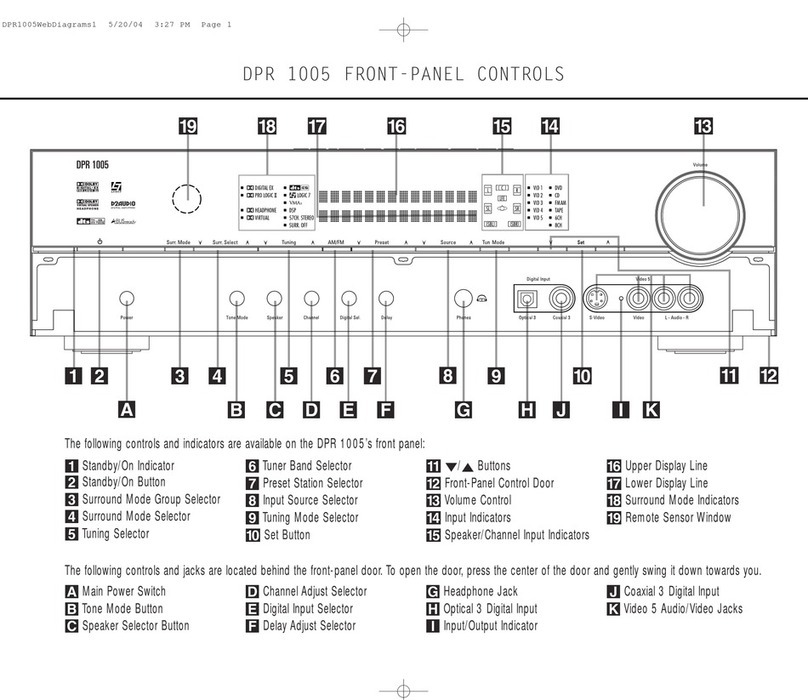
Harman Kardon DPR 1005 Front Panel Controls Guide
SOMFY
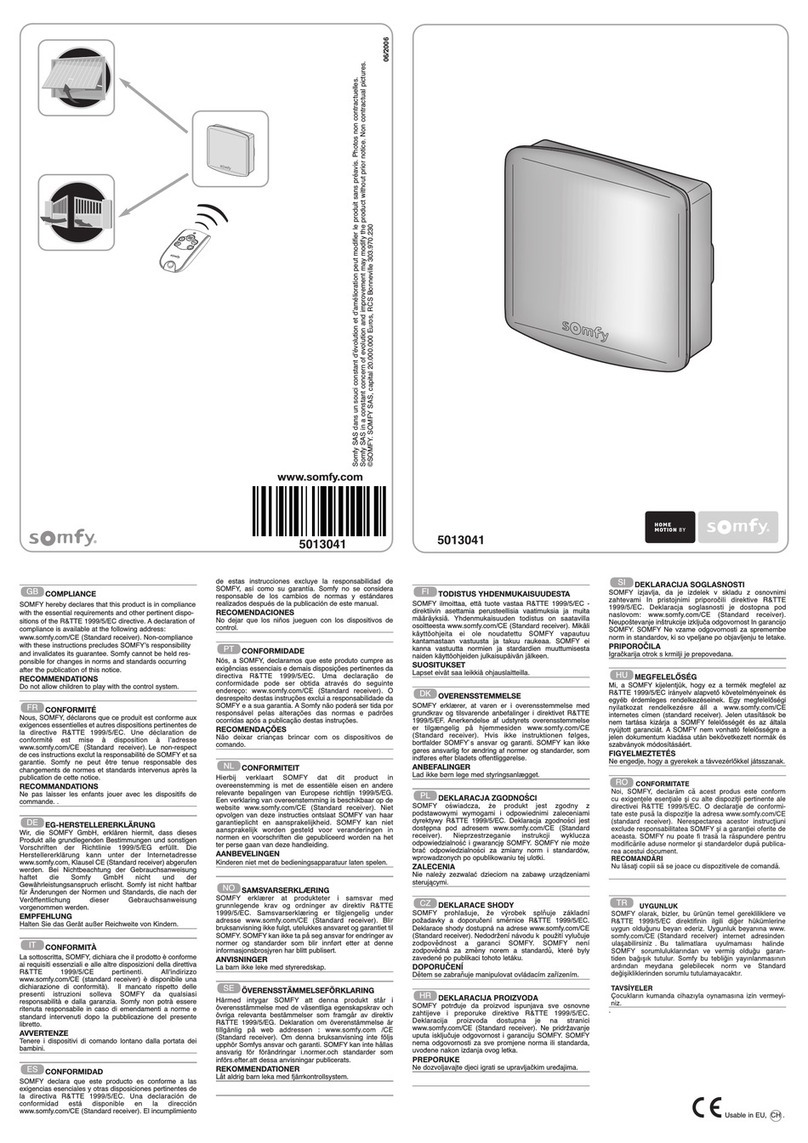
SOMFY 5013041 manual
NORTHROP GRUMMAN
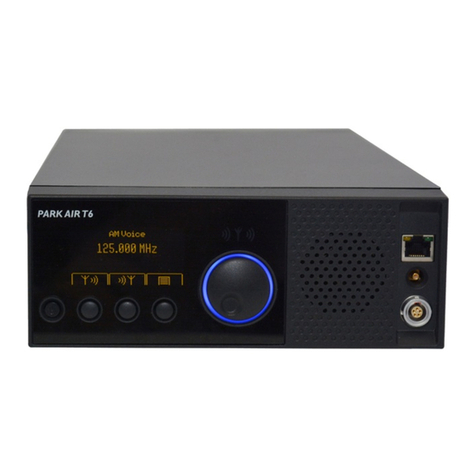
NORTHROP GRUMMAN Park Air T6-RV User documentation

Harman Kardon
Harman Kardon AVR 120 owner's manual

Sirius Satellite Radio
Sirius Satellite Radio Xact XTR1 quick start guide
