Toodis MPAL-201F User manual

01
Table of Contents
M-PAL (MUSIC FRIEND)
1. What is M-PAL? 3
2. Features 5
3. Before Using 7
Using batterycharger 7
Replacing battery 7
How to start 9
For safety 9
Meaning of displays 9
Introduction of icons 10
Precautions 11
4. Part names and LCD display 13
Body 13
LCD display 14
Remote switch 14
5. MP3 MENU 15
MENU 15
MP3 PLAYER KEY FUNCTION 16
Folder management 16
Voice quality setup 18
Repeat setup 19
Recording Mode setup 20
Play speed setup 21
Sync setup 21
Input mode selection 22
M-Pal setup 23
Play 25
Handy play functions 25
Erase 27
6. VOICE RECORDER MENU 29
MENU 29
VOICE RECORDER KEY FUNCTION 30
Folder management 30

02
Recording Mode setup 32
VOR setup 33
Reserved Recording 33
Input mode selection 34
Play speed setup 35
Repeat setup 35
M-Pal setup 36
Recording 38
Handy record functions 39
Play 39
Handy play functions 40
Erase 41
Format 41
7. RADIO MENU 43
MENU 43
RADIO MODE 44
PRESET 44
Recording Mode setup 45
Sleep mode 46
FM Region setup 46
M-Pal setup 47
Using radio functions 49
Handy radio functions 50
Recording while listening to radio 50
Handy record functions 50
8. Connecting to external devices 51
9. Connecting to PC 53
Connecting to PC 53
PC program manual 54
10. Specifications and warranty 65

03.
What is M-PAL?
MUSIC FRIEND
Toodis Co., Ltd. is specialized in digital voice recorders. M-Pal is a multiple feature
portable digital audio set with new functions more advanced than those of the existing
MP3 players.
Realizing a super compact design and best sound quality, M-Pal is the world best
multimedia player with integrated functions of MP3 player, voice recorder, FM radio,
and portable hard drive.
Super slim design
With a total design concept with fashionable user interfaces, M-Pal becomes the user
any time any place, easy to carry for its super compact dimension and convenient to
use.
MULTI-PLAYER
M-PAL records and playbacks a diverse range of sound file formats, producing rich
refined sound quality on generic audio equipment with diverse sound quality setup
functions.
VOICE RECORDING
M-PAL is based on the best know-how of our company that takes lead in the voice recorder
product. M-PAL enables you to record the mobile phone call and regular phone call with various
qualities, M-PAL will present you the longest and best functionalities.
FM RADIO
With M-PAL, you can listen to FM radio any time any place and you can repeatedly
playback recordings as it offers DIRECT ENCORDING.
Firmware Upgrade
This enables M-PAL to maintain the best functions through frequent upgrading of its
firmware.
TOGETHER

M-PAL’s embedded speaker lets you share music or other recordings with your pals as
its name implies.
04
Accessories
Your M-PAL pack consists of the body, user manual, program CD, earphone, remote
switch, line (cable) and optional case.
Basic M-PAL components
Body, user manual, program CD, earphone, remote switch, cable and battery
Optional M-PAL components
Remote switch, line (cable)
05
Features
Features
Flash memory
M-PAL maintains recordings even when the power is cut off.
AUTO POWER OFF
M-PAL conserves battery power as its power is automatically cut off when in prolonged
standby mode.
VOR (Voice Operated Recording System)
M-PAL conserves memory as it starts recording only when sound is detected.
Extended recording
M-PAL can record up to 3,480 minutes (128M-LQ) or 6960 minutes (128M-LQ) with
expanded internal memory.
EL BACK LIGHTING
You may easily read M-PAL displays as it has EL back lighting.

Folder generation
M-PAL enables you to generate and edit folders as it has large capacity hard disc.
Automatic Adjustment of Play Speed
M-PAL playback speed can be adjusted to five different slow speeds as well as the
normal speed.
Diverse user-adjusted equalizing functions
M-PAL offers two EQ modes in addition to normal, rock, pop, jazz, and classic mode.
Remote control
You can easily control M-Pal with the remote control switch.
Reserved Recording
You may schedule recording start time up to one hour.
(1 minute ~ 1 hour in minute increments: Recording starts at the scheduled time)
*Extended recording is available with the adaptor.
Repeat playback of selected recording sections
You may playback your desired section repeatedly.
06
Repeated playback of MP3 files
The default MP3 setup is for unlimited repetition in seven different repeat modes.
Monitoring
You may listen to recordings with the earphone while being recorded.
Mutual recording with external devices
Mutual recording is available with external devices using the audio cable.
Sound level display
Sound level is displayed during recording or playback.
Pause

You may suspend the recording or playback temporarily.
(M-PAL automatically turns into Pause after 15 idle minutes.)
Menu setup
You may set up various functions with the Menu setup functions.
Hold
It prevents wrong key operations during recording or playback.
Recording Mode setup
You may select recording sound quality by selecting LQ, HQ, SQ, or SHQ.
Scan
You may listen to the beginning part of multiple files.
Voice E-mailing
You may send voice e-mail using the voice manager program.
Easy and speedy file edit
You may divide, merge, move or add files using the voice manager program.
Large capacity storage disc recognition
You may use this disc as a movable disc.
07 Before Using
Using battery charger
*Using battery charger (Option)
1. Insert the battery into the charger matching the poles.
2. Insert the charger into a power connector receptacle.

When fully charged, the charge lamp turns from red to green.
*Note:
It takes approximately 1.5 hour to charge the battery when fully discharged.
The charger may be used on 220V only.
*Warning:
Keep the battery and the charger away from children.
Do not disassemble the charger.
Refrain from over charging to avoid a possible fire. Remove the charger from the power
source whenever the battery is fully discharged.
Ensure to use the approved batteries only.
Inserting the battery
*Inserting the battery
1. Push the battery cover by the arrow direction.
2. Insert the battery with + and –pole properly matching.
3. Close the battery cover.
08
*Note:
Replace batteries with the power off.
Ensure to match the poles (+, -).
Detach the batteries from the set when it is not used for a prolonged time.
*Battery display icons
Sufficient, half consumed, consumed, nearly discharged, replace
*Battery life

Battery Type Recording
Listening
Mode Playback
MP3
Playback
FM
Reception
Speaker 12.5
hour 6.5 hourRechargeable
(800mA 7hour
Earphone
14.5
hour 7.5 hour 11.5 hour
Speaker 12.5
hour 6.5 hour
AAA
ALKALINE
Dry battery
(800mA).
hour
7hour
Earphone
14.5
hour 7.5 hour 11.5 hour
*Set the volume at 13 when testing battery life.
Insert time later.
●Note:
-“LOW BATT” is displayed on the LCD window when the battery is low. It is fully
depleted in 10 seconds.
-Battery life may vary depending on sound volume.
-You should better set up AUTO POWER OFF to conserve battery.
-You can further prevent battery from being wasted by wrong key operations if HOLD is
set On.
●Warning:
-Immediately cleanse electrolyte from your skin or clothes with clean water. You should
see a medical doctor if your skin shows abnormal symptoms.
-Immediately cleanse electrolyte from your eyes with clean water. Do not rub with your
hands. Ensure to see a medical doctor.
09 Before Using
Starting (Enter)your M-PAL
*Power On/Off
1. Release HOLD button. (HOLD OFF)
2. Press REC/STOP (*/&) button for over 3 seconds to turn the power on.
3. Press REC/STOP (*/&) button for over 3 seconds again to turn the power off.
*Note:
-Power turns off if no button is pressed for over 1 minute in standby under VOICE or
MP3 mode.
*Connecting to Remote Control Switch (Remocon)
1. Connect Remocon plug to the earphone jack on the unit bottom.
2. Insert the unit plug into the earphone jack of Remocon.
*Mode Selection
You move to various modes (MP3, VOICE, RADIO) alternately if you press and hold M
(Menu) button while the power is on.
For your safety -
-This user guide includes important precautions to prevent misuse or abuse of the
product. Carefully read this user guide before using this product.
-Keep the user guide for future reference.
Meanings of Displays
*Note:
-When misuse or abuse may cause damage to you or the product.
*Warning:
-When misuse or abuse may cause damage to you or malfunction.
*Note:
-Reference points that help you use your M-PAL more efficiently.
10
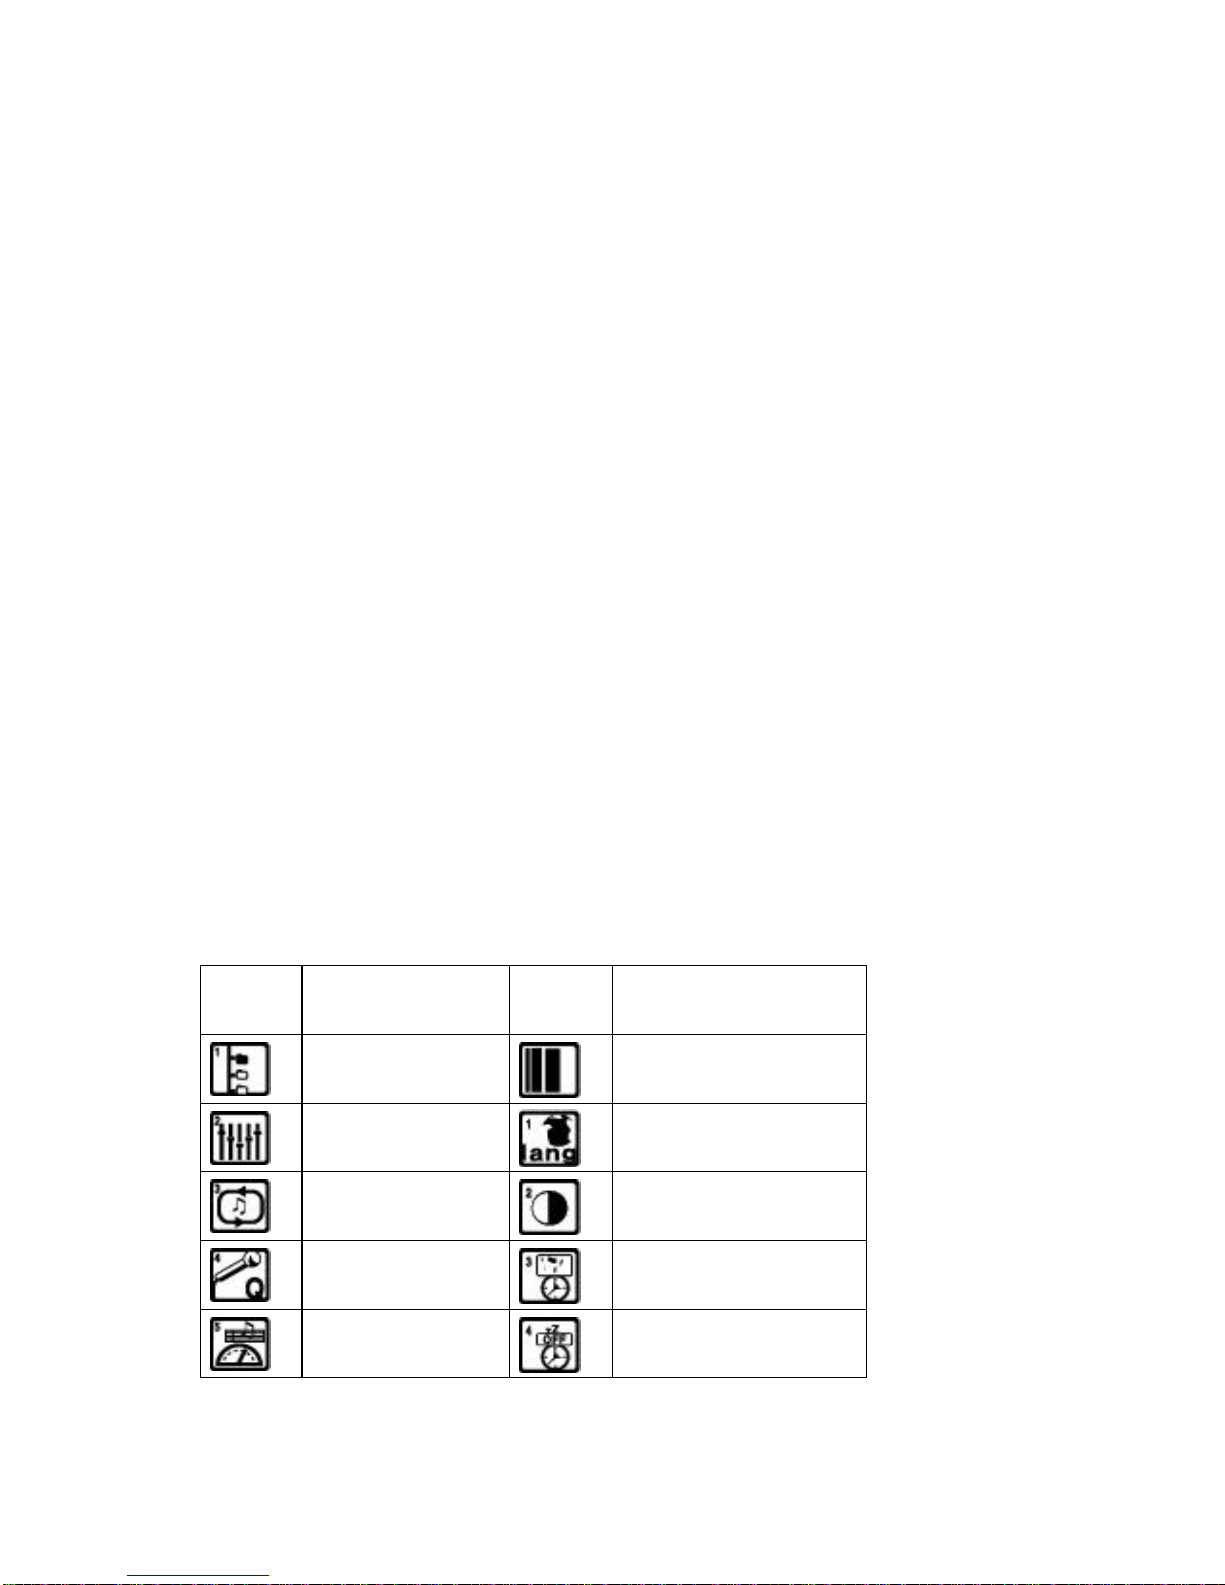
Icons
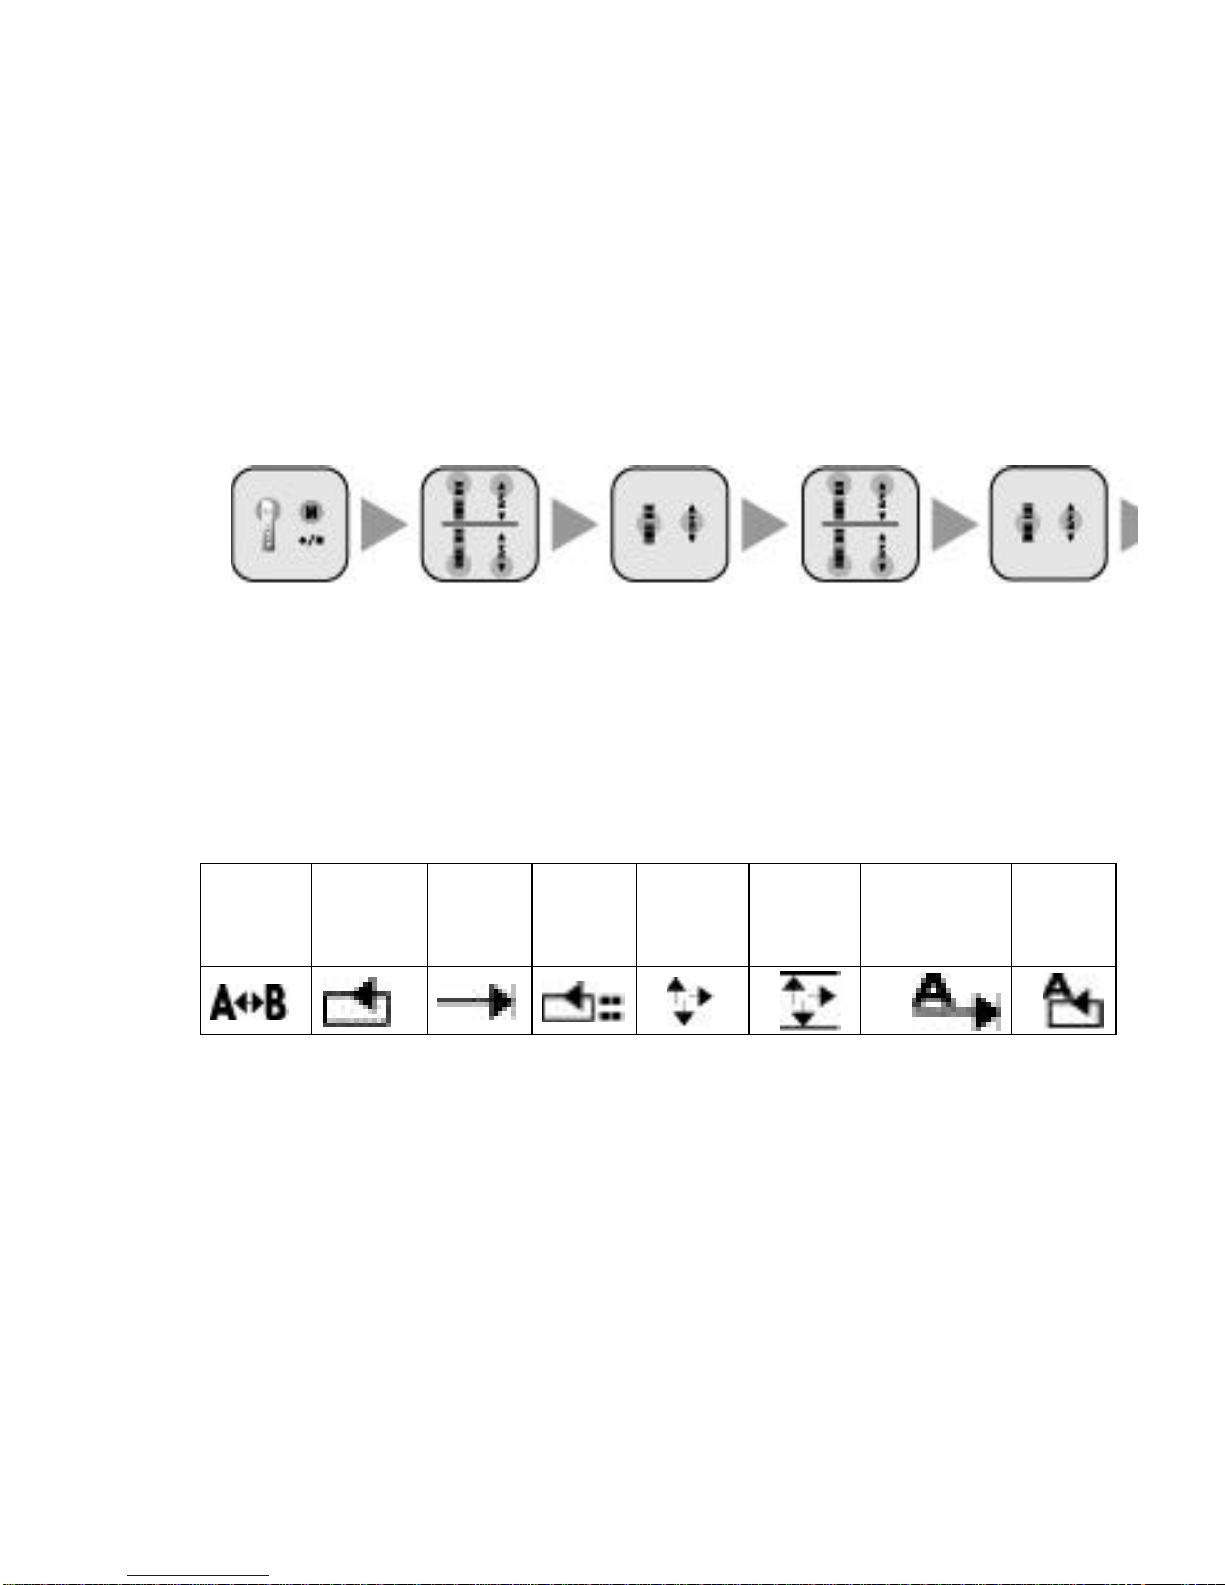
Icon Name Icon Name
Folder Management
Playback Speed
Sound Quality
Setup
LANGUAGE
Repeat Mode
LCD Brightness Setup
Recording Mode
Backlight Setup
Play Speed
AUTO POWER OFF

SYNC Setup
Flash Format
Input Mode
Selection
View Memory
M-PAL Setup
PC LINK
VOR Setup
Country Setup
Reserved
Recording
To Upper Menu
PlaybackSound
Quality Setup
Playback Repeat Mode
11
●Precautions
*Do not drop or apply force to the product!! It may cause malfunction.
*Do not keep in the following spots:
-where it is very hot (60oC)
-where directly exposed to sun light or heating appliances
-in a closed car (especially in summer)
-bathroom or other humid room
-highly dusty
*Excessive force to the LCD may cause damage or malfunction for the nature of LCD.
*Keep your cash card or credit card with magnetic stripe away from the speaker. It may
cause damage to the magnetic memory.
*Please note the manufacturers are not to be held responsible for any damages
caused by this product to you or to claims raised by any third person.
*Save important data in a safe media by transferring from the product to an external
memory device as the data saved in the product memory are subjectto damage.
*Beware of electric shock when you use this product.
*The printings or markings of this product may wear or tear for long use or other
causes (excessive pressure or abrasion).
*Holding the unit tight on your arm for long hours may cause impediment to your blood
circulation.
*Beware. If you hold the unit strap on your neck, it may be trapped in elevator doors etc.
●Precautions for Safety
*Do not attempt to repair, disassemble or alter the unit.
*Immediately remove the batteries if smoke or deformation from heat arises.
*Refrain from using in an aircraft or other places where use of electronic devices is
banned.
*Keep the unit or its accessories away from children as they may swallow small parts.
*Do not put the unit into your mouth as the unit surface has paint that may be
hazardous to human body.
*Do not remove the front sheet as the unit front has sharp corners that may cause
damages to you.
*Do not throw the unit to others.
*Do not cut, disassemble or apply heat to the battery.
*It may cause alkali solution or other electrolyte drop into your eyes or explosion or
rupture.
-Immediately cleanse alkali solution or electrolyte with clean water if your skin or
clothes are stained. Cleanse your eyes if the solution drop enters them and
immediately see a doctor.
12
13. Description of Parts
Name of Various Parts (Body)
*Top *Bottom
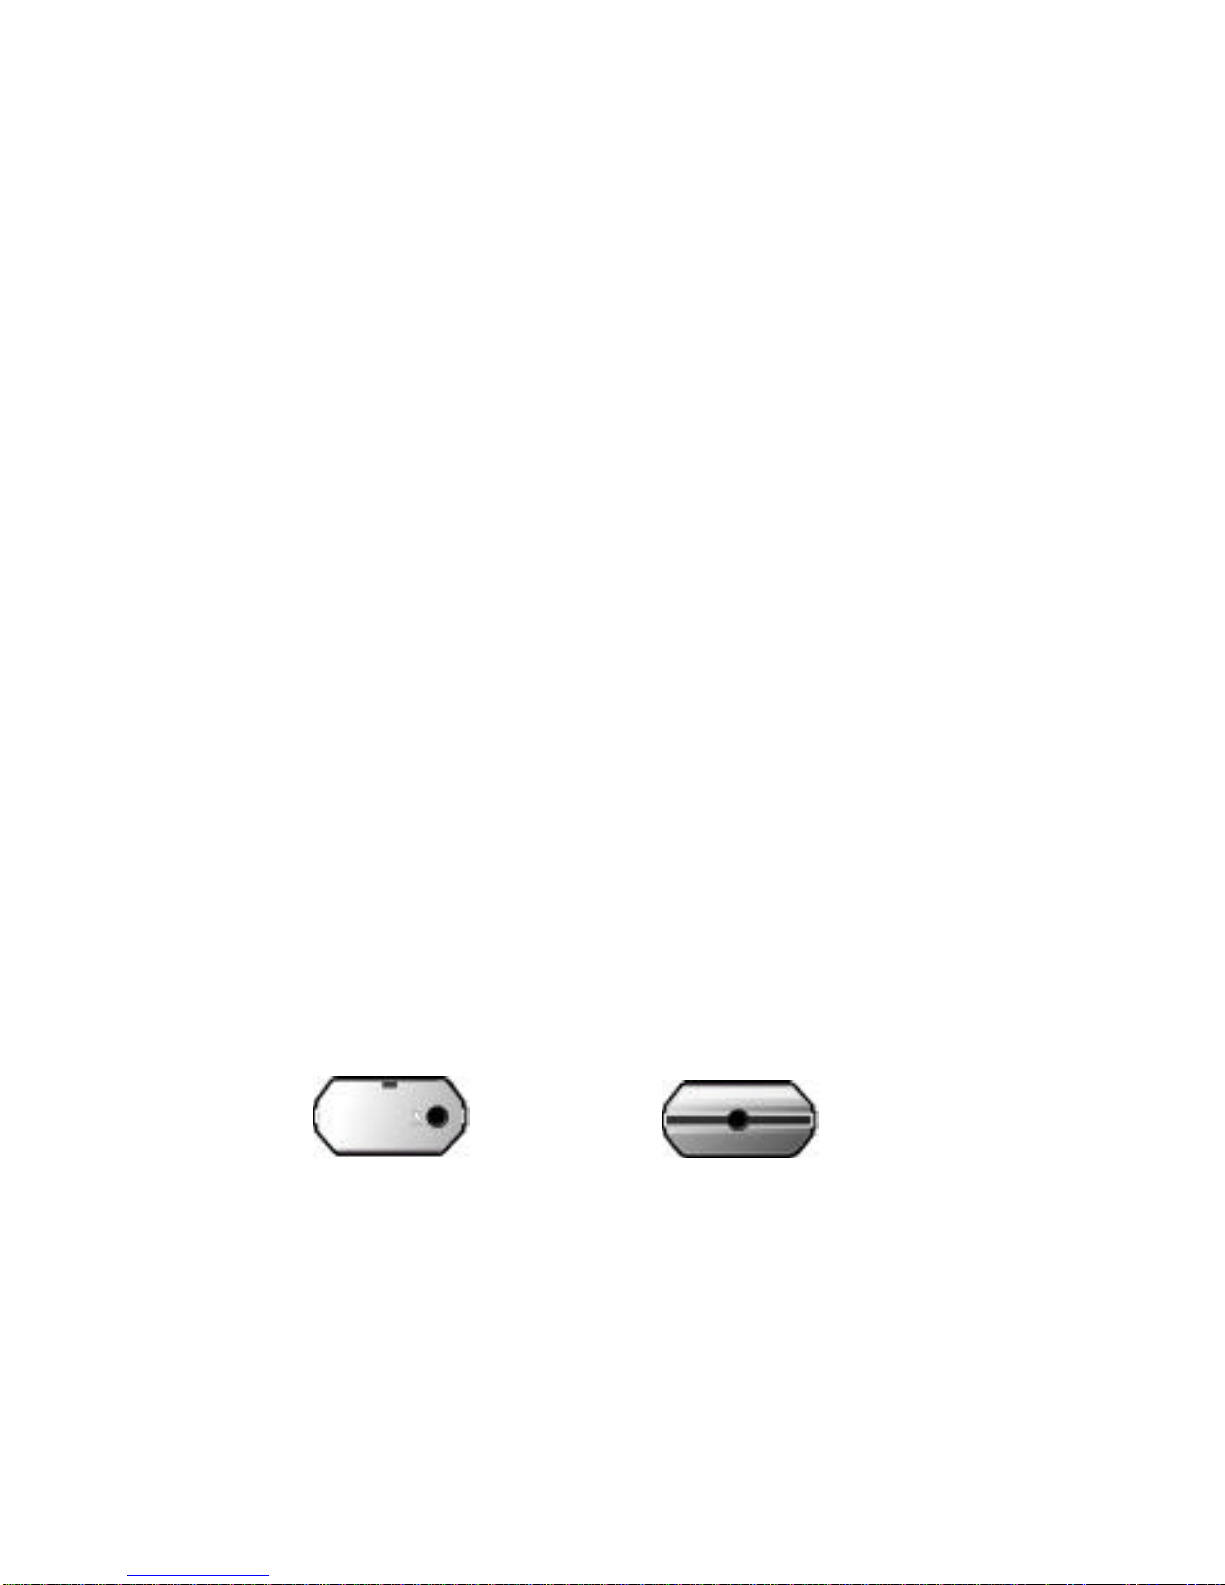
Battery Cover /External Input Terminal Earphone Jack
*Left *Front *Right
*Rear
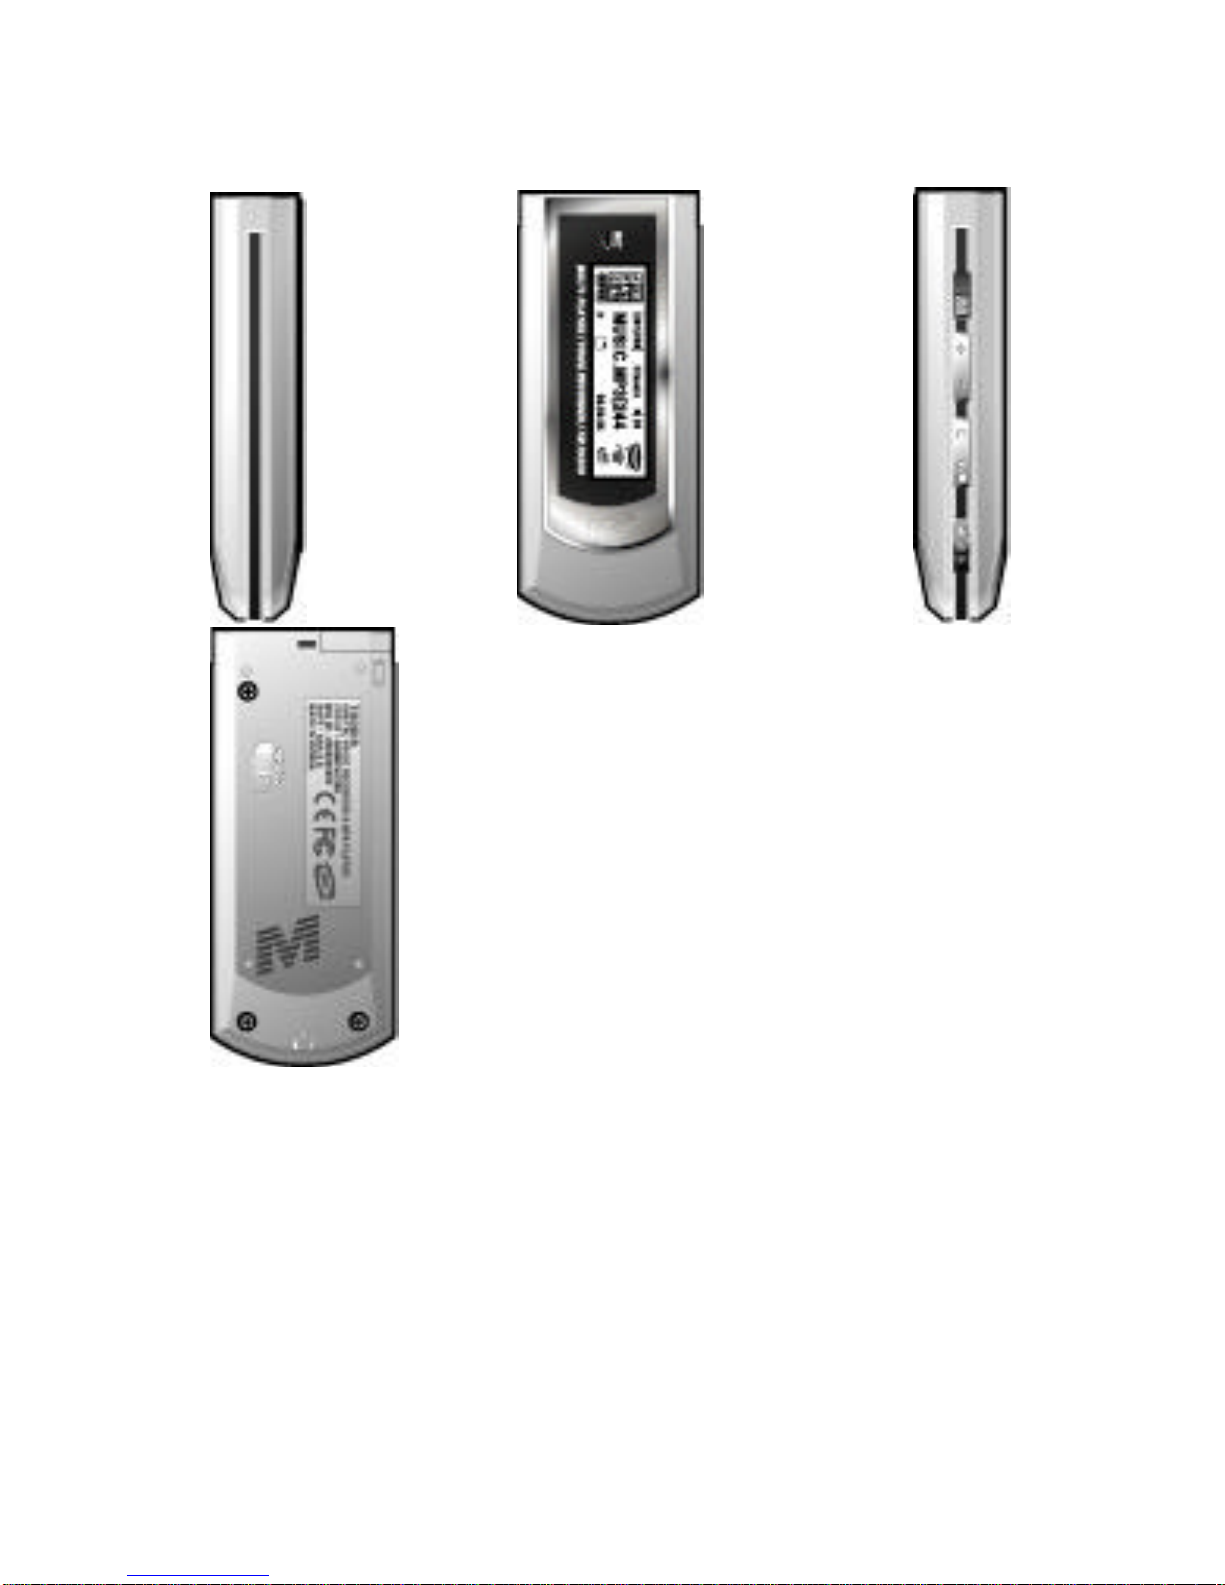
LCD Screen HOLD Built-
in Speaker
USB JACK
Volume+
Volume-
Menu M
Record/Stop
*/&
Play/Pause
Move forward or backward
*/&
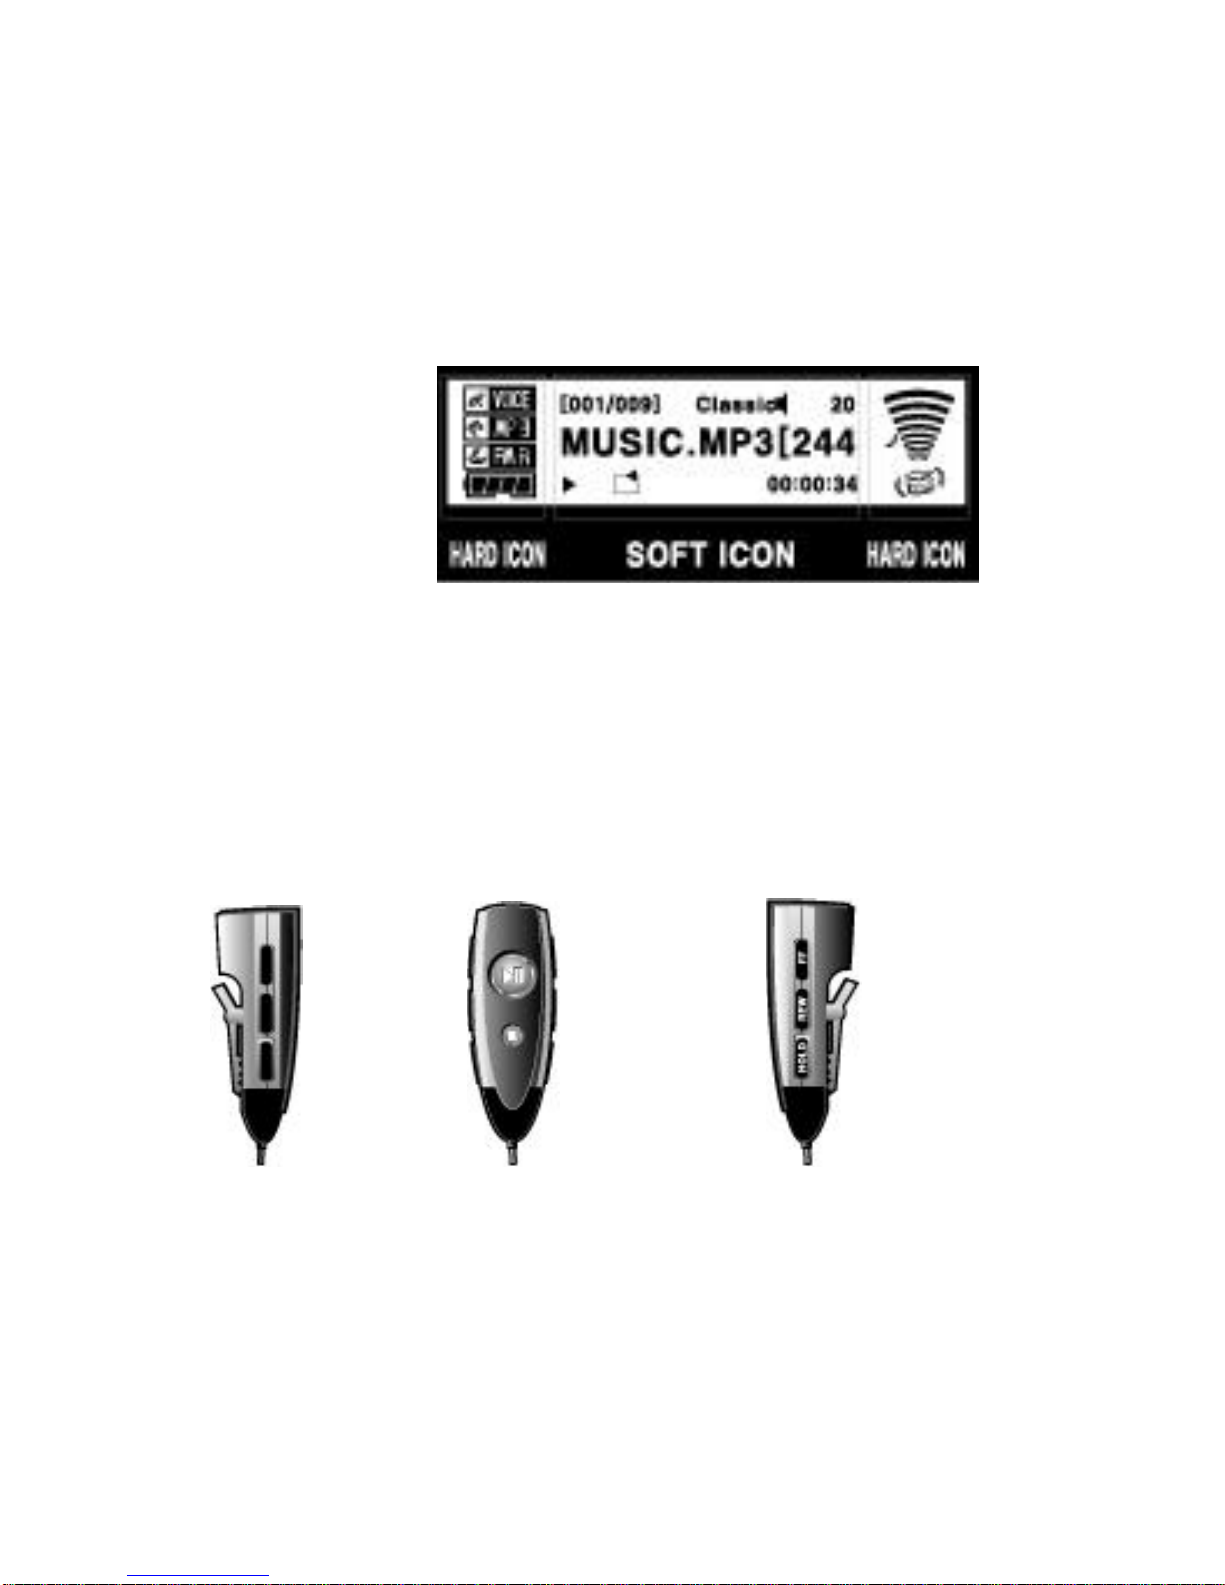
14. Name of Various Parts (LCD Screen)
*LCD Display
VOICE ICON
MP3 ICON Status Display Screen VOLUME LEVEL
FM RADIO ICON
BATTERTY ICON
Name of Various Parts (Remocon)
*Left *Front *Right
Volume+ Play/Pause Move forward
Volume-Move backward
Equalizer Record/Stop HOLD
*
15. MP3 MENU
MENU *Select Play/Pause button after entering Menu
(Exit from Menu by Rec/Stop button)
MENU Upper Menu Lower Menu Menu Description Key Operation
Delete folder Delete selected folder or
file one by one Delete by VOL
button (Exit by
REC/Stop button)
1. Folder
management
Delete file
1 NORMAL
2 ROCK
3. JAZZ
4. POP
5. CLASSIC
6. USER1
2.Setup
Sound
Quality
7. USER2
Select sound quality by
Sound Quality Setup
1.FILE REPEAT
2.
FOLDER PLAY
3. FOLDER
REPEAT.
4. RANDOM PLAY
5. RANDOM
REPEAT.
6. ALL FOLDER
3.Repeat
Mode
7.ALL FOLDER
REPEAT
Select REPEAT mode by
Repeat Mode Setup
1. STEREO4. Record
Modes 2. MONO. You may select Record
Modes or change the
compression rate with
Recording Mode Setup.
MENU(M
Button)
5. Play
Speed 1. SLOW (1~5
steps) You may select the
playback speed up to six
Select
by Play/Pause
button after moving
with jog key(Exit by
Record/Stop (*/&)
Button)

2. NORMAL (1~5 Slow steps and
Normal) different steps
with Speed Setup
1. ON
2.
ONE
6. Sync
setup 3.
OFF
You may save recordings
while SYNC is set up into
one or multiple files.
1. LINE INPUT7. Input
mode
selection 2. MIC INPUT
1. LANGUAGE.
2.LCD Brightness
Setup
3.Backlight Setup
4.Auto Power Off
5.Flash Format
6. View Memory
7.PC LINK
8.Country Selection
8.M-Pal
setup
9. To Upper Menu
You may select
language, brightness,
illumination, auto off,
memory format, View
Memory. You can
upgrade these functions
through FIRMWARE
UPGRADE by selecting
PC Link.
*Above is MP3 MENU.
16
MP3 PLAYER KEY FUNCTION
-Press and hold (long pressing) -Click (short pressing)
Button Key Operation In the standby
mode In Playback In Recording Mode
Volume keeps
increasing Volume keeps
increasing
Volume
increases by 1
step
Volume increases
by 1 step
Volume keeps
decreasing Volume keeps
decreasing
Volume keeps
decreasing Volume keeps
decreasing
Mode switch

Mode switch
Enter Menu Enter MP3 MenuPOWER OFF
Start Recording,
Stop Recording Stop Playback Stop Recording
Keep moving to
previous files Moves to front
parts of a file
Move to
previous file Play previous file
INTRO SCAN
PLAY PAUSE
Start Playback Repeat Section Pause
Keep moving to
next files Moves to front
parts of a file
Move to next
file Play next file
Folder Management
-MP3 Folder Change
1. Enter Menu pressing M button in the standby mode.
2. Enter a lower menu by pressing Play/Pause (*/&) button in 1. Folder
Management in the upper menu
3. Go to a folder which you want to play or record in using FF/REW(?/.) button.
4. The folder is selected and your exit from the menu when you press 4. Rec/Stop
(*/&) button.
(Beware. All files are deleted if you press VOL button. Exit by pressing
Rec/Stop (*/&) button)

To Upper Menu Move to Folder Select Folder Search Folder
Move to Upper Menu Exit from Menu
Management Menu Management Menu
after Selecting Folder
17 MP3 Menu
Delete Folder
You may erase MP3 folders saved in the unit.
1. Enter Upper Menu pressing M button in the standby mode.
2. Enter a lower menu by pressing Play/Pause (*/&) button in 1. Folder
Management in the upper menu
3. Go to the folder to delete using FF/REW(*/&) button.
4. A screen appears to ask you to confirm if you want to delete a folder when
pressing VOL button in the folder to delete. The folder is deleted if you press
Rec/Stop (*/&) button after selecting “YES” with FF/REW (*./&) button in the
screen.
(Cancel by pressing Rec/Stop (*/&) button.)
*Only the files in a folder are deleted when you delete a folder.
Enter Upper Move to Folder To Select Folder Search Folder
Folder Deleted Exit from Menu
Menu Management Menu Management Menu
*Delete Files
You may erase MP3 files saved in the unit memory.
1. Enter Upper Menu pressing M button in the standby mode.
2. Enter a lower menu by pressing Play/Pause (*/&) button in 1. Folder
Management in the upper menu

3. Go to the file to delete using FF/REW (*/&) button.
4. You may view all the files in a selected folder by pressing Rec/Stop (*.&) button
while the folder is selected.
5. Go to the file to delete using FF/REW (*/&) button.
6. A screen appears to ask you to confirm if you want to delete a file when pressing
VOL button in the file to delete. The file is deleted if you press Play/Pause (*/&)
button after selecting “YES” with FF/REW (*/.&) button in the screen.
Enter Upper Move to Folder Select Folder Search Folder
Select Folder File Search File Deleted Exit from Menu
Menu Management Menu Management Menu
Sound Quality Setup
*Sound Quality Setup
You may enjoy optimized sound quality (tone) by selecting your desired sound quality.
1. Enter Upper Menu by clicking M button in the standby mode.
2. Go to 2. Sound Quality Setup using FF/REW (*/.&) button.
3. Go to the lower menu by pressing Play/Pause (*/&) button in Sound Quality
Setup.
4. Select one of the seven sound quality modes in the lower menu using FF/REW
(*/.&) button.
5. Press Play/Pause button after selecting a sound quality.
6. The sound quality is selected and you return to the upper menu.
(Cancel by pressing Rec/Stop button.)
7. Press Rec/Stop button to exit the menu.
*You may select a sound quality out of the five sound quality values that best suits a
user if you press Play/Pause button when User 1 or 2 is selected.
Enter Upper Go to Sound Select Sound Search Sound

Move to Upper Menu Exit from Menu
]Menu Quality Setup Menu Quality Setup Menu Quality
after Selecting S
ound Quality
*Note:
-Two User sound quality setup is supported. The default value is set to 0. You may
save User Sound Quality Setup by adjusting five different values. You may adjust the
frequency value with +,-and move to frequency with FF/REW button.
19 MP3 Menu
Repeat Mode
*Repeat Mode
You may set up a total of seven repeat modes -FILE REPEAT, FOLDER PLAY,
FOLDER REPEAT, ALL FOLDER PLAY, ALL FOLDER REPEAT, RANDOM PLAY, or
RANDOM REPEAT.
You may use Section Repeat by clicking Rec/Stop button during recording.
1. FILE REPEAT : Repeats a selected file.
2. FOLDER PLAY : Stops after playing the last piece in a selected folder.
3. FOLDER REPEAT : Repeats all pieces in a selected folder.
4. RANDOM PLAY :Stops after Random playback of a selected MP3 file.
5. RANDOM REPEAT : Repeats Random playback of a selected MP3 file.
6. ALL FOLDER PLAY : Stops after repeated playback of MP3 files of all the
folders saved in the unit.
7. ALL FOLDER REPEAT : Repeats playback of MP3 files of all the folders saved
in the unit.
*Repeat Mode Setup
1. Enter Upper Menu by clicking M button in the standby mode.
2. Move to 3. Repeat Mode in the menu using FF/REW button.
3. Go to the lower menu by pressing Play/Pause (*/&) button in Repeat Mode
menu.
4. Select one of the seven repeat modes in the lower menu using FF/REW button.
5. Press Play/Pause button after selecting a repeat mode.
6. The repeat mode is selected and you return to the upper menu.
7. Press Rec/Stop button to exit the menu.
Enter Upper Move to Repeat Select Repeat Move to Repeat
Move to Upper Exit from Menu
Menu Mode menu Mode menu Mode menu
Menu after selecting a
repeat mode menu
*LCD Display of Repeat Setup
SECTION
REPEAT FILE
REPEEAT
FOLDER
PLAY FOLDER
REPEAT
RANDOM
PLAY RANDOM
REPEAT ALL FOLDER
REPEAT ALL
FOLDER
REPEAT
20
Recording Mode Setup
*Record Modes
You may set up the sound quality of recording files in MONO and STEREO each
having 15 sound qualities.
(It is recorded in MP3 file when Rec/Stop button is pressed in MP3 mode.)
1. STEREO : It supports a total of 16 record sound qualities -8Kbps, 16 Kbps,
24Kbps,32Kbps, 40Kbps, 48Kbps, 56Kbps, 64Kbps, 80Kbps, 96Kbps, 112Kbps,
128Kbps, 160Kbps, 192Kbps, 224Kbps, or 256Kbps.
2. MONO: It supports a total of 16 record sound qualities -8Kbps, 16 Kbps,
Table of contents


 Operation guide")


