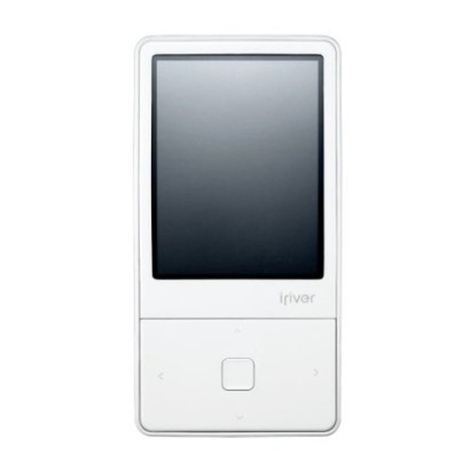
IRiver E200 User manual

T
HENEW
МО
МЕСФЕ
МЕ
ALL
O
N
E200
RAT
ifiver

Contents...
Chapter
01
Getting
Started
4
Components
5
Names
of
Parts
6
LCD
Screen
7
installing
Application
Chapter
02
Basic
Operations
9
Turning
the
Product
ON/OFF
&
Selecting
Modes
10
Using
HOLD
and
RESET
11
Connecting
Chapter
03
Using
the
Product
16
MUSIC
19
VIDEO
21
PICTURES
23
FM
Radio
25
TEXT
27
Recording
29
Flash
Games
30
File
Browser
Chapter
04
Settings
32
Setup
Chapter
05
Other
Information
35
38
41
42
45
Using
iriver
plus
3
Using
Windows
Media
Player
11
Copyrights/Certification/
Trademarks/Limited
Liability
Safety
Instructions
Troubleshooting

ifiver
E200

Chapterot
Getting
Started
4
Components
5
Names
of
Parts
6
LCD
Screen
7
Installing
Application
Installing
iriver
plus
3
Installing
Windows
Media
Player
11

Com
ponents
Components
are
subject
to
change
without
notice
and
may
vary
from
images
shown.
E200
Earphones
Quick
Start
Guide
&
Warranty
Card
Installation
CD
(with
Instruction
Guide)
USB
Cable
04
Getting
Started

Names
of
Parts
C
sep)
Power
HOLD
|
www
1
Speaker
——e
LCD
——
Volume
-
TI
TE
Up
Iriver
e———
Volume
+
:
:
SPI
Menu/
JE
ol
reser
-Мс.
cs
Te
d
sn
472
=
{WJ
LJ
USB
Jack
й
L
Micro
50
Card
Slot
Earphone
Jack
i
le
a
t
i
)
05
Getting
Started

LCD
Screen
MUSIC
Mode
Current
Time
Batlery
|
LOCK
Mode
Thought
You
За
——
Filename
cl
ea
e
Album
Name
\———
Play
Mode
[Ss
—
Progress
Ваг
|
Total
Play
Time
|
ЕО
Rating
Play
Time
06
Getting
Started
FM
RADIO
Mode
Current
Frequency
s=
Channel
No.
Frequency
Band
Elapsed
Recording
Time
RECORDING
Mode
Current
Status
Record
Filename
Remaining
Recording
Time

H
.
H
iriver
plus
3
and
Windows
Media
Player
11
are
integrated
software
applications
that
efficiently
manage
various
multimedia
Installing
Application
files.
iriver
plus
3
and
Windows
Media
Player
11
enable
you
to
transfer
files
from your
computer
to
your
product.
Installing
iriver
plus
3
Installing
Windows
Media
Player
11
1.
Insert
the
provided
installation
CD
into
your
computer
1.
Insert
the
provided
installation
CD
into
your
computer
and
then
an
installation
screen
will
appear
on
your
monitor.
and
then
an
installation
screen
will
appear
on
your
monitor.
2.
Click
iriver
plus
3
and
complete
the
installation
process
2.
Click
Windows
Media
Player
11
and
complete
the
by
following
the
on-screen
instructions.
installation
process
by
following
the
instructions
on-screen,
т
Minimum
requirements
for
software
applications:
*
For
Windows®
2000/XP
-
Intel®
Pentium®
||
233
MHz
or
higher
processor
speed
-
64
MB
or
above
memory
-
30
MB
or
above
hard
disk
space
-
16
bit
support
sound
card
and
speaker
-
Microsoft
Intemet
Explorer
version
6.0
or
later
-
SVGA
or
higher
resolution
monitor
(1024x768
resolution
or
greater)
*
For
Windows®
Vista
(Windows®
Vista
only
supports
the
32-bit
version
and
does
not
support
the
64-bit
version.)
-
Intel®
Pentium®
||
800
MHz
or
higher
processor
speed
-
512
МВ
or
above
memory
—
-
20
MB
or
above
hard
disk
space
-
16
bit
support
sound
card
and
speaker
-
Microsoft
пиете!
Explorer
version
6.0
or
later
-
SVGA
or
higher
resolution
monitor
(1024x768
resolution
or
greater)
=
For
more
information
on
using
iriver
plus
3,
refer
to
pages
35-37,
ш
For
more
information
on
using
Windows
Media
Player
11,
refer
to
pages
38-40,
=
To
connect
your
product
to
Iriver
plus
З,
set
to
MSC
in
Setup-Advanced-Transfer
Method.
To
connect
your
product
to
Windows
Media
Player
11,
set
fo
MTP
from
the
same
menu.
(Refer
to
page
33.)
07
Getting
Started

Chapter
02
Basic
Operations
9
Tuming
the
Product
ON/OFF
11
Connecting
&
Selecting
Modes
Connecting
Earphones
Turning
the
Product
on/off
Charging
the
Product
Selecting
Modes
Inserting/Removing
the
Micro
SD
Card
10
Using
HOLD
and
RESET
Recommended
Micro
SD
Card
Using
HOLD
Connecting
to
Your
Computer
Using
RESET
Disconnecting
from
Your
Computer
Copying
Files/Folders
to
the
Product
Deleting
Files/Folders
from
the
Product

Turning
the
Product
ON/OFF
&
Selecting
Modes
Turning
the
Product
on/off
1.
Press
and
hold
(9
on
the
product
to
turn
it
on.
2.
Press
and
hold
©
on
the
product
again
to
turn
it
off.
=
This
product
has
an
automatic
power
saving
function
to
conserve
battery
power.
Based
on
the
settings
in
Power
Save
mode,
the
product
will
automatically
tum
off
after
the
preset
perlod
without
operation.
For
more
Information
on
setting
this
mode,
please
refer
to
Setup-Timer-Auto
Power
OFF.
(Refer
to
page
32.)
09
Basic
Operations
Selecting
Modes
1.
Tum
on
the
power
to
display
the
main
mode
screen.
Either
press
<
or
drag
towards
`>
=
<
in
any
mode
to
return
to
the
main
mode
screen.
2.
Press
«/-
to
select
the
desired
mode,
and
then
either
press
>
or
O
to
run
the
selected
mode.
т
Drag
towards
.".
ә".
or
“ите.
to
move
quickly
through
the
list
screen,
=
Drag
towards.
-.
In
main
mode
screen
to
display
the
Widget
menu.

Using
HOLD
and
RESET
Using
HOLD
Using
RESET
1.
Slide
the
HOLD
switch
towards
the
arrow
direction
to
1.
When
the
product
does
not
respond
while
in
use
and
lock
the
product.
all
keys
do
not
operate,
press
the
RESET
key
on
the
side
of
the
product.
Ë
RESET
O
:
2.
Slide
the
HOLD
switch
to
the
opposite
side
to
unlock.
=
When
using
the
RESET
function,
Date/Time
settings
and
memory
data
are
not
deleted.
=
The
product
power
will
turn
off
and
then
automatically
tum
on
again
after
reset.
If
the
power
does
not
automatically
turn
on,
please
try
pressing
the
&
key
to
manually
turn
tne
product
on.
10
Basic
Operations

Connecting
Connecting
Earphones
1.
Connect
the
earphone
to
the
jack
of
the
product.
11
Basic
Operations
Charging
the
Product
1.
Tum
on
your
computer
and
connect
the
product
to
your
computer
using
the
provided
USB
cable.
2.
The
internal
battery
will
charge
automatically.
==)
Do
not
use
any
USB
cable
other
than
the
one
provided
with
the
product.
This
may
cause
the
product
to
malfunction.
Check
if
the
product
is
connected
to
a
high-power
USB
2.0
род.
Some
low-power
USB
ports
built
into
certain
peripheral
devices,
such
as
some
types
of
keyboards
and
USB
hubs
without
integrated
power,
may
not
provide
enough
power
to
charge
the
product.
The
product
might
not
charge
if
the
computer
switches
to
standby
mode.
Store
and
charge
tne
product
only
at
room
temperature.
Product
may
not
charge
in
extremely
hot
or
cold
environments.
Charging
usually
takes
about
3
hours
and
30
minutes.
(based
on
complete
discharge
and
power
OFF)
The
charging
battery
is
consumable
and
usage
time
will
gradually
decrease
over
time.
It
may
take
longer
to
fully
charge
your
product
if
you
use
it
during
charging.

Connecting
Inserting/Removing
the
Micro
SD
Card
1.
While
the
product
is
off,
open
the
cover
at
the
bottom
of
the
product
and
lightly
push
the
Micro
SD
card
into
the
slot
in
the
same
direction
shown
in
the
image.
2.
Press
the
Micro
SD
card
again
to
remove
it.
Insert/remove
the
Micro
SD
card
while
the
product
Is
off.
Do
not
insert
the
Micro
SD
card
with
force,
This
may
cause
product
malfunction
and
damage
to
the
Micro
SD
card
Never
remove
the
Micro
SD
card
while
in
use.
This
may
cause
data
to
be
deleted,
product
malfunction
and
damage
to
the
Micro
SD
card
Do
not
insert/remove
the
Micro
SD
card
frequently
if
the
Micro
SD
card
Is
inserted
improperly,
then
the
product
may
malfunction
and
the
card
may
be
difficult
to
remove
12
Basic
Operations
Recommended
Micro
SD
Card
SanDisk,
Transcend
Using
a
Micro
SD
card
other
than
the
recommended
one
may
cause
malfunction
The
transfer
speed
of
the
Micro
SD
card
may
vary
depending
on
your
computer.
Formatting
the
Micro
SD
Card
will
delete
all
data
within
the
card;
therefore,
itis
important
to
backup
data
before
formatting,
FAT
system
for
below
4
GB
and
FAT
32
system
for
above
4
GB
is
recommended
when
formatting
the
Micro
SD
Card,
Try
to
format
the
card
if
the
Micro
SD
Card
cannot
be
recagnized
or
causes
malfunction,
The
Micro
SD
Card
|в
not
included
with
the
product,
Please
purchase
one
separately.
A
Micro
SD
Card
of
8
GB
is
recommended
for
this
product.

Connecting
Connecting
to
Your
Computer
Disconnecting
from
Your
Computer
1.
Press
and
hold
ооп
the
product
to
tum
it
on.
1.
Click
the
icon
in
the
taskbar
to
disconnect
the
product
2.
Tum
on
your
computer
and
connect
the
product
to
using
the
Safely
Remove
Hardware
menu.
your
computer
using
the
provided
USB
cable.
Safely
Remove
Hardware
(J
2.
Click
OK
and
select
the
device
to
remove.
C
x3)
3.
If
the
product
is
properly
connected,
the
product
LCD
will
display
the
following:
-
Charging
&
Data
Transfer:
The
product
starts
to
charge
and
data
can
be
transferred.
-
Charging
&
Play;
The
product
starts
to
c
-
Charging
Only:
The
produc
arge
and
you
can use
the
product.
т
The
icon
in
the
taskbar
may
be
hidden
in
some
operating
systems
such
as
s
to
charge
Windows
XP,
Click
the
Show
Hidden
Icons
to
display
the
hidden
icons,
=
The
Safely
Remove
Hardware
function
may
not
be
available
while
using
some
applications
such
as
Windows
Explorer
or
Windows
Media
Player.
Close
all
applications
before
performing
the
Safely
Remove
Hardware
function.
=
If
the
Safely
Remove
Hardware
is
not
performed
properly,
try
again
after
a
few
minutes.
Removing
the
product
п
a
different
way,
may
cause
data
in
the
product
memory
to
be
lost,
=
It
is
recommended
that
you
stop
all
operations
before
connecting
the
product
to
your
compuler
for
optimum
performance.
и
Check
if
the
product
is
connected
to
a
high-power
USB
2.0
port.
Some
low-power
USB
ports
built
into
certain
peripheral
devices,
such
as
keyboards
and
USB
hubs
without
integrated
power,
may
not
provide
enough
power
to
charge
your
product.
18
Basic
Operations

Connecting
Copying
Files/Folders
to
the
Product
Deleting
Files/Folders
from
the
Product
1.
Select
the
files/folders
to
transfer
from
your
computer,
1.
Select
the
files/folders
to
delete,
then
right-click
with
hen
drag
and
drop
to
the
drive
that
represents
the
your
mouse
and
select
Delete.
product
to
copy
the
files/folders
to
your
product.
2.
Click
Yes
in
the
Confirm
File
Delete/Confirm
Folder
Abe
Delete
popup
window
to
delete
the
files/folders.
=
Always
properly
connect
the
product
to
your
computer,
=
While
you
transfer
data,
never
disconnect
or
tum
off
the
power
which
may
cause
serious
damage
to
the
internal
memory
of
the
product.
m
Transfer
speed
may
vary
depending
on
your
computer
and
operating
system,
и
[t
is
recommended
that
you
save
media
files
using
iriver
plus
З
or
Windows
Media
Player
1
1.
14
Basic
Operations

Chapteros
Using
the
Product
16
USIC
Selecting
Music
Playing
Music
Additional
Features
19
VIDEO
21
Selecting
Video
Playing
Video
Additional
Features
PICTURES
Selecting
Pictures
Viewing
Pictures
Additional
Features
23
FM
Radio
Using
Radio
Listening
to
Radio
Additional
Features
25
TEXT
Selecting
Text
Viewing
Text
Additional
Features
27
Recording
Recording
Additional
Features
29
Flash
Games
Selecting
Games
Playing
Games
30
File
Browser
Browsing
Files
Deleting
Files

Music
Selecting
Music
1.In
the
main
menu,
select
Music
to
display
the
music
playlist.
2.Press
-,,
€,
>
to
select
the
desired
song
from
the
playlist,
and
then
either
press
>
or
O
to
play
the
selected
music.
5
:
Move
to
upper
list/folder
“
/
O
:
Move
to
sub
list/folder,
play
selected
file
s
/
=
Move
within
the
list
=
Music
files
can
be
browsed
by
folder
in
MUSIC-Browser.
=
Only
music
files
are
viewed
within
the
Music
folder
in
MUSIC
mode.
Switch
to
EXTRA|Browse
mode
to
view
music
files
within
other
folders.
=
Supported
File
Formats:
MP3(8-320Kbps),
WMA(8~320Kbps),
OGG(Q1~Q10),
ASF,
FLAC
и
Manage
your
playlist
using
iriver
plus
З
or
Windows
Media
Player
11
16
Using
the
Product
Playing
Music
e
While
playing,
press
+/—
to
control
the
volume.
*
While
playing,
press
O
to
pause
or
resume
playback.
e
While
playing,
press
and
hold
--./“-
to
rewind
or
fast
forward.
e
While
playing,
press
-+/+
to
play
the
previous
or
next
song.
e
While
playing,
set
the
repeat
loop
by
pressing
>
to
set
point
A
and
press
again
to
set
Point
B.
The
product
will
play
the
loop
repeatedly.
Press
>
once
again
to
stop
the
loop.

Music
Additional
Features
1.
While
in
standby
or
playback
mode,
press
and
hold
>
to
display
the
list
of
additional
features.
2.
Press
~.
/““
to
select
the
desired
function,
then
either
press
>
or
O
to
display
the
setup
window.
x
:
Move
to
upper
list
3.
Press
+/+
to
set
a
function,
then
either
press
>
or O
to
save/run
the
function.
17
Using
the
Product
e
Add
Bookmark:
Add
the
location
of
a
song
as
a
bookmark.
The
newly
added
bookmark
is
saved
in
MUSIC-Bo:
-
Select
a
bookmark
to
play
from
the
bookmark
list,
then
press
O
to
play
the
selected
bookmark.
List
and
then
a
confirm
delete
window
will
appear.
па
select
YES,
then
press
О
to
delete
the
selected
bookmark.
е
Select
EQ:
Sets
the
EQ
to
use
during
music
playback.
*
Playback
Mode:
Sets
the
mode
to
use
during
music
playback.
е
Set
Rating:
Sets
the
rating
of
the
selected
music.
е
Customize
Mode:
Sets
the
movement
speed
of
=
/
=“
when
pressed
during
playback.

Music
Additional
Features
e
Sound
Setup:
Sets
the
sound
effects.
*
Repeat
Frequency:
Sets
the
number
of
times
to
play
Custom
EQ:
Customizes
the
eaualizer
settings
the
loop.
SRS
WOW
HD:
Sets
the
levels
of
3D
sound
effects
-
SRS:
Customizes
virtual
3D
sound
effects.
-
TruBass:
Customizes
the
bass
sound
level.
i
Ie
DE
! i
-
FOCUS:
Sets
the
sound
sharpness.
*
File
Information:
Displays
the
information
of
the
-
WOW:
Customizes
the
boost
value
according
to
the
selected
song.
earphones
you
are
using.
-
Definition:
Restores
sounds
to
its
original
level.
Fade-in;
Volume
increases
gradually
when
playback
starts
е
Repeat
Interval:
Sets
the
interval
between
loops.
*
Navigation
Speed:
Sets
the
navigation
speed
for
rewind/fast
forward.
е
Playback
Speed:
Sets
the
speed
to
use
during
music
playback.
е
Lyric
Display:
Sets
to
display/hide
lyrics
on
screen
if
lyric
information
is
included
in
the
music
file
being
played.
*
The
lyric
display
function
is
currently
available
for
Korean
only.
18
Using
the
Product

Video
Selecting
Video
1.
In
main
mode,
select
Video
to
display
the
video
Search
list.
2.
Press
+,
=,
=,
>
to
select
the
desired
video
from
the
list,
then
either
press
>
or
O
to
play
the
selected
video.
x
:
Move
to
upper
list/folder
/
O
:
Move
to
sub
list/folder,
play
selected
file
^
:
Move
within
the
list
т
When
a
video
is
played,
the
screen
will
change
direction
and
key
operation
will
also
change
accordingly.
т
Video
files
can
be
browsed
by
folder
in
VIDEO-Directory
List.
=
Only
video
files
are
displayed
within
the
Video
folder
in
VIDEO
mode.
Switch
to
File
Browser
mode
to
view
video
files
within
other
folders.
=
Supported
File
Formats:
AVI,
WMV,
RM,
RMVB(320X240,
RV8, RV9,
RV9B,
RVG2
supported)
=
Always
use
iriver
plus
З
to
transfer
video
files
to
your
product.
(Transferring
files
using
another
program
may
affect
the
file
resolution,
bit
rate,
playback
speed,
prevent
the
file
from
playing
or
an
unexpected
error
may
occur.)
=
Use
iriver
plus
З
to
convert
video
files
with
subtitle
files
(smi)
together.
(The
filename
of
the
subtitle
file
must
be
the
same
as
the
video
file.)
19
Using
the
Product
Playing
Video
e
While
playing,
press
+
/—
to
control
the
volume.
e
While
playing,
press
O
to
pause
or
resume
playback.
e
While
playing,
press
and
hold
-/
to
rewind
or
fast
forward.
e
While
playing,
press
../~
to
play
the
previous
or
next
file.
e
While
playing,
press
>
to
add
the
current
location
as
a
bookmark.
*
The
newly
added
bookmark
is
saved
in
VIDEO-Bookmark
List
-
Select
a
bookmark
to
play
from
the
bookmark
list,
then
press
O
to
play
the
selected
bookmark,
-
Select
a
bookmark
to
delete
from
the
bookmark
list,
press
and
hold
>
and
then
a
confirm
delete
window
will
appear.
Press
~./
and
select
YES,
then
press
O
to
delete
tne
selected
bookmark.
Other manuals for E200
1
Table of contents
Other IRiver MP3 Player manuals

IRiver
IRiver ACTIVO CT10 User manual

IRiver
IRiver H10 20GB User manual

IRiver
IRiver iFP-799 User manual

IRiver
IRiver N10 512MB User manual

IRiver
IRiver iFP-300 Series User manual

IRiver
IRiver T10 User manual

IRiver
IRiver H120 User manual

IRiver
IRiver H10 User manual

IRiver
IRiver H320 User manual
IRiver
IRiver T10 User manual

IRiver
IRiver iHP-100 Series User manual

IRiver
IRiver T20 User manual

IRiver
IRiver T8 User manual

IRiver
IRiver Data Play IDP-100 User manual

IRiver
IRiver T8 User manual

IRiver
IRiver E300 User manual

IRiver
IRiver T30 512MB User manual

IRiver
IRiver astell & kern AK100 User manual

IRiver
IRiver Astell & Kern AK380 User manual

IRiver
IRiver T20 1GB User manual