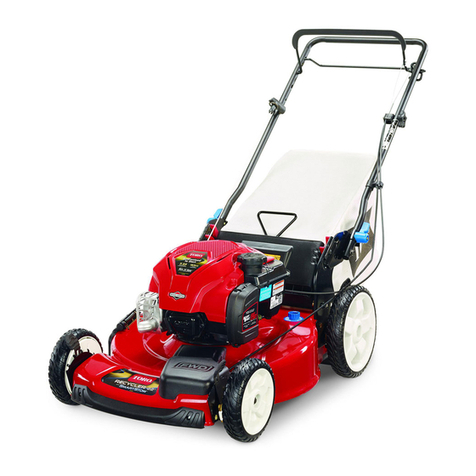
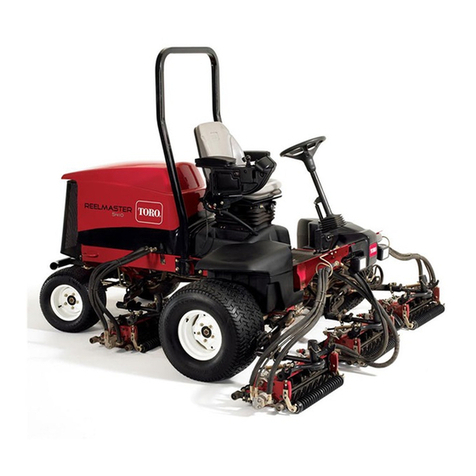
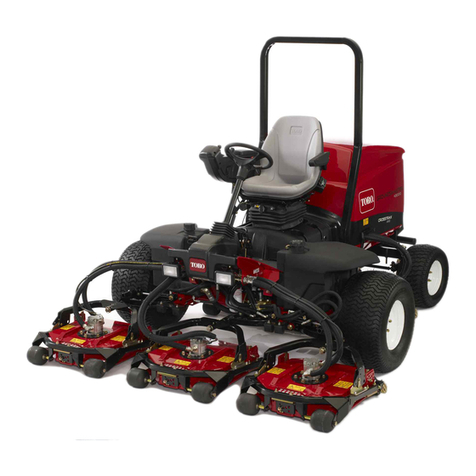
Toro 04018 Greensmaster Flex 18 User manual

FormNo.3357-158RevC
Greensmaster®Flex18orFlex21
Walk-BehindMower
ModelNo.04018(TractionUnit)—SerialNo.260003001
andUp
ModelNo.04206(CuttingUnit)—SerialNo.260000001
andUp
ModelNo.04022(TractionUnit)—SerialNo.260003001
andUp
ModelNo.04202(CuttingUnit)—SerialNo.260000001
andUp
G000507
Registeratwww.Toro.com.OriginalInstructions(EN)

Warning
CALIFORNIA
Proposition65Warning
Theengineexhaustfromthisproduct
containschemicalsknowntotheStateof
Californiatocausecancer,birthdefects,
orotherreproductiveharm.
ThissparkignitionsystemcomplieswithCanadian
ICES-002.
Introduction
Readthisinformationcarefullytolearnhowtooperate
andmaintainyourproductproperlyandtoavoidinjury
andproductdamage.Youareresponsibleforoperating
theproductproperlyandsafely.
YoumaycontactTorodirectlyatwww.Toro.comfor
productandaccessoryinformation,helpndinga
dealer,ortoregisteryourproduct.
Wheneveryouneedservice,genuineToroparts,or
additionalinformation,contactanAuthorizedService
DealerorToroCustomerServiceandhavethemodel
andserialnumbersofyourproductready.Figure1and
Figure2identifythelocationofthemodelandserial
numbersontheproduct.Writethenumbersinthe
spaceprovided.
Figure1
1.Locationofthemodelandserialnumbers-Tractionunit
Tractionunit:
ModelNo.
SerialNo.
Figure2
1.Locationofthemodelandserialnumbers-CuttingUnit
Cuttingunit:
ModelNo.
SerialNo.
Thismanualidentiespotentialhazardsandhas
safetymessagesidentiedbythesafetyalertsymbol
(Figure3),whichsignalsahazardthatmaycauseserious
injuryordeathifyoudonotfollowtherecommended
precautions.
Figure3
1.Safetyalertsymbol.
Thismanualusestwootherwordstohighlight
information.Importantcallsattentiontospecial
mechanicalinformationandNoteemphasizesgeneral
informationworthyofspecialattention.
©2007—TheToro®Company
8111LyndaleAvenueSouth
Bloomington,MN554202
Contactusatwww.Toro.com.
PrintedintheUSA.
AllRightsReserved

Contents
Introduction.................................................................2
Safety...........................................................................4
SafeOperatingPractices.......................................4
ToroMowerSafety...............................................5
SoundPressureforaFlex18.................................6
SoundPowerforaFlex18....................................6
VibrationforaFlex18..........................................6
SoundPressureforaFlex21.................................7
SoundPowerforaFlex21....................................7
VibrationforaFlex21..........................................7
SafetyandInstructionalDecals.............................7
Setup..........................................................................10
1InstallingtheHandle........................................11
2InstallingtheKickstandforFlex18Mowers
Only...............................................................11
3AdjustingtheHandle.......................................12
4InstallingtheTransportWheels........................12
5CheckingFluidLevels......................................13
6InstallingtheGrassBasket...............................13
ProductOverview......................................................14
Controls.............................................................14
Specications.....................................................15
Attachments/Accessories...................................16
Operation...................................................................16
ThinkSafetyFirst...............................................16
CheckingtheEngineOilLevel............................16
FillingtheFuelTank...........................................16
CheckingtheInterlockSwitchOperation............17
StartingandStoppingtheEngine........................17
TransportOperation..........................................18
PreparingtoMow...............................................18
MowingOperation.............................................18
Maintenance...............................................................20
RecommendedMaintenanceSchedule(s)................20
DailyMaintenanceChecklist...............................21
EngineMaintenance...............................................22
EngineOil..........................................................22
ServicingtheAirCleaner....................................22
ReplacingtheSparkPlug....................................23
FuelSystemMaintenance.......................................24
CleaningtheFuelFilter.......................................24
ElectricalSystemMaintenance................................24
ServicingtheInterlockSwitch............................24
DriveSystemMaintenance.....................................25
CheckingtheTransmissionFluidLevel...............25
ChangingtheTransmissionFluid........................26
BrakeMaintenance.................................................26
AdjustingtheService/ParkingBrake...................26
BeltMaintenance....................................................27
AdjustingtheBelts.............................................27
ControlsSystemMaintenance.................................30
AdjustingtheTractionControl...........................30
AdjustingtheReelControl..................................30
CuttingUnitMaintenance.......................................31
SeparatingtheCuttingUnitfromtheTraction
Unit................................................................31
AdjustingtheRearRoller....................................31
AdjustingtheBedknifetotheReel......................32
AdjustingtheHeightofCut................................33
AdjustingtheCut-OffBar..................................34
SettingtheMachinetoMatchTurf
Conditions.....................................................35
ServicingtheBedbar...........................................36
BacklappingtheReel..........................................37
Storage.......................................................................38
3

Safety
ThismachinemeetsorexceedsCENstandard
EN836:1997,ISOstandard5395:1990,andANSI
B71.4-2004specicationsineffectatthetimeof
productionwhentheOperatorPresenceKit,PartNo.
105-5333isinstalled.
Improperuseormaintenancebytheoperatororowner
canresultininjury.Toreducethepotentialforinjury,
complywiththesesafetyinstructionsandalwayspay
attentiontothesafetyalertsymbol,whichmeans
CAUTION,WARNING,orDANGER-“personalsafety
instruction."Failuretocomplywiththeinstructionmay
resultinpersonalinjuryordeath.
SafeOperatingPractices
ThefollowinginstructionsarefromtheCENstandard
EN836:1997,ISOstandard5395:1990,andANSI
B71.4-2004.
Training
•ReadtheOperator’sManualandothertraining
materialcarefully.Befamiliarwiththecontrols,
safetysigns,andtheproperuseoftheequipment.
•Neverallowchildrenorpeopleunfamiliarwiththese
instructionstouseorservicethemower.Local
regulationsmayrestricttheageoftheoperator.
•Nevermowwhilepeople,especiallychildren,orpets
arenearby.
•Keepinmindthattheoperatororuserisresponsible
foraccidentsorhazardsoccurringtootherpeopleor
theirproperty.
•Theowner/usercanpreventandisresponsiblefor
accidentsorinjuriesoccurringtohimselforherself,
otherpeople,orproperty.
Preparation
•Whilemowing,alwayswearsubstantialfootwear,
longtrousers,hardhat,safetyglasses,andear
protection.Longhair,looseclothing,orjewelrymay
gettangledinmovingparts.Donotoperatethe
equipmentwhenbarefootorwearingopensandals.
•Thoroughlyinspecttheareawheretheequipment
istobeusedandremoveallobjectswhichmaybe
thrownbythemachine.
•Warning-Fuelishighlyammable.Takethe
followingprecautions:
–Storefuelincontainersspecicallydesignedfor
thispurpose.
–Refueloutdoorsonlyanddonotsmokewhile
refuelling.
–Addfuelbeforestartingtheengine.Never
removethecapofthefueltankoraddfuelwhile
theengineisrunningorwhentheengineishot.
–Iffuelisspilled,donotattempttostartthe
enginebutmovethemachineawayfromthe
areaofspillageandavoidcreatinganysourceof
ignitionuntilfuelvaporshavedissipated.
–Replaceallfueltanksandcontainercapssecurely.
•Replacefaultysilencers.
•Evaluatetheterraintodeterminewhataccessories
andattachmentsareneededtoproperlyand
safelyperformthejob.Onlyuseaccessoriesand
attachmentsapprovedbythemanufacturer.
•Checkthatoperator’spresencecontrols,safety
switchesandshieldsareattachedandfunctioning
properly.Donotoperateunlesstheyarefunctioning
properly.
Operation
•Donotoperatetheengineinaconnedspacewhere
dangerouscarbonmonoxidefumescancollect.
•Mowonlyindaylightoringoodarticiallight.
•Beforeattemptingtostarttheengine,disengageall
bladeattachmentclutches,shiftintoneutral,and
engagetheparkingbrake.
•Donotuseonslopesofmorethan15°.
•Rememberthereisnosuchthingasasafeslope.
Travelongrassslopesrequiresparticularcare.To
guardagainstoverturning:
–donotstoporstartsuddenlywhengoingupor
downhill;
–engageclutchslowly,alwayskeepmachinein
gear,especiallywhentravellingdownhill;
–machinespeedsshouldbekeptlowonslopes
andduringtightturns;
–stayalertforhumpsandhollowsandother
hiddenhazards;
–nevermowacrossthefaceoftheslope,unless
themowerisdesignedforthispurpose.
•Stayalertforholesintheterrainandotherhidden
hazards.
•Watchoutfortrafcwhencrossingornearroadways.
•Stopthebladesrotatingbeforecrossingsurfaces
otherthangrass.
4

•Whenusinganyattachments,neverdirectdischarge
ofmaterialtowardbystandersnorallowanyonenear
themachinewhileinoperation.
•Neveroperatethemachinewithdamagedguards,
shields,orwithoutsafetyprotectivedevicesinplace.
Besureallinterlocksareattached,adjustedproperly,
andfunctioningproperly.
•Donotchangetheenginegovernorsettingsor
overspeedtheengine.Operatingtheengineat
excessivespeedmayincreasethehazardofpersonal
injury.
•Beforeleavingtheoperator’sposition:
–stoponlevelground;
–disengagethepowertake-offandlowerthe
attachments;
–changeintoneutralandsettheparkingbrake;
–stoptheengine.
•Disengagedrivetoattachmentswhentransporting
ornotinuse.
•Stoptheengineanddisengagedrivetoattachment
–beforerefuelling;
–beforeremovingthegrasscatcher/catchers;
–beforemakingheightadjustmentunless
adjustmentcanbemadefromtheoperator’s
position.
–beforeclearingblockages;
–beforechecking,cleaningorworkingonthe
mower;
–afterstrikingaforeignobjectorifanabnormal
vibrationoccurs.Inspectthemowerfordamage
andmakerepairsbeforerestartingandoperating
theequipment.
•Reducethethrottlesettingbeforestoppingengine
and,iftheengineisprovidedwithafuelshut-off
valve,turnthevalveoffattheconclusionofmowing.
•Keephandsandfeetawayfromthecuttingunit.
•Slowdownandusecautionwhenmakingturns
andcrossingroadsandsidewalks.Stopreelsifnot
mowing.
•Donotoperatethemowerundertheinuenceof
alcoholordrugs
•Usecarewhenloadingorunloadingthemachine
intoatrailerortruck
•Usecarewhenapproachingblindcorners,shrubs,
trees,orotherobjectsthatmayobscurevision.
MaintenanceandStorage
•Keepallnuts,boltsandscrewstighttobesurethe
equipmentisinsafeworkingcondition.
•Neverstoretheequipmentwithfuelinthetank
insideabuildingwherefumesmayreachanopen
ameorspark.
•Allowtheenginetocoolbeforestoringinany
enclosure.
•Toreducetherehazard,keeptheengine,silencer,
batterycompartmentandfuelstorageareafreeof
grass,leaves,orexcessivegrease.
•Checkthegrasscatcherfrequentlyforwearor
deterioration.
•Keepallpartsingoodworkingconditionandall
hardwareandhydraulicttingstightened.Replaceall
wornordamagedpartsanddecals.
•Ifthefueltankhastobedrained,dothisoutdoors.
•Becarefulduringadjustmentofthemachineto
prevententrapmentofthengersbetweenmoving
bladesandxedpartsofthemachine.
•Disengagedrives,disengagethecuttingunit,set
parkingbrake,stopengineanddisconnectsparkplug
wire.Waitforallmovementtostopbeforeadjusting,
cleaningorrepairing.
•Cleangrassanddebrisfromcuttingunit,drives,
mufers,andenginetohelppreventres.Cleanup
oilorfuelspillage.
•Carefullyreleasepressurefromcomponentswith
storedenergy.
•Disconnectbatteryandremovesparkplugwire
beforemakinganyrepairs.Disconnectthenegative
terminalrstandthepositivelast.Reconnect
positiverstandnegativelast.
•Usecarewhencheckingthereel.Wearglovesand
usecautionwhenservicingthem.
•Keephandsandfeetawayfrommovingparts.If
possible,donotmakeadjustmentswiththeengine
running.
ToroMowerSafety
Thefollowinglistcontainssafetyinformationspecic
toToroproductsorothersafetyinformationthatyou
mustknowthatisnotincludedintheCEN,ISO,or
ANSIstandard.
Thisproductiscapableofamputatinghandsand
feetandthrowingobjects.Alwaysfollowallsafety
instructionstoavoidseriousinjuryordeath.
Useofthisproductforpurposesotherthanitsintended
usecouldprovedangeroustouserandbystanders.
•Knowhowtostoptheenginequickly.
•Donotoperatethemachinewhilewearingtennis
shoesorsneakers.
5

•Wearingsafetyshoesandlongpantsisadvisableand
requiredbysomelocalordinancesandinsurance
regulations.
•Handlegasolinecarefully.Wipeupanyspills.
•Checkthesafetyinterlockswitchesdailyforproper
operation.Ifaswitchshouldfail,replacetheswitch
beforeoperatingthemachine.Aftereverytwoyears,
replaceallinterlockswitchesinthesafetysystem,
regardlessiftheyareworkingproperlyornot.
•Alwaysstandbehindthehandlewhenstartingand
operatingthemachine.
•Tostartandstoptheengine:
–Openfuelshut-offvalve.
–Verifythatthetractionandreeldrivecontrol
leversonhandleareinNeutralposition.
–Moveon/offswitchtoONposition,setchoke
tofullchokeposition(coldstart)andthrottleto
halfthrottle.
–Pullstartercordtostartengine.
–MovethrottletoSlowandon/offswitchtoOff
positiontostopengine.
•Totransportmowerfromoneareatoanother:
–Installtransportwheels.
–Disengagereeldrive.
–Startengine.
–Pressdownonhandletoraisefrontofmower
andengagetractiondrive.
•Beforebeginningmowingoperation:
–Disengagetractiondrive.
–Stopengine.
–Removetransportwheels.
–Startengine
–Engagereeldrive.
•Usingthemachinedemandsattention.Toprevent
lossofcontrol:
–Donotdriveclosetosandtraps,ditches,creeks,
orotherhazards.
–Reducespeedwhenmakingsharpturns.Avoid
suddenstopsandstarts.
–Whennearorcrossingroads,alwaysyieldthe
right-of-way.
–Applytheservicebrakeswhengoingdownhillto
keepforwardspeedslowandtomaintaincontrol
ofthemachine.
•Thegrassbasketmustbeinplaceduringoperation
ofthereelsorthatchersformaximumsafety.Shut
theengineoffbeforeemptyingthebaskets.
•Donottouchtheengine,mufer,orexhaustpipe
whiletheengineisrunningorsoonafterithas
stoppedbecausetheseareascouldbehotenough
tocauseburns.
•Stayclearoftherotatingscreenatthesideofthe
enginetopreventdirectcontactwithyourbodyor
clothing.
•Whenapersonorpetappearsunexpectedlyin
ornearthemowingarea,stopmowing.Careless
operation,combinedwithterrainangles,ricochets,
orimproperlypositionedguardscanleadtothrown
objectinjuries.Donotresumemowinguntilthe
areaiscleared.
MaintenanceandStorage
•Checkallfuellinesfortightnessandwearona
regularbasis.Tightenorrepairthemasneeded.
•Iftheenginemustberunningtoperforma
maintenanceadjustment,keephands,feet,clothing,
andanypartsofthebodyawayfromthecuttingunit,
attachments,andanymovingparts,especiallythe
screenatthesideoftheengine.Keepeveryoneaway.
•Toensuresafetyandaccuracy,haveanAuthorized
ToroDistributorcheckthemaximumenginespeed
withatachometer.Maximumgovernedenginespeed
shouldbe3600RPM.
•Ifmajorrepairsareeverneededorifassistanceis
desired,contactanAuthorizedToroDistributor.
•UseonlyToro-approvedattachmentsand
replacementparts.Thewarrantymaybevoidedif
usedwithunapprovedattachments.
SoundPressureforaFlex18
Thisunithasamaximumsoundpressurelevelatthe
operator’searof85dBA,basedonmeasurementsof
identicalmachinesperEN11094andEN836.
SoundPowerforaFlex18
Thisunithasaguaranteedsoundpowerlevelof96dBA,
basedonmeasurementsofidenticalmachinesperEN
11094.
VibrationforaFlex18
Thisunitdoesnotexceedahand/armvibrationlevelof
2.50m/s2,basedonmeasurementsofidenticalmachines
perEN1033.
6

SoundPressureforaFlex21
Thisunithasamaximumsoundpressurelevelatthe
operator’searof85dBA,basedonmeasurementsof
identicalmachinesperEN11094andEN836.
SoundPowerforaFlex21
Thisunithasaguaranteedsoundpowerlevelof98dBA,
basedonmeasurementsofidenticalmachinesperEN
11094.
VibrationforaFlex21
Thisunitdoesnotexceedahand/armvibrationlevelof
2.50m/s2,basedonmeasurementsofidenticalmachines
perEN1033.
SafetyandInstructional
Decals
Safetydecalsandinstructionsareeasilyvisibletotheoperatorandarelocatednearanyareaof
potentialdanger.Replaceanydecalthatisdamagedorlost.
93-7348
1.Warning—readtheOperator’sManual.
2.Firehazard—nore,openames,orsmoking;whenadding
fueltothetank,leavespacebetweenthefuelandthetopof
thetank.
3.Thrownobjecthazard—keepbystandersasafedistance
fromthemachine.
4.Cuttinghazardofhandorfoot—stayawayfrommovingparts
93-9356
1.Entanglementhazard—stayawayfrommovingparts.
105-5309
1.Hotsurface/burnhazard—keepasafedistancefromthe
hotsurface.
93-6085
1.Fast3.Slow
2.Continuousvariable
setting
7

93-9886
1.Useunleadedgasoline.
104-2618
1.Parkingbrake3.Engage
2.Disengage
93-8064
1.Warning—readtheinstructionsbeforeservicingor
performingmaintenance.
2.Cuttinghazardofhandorfoot—stoptheengineandwaitfor
movingpartstostop.
104-2617
1.Tractiondrive4.Forward
2.Reeldrive5.Leverengaged
3.Neutral6.Leverdisengaged
105-2411
1.Transmissionoil
8

104-2621
1.ReadtheOperator’sManual.
9

Setup
LooseParts
Usethechartbelowtoverifythatallpartshavebeenshipped.
ProcedureDescriptionQty.Use
1Handle1Installthehandle.
Kickstandassembly1
Spring1
Smallspacer1
Largespacer1
Largebolt(M8–1.25x100)1
Smallbolt(M8–1.25x030)1
Locknut(M8x1.25)2
2
Washer(M8)2
InstallthekickstandforFlex18Mowers
Only.
3Nopartsrequired–Adjustthehandle.
4Transportwheels(OptionalTransport
WheelKit,Model04123)2Installthetransportwheels.
5Nopartsrequired–Checktheengineoilandtransmission
uidlevels
6Grassbasket1Installthegrassbasket.
MediaandAdditionalParts
DescriptionQty.Use
Operator’sManual1
EngineOperator’sManual1
PartsCatalog1
OperatorTrainingMaterial1
CerticateofCompliance1
Readorviewbeforeoperatingthemachine
Note:Determinetheleftandrightsidesofthemachine
fromthenormaloperatingposition.
10

1
InstallingtheHandle
Partsneededforthisprocedure:
1Handle
Procedure
1.Removetheangelocknutfromtheboltandpivot
pinoneachsideofthemower(Figure4).
Figure4
1.Flangelocknut2.Pivotpin
2.Insertthehandleendsthroughtheslotsinthehandle
supportarms(Figure5).
Figure5
1.Lefthandleend3.Pivotpin
2.Supportarm4.Locknut
3.Squeezethehandleendsinwardandinstallthemon
thestepofthepivotpin(Figure5).
4.Securethehandletotheboltandpivotpinwiththe
angelocknut(Figure5).
5.Locatecabletielooselysecuringthrottlecableto
wireharness.Positioncabletieapproximatelyone
inchbehindtransmissionandtightencabletie.
2
InstallingtheKickstandfor
Flex18MowersOnly
Partsneededforthisprocedure:
1Kickstandassembly
1Spring
1Smallspacer
1Largespacer
1Largebolt(M8–1.25x100)
1Smallbolt(M8–1.25x030)
2Locknut(M8x1.25)
2Washer(M8)
Procedure
1.Positionthekickstandbetweenthetabsontherear
oftheframe.
2.Installawasher(M8)ontothesmallbolt(M8–1.25
x030).Installtherightsideofthekickstandtothe
framewiththeboltandwasher,thesmallspacer,
andlocknut(M8–1.25)(Figure6).Ensurethebolt
isinstalledfromtheinsideoftheframeasshown
inFigure6.
3.Installawasher(M8)ontothelargebolt(M8–1.25x
100).
4.Installthespacerintothespringandinstallthelarge
bolt(M8–1.25x100)intothespacer.
Important:Wheninstallingthespring,place
oneendofthespringundertherearframe
(Figure6).
5.Installtheleftsideofthekickstandtotheframe
withtheboltandwasher,thelargespacerandspring,
andlocknut(M8–1.25)(Figure6).Ensurethebolt
isinstalledfromtheinsideoftheframeasshown
inFigure6.
11

Figure6
1.Lefthandleend5.Largebolt(M8–1.25x
100)
2.Locknut(M8–1.25)6.Spring
3.Smallspacer7.Largespacer
4.Washer(M8)8.Ssmallbolt(M8–1.25x
030)
6.Placeanutrunnerovertheendofthespringpointing
towardstherearandmovetheendofthespringover
andunderthekickstandspacer(Figure7).
Figure7
1.Spring3.Nutrunner
2.Springendunderthe
frame
4.Movethespringendunder
thekickstandspacer.
3
AdjustingtheHandle
NoPartsRequired
Procedure
1.Removehairpincottersfromringpinsoneachside
ofmower(Figure8).
Figure8
1.Ringpins
2.Whilesupportinghandle,removeringpinsfrom
eachsideandraiseorlowerhandletodesired
operatingposition(Figure8).
3.Reinstallringpinsandhairpincotters.
4
InstallingtheTransport
Wheels
Partsneededforthisprocedure:
2Transportwheels(OptionalTransportWheelKit,
Model04123)
Procedure
1.Pushkickstanddownwithfootandpullupon
handlesupportuntilkickstandhasrotatedforward,
overcenter(Figure9).
12

Figure9
1.Kickstand
2.Presswheellockingcliptowardthecenterofwheel
andslidewheelontohexshaft(Figure10).
Figure10
1.Lockingclip
3.Rotatewheelbackandforthuntilitslidescompletely
ontoaxleandlockingclipissecuredingrooveon
axleshaft.
4.Repeatprocedureonoppositesideofmachine.
5.Inatethetiresto12-15psi.
6.Carefullyliftuponhandlesupporttoreleasekick
stand.
5
CheckingFluidLevels
NoPartsRequired
Procedure
1.Checktheengineoillevel,refertoCheckingthe
EngineOilLevelinEngineMaintenance,page22.
2.Checkthetransmissionuidlevel,refertoChecking
theTransmissionFluidLevelinDriveSystem
Maintenance,page25.
6
InstallingtheGrassBasket
Partsneededforthisprocedure:
1Grassbasket
Procedure
Graspbasketbytoplipandslidebasketframeintothe
receivers(Figure11).
Figure11
1.Grassbasket2.Basketreceivers
13

ProductOverview
Figure12
1.Handle5.Cuttingunit
2.Controlpanel6.Grassbasket
3.Engine7.Fueltank
4.Transportwheels
Controls
Figure13
1.Throttlecontrol3.Service/parkingbrake
2.Traction&reeldrive
engagementlever
ThrottleControl
Thethrottlecontrol(Figure13)islocatedonrearright
sideofcontrolpanel.Leverconnectstoandoperates
throttlelinkagetocarburetor.Enginespeedcanbe
variedfrom2400RPMto3600RPM.
TractionandReelDriveEngagement
Lever
Thetractionandreeldriveengagementlever(Figure13)
islocatedonfrontrightsideofcontrolpanel.Traction
leverhastwopositions:NeutralandForward.Pushing
leverforwardengagestractiondrive.
Thereeldriveleverhastwopositions:Engageand
Disengage.Movetopoflevertothelefttoengagereel
orbacktoneutraltodisengagereel.
Service/ParkingBrake
Theservice/parkingbrake(Figure13)islocatedonleft
frontsideofcontrolpanel.Pullingtheleverbackover
centerwillsettheparkingbrake.Brakemustbereleased
beforetractiondriveisengaged.
OperatorPresenceControl
Theoptionaloperatorpresencecontrolmustbeengaged
beforeengagingthetractionleverortheenginewillstop.
ChokeLever
Thechokelever(Figure14)islocatedonleftfrontof
engine.Leverhastwopositions:RunandChoke.Move
thechokelevertothehalf-openpositionwhenstarting
acoldengine.AfterenginestartsmovelevertoRun
position.
Figure14
1.Chokelever2.Fuelshut-offvalve
FuelShut-OffValve
Thefuelshut-offvalve(Figure14)islocatedonleft
frontofengine.Valvehastwopositions:Closedand
Open.Movelevertoclosedpositionwhenstoring
14

ortransportingmachine.Openvalvebeforestarting
engine.
RecoilStarter
Pullrecoilstarterhandle(Figure15)tostartengine.
Figure15
1.Recoilstarter3.Hourmeter
2.On/offswitch
On/OffSwitch
Theon/offswitch(Figure15)islocatedonrearof
engine.MoveswitchtoOnpositiontostartengineand
Offtostopengine.
HourMeter
Thehourmeter(Figure15)locatedonrearofengine,
indicatesthetotalhoursofmachineoperation.
Kickstand
Thekickstand(Figure16)ismountedtorearofmachine
andisusedtoraiserearofmachineforinstallationor
removaloftransportwheels.
Figure16
1.Kickstand
Specications
Flex21Flex18
Width35-1/2inches(90.1
cm)
32inches(81.3cm)
Height41–1/4inches
(104.8cm)
41–1/2inches
(105.4cm)
Lengthwithbasket61–1/2inches
(156.2cm)
61inches(155cm)
Weightwithfull
uidsandbasket
267lb(121kg)261lb(118kg)
Dryweightwith
basket
256lb(116kg)250lb(113kg)
EngineKawasaki,4-cycle,
3.7(2.7kw)air
cooledOHV
engine,3600
RPM,7.57cu
inch(124cc)
displacement,cast
ironcylindersleeve;
electronicignition
withintegrallighting
coil;maximum
noisesuppression
mufer;85dB(A)at
operator’sear
Kawasaki,4-cycle,
3.7(2.7kw)air
cooledOHV
engine,3600
RPM,7.57cu
inch(124cc)
displacement,cast
ironcylindersleeve;
electronicignition
withintegrallighting
coil;maximum
noisesuppression
mufer;85dB(A)at
operator’sear
Fuelcapacity2.64qt.(2.5
l);regulargrade
unleadedgasoline
2.64qt.(2.5
l);regulargrade
unleadedgasoline
GroundspeedMowingspeed:1.3
to3.3MPH(2.1to
5.3km/h)Transport
speed:4.9
MPH(7.9km/h)
maximum
Mowingspeed:1.3
to3.3MPH(2.1to
5.3km/h)Transport
speed:4.9
MPH(7.9km/h)
maximum
Widthofcut21inches(53.3cm)18inches(45.7cm)
15

Heightofcut1/16to19/64
inches(1.5to7.5
mm)withMicro-Cut
bedknife
1/16to19/64
inches(1.5to7.5
mm)withMicro-Cut
bedknife
Clipfrequency11blade
(standard):.14
in.
11blade
(standard):.14
inch
Attachments/Accessories
AselectionofToroapprovedattachmentsand
accessoriesareavailableforusewiththemachineto
enhanceandexpanditscapabilities.Contactyour
AuthorizedServiceDealerorDistributororgoto
www.Toro.comforalistofallapprovedattachments
andaccessories.
Operation
Note:Determinetheleftandrightsidesofthe
machinefromthenormaloperatingposition.
ThinkSafetyFirst
Pleasecarefullyreadallofthesafetyinstructionsand
decalsinthesafetysection.Knowingthisinformation
couldhelpyouorbystandersavoidinjury.
CheckingtheEngineOilLevel
Checktheengineoillevelbeforeeachuseorevery8
operatinghours,refertoCheckingtheEngineOilLevel
inEngineMaintenance,page22.
FillingtheFuelTank
Important:Neverusemethanol,gasoline
containingmethanol,gasoholcontainingmore
than10%ethanol,gasolineadditives,premium
gasoline,orwhitegasbecausethefuelsystem
couldbedamaged.Donotmixoilwithgasoline.
Figure17
1.Fueltankcap2.Fuelgauge
Gasolineisharmfulorfatalifswallowed.
Long-termexposuretovaporscancauseserious
injuryandillness.
•Avoidprolongedbreathingofvapors.
•Keepfaceawayfromnozzleandgastankor
conditioneropening.
•Keepgasawayfromeyesandskin.
16

Incertainconditions,gasolineisextremely
ammableandhighlyexplosive.Areor
explosionfromgasolinecanburnyouand
othersandcandamageproperty.
•Fillthefueltankoutdoors,inanopenarea,
whentheengineiscold.Wipeupany
gasolinethatspills.
•Donotllthefueltankcompletelyfull.Add
gasolinetothefueltankuntilthelevelis1/4
to1/2inch(6to13mm)belowthebottomof
thellerneck.Thisemptyspaceinthetank
allowsgasolinetoexpand.
•Neversmokewhenhandlinggasoline,and
stayawayfromanopenameorwhere
gasolinefumesmaybeignitedbyaspark.
•Storegasolineinanapprovedcontainerand
keepitoutofthereachofchildren.Never
buymorethana30-daysupplyofgasoline.
•Alwaysplacegasolinecontainersonthe
groundawayfromyourvehiclebeforelling.
•Donotllgasolinecontainersinsidea
vehicleoronatruckortrailerbedbecause
interiorcarpetsorplastictruckbedliners
mayinsulatethecontainerandslowtheloss
ofanystaticcharge.
•Whenpractical,removegas-powered
equipmentfromthetruckortrailerand
refueltheequipmentwithitswheelsonthe
ground.
•Ifthisisnotpossible,thenrefuelsuch
equipmentonatruckortrailerfroma
portablecontainer,ratherthanfroma
gasolinedispensernozzle.
•Ifagasolinedispensernozzlemustbeused,
keepthenozzleincontactwiththerimof
thefueltankorcontaineropeningatall
timesuntilfuelingiscomplete.
1.Cleanaroundfueltankcapandremovecapfrom
tank(Figure17).Usingunleadedgasoline,llfuel
tanknohigherthantobottomoflterscreen.Do
notoverll.
2.Installfueltankcapandwipeupanyspilledgasoline.
CheckingtheInterlockSwitch
Operation
Ifsafetyinterlockswitchesaredisconnected
ordamagedthemachinecouldoperate
unexpectedlycausingpersonalinjury.
•Donottamperwiththeinterlockswitches.
•Checktheoperationoftheinterlock
switchesdailyandreplaceanydamaged
switchesbeforeoperatingthemachine.
•Replaceswitcheseverytwoyearsregardless
ofwhethertheyareoperatingproperlyor
not.
1.Pushkickstanddownwithfootandpullupon
handlesupportuntilkickstandhasrotatedforward,
overcenter(Figure18).
Figure18
1.Kickstand
2.PlacetractionleverintoEngagepositionandengine
controlsinstartingposition.
3.Attempttostartengine.Engineshouldnotstart.
Ifenginestarts,theinterlockswitchneedsservice.
Correctproblembeforeoperating.Referto
ServicingInterlockSwitch.
4.Carefullyliftuponhandletoreleasekickstand.
StartingandStoppingthe
Engine
Note:Forillustrationsanddescriptionsofthecontrols
referencedinthissection,refertoControls,page14.
17

StartingtheEngine
Note:Makesuresparkplugwireisinstalledonspark
plug.
1.Makesuretractionandreeldriveleversarein
Disengagedposition.
Note:Enginewillnotstartiftractionleverisin
theengagedposition.
2.Openthefuelshut-offvalveontheengine.
3.Movetheon/offswitchtotheOnposition.
4.MovethethrottlecontroltotheFastposition.
5.Movethechokelevertothehalf-openposition
whenstartingacoldengine.Thechokemaynotbe
requiredwhenstartingawarmengine.
6.Pulltherecoilstarterhandleoutuntilpositive
engagementresults,thenpullitvigorouslytostart
theengine.Openthechokeasenginewarmsup.
Important:Donotpullrecoilropetoitslimit
orletgoofstarterhandlewhenropeispulled
outbecauseropemaybreakorrecoilassembly
maybedamaged.
StoppingtheEngine
1.Movethetractionandreeldrivecontrolstothe
Disengagedposition,thethrottlecontroltoSlow ,
andtheon/offswitchtoOff.
2.Pullthemoldedsparkplugwireoffofthespark
plugtopreventthepossibilityofaccidentalstarting
beforestoringmachine.
3.Closethefuelshut-offvalvebeforestoringor
transportingmowerinavehicle.
TransportOperation
Note:Donotrunthemowerenginewhiletransporting
itinatransporttrailerbecausedamagecanoccurto
themower.
1.Pushkickstanddownwithfootandpullupon
handlesupportuntilkickstandhasrotatedforward,
overcenter.
2.Toreleasekickstand,pulluponhandleandlower
rearofmowerontotransportwheels.
3.Ensuretractionandreeldrivecontrolsarein
Disengagepositionandstartengine.
4.SetthrottlecontroltoSlow,tipfrontofmachineup
graduallyengagetractiondriveandslowlyincrease
enginespeed.
5.Adjustthrottletooperatemoweratdesiredground
speedandtransportmowertodesireddestination.
PreparingtoMow
1.ReturntractioncontrollevertoDisengage,throttle
toSlowandstopengine.
2.Pushkickstanddownwithfootandpullupon
handlesupportuntilkickstandhasrotatedforward,
overcenter.
3.Removetransportwheels.
4.Releasekickstand.
MowingOperation
Properuseofthemachineprovidesthesmoothestturf
cuttingavailable.
Important:Grassclippingsactasalubricant
whenmowing.Excessiveoperationofthecutting
unitwiththeabsenceofgrassclippingscan
damagethecuttingunit.
PriortoMowing
Besurethemoweriscarefullyadjustedandissetevenly
onbothsidesofthereel.Impropermoweradjustment
ismagniedintheappearanceoftheclippedturf.
Removeallforeignobjectsfromturfpriortomowing.
Makesureeveryone,especiallychildrenandpets,are
clearoftheworkarea.
MethodofMowing
Thegreensshouldbemowedinastraightbackand
forthdirectionacrossthegreen.Avoidcircularmowing
orturningthemowerongreensareassincescufngmay
occur.Turningthemowershouldbedoneoffthegreen
byraisingthecuttingreel(pushingthehandledown)
andturningonthetractiondrum.Mowingshouldbe
doneatanormalwalkingpace.Fastspeedssavesvery
littletimeandwillresultinaninferiormowingjob.
Toassistinmaintainingastraightlineacrossthegreen
andtokeepthemachineanequaldistancefromthe
edgeofthepreviouscut,usethealignmentstripeson
thebasket(Figure19).
18

Figure19
1.Alignmentstripes
ControlOperation
Tooperatethecontrolswhilemowing:
1.Starttheengine,setthethrottleatreducedspeed,
pushdownonhandletoraisecuttingunit,move
tractionlevertoEngagedpositionandtransport
mowerontocollarofgreen(Figure20).
2.MovetractionlevertoDisengagedpositionand
Engagereeldrivelever(Figure20).
Figure20
1.Tractiondrive-neutral3.Tractiondrive-engaged
(transport)
2.Tractiondriveneutral&
reeldriveoff
4.Tractiondrive&reeldrive
engaged
3.MovetractionlevertoEngagedposition,increase
throttlespeeduntilthemoweristravelingatthe
desiredgroundspeed,drivethemoweroutontothe
greenarea,lowerthefrontofthemowerdownand
commenceoperation(Figure20).
AfterMowing
1.Driveoffgreen,movereeldriveandtractioncontrol
leverstoDisengageandstoptheengine.
2.Emptythegrasscatcherofclippings,installgrass
catcherandcommencetransportoperation.
19

Maintenance
Note:Determinetheleftandrightsidesofthemachinefromthenormaloperatingposition.
RecommendedMaintenanceSchedule(s)
MaintenanceService
IntervalMaintenanceProcedure
Aftertherst8hours•Changetheengineoil.
Aftertherst25hours•Cleanthefuellter.
•Changethetransmissionuid.
Beforeeachuseordaily•Checktheengineoillevel.
Every25hours•Cleantheaircleaner(moreoftenindirtyordustyconditions).
Every50hours
•Changetheengineoil.
•Cleanthefuellter.
•Checkthetransmissionuidlevel.
Every100hours•Cleanorreplacethepaperairlterelement(moreoftenindirtyordustyconditions).
•Checkthesparkplug.
Every200hours•Decarbontheengine.
Every1,500hours•Replacetheinterlockswitch.
•Changethetransmissionuid.(Or2years,whicheveroccursrst)
Beforestorage•Paintchippedsurfaces.
Important:Refertoyourengineoperator’smanualforadditionalmaintenanceprocedures.
20
This manual suits for next models
7
Table of contents
Other Toro Lawn Mower manuals

Toro
Toro 22173 User manual

Toro
Toro Groundsmaster 360 User manual

Toro
Toro GrandStand User manual

Toro
Toro Z441 Z Master 74441 User manual

Toro
Toro 20340 User manual

Toro
Toro Titan Z4800 74812 Manual

Toro
Toro 30433 User manual

Toro
Toro Master Commercial 3000 Series User manual

Toro
Toro 30353 User manual

Toro
Toro 30430 User manual