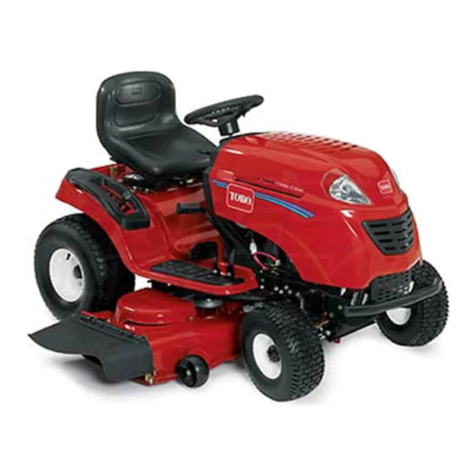
Toro 30873 User manual

FormNo.3376-169RevC
Groundsmaster®4500-Dand
4700-DTractionUnit
ModelNo.30873—SerialNo.313000001andUp
ModelNo.30874—SerialNo.313000001andUp
Registeratwww.Toro.com.
OriginalInstructions(EN)*3376-169*C

ThisproductcomplieswithallrelevantEuropeandirectives,
fordetailspleaseseetheseparateproductspecicDeclaration
ofConformity(DOC)sheet.
WARNING
CALIFORNIA
Proposition65Warning
Dieselengineexhaustandsomeofits
constituentsareknowntotheStateof
Californiatocausecancer,birthdefects,
andotherreproductiveharm.
Becauseinsomeareastherearelocal,state,orfederal
regulationsrequiringthatasparkarresterbeusedonthe
engineofthismachine,asparkarresterisincorporatedwith
themuferassembly.
GenuineTorosparkarrestersareapprovedbytheUSDA
ForestryService.
Important:Thisengineisequippedwithaspark
arrestermufer.ItisaviolationofCaliforniaPublic
ResourceCodeSection4442touseoroperatetheengine
onanyforest-covered,brush-covered,orgrass-covered
landwithoutasparkarrestermufermaintainedin
workingorder,ortheengineconstricted,equipped,and
maintainedforthepreventionofre.Otherstatesor
federalareasmayhavesimilarlaws.
ThissparkignitionsystemcomplieswithCanadianICES-002.
Theenclosed
Engine Owner's Man ual
issuppliedfor
informationregardingtheUSEnvironmentalProtection
Agency(EPA)andtheCaliforniaEmissionControl
Regulationofemissionsystems,maintenance,and
warranty.Replacementsmaybeorderedthroughthe
enginemanufacturer.
Introduction
Thismachineisaride-on,rotary-bladelawnmowerintended
tobeusedbyprofessional,hiredoperatorsincommercial
applications.Itisprimarilydesignedforcuttinggrasson
well-maintainedlawnsinparks,golfcourses,sportselds,
andoncommercialgrounds.Itisnotdesignedforcutting
brush,mowinggrassandothergrowthalongsidehighways,
orforagriculturaluses.
Readthisinformationcarefullytolearnhowtooperateand
maintainyourproductproperlyandtoavoidinjuryand
productdamage.Youareresponsibleforoperatingthe
productproperlyandsafely.
YoumaycontactTorodirectlyatwww.Toro.comforproduct
andaccessoryinformation,helpndingadealer,ortoregister
yourproduct.
Wheneveryouneedservice,genuineToroparts,oradditional
information,contactanAuthorizedServiceDealerorToro
CustomerServiceandhavethemodelandserialnumbersof
yourproductready.Figure1identiesthelocationofthe
modelandserialnumbersontherightfrontframemember
oftheproduct.Writethenumbersinthespaceprovided.
Figure1
1.Modelandserialnumberlocation
ModelNo.
SerialNo.
Thismanualidentiespotentialhazardsandhassafety
messagesidentiedbythesafetyalertsymbol(Figure2),
whichsignalsahazardthatmaycauseseriousinjuryordeath
ifyoudonotfollowtherecommendedprecautions.
Figure2
1.Safetyalertsymbol.
Thismanualusestwootherwordstohighlightinformation.
Importantcallsattentiontospecialmechanicalinformation
andNoteemphasizesgeneralinformationworthyofspecial
attention.
©2013—TheToro®Company
8111LyndaleAvenueSouth
Bloomington,MN554202
Contactusatwww.Toro.com.
PrintedintheUSA.
AllRightsReserved

Contents
Introduction..................................................................2
Safety...........................................................................4
SafeOperatingPractices...........................................4
ToroRidingMowerSafety........................................5
SoundPowerLevel..................................................7
SoundPressureLevel...............................................7
VibrationLevel......................................................7
EngineEmissionCertication...................................7
SafetyandInstructionalDecals.................................8
Setup...........................................................................12
1ReplacingtheWarningDecalforCE
Compliance........................................................13
2InstallingtheHoodLatch(CEOnly).......................13
3GreasingtheMachine...........................................14
4CheckingFluidLevels...........................................14
ProductOverview.........................................................15
Controls...............................................................15
Specications........................................................21
Attachments/Accessories........................................21
Operation....................................................................22
CheckingtheEngineOilLevel.................................22
CheckingtheCoolingSystem...................................22
FillingtheFuelTank...............................................23
CheckingtheHydraulicFluidLevel...........................24
CheckingtheTirePressure......................................25
StartingandStoppingtheEngine..............................25
SmartPower..........................................................25
ReversingFanOperation.........................................25
AutoIdle...............................................................26
MowSpeed............................................................26
TransportSpeed.....................................................26
Counterbalance......................................................26
CheckingtheInterlockSwitches...............................26
PushingorTowingtheMachine................................27
JackingPoints........................................................27
TieDowns............................................................27
OperatingCharacteristics........................................27
OperatingTips......................................................28
Maintenance.................................................................29
RecommendedMaintenanceSchedule(s)......................29
DailyMaintenanceChecklist....................................30
ServiceIntervalChart.............................................31
PremaintenanceProcedures........................................32
RemovingtheHood...............................................32
Lubrication...............................................................32
GreasingtheBearingsandBushings..........................32
EngineMaintenance..................................................34
ServicingtheAirCleaner.........................................34
ServicingtheEngineOilandFilter............................35
FuelSystemMaintenance...........................................35
FuelTank..............................................................35
FuelLinesandConnections.....................................35
ServicingtheWaterSeparator..................................35
FuelPickupTubeScreen.........................................36
ElectricalSystemMaintenance....................................36
ChargingandConnectingtheBattery........................36
BatteryCare...........................................................37
Fuses....................................................................38
DriveSystemMaintenance.........................................39
CheckingtheTorqueoftheWheelNuts.....................39
CheckingthePlanetaryGearDriveOil......................39
ChangingthePlanetaryGearDriveOil......................39
CheckingtheRearAxleLubricant.............................40
ChangingtheRearAxleLubricant.............................40
CheckingtheRearWheelToe-In..............................40
CoolingSystemMaintenance......................................41
ServicingtheEngineCoolingSystem........................41
BrakeMaintenance....................................................42
AdjustingtheServiceBrakes....................................42
BeltMaintenance......................................................43
ServicingtheAlternatorBelt....................................43
HydraulicSystemMaintenance....................................43
ChangingtheHydraulicFluid...................................43
ReplacingtheHydraulicFilters.................................43
CheckingtheHydraulicLinesandHoses....................44
Storage........................................................................45
TractionUnit.........................................................45
Engine..................................................................45
Schematics...................................................................46
3

Safety
ThismachinemeetsorexceedsCENstandardEN836:1997
(whenappropriatedecalsapplied),andANSIB71.4-2012
specicationsineffectatthetimeofproduction.
Improperuseormaintenancebytheoperatororownercan
resultininjury.Toreducethepotentialforinjury,comply
withthesesafetyinstructionsandalwayspayattentiontothe
safetyalertsymbol,whichmeansCAUTION,WARNING,or
DANGER-"personalsafetyinstruction."Failuretocomply
withtheinstructionmayresultinpersonalinjuryordeath.
SafeOperatingPractices
ThefollowinginstructionsarefromtheCENstandardEN
836:1997,ISOstandard5395:1990,andANSIB71.4-2012.
Training
•Readtheoperator'smanualandothertrainingmaterial
carefully.Befamiliarwiththecontrols,safetysigns,and
theproperuseoftheequipment.
•Iftheoperatorormechaniccannotreadthelanguage
ofthismanual,itistheowner'sresponsibilitytoexplain
thismaterialtothem.
•Neverallowchildrenorpeopleunfamiliarwiththese
instructionstouseorservicethemower.Local
regulationsmayrestricttheageoftheoperator.
•Nevermowwhilepeople,especiallychildren,orpetsare
nearby.
•Keepinmindthattheoperatororuserisresponsiblefor
accidentsorhazardsoccurringtootherpeopleortheir
property.
•Donotcarrypassengers.
•Alldriversandmechanicsshouldseekandobtain
professionalandpracticalinstruction.Theowneris
responsiblefortrainingtheusers.Suchinstructionshould
emphasize:
–theneedforcareandconcentrationwhenworking
withride-onmachines;
–controlofaride-onmachineslidingonaslopewill
notberegainedbytheapplicationofthebrake.The
mainreasonsforlossofcontrolare:
◊insufcientwheelgrip;
◊beingdriventoofast;
◊inadequatebraking;
◊thetypeofmachineisunsuitableforthetask;
◊lackofawarenessoftheeffectofground
conditions,especiallyslopes;
•Theowner/usercanpreventandisresponsiblefor
accidentsorinjuriesoccurringtohimselforherself,other
people,orproperty.
Preparation
•Whilemowing,alwayswearsubstantialfootwear,long
trousers,hardhat,safetyglasses,andhearingprotection.
Longhair,looseclothing,orjewelrymaygettangled
inmovingparts.Donotoperatetheequipmentwhen
barefootorwearingopensandals.
•Thoroughlyinspecttheareawheretheequipmentisto
beusedandremoveallobjectswhichmaybethrownby
themachine.
•Warning-Fuelishighlyammable.Takethefollowing
precautions:
–Storefuelincontainersspecicallydesignedforthis
purpose.
–Refueloutdoorsonlyanddonotsmokewhile
refueling.
–Addfuelbeforestartingtheengine.Neverremove
thecapofthefueltankoraddfuelwhiletheengineis
runningorwhentheengineishot.
–Iffuelisspilled,donotattempttostarttheengine
butmovethemachineawayfromtheareaofspillage
andavoidcreatinganysourceofignitionuntilfuel
vaporshavedissipated.
–Replaceallfueltankandcontainercapssecurely.
•Replacefaultysilencers/mufers.
•Evaluatetheterraintodeterminewhataccessoriesand
attachmentsareneededtoproperlyandsafelyperform
thejob.Onlyuseaccessoriesandattachmentsapproved
bythemanufacturer.
•Checkthatoperator'spresencecontrols,safetyswitches
andshieldsareattachedandfunctioningproperly.Donot
operateunlesstheyarefunctioningproperly.
Operation
•Donotoperatetheengineinaconnedspacewhere
dangerouscarbonmonoxidefumescancollect.
•Mowonlyindaylightoringoodarticiallight.
•Beforeattemptingtostarttheengine,disengageallblade
attachmentclutchesandengagetheparkingbrake.
•Donotputhandsorfeetnearorunderrotatingparts.
Keepclearofthedischargeopeningatalltimes.
•Rememberthereisnosuchthingasasafeslope.Travel
ongrassslopesrequiresparticularcare.Toguardagainst
overturning:
–donotstoporstartsuddenlywhengoingupor
downhill;
–machinespeedsshouldbekeptlowonslopesand
duringtightturns;
–stayalertforhumpsandhollowsandotherhidden
hazards;
–nevermowacrossthefaceoftheslope,unlessthe
mowerisdesignedforthispurpose.
–Usecounterweight(s)orwheelweightswhen
suggestedintheoperator'smanual.
4

•Stayalertforholesintheterrainandotherhiddenhazards.
•Watchoutfortrafcwhencrossingornearroadways.
•Stopthebladesfromrotatingbeforecrossingsurfaces
otherthangrass.
•Neveroperatethemachinewithdamagedguards,shields,
orwithoutsafetyprotectivedevicesinplace.Besureall
interlocksareattached,adjustedproperly,andfunctioning
properly.
•Beforeleavingtheoperator'sposition:
–stoponlevelground;
–disengagethepowertake-offandlowerthe
attachments;
–settheparkingbrake;
–stoptheengineandremovethekey.
Important:Allowenginetoidlefor5minutes
beforeshuttingitoffafterafullloadoperation.
Failuretodosomayleadtoturbo-charger
trouble.
•Stoptheengine
–beforerefuelling;
–beforemakingheightadjustment.
–beforeclearingblockages;
–beforechecking,cleaningorworkingonthemower;
–afterstrikingaforeignobjectorifanabnormal
vibrationoccurs.Inspectthemowerfordamage
andmakerepairsbeforerestartingandoperatingthe
equipment.
•Reducetheenginespeedsettingduringenginerun-out.
•Keephandsandfeetawayfromthecuttingunits.
•Lookbehindanddownbeforebackinguptobesureof
aclearpath.
•Slowdownandusecautionwhenmakingturnsand
crossingroadsandsidewalks.Stopbladesfromrotating.
•Beawareofthemowerdischargedirectionanddonot
pointitatanyone.
•Donotoperatethemowerundertheinuenceofalcohol
ordrugs
•Lightningcancausesevereinjuryordeath.Iflightning
isseenorthunderisheardinthearea,donotoperate
themachine;seekshelter.
•Usecarewhenloadingorunloadingthemachineinto
atrailerortruck
•Usecarewhenapproachingblindcorners,shrubs,trees,
orotherobjectsthatmayobscurevision.
MaintenanceandStorage
•Keepallnuts,boltsandscrewstighttobesurethe
equipmentisinsafeworkingcondition.
•Neverstoretheequipmentwithfuelinthetankinsidea
buildingwherefumesmayreachanopenameorspark.
•Allowtheenginetocoolbeforestoringinanyenclosure.
•Toreducetherehazard,keeptheengine,
silencer/mufer,batterycompartmentandfuelstorage
areafreeofgrass,leaves,orexcessivegrease.
•Keepallpartsingoodworkingconditionandallhardware
andhydraulicttingstightened.Replaceallwornor
damagedpartsanddecals.
•Ifthefueltankhastobedrained,dothisoutdoors.
•Becarefulduringadjustmentofthemachinetoprevent
entrapmentofthengersbetweenmovingbladesand
xedpartsofthemachine.
•Onmulti-spindlemowers,takecareasrotatingoneblade
cancauseotherbladestorotate.
•Disengagedrives,lowerthecuttingunits,setparking
brake,stopengineandremoveignitionkey.Waitforall
movementtostopbeforeadjusting,cleaningorrepairing.
•Cleangrassanddebrisfromcuttingunits,drives,
silencers/mufers,andenginetohelppreventres.Clean
upoilorfuelspillage.
•Usejackstandstosupportcomponentswhenrequired.
•Carefullyreleasepressurefromcomponentswithstored
energy.
•Disconnectbatterybeforemakinganyrepairs.Disconnect
thenegativeterminalrstandthepositivelast.Reconnect
positiverstandnegativelast.
•Usecarewhencheckingtheblades.Wearglovesanduse
cautionwhenservicingthem.
•Keephandsandfeetawayfrommovingparts.Ifpossible,
donotmakeadjustmentswiththeenginerunning.
•Chargebatteriesinanopenwellventilatedarea,away
fromsparkandames.Unplugchargerbeforeconnecting
ordisconnectingfrombattery.Wearprotectiveclothing
anduseinsulatedtools.
•Storethemachinewiththecuttingunitsinthelowered
positionorsecurethewingdeckswiththestoragelatches
topreventthemfromunintentionallylowering.
ToroRidingMowerSafety
ThefollowinglistcontainssafetyinformationspecictoToro
productsorothersafetyinformationthatyoumustknowthat
isnotincludedintheCEN,ISO,orANSIstandard.
Thisproductiscapableofamputatinghandsandfeetand
throwingobjects.Alwaysfollowallsafetyinstructionsto
avoidseriousinjuryordeath.
Useofthisproductforpurposesotherthanitsintendeduse
couldprovedangeroustouserandbystanders.
WARNING
Engineexhaustcontainscarbonmonoxide,which
isanodorless,deadlypoisonthatcankillyou.
Donotrunengineindoorsorinanenclosedarea.
•Knowhowtostoptheenginequickly.
5
•Donotoperatethemachinewhilewearingtennisshoes
orsneakers.
•Wearingsafetyshoesandlongpantsisadvisableand
requiredbysomelocalordinancesandinsurance
regulations.
•Handlefuelcarefully.Wipeupanyspills.
•Checkthesafetyinterlockswitchesdailyforproper
operation.Ifaswitchshouldfail,replacetheswitch
beforeoperatingthemachine.
•Beforestartingtheengine,sitontheseat.
•Usingthemachinedemandsattention.Topreventloss
ofcontrol:
–Donotdriveclosetosandtraps,ditches,creeks,
embankments,orotherhazards.
–Reducespeedwhenmakingsharpturns.Avoid
suddenstopsandstarts.
–Whennearorcrossingroads,alwaysyieldthe
right-of-way.
–Applytheservicebrakeswhengoingdownhillto
keepforwardspeedslowandtomaintaincontrolof
themachine.
•WhenoperatingamachinewithROPS(roll-over
protectionsystem)neverremovetheROPSandalways
usetheseatbelt.
•Raisethecuttingunitswhendrivingfromoneworkarea
toanother.
•Donottouchtheengine,silencer/mufer,orexhaust
pipewhiletheengineisrunningorsoonafterithas
stoppedbecausetheseareascouldbehotenoughtocause
burns.
•Onanyhill,thereisthepossibilityoftippingorrolling
over,buttheriskincreasesastheslopeangleincreases.
Steephillsshouldbeavoided.
Cuttingunitsmustbeloweredwhengoingdownslopes
tomaintainsteeringcontrol
•Engagetractiondriveslowly,alwayskeepfootontraction
pedal,especiallywhentravelingdownhill.
Usereverseontractionpedalforbraking.
•Ifthemachinestallswhenclimbingaslope,donotturn
themachinearound.Alwaysbackslowly,straightdown
theslope.
•Whenapersonorpetappearsunexpectedlyinornearthe
mowingarea,stopmowing.Carelessoperation,combined
withterrainangles,ricochets,orimproperlypositioned
guardscanleadtothrownobjectinjuries.Donotresume
mowinguntiltheareaiscleared.
MaintenanceandStorage
•Makesureallhydrauliclineconnectorsaretightandall
hydraulichosesandlinesareingoodconditionbefore
applyingpressuretothesystem.
•Keepyourbodyandhandsawayfrompinholeleaksor
nozzlesthatejecthydraulicuidunderhighpressure.
Usepaperorcardboard,notyourhands,tosearchfor
leaks.Hydraulicuidescapingunderpressurecanhave
sufcientforcetopenetratetheskinandcauseserious
injury.Seekimmediatemedicalattentionifuidis
injectedintoskin.
•Beforedisconnectingorperforminganyworkonthe
hydraulicsystem,allpressureinthesystemmustbe
relievedbystoppingtheengineandloweringthecutting
unitsandattachmentstotheground.
•Checkallfuellinesfortightnessandwearonaregular
basis.Tightenorrepairthemasneeded.
•Iftheenginemustberunningtoperformamaintenance
adjustment,keephands,feet,clothing,andanypartsof
thebodyawayfromthecuttingunits,attachments,and
anymovingparts.
•Toensuresafetyandaccuracy,haveanAuthorizedToro
Distributorcheckthemaximumenginespeedwitha
tachometer.
•Ifmajorrepairsareeverneededorifassistanceisdesired,
contactanAuthorizedToroDistributor.
•UseonlyToro-approvedattachmentsandreplacement
parts.Thewarrantymaybevoidedifusedwith
unapprovedattachments.
6

SoundPowerLevel
Groundsmaster4500
Thisunithasaguaranteedsoundpowerlevelof104dBA,
whichincludesanUncertaintyValue(K)of0.7dBA.
Soundpowerlevelwasdeterminedaccordingtothe
proceduresoutlinedinISO11094.
Groundsmaster4700
Thisunithasaguaranteedsoundpowerlevelof105dBA,
whichincludesanUncertaintyValue(K)of0.7dBA.
Soundpowerlevelwasdeterminedaccordingtothe
proceduresoutlinedinISO11094.
SoundPressureLevel
Groundsmaster4500
Thisunithasasoundpressurelevelattheoperator’searof88
dBA,whichincludesanUncertaintyValue(K)of0.7dBA.
Soundpressurelevelwasdeterminedaccordingtothe
proceduresoutlinedinEN836.
Groundsmaster4700
Thisunithasasoundpressurelevelattheoperator’searof89
dBA,whichincludesanUncertaintyValue(K)of0.7dBA.
Soundpressurelevelwasdeterminedaccordingtothe
proceduresoutlinedinEN836.
VibrationLevel
Groundsmaster4500
Hand-Arm
Measuredvibrationlevelforrighthand=0.3m/s2
Measuredvibrationlevelforlefthand=0.4m/s2
UncertaintyValue(K)=0.2m/s2
Measuredvaluesweredeterminedaccordingtotheprocedures
outlinedinEN836.
WholeBody
Measuredvibrationlevel=.35m/s2
UncertaintyValue(K)=0.18m/s2
Measuredvaluesweredeterminedaccordingtotheprocedures
outlinedinEN836.
Groundsmaster4700
Hand-Arm
Measuredvibrationlevelforrighthand=0.3m/s2
Measuredvibrationlevelforlefthand=0.4m/s2
UncertaintyValue(K)=0.2m/s2
Measuredvaluesweredeterminedaccordingtotheprocedures
outlinedinEN836.
WholeBody
Measuredvibrationlevel=.35m/s2
UncertaintyValue(K)=0.18m/s2
Measuredvaluesweredeterminedaccordingtotheprocedures
outlinedinEN836.
EngineEmissionCertication
TheengineinthismachineisEPATier4iandstage3a
compliant.
7

SafetyandInstructionalDecals
Safetydecalsandinstructionsareeasilyvisibletotheoperatorandarelocatednearanyareaofpotential
danger.Replaceanydecalthatisdamagedorlost.
117-4763
1.Toengagetheparking
brake,securethebrake
pedalswiththelockingpin,
presstheparkingbrake
pedalsandengagethetoe
pedal.
2.Todisengagetheparking
brake,disengagethe
lockingpinandreleasethe
pedals.
121–3884
1.Engine—stop3.Engine—start
2.Engine—preheat
121–3887
1.ReadtheOperator’sManual.
120–4159
Groundsmaster4700Shown
1.Off8.High
2.Lights9.Tractiondrive
3.On10.Low
4.Lightswitchlocation11.Powertake-off(PTO)
5.Fast12.Lowerleftdeck
6.Variablespeedadjustment13.Lowercenterdeck
7.Slow14.Lowerrightdeck
8

125–4604
1.Raiseleftdeck3.Raiserightdeck
2.Raisecenterdeck
117-4765
1.ReadtheOperator'sManual.
2.Donotusestartingaids.
117-4766
1.Cutting/dismembermenthazard;fan—stayawayfrom
movingparts,keepallguardsandshieldsinplace.
106-6755
1.Enginecoolantunder
pressure.
3.Warning—donottouchthe
hotsurface.
2.Explosionhazard—read
theOperator'sManual.
4.Warning—readthe
Operator'sManual.
117-4764
1.Thrownobjecthazard—keepbystandersasafedistance
fromthemachine.
2.Cuttinghazardofhand,mowerblade—stayawayfrom
movingparts,keepallguardsandshieldsinplace.
3.Cuttinghazardoffoot,mowerblade—stayawayfrom
movingparts,keepallguardsandshieldsinplace.
98-4387
1.Warning—wearhearingprotection.
106-6754
1.Warning—donottouchthehotsurface.
2.Cutting/dismembermenthazard,fanandentanglement
hazard,belt—stayawayfrommovingparts.
9

112-5297
1.Warning—readtheOperator'sManual,donotoperatethis
machineunlessyouaretrained.
2.Warning—readtheOperator'sManualbeforetowingthe
machine.
3.Tippinghazard—slowmachinebeforeturning,donotturn
athighspeeds;lowerthecuttingunitwhendrivingdown
slopes;usearolloverprotectionsystemandweartheseat
belt
4.Warning—donotparkthemachineonslopes;engagethe
parkingbrake,lowerthecuttingunits,stoptheengineand
removetheignitionkeybeforeleavingthemachine.
5.Thrownobjecthazard—keepbystandersasafedistance
fromthemachine.
6.Entanglementhazard,belt—stayawayfrommovingparts,
keepallguardsandshieldsinplace.
112-5298
(Afxoverpartno.112–5297forCE*
*Thissafetydecalincludesaslopewarningrequiredonthemachinefor
compliancetotheEuropeanLawnMowerSafetyStandardEN836:1997.The
conservativemaximumslopeanglesindicatedforoperationofthismachineare
prescribedbyandrequiredbythisstandard.
1.Warning—readtheOperator'sManual,donotoperatethis
machineunlessyouaretrained.
2.Warning—readtheOperator'sManualbeforetowingthe
machine.
3.Tippinghazard—donotoperateonslopesgreaterthan15°;
lowerthecuttingunitswhenoperatingonslopes;wearthe
safetybelt.
4.Warning—donotparkthemachineonslopes;engagethe
parkingbrake,lowerthecuttingunits,stoptheengineand
removetheignitionkeybeforeleavingthemachine.
5.Thrownobjecthazard—keepbystandersasafedistance
fromthemachine.
6.Entanglementhazard,belt—stayawayfrommovingparts,
keepallguardsandshieldsinplace.
125–4605
1.Powerseat,10A6.Powersupplied,10A
2.Worklight,10A7.GM4700controller,2A
3.Engine,10A8.Powersupplied,7.5A
4.Cigarettelighter,10A9.GM4500controller,2A
5.Infocenter,2A10.Enginepreheat,60A
BatterySymbols
Someorallofthesesymbolsareonyourbattery
1.Explosionhazard6.Keepbystandersasafe
distancefromthebattery.
2.Nore,opename,or
smoking.
7.Weareyeprotection;
explosivegasescan
causeblindnessandother
injuries
3.Causticliquid/chemical
burnhazard
8.Batteryacidcancause
blindnessorsevereburns.
4.Weareyeprotection9.Flusheyesimmediately
withwaterandgetmedical
helpfast.
5.ReadtheOperator's
Manual.
10.Containslead;donot
discard.
10

93-7272
1.Cutting/dismembermenthazard;fan—stayawayfromoving
parts.
117–2718
125–4606
1.ReadtheOperator’sManualforinformationon
maintenance.
11

Setup
LooseParts
Usethechartbelowtoverifythatallpartshavebeenshipped.
ProcedureDescriptionQty.Use
1Warningdecal1Usedonlyonmachinesrequiring
EuropeanCECompliance.
Lockbracket1
Rivet2
Washer1
Screw,1/4x2inches1
2
Locknut,1/4inch1
InstalltheHoodLatch(CE).
3Nopartsrequired–Greasethemachine.
4Nopartsrequired–Checktherearaxlelubricant,hydraulic
uid,andengineoillevels
MediaandAdditionalParts
DescriptionQty.Use
Operator'sManual1Readbeforeoperatingmachine
EngineOperator'sManual1Readbeforeoperatingengine
PartsCatalog1Usetoreferencepartnumbers
OperatorTrainingMaterial1Viewbeforeoperatingmachine
Note:Determinetheleftandrightsidesofthemachinefromthenormaloperatingposition.
12

1
ReplacingtheWarningDecal
forCECompliance
Partsneededforthisprocedure:
1Warningdecal
Procedure
OnmachinesrequiringEuropeanCECompliance,replace
thewarningdecal,partno.112–5297withthewarningdecal
partno.112-5298.
2
InstallingtheHoodLatch(CE
Only)
Partsneededforthisprocedure:
1Lockbracket
2Rivet
1Washer
1Screw,1/4x2inches
1Locknut,1/4inch
Procedure
1.Unhookthehoodlatchfromthehoodlatchbracket.
2.Removethe(2)rivetssecuringthehoodlatchbracket
tothehood(Figure3).Removethehoodlatchbracket
fromthehood.
G012628
1
2
Figure3
1.Hoodlatchbracket2.Rivets
3.Whilealigningthemountingholes,positiontheCE
lockbracketandthehoodlatchbracketontothehood.
Thelockbracketmustbeagainstthehood(Figure4).
Donotremoveboltandnutassemblyfromthelock
bracketarm.
G012629
1
2
Figure4
1.CElockbracket2.Boltandnutassembly
4.Alignthewasherswiththeholesontheinsideofthe
hood.
5.Rivetthebracketsandthewasherstothehood(Figure
4).
6.Hookthelatchontothehoodlatchbracket(Figure5).
13

G012630
1
Figure5
1.Hoodlatch
7.Screwtheboltintotheotherarmofhoodlockbracket
tolockthelatchinposition(Figure6).Tightenbolt
securelybutdonottightennut.
G012631
1
2
3
Figure6
1.Bolt3.Armofhoodlockbracket
2.Nut
3
GreasingtheMachine
NoPartsRequired
Procedure
Beforethemachineisoperated,itmustbegreasedtoensure
properlubrication.RefertoLubricationsection.Failureto
properlygreasethemachinewillresultinprematurefailureof
criticalparts.
4
CheckingFluidLevels
NoPartsRequired
Procedure
1.Checktherearaxlelubricantlevelbeforetheengineis
rststarted,refertoCheckingtheRearAxleLubricant
inDriveSystemMaintenance.
2.Checkthehydraulicuidlevelbeforetheengineisrst
started,refertoCheckingtheHydraulicFluidLevelin
Operation.
3.Checktheengineoillevelbeforeandaftertheengineis
rststarted,refertoCheckingtheEngineOilLevelin
Operation.
14

ProductOverview
Controls
BrakePedals
Twofootpedals(Figure7)operateindividualwheelbrakes
forturningassistanceandtoaidinobtainingbettersidehill
traction.
PedalLockingLatch
Thepedallockinglatch(Figure7)connectsthepedals
togethertoengagetheparkingbrake.
ParkingBrakePedal
Toengagetheparkingbrake,(Figure7)connectthepedals
togetherwiththepedallockinglatch,pushdownontheright
brakepedalwhileengagingthetoepedal.Toreleasethe
parkingbrake,pressoneofthebrakepedalsuntiltheparking
brakelatchretracts.
Figure7
1.Brakepedal4.Tractionpedal
2.Pedallockinglatch5.Tiltsteeringpedal
3.Parkingbrakepedal
TractionPedal
Thetractionpedal(Figure7)controlsforwardandreverse
operation.Depressthetopofthepedaltomoveforwardand
thebottomtomovebackward.
Tostop,reduceyourfootpressureonthetractionpedaland
allowittoreturntothecenterposition.
TiltSteeringPedal
Totiltthesteeringwheeltowardsyou,pressthefootpedal
(Figure7)down,andpullthesteeringtowertowardyouto
themostcomfortablepositionandthenreleasethepedal.
KeySwitch
Thekeyswitch(Figure8)hasthreepositions:Off,
On/Preheat,andStart.
PTOSwitch
ThePTOswitch(Figure8)hastwopositions:Out(start)
andIn(stop).PullthePTObuttonouttoengagethecutting
unitblades.Pushinthebuttontodisengagethecuttingunit
blades.
Hi-LoSpeedControl
Theswitch(Figure8)allowsthespeedrangetoincreasefor
transportofthemachine.ToswitchbetweentheHiandLo
speedranges,thedecksmustberaised,thePTOmustbe
disengaged,thetractionpedalmustbeintheneutralposition
andthemachinemustbemovingataslowspeed.
Note:Thecuttingdeckswillnotoperateand/orcannotbe
loweredfromthetransportpositionwhentheswitchisin
thehighrange.
Figure8
1.Liftswitches(GM4700
only)
6.Hi-Lospeedcontrol
2.Liftswitch(GM4500and
4700)
7.Enginespeedswitch
3.PTOswitch8.Lightswitch
4.Keyswitch9.Cruisecontrol
5.InfoCenter
LiftSwitches
Theliftswitches(Figure8)raiseandlowerthecutting
units.Presstheswitchesforwardtolowerthecuttingunits
andbackwardtoraisethecuttingunits.Whenstartingthe
machine,withthecuttingunitsinthedownposition,pressthe
liftswitchdowntoallowthecuttingunitstooatandmow.
Note:ThedeckswillnotlowerwhileintheHIspeedrange
andtheywillnotraiseorloweriftheoperatorisoutoftheseat
15

whentheengineisrunning.Tolowerthedecksforservice,
rotatethekeytotheONpositionwhilesittingintheseat.
LightSwitch
Presstheloweredgeoftheswitch(Figure8)toturnonthe
lights.Presstheupperedgeoftheswitchtoturnoffthelights.
PowerPoint
Thepowerpoint(Figure9)isusedtopoweroptional12volt
electricalaccessories.
g020512
Figure9
1.Powerpoint2.Bagholder
BagHolder
Usethebagholder(Figure9)forstorage.
SeatAdjustments
ForeandAftAdjustingLever
Pulloutonthelevertoslidetheseatforeoraft(Figure10).
SeatArmRestAdjustingKnob
Rotatetheknobtoadjusttheseatarmrestangle.
SeatBackAdjustingLever
Movethelevertoadjusttheseatbackangle(Figure10).
Weightgauge
Indicateswhentheseatisadjustedtotheweightofthe
operator(Figure10).Heightadjustmentismadeby
positioningthesuspensionwithintherangeofthegreen
region.
Figure10
1.Weightgauge4.Seatbackadjustinglever
2.Weightadjustinglever5.Armrestadjustingknob
(notshown-locatedunder
armrest)
3.ForeandAftadjusting
lever
WeightAdjustingLever
Adjustforoperatorweight(Figure10).Pulluponthelever
toincreasetheairpressureandpushdowntodecreasetheair
pressure.Theproperadjustmentisattainedwhentheweight
gaugeisinthegreenregion.
16

UsingtheInfoCenterLCDDisplay
TheInfoCenterLCDdisplayshowsinformationaboutyour
machinesuchastheoperatingstatus,variousdiagnostics
andotherinformationaboutthemachine(Figure11)There
isasplashscreenandmaininformationscreenofthe
InfoCenter.Youcanswitchbetweenthesplashscreenand
maininformationscreen,atanytime,bypressinganyof
theInfoCenterbuttonsandthenselectingtheappropriate
directionalarrow.
1
g020650
2
3
4
TORO
Figure11
1.Indicatorlight3.Middlebutton
2.Rightbutton4.Leftbutton
•LeftButton,MenuAccess/BackButton—pressthis
buttontoaccesstheInfoCentermenus.Youcanuseitto
backoutofanymenuyouarecurrentlyusing.
•MiddleButton—usethisbuttontoscrolldownmenus.
•RightButton—usethisbuttontoopenamenuwherea
rightarrowindicatesadditionalcontent.
•Beeper—activatedwhenloweringthedecksorfor
advisoriesandfaults.
Note:Thepurposeofeachbuttonmaychange
dependingonwhatisrequiredatthetime.Eachbutton
willbelabeledwithanicondisplayingitscurrentfunction.
InfoCenterIconDescription
SERVICEDUEIndicateswhenscheduledservice
shouldbeperformed
EngineRPM/status—indicatesthe
engineRPM
Infoicon
Setsthemaximumtractionspeed
Fast
Slow
FanReversal—indicateswhenthe
fanisreversed
Stationaryregenerationrequired
Glowplug-indicatesthattheglowplug
isactive
Raiseleftdeck
Raisecenterdeck
Raiserightdeck
Operatormustsitinseat
ParkingBrakeIndicator—indicates
whentheparkingbrakeisOn
IdentiestherangeasFast
Neutral
IdentiestherangeasSlow
CoolantT emperature-indicatesthe
enginecoolanttemperatureineither
°Cor°F
Temperature(hot)
TractionorTractionPedal
Deniedornotallowed
EngineStart
PTO-indicatesthePTOisOn
17

InfoCenterIconDescription(cont'd.)
Stoporshutdown
Engine
Keyswitch
Indicateswhenthecuttingunitsare
beinglowered
Indicateswhenthecuttingunitsare
beingraised
PINpasscode
HydraulicOilT emperature-indicates
thehydraulicoiltemperature
CANbus
InfoCenter
Badorfailed
Center
Right
Left
Bulb
OutputofTECcontrollerorcontrol
wireinharness
High:overallowedrange
Low:underallowedrange
/
Outofrange
Switch
Operatormustreleaseswitch
Operatorshouldchangetoindicated
state
Symbolsareoften
combinedtoform
sentences.Some
examplesareshown
below
Operatorshouldputmachinein
neutral
InfoCenterIconDescription(cont'd.)
Enginestartdenied
Engineshutdown
Enginecoolanttoohot
Hydraulicoiltoohot
or
Sitdownorsetparkingbrake
18

UsingtheMenus
ToaccesstheInfoCentermenusystem,pressthemenuaccess
buttonwhileatthemainscreen.Thiswillbringyoutothe
mainmenu.Refertothefollowingtablesforasynopsisof
theoptionsavailablefromthemenus:
MainMenu
MenuItemDescription
FaultsTheFaultsmenucontains
alistoftherecentmachine
faults.RefertotheService
ManualoryourAuthorizedToro
Distributorformoreinformation
ontheFaultsmenuandthe
informationcontainedthere.
ServiceTheServicemenucontains
informationonthemachine
suchashoursofuseandother
similarnumbers.
DiagnosticsTheDiagnosticsmenulists
variousstatesthatthemachine
currentlyhas.Youcanusethis
totroubleshootcertainissues
asitwillquicklytellyouwhich
machinecontrolsareonand
whichareoff.
SettingsTheSettingsmenuallows
youtocustomizeandmodify
congurationvariablesonthe
InfoCenterdisplay.
AboutTheAboutmenuliststhe
modelnumber,serialnumber,
andsoftwareversionofyour
machine.
Service
MenuItemDescription
HoursListsthetotalnumberofhours
thatthemachine,engineand
fanhavebeenon,aswell
asthenumberofhoursthe
machinehasbeentransported
andoverheated.
CountsListsthenumberofpreheats
andstartsthemachinehas
experienced.
Diagnostics
MenuItemDescription
EngineRunRefertotheServiceManual
oryourAuthorizedToro
Distributorformoreinformation
ontheEngineRunmenu
andtheinformationcontained
there.
GlowPlugsIndicatesifthefollowingitems
areactive:Keystart,timeout
limited,andglowplugs.
FanIndicatesifthefanisactive
inthefollowinginstances:
Enginehightemp,oilhigh
temp,engineorhydraulichigh
temp,andfanon.
Settings
MenuItemDescription
UnitsControlstheunitsusedonthe
InfoCenter.Themenuchoices
areEnglishorMetric.
LanguageControlsthelanguageusedon
theInfoCenter*.
LCDBacklightControlsthebrightnessofthe
LCDdisplay.
LCDContrastControlsthecontrastofthe
LCDdisplay.
ProtectedMenusAllowsthemaintenance
directortoaccessprotected
menusbyinputtinga
passcode.
AutoIdleControlsthetimethatbefore
idlingtheenginewhenthe
machinenotinuse.
MowSpeedControlsthemaximumspeed
whileinmow(lowrange).
Trans.SpeedControlsthemaximumspeed
whileintransport(highrange).
CounterbalanceControlstheamountof
counterbalanceappliedbythe
decks.
SmartPowerPreventsboggingdownin
heavyturfbyautomatically
controllingthemachine
speedandoptimizingcutting
performance.
*Only"operator-faced"textistranslated.Faults,Service,and
Diagnosticsscreensare"service-faced".Titleswillbeinthe
selectedlanguage,butmenuitemsareinEnglish.
About
MenuItemDescription
ModelListsthemodelnumberofthe
machine.
SNListstheserialnumberofthe
machine.
S/WRevListsthesoftwarerevisionof
themastercontroller.
InfoCenterListsthesoftwarerevisionof
theInfoCenter.
CANBusListsthemachine
communicationbusstatus.
19

ProtectedMenus
Thereare4operatingcongurationsettingsthatare
adjustablewithintheSettingsMenuoftheInfoCenter:auto
idle,maximummowinggroundspeed,maximumtransport
groundspeed,anddeckcounterbalance.Thesesettingsare
intheProtectedMenu.
AccessingtheProtectedMenuSettings
ToaccesstheProtectedMenuSettings
•FromtheMainMenu,scrolldowntotheSettingsMenu
andpresstherightbutton.
•IntheSettingsMenu,scrolldowntotheProtectedMenu
andpresstherightbutton.
•Toenterthepasscode,usethecenterbuttontosetthe
rstdigitthenpresstherightbuttontomoveontothe
nextdigit.
•Usethecenterbuttontosettheseconddigitthenpress
therightbuttontomoveontothenextdigit.
•Usethecenterbuttontosetthethirddigitthenpressthe
rightbuttontomoveontothenextdigit.
•Usethecenterbuttontosetthefourthdigitthenpress
therightbutton.
•Pressthemiddlebuttontoenterthecode.
TheabilitytoviewandchangethesettingsintheProtected
Menucanbechanged.OncetheProtectedMenuhasbeen
accessed,scrolldowntoProtectSettings.Usingtheright
button,changingProtectSettingstoOFFwillallowthe
abilitytoviewandchangethesettingsintheProtectedMenu
withoutenteringthepasscode.ChangingProtectSettingsto
ONwillhidetheprotectedoptionsandwillrequireenteringa
passcodetochangethesettingintheProtectedMenu.After
thepasscodehasbeenset,thekeyswitchmustbeturnedoff
andbackontoenableandsavethisfeature.
ToSettheAutoIdle
•IntheSettingsMenu,scrolldowntoAutoIdle
•Presstherightbuttontochangetheautoidletime
betweenOFF,8S,10S,15S,20s,&30S.
ToSettheMowSpeed
•IntheSettingsMenu,ScrolldowntoMowSpeedand
presstherightbutton.
•Usetherightbuttontoincreasethemaxfullmowspeed
(50%,75%,or100%).
•Usethecenterbuttontodecreasethemaxfullmowspeed
(50%,75%,or100%).
•Presstheleftbuttontoexit.
ToSettheTransportSpeed
•IntheSettingsMenu,scrolldowntoTransportSpeed
andpresstherightbutton.
•Usetherightbuttontoincreasethemaxtransportspeed
(50%,75%,or100%).
•Usethecenterbuttontodecreasethemaxtransport
speed(50%,75%,or100%).
•Presstheleftbuttontoexit.
ToSettheCounterbalance
•IntheSettingsMenu,scrolldowntoCounterBalance
andpresstherightbutton.
•PresstherightbuttontoswitchbetweenLow,Med,and
High.
WhennishedwiththeProtectedMenu,presstheleftbutton
toexittotheMainMenu,thenpresstheleftbuttontoexit
totheRunMenu.
20
Other manuals for 30873
1
This manual suits for next models
3
Table of contents
Other Toro Lawn Mower manuals

Toro
Toro 3806 User manual

Toro
Toro 22200TE User manual

Toro
Toro TITAN series Manual

Toro
Toro 39678 User manual

Toro
Toro 78363 User manual

Toro
Toro 30582 Groundsmaster 580-D User manual

Toro
Toro Z400 Series Z-Master User manual

Toro
Toro TimeCutter SW Series Manual

Toro
Toro GrandStand 72513 User manual

Toro
Toro 30403 User manual