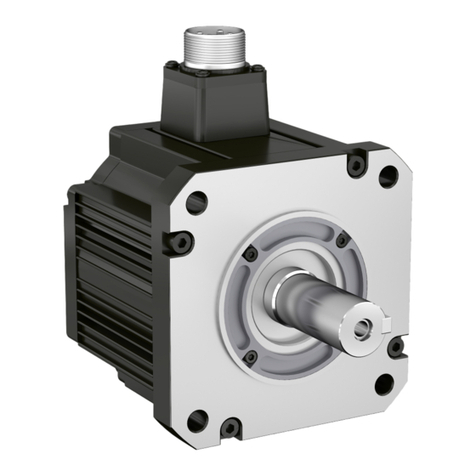
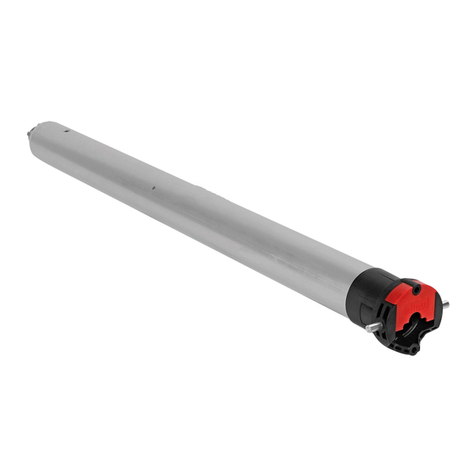
TOSO Progress 25 User manual

P.20
TOSO CO.,LTD
1-4-9 Shinkawa Chuo-ku, Tokyo
No.N−190012
Instruction Manual
INDEX
■Caution ................................................................................................................. 2
■Product View and Part Names............................................................................ 4
■Wiring Method ...................................................................................................... 6
■Connection Method ............................................................................................. 9
■Connecting the various switches ..................................................................... 11
■Setting Method of the various switches .......................................................... 11
■Limit Setting ....................................................................................................... 14
■Check the Operation.......................................................................................... 16
■Product Specification ........................................................................................ 18
■Cleaning ............................................................................................................. 18
■Disposal of Packing Materials ......................................................................... 18
■Troubleshooting ................................................................................................. 19
Thank you for purchasing TOSO products. To ensure safe use of this product,
please read the following thoroughly and keep this manual stored.
Guide for Distributors and Installation Contractors
This manual contains information for a user to safely operate this product.
Please provide this manual to a customer.
Motorized Curtain Tracks
Progress 25・50 Motor Set
80016176
First edition

P.2
CAUTIONS
∗This manual contains cautions and instructions for safe use of the product.
Please read it carefully before using to ensure appropriate use.
∗Operating noise of this product is less than 70dB.
This document illustrates the dangers of using this product without taking necessary
precautions. Please refer to the symbols below for different types of safety points.
This document illustrates safety points to be followed using the symbols below.
Illustrates that if this product is misused, there are dangers of
serious injuries or possible fatal accidents.
Illustrates that if this product is misused, there are dangers of
casualties or possible physical damage of the product.
Illustrates specific actions which are prohibited.
Illustrates specific guidelines which must be followed.
Warning
Caution
Precautions upon installing the product (Please read before installation.)
Warning
Caution
This product is intended for indoor use. Please do not use it for
outdoor purposes.
Locations subject to high temperatures and high humidity, or areas
where water may leak, should be avoided.
Make sure to install this product horizontally.
Check the foundation base and strength of the material before installing this product. If
not installed properly to the foundation base, there are dangers of it falling.
Install this product as instructed with the necessary quantity of brackets. Otherwise the
product may fall.
This is a class A product. In a domestic environment , this product may cause radio
interference in which case the user may be required to take adequate measures.
The drive shall be disconnected from its power source during cleaning, maintenance
and when replacing parts.
P.3
Safety in Use (Please read thoroughly)
Caution
When there is strong wind, please either close the window or have
the curtain completely open.
Please do not dismantle the mechanical assembly nor lubricate the
moving parts of this product. This will ensure physical damage or
malfunction of the product.
To avoid breakage and malfunction, do not disassemble this product.
Please do not use it by open flames.
Around the area where the screen is to open and close, please
remember to clear all objects which may break when placed around
the screen.
Warning
Please do not hang from or pull on this product. This may damage
the product or cause it to fall down.
This product requires an AC 220–230V power source. Do not use
any other power source.
Unplug the power cord from the outlet if the product will not be used
for a long time.
Avoid any actions that may damage the power cord or plug. Using
damaged components may result in electric shock, short circuits, or fire.
This is a class A product.In a domestic environment this product
may cause radio interference in which case the user may be required
to take adequate measures.
Clean power plugs at regular intervals. Plugs exposed to moisture or
to excessive dust may lead to insulation failures or cause fires.
Do not touch the product with a wet hand as there are danger of
electrical shock.
This appliance is not intended for use by persons(including children) with
reduced physical, sensory or mental capabilities, or lack of experience and
knowledge unless they have been given supervision or instruction
concerning use of the appliance by a person responsible for their safety.
This appliance can be used by children aged from 8 years and above
and persons with reduced physical,sensory or mental capabilities or
lack of experience and knowledge if they have been given
supervision or instruction concerning use of the appliance in a safe
way and understand the hazards involved.
Children shall not play with the appliance.
Cleaning and user maintenance shall not be made by children
without supervision.

P.4
Product View and Part Names
■Product View · Part Names ■Progress50 Motor Set Dimension (mm)
Accessories
■
●Curtain Hook x 2pcs ●Power cord 1 m x 1
Motor shaft
Motor fixation screw
Selection switches
75.2
56
66
326
P.5
●FM Remote-control receiver 2.4G with IR terminal
LED indicator
lamp (green, red)
Selection switches IR jack
(6 poles, 4 cores)
*Reserved
95
27
35
●FM Remote-control
transmitter 2.4G (7ch)
●FM Multi remote-control transmitter 2.4G
100
115
29
52
14
109
●Infra-red Receiver 01 ●3 button switch
(Wide switch plate +
Inlay wide switch 3 button A)
●Modular Plate for
Single (6 poles)
●Modular cord
(1 m) (6 poles)
●Infrared remote control (9ch)
52
14
109
●FM Remote-control
transmitter 2.4G (6ch)
30
15
163
35
28
35
120
70
120
70

P.6
Wiring Method
■Individual operation
■Two-point operation
Be sure to consult with a TOSO representative and an electrician before installing
power cables/operation cables. In addition, hire an electrician to install and connect
cables.
Entrust the wiring and connection work to the electrical contractor.
While the connection work is underway, do not activate the power. Failure to
observe this precaution may lead to electric shock.
Caution
←to the Power supply
VVFØ1.6x2C E1.6 (separate procedure) VCTF0.75□×4C
or IPØ0.65×4C (separate procedure)
AC 100V-240V power
outlet with ground
terminal
(separate procedure)
Power cord (1 m) →
Inlay Modular Connector (6 poles)
for single or inlay connector chip body
Modular cord (6 poles) or
Modular cord (6 poles) with terminal
←to the Power supply
VVFØ1.6x2C E1.6 (separate procedure)
VCTF0.75□×4C
or IPØ0.65×4C (separate procedure)
AC 100V-240V power
outlet with ground
terminal
(separate procedure)
Power cord (1 m) →
Inlay Modular Connector (6 poles)
for single or inlay connector chip body
Modular cord (6 poles) or
Modular cord (6 poles) with terminal
P.6P.7
■Simultaneous operation
■Simultaneous selective operation
←to the Power supply
VVFØ1.6x2C E1.6 (separate procedure)
VCTF0.75□×4C
or IPØ0.65×4C (separate procedure)
AC 100V-240V power
outlet with ground
terminal
(separate procedure)
Power cord (1 m)→
Inlay Modular Connector (6 poles)
for single or inlay connector chip body
Modular cord (6 poles) or
Modular cord (6 poles) with terminal
←to the Power supply
VVFØ1.6x2C E1.6 (separate procedure)
VCTF0.75□×4C
or IPØ0.65×4C(separate procedure)
AC 100V-240V power
outlet with ground
terminal
(separate procedure)
Power cord (1 m)→
1 2 3
Inlay Modular Connector (6 poles)
or inlay connector chip body
Modular cord (6 poles) or
Modular cord (6 poles) with terminal
ALL
Switch
Switch
1
Switch
2
Switch
3

■Infrared remote control operation
■FM remote control operation
←to the Power supply
VVFØ1.6×2C E1.6 (separate procedure)
AC 100V-240V power
outlet with ground
terminal
(separate procedure)
Power cord (1 m)→
Infrared remote control (9ch)
Infra-red Receiver 01 (Cord length: 0.7 m)
←to the Power supply
VVFØ1.6× 2C E1.6 (separate procedure)
AC 100V-240V power
outlet with ground
terminal
(separate procedure)
Power cord (1 m)→Modular cord (six-poles, four-cores)
P.8
FM Remote-control transmitter 2.4G (6ch)
FM RC receiver 2.4G with IR terminal
P.9
Connection Method
■Individual operation
■Two-point operation
Be sure to consult with a TOSO representative and an electrician before installing
power cables/operation cables. In addition, hire an electrician to install and connect
cables.
Entrust the wiring and connection work to the electrical contractor.
While the connection work is underway, do not activate the power. Failure to observe
this precaution may lead to electric shock.
Caution
←to the Power supply
WBGR
WBGR
OPEN
STOP
CLOSE
←to the Power supply
WBGR
WBGR
OPEN
STOP
CLOSE
OPEN
STOP
CLOSE
W : White
B : Black
G : Green
R : Red
W : White
B : Black
G : Green
R : Red

P.10
■Simultaneous operation
■Simultaneous selective operation
←to the Power supply
WBGR
WBGR WBGR WBGR
OPEN
STOP
CLOSE
←to the Power supply
1 2 3
WBGR
OPEN
STOP
CLOSE
WBGR
OPEN
STOP
CLOSE
WBGR
OPEN
STOP
CLOSE
WBGR
WBGRWBGR WBGRWBGR WBGRWBGR
OPEN
STOP
CLOSE
ALL
Switch
Switch
1
Switch
2
Switch
3
W : White
B : Black
G : Green
R : Red
W : White
B : Black
G : Green
R : Red
Connecting the various switches
<3 Button Switch and Infrared Remote Control>
●
Follow the procedures illustrated in the figures below to connect the various switches to the main
unit.
The various function
setting switches
Setting Method of the various switches
●Basic operating parameters or controls, including speed settings, can be set or controlled
using the switches on the Motor unit.
Speed Setting Switch
Address Setting Switch
P.11
<FM Terminal>
Modular cord 1 m
to SW
to IR
to IR
Back side of Motor
Inlay Modular plate
Infra-red Receiver 01
(OPEN)
(STOP)
(COMMON)
(CLOSE)
Red
Black
White
Green
Modular cord 1 m
IR jack FM RC
receiver 2.4G with IR terminal
FM Remote-control transmitter 2.4G (6ch)

■Function Setting of DIP Switch
●The control switches are used to set the functions for various operating switches.
●When shipped, all switches are set by default to their OFF positions.
Switch 1
Switch 2
Switch 3
Switch 4
Functions to be set
The setting operations of Two-button and three-button
The setting operation of self hold circuit on Two-button
Enables/disables Touch-motion functions
Switches motor rotation direction
ON
Two-button
Function to be set
Enable
Reverse
OFF
Three-button
Function to be not set
Disable
Normal
●
Touch-Motion Function enables opening/clos-
ing of curtains without using any switch
operations.
●
By pulling the curtain (Pilot Runner will move
5cm), the curtain will move (motor will operate in
the corresponding direction) and stop at Limit
Position.
* Switch 1 :ON Switch 2: OFF setting (two button
operations/ no function) will disable Touch-
Motion function. Apply a different setting.
<The Touch-Motion Function>
●This function enables switching of motor rotation direction without reassembling the Rail
Set. Use this if the Rail Set has been accidentally assembled in the reverse orientation.
●Turn Switch 4 ON, unplug the power cord, wait for at least 5 seconds, then plug the power
cord in again.
●When you power on the product, the motor will rotate in the opposite (reverse) direction.
●Press the OPEN or CLOSE button to initiate instructive operation.
*For detailed information on instructive operation, refer to "Limit Setting Method" described
on page 14.
<Rotation Direction Selecting>
Caution
Always operate with the switch when you want to stop the curtain track. Forcibly
pulling the curtain will cause damage.
P.12
Approx.5cm
Moves
P.13
OPEN: press and hold for 3 sec.
OPEN
Speed Setting:5
OPEN
Accelerates toward
speed A
■Speed Setting Switch (sec./m)
●Switch for changing the opening/closing speed for the curtain.
●The speed setting switch are set by level “5” when the unit is delivered.
(* speed changes
by the weight of curtain.)
■Address Setting Switch
●Switch for setting the address for infrared remote control (9ch).
●When using infrared remote control (9ch), set within the range of 1 to 9.
●The address setting switch are set by level “1” when the unit is delivered.
*In case of FM remote control 2.4G,please refer to "Instruction Manual'' of FM Receiver 2.4G
and set the address.
1
1
2
2
3
3
4
4
5
5
6
6
7
7
8
8
9
9
A 〜 F・0
Speed level
Speed (sec./m)
Address Setting Switch
Channel
1
11
2
10 . 5
3
10
4
9
5
8.5
6
8
7
7
8
6
9
5.5
A〜F
4.5
●This function is available only with 3 button switch.
●Press and hold the OPEN or CLOSE button for 3 seconds to accelerate opening/closing
speed from set speed to the maximum speed (4.5 sec./m).
●Press switch in the same direction again to moving cancel accelerate mode and back to
set speed.
<Acceleration Mode〉

P.14
Limit Setting
■
Limit Setting (instructive operation)
❶
Switch the Motor Set ON.
❷Press the OPEN or CLOSE button of remote
controller or button switch.
❸Pilot Roller will move in the full-closing direction and
stop after reaching the full-closing position.
❹
After stopping at the full-closing position, Pilot
Roller automatically moves in the full-opening
direction and stops at the full-opening position,
thereby completing the instruction.
Caution
Please always start the instruction with the curtain hanging condition.
Be sure to run the instruction sequence with the motor set installed on the Rail
Set.Note that Pilot Runner will move at the slowest speed while executing the
command. This does not indicate an error or a defect.
Please don’t move curtains for 5 seconds after the instruction.
If the process is interrupted in this way, issue the command once again. Note that
the system will not recall the Limit Position if power is interrupted or the process is
otherwise aborted while the command is being executed. (Once this command is
completed, the Limit Position will be recalled even if power is interrupted.)
●When powered on, the system executes an instruction that automatically detects the full
opening/closing position (Limit Position) of the curtain. Always confirm that this instruction
is performed before use.
❷
Press button
❹
After the full-opening
operation, setting is finished.
❶
Switch ON.
❸
The full-closing
operation
P.15
❶Change the Address Setting Switch to "F" (refer
to "Setting Method of the various switches"
described on page 11).
❷Unplug the product.
❸Wait for at least 5 seconds after unplugging,
then plug the power cord in again and power
on the product. Limit settings have been
reset.
❹Set the Address Setting Switch again to a
preferred number (1–9).
■An initialization of Limit Setting
●The Limit Position can be set to assume a new value when curtains are replaced or in the
event of another action.
❶Press and hold the STOP button for 5 seconds to
switch to intermediate limit setting mode.
❷Press and hold the OPEN or CLOSE button until
the curtains reach the desired limit position.
❸If moving in the OPEN direction, press the
STOP button 3 times and the OPEN button 1
time to set the intermediate limit position. If
moving in the CLOSE direction, press the stop
button 3 times and the CLOSE button 1 time to
set the intermediate limit position.
❹Press the STOP button 5 times to end
intermediate limit setting mode.
■Intermediate Limit Setting
●Intermediate limits can be set for both the opening and closing directions. These can be set
with the 3 button switch or infrared remote control; they cannot be set with the FM
remote-control transmitter.
OPEN: press and
hold for 5 sec.
×3
×5
×1
×1
Press and hold until curtains
reach the desired limit
position
or
or
* Turn switch 1 of Function Setting of DIP Switch to OFF.
❶
❶
❷
❷
❸
❸
❹
❹

■For operations in which the operating
address is specified.
❶Specify the Address No. registered for the
product you want to operate.
❷To open and close the curtain, press the OPEN
or CLOSE button.
❸To stop the curtain half way, press the STOP
button.
<Check the Operation with Infrared Remote Control (9ch)>
❶To open and close the curtain, press the
OPEN or CLOSE button.
❷To stop the curtain half way, press the STOP
button.
<Check the Operation with 3 Button Switch>
P.16
Check the Operation
❶Switch the Motor Set ON.
❷If you have not yet executed the instruction, do so now and set the Limit Position.
❸Operate using each switch and check the operation.
❶
❷
❶
❷
❸
P.17
The infrared remote control has orientation
as illustrated, therefore be sure to point
your remote control toward the infra-red
receiver. Maximum distance to reach the
radiation from the remote control to the
receiver is 10 meter in radiation axis. Please
note that when the radiation axis is not
directly meeting the Receiver, radiation
travels shorter distance.
Because of characteristic as above, “ALL
(A)” button is not available for opening
/closing several motors at once. Please be
sure to point your remote control toward
the infra-red receiver that is connected to
the motor you would like to open/close
individually.
Please do not mount infra-red receiver to
shinny location.The infra-red receiver may
not receive infra-red signal correctly if the
receiver is mounted where it is exposed to
direct sunshine or even shinny place where
it is not exposed to direct sunshine.
If the operation became unstable, please
change the batteries.
Caution
10m
10m
30°
30°
45°
45°
6m
6m
3m
3m
■To execute an operation for all product addresses
❶Specify ALL.
❷To open and close the curtain, press the
OPEN or CLOSE button.
❸To stop the curtain half way, press the STOP
button.
❷
❸
❶

Disposal of Packing Materials
Cleaning
●Whenever necessary, wipe the product with dry, clean, and soft cloth.
●Refrain from directly applying water, thinner or other chemicals to the product. Those materials
may cause damages, discoloring, and distortion to the product.
●Do not leave packing material at the installation site.
●Separate combustible cardboard from noncombustible waste.
●Observe the local waster separation regulations when disposing of the materials.
Product Specification
Rated Power Voltage
Rated Power Frequency
Power consumption
Operating voltage
Operating current
Power rating
Rated Current
Time rating
Ambient Temperature
AC 100 to 240V
50/60Hz
During stand by : 0.5W or lower , Max . load operation : 86W
DC24V
3 mA
0.86A (AC100V), 0.48A (AC240V)
8 min.(continuous operation)
0 to 50°C (non-condensing)
Progress Motor 25 50
0.59N.m 0.98N.m
P.18
Curtain moves
automatically when
force opened
manually.
Moves adversely and
in opposite direction
Operation speed is
low
Movement speed after
having spent a power
supply is low
Operates only while
pushing the button
●The rail is not assembled correctly.
⇒Set up according to "About Motor Rotation Direction Switching" on page 12.
●The switches and interior wiring are not connected correctly.
⇒Exchange the red and green cables and reconnect.
●The interior wiring and Modular outlet are not connected correctly.
⇒Exchange the red and green cables and reconnect.
●The various setting switch No.4 is turned ON.
⇒Turn off the switch No.4.
●Opening/closing is set to the slowest speed.
⇒Refer to "Speed Setting Switch (sec./m)" on page 13 and change to a more suitable
speed.
●The instruction has not been completed.
⇒Refer to "Limit Setting Method" on page 14 and completely finish the Limit Setting Method
(instructive operation)
●The Address Setting Switch is set to "F".
⇒Set the Address Setting Switch to a number between 1 and 9.
●The value set here corresponds to two-button operations.
⇒Turn off the No.1 setting switch.
●The various setting switch No.3 is turned on and Touch-motion functions is set.
⇒Turn off the switch.
Troubleshooting
■
Before you decide that the trouble is a malfunction, perform the following check.
Not operating
Condition Possible Causes and Solution
●The power cord plug is not connected.
⇒Switch the Progress Motor Set to on (AC 100–240V).
●The wire from the switch is not connected to the Motor Set.
⇒Refer to "Wiring Method" on page 6 and connect appropriately.
●The Infra-red Receiver is not installed to enable remote control.
⇒Refer to "Wiring Method" on page 6 and connect appropriately.
●
Address of motor set is not correctly set.
⇒Refer to "Address Setting Switch'' on page 13 and set the address.
●
In case of FM remote control, wiring from receiver 2.4G with IR termnal is connected to "SW".
⇒Connect to "IR".
●In case of FM remote control, the receiver has no address setting.
⇒Refer to Instruction manual of FM Receiver and set the address.
●No connection is in place between the interior wiring and the switch or the modular outlet.
⇒Refer to "Connection Method" on page 9 and connect appropriately.
●In case of remote control, the battery is not in the FM transmitter.
⇒Install batteries in the transmitter.
Unstableoperation ●Batteries are old.
⇒Replace old batteries with new batteries.
●Inverter light is used near the Infra-red Receiver.
⇒Remove the Infra-red receiver from the inverter light.
●Infra-red Receiver is under the sun light.
⇒Remove the Infra-red receiver to a location with no sun light.
●There is an obstacle blocking the curtain.
⇒Remove the obstacle before the curtain in the opening/closing position.
●Connection between the interior wiring and the switch or the modular outlet is loose.
⇒Refer to "Connection Method" on page 9 and connect appropriately.
P.19
This manual suits for next models
1
Table of contents

