DIFFICULTY LEVEL
• Genuine Toyota Thermostat
• Genuine Toyota Gasket for thermostat or water inlet housing
• Genuine Toyota Coolant as required
• Metric wrench or socket set
• Scraper or putty knife
• Flat-tip (– shaped) screwdriver
• Pliers
• Radiator drain plug wrench (if needed)
• Gasket sealant
• Drain pan (large enough to hold up to 2 gallons of coolant
and still fit under the vehicle)
• Rag or Paper towels
• Torque wrench (sizes #10-#19)
• Disposable gloves
REMOVE THE THERMOSTAT – Lift the
thermostat straight out by hand. If it
is stuck, use a screwdriver to pry it
gently. Be careful not to damage the
mounting surface.
NOTE: Observe the direction (inlet side
and outlet side) of the old thermostat
so the new thermostat will be installed correctly.
60-90
MINUTES
FROM ONE TO FOUR–FOUR BEING THE MOST DIFFICULT
THERMOSTAT LOCATION
TOOLS AND SUPPLIES
INSTRUCTIONS(continued) INSTRUCTIONS(continued)
REMOVE THE KEYS FROM THE IGNITION WHEN WORKING ON THE
VEHICLE. SEE CAUTION ON BACK PANEL. – Wear disposable gloves.
mWARNING: To prevent injuring yourself, allow the engine to
cool before starting work.
INSTRUCTIONS
1
DISCONNECT THE NEGATIVE BATTERY TERMINAL CABLE.
NOTE: On some vehicles, the alarm will sound when the battery
is reconnected. Also, clocks and radio station presets will have
to be reset after the battery is reconnected (refer to your
vehicle’s Owner's Manual for instructions).
mWARNING: Keep your hands and tools away from the fan. Do
not lean on the fan housing. If the battery is not disconnected,
electric fans (if equipped) could automatically turn on at any time.
2
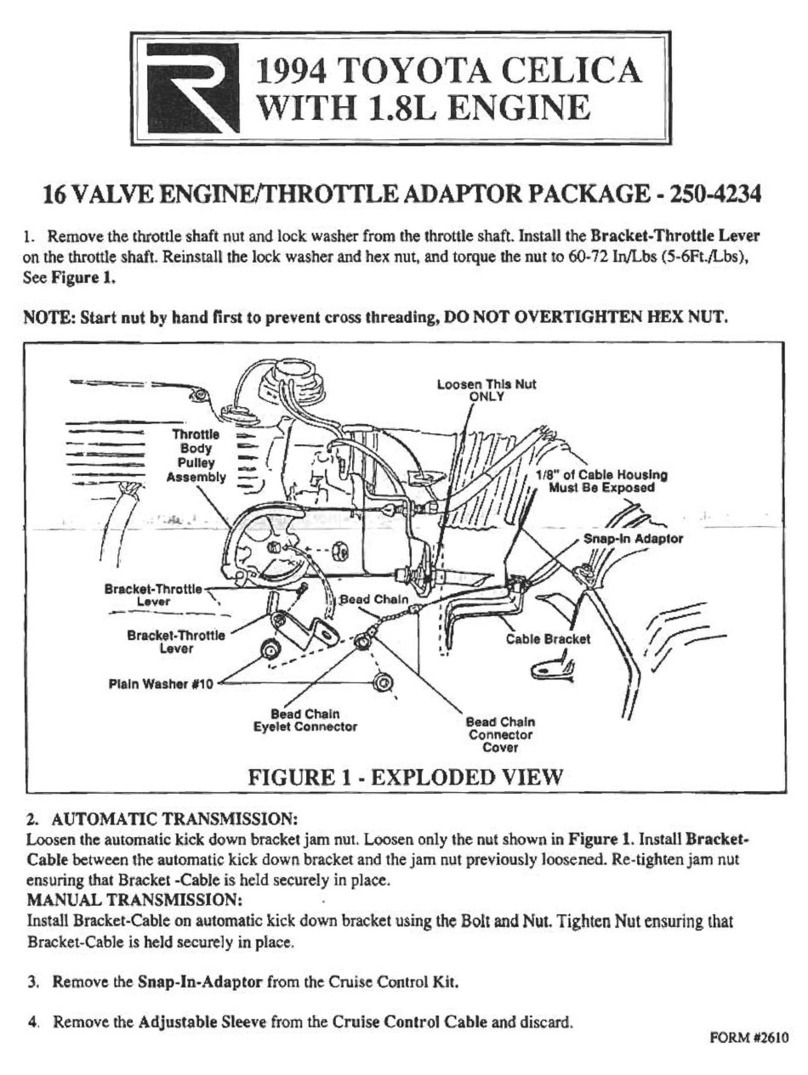
IF NECESSARY, REMOVE THE AIR CLEANER ASSEMBLY – On
some models the air cleaner assembly will have to be removed
to gain access to the thermostat housing.
CAUTION: If it is necessary to remove the air filter, DO NOT
remove the airflow meter. Please refer to the "How To Replace
an Air Filter" Brochure for proper removal.
a. Remove the air cleaner cover.
b. Disconnect all emission hoses from the air cleaner (label
hoses to aid in correct reinstallation).
c. Disconnect the air intake hose.
d. Remove the mounting bolts from the air cleaner base.
e. Carefully lift off the assembly making sure that everything
has been disconnected.
3
DRAIN THE COOLANT – Slowly
remove the radiator cap to relieve
pressure in the cooling system.
Position the clean container under
the radiator drain cock located in the
lower section of the radiator. Using
pliers or a wrench, turn the drain
cock counterclockwise and allow
coolant to drain. The coolant must be
drained below the level of the
thermostat housing. Close the drain cock.
4
REMOVE THE THERMOSTAT HOUSING OR WATER INLET
COVER – Remove the mounting bolts/nuts and lift off the cover
with the hose(s) attached. Swing the housing cover to one side.
Remove the hose if needed to gain access to mounting
bolts/nuts.
5
6
SCRAPE THE OLD GASKET MATERIAL
FROM BOTH HOUSING FLANGES – Using
a scraper or putty knife, remove all the
old gasket material to ensure a good
water-tight seal with the new gasket.
CAUTION: Be careful not to damage
or scar the mounting surfaces of the
housing. Also avoid getting debris inside the thermostat housing.
7
FIT THE NEW THERMOSTAT INTO ITS SEAT – Be sure that
the new thermostat is placed in the same direction as the
removed thermostat. Jiggle valve or arrow pointing up. See
the repair manual.
NOTE: Reference your Toyota Repair Manual for the
recommended gasket sealing compound.
8
INSTALL THE NEW GASKET OR O-RING.
9
RE-INSTALL THE AIR CLEANER ASSEMBLY – Reverse the
directions described in Step 3.
12
INSTALL THE HOUSING COVER – Tighten the nuts evenly and
securely but DO NOT OVER-TIGHTEN. See the repair manual
for proper torque specification.
10
FILL THE RADIATOR WITH COOLANT – If the old coolant is
more than 2 years old, flush the cooling system with water
and replace coolant with 50 to 70% anti-freeze and 50 to 30%
water. Bleed air out of the system. See the repair manual for
bleeding requirements.
mWARNING: Do not bleed system while engine is hot –
severe burns may result.
CAUTION: Do not pour coolant onto the ground, into a storm
drain or sewer – it is environmentally unsafe and illegal. Put
the coolant into plastic containers and take them to a service
station, recycling center or your Toyota Dealer Service
Department for recycling. USED COOLANT MAY CONTAIN
HEAVY METALS AND IS TOXIC. Be sure to wipe up any
coolant that has spilled on your hands, clothes, the vehicle, or
the ground. Animals are attracted to spilled coolant and it can
be fatal if ingested.
11
ESTIMATED TIME INVOLVED
The thermostat housing is normally
located where the upper radiator
hose connects to the engine.
HARD TO SERVICE MODELS
You may experience difficulty accessing the thermostat on the
following models:
• MR2
• MR2 Spyder
•Van
• Previa
• Any turbo or supercharged models
Unless you have proper knowledge, equipment and tools, have your
Toyota Dealer Service Department perform the repairs and maintenance.
RECONNECT NEGATIVE BATTERY CABLE.
13
CHECK FOR LEAKAGE – Start the engine and run the engine
until it reaches normal operating temperature, then check
thermostat housing for leakage.
14
ThermoHowToBroch(New).qxd 7/21/04 7:16 PM Page 2
