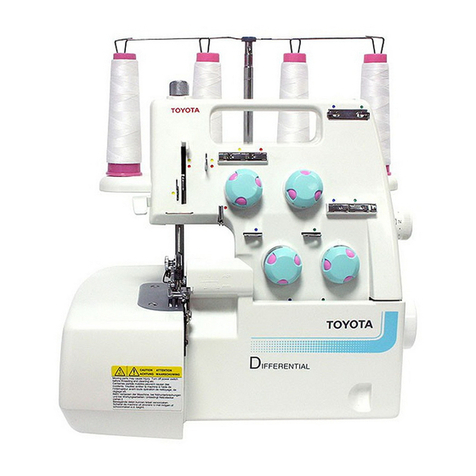
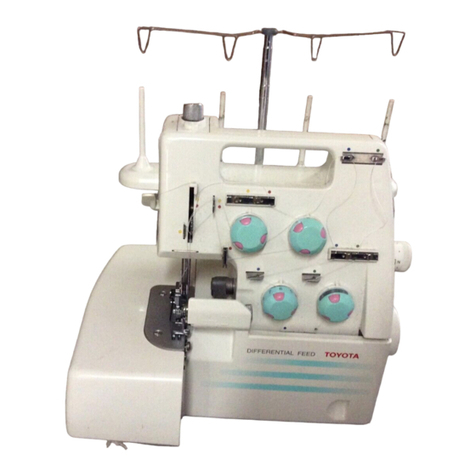
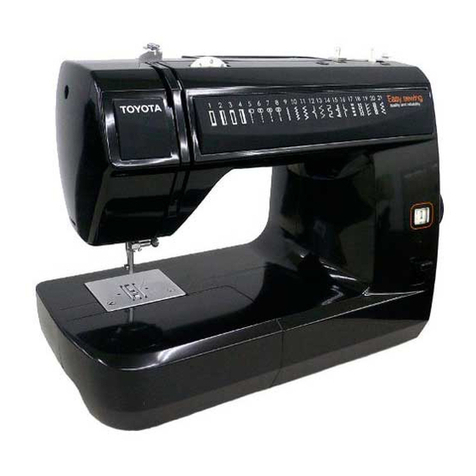
Toyota SL1A Series User manual


1 -1
CONTENTS
1. BEFORE USE........................................................................................ 2
1. Important Safety Instructions......................................................................... 2
2. How to Change the Power Plug .................................................................... 4
2. NAMES OF PARTS............................................................................... 5
3. PREPARATION FOR SEWING............................................................. 6
1. Connecting Power Cord ................................................................................ 6
2. Setting Telescopic Thread Stand .................................................................. 7
3. Opening the Front Cover and Side Cover ..................................................... 7
4. Turning the Moveable Cutter to the Non-operating Position ......................... 8
5. How to Change Threads................................................................................ 8
6. Replacing Needles ........................................................................................ 9
7. Changing the Presser Feet.......................................................................... 10
8. Setting Waste Tray...................................................................................... 10
9. Threading .................................................................................................... 11
10. Preparation for Sewing and Checking......................................................... 14
4. FOUR THREAD OVEREDGING STITCH USING 2 NEEDLES .......... 15
1. Before Sewing ............................................................................................. 15
2. Presser Foot Lever...................................................................................... 15
3. Beginning and Ending of Sewing................................................................. 15
4. Adjustment of the Presser Foot Pressure.................................................... 16
5. Thread Tension Adjustment ........................................................................ 17
6. Adjustments for the Differential Feed Ratio................................................. 19
7. Adjustments for Size of Bight ...................................................................... 20
8. How to Adjust Stitch Length ........................................................................ 21
9. Sewing for Curved Seams........................................................................... 21
10. Corded Overlock ......................................................................................... 22
5. THREE THREAD OVEREDGING STITCH USING ONE NEEDLE..... 23
6. HOW TO ROLL HEM........................................................................... 24
7. REPLACING THE UPPER/LOWER CUTTERS .................................. 25
8. CHANGING THE LIGHT BULB ........................................................... 26
9. MAINTENANCE................................................................................... 27
10. TABLE OF SEWING MATERIALS, NEEDLES AND THREAD ........... 28
11. ACCESSORIES ................................................................................... 29
12. SPECIFICATIONS ............................................................................... 30
13. TROUBLE SHOOTING........................................................................ 31
14. SERVICING ......................................................................................... 32
15. RECYCLING ........................................................................................ 33

1 -2
BEFORE USE
1. BEFORE USE Be sure to read this section before use
1. Important Safety Instructions
These safety instructions are designed to prevent danger or damage arising from the incorrect
operation of the machine. Read carefully and always follow the instructions.
Explanation of " " and " "
Symbol explanation
An incorrect operation could result in death or serious injury.
An incorrect operation could result in an injury or damage to the machine.
Do not touch
Prohibited actions
Required actions
Remove the power plug from the outlet.
Use an AC 220 to 230 V power supply.
Not doing so could cause an electric shock or a fire.
Do not damage the power cord, modify it, bend it
excessively, jerk it or twist it.
Doing so could cause an electric shock or a fire.
If the power cord is damaged, it must be replaced by the
manufacturer or its service agent.
Do not operate where aerosol ( spray ) products are being used or where oxygen is
being administered.
Doing so could cause a fire.
Do not use outdoors.
Doing so could cause an electric shock or a fire.

1 -3
BEFORE USE
When the machine is not in use, it should be stored safely, not on the floor as protruding
parts could cause injury if a person fell on the machine.
Not doing so could cause an injury.
Use with the front cover and the side cover closed.
Not doing so could cause an injury.
Before replacing the needle or presser foot or when threading, switch the machine off.
Not doing so could cause an injury.
Do not look away from the needle while operating the machine.
If the needle breaks it could cause an injury.
Do not touch moving parts such as the needle, upper cutter, take-up lever or hand
wheel.
Doing so could cause an injury.
Children should only use the machine under the supervision of a parent or a guardian.
Otherwise they could injure themselves.
Do not use when young children are near the machine.
They could touch the needle and be injured.
Before leaving the machine after using it, remove the power plug from the outlet.
Not doing so could cause an injury.
Before using the machine, make sure that the presser foot holder set screw, needle
set screw and needle plate set screw are firmly tightened, and that the presser foot
is properly set in the presser foot holder.
Not doing so could cause an injury.
Do not perform the following
actions.
Doing so could cause an injury.
Overlocking without lowering the presser foot.
Overlocking while the needle is incorrectly installed.
Using a bent needle.
Overlocking while jerking the fabric.
Do not operate on an unstable surface such as a sofa or a bed.
If the machine falls down, it could cause an injury or damages to the machine.
Do not drop or insert any foreign objects into any openings.
Doing so could cause an injury or damages to the machine.
Do not repair, disassemble or modify except what is mentioned in the instruction
manual.
Doing so could cause an electric shock, a fire or an injury.

1 -4
BEFORE USE
2. How to Change the Power Plug
The wires in this mains lead are coloured in accordance with the following code:
BLUE-NEUTRALBROWN-LIVE ( OR ACTIVE )
As the colours of the mains lead of this appliance may not correspond with the coloured
markings identifying the terminals in your plug - PROCEED AS FOLLOWS:
The earth plug pin in unnecessary. As the machine is designed under double insulation
structure, the earth wire is removed from the machine. The wire coloured BROWN must be
connected to the terminal marked L or A or coloured RED. The wire coloured BLUE must
be connected to the terminal marked N or coloured BLACK. Neither core is to be connected
to the earth terminal of a three-pin plug.
UK ONLY IMPORTANT PLEASE READ CAREFULLY
When you change the power plug or cord, do not repair, disassemble or modify except
at the authorised dealer or service centre.
Doing so could cause an electric shock or a fire.
If for any reason the power plug for this product is removed it should be immediately
disposed of safety and not stored anywhere where it could be inadvertently used again.
Doing so could cause an electric shock or a fire.

1 -5
NAMES OF PARTS
2. NAMES OF PARTS
1. Spool pin 8. Front panel
2. Presser foot lever 9. Side cover
3. Take-up lever 10. Stitch length adjusting lever
4. Pressure adjusting dial 11. Presser foot
5. Thread tension guide 12. Stitch width adjusting dial
6. Telescopic thread stand 13. Upper cutter
7. YLeft needle thread tension dial 14. Tweezers (Accessories found in the carton )
GRight needle thread tension dial 15. Front cover
BUpper looper thread tension dial 16. Hand wheel (Right side of machine)
RLower looper thread tension dial 17. Differential feed adjusting dial

1 -6
PREPARATION FOR SEWING
3. PREPARATION FOR SEWING
1. Connecting Power Cord
Turn the power switch off when inserting the power plug.
Not doing so could cause an injury.
Hold the power plug when removing it from the outlet.
Not doing so could damage the cord and cause an electric shock, fire or injury.
Do not touch the power plug with wet hands.
Doing so could cause an electric shock.
Connect foot controller and power cord 偋䢢偌 .
倩Specifications vary from country to country.
倩Before plugging in your machine, be sure
that the voltage is the same as that of your
machine.(written on a plate at back of ma-
chine).
Press the switch on the machine to turn on the
power and the sewing light.
Always switch off or unplug the machine when
not in use.
Press hard to foot controller, the machine runs
faster.
When the power switch is turned off, the machine
will not operate even by pressing on the foot
controller.
On
Off
Power switch

1 -7
PREPARATION FOR SEWING
2. Setting Telescopic Thread Stand
3. Opening the Front Cover and Side Cover
Extend the telescopic thread stand to its full
height, then turn it until the shaft clicks into its
locked position.
Before opening the front cover and side cover, switch the machine off.
Not doing so could cause an injury.
How to Open the Front Cover:
a. Push cover to the right as far as it will go, and
b. Pull cover down towards you.
How to Open Side Cover:
a. Push cover to the left to unlock, and
b. Swing cover back away from you.
How to Close Side Cover:
a. Push cover to the right, and
b. Lock into place.
Setting the Tweezers
Take out the tweezers from accessory box to
set it inside of the front panel.
Front cover
Side cover
Tweezers

1 -8
PREPARATION FOR SEWING
4. Turning the Moveable Cutter to the Non-operating Position
5. How to Change Threads
Push the upper cutter set screw from 之with the
forefinger of your left hand and grasp the right
end of the dial 乍and turn it in the direction of
arrow 乌with your right hand.
Return the moveable cutter to the cutting
position.
倩For ease in threading, turn the moveable cutter
to the non-operating position.
Upper cutter
Non-operating position
䷵
Do not touch the blade of the upper cutter.
Doing so could cause an injury.
Before changing threads, switch the machine off.
Not doing so could cause an injury.
The machine is supplied with thread but the
following is an easy way to change them:
(1) Cut the thread in use near the cone spool
(behind the telescopic thread stand). Place
the new thread on the spindle and tie it to
the end of the original thread.
(2) Lower the presser foot lever to lift up the
presser foot.
(3) Set tensions to "0" so that the thread knot
can pass through smoothly, draw out the
looper thread until the thread knot comes to
about 10 cm past the presser foot.
(4) When changing the needle thread, cut off
the thread knot before it reaches the eye of
the needle to avoid bending the needle as the
knot is pulled and caught in the needle's eye.
To make the above threading easier, use
tweezers.
Tie threads
Cut thread
Needle eye

1 -9
PREPARATION FOR SEWING
6. Replacing Needles
Cover the spool with the "NET" as chemical fibers
(fibers) and the like are easily frayed.
When using a real type thread spool, insert
the spool adapter (supplied with the machine)
(as shown).
Net
Before changing the needle, switch the machine off.
Not doing so could cause an injury.
Replace needles in the following way:
(1) Bring needles to their highest position by
turning the hand wheel towards you.
(2) Loosen the Right/Left needle set screw and
remove the Right/Left needles separately.
(3) With the flat side away from you, insert the
new needles into the groove of needle bar and
push them up as far as they will go.
(4) Firmly tighten the Right/Left needle set screw
with screw driver.
If you are using one needle, remove the Right/Left
needle.
Use "HA x1T (705/130)" #11(80) or #14(90) or
other homeuse sewing machine needles.
Needle set screw
Left
needle Right
needle

1 -10
PREPARATION FOR SEWING
7. Changing the Presser Feet
8. Setting Waste Tray
Before changing the presser feet, switch the machine off.
Not doing so could cause an injury.
1. Raise the presser foot and bring the needle
to its highest position. Press the presser foot
holder button in the direction of the arrow to
release the regular foot.
2. Position the presser foot pin below the groove
in the presser foot holder. Lower the presser
foot lever by pressing the button to set the
presser foot.
Button
Presser foot
Presser foot
holder
Groove
Presser foot
pin
(Optional Accessory)
(1) Insert the right guide 乥of the waste tray to
the right leg of the overlock machine as
illustrated.
Turn the waste tray in the direction of arrow.
(2) Push the left end of the waste tray in the
direction of arrow.

1 -11
PREPARATION FOR SEWING
9. Threading
Upper looper threading
Before threading, switch the machine off.
Not doing so could cause an injury.
When threading the machine from the beginning, threading must be carried out in the
following sequence:
First: Upper looper threading
Second: Lower looper threading
Finally: Needle threading
Open front cover and side cover.
Bring the upper looper to its lowest position by
turning hand wheel towards you.
Draw thread from spool and pass it through guide
偋of the thread stand and then, in order, through
guides 偌到䷼ .
Thread the hole of upper looper 偓using
tweezers. Cut the thread leaving about 10cm (4")
of spare thread.

1 -12
PREPARATION FOR SEWING
Lower looper threading
Take the thread drawn from the spool and pass
it through guide 偋of the thread stand and then,
in order, through guides䢢偌 and thread tension
dial 偍.
Pass the thread through guides 偎䢢到䢢偑 and 偒.
Bring the lower looper to the far left position by
turning hand wheel towards you, and pass the
thread through lower looper thread guide 偓.
Pass thread through lower looper slit 偔from
behind.
Then move the lower looper slightly to the right
by turning the hand wheel towards you.
Then thread the hole of lower looper ䷿using
tweezers.
Cut the thread leaving about 10cm (4") of spare
thread.
Close the front cover.

1 -13
PREPARATION FOR SEWING
Right needle threading
Take the thread drawn from spool, and pass it
through thread guide 偋䢢到偑 . Then thread the
eye of right-hand needle's eye 偒from front to
back using tweezers.
Cut the thread leaving about 10cm (4") of spare
thread.

1 -14
PREPARATION FOR SEWING
Left needle threading
10. Preparation for Sewing and Checking
Take the thread drawn from spool, and pass it
through thread guides 偋䢢到䢢偍 ,偎䢢到䢢偑 , and
thread the left hand needle's eye 偒from front to
back.
Check that no thread slips off or snaps.
Confirm that the upper cutter moves against
the lower cutter correctly by turning the hand
wheel slowly towards you. If it is not correct,
check if there is any fabric or waste thread
between cutters.
Turn the hand wheel towards you with your right
hand to check that the thread winds around the
stitch finger of the needle plate.
If the thread doesn't wind around the stitch finger
of the needle plate, check if any threads are
threaded incorrectly.

1 -15
FOUR THREAD OVEREDGING STITCH USING 2 NEEDLES
4. FOUR THREAD OVEREDGING STITCH USING 2 NEEDLES
1. Before Sewing
2. Presser Foot Lever
3. Beginning and Ending of Sewing
Beginning to sew
After threading is completed, and when the
threads are not wound around the stitch finger,
gently draw out the four threads under and
behind the presser foot, and turn the hand wheel
towards you by hand two or three times to make
the thread wind on to the needle plate.
For setting average material, there is no need to
lower the presser foot lever.
When beginning to sew, push the material just in
front of the presser foot and it will be fed through.
For the thick material, lower the presser foot lever,
place the material under the presser foot, then
raise the presser foot lever.
Just put your left hand on the material to push
it slightly until the tip of the fabric comes exactly
behind the presser foot.

1 -16
FOUR THREAD OVEREDGING STITCH USING 2 NEEDLES
Ending of sewing
4. Adjustment of the Presser Foot Pressure
Make chain-stitches at the end of the sewing to
prevent the thread from untying and to prepare
for the next sewing.
Draw the finished fabric gently backwards and to
the left as the machine is operating and making
chain-stitches.
This is called chain-stitch sewing. Then cut the
thread 2 ~ 5cm (1-2") from the presser foot.
Do not pull the threads out roughly.
Doing so could cause an injury because of broken needles.
The presser foot pressure is pre-adjusted for
materials of medium (standard) thickness.
Adjustment is necessary only when you work
on very thin or very thick materials.
Accordingly, sew thinner materials with less
pressure and thicker materials with more
pressure. Increase the pressure of the presser
foot by tightening the pressure adjusting dial.
Tighten Loosen

1 -17
FOUR THREAD OVEREDGING STITCH USING 2 NEEDLES
5. Thread Tension Adjustment
Tension Guide
Correct tension
When the upper looper thread is unbalanced and lies on the under side of fabric
Adjust thread tension to suit the type of material
and the size of thread used. As the number on
the thread tension dial increases, the thread
tension becomes tighter.
Adjust thread tensions using the guide as below.
Test sew on scrap of fabric. Adjust finely to
perfect seam.
Dial 刎Fabric Light Weight
(Chiffon, etc)
Medium
(Wool, Jersey)
Heavy
(Denim, etc)
Y2.5 到34到65到7
G2到33到55到7
B2.5 到44到55到7
R0到23到42.5到3.5
Lower looper thread and upper thread should
be well balanced with same tension. (Both looper
threads should make cross at the edge of the
fabric.)
Needle thread should not be loose or tight,
but of average tension.
Wrong side
Right side
Lower looper thread
Right-hand needle
thread
Upper looper thread
Left-hand needle
thread
Tighten the thread tension of the upper looper
(Dial B) or loosen the thread tension of the
lower looper (Dial R).
Wrong side
Right side
Lower looper thread
Right-hand needle
thread
Upper looper thread
Left-hand needle
thread

1 -18
FOUR THREAD OVEREDGING STITCH USING 2 NEEDLES
When the lower looper thread is unbalanced and appears on the top-side of fabric
When the left-hand needle thread is too loose
When the right-hand needle thread is too loose
Tighten the thread tension of the lower looper
(Dial R) or loosen the thread tension of the
upper looper (Dial B).
Wrong side
Right side
Left-hand needle
thread
Upper looper thread
Right-hand needle
thread
Lower looper thread
Tighten the thread tension of the left needle
(Dial Y) or loosen both looper thread (Dial B
and R).
Wrong side
Right side
Lower looper thread
Right-hand needle
thread
Upper looper thread
Left-hand needle
thread
Tighten the thread tension of the right needle
(Dial G).
Wrong side
Right side
Lower looper thread
Right-hand needle
thread
Upper looper thread
Left-hand needle
thread

1 -19
FOUR THREAD OVEREDGING STITCH USING 2 NEEDLES
6. Adjustments for the Differential Feed Ratio
Refer to the below chart and test stitch performance on a scrap of material you are going to use.
Differential feeding performs the function of
stretching or condensing the edge of the fabric,
since two independent feed dogs, one in front
and one behind the needles, can be adjusted
to feed at differential feed ratio.
The function has the effect of producing a
neat finish of overedging for stretchable and
condensable fabrics.
倩"N" indicates the neutral position on the
differential feed adjusting dial.
Differential feed
adjusting dial
Fabric Differential feed
ratio is set "N"
Differential
feed ratio
Result of
adjustment
Stretchable
materials
Knit
Jersey N-2
Unstretchable and
incondensable
materials
Medium woven
fabrics N
Condensable
materials Georgette 0.7-N
Table of contents
Other Toyota Sewing Machine manuals

Toyota
Toyota ESP9000 User manual

Toyota
Toyota QUILT 50 User manual

Toyota
Toyota KR 460 User manual

Toyota
Toyota 3314 User manual

Toyota
Toyota SP100 Series User manual

Toyota
Toyota SP100 Series User manual

Toyota
Toyota 4500 EL User manual

Toyota
Toyota EC-1 Series User manual

Toyota
Toyota SP200 Series User manual

Toyota
Toyota OEKAKI 50 User manual

Toyota
Toyota SPB15 Operator's manual

Toyota
Toyota ESM21 User manual

Toyota
Toyota 3314 - OTHER 3 User manual

Toyota
Toyota EC-1 Series User manual

Toyota
Toyota Expert EPS9000 User manual

Toyota
Toyota EZ1-U1-3DEL User manual

Toyota
Toyota RS2000 User manual

Toyota
Toyota RS2000-2D User manual

Toyota
Toyota KR 460 User manual

Toyota
Toyota RS2000-2D User manual