TP-Link TL-SC3130G User manual

IP Surveillance System
User’s manual

CONTENTS
1.1 System Requirement..................................................................................................1
1.2 Installation...................................................................................................................1
1.3 Quick Start...................................................................................................................5
2.1 Start............................................................................................................................11
2.2 Information Window:................................................................................................13
2.3 PTZ Camera Control:................................................................................................13
2.3.1. Preset/ Go:..........................................................................................................13
2.3.2. Zoom:..................................................................................................................13
2.3.3. Focus:.................................................................................................................13
2.3.4. Patrol:..................................................................................................................13
2.4 On Screen Menu........................................................................................................14
2.4.1. Enable Talk:........................................................................................................14
2.4.2. Connect/ Disconnect: .........................................................................................14
2.4.3. Show Camera:....................................................................................................15
2.4.4. Snapshot:............................................................................................................15
2.4.5. Manual Record:..................................................................................................15
2.4.6. Toggle Full Screen: ............................................................................................15
3.1 Information Window:................................................................................................18
3.2 Audio Volume Control:.............................................................................................18
3.3 Screen Division:........................................................................................................18
3.4 Browse Mode: ...........................................................................................................18
3.5 Open Record:............................................................................................................18
3.6 Enhancement ............................................................................................................19
3.6.1. General Setting:..................................................................................................19
3.6.2. Filter Setting........................................................................................................19
3.7 Save Video.................................................................................................................19
3.8 Save Image ................................................................................................................20
3.9 Print............................................................................................................................20
3.10 Backup.......................................................................................................................20
3.11 Log Viewer.................................................................................................................22
3.11.1. Unusual Event:...................................................................................................22
3.11.2. System Log:........................................................................................................23
4.1 Day Mode ...................................................................................................................24

4.2 Load Preset Modes...................................................................................................24
4.3 Insert a New Schedule Manually.............................................................................25
4.4 Copy Schedule..........................................................................................................26
4.5 Week Mode ................................................................................................................26
4.5.1. Default: ...............................................................................................................27
4.5.2. Holiday:...............................................................................................................27
4.5.3. Custom: ..............................................................................................................27
4.6 Adjust the Scheduled Setting..................................................................................27
4.7 Encoding Option Panel............................................................................................28
4.7.1. Always Record:...................................................................................................28
4.7.2. Record on Motion:..............................................................................................28
4.7.3. Pre-record/ Post-record Time:............................................................................28
5.1 Event ..........................................................................................................................29
5.1.1. Assign a Camera Event......................................................................................30
5.1.2. Event - Signal Lost .............................................................................................30
5.1.3. Event - General Motion.......................................................................................31
5.2 Action.........................................................................................................................33
5.2.1. Action - Action Type ...........................................................................................33
6.1 Setting – General ......................................................................................................35
6.1.1. Startup ................................................................................................................35
6.1.2. Automatically Popup Event Report.....................................................................35
6.1.3. Status Display.....................................................................................................37
6.2 Setting - Camera .......................................................................................................37
6.2.1. Add Camera........................................................................................................37
6.2.2. Camera Parameter.............................................................................................39
6.2.3. OSD Setting:.......................................................................................................39
6.2.4. IP Camera / Video Server Setting Panel............................................................40
6.3 Setting - I/O Device...................................................................................................40
6.4 Setting - PTZ Config .................................................................................................41
6.5 Setting - User Account.............................................................................................42
6.6 Setting – Monitor Display.........................................................................................42
6.7 Save/ Load Configuration........................................................................................43
6.8 Log Viewer.................................................................................................................44
6.8.1. Log Viewer – Unusual Event..............................................................................44
6.8.2. Log Viewer – System Log...................................................................................45

6.9 Backup.......................................................................................................................46
6.9.1. Backup................................................................................................................46
6.9.2. Delete Recorded Information from the System..................................................48
6.10 Network Service........................................................................................................50
6.10.1. Live Streaming Server........................................................................................50
6.11 About Main Console.................................................................................................53
7.1 Setup Panel................................................................................................................55
7.1.1. Setup Panel—Server..........................................................................................56
7.2 Show Camera(s) On the Display Screen................................................................56
7.2.1. Log In/ Log Out:..................................................................................................57
7.2.2. Server and Camera List:.....................................................................................57
7.2.3. PTZ Camera Control: .........................................................................................57
7.2.4. Digital Zoom:.......................................................................................................58
7.2.5. Play/ Stop/Drop:..................................................................................................58
7.2.6. Information Display Window:..............................................................................58
8.1 Server IP.....................................................................................................................59
8.2 Remote Live Viewer..................................................................................................59
8.3 Remote Playback......................................................................................................60

1
Chapter 1. Quick Start
1.1 System Requirement
Total FPS
at CIF 480~640 360~480 240~360 120~240 0~120
CPU Intel Core 2
Duo Intel Pentium
D 930 Intel Pentium
D 930 Intel P4 2.8
GHz Intel P4 2.4
GHz
RAM 1 GB 1 GB 1 GB 512 MB 512 MB
Mother-
board Intel 945 or 965 chip, Intel Chipset recommended
Display ATI Radeon 9200, nVIDIAGeForce FX-5200, Intel 945 / 965, or above (ATI
recommended)
Ethernet 100 BaseT orAbove, Gigabit LAN Recommended
Hard Disk 80 GB or above
OS MS Windows 2000 / 2003 / XP Pro SP2 / Vista / Windows 7
1.2 Installation
Step 1: Insert the Installation CD.
Step 2: Run Setup.exe from the CD-ROM driver/
directory to install.
Step 3: Check the option “I accept the terms of the license agreement”.

2
Step 4: Please enter your name and the company name for which you work.
3
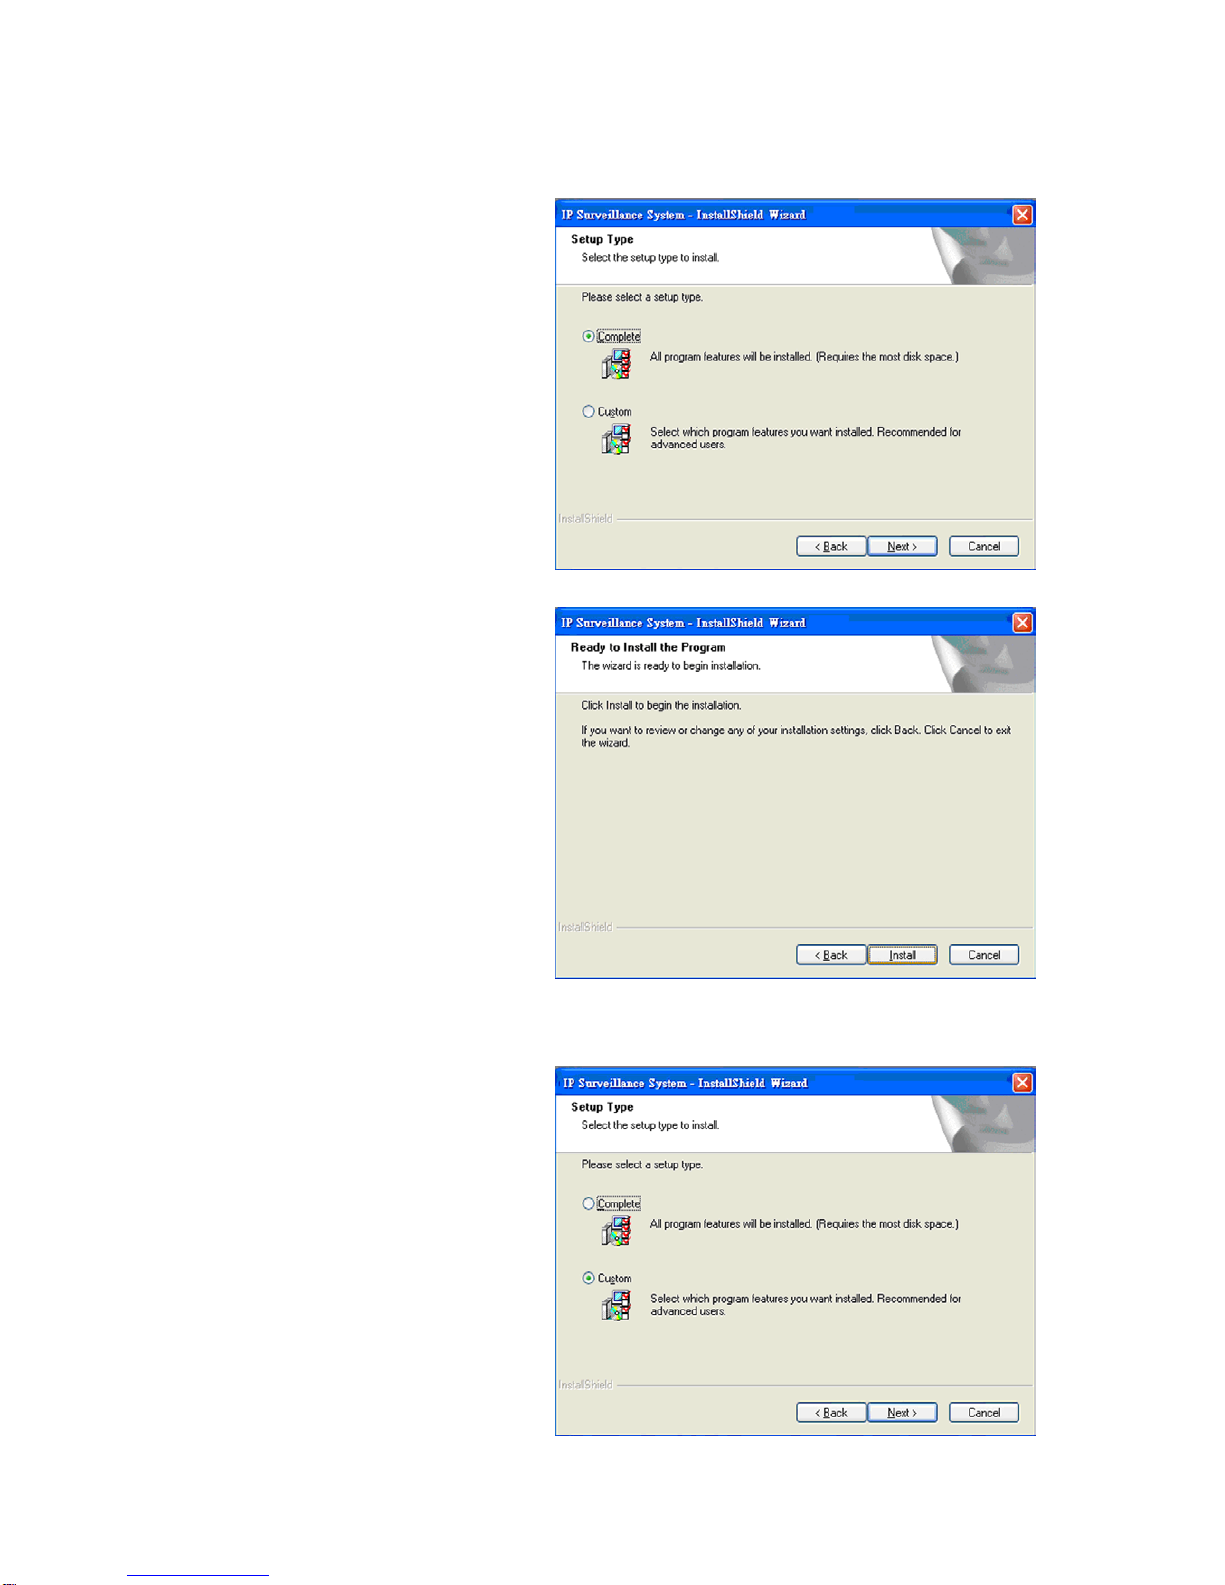
Complete Setup Type:
Install all program features into the
default directory.
Check the option “Complete”.
All program features will be
installed. [Require the most disk
space.]
Press the “install” to start the
installation.
Custom Setup Type:
Install the system to a preferred
directory. Or select whichever
feature(s) you wish to install.
Check the option “Custom”.
Select which program features you
want to install. This is
recommended for advanced users.
4
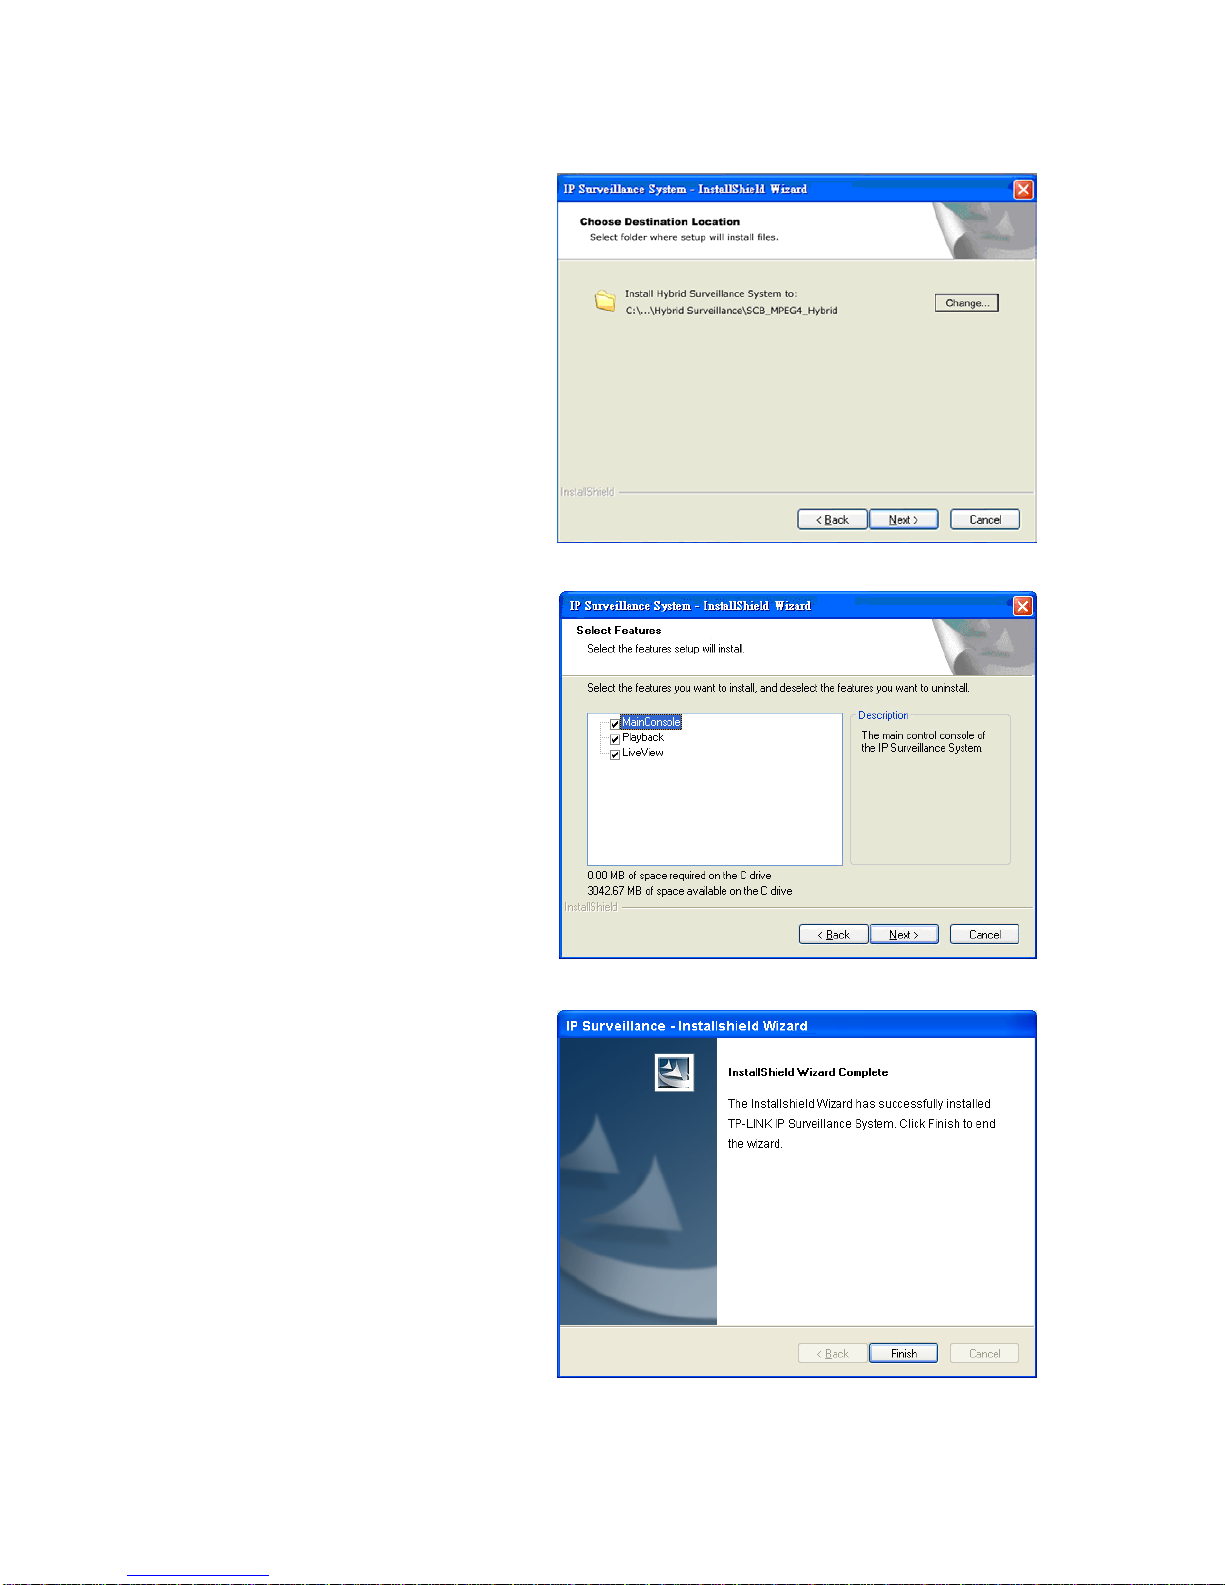
Select folder where setup will
install files.
Select the features setup will
install.
Hint: For example, select only
Playback and LiveView for
installation. Install and use only
these features on multiple remote
sites at home or anywhere with a
PC.
Press “Finish” to finish the
installation.

5
Execute the Main Console
Enter the password you like into the edit
box and enter again at the edit of
Password Confirm.And then press “OK”.
Now enjoy our Intelligent Surveillance
Solution.
1.3 Quick Start
Install IP camera(s)
Step 1: Setup the IP camera(s) following by the instruction manual provided by the
manufacturer.
Step 2: Check the network between the IP camera(s) and the system.
Step 3: Add the IP camera(s) to the system following below steps.
Add IP camera(s)
Step 1: Go to Start > All Programs > IP
Surveillance > Main Console.
Step 2: Type in user name and password
and log on to the system.
Step 3: In Main Console, go to Config >
Setting to obtain the Setting
panel.
Step 3

6
Step 4: Go to Camera tab. If your
IP cameras support UPnP.
Follow step 5. Otherwise,
follow step 8.
Step 5: Click “Search” to search for
the IP cameras that are
available at this point.
Note:
Search function just support the IP
cameras with UPnP supported.
Step 6: Select one of the IP cameras that
are available; check the option
and enter the username and
password.
Step 7: Click OK to add the camera.
Step 8: Click “Insert” to insert the IP
cameras.
Step 9: Enter the IP address or domain name (check the “Use DNS” option), Http
Port, Username, and Password.
Step 10: Click “Auto Detect”
Step 11: Click OK to add the camera.
Click OK to exit the Setting panel.
Step 9
Step 10
Step 11
Step 4
Step 5
Step 8
7
Set Schedule
Step 1: Go to Start > All programs > IP Surveillance > Main
Console.
Step 2: Type in user name and password and log on to the system.
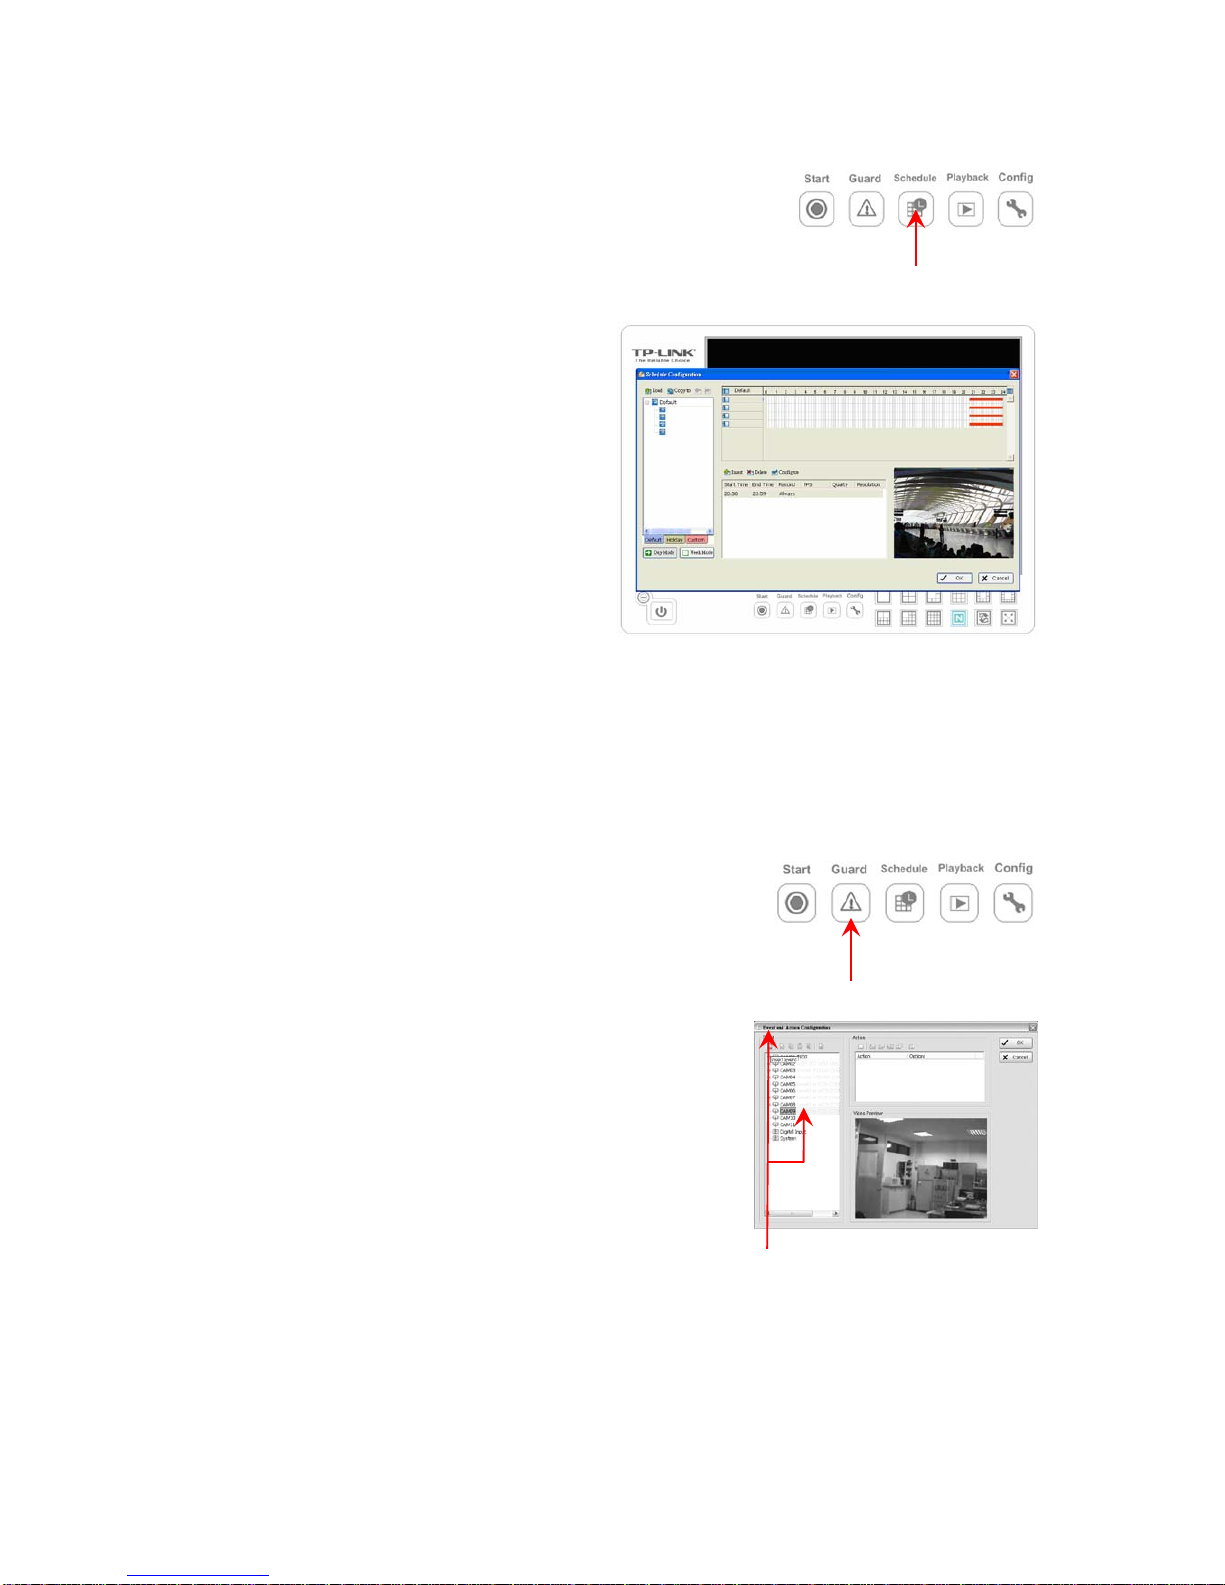
Step 3: In the Main Console, go to
Schedule.
Step 4: By default, when inserting a
camera to the system, the
recording schedule is
automatically set to be 24 hours
a day, always record.
Step 5: Click Configure on the selected
camera schedule or double click
on any schedule bar to modify
the recording mode.
Step 6: When satisfied with the schedule setting, click OK to update the recording
schedule.
Step 7: Click OK again to go back to the Main Console.
Set Smart Guard
Step 1: Go to Start > All Programs > IP Surveillance >
Main Console.
Step 2: Type in user name and password and log on to
the system.
Step 3: In the Main Console, go to Guard.
Step 4: Select a camera and then click on “Insert
Event.”
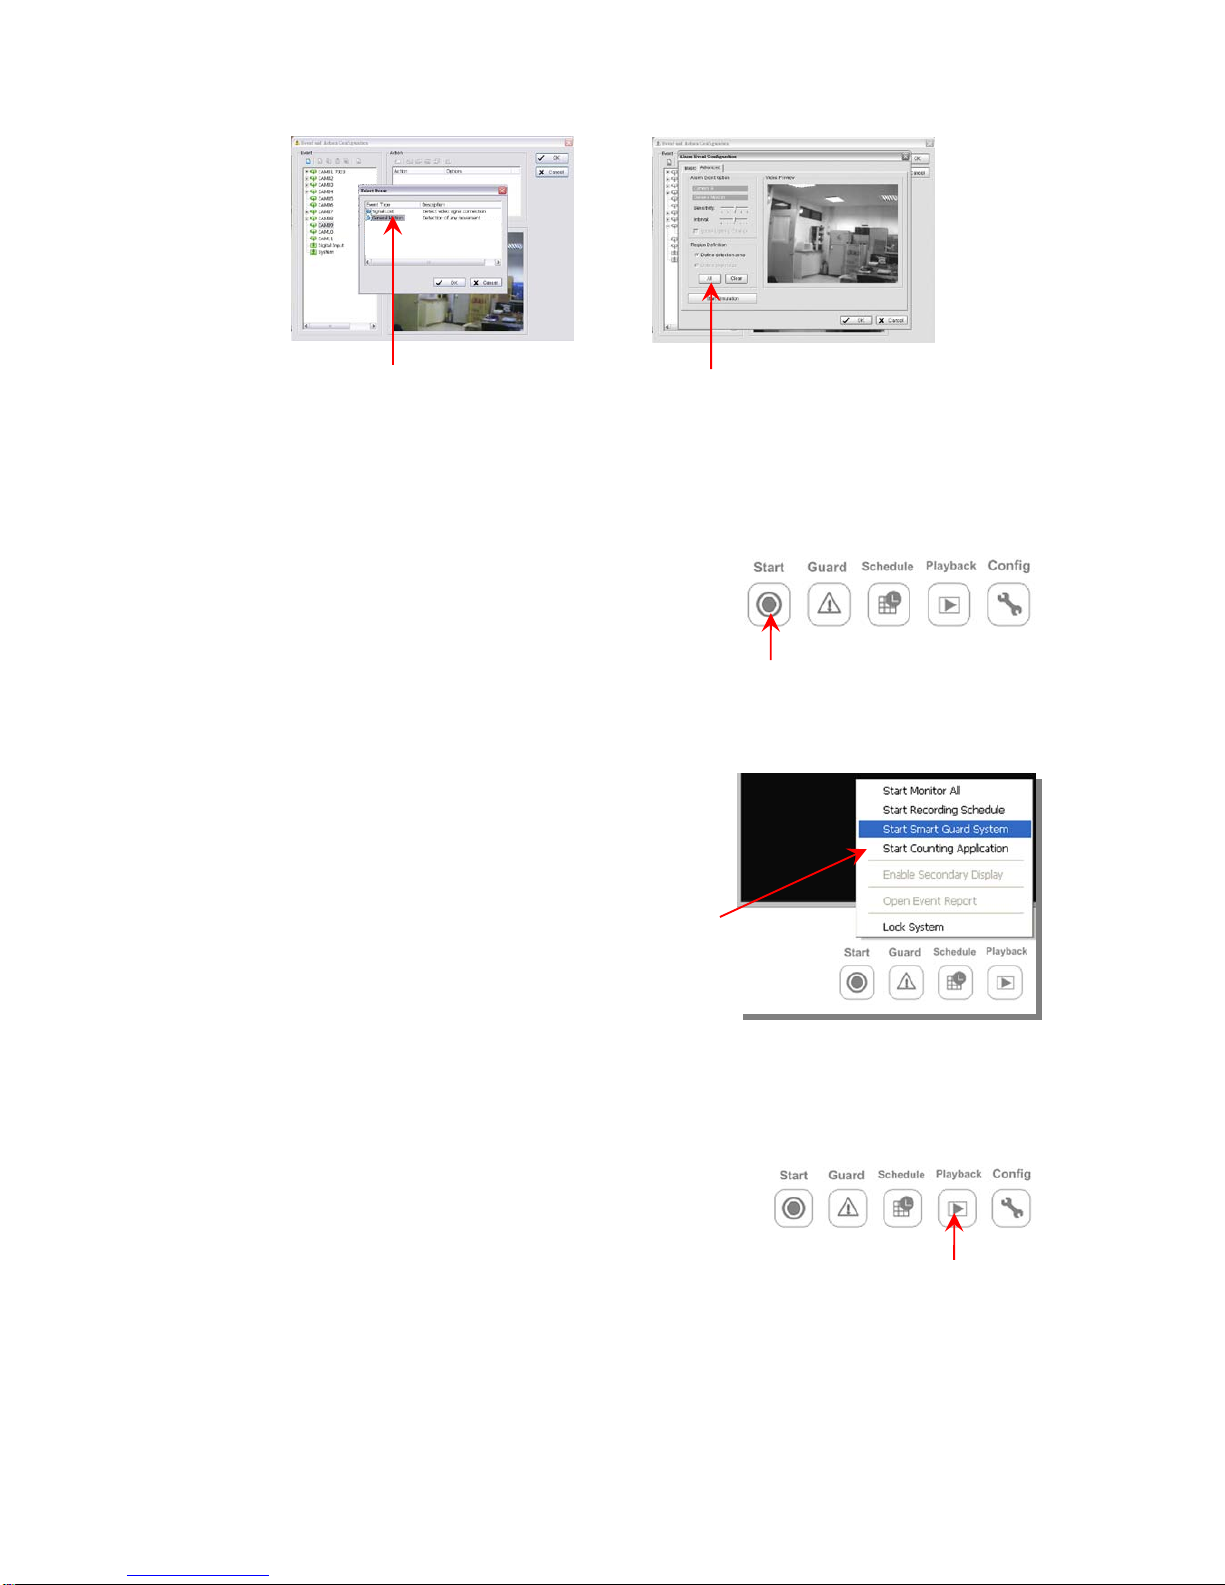
Step 5: Select General Motion as the event type, click
OK.
Step 6: In the Alarm Event Configuration panel, set the detection zone as all, and
then click OK to exit the panel.
Step 7: Click OK to go back to the Main Console.
Step 3
Step 4
Step 3
8
Start Recording & Smart Guard
Step 1: Go to Start >All Programs > IP Surveillance > Main Console
Step 2: Type in user name and password and log on to the system.
Step 3: In the Main Console, go to Start.
Step 4: Click on “Start Recording Schedule” and
“Start Smart Guard System” to
initiate the two functions.
Playback
Step 1: Go to Start > All programs > IP Surveillance >
Main Console.
Step 2: Type in user name and password and log on to
the system.
Step 3: In the Main Console, go to Playback.
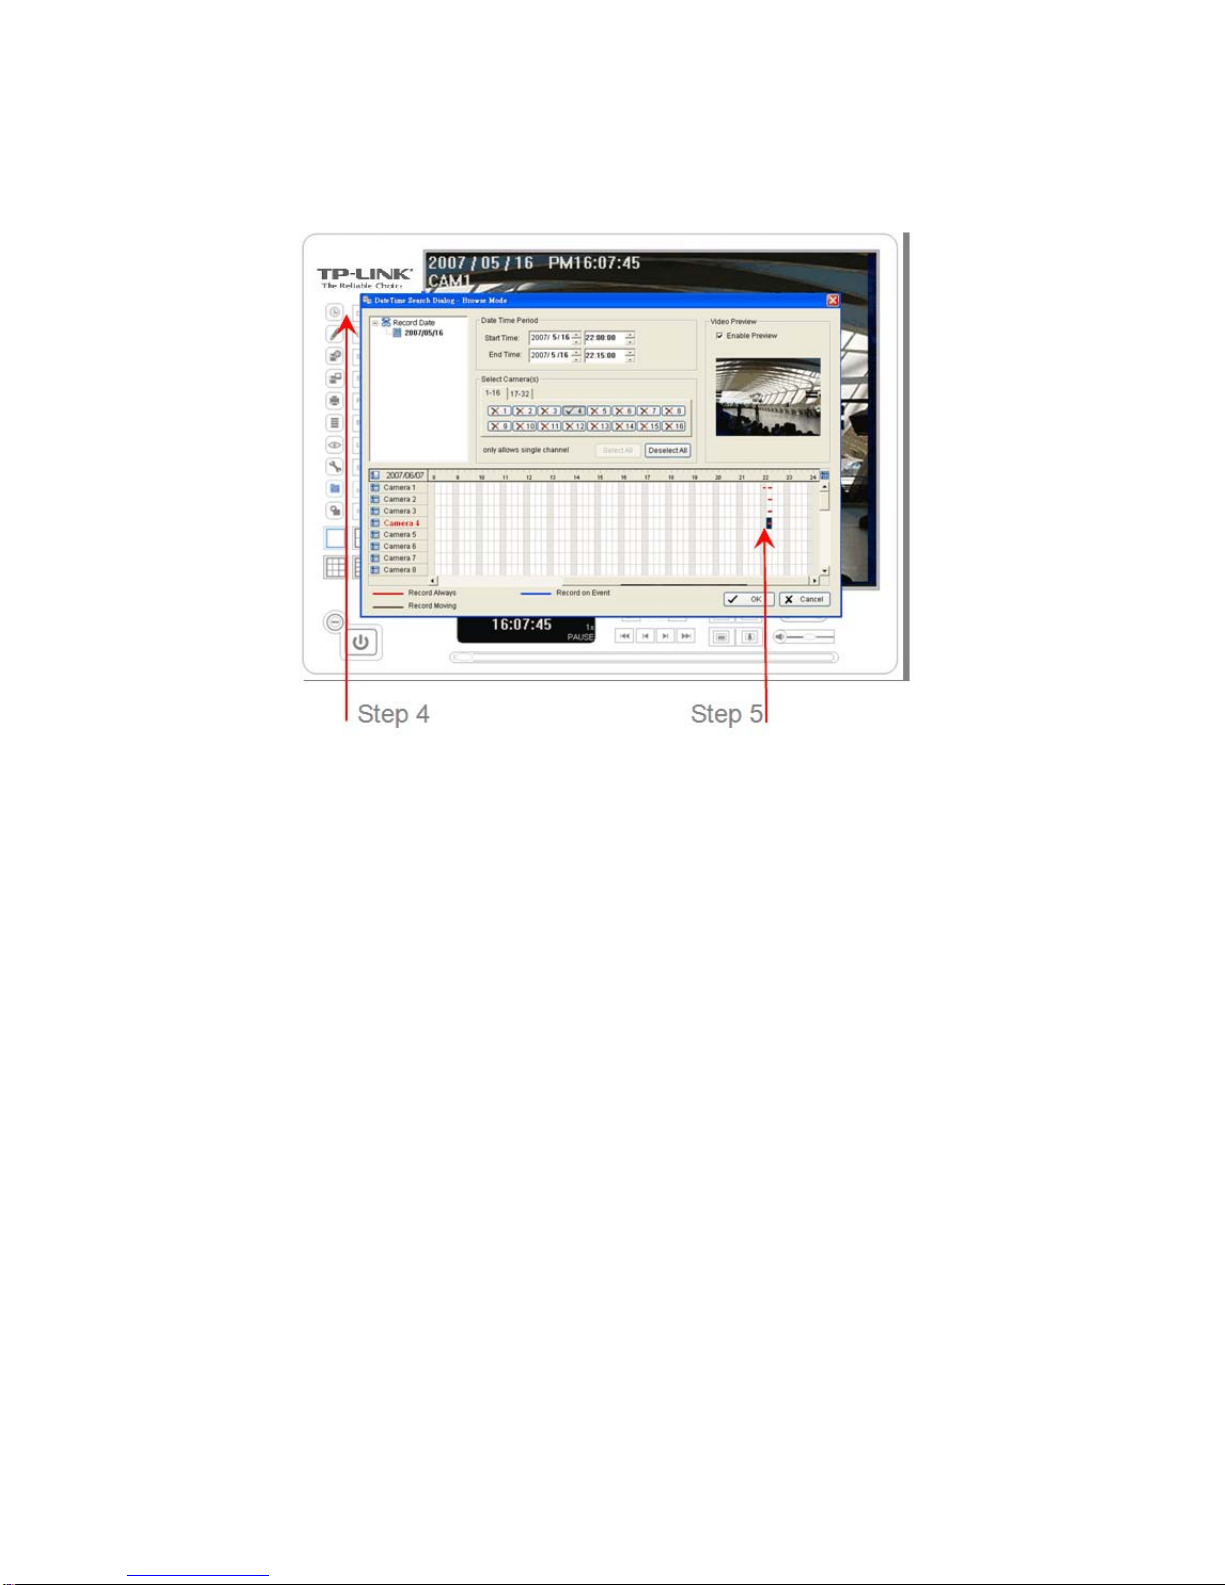
Step 4: In the Playback window, click on the Open Record Icon.
Step 5: In the time table, recorded files are displayed in color bars. Highlight any color
Step 5
Step 6
Step 3
Step 3
Step 4
9
bars to select playback section. Click OK to return to Playback Console.
Step 6: The recorded files are ready to view now.
10
Chapter 2. Main Console
This is the main operation
system - to activate, schedule
recording, setup smart guard
and configure system setting.
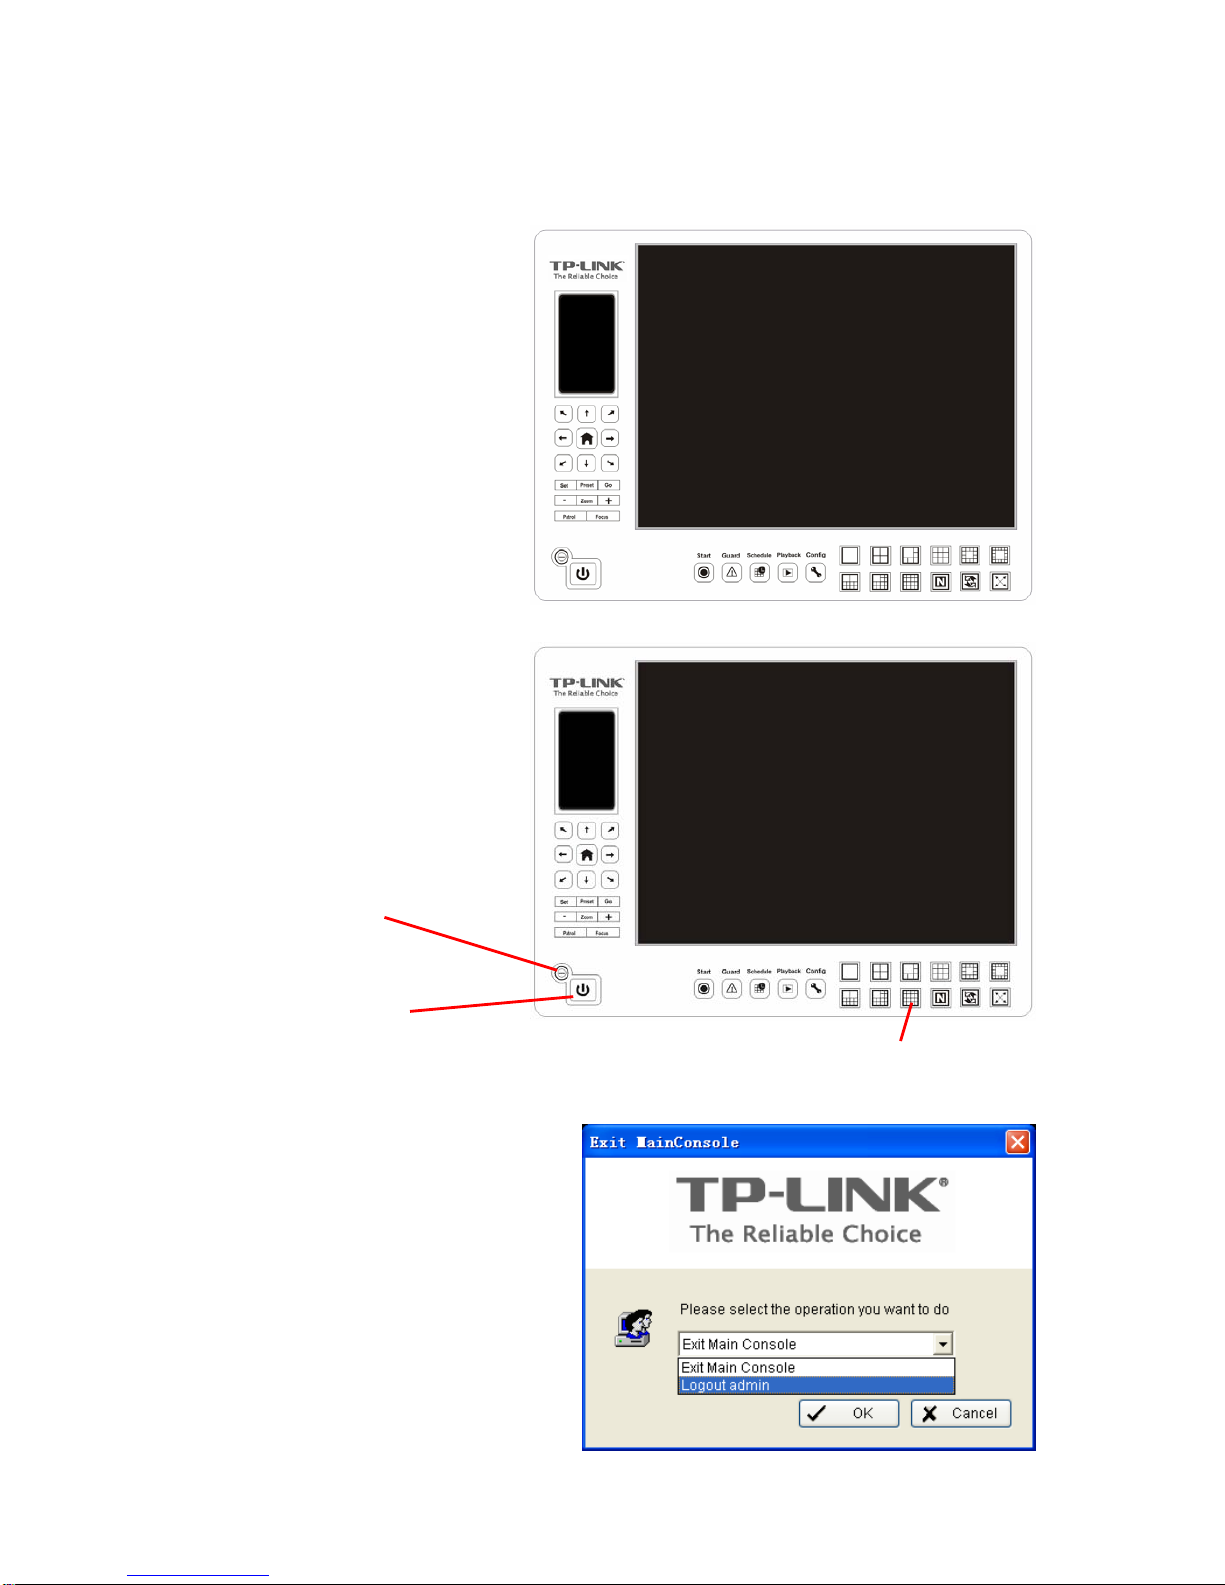
EXIT: Shut down the Surveillance
System or log out current user.
MINIMIZE: Minimize the Main
Console window.
SCREEN DIVISION:
Allocate the
sub-screen display by clicking on the
desired layout icon. To switch to
single camera display, double click on
a particular sub-screen. Double click
on the screen again to regain
previous screen division layout.
Exit
Minimize
Screen Division

11
2.1 Start
START: Click on the Start icon and select from the drop down menu to activate/
deactivate: (a) Recording Schedule System, (b) Smart Guard System, or (c) Counting
Application. Select Start/Stop Monitor All to activate/ deactivate all the functions at
once.
Note:
When activating any of the monitor functions, system considers the current screen
status as normal. Therefore, if you want to, for example, detect Missing Object, be
sure the object needed to be protected is in its position at the moment you click Start
button.
Divide into 1
screen(s)
Divide into 4
screen(s)
Divide into 6
screen(s)
Divide into 9
screen(s)
Divide into
10 screen(s) Divide into
13 screen(s)
Divide into
16 screen(s) Divide into N
screen(s)
Divide into
13 screen(s) Divide into
17 screen(s) Switch to
Full screen Rotate all
screens
Start
12
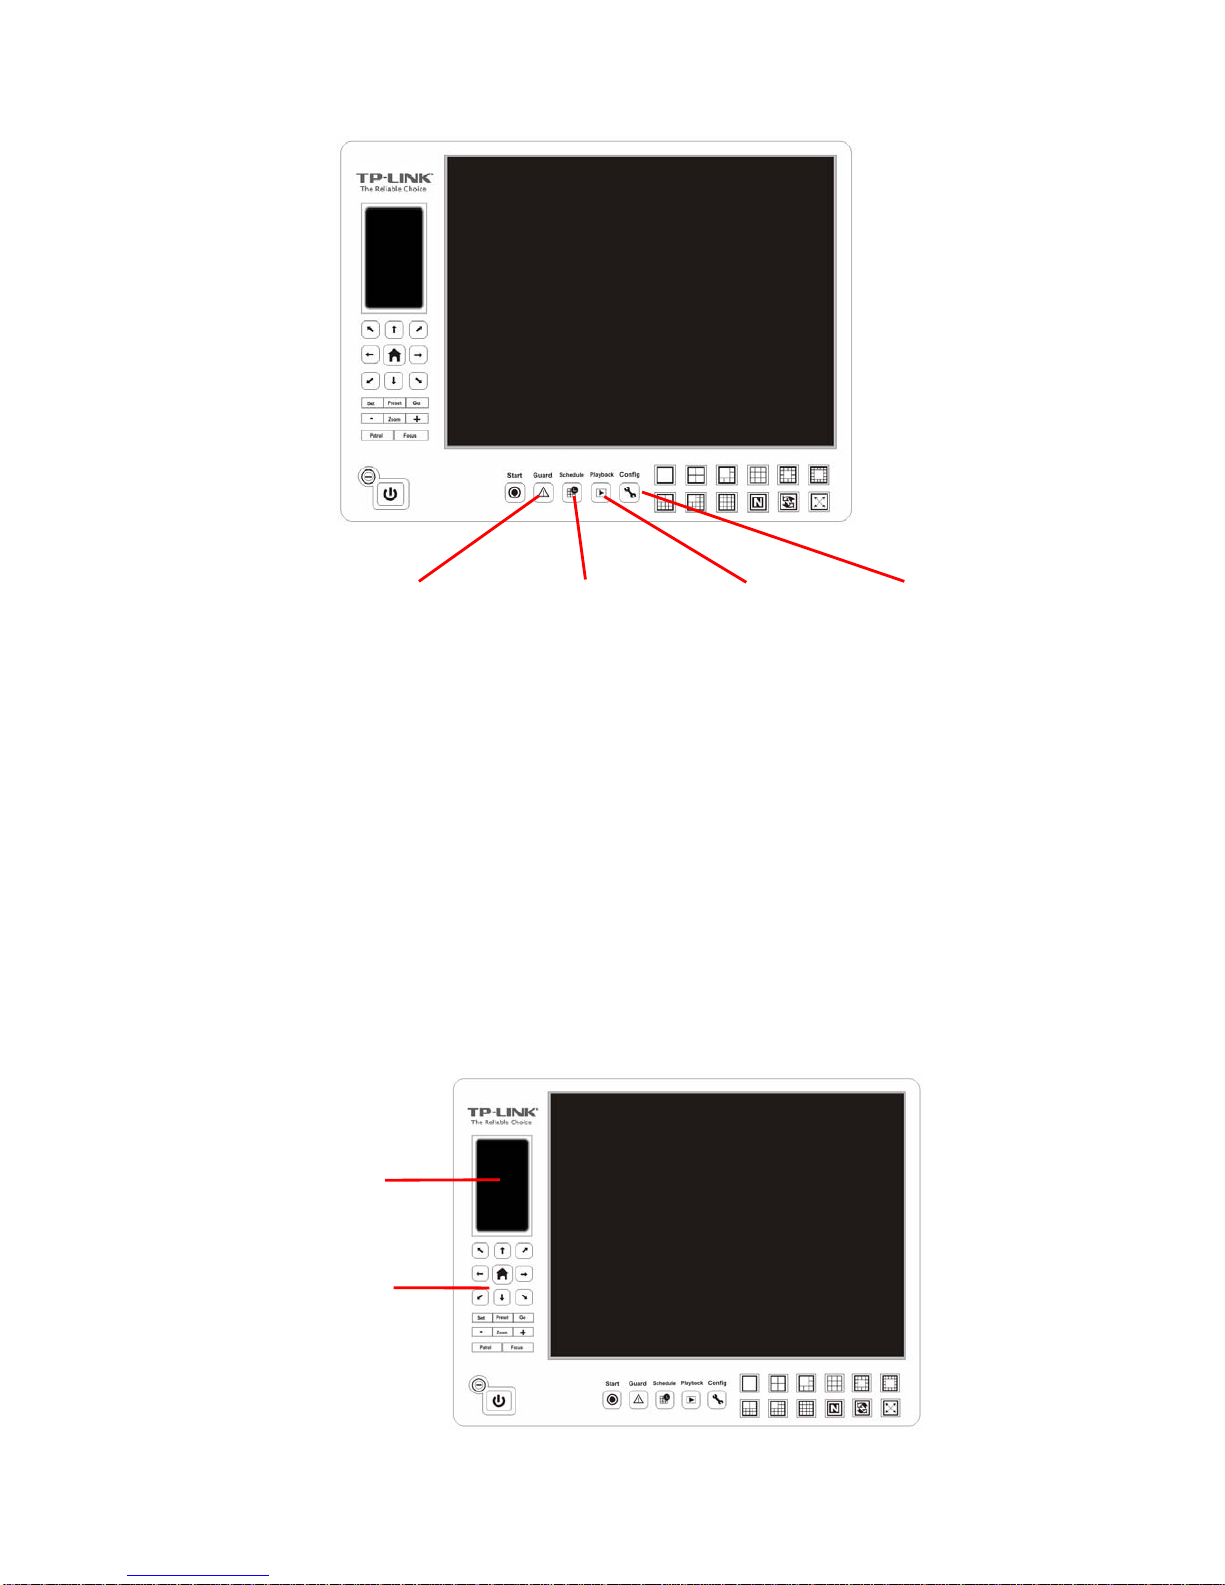
PLAYBACK: Click on the icon to get Playback Console. You can watch recorded
video, search recorded video, adjust image of the stored data, save video/ pictures,
print images, check log information and event records, and set up recording function
configuration. See Playback on page 20 for detail.
SCHEDULE: Organize recording time schedule and setup recorder configuration.
See Schedule on page 30 for detail.
GUARD: Add/edit type(s) of events that you want to detect; setup reaction(s)
responding to events. See Guard on page 36 for detail.
CONFIG: Select from the drop down menu to modify general setting, save/ load
configuration settings, start counting application, access log viewer and backup files,
or setup network services. See Config on page 42 for detail.
Playback
Schedule
Guard
Config
PTZ Camera
Control
Information
Window

13
2.2 Information Window:
Display date, time, free HD space, CPU temperature, fan speed, and customized text.
To customize Information about window’s setting, go to Config > General Setting >
General
2.3 PTZ Camera Control:
Control the movement of PTZ cameras. With cameras that support PTZ control, you
can move, zoom, patrol, adjust the focus, and set preset points of the cameras.
2.3.1. Preset/ Go:
Adjust the camera view until you are satisfied. Click on the Set icon and set up the
view as the preset point 01. Adjust the camera view again and set up the preset point
02. Repeat the process until finish setting up all preset points. You can enter any
names you like to instead of the preset point 01, preset point 02, preset point 03.
Click on the Go icon and view the result of your setting.
2.3.2. Zoom:
Click on the + and – signs to zoom in and zoom out the view.
2.3.3. Focus:
You can select to have the camera focused near or far. To focus near means objects
that are closer will be clearer than the objects that are further away. On contrast, to
focus far means objects that are further will be clearer than the objects that are
closer.
Click on the Focus icon and select auto focus if you want the system to decide the
focus point for you.
2.3.4. Patrol:
Go to Patrol > Set Patrol to obtain the Patrol Setup dialog. From the left window,
select the cameras that you would like to have in the patrol group. Align the cameras
in order in the right window and adjust the time. Rename the group name if you want.
After completing the setup, check theActive option, and then click OK.
You can setup up to four groups of auto patrol. To start or stop, click on the Patrol
icon in the Main Console, and select Start Patrol or Stop Patrol.

14
2.4 On Screen Menu
Right click on the camera screen and get the On Screen Menu, from which you can
enable move, enable digital PTZ, and connect/ disconnect the camera.
2.4.1. Enable Talk:
With cameras that support two-way audio, you may select enable talk to utilize the
function.
2.4.2. Connect/ Disconnect:
Right click on the display screen and select Connect/ Disconnect to modify the
connecting status of the camera.

15
2.4.3. Show Camera:
Select the camera to be displayed from the Show Camera Menu.
2.4.4. Snapshot:
Select the snapshot function to capture a specific video image immediately. You have
the options to copy the image to the clipboard or to save it.
2.4.5. Manual Record:
Start recording video by selecting manual record.
2.4.6. Toggle Full Screen:
To view a specific channel with full screen.
16
Chapter 3. Playback
Watch the recorded video, view and/or search for unusual events and recorded
system information.
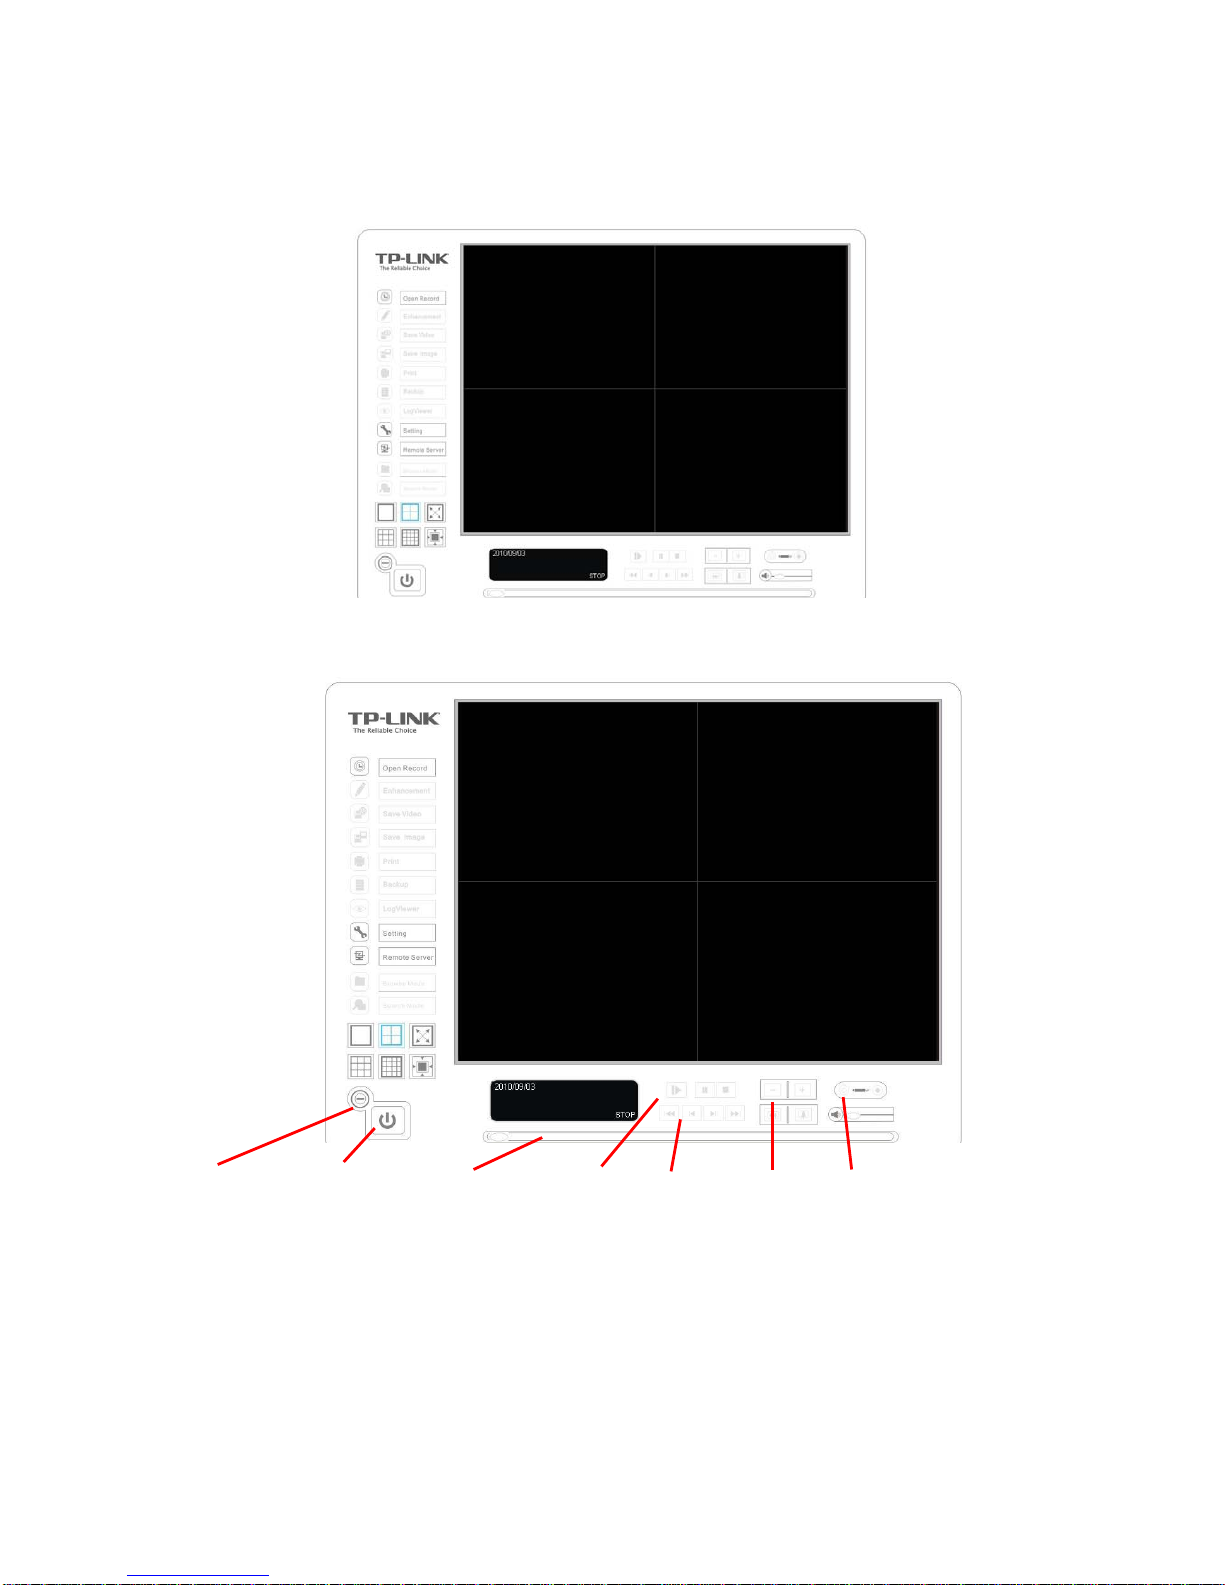
MINIMIZE: Minimize the Playback console.
EXIT: Shut down the Playback console.
SCROLL BAR:
Indicate the status of the playing video; drag it to where you want to
review.
Cue
Zoom
Scroll Bar
Exit
Minimize
Control
Speed
Other manuals for TL-SC3130G
3
This manual suits for next models
5
Table of contents
Popular Security System manuals by other brands


Ness Security Products
Ness Security Products SecurityGuardII owner's manual

DSC
DSC PC5020 Power864 installation manual

Velleman
Velleman DWH G955 Installation and operation instruction manual

Polaroid
Polaroid PSMAA10NA user manual

Concept Smoke Screen
Concept Smoke Screen Sentinel S70 Installation and operation manual

Cocoon
Cocoon HE180040 instruction manual