Tradeflame 218145 User manual

O
30 W Wood Burning Kit Soldering Irons
Part No. 218145, 218134 & 218223
PRODUCT MANUAL
Fig. 1
O
Fig. 4 - WARNING - hot tip when in use, do not touch, keep Soldering Iron
clean and away from oils and lubricants. Do not immerse Soldering Iron in
water
O
IO
IO
Fig. 2 - Correct storage of Soldering Iron when not in use
IO
Fig. 3 - Do not place in coil holder
Fig. 5 - Do not modify or attempt to repair the Soldering Iron except as
indicated in the instructions for use and care.
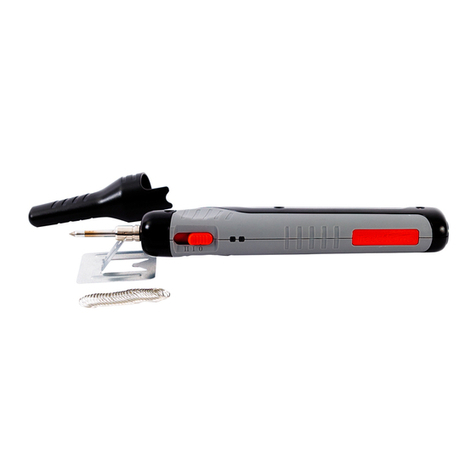
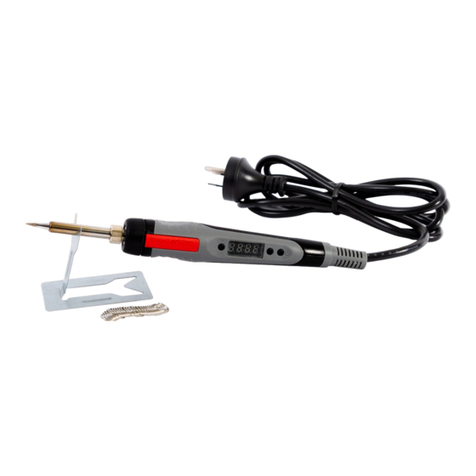
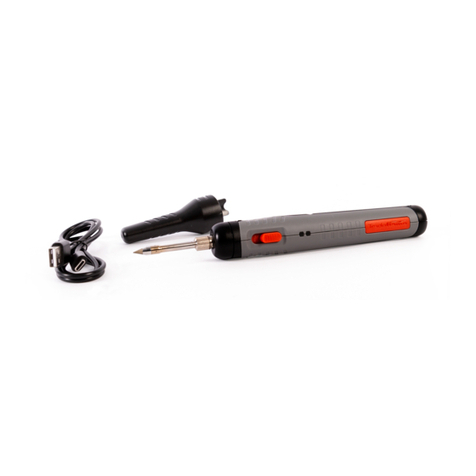
i. Soldering Iron
ii. Metal stand
iii.Long-life conical tip
iv. On / off power switch
v. Ergonomic comfort grip handle
vi. Indicator light
NOTE CONTENTS FOR EACH SOLDERING IRON MIGHT VARY
PLEASE CHECK PACKAGING FOR EXACT DESCRIPTION
vii. Finger guard.

SAFETY WARNINGS
Your Tradeame Soldering Iron is a very safe tool and complies with all
the relevant safety regulations in Australia. Nevertheless, like all electrical
appliances, it must be handled with care. Read all safety warnings,
instructions, illustrations and specications provided with this Soldering Iron.
Failure to follow all instructions listed below may result in electric shock, and/
or serious injury. Never forget that the soldering tip and heater can reach high
temperatures. Follow these simple safety rules at all times. Keep Soldering Iron
out of reach of children. Keep your Soldering Iron well away from all ammable
material. To avoid burns, always assume that the tip is hot. Be sure the hot
soldering tip and heater does not come into contact with the electric power cord.
Before making any adjustment (removing or replacing a tip, etc.) make sure the
iron is unplugged and cool. Do not dip the tool into any liquid. Always work in a
well-ventilated area. After use, unplug the iron, allow the tip to cool, and store in
a safe place. Safety goggles are recommended for preventing hot materials from
injuring eyes. Save all warnings and instructions for future reference. The
term “Soldering Iron” in the warnings refers to your mains-operated (corded)
Soldering Irons or battery-operated (cordless) Soldering Irons.
WORK AREA SAFETY
zKeep work area clean and well lit. Cluttered or dark areas invite accidents.
zDo not operate Soldering Iron in explosive atmo-liquids, gases or dust.
Soldering Irons create sparks which may ignite the dust or fumes.
zKeep children and bystanders away while operating
ELECTRICAL SAFETY
zIndoor use. Do not expose Soldering Iron to rain or wet conditions.
Water entering a Soldering Iron will increase the risk of electric shock (Fig. 4)
PERSONAL SAFETY
zStay alert, watch what you are doing and use common sense when operating
a Soldering Iron. Do not use a Soldering Iron while you are tired/distracted or
under the inuence. A moment of inattention while operating a Soldering Iron
may result in serious personal injury.
zUse personal protective equipment. Always wear eye protection. Protective
equipment such as a dust mask, non-skid safety shoes, hard hat or hearing
protection used for appropriate conditions will reduce personal injuries.
zPrevent unintentional starting. Ensure the switch is in the off position
before connecting to power source, picking up or carrying the Soldering
Iron.
zDo not overreach. Keep proper footing and balance at all times. This enables
better control of the Soldering Iron in unexpected situations.
zDress properly. Do not wear loose clothing or jewellery. Keep your hair and
clothing away from moving parts. Loose clothes, jewellery or long hair
can be caught in moving parts.
zDo not let familiarity gained from frequent use of the Soldering Irons allow
you to become complacent and ignore Soldering Iron safety principles. A
careless action can cause severe injury within a fraction of a second.
SOLDERING USE AND CARE
zDo not force the Soldering Iron. Use the correct Soldering Iron for your
application. The correct Soldering Iron will do the job better and safer at the
rate for which it was designed.
zDo not use the Soldering Iron if the switch does not turn it on and off. Any
Soldering Iron that cannot be controlled with the switch is dangerous and
must be replaced.
zDisconnect the plug from the power source and/or turn off the battery, from
the Soldering Iron before making any adjustments, changing accessories, or
storing Soldering Iron. Such preventive safety measures reduce the risk of
starting the Soldering Iron accidentally.
zStore idle Soldering Iron out of the reach of children and do not allow
persons unfamiliar with the Soldering Iron or these instructions to operate
the Soldering Iron. Soldering Iron are dangerous in the hands of untrained
users.
zMaintain Soldering Iron and accessories. Check for misalignment or binding
of moving parts, breakage of parts and any other condition that may affect
the Soldering Iron’s operation. If damaged, have the Soldering Iron repaired
before use. Many accidents are caused by poorly maintained Soldering Iron.
zUse the Soldering Iron, accessories and Soldering Iron bits etc. in accordance
with these instructions, taking into account the working conditions and the
work to be performed. Use of the Soldering Iron for operations different from
those intended could result in a hazardous situation.
zKeep handles and grasping surfaces dry, clean and free from oil and grease.
(Fig. 4) Slippery handles and grasping surfaces do not allow for safe handling
and control of the Soldering Iron in unexpected situations.
zDo not expose a Soldering Iron to re or excessive temperature. Exposure to
re or temperature above 130°C (265°F) may cause explosion.
SPECIFIC SAFETY RULES FOR SOLDERING IRONS
zContact with a hot tip could ignite ammable materials. Contact with a hot
tip could ignite a re.
zWhile in use do not stand or store Soldering Iron on its side. Soldering Iron
could tip resulting in contact between hot tip and ammable materials.
Always set/store Soldering Iron on metal stand provided (Fig. 2)
zDo not place Soldering Iron in coil stand (Fig. 3).
zKeep hands clear of the tip serious burns can occur if skin contacts tip
(Fig. 4)
zWork in well ventilated areas. Soldering can produce fumes and smoke.
zUse personal protective equipment when using
zThis Soldering Iron is not intended for use by persons (including children)
with reduced physical, sensory or mental capabilities, or lack of experience
and knowledge, unless they have been given supervision or instruction
concerning use of the appliance by a person responsible for their safety.
KEEP AWAY FROM CHILDREN
zTo reduce the risk of re, personal injury, and product damage due to a short
circuit, never immerse your Soldering Iron, battery pack or charger in uid
or allow a uid to ow inside them. Corrosive or conductive uids, such as
seawater, certain industrial chemicals, and bleach or bleach-containing
products, etc., can cause a short circuit. (Fig. 4)
zTo reduce the risk of injury, always wear safety goggles or glasses with side
shields. Keep hands and ngers behind nger guard (Fig.1 / vii). Serious
burns could occur if skin contacts a hot tip.(Fig. 4)
ACCESSORIES
Use only recommended accessories. Others may be hazardous.
For a complete listing of accessories, go online to www.tradeame.com

CHANGING THE SOLDERING TIP
Ensure the tip is cool and Soldering Iron is switched off and unplugged from
mains current before touching the tip as serious burns could occur to skin if
touched.
1. Unscrew the nut and remove the nut and barrel.(Fig. 6)
2. Remove the tip and replace. (Fig. 7)
3. Reinstall the nut and barrel. Tighten the nut securely. (Fig. 6)
GETTING THE MOST FROM YOUR TRADEFLAME WOOD BURNING
KIT
Tips, Tricks, and Techniques for Better Results
Pyrography is the correct term for the technique more commonly known as
“wood burning”. The term means the art of ‘drawing with re’. It is an ancient
craft practiced throughout the world.
Originally pokers were heated in res and created rather crude results. During
the Victorian period the craft enjoyed its greatest popularity.
Victorian ladies developed various tools such as ne steel rods similar to knitting
needles and heated them in a re or over a spirit lamp, allowing them to work
more skilfully and create ne designs. The rods would lose their heat quickly
and have to be returned to the re for reheating, making the process slow and
tedious.
Today Pyrography is enjoying renewed popularity due to the advancement in
wood burning irons, the variety of available tips and the vast assortment of
surfaces to decorate.
Tip: When starting a new project, test the wood and the tips by writing your
name on the back of the chosen piece of wood. This allows you to get a feel
for how the wood will respond and to get your creative juices and technique
owing.
GETTING STARTED
Set up a safe work area. You can tape the iron holder to a piece of ceramic
tile. The tile is heavy enough to keep the iron stand from tipping over while it
protects the work surface. You will also need a reproof container like a glass
dish or metal lid to hold your various tips while they are cooling. You will need a
pair of needle nose pliers with smooth jaws to remove the hot tips from the iron.
Remember that metal conducts heat very quickly. Never attempt to change a hot
tip with your ngers. Protect your work surface with aluminium foil, or a piece of
plywood.
The best way to get started is to familiarize yourself with the iron, the various
tips and the patterns they create. See the “Tips and Their Uses” section for an
explanation of how to use each tip included with your new kit.
TIPS AND THEIR USES
1. Your new Tradeame Wood Burning Kit comes with a wide variety of
burning, cutting, branding, and specialty tips depending on which kit you
have purchased. To get the most from your kit, follow these instructions to
create the results you want.
2. Universal tip - a multi-purpose tip. Hold the tip at various angles for
creating lines of varying widths. Performs all fundamental wood burning
techniques.
3. Slanted tip - Hold the tip at various angles for creating lines of varying
widths.
4. Stencil tip - Use this tip to cut craft pattern stencils into stencil materials.
5. Dot tip - for making dots of various sizes and depths. Using this tip, make
light touches to your surface for ne dots. Hold the tip on the surface for
longer periods of time to create deep holes.
6. Script tip - for writing script and for burning grooves of various depths.
Move slowly across your work to make deeper grooves.
7. Calligraphy tip - This tip mimics the shape of a calligraphy pen. Do not
allow the iron to rotate in your hand as you trace calligraphy letters.
8. Flow tip - Use to burn curves, dots, and ne details. Works well for cursive
writing and dot shading techniques.
9. Shading/transfer tip - this tip is tapered so that you can use it in several
positions to create light and dark shading. The polished base slides
smoothly and is great for general shading. Also can be used to transfer
patterns. Edges can be used for thinner imprecise lines. The toe can be
used for burning fatter imprecise lines. The inverted tip can be used for
stippling.
10. Stripes Tip - this tip is used to create stripes as required
11. Blade Tip - To install the knife blade tip onto the iron, carefully insert the
blade into the tool and tighten the screw to secure it in place. Use this
specialty tip to cut foam, rope, or other soft rigid materials
12. Stamp tips - Apply these various tips vertically on your project surface.
Remove them in a straight vertical motion to make a distinct pattern. Use
these separately or together to create interesting patterns and borders on
multiple surfaces
13. Conical tip – Used to convert the tool into a Soldering Iron. Use with lead-
free solder to join metal.
PRACTICE
1. Plug in your wood burning iron and allow it about four minutes to heat up.
2. Hold the wood burner like a pencil. Do not touch any of the metal parts,
as they are hot.
3. Start by writing your name. Practice pulling the point toward you instead of
pushing it away.
4. You can vary the appearance of the pattern by the amount of time you
leave the tip on the surface and by the pressure applied to the tip.
5. The longer the tip stays on the surface the deeper and darker the pattern
will appear.
6. The brown shading is affected by the speed of the tip across the surface.
7. The smoother the surface of the material, the clearer and ner the design
will appear.
8. After you have practiced a while, make a sample board as a reminder of
patterns you can create using different tips and techniques.
9. This will make it fun and easy to complete a new project with an
interesting display of “pyrography techniques”.
Fig. 7
Fig. 6

PATTERNS ONTO YOUR PROJECT:
1. Make a copy of your pattern using a laser printer.
2. Place a copy face down on your project surface.
3. Fit the wood burning iron with the shading/transfer tip (8) and allow the tip
to heat to working temperature (about ve minutes).
4. Using the shading/transfer tip (8) slowly rub the back of the pattern in a
circular motion to transfer the printed pattern to your project surface.
5. You can now burn your pattern into your project surface.
zKeep your tips clean for good performance and long life. Carbon may build
up on the tip surface as you work, especially if you’re working with a sappy
wood such as pine. Use a ne grit sandpaper or wire brush to gently clean
the tips while they are hot.
DESIGNS
You can adapt a variety of designs from almost any media. From colouring books
to garden manuals just about every item has been captured as line art or a
simple sketch. Once you have become familiar with the iron and the patterns,
you can create using the various tips, it will be easier for you to create your own
designs. Use a copy machine to reduce and enlarge designs to suit your project.
TRANSFERRING DESIGNS
zTools needed:
zTracing paper
zPencil
zRuler
zLow tack masking tape
zCarbon paper
Place your pattern on the surface and secure with masking tape across the top.
Lift the pattern and place the carbon paper directly on the surface. Reposition
the pattern and lightly trace the design using a pencil. Double check your design
before removing the pattern to make sure you have transferred the entire
pattern. Use a ruler to trace straight lines.
SURFACES
A wide variety of surfaces are suitable for pyrography. Hardwoods such as
beech, sycamore, birch and hornbeam are most popular. Most craft stores carry
a good selection of these varieties. Birch plywood works well and is available at
home improvement centres. You can also make your own tabletops and furniture
using plywood and decorate it with your new skills. Smooth grained and light
coloured woods work best. Stay away from dark, coarse grained hardwoods.
Pines are not suitable because they have too much sap causing it to burn and
mar your patterns. Cork, leather, some papers, and even wax candles make
great design surfaces. Check your craft store and woodworking shops for
suitable surfaces. Experiment! This is a hobby. That means you can just do it
because it’s fun.
SAFETY TIP:
Caution should be taken when working with certain hardwoods such as, English
pressure treated or tropical woods. Avoid using very thin plywood or veneer
because they contain adhesives that emit dangerous fumes when heated. Wear
protective masks.
ADDING COLOUR TO YOUR DESIGNS
Colour can add an extra element of excitement to your new project. The tips
have provided great texture. Now it’s time to add a nishing touch, once the
pyrography is complete but before you varnish try some of these materials. Be
sure to clean the surface rst with a light rub of alcohol to remove ngerprints
and grease.
Suggested colouring and nishing supplies:
zVarnish
zAcrylic paint thinned with water
zColoured glazing gels
zWatercolours
zCaulks
zWood stains and nishes
zShoe polish
zShoe dyes for a deep rich shade
zPaintbrushes with soft bristle
zSponges for applying varnish
zSoft cloth
FINE GRIT SANDPAPER
Add a little water to your medium to keep it thin. Thickpaint will cover up your
pattern work. A foam plate makes a great pallet because there’s no clean up
and paints don’t bleed into the surface. Test your colours and your technique on
scrap materials if possible. If not, select the least visible location. Colour can be
added to the designs as well as the background or both.
APPLYING VARNISH
Two to three coats of satin or gloss varnish will protect your work of art. Use
a soft cloth or sponge rather than a brush, which might leave hairs and brush
strokes behind. Follow manufacturer instructions regarding application, safety
and drying times.
SOLDERING HINTS
zRe-tin the tip (cover the heated tip with solder) prior to use.
zUse the Soldering Iron to heat the work items and apply solder directly to the
work items – not to the Soldering Iron tip.
zClean the tip with a damp sponge or Tradeame’s Brass Tip Cleaning brass
wire (part number: 218167). after use – do not le tip.
zUse the metal stand when Soldering Iron is not in use
SOLDERING TIP ONLY (CHART ITEM 12)
OPERATING
1. Prepare the work area and piece
2. Ensure the Soldering Iron tip and work items are clean.
3. Make sure Soldering Iron tip is xed in position andsecure. (Fig. 6 & 7)
4. Connect Soldering Iron to mains current and place on the metal stand
provided (Fig. 2).
5. To turn on push the power switch forward (Fig. 1 / v).
6. Allow the Soldering Iron to come to full temperature.
zTemp Indicator:
zBlinking Green - Heating
zSolid Green - Solder melt temp
7. Surfaces of the connection points must be clean.
8. “Tin” the tip by covering the heated tip with Tradeame Solder.
9. Use the Soldering Iron to heat the connection points, not the solder.
10. Apply only enough solder to the heated parts.
11. Allow the joint to cool undisturbed.
12. To turn off the Soldering Iron, pressing switch back.
13. While still hot, clean the tip with a lightly damp sponge or Tradeame’s
Brass Tip Cleaning Brass Wire (Part Number: 218167).
WARNING! Avoid contact, tip is hot and could cause serious burns.
14. Place Soldering Iron on Metal Stand provided on its side with the tip away
from working area (Fig. 2)
15. Turn the mains current off and unplug the Soldering Iron.
16. Let the Soldering Iron to cool down naturally
17. Once tip has cooled store is a safe and dry space.
Distributed by
TRADEPEM INDUSTRIAL PTY LTD.

WOOD BURNING TIPS
1 Universal Tip
2 Slanted Tip
3 Stencil Tip
4 Dot Tip
5 Script Tip
6 Calligraphy Tip
7 Flow Tip
8 Shading Tip
9 Stripes Tip
KNIFE TIPS
10 Blade Tip
WOOD BURNING TIPS
1 Universal Tip
4 Dot Tip
KNIFE TIPS
10 Blade Tip
STAMP TIPS
11 Windmill Tip
11 Hexagonal Tip
SOLDERING TIP
12 Conical Tip
WOOD BURNING KIT TIP CHART Part No. 218145 & 218223
MULTI- SOLDERING IRON TIP CHART Part No. 218134FESTIVE STAMPS Part No. 218223
11 STAMP TIPS
Windmill Tip
Hexagonal Tip
Square Tip
Triangle Tip
Wheel Tip
Stripe Tip
Dart Board Tip
S Shape Tip
Star Tip
Moon Tip
SOLDERING TIP
12 Conical Tip
6 FESTIVE STAMP TIPS
Star Stamp
Heart Stamp
Squiggle Stamp
Oval Stamp
Square Stamp
Flower Stamp
This manual suits for next models
2
Other Tradeflame Power Tools manuals
