Tradeflame 218034 User manual

8 W / 11 W (4 x AA BATTERIES) - Soldering Iron
Part No. 218034
PRODUCT MANUAL
Fig. 1
Fig. 4 - WARNING - hot tip when in use, do not touch, keep Soldering Iron
clean and away from oils and lubricants. Do not immerse Soldering Iron in
water
Fig. 2 - Correct storage of Soldering Iron 218012 when not in use Fig. 3 - Do not place in coil holder
Fig. 5 - Do not modify or attempt to repair the Soldering Iron except as
indicated in the instructions for use and care.
ILLUSTRATION ONLY PLEASE CHECK PACKAGING FOR EXACT CONTENTS
4 X 1.5V AA ALKALINE BATTERIES NOT INCLUDED
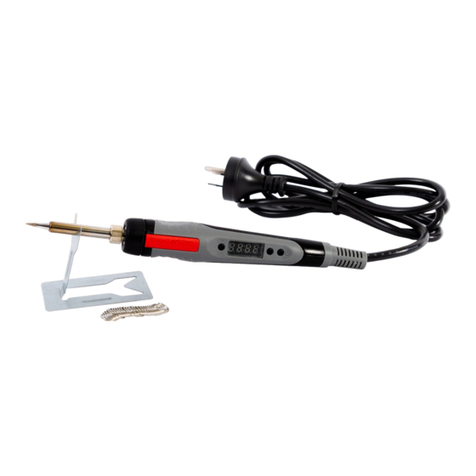
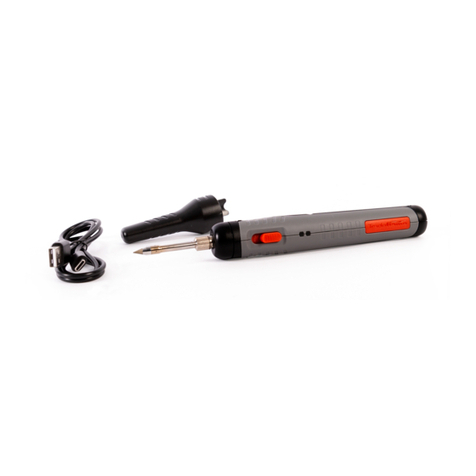
i. Ergonomiccomfort grip handle
ii. LED working light
iii. Low voltage indicator light
iv. On / off switch
v. Long-life conical tip
vi. Battery end cover
vii. Protective cap
viii. Metal stand
ix. Solder

SAFETY WARNINGS
Read all safety warnings, instructions, illustrations and specications
provided with this Soldering Iron. Failure to follow all instructions listed below
may result in electric shock, and/or serious injury. Save all warnings and
instructions for future reference. The term “Soldering Iron” in the warnings
refers to your mains-operated (corded) Soldering Irons or battery-operated
(cordless) Soldering Irons.
WORK AREA SAFETY
zKeep work area clean and well lit. Cluttered or dark areas invite accidents.
zDo not operate Soldering Iron in explosive atmo-liquids, gases or dust.
Soldering Irons create sparks which may ignite the dust or fumes.
zKeep children and bystanders away while operating
ELECTRICAL SAFETY
zIndoor use. Do not expose Soldering Iron to rain or wet conditions.
Water entering a Soldering Iron will increase the risk of electric shock (Fig. 4)
PERSONAL SAFETY
zStay alert, watch what you are doing and use common sense when operating
a Soldering Iron. Do not use a Soldering Iron while you are tired/distracted or
under the inuence. A moment of inattention while operating a Soldering Iron
may result in serious personal injury.
zUse personal protective equipment. Always wear eye protection. Protective
equipment such as a dust mask, non-skid safety shoes, hard hat or hearing
protection used for appropriate conditions will reduce personal injuries.
zPrevent unintentional starting. Ensure the switch is in the off position
before connecting to power source, picking up or carrying the Soldering
Iron.
zPart no. 218034 - place Protective cap (Fig.1 / vii) over a cooled tip
locking switch in off position.
zDo not overreach. Keep proper footing and balance at all times. This enables
better control of the Soldering Iron in unexpected situations.
zDress properly. Do not wear loose clothing or jewellery. Keep your hair and
clothing away from moving parts. Loose clothes, jewellery or long hair
can be caught in moving parts.
zDo not let familiarity gained from frequent use of the Soldering Irons allow
you to become complacent and ignore Soldering Iron safety principles. A
careless action can cause severe injury within a fraction of a second.
SOLDERING USE AND CARE
zDo not force the Soldering Iron. Use the correct Soldering Iron for your
application. The correct Soldering Iron will do the job better and safer at the
rate for which it was designed.
zDo not use the Soldering Iron if the switch does not turn it on and off. Any
Soldering Iron that cannot be controlled with the switch is dangerous and
must be replaced.
zDisconnect the plug from the power source and/or turn off the battery, from
the Soldering Iron before making any adjustments, changing accessories, or
storing Soldering Iron. Such preventive safety measures reduce the risk of
starting the Soldering Iron accidentally.
zStore idle Soldering Iron out of the reach of children and do not allow
persons unfamiliar with the Soldering Iron or these instructions to operate
the Soldering Iron. Soldering Iron are dangerous in the hands of untrained
users.
zPart No. 218034 remove batteries from Soldering Tool if being stored for
a long period.
zMaintain Soldering Iron and accessories. Check for misalignment or binding
of moving parts, breakage of parts and any other condition that may affect
the Soldering Iron’s operation. If damaged, have the Soldering Iron repaired
before use. Many accidents are caused by poorly maintained Soldering Iron.
zUse the Soldering Iron, accessories and Soldering Iron bits etc. in accordance
with these instructions, taking into account the working conditions and the
work to be performed. Use of the Soldering Iron for operations different from
those intended could result in a hazardous situation.
zKeep handles and grasping surfaces dry, clean and free from oil and grease.
(Fig. 4) Slippery handles and grasping surfaces do not allow for safe handling
and control of the Soldering Iron in unexpected situations.
zDo not expose a Soldering Iron to re or excessive temperature. Exposure to
re or temperature above 130°C (265°F) may cause explosion.
SPECIFIC SAFETY RULES FOR SOLDERING IRONS
zContact with a hot tip could ignite ammable materials. Contact with a hot
tip could ignite a re.
zDo not stand or store tool upright on the battery pack. The Soldering Iron
could tip resulting in contact between hot tip and ammable materials.
Always set/store Soldering Iron on its side. (Fig. 2)
zDo not place Soldering Iron in coil stand (Fig. 3). (218012 - place on its side
when not in use Fig. 2)
zKeep hands clear of the tip serious burns can occur if skin contacts tip
(Fig. 4)
zWork in well ventilated areas. Soldering can produce fumes and smoke.
zUse personal protective equipment when using
zThis Soldering Iron is not intended for use by persons (including children)
with reduced physical, sensory or mental capabilities, or lack of experience
and knowledge, unless they have been given supervision or instruction
concerning use of the appliance by a person responsible for their safety.
KEEP AWAY FROM CHILDREN
zTo reduce the risk of re, personal injury, and product damage due to a short
circuit, never immerse your Soldering Iron, battery pack or charger in uid
or allow a uid to ow inside them. Corrosive or conductive uids, such as
seawater, certain industrial chemicals, and bleach or bleach-containing
products, etc., can cause a short circuit. (Fig. 4)
zTo reduce the risk of injury, always wear safety goggles or glasses with side
shields. Serious burns could occur if skin contacts a hot tip.(Fig. 4)
ACCESSORIES
Use only recommended accessories. Others may be hazardous.
For a complete listing of accessories, go online to www.tradeame.com

CHANGING THE SOLDERING TIP
Ensure the tip is cool and Soldering Iron is switched off and unplugged from
mains current and the tip temp indicator off before touching the tip as serious
burns could occur to skin if touched
1. Loosen the sleeve - counter clockwise (Fig. 6)
2. Remove the tip and replace. (Fig.7)
3. Tighten the sleeve securely. - clock wise (Fig. 6)
SOLDERING HINTS
zEnsure the soldering tip and work items are clean.
zRe-tin the tip (cover the heated tip with solder) prior to use.
zUse the soldering iron to heat the work items and apply solder directly to the
work items – not to the soldering iron tip.
zClean the tip with a damp sponge or Tradeame’s Brass Tip Cleaning brass
wire (part number: 218167). after use – do not le tip.
ASSEMBLY/CHARGING
1. Remove battery end cover (Fig.1 / vi)
2. Install 4 x 1.5V AA Alkaline batteries according to polarity diagram
inside handle
3. Retcover.
zNOTE: BATTERIES NOT INCLUDED.
OPERATION 218034
1. Prepare the work area and piece
2. Make sure Soldering Iron tip is xed in position andtightened.
3. Remove the Protective cap (Fig. 1 / vii).
4. Slide On / off switch forward to turn on the Soldering Iron (Fig. 1 / iv).
5. Allow the tool to come to full temperature. Working light: indicates the iron
has reached the default temperature for working
6. From Oto I(low temperature 8 W), it takes approx. 30 seconds, the green
light will ash until it reaches the pre-set working temperature. Green light
will change to solid green when ready.
7. From I to II (low temperature 8 W to 11 W), it takes around 30 seconds,
the red light will ash until it reaches the pre-set working temperature.
Red light will change to solid red when ready.
8. When turning II to I, the green light will ash until it reaches the pre-set
working temperature. Green light will change to solid green when ready.
9. Surfaces of the connection points must be clean.
10. “Tin” the tip by covering the heated tip with rosin core solder.
11. Use the Soldering Iron to heat the connection points, not the solder.
12. Apply only enough solder to the heated parts.
13. Allow the joint to cool undisturbed.
14. Low Voltage indicator light: Red light on when it is running out of battery.
(Fig.1 / iii)
15. To turn off the Soldering Iron, slide the, turn off tool by pressing back the
On / off switch (Fig. 1 / iv).
16. While still hot, clean the tip with a lightly damp sponge or Tradeame’s
Brass Tip Cleaning Brass Wire (Part Number: 218167).
WARNING! Avoid contact, tip is hot and could cause serious burns.
17. Place Soldering Iron on Metal Stand provided on its side with the tip away
from working area (Fig. 2)
Temp Indicator:
zSolid Red - Cooling Turn
18. Let the Soldering Iron to cool down naturally
19. Once tip has cooled place its Protective cap (Fig. 1 / vii) back on the
Soldering Iron and store is a safe and dry space.
Fig. 7
Fig. 6
Distributed by
TRADEPEM INDUSTRIAL PTY LTD.
Other Tradeflame Power Tools manuals


