Trafficmaster smartnav touchscreen User manual
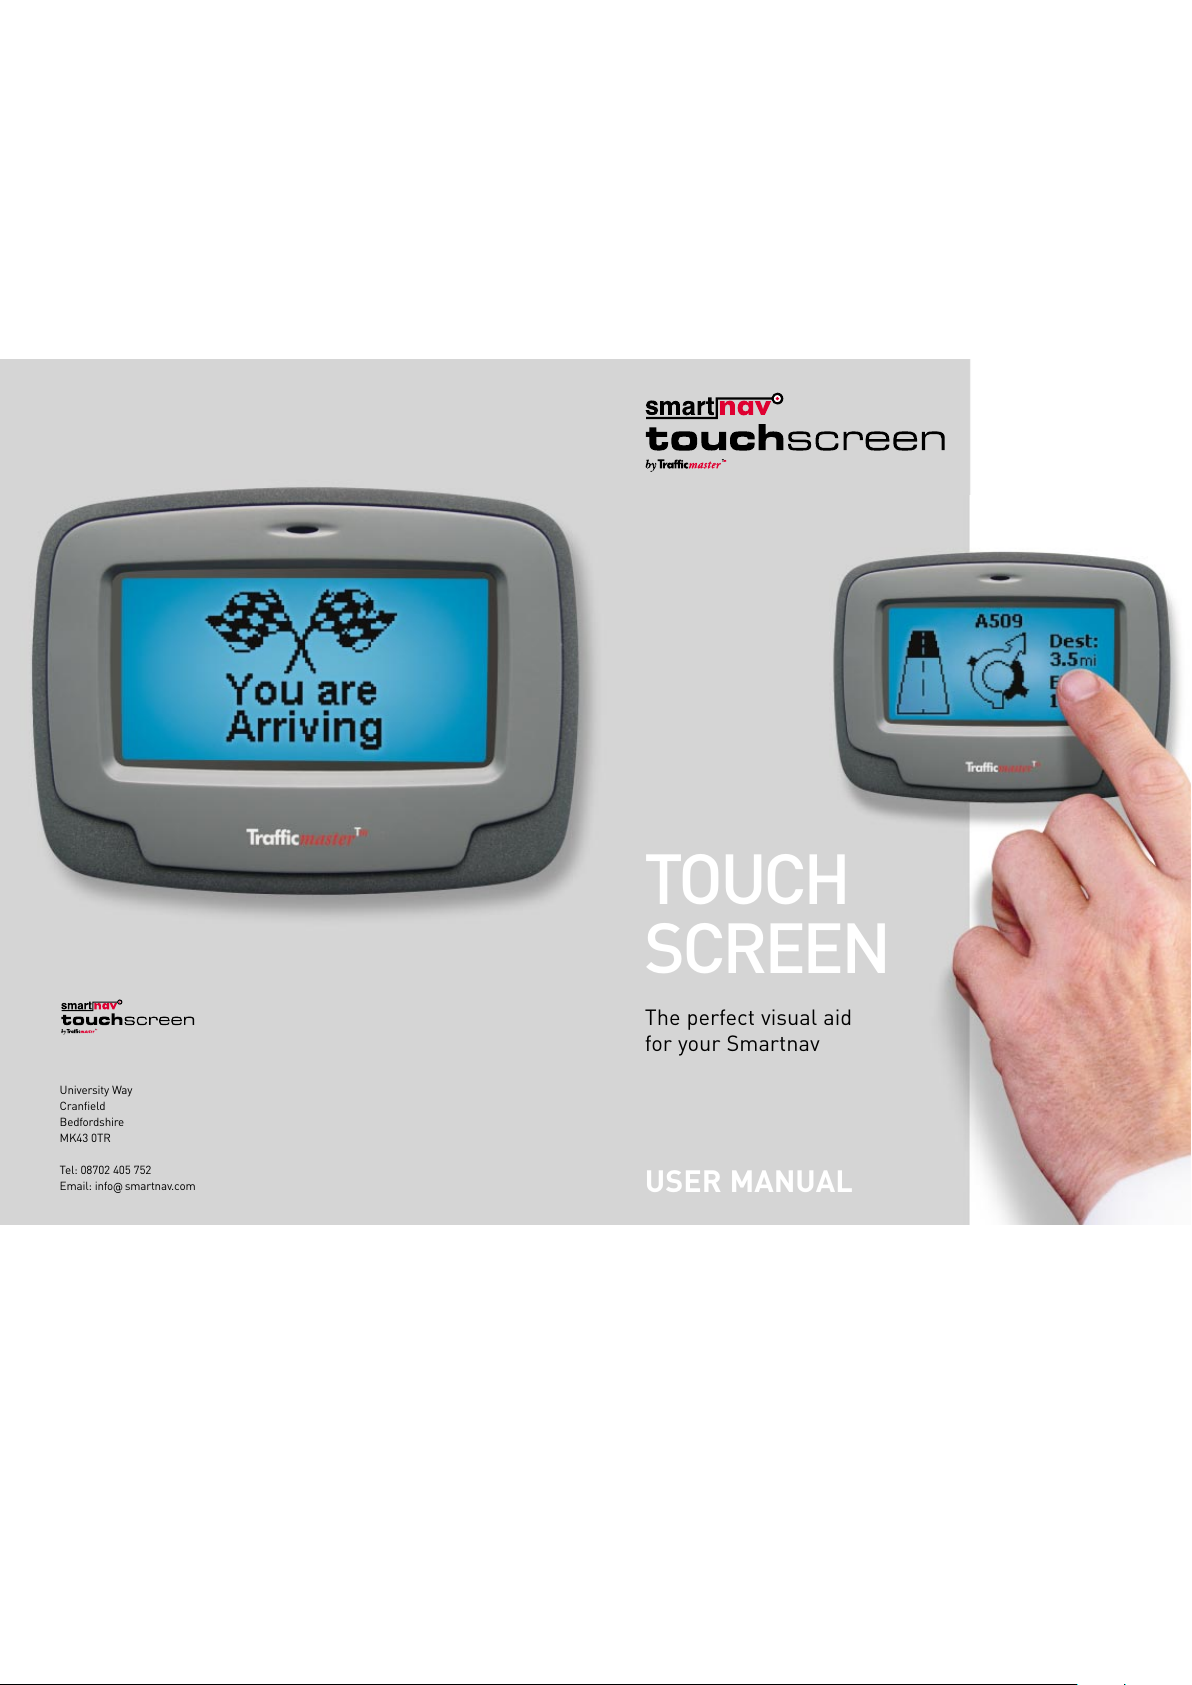
TOUCH
SCREEN
The perfect visual aid
for your Smartnav
USER MANUAL
University Way
Cranfield
Bedfordshire
MK43 0TR
Tel 08702 405 752
Email info@smartnav.com

TABLE OF CONTENTS
ATTENTION! Important safety information 4
System overview 5
Important notes on the f nction
of yo r navigation system 5
•GPS positioning
•GSM coverage
Familiarising yo rself with yo r
Smartnav To ch Screen 6
Getting from A - B 7
•To enter a new destination
•Favourite destination screen
•Control Centre
•Postcode destination screen
•Cancelling a route request
•Cancel/suspend/re-route functions
Use of Smartnav To ch Screen
whilst driving 10
•Instructions at roundabouts
•Visual instructions
•Information displayed on your Smartnav
Touch Screen during guidance
•Junctions
•Manoeuvre pictograms
•Graphics for junctions close together
•Going off route
•Arrival
Additional req ests/f nctions
d ring navigation 14
•Clock
•Repeat function
•Mute function
C stomising yo r Smartnav To ch Screen 15
•Volume
•Key tones
•Clock
•Screen settings
Other f nctions of yo r Smartnav
To ch Screen 16
•SOS facility
•Receiving a call
•The Smartnav website – www.smartnav.com
Smartnav options 18
•Safe Speed option
•RAC Trackstar Plus option
•Extended Warranty option
Tro bleshooting 20
S mmary of warranty
Terms and conditions of se 21
32
SYSTEM OVERVIEW
Smartnav Touch Screen is Trafficmaster’s full
feature, in-car navigation system, combining
powerful navigation servers with a GPS (Global
Positioning System) based satellite tracking,
state-of-the-art digital speech synthesis and
a touch-sensitive visual display.
The navigation computer, which is located at
the Trafficmaster Control Centre, calculates
the best route to your destination, taking into
consideration current traffic conditions, historic
and forecast information and incident reports.
The route is then sent via the GSM (mobile phone
system) to your in-car unit, which will then
intelligently guide you turn-by-turn to your
destination using the most efficient route.
IMPORTANT NOTES ON
THE FUNCTION OF YOUR
NAVIGATION SYSTEM
GPS positioning
The accuracy of position measurement can be
impaired by poor or interrupted GPS signals.
In tunnels, underground car parks and in similar
conditions, the vehicle will be unable to receive a
signal from at least three satellites, and guidance
will not be available.
GSM coverage
Mobile phone networks have incomplete
coverage and there may be occasions, due to
geographical conditions or a busy network,
when you are unable to communicate with the
Smartnav Control Centre.
If you are unable to connect to the Control
Centre, you will hear the following message
“The mobile phone network failed to connect your
call, Smartnav is trying again – use the Smartnav
menu if you wish to cancel.”
If you do not cancel the call, Smartnav will
attempt to contact the Control Centre for up to
ten minutes. During this period, it may help to
move the vehicle a short distance to obtain better
GSM coverage.
5
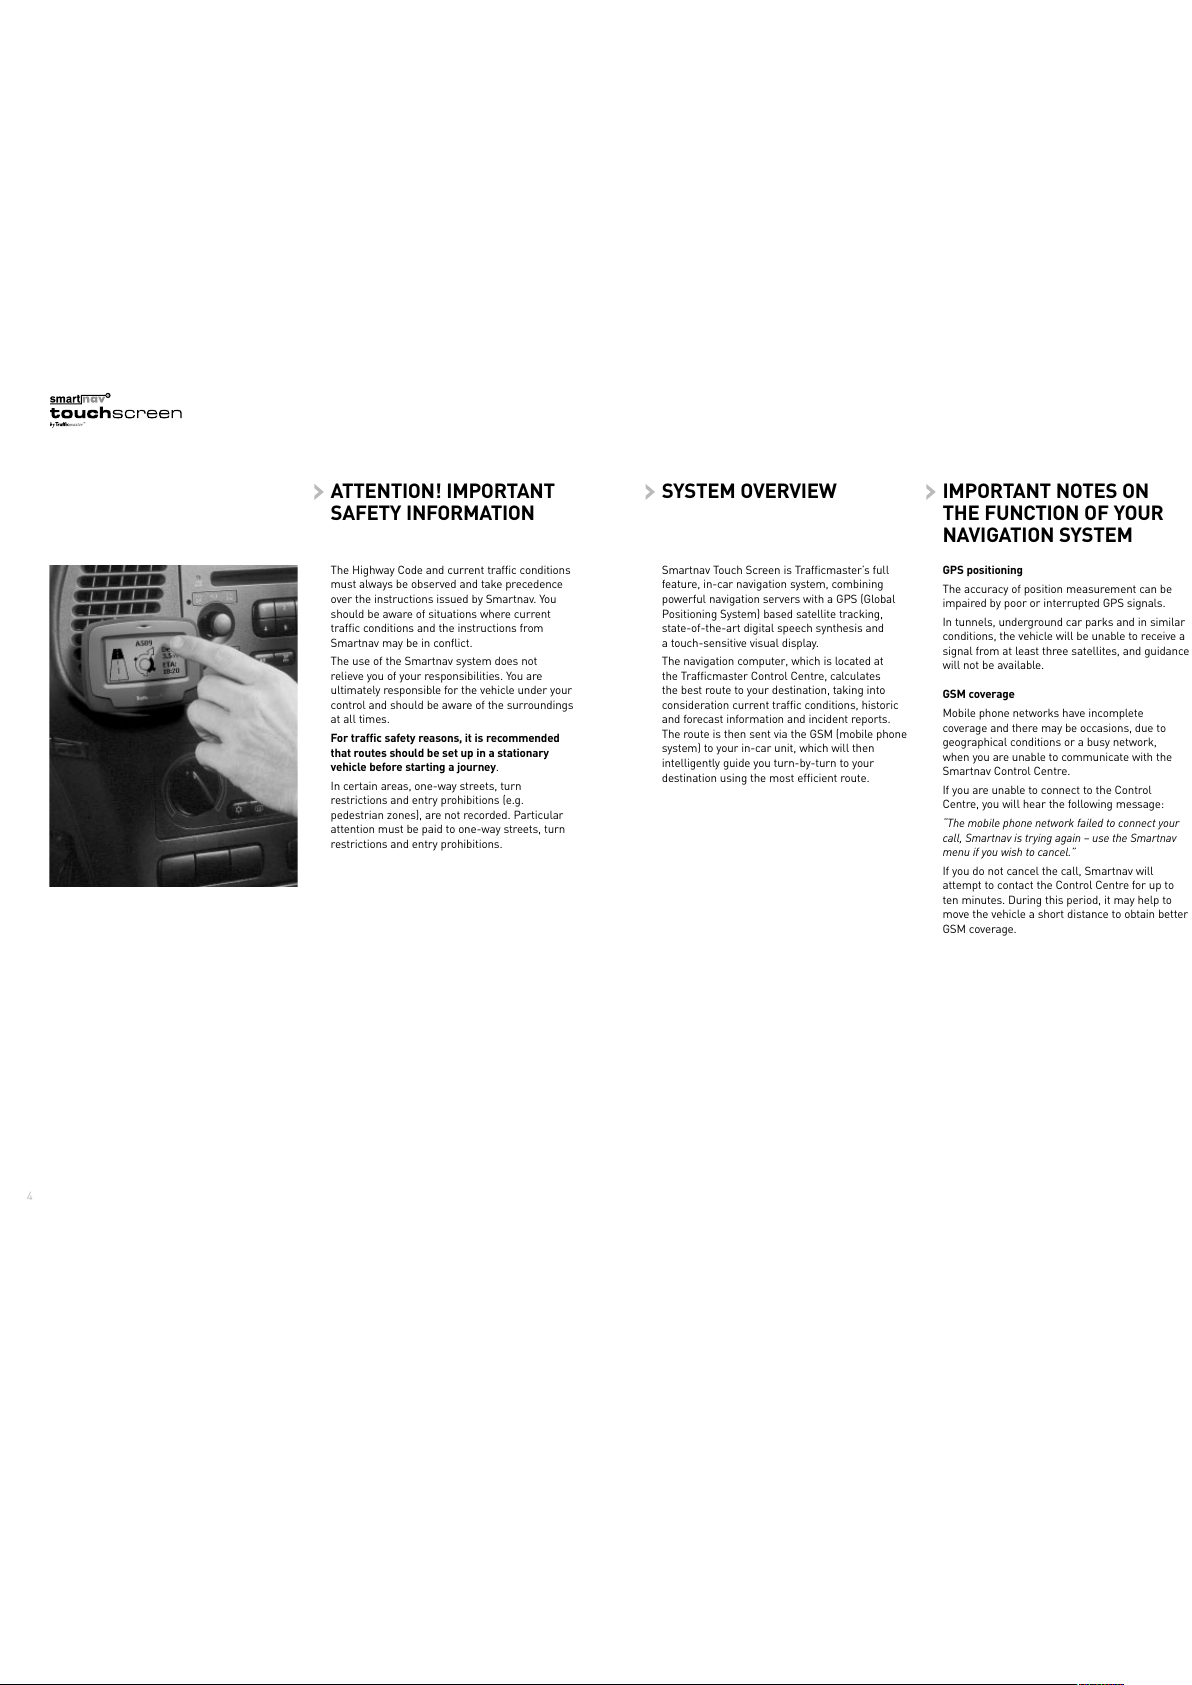
ATTENTION! IMPORTANT
SAFETY INFORMATION
The Highway Code and current traffic conditions
must always be observed and take precedence
over the instructions issued by Smartnav. You
should be aware of situations where current
traffic conditions and the instructions from
Smartnav may be in conflict.
The use of the Smartnav system does not
relieve you of your responsibilities. You are
ultimately responsible for the vehicle under your
control and should be aware of the surroundings
at all times.
For traffic safety reasons, it is recommended
that ro tes sho ld be set p in a stationary
vehicle before starting a jo rney.
In certain areas, one-way streets, turn
restrictions and entry prohibitions (e.g.
pedestrian zones), are not recorded. Particular
attention must be paid to one-way streets, turn
restrictions and entry prohibitions.
4
Depending on how your Smartnav Touch Screen
unit has been fitted, the unit can be operated in
the following ways
•If both the screen display and the Smartnav
button are installed, the button can also be
used to make guidance requests.
•If you have not had the Smartnav button
installed, all guidance related requests should
be made through the Smartnav Touch Screen.
Start- p behavio r
Start the vehicle ignition and wait 10 seconds for
the system to activate. Once the unit has received
signals from at least three GPS satellites, the
compass indicator will show your current
heading and the current time will be displayed.
FAMILIARISING YOURSELF
WITH YOUR SMARTNAV
TOUCH SCREEN
GETTING FROM A-B
Touch the screen to view the main menu
1. Request a new route
2. SOS facility
3. Quiet mode/mute volume
4. Repeat last instruction
5. Customise screen options
6. Cancel/suspend/re-route
7. View previous screen
•The screen will also display sub-menus
dependent on your selection from the main
menu.
•Press from any menu to return to the
previous screen.
•If you do not touch the screen for 10 seconds,
then the screen will return to the compass
indicator screen.
To enter a new destination
To request a route via the screen, press the
screen once to bring up the main menu.
Press to view the following sub-menu
Favo rite destination screen
Names of up to 10 Favourite destinations can
be stored. Use the icon to view all pre-set
destinations.
To use this option, you will need to first set
up your Favourite destination(s) by logging onto
your personal page of the Smartnav website at
www.smartnav.com. If you do not know your login
and password details, please call Customer
Services on 08702 405 752.
Your Favourites are automatically updated each
time you request a new route and the new
destination menu will indicate when Favourites
have been updated. Alternatively, you can
manually update your Favourites
When you have saved your destination on-line,
press and the following menu will be
displayed.
To allow the Smartnav Touch Screen to access
your saved destination(s), press five times
until the following menu appears
Press to refresh your destinations
from the website.
Once your Favourites have been refreshed, the
names you have given them will be displayed,
similar to the illustration below
Select the name of your chosen route to request
guidance to your destination.
76
1 2 3 4
5 6 7
Control Centre
Press to call the Smartnav Control
Centre which is operational 24 hours a day
7 days a week.
You will hear the following message
“Calling the Smartnav Control Centre”
and will be displayed on the screen to
confirm that a call is being initiated; press the
phone icon if you wish to cancel the call.
A Smartnav Personal Assistant (PA), who
simultaneously sees your current position
displayed on their control screen, will answer
your call and ask you for your intended
destination.
You can provide your destination details in the
following ways
•A house number and street address in a town.
•OR a postcode.
•OR a point of interest such as ‘Reading Railway
Station’, ‘Terminal 4 Heathrow Airport’, etc.
•OR a stored Favourite destination set up on
your web page (see Smartnav website).
•OR one of your 5 last destinations.
If you have the Smartnav button installed you can
also contact the Control Centre by pressing and
holding it for 2 seconds.
Postcode destination screen
Press if you wish Smartnav to route you
to the postcode for your destination (Note you
must enter the complete postcode). The following
screen will appear
•Use the alphanumeric keypad to enter the
postcode. As you enter the details, the cursor
will auto-advance and select numbers or
letters according to its position and the UK
postcode format.
•To enter alphabetic characters, press the single
key which contains the required letter.
After this, an enlarged key pad appears which
enables you to select which of the alphanumeric
characters contained within the single key you
require e.g. pressing the M/N/O key will cause
the following menu to appear
Press the desired letter that you wish to select
directly (e.g. M).
• The menu can be changed from characters
(A to Z) to numbers (0 to 9) by pressing .
This will display the following menu
The menu can be changed back to characters via
the icon.
•Correct errors made during postcode entry by
using the icon.
•Cancel the route entry process at anytime by
using the icon.
•Use the icon to confirm you have
entered the postcode correctly and to request
route guidance.
If you enter a postcode incorrectly, or it cannot
be recognised, an error message will be
displayed and you will be prompted to re-enter
the postcode.
98
Cancelling a ro te req est
Once you have entered your intended destination,
or requested the unit to contact the Smartnav
Control Centre, your Smartnav Touch Screen will
display . Press this icon if you wish to cancel
the route request. You will be prompted to
confirm that you wish to cancel the call by
pressing either yes or no from the screen display
USE OF SMARTNAV TOUCH
SCREEN WHILST DRIVING
Cancel/s spend/re-ro te f nctions
You can cancel, suspend or re-route during
guidance by pressing from the main menu.
Choose your desired option from the following
sub-menu
Cancel
This button will cancel your current route.
Re-route
This button requests a new route to your current
destination (only available if you have gone off
route or Smartnav has advised that due to traffic
conditions there is a quicker route available).
Suspend
This button will suspend your current route. The
icon will change to display and no further
guidance (spoken or graphical) will be provided
until you select this icon.
If you exit this menu (via the icon), then the
display will indicate that guidance has been
suspended
The Smartnav unit will provide spoken
instructions as your primary method of route
guidance. The Smartnav Touch Screen has
been designed to provide supplementary visual
instructions and can, if preferred, be customised
to provide the only method of navigation.
Instr ctions at ro ndabo ts
Note Smartnav only recognises roundabouts that
are kerbed. Mini roundabouts that are painted
onto the road surface are treated as a junction.
If the route being followed passes straight across
this type of mini roundabout, Smartnav will not
give an instruction. If the route being followed
requires a turn, Smartnav will give a normal turn
left or turn right instruction.
Vis al instr ctions
When the route has been downloaded to your
screen, you will see the guidance start-up menu
The display offers a compass indicator to assist
the driver in choosing in which direction to
initially travel at the start of a route. The compass
indicator will show the direction and the distance
(as the crow flies) to the nearest point on your
route (when this exceeds 25 yards). The compass
disappears as soon as the route is joined, i.e. the
first guidance instruction is given.
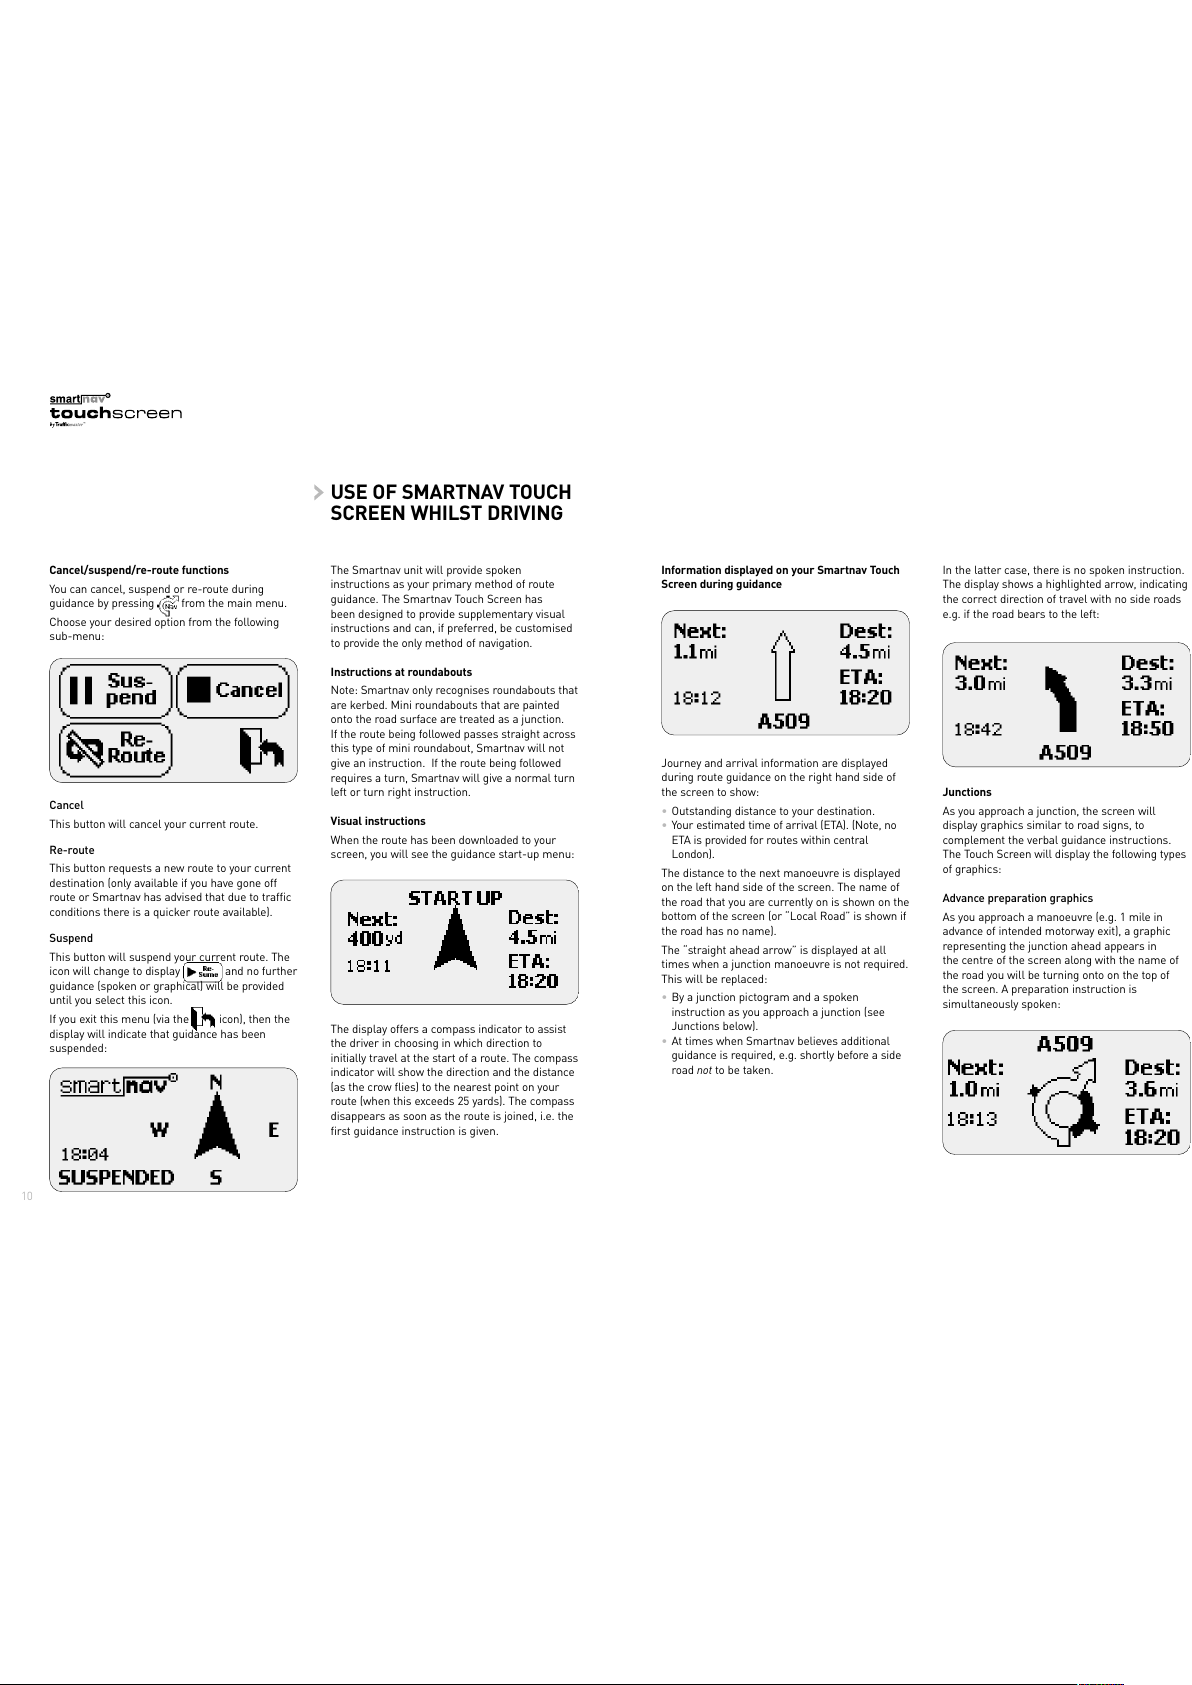
Information displayed on yo r Smartnav To ch
Screen d ring g idance
Journey and arrival information are displayed
during route guidance on the right hand side of
the screen to show
•Outstanding distance to your destination.
•Your estimated time of arrival (ETA). (Note, no
ETA is provided for routes within central
London).
The distance to the next manoeuvre is displayed
on the left hand side of the screen. The name of
the road that you are currently on is shown on the
bottom of the screen (or “Local Road” is shown if
the road has no name).
The “straight ahead arrow” is displayed at all
times when a junction manoeuvre is not required.
This will be replaced
•By a junction pictogram and a spoken
instruction as you approach a junction (see
Junctions below).
•At times when Smartnav believes additional
guidance is required, e.g. shortly before a side
road not to be taken.
In the latter case, there is no spoken instruction.
The display shows a highlighted arrow, indicating
the correct direction of travel with no side roads
e.g. if the road bears to the left
J nctions
As you approach a junction, the screen will
display graphics similar to road signs, to
complement the verbal guidance instructions.
The Touch Screen will display the following types
of graphics
Ad ance preparation graphics
As you approach a manoeuvre (e.g. 1 mile in
advance of intended motorway exit), a graphic
representing the junction ahead appears in
the centre of the screen along with the name of
the road you will be turning onto on the top of
the screen. A preparation instruction is
simultaneously spoken
1110
Imminent warning graphics
When the manoeuvre is imminent (e.g. 400 yards
in advance of junction) or in progress, the
numerical display of the distance is replaced by
a graphical indication of the distance to the
junction
As you get very close to the junction (typically
100 yards), an exit indicator is displayed at the
bottom left of the screen*. These dynamic arrows
are intended to give you additional guidance at
complex junctions and large roundabouts by
indicating where your exit is relative to your
current direction of travel.
When negotiating roundabouts, the exit indicator
will remain on the screen while you drive round
the roundabout. The exit indicator will point you
towards the correct exit.
The junction pictogram is withdrawn when the
junction has been passed, or if you drive off route.
Manoe vre pictograms
The following are examples of the various kinds
of manoeuvre pictograms
Junctions – “Turn left.”
Roundabouts – “Take the third e it of the
roundabout.”
Lane changes – “Move into the left hand lane.”
Graphics for j nctions close together
Some junctions along your route may be too
close together to be displayed individually.
On these occasions the screen will display the
manoeuvres together
“Take the second exit of the roundabout and then
immediately turn sharp left.”
Going off ro te
If you go off the planned route, the following
screen will be displayed
You will hear ”You are no longer on the planned
route. Smartnav is automatically calculating a
new route to your destination”.
The compass indicator will show the direction
and the distance (as the crow flies) to the nearest
point on your route.
If your Smartnav unit is requesting a re-route
to your destination, the phone icon will also be
displayed
Arrival
Upon arrival at your destination a chequered flag
will be shown
You will hear “You are arriving at your destination.”
1312
* The feature has to be enabled via the Smartnav website
Edit Options page.
Clock
A clock will be displayed on the bottom left of the
screen.
Note The clock will automatically update itself
as a result of GMT/BST time the next time you
request a route after it has changed. This is very
accurate because the time is corrected by the
GPS satellites.
Repeat f nction
Press from the main menu to
•Repeat a previously spoken instruction.
•Silence (stop) speech.
•Repeat an instruction that would have been
delivered but for a phone call being in progress.
•Suppress automatic route summary
information if pressed within 4 minutes of
downloading a route. You can also switch off
the route summary via your preferences page
at www.smartnav.com.
A dio prompts
A number of distinct audio prompts will be
generated by the Smartnav Touch Screen to
confirm selections OR to attract your attention
•You miss a guidance instruction whilst
receiving a voice call.
M te f nction
The mute icon on the main menu has three basic
functions
ADDITIONAL
REQUESTS/FUNCTIONS
DURING NAVIGATION
1514
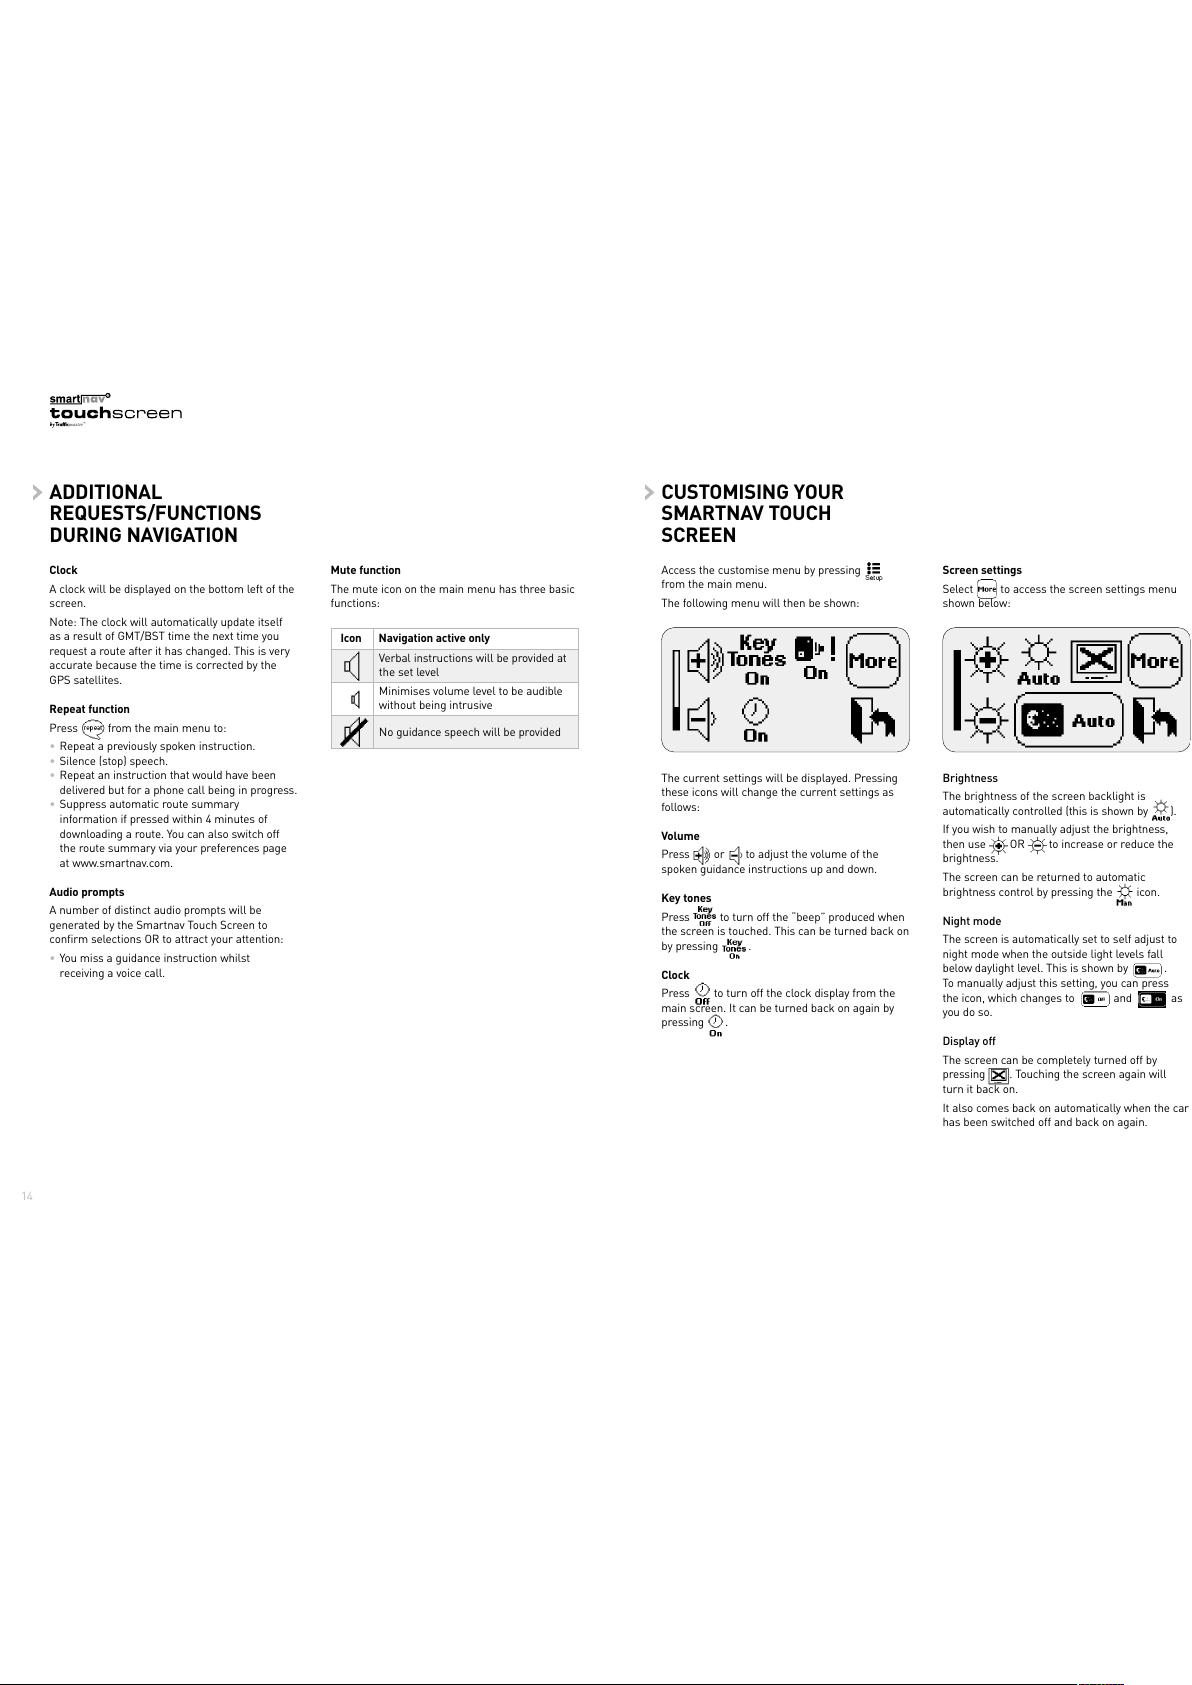
Access the customise menu by pressing
from the main menu.
The following menu will then be shown
The current settings will be displayed. Pressing
these icons will change the current settings as
follows
Vol me
Press or to adjust the volume of the
spoken guidance instructions up and down.
Key tones
Press to turn off the “beep” produced when
the screen is touched. This can be turned back on
by pressing .
Clock
Press to turn off the clock display from the
main screen. It can be turned back on again by
pressing .
Screen settings
Select to access the screen settings menu
shown below
Brightness
The brightness of the screen backlight is
automatically controlled (this is shown by ).
If you wish to manually adjust the brightness,
then use OR to increase or reduce the
brightness.
The screen can be returned to automatic
brightness control by pressing the icon.
Night mode
The screen is automatically set to self adjust to
night mode when the outside light levels fall
below daylight level. This is shown by .
To manually adjust this setting, you can press
the icon, which changes to and as
you do so.
Display off
The screen can be completely turned off by
pressing . Touching the screen again will
turn it back on.
It also comes back on automatically when the car
has been switched off and back on again.
CUSTOMISING YOUR
SMARTNAV TOUCH
SCREEN
Navigation active onlyIcon
Verbal instructions will be provided at
the set level
Minimises volume level to be audible
without being intrusive
No guidance speech will be provided

SOS facility
You can use your Smartnav Touch Screen to call
for assistance in cases of emergency and/or
breakdown.
Press from the main menu. This will bring up
the following menu
Pressing the Emergency icon will directly connect
you to the emergency services.
Pressing the Breakdown icon will connect you to
the Smartnav Control Centre.
Receiving a call
You can receive a voice call on your Smartnav
Touch Screen. Your Smartnav unit contains a
dedicated GSM number, which you can access
by logging onto your personal page at
www.smartnav.com. This allows you to receive
incoming calls only, as if you had a hands-free
car kit.
If a voice call is made to your Smartnav Touch
Screen unit, the caller’s number will be displayed
on your screen where the CLI (Call Line Identity)
is available. If the caller withholds their number
“Anonymous Call” will be displayed. You will
simultaneously hear a standard ringing tone.
•Press Answer to answer the call.
•Press Cancel if you do not want to answer
the call.
You will not receive spoken navigation
instructions when you are using the Smartnav
Touch Screen to receive a voice call, but you will
hear an audible alert to inform you that there is a
necessary instruction based on your current
position. If you have answered the call, it may be
ended at any time by pressing .
Tone settings d ring a voice call
OTHER FUNCTIONS
OF YOUR SMARTNAV
TOUCH SCREEN
1716
The Smartnav website – www.smartnav.com
The Smartnav website enables you to enter
•Personal details.
•Standard destinations which may then be
retrieved by name when using Smartnav.
•Routing preferences, e.g. motorways/non
motorways.
•Purchase of credits and personal account
management for Pay As You Go customers.
•Purchase of additional services subscriptions.
•Find out your phone number to receive
incoming voice calls.
•Activate exit indicator screen graphics.
•Suppress automatic route summary.
The website also carries information on the
latest Smartnav developments along with
product updates.
Navigation active and voice callIcon
Tones will be provided at the set level
Minimises volume level of tones
Turns off alert tones

For variable speed limit areas (e.g. M25)
The system alerts you to the monitored zone in
exactly the same manner as for a fixed zone.
There is, however, no over speed warning for
these sites. The screen will highlight that the
zone has variable speed limits as follows
Screen display when guidance is active.
Screen display when guidance not active.
Temporary safety camera zones (e.g. where
road markings exist but a speed camera is not
permanently present in the zone) are not
incorporated within the service, hence no alerts
will be given when approaching these sites.
For fixed single cameras
Two levels of warning are provided - one as you
approach the monitored zone (3 short beeps)
and a second (5 beeps) immediately before the
monitored zone. The screen will also display the
speed for that zone as follows
Screen display when guidance is active.
Screen display when guidance not active.
For Specs cameras, where your average speed
is recorded through the monitored zone, you will
also receive two levels of warning – one as you
approach the monitored zone (3 long beeps) and
the second immediately before the monitored
zone (5 long beeps).
For both types of camera, if you drive over the
speed limit for that zone, your unit will emit
continuous beeps at a higher volume until you
return to the safe legal limit.
Smartnav offers a number of additional
subscription services to optimise your driving
experience
Safe Speed option to protect you and your
licence by audibly alerting you when driving
through zones monitored by safety cameras.
RAC Trackstar Plus option to track and locate
your vehicle should it be stolen.
Extended Warranty option to protect your
Smartnav unit after the initial one year
guarantee.
To subscribe to these services call 0870 050 3000,
Monday to Friday 9 00 – 17 30 or upgrade on line
at www.smartnav.com
Icons displayed for Safe Speed option
If the customise menu shows then your
Smartnav unit does not have a Safe Speed
subscription.
The Safe Speed option is designed with safe
driving as a priority. The system works by alerting
you when you approach zones monitored by fixed
safety cameras, variable safety cameras and
multi-camera detectors (also known as Specs).
The system will help you to drive in accordance
with the speed limits by warning you as you
approach the monitored zone.
SMARTNAV
OPTIONS
1918
The database of safety camera zones is
continuously updated by our data research team.
The data within your Smartnav unit will be
automatically updated once a month, when you
next use your Smartnav unit for navigation.
Safe Speed option is operational every time you
make a journey, with or without navigation
active. Warnings can be disabled or reactivated
via the icons and accessed from the
customise menu.

TROUBLESHOOTING
The following table lists problems that may occur
with your unit. If the suggested action does not
resolve the problem or your problem is not listed
in the table, please contact your dealer.
2120
Problem Action Comments
Touch Screen is blank Check ignition is on Screen is off unless ignition is on
Press touch screen Screen could be off
Display shows Wait 5 minutes Your Smartnav unit is probably
“Connection Error” being remotely upgraded
Unable to contact the Try driving to another area You may have a problem with the
Call Centre coverage of the GSM network
Your Touch Screen fails to Wait 5 minutes Your Smartnav unit needs time
display the compass indicator to acquire the GPS signals
or says ”No guidance until Try driving to another area You have a problem with your
GPS active” GPS coverage
Backlight turns off Touch Screen has switched This occurs if the internal
off the backlight because the temperature is over 60°C
ambient temperature is
too high
Smartnav Touch Screen is supplied with a
12 month warranty. Trafficmaster Plc warrants
its products against defects in material and
workmanship for a period of 12 months from
the date of purchase.
Proof of purchase will be required before any
warranty consideration by Trafficmaster Plc.
Smartnav Touch Screen requires a Smartnav Unit
to be installed in your vehicle in order to operate
and a current subscription or pay-as-you-go
credit is required to ensure continued use of this
equipment. The purchase of a subscription or
pay-as-you-go credit also represents your licence
for the use of Trafficmaster traffic information.
The information is the copyright of Trafficmaster
Plc and no unauthorised broadcast or other public
use of the information is permitted without
written authorisation from Trafficmaster Plc.
All warranty repairs must be forwarded to
Trafficmaster Plc at the expense of the purchaser.
This warranty does not cover any damage caused
by negligence, failure to follow the instructions in
the user manual, unauthorised modifications, or
inappropriate installation. Trafficmaster cannot be
held responsible for any damage that may occur
resulting from installation or modification by
anyone other than a Trafficmaster technician or
the company’s appointed agents.
The warranty does not apply if the product has
been damaged by accident, abuse, misuse,
cosmetic wear and tear, or misapplication, or as
a result of service to the product by anyone other
than Trafficmaster Plc, or an approved
Trafficmaster agent.
Your Smartnav Touch Screen unit has been fitted
by an approved Trafficmaster technician or a
Trafficmaster appointed agent. Altering the
position of your Smartnav Touch Screen
installation could interfere with the operation
of driver or passenger airbags or the vehicle
controls. Trafficmaster cannot be held responsible
SUMMARY OF WARRANTY/
TERMS AND CONDITIONS
OF USE
for any malfunction of the vehicle or its systems
resulting from incorrect fitment of the Smartnav
Touch Screen unit. If you have any doubts, please
refer to the vehicle manufacturer for assistance.
Trafficmaster Plc is not responsible for any
financial loss, or other incidental or consequential
damage arising out of the use of, or inability to
use, this product. This includes damage to
property and, to the extent permitted by law,
damages for personal injury and death.
The Purchaser expressly acknowledges that the
operation of Smartnav Touch Screen may from
time to time be adversely affected by physical
features such as buildings, underpasses,
atmospheric conditions and other causes of
interference beyond the control of Trafficmaster
Plc, who will not be liable to the subscriber for
any loss or damage incurred. This product must
always be used in conditions that will not affect
your ability to drive safely or affect the safety of
other road users. This warranty applies only to
the Smartnav Touch Screen product and does
not affect your statutory rights. The Purchaser
acknowledges that the purchase of the Smartnav
Touch Screen Unit does not in any way mitigate
his or her duty to obtain adequate insurance for
the vehicle.
Full terms and conditions can be found on the
Smartnav internet site at www.smartnav.com.
Trafficmaster Plc has the right to amend the
above terms at any time without prior notification.
Information in this manual is correct at time of
printing.
2322
Table of contents
Popular Automobile Accessories manuals by other brands


Lippert
Lippert JT's Strong Arm Installation and owner's manual

CARRYBOY
CARRYBOY CB-744-CFTC installation manual

KAP Trader
KAP Trader FORD SYNC3 TDC2 instruction manual

Directed
Directed Directechs DB3 installation guide

Evolveo
Evolveo CARCAM F140 user guide

Digital Barriers
Digital Barriers EDGEVIS HD-IP450 installation guide