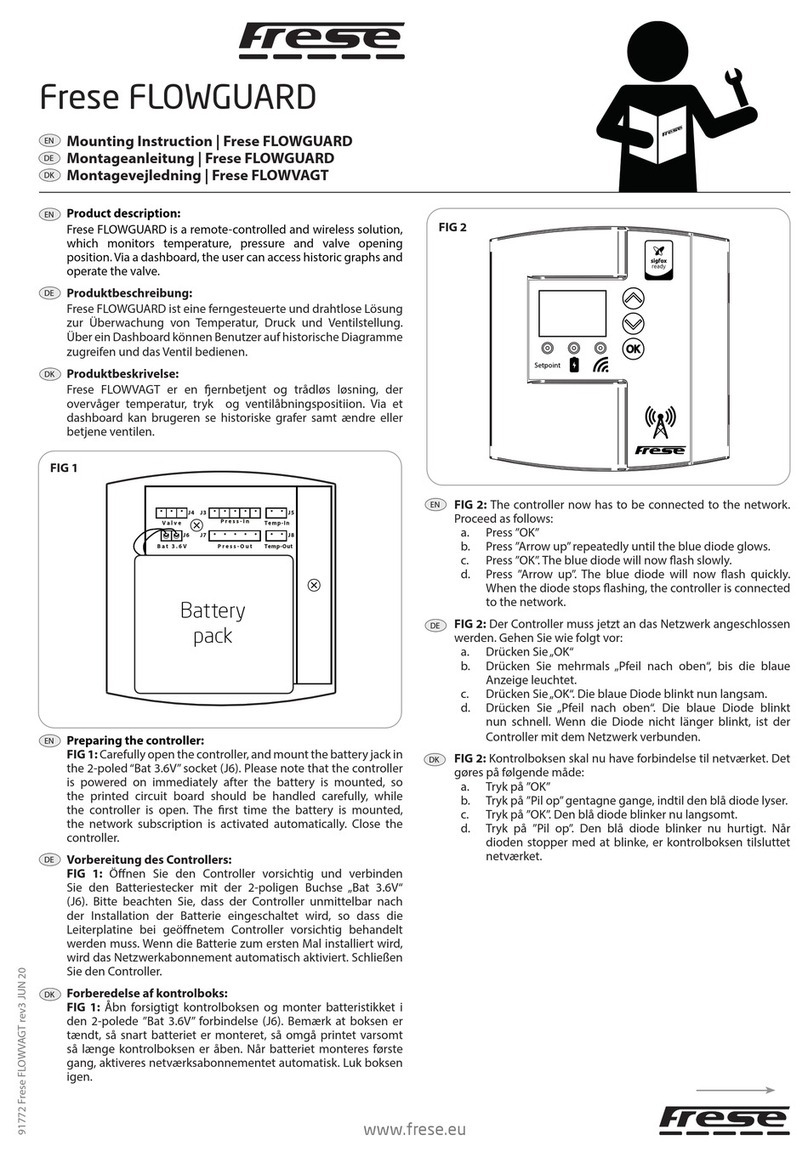
trans HD3030 User manual

0
15,0,11,4,1,14,5,10,13,2,9,6,3,12,7,8
15,0,15,0,1,14,1,14,13,2,13,2,3,12,3,12,11,4,11,4,5,10,5,10,9,6,9,6,7,8,7,8
Professional Portable
Dissolved Oxygen meter
HD3030
Operations Manual

1
INTRODUCTION
Your purchase of this professional Dissolved Oxygen meter HD3030
marks a step forward for you into the field of precision measurement.
Although this meter is a complex and delicate instruments, its
ruggedness will allow many years of use if proper operating techniques
are observed and practiced.
Please read the following instructions carefully and always keep this
manual within easy reach.
1. FEATURES:
•Dual DO and temperature display
•Abel to put display reading on hold
•One touch calibration in air
•Able to set salinity compensation
•Able to set atmospheric pressure
•Save up to 99 data memory with Real time clock
•Able to recall Maximum and Minimum readings over saved data
•Backlite for night display
•Make online data logging on PC with optional RS232 kit.
2. CONTENT:
This package contain the following items:
a. Main unit
b. Dissolved Oxygen probe with 3 meter cable
c. Syringe set
d. 2 X Bottle of electrolyte
e. 2 X DO membrane & Oring
f. Operations manual
g. Hard carrying case
3. SPECIFICATION:

2
Battery
Compartment
behind
DO Probe
RS232 port for use
with optional PC
connection kit for
online data logging
DC power
socket for use
with Optional
ada
p
te
r
Probe Connector
Infra Ray transmitter to
optional printer device
Range 0 to 19.99ppm 0 to 50ºC
Resolution 0.01ppm 0.1ºC
Accuracy ±1.5% F.S. ±0.3ºC
Battery 4 x 1.5Volt AAA size battery
Calibration Single point calibration in air at 100%
Size 195 x 40 x 36mm
Weight 150g
4. PRODUCT LAYOUT:

3
5. DISPLAY PANEL DESCRIPTION:
6. KEY FUNCTION & OPERATION:
This meter has very easy to understand keys. Familiarizing these
buttons will make operation a breeze.
BASIC OPERATION FUNCTION (in black):
Press a while to turn
the unit on or off
Press to enter into
CALIBRATION mode or EXIT
Press once to HOLD or
RELEASE the display reading
Press to SWITCH display
between % or ppm
Press once to SAVE current
reading to memory
Press to CONFIRM
calibration
Press both HOLD and OK
buttons to switch on
backlite for 10 seconds
Temperature reading
Or Sub-Display
Recall Mode
indicator
Calibration
Mode indicator
READY
indicator
Date or Time
display
Memory
counter
Low
Battery
indicator
Display put on
Hold / freezed
Maximum of
saved Readings
Minimum of
saved Readings
Average of
saved Readings

4
RECALL MEMORY FUNCTION (in blue):
SETUP FUNCTION (in Red):
6. SETUP THE UNIT:
6.1 Before you begin using the unit, it is important to define your measuring
requirements. These will allow the unit to display accurately on the
condition of sample that is being measured. Conditions such as
atmospheric pressure, salinity, membrane coefficient, real time clock
setting etc.
6.2 While the unit is switched OFF, press and hold down the SET key until
display shows Prn (P0.0).
6.3 Press f>to go to next parameter and <eto go to previous parameter.
Below are the description of each parameter setting:
(Anytime during setup, press EXIT to cancel or return to measuring mode)
Press to CANCEL setting or
to EXIT setup mode
W
hile unit is switch OFF,
Press & Hold down till it
begin SETUP mode
Press to select NEXT
parameter
Press to select
PREVIOUS parameter
Press to CONFIRM the
new setting
Press to review
PREVIOUS recalled data
Press & Hold down to
begin RECALL mode
Press to EXIT RECALL
mode
Press to find the Minimum reading
within all saved data. Press again
for Maximum reading and again
for Average reading in a cyclical
sequence.
Press to review NEXT
recalled data

5
Prn(P0.0) PRINTER TRANSMISSION
If you have purchased the optional printer, you can transmit saved data
via infa-red signal to begin printing. Make sure you switch on the
printer and point the infa-red emitter to the printer’s receiver.
1. Press OK and display will show Prn (P0.1)flashing, indicating that
transmission is in progress.
2. When transmission is completed, display will stop flashing and
return to Prn P0.0.
3. Press f>to go to next parameter.
CLr(P1.0) CLEAR MEMORY
This setting will clear all the saved memory in the unit.
1. Press OK and display will show P1.1 with n(No) flashing.
2. Press f>once to select between Y(yes) or n(No). If you select Y
(yes) and press OK, all memory will be cleared. Otherwise select n
(No) then press OK, display will return to CLr (P1.0).
3. Press f>to go to next parameter.
Unt(P2.0) UNIT OF MEASUREMENT
This setting allow you to set the unit of measurement for temperature or
DO.
1. Press OK and display will show Unt (P2.1)with °C flashing.
2. Press f>to change between °F or °C.
3. Press OK to confirm setting.
4. Do (P2.2) will be displayed and ppm flashing.
5. Press f>to change between mg/l or ppm
6. Press OK to confirm setting, display will return to Unt (P2.0).
4. Press f>to go to next parameter.
COF(P3.0) SENSOR CORRECTION (ALTITUDE & SALINITY)
Atmospheric pressure and salinity has an effect on to sensor. If you
make measurement at different altitude, a correction is necessary to
compensate for the pressure effect. Similarly, different salinity in water
will also affect measurements and require compensation. This meter
will automatically compensate these errors and give accurate
measurements if they are carefully set.

6
1. If you are making measurement at sea level and in fresh water, you
can skip this section. Press f>to go to next parameter.
2. To change, while in COF (P3.0), press OK to begin setting and
display will show 760mmHg (P3.1)for altitude setting.
3. Press f>or <eto change the value. The pressure should be the
same altitude where you are making the measurement. Below is a
chart to correlate altitude against pressure:
ALTITUDE
Meter Feet Pressure (mmHg)
0 0 760
152 500 746
305 1,000 732
457 1,500 720
610 2,000 707
762 2,500 694
914 3,000 681
1,067 3,500 668
1,219 4,000 656
1,372 4,500 644
1,524 5,000 632
1,676 5,500 621
1,829 6,000 609
4. Press OK to confirm the setting, 101.3 kPA (P3.2)will be displayed
for setting pressure in kPA. Change this value if you have an
accurate pressure meter as a reference.
5. Press f>or <eto change this value.
6. Press OK to confirm changes and display will show 0.0ppt (P3.3).
Here you can change the salinity value to that of the water you are
about to measure.
7. Press f>or <eto change this value.
8. Press OK to confirm the setting, display will return to COF (P3.0).
9. Press f>to go to next parameter.

7
Rdy(P4.0) ENDPOINT INDICATOR
This setting allow you to switch ON or OFF the endpoint indicator.
When a measurement is still in progress, the READY sign will flash.
When the READY sign will stop flashing, it indicates that a stable
endpoint reading has reached. This will be helpful to eliminate
guesswork. In some special case, especially where the reading is
exceptionally slow in response, switch OFF the indicator for
indepandent user’s judgement.
1. Press OK and display will show rdy P4.1 with OF (off) flashing.
2. Press f>to change to on or OF.
3. Press OK to confirm setting, display will return to Rdy (P4.0)
4. Press f>to go to next parameter.
Aut(P5.0) AUTOMATIC SHUTOFF
This setting allow you to set a different time for the unit to automatically
shutoff after last button pressed, longer timing should be set where
multiple tests are required.
1. Press OK and display will show 40 (P5.1).
2. Press f>or <eto change to 20, 30, 40, 60, 90 or 120 minutes
shutoff.
3. Press OK to confirm setting, display will return to Aut (P5.0)
4. Press f>to go to next parameter.
RTc(P6.0) REAL TIME CLOCK
This setting allow you to change the date and time on the unit.
1. Press OK and display will show rtc (P6.1) Y-M-D 00-00-00 with
first 2 digit flashing.
2. Press f>or <eto change the value of Year.
3. Press OK to confirm, display will show next 2 digit flashing.
4. Press f>or <eto change the value of Month.
5. Press OK to confirm, display will show next 2 digit flashing.
6. Press f>or <eto change the value of Day.
7. Press OK to confirm setting, display will show rtc (P6.2)
H:M:S 00-00-00 with the first 2 digit flashing.
8. Press f>or <eto change the value of Hour.

8
9. Press OK to confirm, display will show next 2 digit flashing.
10.Press f>or <eto change the value of Minutes.
11.Press OK to confirm, display will show next 2 digit flashing.
12.Press f>or <eto change the value of Seconds.
13.Press OK to confirm setting, display will return to rtc (P6.0)
14.Press f>to go to next parameter.
BEt(P7.0) MEMBRANE COEFFICIENT
This setting allow you to change the temperature coefficient of the
membrane. The supplied membrane is 4.8, but different
manufacturer’s membrane may have different value. Use only
membrane with known coefficient value.
1. Press OK and display will show 4.8 (P7.1)
2. Press f>or <eto change the value.
3. Press OK to confirm setting, display will return to BEt (P7.0)
4. Press f>to go to next parameter.
CAL(P8.0) REVIEW CALIBRATION DATA
This setting allow you to review the last calibration information.
1. Press OK and display will show Last Calibration Slope Value
(P8.1) with Date and time alternating.
2. Press OK and display will show the Temperature of the Last
Calibrated Value.
3. Press OK to return to CAL (P8.0)
4. Press f>to go to next parameter.
rSt(P9.0) MASTER RESET
This setting allow you to reset the unit to the factory’s default.
1. Press OK and display will show rSt (P9.1) with nflashing.
2. Press f>once to select between Y(yes) or n(No). If you select Y
(yes) and press OK, all setting will be cleared and reset to factory
default. Otherwise select n(No) then press OK, display will return
to rSt (P9.0).
3. Press f>to return to beginning.

9
7. CALIBRATION:
7.1 Ensure you are in an environment, which is open with good air
circulation and not crowded. If you in a higher altitude above sea level,
setup the altitude compensation (see Page 6 on COF – P3.0) before
you continue.
7.2 Hold the probe in air with the sensor facing downwards and switch on
the unit. Wait at least 10 minutes for the sensor to get stabilized. Set
the auto-shutoff timing to 30 minutes or longer to prevent auto-shutoff
(see Page 7 on Aut - P5.0).
7.3 After sensor is polarized, press the CAL button to activate calibration.
The display will show reading in %while the Ready sign flashes.
7.4 When the Ready sign stops flashing, press the OK button.
7.5 Display will show 100% reading and calibration is completed.
7.6 Press the %-ppm button to switch to ppm or mg/l reading and proceed
to take a measurement in water.
CALIBRATIOIN FAILURE:
7.7 If the unit is not able to calibrate or gives a very low reading, it is
possible that there are air pocket between the membrane and the
probe tip. Carefully study section 9 to understand the probe assembly.
7.8 Place the probe horizontally on the table and tap the probe head on the
table lightly several times to allow any air pocket to be filled with
electrolyte. Recalibrate again.
7.9 If calibration still fails, remove the probe guard, loosen the LockRing
Assembly and repeat step 7.8, replace the Probe Guard and
recalibrate.
7.10 If calibration still fails, it could be that the membrane is damaged or the
electrolyte is expired.
7.11 Perform a full membrane change as in section 9.
Be
f
ore makin
g
a series o
f
measurement, alwa
y
s calibrate the unit
f
irst.
Note that this meter utilize a polarographic sensor which requires
10 minutes of stabilization prior to use.

10
8. MAKING MEASUREMENT:
8.1 Always calibrate the meter before a series of tests.
8.2 Avoide switching off the unit if a series of tests are to be made, this is
to save time so you do not have to polarize the sensor everytime the
unit is switched on.
8.3 Dip the sensor into the water and the required depth.
8.4 This meter utilizes a polarographic electrode, which consumes oxygen
on the membrane surface. A constant stirring or jiggling of the
sensor probe is required during measurement.
8.5 When the Ready sign stops flashing, it indicates a stabilized endpoint
reading has reached. You can now take the measurement.
8.6 Press the HOLD button to freeze the display as desired. HLD will
appear on the top left of display. Press again to release it for another
measurement.
BACKLIGHT FUNCTION
8.7 Under dim or dark environment, the display can be illuminated with a
backlight. Press both the HOLD and OK buttons and backlight will be
switched on for 10 seconds.
SAVING DATA TO MEMORY
8.8 To save the displayed data into the meter’s memory, press the SAVE
button.
8.9 The digit 01 will appear on the right side of the display, indicating that
the last reading is stored in data number 1.
8.10 99 data can be saved together with date and time of measurement.
8.11 To recall the saved data, press and hold down the RECALL button until
REC appear flashing on the left side of the display.
8.12 Follow the blue key function in Page 4 under RECALL MEMORY
FUNCTIONS, to recall the desired data.
8.13 Press EXIT to return to measuring mode.
8.14 To clear all data, follow the instructions under SETUP on page 5 of CLr
(P1.0)

11
9. DO PROBE ASSEMBLY & MAINTENANCE:
9.1 The DO probe is one of the main components in the measuring system.
Keeping the sensor in good conditions will ensure prolong of operation.
9.2 The Probe consist of several parts and it is important to understand the
construction:
9.3 The membrane will allow oxygen to permeate onto the Cathode and
Anode to make measurement. It can be damaged or punctured.
9.4 To replace the membrane, unscrew the Probe Guard and remove
item X& Yas above. You may need a knife assist in separating
item Y.
9.5 Unscrew the Electroyte Refill Port and drain away the electrolyte.
9.6 Clean and rinse the probe tip with distilled water, use a tissue paper to
polish the probe tip if required. DO NOT USE sand paper.
9.7 To re-assemble the probe, place the new O Ring on the probe tip X.
9.8 Push in place the Membrane Cap onto the probe tip Y.
9.9 Place the probe horizontally with the Refill Port facing up.
9.10 Extract the fresh electrolyte with the syringe and gradually fill the
Electrolyte container till half filled.
9.11 Tap on the table to allow electrolyte to filled to the probe tip. If air is
trap between the probe tip and membrane, it will cause calibration and
measuring problem (E01, e03). Unscrew Probe Guard, slightly
loosen Membrane Cap then replace Probe Guard.
9.12 Replace the Probe Guard and screw tight Z.
9.13 Then fully fill the container; replace the Oring, Washer and tighten the
Screw onto the Electroyte Refill Port.
Electrolyte Refill Port
O Ring
Probe Tip
(Cathode & Anode)
Membrane Cap
Probe Guard
Z
XY
Washer
Oring
Screw
Electrolyte
Container

12
Electrolyte Refilling:
9.14 From time to time, electrolyte may evaporate and dry out.
9.15 Unscrew the Electrolyte Refill Port and refill with elelctroyte.
9.16 The electrolyte may also degrade after prolong usage. When bubbles
are seen in the electroyte container or the sensitivity of the meter
becomes low, or error messages of inaccurate reading, the electrolyte
should be replace completely.
9.17 Change the membrane and replace electrolyte as in 9.4 to 9.13
Probe Maintenance:
9.18 After about 50hours of continuous use, the Probe-Tip anode or
cathode may get tarnished due to polarization.
9.19 Disassemble the probe and drain the electrolyte. Rinse probe tip with
distilled water and polished it with diamond power paste. Rinse and
re-assemble with new membrane and electrolyte as 9.8 to 9.13
10. TROUBLESHOOTING & ERROR CODES
10.1 Power cannot switch on:
a. Press the switch a short while to switch on. If press too fast, unit
will not swtich on.
b. Check battery is place correctly or if the battery had expired.
c. System hanged: - Remove battery for 1 minute then replace.
10.2 Error Codes:
E01 Air bubble trap in membrane sensor. See 9.11.
Lack of electrolyte or sensor tarnished. See 9.14 to 9.19
Probe connection problem or probe damaged.
E01ºCProbe Temperature sensor damage or connection problem.
E02 Reading is below measuring range. Rectify as E01.
E03 Reading is over and above measuring range of DO or
temperature. Rectify as E01.
E04 Relative value error.
E17 Calibration error. See section 9.11; 9.14 to 9.19.
E21 Temperature is beyond ±10°C of the last calibrated
temperature.
E31 IC analog to digital error.
E32 IC memory error.

13
11. MAINTENANCE:
11.1 When the low battery sign appears, it means that the batteries must
be replaced.
11.2 Open the battery compartment at the back of the unit and change all
4 batteries with new ones according to polarity.
12. ONLINE DATA LOGGING TO PC: (OPTIONAL ITEM REQUIRED)
12.1 This unit can be linked to any computer via the RS232 connection
port to perform real time online data logging on the computer.
RS232 connection software kit can be purchased separately.
12.2 Data will be collected at defined intervals and a graph will be ploted.
12.3 Connect the RS232 mini phone jack connector to the back of the
meter and the RS232 jack to the COM port on the computer socket.
(optional USB connector can be purchased and used)
12.4 Insert the PC connect CD-ROM to begin software installation.
12.5 Run the setup program.
12.6 After loading completed, run the program.
12.7 Read the instructions under help for detail setting.
Select a data
Parameter
Set maximum
a
l
a
rm limi
t
Click to Start or
Stop graph &
data recording
Click to quit
program
Click to read operation
procedures and help
Click to save recorded
data as a file & location
Click to load an
existing data file
Click to set input COM port
When correct COM port is
recognised and data
received, “Logging Data”
will appear
Set No. of data
to sample
Set sampling rate
in seconds
Set graph
X-axis data
display range
Set minimum
a
l
a
rm limi
t
Set graph
Y-axis
baseline offset
Set graph
Y-axis scale
divisioin
Switch alarm
o
n
o
r
o
ff
Legend for each
parameter in
different color

14
WARRANTY
Trans Instruments (Singapore) Pte. Ltd., warranties this product for a period
of 12 months for main unit and 3 months for probe & electrode from date of
purchase against all defects in material and workmanship.
This warranty does not apply to the abuse or misuse of the instrument. If
repairs or adjustments are required, please return the defective product
freight prepaid. Instrument within warranty will be repaired at no charge.
Make sure that the product is properly packed and insured against possible
damage or loss in shipment.
Purchase invoice MUST be accompanied in returned product or else
warranty is considered void.
Please obtain authorization from Trans Instruments (Singapore) Pte Ltd.
Directly or through your local sales representatives prior to returning the
product.
Trans Instruments staff can be contacted at the following email address or
through our web-page contacts:
sales@transinstruments.com
http://www.transinstruments.com
Direct address:
TRANS INSTRUMENTS (S) PTE LTD
5 Jalan Kilang Barat
#06-04 Petro Centre
Singapore 159349
Singapore

15
Rev-5 March 2011
PRINTED IN SINGAPORE
Quality checked in Singapore
Table of contents
Popular Measuring Instrument manuals by other brands
PCE Instruments
PCE Instruments PCE-VT 38 0 Series user manual
Anritsu
Anritsu MS2830A Operation manual

Cybertek
Cybertek HCP8000 Series manual

Horiba Scientific
Horiba Scientific LAQUAact D-74G instruction manual

Freedom
Freedom R8000 Series user guide
Horizon Fitness
Horizon Fitness P-1000 Installation instructions manual
