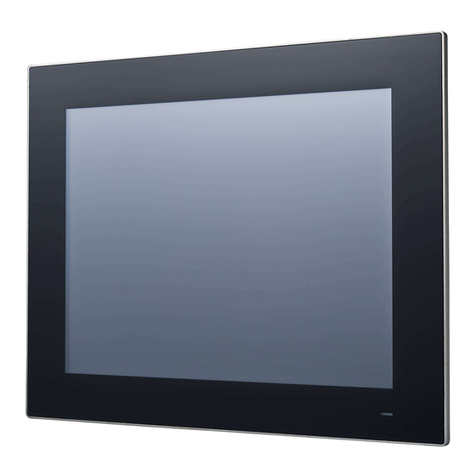
Transduction TR-LCD2300W-V2 User manual

2 TR-LCD2300W-V2 User Manual
Revision
Description
Date
1.0
Initial Release
10/19/2016
1.1
Revise viewing angle in
specifications and add IEC
61000-6-4 / EN61000-6-4
certificate
11/29/2016
1.2
Revise to reflect change of
video controller board and
LCD panel
10/17/2022

3 TR-LCD2300W-V2 User Manual
Table of Contents
Introduction ..................................................................................................................... 4
Description of the TR-LCD2300W-V2 Computer Monitor ............................................ 4
Specifications .................................................................................................................. 7
Important Information ................................................................................................... 9
Safety Precautions ........................................................................................................ 10
Contents ........................................................................................................................ 11
Quick Start .................................................................................................................... 13
OSD Setup Button Functions ........................................................................................ 14
Button Name and Function ........................................................................................ 14
OSD Setup ................................................................................................................. 15
General Description ............................................................................................... 15
Main Menu ............................................................................................................. 15
Brightness/Contrast ................................................................................................ 16
Color Settings......................................................................................................... 16
Input Source ........................................................................................................... 17
Display Settings ..................................................................................................... 18
Other Settings ........................................................................................................ 18
Information ............................................................................................................. 19
Auto Adjust ............................................................................................................. 19
Resolutions Supported .................................................................................................. 20
Touch Screen Calibration (If Option is Ordered) ........................................................... 21
Troubleshooting Tips ..................................................................................................... 29
Frequently Asked Questions ......................................................................................... 30
Mechanical Drawings .................................................................................................... 31

4 TR-LCD2300W-V2 User Manual
Introduction
Description of the TR-LCD2300W-V2 Computer Monitor
TR-LCD2300W-V2 monitor has been designed specifically for the stringent
requirements of the reliability and safety in nuclear power plants. The design of this
monitor is compliant with US Atomic Energy Commission Class 1E equipment standard
that defines characteristics of equipment needed for the monitoring of the nuclear
reactor and emergency shutdown procedures.
Transduction has a long history of manufacturing computers and monitors for the
nuclear power plants in USA, China and Canada. Utmost attention is paid during
design, manufacturing and test of our products in accordance with QA audits of several
nuclear clients.
Model TR-LCD2300W-V2 monitor uses reliable LG LCD panel and sophisticated video
controller card based on TSUMOLP887 from M STAR video chip. Precision welded
aluminum frame has superior mechanical stability over wide range of temperature and
is not affected by any vibration or shocks. For safety against intrusion no software BIOS
is used, only internal settings of the video chip that are not accessible from the outside.
The video card has high performance input filter to eliminate problems with low signal to
noise ratio on the long cable runs. Furthermore, the video controller allows user for
"black level" adjustment to eliminate noise visible on the display.
Clarity of the image can be fine-tuned with user accessible “sharpness" feature.
The isolated power supply included with the monitor can be used with AC source 85 to
264VAC 50/60 Hz or 125 or 250 VDC that is available from power back-up systems.
48VDC power option can also be supplied. MTBF of the power supply and monitor is
150,000 hours limited by the useful life of the LCD backlights.
This monitor is a fine example of our quality and workmanship. We can quickly re-
design this monitor to fit mechanical opening of any existing monitors that are obsolete.
Non-standard video formats can be matched.
Warranty of the TR-LCD2300W-V2 monitor is 5 years.

5 TR-LCD2300W-V2 User Manual
TR-LCD2300W-V2 Front
TR-LCD2300W-V2 Rear

6 TR-LCD2300W-V2 User Manual
TR-LCD2300W-V2 Rear (With Optional VESA Bracket)

7 TR-LCD2300W-V2 User Manual
Specifications
TR-LCD2300W-V2 Monitor
Notes
LCD Module
Size:
Display Area (mm):
Pixel Pitch(mm):
Type:
Viewing Angle:
Brightness:
Contrast Ratio:
23 inch diagonal
509.184 (H) x 286.416 (L)
0.2652 (H) x 0.2652 (L)
AG, haze 25%, hard coating (3H)
89º(H) / (V)
250cd/m²
1000:1
Touch Screen
Optional USB Resistive
Synchronization
Horizontal:
Vertical:
54.2 – 83.8kHz
49 – 75kHz
Display Colors
16.7M
Resolution
1920 x 1080 @60Hz
Input Signal
DVI-D, SVGA, DisplayPort
Maximum Pixel Clock
83MHz
Power Supply
AC Power Input: 85-264VAC 50/60Hz
DC Power Input: 120-370VDC 50/60Hz
Input Current: 2.1A max.
Output: 12VDC ±0.1V /8.5A, 100W
Power Supply Isolation
Input to Output: 500VDC
Output to Chassis: 500VDC
Input to Chassis: 500VDC
Power Supply Efficiency
80% minimum at full load
Dimensions
21.300” (L) x 12.600” (H) x 2.795” (W)
54.10cm (L) x 32.00cm (H) x 7.09cm (W)
Weight
Power Supply
With VESA Bracket
1.2lbs (0.55kg)
14.33lbs (6.5kg)
15.43lbs (7.0kg)

8 TR-LCD2300W-V2 User Manual
Environmental
Operating Temperature:
Humidity:
Storage Temperature:
Humidity:
Vibration and Shock:
EMI/RFI:
32ºF ~ 122ºF, 144 ºF for 2 hours (0ºC ~ 50ºC, 60 ºC for 2 hours)
10% ~ 90%
-4ºF ~ 140ºF (-20ºC ~ 60ºC)
10% ~ 90%
7.5G/50G,seismic qualified – available upon request
Compliant – available upon request
Plug and Play Capability
This monitor can be installed and any Plug & Play compatible
system. Interaction of the monitor and computer will provide the
best operating conditions and monitor settings. In most cases,
monitor installation will proceed automatically, unless the user
wishes to select alternate settings.
User Adjustments:
Main Menu, Image, Display and Picture-In-Picture (PIP)
Regulatory Approvals
CE, UL, FCC Class B
Note#1: This monitor meets all requirements of IEEE Class 1E equipment to be used in
nuclear power plants. Qualification reports are available on request.
Note# 2 –Safety: This monitor includes video controller card that is not software
programmable and not accessible via any connection to the monitor.
Note# 3: EMI/RFI is compliant with EPRI TR-102323 Rev. 3 for Nuclear Safety Related
Applications.

9 TR-LCD2300W-V2 User Manual
Important Information
The information in this document is subject to change without notice.
All relevant issues have been considered in the preparation of this document. Should you notice an
omission or any questionable item in this document, please feel free to notify Transduction.
Regardless of the foregoing statement, Transduction assumes no responsibility for any errors that may
appear in this document or for results obtained by the user as a result of using this product.
Copyright ©2022 Transduction. All rights reserved.
This document is protected by copyright. No part of this document may be reproduced, copied, or
translated in any form or means without prior written permission from Transduction.
Return Policy
Products returned for repair must be accompanied by a Return Material Authorization (RMA) number,
obtained from Transduction prior to return. Freight on all returned items must be prepaid by the
customer. The customer is responsible for any loss or damage caused by the carrier in transit.
To obtain a RMA number, call us at 905-625-1907. We will need the following information:
• Return company address and contact
• Model name, model number and serial number
• Description of the failure
Mark the RMA number clearly on the outside of each box, include a failure report and return the product
to:
Transduction Inc.
RMA# XXXXX
23-5155 Spectrum Way
Mississauga, ON Canada L4W 5A1
Tel: 905-625-1907

10 TR-LCD2300W-V2 User Manual
Safety Precautions
• When not used for extended periods of time, set your computer/monitor to
DPMS. If using a screen saver, set it to the active screen mode.
• Do not use a damaged or loose plug. This may cause and electric shock or fire.
• Do not pull the plug out by the wire or touch the plug with wet hands. This may
cause and electric shock or fire.
• Use only a properly grounded plug or receptacle. An improper ground may
cause electric shock or equipment damage.
• Do not excessively bend the plug and wire or place heavy objects on them. This
could cause damage, electric shock or fire.
• Do not place the monitor face down. The CDT surface may be damaged.
• When cleaning, wipe with slightly moistened soft cloth. Do not spray any cleaner
directly on the monitor.
• Do not remove housing. No serviceable parts inside. Refer servicing to
Transduction.

11 TR-LCD2300W-V2 User Manual
Contents
Your new TR-LCD2300W-V2 monitor box should contain the following:
1. TR-LCD2300W-V2 monitor with AC/DC power supply
2. AC power cord, 6 feet
3. USB 2.0 Type A to Type A cable, 5 feet (optional – if touch screen model is
ordered)
4. SVGA to SVGA video cable, 6 feet
5. DVI to DVI cable, 6 feet
6. DisplayPort to DisplayPort cable, 6 feet
7. User manual and driver installation CD
**Remember to save your original box and packaging material to transport or ship monitor. **
6FT Power Cord 5FT USB 2.0 Type A to Type A cable

12 TR-LCD2300W-V2 User Manual
6FT DVI to 6FT SVGA to SVGA cable
DVI Cable
6FT DisplayPort to DisplayPort Cable
AC/DC Power Supply Optional VESA Mount Bracket
TR-LCD2300W-V2 Monitor

13 TR-LCD2300W-V2 User Manual
Quick Start
**Warning: Never attach monitor to computer with the power ON as it might damage
video port.
To attach the TR-LCD2300W-V2 monitor to your computer, follow the instructions
below:
1. Turn OFF the power to your computer.
2. Plug the power cord for the monitor into nearby outlet.
3. Video connection options on the monitor:
3.1. Option 1: connect the SVGA to SVGA cable – SVGA on the back of the monitor
and SVGA on the computer.
3.2. Option 2: connect the DVI to DVI cable – DVI on the back of the monitor and DVI
on the computer.
3.3. Option 3: connect the DisplayPort to DisplayPort cable to the DisplayPort on the
back of the monitor and computer.
4. Turn ON the computer and monitor. If the monitor displays an image, installation is
complete.
Notes:
• If the monitor is connected properly but you get a blank or fuzzy screen, check to
see if monitor status is set to analog. Press the SOURCE key to have the
monitor verify the input signal source.

14 TR-LCD2300W-V2 User Manual
OSD Setup Button Functions
Button Name and Function
Button
Description
MENU
Activates the OSD menu
Confirm selected item
DOWN
Scroll through items within the main menu
LEFT
Increases the adjustment of the selected
function
RIGHT
Decreases the adjustment of the selected
function
SOURCE
Select video input source
Go to previous sub-menu
POWER
Turns ON/OFF the monitor

15 TR-LCD2300W-V2 User Manual
OSD Setup
General Description
The monitor features an on-chip OSD (On-Screen Display) controller that creates the
OSD user interface menus and overlays them onto the output data stream. User can
adjust the display conditions on LCD monitor using the touch pad. After powering on,
the controller restores itself to the last known conditions saved in Non-Volatile Random
Access Memory (NVRAM). All parameters (Settings) are saved whenever user selects
icon in OSD. Not making a selection within a defined time period causes the OSD menu
to close. The DOWN key is used to scroll through items within the main menu. The
selected item is highlighted. The LEFT and RIGHT keys are used to increase and
decrease the adjustment of the selected function. The MENU key is used to open and
close the OSD menu. The MENU key is defined as “CONFIRM” to activate the
highlighted item. The SOURCE key is used to select the video input source. The
SOURCE key is defined as “BACK” to go to previous sub-menu. The POWER key
enables user to turn ON/OFF the monitor.
Main Menu
Press MENU of OSD board to start Main Menu. There are seven major icons in the
Main menu: Brightness/Contrast, Color Settings, Input Source, Display Settings, Other
Settings, Information and Auto Adjust. Use the DOWN key to scroll through items. Press
MENU key again to select item sub-menu. For example, when Brightness/Contrast is
highlighted, press MENU and then use the DOWN key to scroll the items. If sub-menu
item Brightness is highlighted, press MENU ton select and then RIGHT or LEFT to
adjust the brightness level. If setting is finished, press SOURCE to go back to
Brightness sub-menu and press SOURCE again to go back to Brightness/Contrast main
menu. New OSD parameters are saved in NVRAM.

16 TR-LCD2300W-V2 User Manual
Brightness/Contrast
Color Settings

17 TR-LCD2300W-V2 User Manual
Input Source

18 TR-LCD2300W-V2 User Manual
Display Settings
Other Settings

19 TR-LCD2300W-V2 User Manual
Information
Auto Adjust

20 TR-LCD2300W-V2 User Manual
Resolutions Supported
Table of contents
Other Transduction Touch Panel manuals


