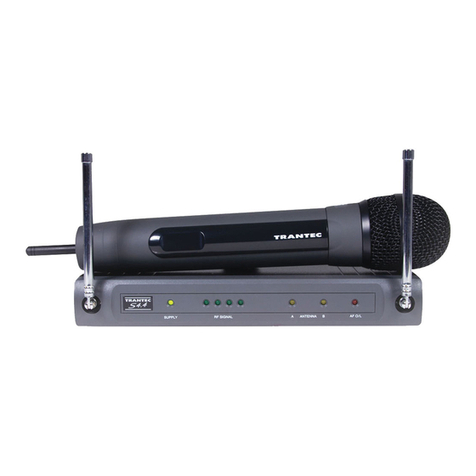
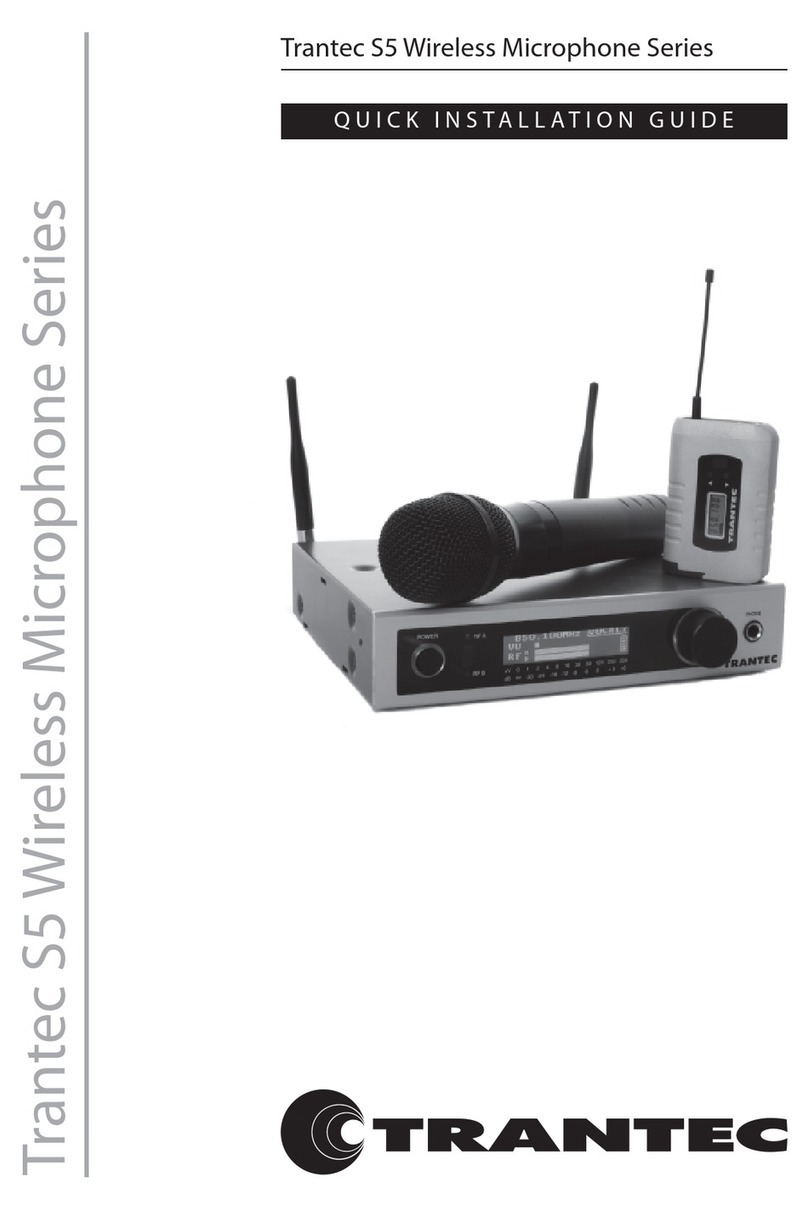
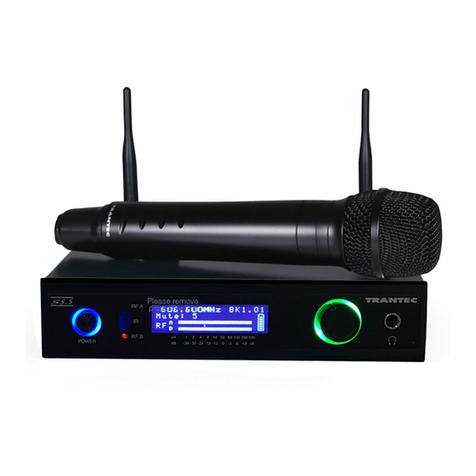
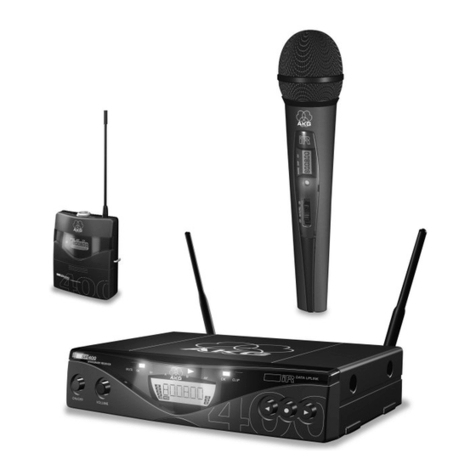
Trantec S4.04 Series User manual

OPERATING
INSTRUCTIONS
WIRELESS MICROPHONE SYSTEM
S4.04 / S4.10 series
CONTENTS
1. SAFETY PRECAUTIONS
2. GENERAL DESCRIPTION
3. FEATURES
4. HANDLING PRECAUTIONS
5. NOMENCLATURE AND FUNCTIONS
6. CHANNEL NUMBER SETTING by MANUAL
7. CHANNEL NUMBER SETTING by
INFRARED SYNCHRONIZATION
8. CHANNEL SCAN
9. BATTERY ALARM
10. OPERATIONAL HINTS
11. TROUBLESHOOTING
12. SPECIFICATIONS
Thank you for purchasing TOA's TRANTEC S4 series Wireless Microphone system.
Please carefully follow the instructions in this manual to ensure long, trouble-free use of your equipment.
English: Page 1 Español: Página 37
Deutsche: Seite 13 Português: Página 49
Français: Page 25

2
1. SAFETY
PRECAUTIONS
• Be sure to read the instructions in this section carefully before use.
• Make sure to observe the instructions in this manual as the conventions of safety symbols and messages
regarded as very important precautions are included.
• We also recommend you keep this instruction manual handy for future reference.
Safety Symbol and Message
Conventions
Safety symbols and messages described below are used in this manual to prevent bodily injury and property
damage which could result from mishandling. Before operating your product, read this manual first and
understand the safety symbols and messages so you are thoroughly aware of the potential safety hazards.
WARNING
Indicates a potentially hazardous situation which, if mishandled, could
result in death or serious personal injury.
When Installing the Receiver
• Do not expose the unit to rain or an environment where it may be splashed by water or other liquids, as
doing so may result in fire or electric shock.
• Use the unit only with the voltage specified on the unit. Using a voltage higher than that which is specified
may result in fire or electric shock.
• Do not cut, kink, otherwise damage nor modify the power supply cord. In addition, avoid using the power
cord in close proximity to heaters, and never place heavy objects -- including the unit itself -- on the power
cord, as doing so may result in fire or electric shock.
• Avoid installing or mounting the unit in unstable locations, such as on a rickety table or a slanted surface.
Doing so may result in the unit falling down and causing personal injury and/or property damage.
• To prevent lightning strikes, install the unit at least five meters away from a lightning rod, and yet within the
protective range (angle of 45°) of the lightning conductor. Lightning strikes may cause a fire, electric shock
or personal injury.
• Since the unit is designed for in-door use, do not install it outdoors. If installed outdoors, the aging of parts
causes the unit to fall off, resulting in personal injury. Also, when it gets wet with rain, there is a danger of
electric shock.
When the Receiver is in Use
• Should the following irregularity be found during use, immediately switch off the power, disconnect the power
supply plug from the AC outlet and contact your nearest TOA dealer. Make no further attempt to operate the
unit in this condition as this may cause fire or electric shock.
· If you detect smoke or a strange smell coming from the unit.
· If water or any metallic object gets into the unit
· If the unit falls, or the unit case breaks
· If the power supply cord is damaged (exposure of the core, disconnection, etc.)
· If it is malfunctioning (no tone sounds.)
• Do not place cups, bowls, or other containers of liquid or metallic objects on top of the unit. If they
accidentally spill into the unit, this may cause a fire or electric shock.
• Do not touch the unit's antennas during thunder and lightning, as this may result in electric shock.
When the Microphone or the Transmitter is in Use
• To prevent the electromagnetic wave from badly influencing medical equipment, make sure to switch
off the unit's power when placing it in close proximity to the medical equipment.

3
CAUTION
Indicates a potentially hazardous situation which, if mishandled,
could result in moderate or minor personal injury, and/or property
damage.
When Installing the Receiver
• Never plug in nor remove the power supply plug with wet hands, as doing so may cause electric shock.
• When unplugging the power supply cord, be sure to grasp the power supply plug; never pull on the cord
itself. Operating the unit with a damaged power supply cord may cause a fire or electric shock.
• When moving the unit, be sure to remove its power supply cord from the wall outlet. Moving the unit with the
power cord connected to the outlet may cause damage to the power cord, resulting in fire or electric shock.
When removing the power cord, be sure to hold its plug to pull.
• The socket outlet shall be installed near the equipment and shall be easily accessible.
• Avoid installing the unit in humid or dusty locations, in locations exposed to the direct sunlight, near the
heaters, or in locations generating sooty smoke or steam as doing otherwise may result in fire or electric
shock.
When the Receiver is in Use
• Do not place heavy objects on the unit as this may cause it to fall or break which may result in personal injury
and/or property damage. In addition, the object itself may fall off and cause injury and/or damage.
• Make sure that the volume control is set to minimum position before power is switched on. Loud noise
produced at high volume when power is switched on can impair hearing.
• Never open the unit case as there are high temperature parts inside the unit, which may cause a burn if
touched. Refer all servicing to your nearest TOA dealer.
• Use the dedicated AC adapter for the unit. Note that the use of other adapter may cause a fire.
• If dust accumulates on the power supply plug or in the wall AC outlet, a fire may result. Clean it periodically.
In addition, insert the plug in the wall outlet securely.
• Switch off the power, and unplug the power supply plug from the AC outlet for safety purposes when cleaning
or leaving the unit unused for 10 days or more. A fire or electric shock may result.
• Any modifications made to this device that are not approved by TOA Corporation may void the authority
granted to the user to operate this equipment.
• Operation of this device is subject to the following two conditions: (1) this device may not cause interference,
and (2) this device must accept any interference, including interference that may cause undesired operation
of the device.
When the Microphone or the Transmitter is in Use
• When the unit is not in use for 10 days or more, be sure to take the battery out of the unit because battery
leakage may cause personal injury or contamination of environment.
• Make sure to observe the following handling precautions so that a fire or personal injury does not result from
leakage or explosion of the battery.
· Do not short, disassemble heat nor put the battery into a fire.
· Do not solder a battery directly.
· Be sure to use the specified type of battery.
· Note correct polarity (positive and negative orientation) when inserting a battery in the unit.
· Avoid locations exposed to the direct sunlight, high temperature and high humidity when storing batteries.
• When the battery becomes inflated or leaks, discontinue use and replace with new one immediately.
CAUTION TO USER: Changes or modifications not expressly approved by the party responsible for
compliance could void the user's authority to operate the equipment.
IMPORTANT NOTE: To comply with the FCC RF exposure compliance requirements, no change to the
antenna or the device is permitted. Any change to the antenna or the device could result in the device
exceeding the RF exposure requirements and void user’s authority to operate the device.

4
IMPORTANT NOTE:
This device complies with Industry Canada’s licence-exempt RSSs. Operation is subject to the following two
conditions:
(1) This device may not cause interference; and (2) this device must accept any interference, including
interference that may cause undesired operation of the device.
Le présent appareil est conforme aux CNR d'Industrie Canada applicables aux appareils radio exempts de
licence. L'exploitation est autorisée aux deux conditions suivantes : (1) l'appareil ne doit pas produire de
brouillage, et (2) l'utilisateur de l'appareil doit accepter tout brouillage radioélectrique subi, même si le
brouillage est susceptible d'encompromettre le fonctionnement.
2. GENERAL
DESCRIPTION
The TOA’s TRANTEC S4 series W i r e l e s s M i c r o p h o n e s ys t e m is designed for use on the UHF
f r e q u e n c y band, and suitable for vocal or speech reinforcement applications. It features a compander
circuit which minimizes the influence of ambient noise.
S4.04 : 4 User selectable channels that can be operated simultaneously.
S4.10 : Up to 16 User selectable channels that can be operated simultaneously. (depending on region)
S4 series HDX Wireless handheld Microphone is a vocal microphone, employing a fine, powerful dynamic
microphone unit.
S4 series BTX Wireless belt-pack transmitter can use TRANTEC series lavalier microphones and headset
microphones.
S4 series RX Wireless receiver is a diversity receiver to minimize drop-outs.
3.
FEATURES
• An optimized PLL-synthesizer minimizes the oscillation frequency drift resulting from the ambient temperature
or voltage fluctuation.
• Power/Battery lamps indicate battery consumption to prevent the unit from malfunctioning when the battery
level remarkably decreases.
• Up to 10 hours of continuous use with single AA alkaline battery.
• S4 series HDX employs a built-in antenna.
• The state of battery consumption can be displayed on S 4 s e r i e s R X receiver's indicator.
• Quick channel scanning and auto channel set-up.
• Infra-red auto channel set-up.
• Compact size and high reliability.
4. HANDLING
PRECAUTIONS
• Do not expose the unit to rain or an environment where it may be splashed by water or other liquids,
as doing so may result in unit failure.
• Never open nor remove the unit case to modify the unit. Refer all servicing to your nearest TOA
dealer.
• Take care not to drop the unit onto the floor nor bump it against a hard object as the unit could fail.
• Do not place the unit in locations of high temperature (e.g. in an ill-ventilated car in summer) or
high humidity as the unit could fail.
• Do not use the unit in locations where it is exposed to seawater.
• Avoid using a mobile telephone near the wireless microphone in use. Noise could be picked up.
• When installing, keep the unit as far away as possible from fluorescent lamps, digital equipment,
personal computers, and other equipment that generate high frequency noise.
• To clean, use a dry cloth. When the unit gets very dirty, wipe lightly with a cloth dampened in a
dilute neutral cleanser, then wipe with a dry cloth. Never use benzene, thinner, or chemically-
treated cleaning towel.
• When using two or more wireless microphones, keep them at least 50 cm away from each other to
avoid malfunctions or noise.
• Keep the wireless microphone at least 3 m away from the receiving antenna. Using the microphone
in close proximity to the antenna could result in malfunctions or noise.

5
5. NOMENCLATURE AND
FUNCTIONS
Receiver : S4.04-RX & S4.10-RXA
[Front]
1. Power switch
Press this switch to turn the power on, and press it
again to turn the power off.
2. Channel setting key [SET]
Used to select the receiving channel (frequency).
(The receiver frequency must be identical to that of
the microphone.)
3. Infrared (IR) sync key [SYNC]
Press this switch to transfer the frequency to
the transmitter.
4. Reception lamps [A, B]
Either lamp A (left) or B (right) lights yellow
when the receiver matches a radio signal from the
transmitter.
5. AF peak lamp [PEAK]
Lights red when the receiver output level reaches
the point about 3 dB below the clipping level.
6. Infrared (IR) port [IR]
Transmit the infrared signal, when pressing
SYNC key,
7. Numerical LED display
Indicates the current channel number in normal
state.
In setting mode, the indicated channel number
flashes until registered.
8. RF signal level meter (S4.10-RXA only)
Indicates the RF signal level.
9. Antennas (S4.04-RX only)
Raise both antennas at 45° outwards from
a vertical line.
When carrying the unit, be sure to fold down
both antennas to prevent them from break.
S4.04-RX
S4.10-RXA

6
[Rear]
10. DC input jack
Connect the power cable of the supplied
AC adapter to this jack.
11. Cable hanger
Hook the power cable onto this part.
12. AF output
Balanced XLR jack, male type (Pin #2: Hot).
S4.04-RX : -20 dBu (maximum)
S4.10-RXA : 16 dBu (maximum)
13. AF output
Unbalanced phone jack
S4.04-RX and S4.10-RXA : 10 dBu (maximum)
14. Volume control (S4.10-RXA only)
Adjust the output level.
15. Antenna input A, B (S4.10-RXA only)
BNC connectors for antennas
Phantom powering for the external
antenna (optional)
For the wireless system covering a relatively
narrow area, use the supplied two rod antennas,
which should be set up at 45° outwards from
a vertical line.
Tip S4.10-RXA receiver gain is continuously adjustable. Should the receiver signal be too high, it will distort
your mixer / amplifier. If the signal is too low, the result will be an increase in general background noise.
Monitor the AF peak LED on the receiver, and adjust the volume control to achieve the best signal
quality.
S4.04-RX
S4.10-RXA

7
Handheld microphone : S4.04-HDX & S4.10-HDX

8
Belt-pack transmitter : S4.04-BTX & S4.10-BTX

9
1. Power switch
Slide this switch towards “ON” to turn the
power on, and slide it again towards “OFF” to
turn the power off.
2. Power / Battery lamp
A green LED lights as long as the battery
capacity is sufficient. When the battery
capacity becomes low, the green LED starts
to flash.
3. Numerical LED display
Indicates the current channel number in
normal state.
In setting mode, the indicated channel
number flashes until registered.
4. Channel setting key [SET]
Used to select the channel (frequency). (The
frequency must be identical to that of the
receiver.)
5. Infrared (IR) port
Receive the infrared signal from the receiver.
6. PAD switch (S4.10-HDX only)
This switch is used for microphone sensitivity
adjustment. The sensitivity can be decreased
to “H” (0dB), “L” (-10dB).
Note Never position the transmitter antenna
directly against the body or hand. This
will have the effect of reducing the
operating range considerably.
7. Battery compartment
Insert an AA battery according to (+) and (–)
indications on the battery compartment.
Note: Turn off the power switch.
HDX:
Hold the microphone body and rotate the
microphone grip counterclockwise to remove it.
BTX
:
Slide the battery cover in the
direction indicated by the arrow while pressing
on the cover with a thumb and hinge upwards.
8. MIC / Instrument switch (BTX only)
Slide this switch towards “MIC” to connect the
microphone, and slide it towards “INST” to
connect the instrument.
9. Audio level control (BTX only)
Adjust the audio level control using the
suppliedscrewdriver. The transmitter
sensitivity increases as the control is rotated
clockwise, and decreases as rotated
counterclockwise.
10. Input connector (BTX only)
3.5 mm jack socket, Connect the
microphone or the instrument cable.
11. Antenna (BTX only)
12. Clip (BTX only)
Clip the transmitter to a belt through the
belt clip.
13. Microphone (BTX only)
Note: Route the microphone cable so as to
avoid undue strain or friction. Try and keep the
microphone cable away from the antenna.
6. CHANNEL NUMBER
SETTING by MANUAL
Step 1. Press the SET key for about 3 seconds until the displayed channel number blinks.
Step 2. Select the desired channel number with the SET key, and once the desired number is
reached, release the SET key. After about 5 seconds, the receiver automatically sets
channel and the blinking number turns to steady light.
Tip Continuous depression of the SET key permits the display to cycle through the channel
numbers.
On the receiver side, when the dot LED by the channel number LED is blinking at
selected channel number, this means that the channel is already occupied.
Note Make sure that the transmitter is identical to the receiver in the channel number.
Should the microphone's setting differ from that of the receiver, the receiver will not receive the radio
signal from the transmitter.
On the transmitter side, the power switch turns on, the channel
number display turns on the light for about 20 seconds, and
then this display turns off the light. When SET key presses in
this condition, this display turns on the light for about 20
seconds.

10
7. CHANNEL NUMBER
SETTING by
INFRARED SYNCHRONIZATION
Step 1. Confirm that the receiver is set to the correct channel number and the
transmitter is turned on, then open the battery case on the transmitter.
Step 2. Bring the IR port in the transmitter within 20cm of IR port on the receiver.
Step 3. Press the SYNC key on the receiver for about 3 seconds. When the
channel data has transmitted successfully from the IR port on the receiver,
the displayed channel number flashes.
Step 4. When the channel number is synchronized
successfully between the receiver and the
transmitter, the displayed channel number in
the transmitter blinks for about 3 seconds,
Note On the transmitter side, even if the channel
number display light turns off, the display turns
on again when IR synchronization has
succeeded.
8. CHANNEL
SCAN
Step 1. Press the SET key and the SYNC key at the same time for about 3 seconds.
Channel scan begins, and an idle channel number is indicated blinking on
the channel number display.
Step 2. After channel scan finishes, the idle channels are displayed in turn.
Step 3. Press the SET key and the SYNC key at the same time, the receiver sets the
idle channel automatically.
Note Before starting the channel scan, turn off all transmitters and any other
equipment that could cause interference during the setting or it may be detected during the channel
scan.
If there are no idle channels, the channel number is displayed blinking as a “-“.
And then the channel before starting the channel scan is set again.
Multiple System Setup
Set up each system one at a time, confirm each system is assigned a different
channel, and leave the transmitter powered on. Otherwise, the channel scan from the other receiver will
not detect as the occupied channel.
9.
BATTERY ALARM INDICATON
• When the battery capacity in the corresponding transmitter becomes low, the dot LED of the numerical LED
on the receiver and the transmitter blinks. Replace the transmitter battery.

11
10.
OPERATIONAL HINTS
• The transmitter's service distance is 3 – 100 m. When the transmitter user moves in a facility, signal
dropouts (momentary losses of signal reception) may be encountered. These dropouts are caused by the
building's architectural design or materials which block the travel of or reflect the radio signal. If this occurs,
the user needs to change locations for better signal reception.
• Confirm the good line of sight between the transmitter and the receiver. Do not place large obstructions (e.g.
Concrete walls or large metal obstructions) between the transmitter and the receiver. In addition keep the
receiver away from metallic beams and obstructions as these can adversely affect the antenna pick-up
pattern and cause interference.
• The proper operation of your wireless system may be interfered with by other systems operating on the same
frequency. In such cases, change the operating frequency of your system.
• Hold the microphone within 20cm from the sound source. Move the microphone closer for a warmer sound.
And do not cover the grille with hand.
• Keep your mouth 15 – 20 cm away from the lavalier microphone for the best possible sound reproduction. In
case of the Omni-directional response, it will pick up sounds from all directions. It is better that the
microphone is placed closer to the sound source. Take care not to bring your mouth too close to the
microphone (within 5 cm) as this impairs speech clarity if you speak loudly.
• In case of the headset microphone, by adjusting the gooseneck, locate the microphone with the supplied
windscreen in front of your mouth, and position it 3 – 5 cm away from your mouth for the best sound
reproduction. When the microphone is too close to your mouth or you speak too loud, speech clarity will be
impaired, making it hard for the audience to hear announcements.
11.
TROUBLESHOOTING
Issue Condition Solution
No sound Receiver Reception lamps
[either A or B] or RF signal level
meter lights.
Confirm the connections of all
sound system or gain
Confirm the receiver volume
control.
Sound distorted AF peak lamp [PEAK] indicates. Confirm the transmitter gain or
PAD.
Confirm the receiver volume
control.
Confirm the receiver output level
match to the input level of the
mixer / amplifier.
Poor range or sound dropouts Receiver Reception lamps [A
and B] are flicking or RF signal
level meter turn light off.
The system must be set up within
recommended range.
The transmitter must be used in
line of sight from the receiver.
Check the channel scan, confirm
nearby source of interference,
and change the receiver and the
transmitter to a different channel.
Confirm the battery indication,
and replace the transmitter
battery.

12
12.
SPECIFICATIONS
System
Modulation Wideband FM
Frequency Range UHF band (506-538, 538-576, 576-603, 603-638, 638-671,
671-701, 720-758, 785-815, 819-832, 836-867, 925-937.5 MHz)
Tunable Frequencies 25 kHz Steps
Switchable Channels S4.04 : 4 channels
S4.10 : up to 16 channels (depending on region)
Operated channels simultaneously S4.04 : 4 channels
S4.10 : up to 16 channels (depending on region)
Pilot tone 32.768kHz
Total Harmonic Distortion < 1 % @1kHz
Function IR sync, Channel scan, Battery life information
Dynamic Range >96 dB(A)
Operating Range approx. 100 m
Operating Temperature Range -10°C to +50° C
Note: 506–603 MHz and 614–698 MHz for USA/Canada, 614–698 MHz for Brazil, 865–867 MHz for India, 925-
937.5 MHz for Korea
TRANSMITTER
S4.04-HDX, S4.10-HDX S4.04-BTX, S4.10-BTX
Microphone unit Dynamic with cardioid pattern TRANTEC series lavalier and head set
microphone
RF Carrier Power 10 mW 10 mW
Audio Frequency
Response 80 - 15000 Hz 50 - 15000 Hz
Audio input Level 140 dB SPL (maximum) -6dBV (maximum), mic gain 0dB
Battery Life approx. 10 hours approx. 10 hours
Power Supply 1 AA size alkaline battery, 1.5 V 1 AA size alkaline battery, 1.5 V
Finish Resin, coating Resin, coating
Dimensions* 250 x φ50 mm 62 (W) x 100 (H) x 25 (D) mm (with clip)
Weight* 245 g (with battery) 85 g (with battery)
RECEIVER S4.04RX, S4.10-RXA
Diversity Reception Antenna Diversity
Sensitivity 10uV at 45dBA S/N
Squelch (SQ) Tone SQ, Carrier SQ, Noise SQ
Audio Frequency Response 50 - 15000 Hz
Audio Output Level
(Maximum)
S4.04-RX Balanced (XLR socket) : -20 dBu
Un-balanced (1/4" jack socket) : 10 dBu
S4.10-RXA Balanced (XLR socket) : 16 dBu
Un-balanced (1/4" jack socket) : 10 dBu
Power Supply 11 - 18 VDC 300 mA
Dimensions* 215 (W) x 39 (H) x 102 (D) mm (excluding antenna and BNC)
Weight* 480g
0dBu=0.775V
Note: The design and specifications are subject to change without notice for improvement.
• Accessory
AC adapter
Microphone holder (For handheld microphone)
Screwdriver (For setting of Belt-pack transmitter)

13
BEDIENUNGSANLEITUNG
DRAHTLOS-MIKROFONANLAGE
S4.04 / S4.10-Serie
INHALTSVERZEICHNIS
1. SICHERHEITSHINWEISE
2. ALLGEMEINE BESCHREIBUNG
3. LEISTUNGSMERKMALE
4. VORSICHTSMASSNAHMEN BEI DER
HANDHABUNG
5. BEDIENELEMENTE UND FUNKTIONEN
6. MANUELLE KANALWAHL
7. KANALWAHL mit SYNCHRONISATION
ÜBER INFRAROT
8. SENDERSUCHLAUF
9. BATTERIEALARM
10. HINWEISE ZUM BETRIEB
11. STÖRUNGSSUCHE
12. TECHNISCHE DATEN
Wir danken Ihnen für den Kauf dieser Drahtlos-Mikrofonanlage der S4-Serie von TOA's TRANTEC.
Beachten Sie bitte stets die Anweisungen in dieser Bedienungsanleitung, um einen langen und
störungsfreien Betrieb des Geräts zu gewährleisten.

14
1. SICHERHEITSHINWEISE
• Lesen Sie die Sicherheits- und Warnhinweise in diesem Abschnitt vor Gebrauch unbedingt durch.
• Beachten Sie die Informationen in dieser Anleitung, da sie sehr wichtige Hinweise sowie Erläuterungen zu den
Sicherheitssymbolen und Signalwörtern enthalten.
• Wir empfehlen Ihnen außerdem, diese Bedienungsanleitung zum späteren Nachschlagen griffbereit
aufzubewahren.
Sicherheitssymbole und Signalwörter
In dieser Anleitung machen die nachstehenden Sicherheitssymbole und Signalwörter auf Gefahrenpunkte
aufmerksam, um Verletzungen und Sachschäden zu vermeiden, die durch unsachgemäße Handhabung
entstehen können. Bevor Sie das Produkt in Betrieb nehmen, lesen Sie daher zunächst diese Anleitung und
machen sich mit den Sicherheitssymbolen und Signalwörtern vertraut, um potenzielle Sicherheitsrisiken
erkennen zu können.
WARNUNG Zeigt eine potenziell gefährliche Situation auf. Die Nichtbeachtung der
Warnhinweise kann zu ernsthaften Verletzungen, möglicherweise auch
mit tödlichem Ausgang, führen.
Beim Installieren des Empfängers
• Das Gerät darf niemals direktem Regen ausgesetzt werden. Aufstellorte, an denen das Gerät mit Wasser
oder anderen Flüssigkeiten bespritzt werden kann, sind zu vermeiden, da dies einen Brand oder
Stromschlag zur Folge haben kann.
• Das Gerät darf nur mit der auf diesem angegenenen Netzspannung betrieben werden. Eine Inbetriebnahme
mit einer höheren Spannung als der angegebenen kann zu einem Brand oder Stromschlag führen.
• Niemals das Netzkabel schneiden, knicken, anderweitig beschädigen oder abändern. Verlegen Sie das
Netzkabel außerdem nicht in unmittelbarer Nähe von Heizungen. Niemals schwere Gegenstände –
einschließlich des Geräts selber – auf das Netzkabel legen, um einen möglichen Brand oder Stromschlag zu
vermeiden.
• Das Gerät nicht an unstabilen Orten, z.B. auf einem wackligen Tisch oder auf einer schrägen Fläche,
installieren oder montieren. Das Gerät kann herunterfallen und Verletzungen und/oder Sachschäden
verursachen.
• Um Blitzeinschläge zu vermeiden, installieren Sie das Gerät in einem Mindestabstand von fünf Metern zum
nächstgelegenen Blitzableiter und dennoch innerhalb der Schutzzone (im Winkel von 45°) des Blitzableiters.
Ein Blitzeinschlag kann einen Brand, Stromschlag oder Verletzungen zur Folge haben.
• Das Gerät ist nur für eine Inbetriebnahme drinnen vorgesehen. Nehmen Sie des daher niemals im Freien in
Betrieb. Bei einer Installation im Freien kann das Gerät wegen Alterung der Bauteile herunterfallen, was
möglicherweise zu Verletzungen führen kann. Außerdem besteht bei Regen die Gefahr eines Stromschlages.
Beim Betrieb des Empfängers
• Treten während des Betriebes die folgenden Unregelmäßigkeiten auf, schalten Sie das Gerät unverzüglich
aus, trennen das Netzkabel von der WS-Steckdose ab und kontaktieren den TOA-Händler in Ihrer Nähe.
Versuchen Sie unter keinen Umständen, das Gerät unter diesen Bedingungen weiter zu betreiben, da dies zu
einem Brand oder Stromschlag führen kann.
· Wenn vom Gerät Rauch oder Brandgeruch ausgeht.
· Wenn Wasser oder ein metallischer Gegenstand in das Gerät eingedrungen ist
· Wenn das Gerät heruntergefallen oder dessen Gehäuse beschädigt ist
· Wenn das Netzkabel beschädigt ist (freiliegender Kern, Trennung usw.)
· Bei Fehlfunktionen (ohne akustisches Signal)
• Keine Tassen, Schüsseln oder andere Behälter mit einer Flüssigkeit oder metallischen Gegenständen auf
das Gerät stellen. Bei einem Umkippen und ungewollten Eindringen in das Gerät besteht das Risiko eines
Brandes oder Stromschlages.
• Die Antennen während einem Donnerschlag oder bei Blitz nicht berühren, um Stromschläge zu vermeiden.
Beim Betrieb des Mikrofons oder Senders
• Um eine gegenseitige Beeinflussing mit medizintechnischen Geräten durch elektromagnetische Wellen zu
vermeiden, stellen Sie sicher, dass Sie die Stromzufuhr zum Gerät abschalten, wenn Sie dieses in
unmittelbarer Nähe zu einem solchen medizintechnischen Gerät hinstellen.

15
ACHTUNG
Zeigt eine potenziell gefährliche Situation auf. Die Nichtbeachtung
der Warnhinweise kann zu mittelschweren oder leichten
Verletzungen und/oder Sachschäden führen.
Beim Installieren des Empfängers
• Den Stecker des Netzkabels niemals mit nassen Händen einstecken oder herausziehen, um einen
Stromschlag zu vermeiden.
• Nehmen Sie den Stecker des Netzkabels in die Hand, wenn Sie ihn von der Steckdose ausziehen wollen.
Niemals am Kabel selber ziehen. Eine Inbetriebnahme des Geräts mit beschädigtem Netzkabel kann zu
einem Brand oder Stromschlag führen.
• Achten Sie vor dem Bewegen des Geräts darauf, dass dessen Netzstecker von der Steckdose
herausgezogen ist. Ein Bewegen des Geräts, wenn dessen Netzkabel an der Steckdose angeschlossen ist,
kann das Netzkabel beschädigen, was zu einem Brand oder Stromschlag führen kann. Beim Herausziehen
des Netzkabels nehmen Sie dessen Netzstecker jeweils in die Hand.
• Die Steckdose sollte gut zugänglich in der Nähe des Geräts installiert sein.
• Das Gerät nicht in feuchten oder staubigen Räumen installieren, nicht direktem Sonnenlicht aussetzen, in
unmittelbarer Umgebung einer Heizung oder an Orten aufstellen, an denen rußiger Rauch oder Dampf
erzeugt wird, da dies einen Brand oder Stromschlag zur Folge haben kann.
Beim Gebrauch des Empfängers
• Keine schweren Gegenstände auf das Gerät legen, da dadurch das Gerät herunterfallen oder beschädigt
werden und dies Verletzungen und/oder Sachschäden verursachen kann. Außerdem kann dadurch der
Gegenstand selbst herunterfallen und Verletzungen und/oder Sachschäden verursachen.
• Stellen Sie vor dem Einschalten des Geräts sicher, dass der Lautstärkeregler auf das Minimum eingestellt ist.
Laute Geräusche mit hoher Lautstärke beim Einschalten des Geräts können das Gehör schädigen.
• Das Gehäuse des Geräts niemals öffnen. Im Innern befinden sich Bauteile unter hoher Temperatur, die bei
einem Berühren Verbrennungen verursachen können. Lassen Sie sämtliche Servicearbeiten bei Ihrem TOA-
Händler in Ihrer Nähe durchführen.
• Verwenden Sie für das Gerät den mitgelieferten WS-Netzadapter. Keine anderweitigen Adapter verwenden,
da dies zu einem Brand führen kann.
• Angesammelter Staub auf dem Netzstecker oder in der WS-Steckdose kann einen Brand verursachen.
Wischen Sie diese daher gelegentlich sauber. Stecken Sie den Stecker jeweils fest und sicher in die
Steckdose ein.
• Wenn das Gerät voraussichtlich 10 Tage oder länger nicht gebraucht oder bevor dieses gereinigt wird,
schalten Sie aus Sicherheitsgründen die Stromzufuhr aus und ziehen den Netzstecker aus der WS-
Steckdose, um einen Brand oder Stromschlag zu vermeiden.
• Es wird darauf verwiesen, dass jegliche Abänderungen oder Modifikationen, die von der TOA Corporation
nicht ausdrücklich genehmigt wurden, einen Entzug der Betriebserlaubnis für dieses Gerät zur Folge haben.
• Der Betrieb muss die folgenden beiden Bedingungen erfüllen: (1) Dieses Gerät darf keine schädlichen
Störungen im Funkwellenempfang verursachen, und (2) dieses Gerät akzeptiert sämtliche empfangene
Störungen, einschließlich derer, die zu einem unerwünschten Betrieb führen können.
Beim Gebrauch des Mikrofons oder Senders
• Wenn das Gerät voraussichtlich 10 Tage oder länger nicht gebraucht wird, entfernen Sie unbedingt die Batterie
aus dem Gerät, da diese anderenfalls auslaufen, eine Verletzung oder Verschmutzung verursachen könnte.
• Achten Sie darauf, dass bei der Handhabung die nachstehenden Vorsichtsmaßregeln eingehalten werden,
um einen Brand oder eine Verletzung durch Auslaufen oder Bersten der Batterie zu vermeiden.
· Die Batterie nicht kurzschließen, zerlegen, erhitzen oder verbrennen.
· Batterie nicht direkt anlöten.
· Unbedingt eine Batterie des vorgeschriebenen Typs verwenden
· Beim Einlegen der Batterie in das Gerät auf korrekte Ausrichtung der Batteriepole (Plus und Minus) achten.
· Batterien nicht an Orten aufbewahren, wo sie direktem Sonnenlicht, hohen Temperaturen und hoher
Luftfeuchtigkeit ausgesetzt sind.
• Sollte die Batterie anschwellen oder auslaufen, sehen Sie sofort von einer weiteren Nutzung ab und ersetzen
sie durch eine neue.
WARNHINWEIS: Der Versuch, Änderungen oder Modifikationen am Gerät vorzunehmen, die nicht von der
zuständigen Stelle ausdrücklich genehmigt wurden, kann zu Schäden am Gerät führen und die Garantie erlischt.

16
2. ALLGEMEINE BESCHREIBUNG
TOA‘s TRANTEC Drahtlos-Mikrofonanlage der S4-Serie ist für den Betrieb mit dem UHF-Frequenzband
konzipiert und eignet sich für die Anwendungen zur Gesangs- oder Sprachbeschallung. Die Anlage verfügt
über eine Kompanderschaltung, mit der Einflüsse durch Geräusche aus der Umgebung minimiert werden.
S4.04: 4 vom Anwender wählbare Kanäle, die gleichzeitig betrieben werden können.
S4.10: Bis 16 vom Anwender wählbare Kanäle, die gleichzeitig betrieben werden können (je nach Region).
Drahtlose HDX-Handmikrofone der S4-Serie als Gesangsmikrofon mit einer feinen, kraftvollen und
dynamischen Mikrofonsprechstelle.
Drahtlose BTX-Taschensender der S4-Serie für den Betrieb mit den Lavaliermikrofonen und
Kopfbügelmikrofonen der TRANTEC-Serie.
Der RX-Drahtlos-Empfänger der S4-Serie ist ein Diversityempfänger zur Minimierung der Ausfälle.
3.
LEISTUNGSMERKMALE
• Ein optimierter PLL-Synthesizer sorgt für die Minimierung der Schwingungsfrequenzdrift durch
Schwankungen der Umgebungstemperaturen oder der Spannung.
• Die Betriebs-/Batterieanzeige signalisiert den nötigen Batteriewechsel bei deutlichem Spannungsabfall,
bevor die niedrige Spannung zu Fehlfunktionen führen kann.
• Für einen kontinuierlichen Betrieb von bis zu 10 Stunden mit einer einzigen AA-Alkalibatterie.
• Der HDX der S4-Serie besitzt eine eingebaute Antenne.
• Die Anzeige des RX-Empfängers der S4-Serie zeigt den Pegel des Batterieverbrauchs an.
• Schneller Sendersuchlauf und automatische Sendereinstellung.
• Automatische Kanalwahl über Infrarot.
• In kompakter Größe und mit hoher Zuverlässigkeit.
4. VORSICHTSMASSNAHMEN BEI DER HANDHABUNG
• Das Gerät darf niemals direktem Regen ausgesetzt werden. Aufstellorte, an denen das Gerät mit Wasser oder
anderen Flüssigkeiten bespritzt werden kann, sind zu vermeiden, da dies zu einer Fehlfunktion führen kann.
• Das Gehäuse des Geräts niemals öffnen oder entfernen, um Modifikationen am Gerät vorzunehmen. Lassen
Sie sämtliche Servicearbeiten bei Ihrem TOA-Händler in der Nähe durchführen.
• Lassen Sie das Gerät nicht auf den Boden fallen und vermeiden Sie starke Stöße gegen harte Gegenstände,
wodurch das Gerät beschädigt werden kann.
• Stellen Sie das Gerät nicht an Orten auf, an denen es hohen Temperaturen (z.B. in einem schlecht
klimatisierten Fahrzeug im Sommer) oder einer hohen Luftfeuchtigkeit ausgesetzt wird, da dies zu
Fehlfunktionen des Geräts führen kann.
• Betreiben Sie das Gerät nicht in Umgebungen, in denen es mit Seewasser in Berührung kommen kann.
• Vermeiden Sie es, ein Handy in unmittelbarer Umgebung des Drahtlos-Mikrofons zu benutzen, da dadurch
Störungen durch Nebengeräusche entstehen.
• Halten Sie das Gerät bei der Installation so weit wie möglich fern von Leuchtstofflampen, Digitalgeräten,
Personal Computern und anderen Geräten und Ausrüstungen, die ein Hochfrequenzrauschen erzeugen.
• Zum Sauberwischen verwenden Sie ein trockenes Tuch. Bei starken Verschmutzungen des Geräts wischen
Sie es sanft mit einem Tuch sauber, das Sie mit einem verdünnten neutralen Reinigungsmittel benetzt haben.
Danach mit einem trockenen Tuch trockenwischen. Niemals Benzol, Verdünner oder chemisch behandelte
Reinigungstücher verwenden.
• Beim Betrieb mit zwei oder mehr Drahtlos-Mikrofonen halten Sie diese in einem Abstand von mindestens 50
cm voneinander entfernt, um Fehlfunktionen oder ein Rauschen zu vermeiden.
• Halten Sie das Drahtlos-Mikrofon mindestens 3 m von der Empfangsantenne entfernt. Eine Benutzung des
Mikrofons in unmittelbarer Nähe zur Antenne kann eine Fehlfunktion oder ein Rauschen verursachen.

17
5. BEDIENELEMENTE UND FUNKTIONEN
Empfänger: S4.04-RX & S4.10-RXA
[Vorderseite]
1. Ein/Ausschalter
Zum Einschalten auf diese Taste drücken. Zum
Ausschalten drücken Sie erneut auf diese Taste.
2. Kanalwahltaste [SET]
Zum Wählen des Empfangskanals (Frequenz).
(Die Empfängerfrequenz muss mit jener des
Mikrofons übereinstimmen.)
3. Infrarot (IR)-Synchr.-Taste [SYNC]
Auf diese Taste drücken, um die Freqenz an den
Sender zu übertragen.
4. Empfängerlampen [A, B]
Entweder leuchtet die Lampe A (links) oder B
(rechts) gelb auf, wenn der Empfänger ein
passendes Funksignal vom Sender auffindet.
5. AF-Spitzenlampe [PEAK]
Leuchtet rot auf, wenn der Ausgangspegel des
Empfängers den Punkt ungefähr 3 dB unter dem
Begrenzungspegel erreicht.
6. Infrarot (IR)-Port [IR]
Beim Drücken auf die SYNC-Taste wird das
Infrarotsignal übertragen.
7. Numerische LED-Anzeige
Zeigt die aktuelle Kanalnummer im Normalstatus
an.
Im Einstellmodus blinkt die angezeigte
Kanalnummer bis zur Eintragung.
8. RF-Signalpegelmesser (nur S4.10-RXA)
Zeigt den RF-Meßpegel an.
9. Antennen (nur S4.04-RX)
Richten Sie beide Antennen in einem Winkel von
45° von einer vertikalen Linie nach außen.
Beim Tragen des Geräts achten Sie darauf, beide
Antennen nach unten zu halten, um zu vermeiden,
dass diese brechen können.
S4.04-RX
S4.10-RXA

18
[Rückseite]
10. DC-Eingangsbuchse
Das Netzkabel des mitgelieferten
Netzadapters mit dieser Buchse verbinden.
11. Kabelsicherung
Befestigen Sie hier das Kabel vom Netzteil.
12. AF-Ausgang
Symmetrische XLR-Buchse, Stecker (Stift #2:
Hot).
S4.04-RX: -20 dBu (max.).
S4.10-RXA: 16 dBu (max.).
13. AF-Ausgang
Unsymmetrischer Klinkenstecker.
S4.04-RX und S4.10-RXA: 10 dBu (max.).
14. Lautstärkeregler (nur S4.10-RXA)
Zum Einstellen des Ausgangspegels.
15. Antenneneingang A, B (nur S4.10-RXA)
BNC-Anschlüsse für die Antennen.
Phantomspeisung für die externe
Antenne (optional).
Für eine drahtlose Anlage in einem relativ
beengten Raum verwenden Sie die beiden
mitgelieferten Stabantennen, die von einer
vertikalen Linie in einem Winkel von 45° nach
außen asugerichtet werden können.
Hinweis Die S4.10-RXA-Empfängerverstärkung ist stufenlos einstellbar. Ein zu hohes Empfängersignal kann
zu Verzerrungen bei Ihrem Mischer/Verstärker führen. Ist das Signal zu niedrig, führt dies zu einer
Verstärkung der Hintergrundgeräusche. Beachten Sie die AF Leak LED am Empfänger und stellen
den Lautstärkeregler so lange ein, bis Sie die beste Signalqualität empfangen.
S4.04-RX
S4.10-RXA

19
Handmikrofon: S4.04-HDX & S4.10-HDX

20
Taschensender: S4.04-BTX & S4.10-BTX
This manual suits for next models
1
Table of contents
Languages:
Other Trantec Microphone System manuals
