Travesso Prima User manual

TM

Introducing the Prima
You are about to experience the next generation of portable espresso
machines. Now you can produce an amazingly consistent espresso
shot, rich with avor and thick and lasting crema – anytime, any-
where. Whether you are at home, or in the ofce, traveling the
world in luxury hotels or camping in remote places, the TravessoTM
Prima can travel with you so the road will never keep you from the
espresso you love!
The Beauty is in the Function
The Prima is portable, compact and easy to use. The patent pend-
ing process is the key to allowing the user the ability to control the
amount of pressure used and the ow rate of the extraction.
Travesso Cares About Our Customers
Thank you for purchasing the Prima. We invite you to leave feedback
or ask questions at info@travesso.com.
TM

TM

STEP 1
Ensure charger safety is on (“up” position). Thread the charger onto the
Schrader valve until it is snug, but do not over tighten. View video link for
demonstration on loading and operation of the CO2 charger:
Using the CO2 Charger - youtube.com/travessoprima

STEP 2
Lay unit and charger on at surface keeping charger
safety on (in “up” position).

STEP 3
Ensure Flow Valve on the lid is in the closed position.
To close – tighten valve knob in a clockwise direction until it stops
(be careful not to over tighten).
STEP 4
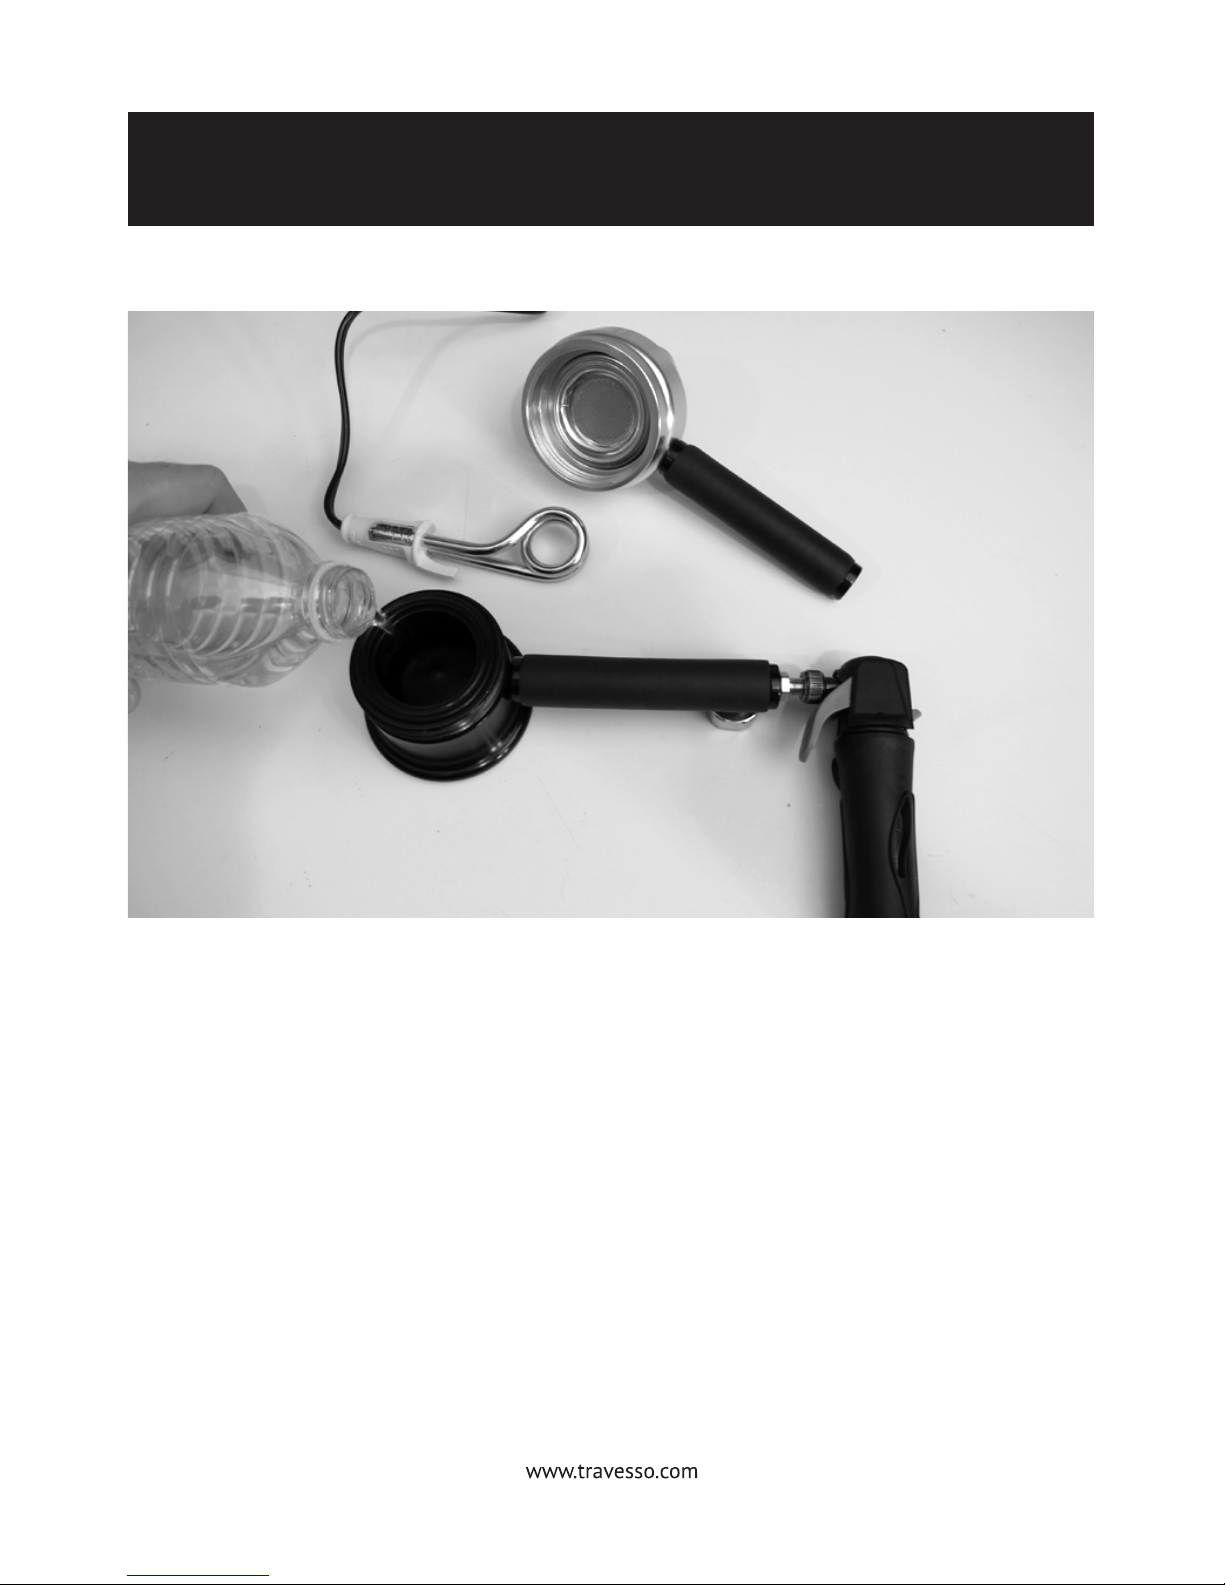
Fill reservoir about 80% of total volume. There are two methods for heating the water:
Method One - Pour boiling water directly into the reservoir.
Step 1. - Pre-heat reservoir by adding boiling water, wait 10 seconds, and discard water.
Step 2. - Immediately re-ll with new boiling water to approximately 80% of total
Reservoir volume. Proceed to Step 8
Method Two - Heat water directly inside the Reservoir using the immersion heater.
Proceed to Step 5
CAUTION:
Lid and Reservoir portion of base become very HOT. Use handles after preheating.

STEP 5
Place the immersion heater into the water and then plug heater
into the electrical outlet.
Using the Immersion Heater - youtube.com/travessoprima
CAUTION:
Plugging the immersion heater before placing the coil in the water will cause it to
overheat and cease function.

STEP 6
Water will be at a rolling boil after approximately two minutes.

STEP 7
Unplug the immersion heater rst, and then remove it from the water.
CAUTION:
Removing the immersion heater BEFORE unplugging will cause it to overheat and
cease function.

STEP 9
Making a Shot:
Choose pod and remove from foil. Pod tab can be trimmed or folded over -
this can obstruct the threads.
Position the pod on the base with the tapered side on the bottom as
shown above diagram.
Making an Espresso Shot - youtube.com/travessoprima

STEP 10
Afx and seal the lid by aligning the treads and rotating clockwise. You
will feel the lid and base snug after several rotations
(being careful not to overtighten).
CAUTION:
Keep unit level, the base will be hot.
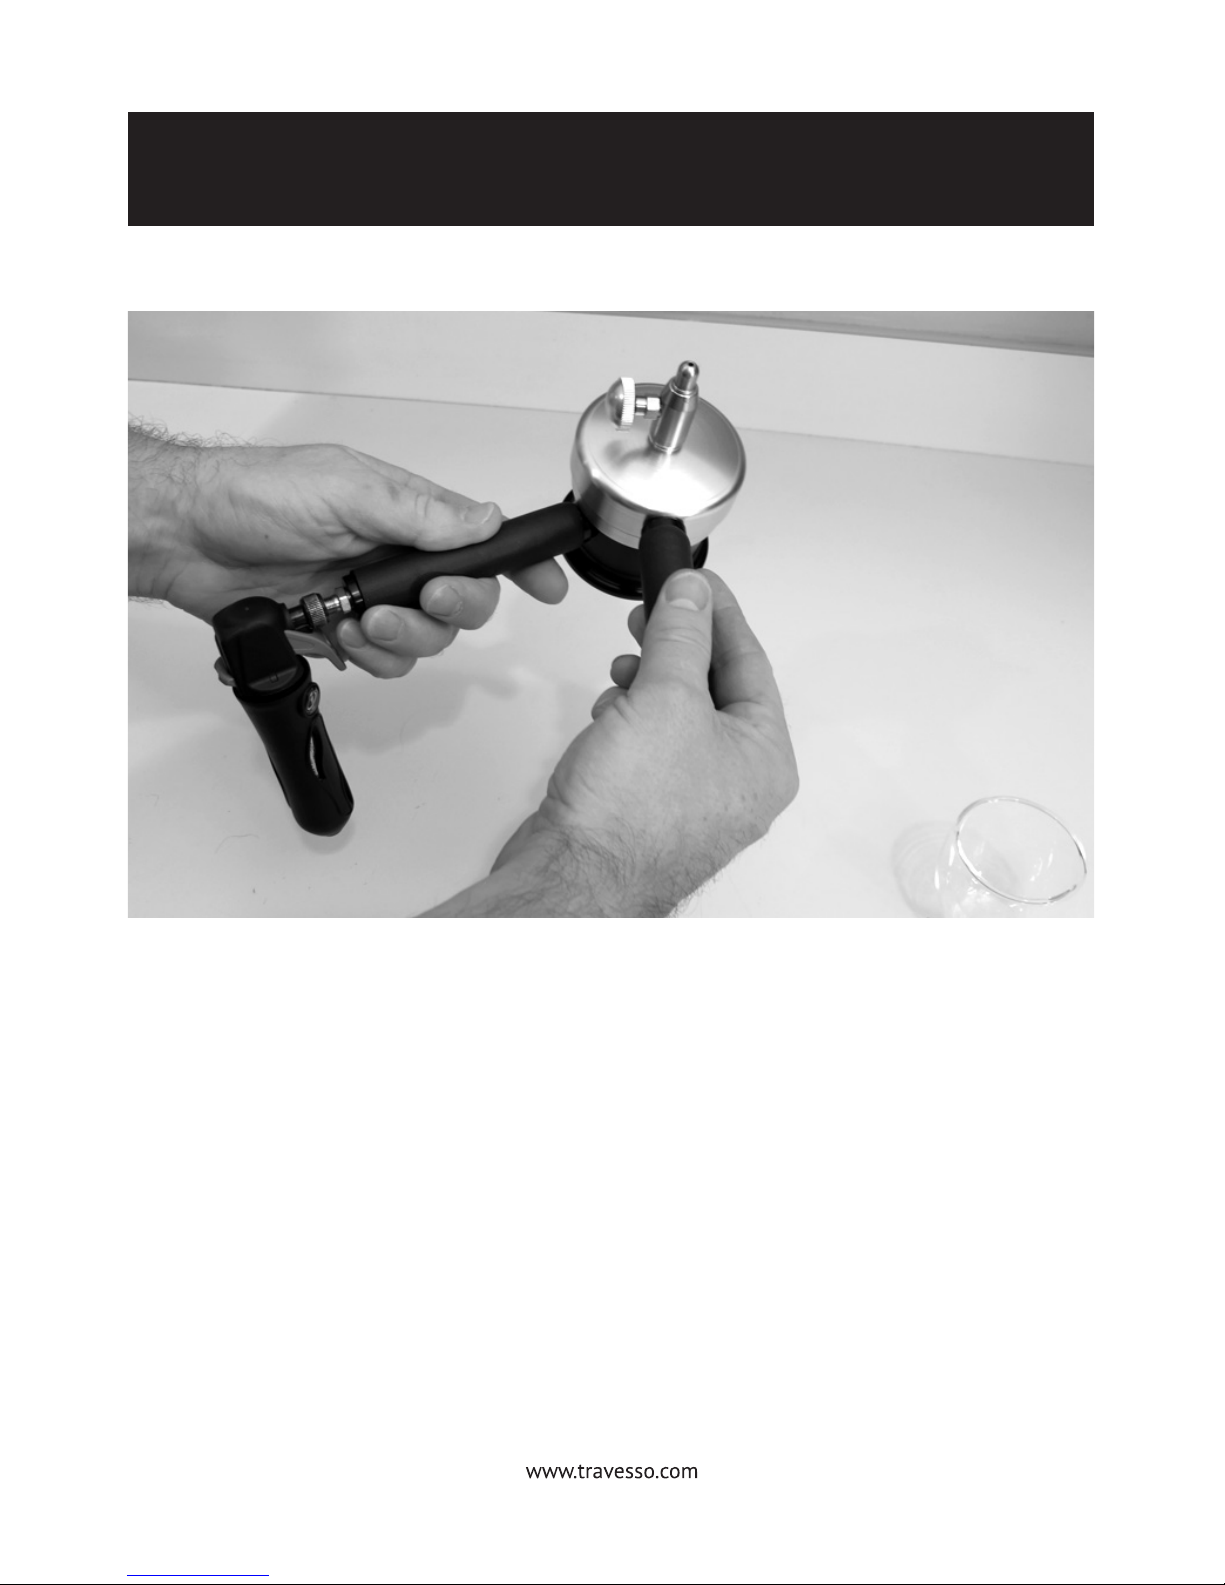
STEP 11
Seal the Unit:
Hold the handle of the base with one hand to stabilize the unit as you
tighten the lid with the lid’s upper handle. The handle’s orientation will be
at approximately a 45 to 90 degree angle from each other. Tighten a slight
bit more and the unit will seal. Do not over tighten.
CAUTION:
Unit base and lid will be hot

STEP 12
Brewing Process: Pre-soak
Gently turn the Prima over so the gauge is now facing up and the exit
valve is facing down. Pre-soak for 8 seconds.

STEP 13
Charging Process
CAUTION:
Before charging the unit, make sure the ow valve is in the closed posi-
tion (tighten knob in a clockwise direction until it stops). Make sure Safety
Switch on charger is in the down (or safety off) position.
Squeeze Charger Trigger lightly and watch the gauge as the pressure
slowly rises. Once the desired pressure is reached (we recommend
between 185 - 220), release the trigger and push the safety on the trigger
to the up (or safety on) position.

STEP 14
While keeping the unit in the inverted position, unscrew and
remove the charger.
High Pressure Steep:
Position nozzle over cup and allow content to steep for 8 seconds or more
before beginning extraction.
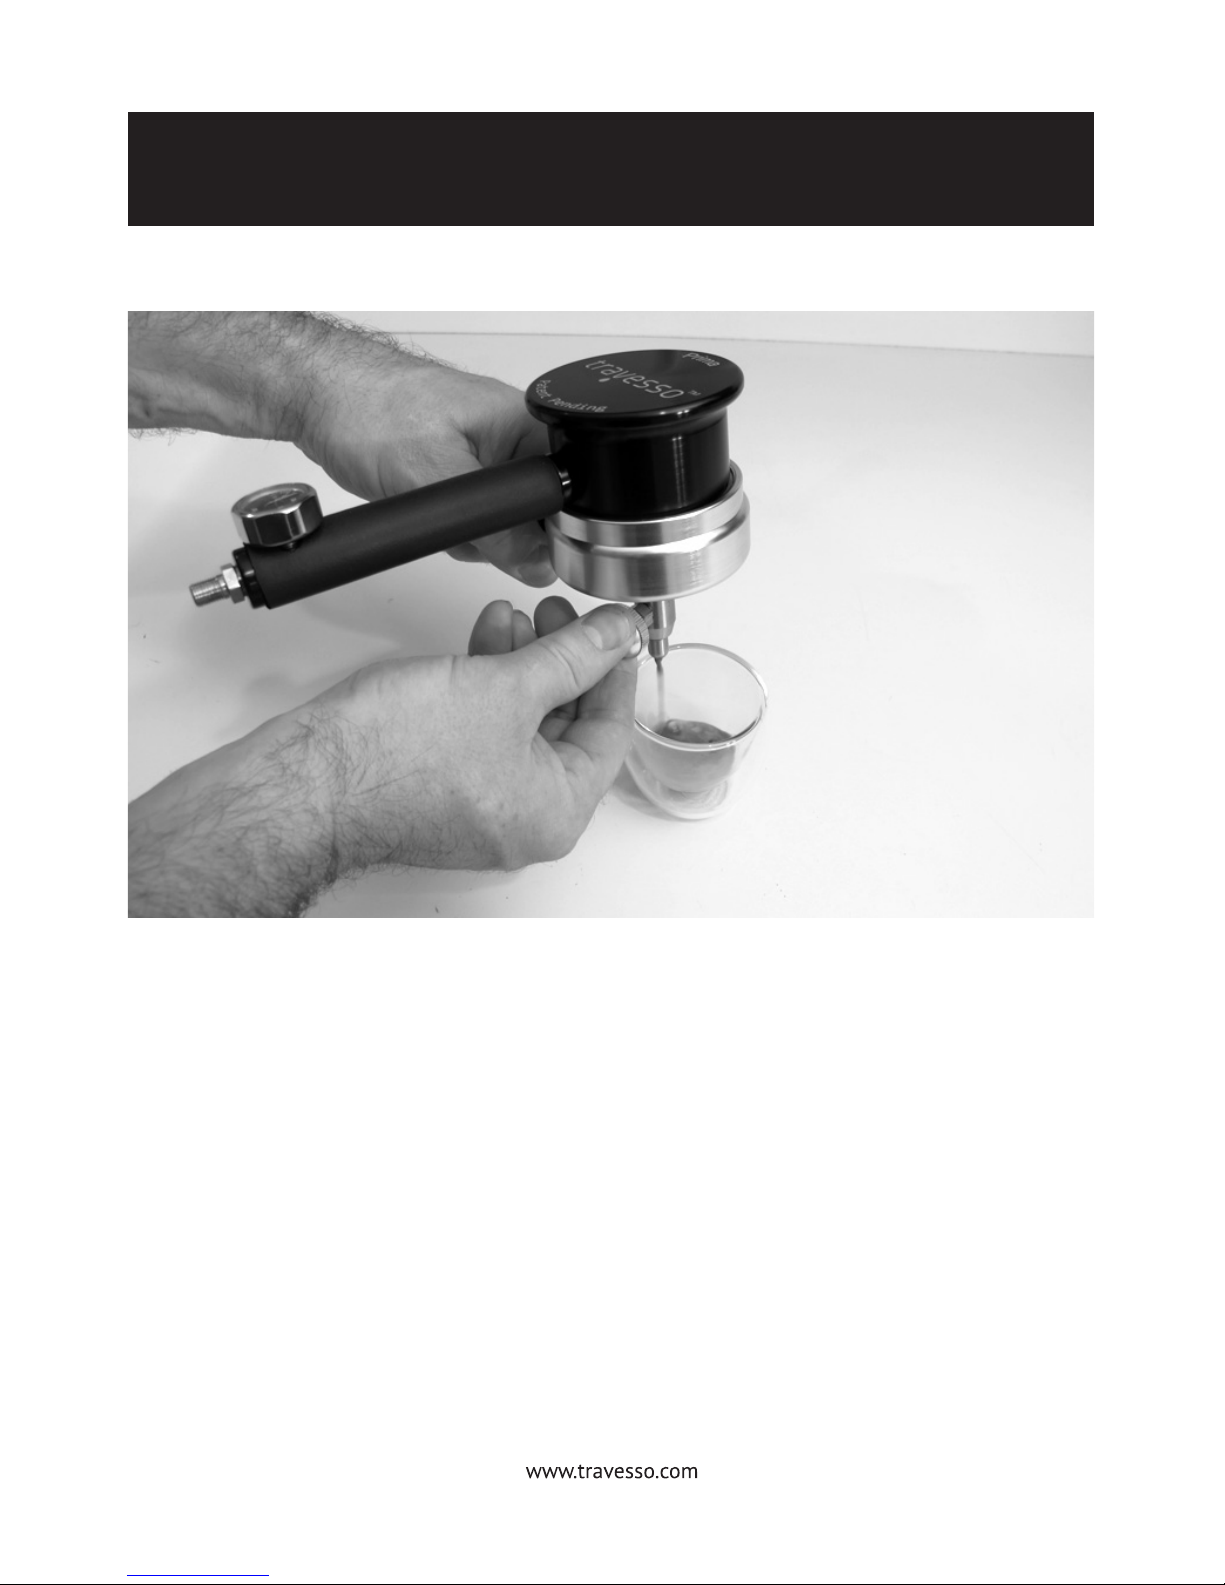
STEP 15
Extraction:
Position the exit valve over cup and slowly rotate the ow valve knob
counter clockwise to begin the extraction. Turn until a honey-like stream
begins to ow into the cup and adjust the ow to your preference
throughout the process.

STEP 16
The ow valve knob allows you to control the rate of ow – it also allows
the stopping and starting of the ow during the process, if needed.
Once approximately 1 ounce has entered the cup, you can choose to
continue or stop the ow. To stop the ow, turn the valve knob in a clock-
wise motion and the ow will stop. Do not overtighten.
Sip and Enjoy

STEP 17
Clean Out:
Hold unit pointed down over sink or appropriate discharge area and open
the exit valve completely. The Prima will vent out all excess water
and pressure.
Venting and Cleaning Your Prima After a Shot - youtube.com/travessoprima

STEP 18
Unscrew lid in a counter clockwise motion by placing the unit on a soft
towel and applying rm pressure to both handles
Table of contents
Popular Coffee Maker manuals by other brands


Gastroback
Gastroback DESIGN ESPRESSO PICCOLO PRO instruction manual

Aroma
Aroma Cappu-Latte AEM-646A instruction manual

Breville
Breville ESP6/8 Instructions for use

Krups
Krups Nescafe Dolce Gusto Lumio KP130110 Service manual

Cuisinart
Cuisinart Espresso Defined EM-25 Quick reference guide

9BARISTA
9BARISTA 9B user guide


