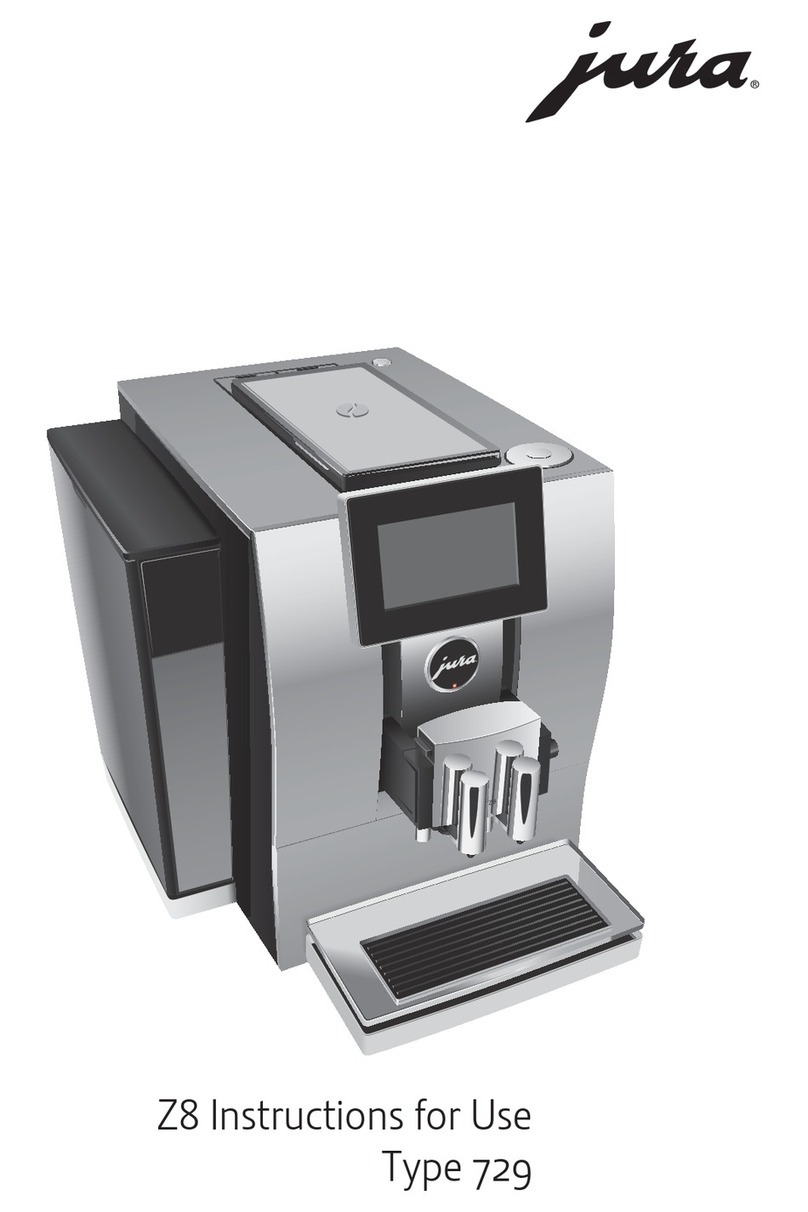
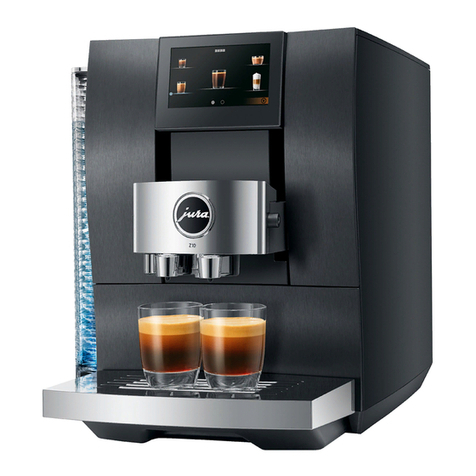
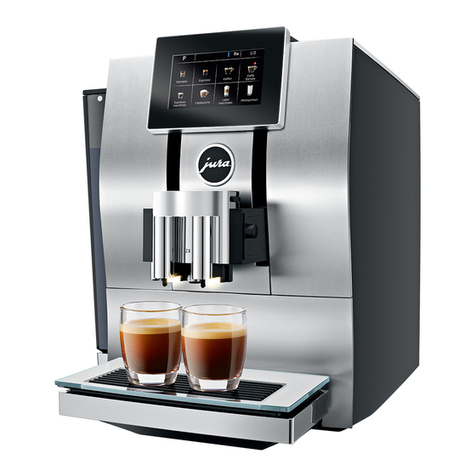
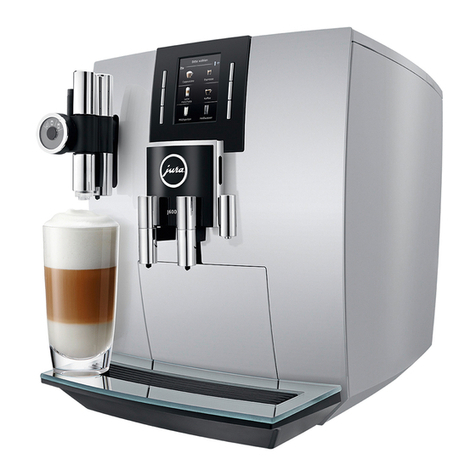
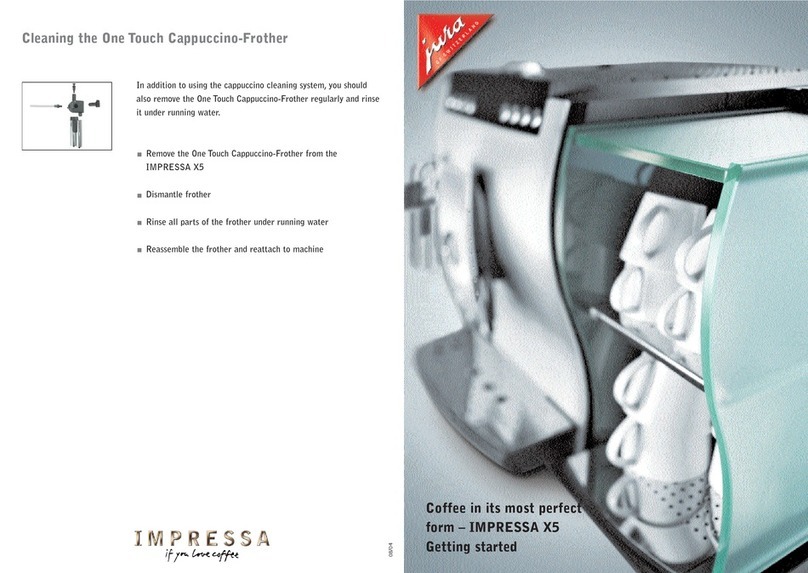
Jura IMPRESSA X9 Win User manual

The IMPRESSA X9 Wi n Manual
KOriginal inst ruct i ons for use
Bef ore usi ng t h e m achi ne read t he i nst ru ct i ons f or use.
JU RA Ty p e 6 5 7
The ‘IMPRESSA Manual’ has been awarded t he seal of approval by t he
independent German Technical Inspection Agency, TÜVSÜD, due to its
easy-to-underst and st yle, it s t horoughness and coverage of safet y
aspect s.
E

2
Yo u r I M PRESSA X9 Wi n
Con t r ol el em en t s 4
Proper use 6
Fo r yo u r saf et y 6
The IMPRESSA X9 Win Manual 8
Sy m b o l d escr i p t i o n . . .. .. .. . .. .. .. . .. .. . .. .. .. . .. .. .. . .. .. .. . .. .. .. . .. .. .. . .. .. .. . .. .. .. . .. .. .. . .. .. . .. .. .. . .. .. .. . .. .. .. . .. .. ............................8
1 I M PRESSA X9 W i n 9
A st ylish performance ..................................................................................................................................9
JU RA o n t h e I n t e r n e t . . . . . . . . . . . . . . . . . . . . . . . . . . . . . . . . . . . . . . . . . . . . . . . . . . . . . . . . . . . . . . . . . . . . . . . . . . . . . . . . . . . . . . . . . . . . . . . . . . . . . . . . . . ..........................10
2 Preparing and using for t he first time 11
St an d ar d p r o d u ct s ... ... ... ... ... .... ... ... ... ... .... ... ... ... ... .... ... ... ... ... .... ... ... ... ... .... ... ... ... ... ... .... ... ... ............................11
Set t i n g u p . .. . .. . .. . .. .. .. .. .. . .. .. .. .. .. . .. .. .. .. .. . .. .. .. .. .. . .. .. .. .. .. . .. .. .. .. .. . .. .. .. .. .. . .. .. .. .. .. . .. .. .. .. .. . .. .. .. ....................................11
Fi l l i n g t he wat er t an k ...................................................................................................................................12
Fi l l i ng t he bean cont ai ner ...........................................................................................................................12
Fi r st - t i m e use ................................................................................................................................................12
Inserting and activating the filter cartridge............................................................................................14
Determining and adjusting the degree of water hardness ..................................................................14
Adj ust ing t he grinder ..................................................................................................................................16
Sw i t ch i n g o n . . . . . . . . . . . . . . . . . . . . . . . . . . . . . . . . . . . . . . . . . . . . . . . . . . . . . . . . . . . . . . . . . . . . . . . . . . . . . . . . . . . . . . . . . . . . . . . . . . . . . . . . . . . . . . . . . . ...............................17
Sw i t ch i n g o f f ( st an d b y ) . . . . . . . . . . . . . . . . . . . . . . . . . . . . . . . . . . . . . . . . . . . . . . . . . . . . . . . . . . . . . . . . . . . . . . . . . . . . . . . . . . . . . . . . . . . . . . . . . . . . . . . ........................17
3 Familiarising yourself wit h t he cont rol opt ions 18
Preparat i on at t he t ouch of a but t on........................................................................................................18
Per m an ent set t i ngs i n pr o gram m i n g m o de ...........................................................................................19
Vi ewi ng i n for m at i on and m ai nt enan ce st at us ......................................................................................20
Reset t i n g t h e co u n t er . . . . . . . . . . . . . . . . . . . . . . . . . . . . . . . . . . . . . . . . . . . . . . . . . . . . . . . . . . . . . . . . . . . . . . . . . . . . . . . . . . . . . . . . . . . . . . . . . . . . . . . . . .........................21
4 Preparation at the touch of a button 22
Esp r esso . .. ... ... ... ... ... .... ... ... ... ... ... .... ... ... ... ... .... ... ... ... ... .... ... ... ... ... .... ... ... ... ... .... ... ... ... ... ...................................22
Cof f ee ............................................................................................................................................................22
Cappu cci no, m i l ky cof f ee and l at t e m acch i at o......................................................................................23
Hot milk ........................................................................................................................................................23
Hot water ......................................................................................................................................................24
St eam . . . ..... . . . . ..... . . . . . ..... . . . . ..... . . . . . ..... . . . . ..... . . . . . .... . . . . . ..... . . . . . .... . . . . . ..... . . . . ..... . . . . . ..... . . . . ..... ...................................24
5 Permanent settings in programming mode 25
Product set t i ngs ..........................................................................................................................................25
Time and weekday ......................................................................................................................................26
Timer .............................................................................................................................................................26
Aut omat i c swit ch-of f ..................................................................................................................................28
Tab l e o f co n t en t s
3
Tab l e o f co n t en t s
Language......................................................................................................................................................29
Fo r m at ( u n i t o f wat er am o u n t an d t i m e f o r m at ) . .. .. .. .. .. .. .. .. .. .. . .. .. .. .. .. .. .. .. .. .. .. .. .. . .. .. .. .. .. .. .. .. .. .. .. .. .. . .. .. ..29
Sw i t ch - o n r i n se . . . . . . . . . . . . . . . . . . . . . . . . . . . . . . . . . . . . . . . . . . . . . . . . . . . . . . . . . . . . . . . . . . . . . . . . . . . . . . . . . . . . . . . . . . . . . . . . . . . . . . . . . . . . . . . .............................30
Multimedia...................................................................................................................................................30
6 Maintenance 32
Maintenance tips.........................................................................................................................................32
Ri n si n g t h e m ach i n e . . . . . . . . . . . . . . . . . . . . . . . . . . . . . . . . . . . . . . . . . . . . . . . . . . . . . . . . . . . . . . . . . . . . . . . . . . . . . . . . . . . . . . . . . . . . . . . . . . . . . . . . . . . ........................32
Dismantling and rinsing t he dual spout .................................................................................................33
Milk system cleaning..................................................................................................................................33
Cof f ee syst em cl ean i ng ..............................................................................................................................34
Com bi ned cl ean i ng .....................................................................................................................................35
Chan g i n g t h e f i l t er ...... ................................................................................................................................ 37
Descaling t he machine...............................................................................................................................38
Cl ean i n g t h e b ean co n t ai n er .................................................................................. ...................................40
Descaling t he water t ank ...........................................................................................................................40
7 Display messages 42
8 Troubleshooting 44
9 Transport and environmentally neutral disposal 46
Tr an sp o r t / em p t y i n g t h e sy st em . . .. .. . .. .. .. . .. .. . .. .. . .. .. .. . .. .. . .. .. . .. .. .. . .. .. . .. .. . .. .. . .. .. .. . .. .. . .. .. . .. .. .. . .. .. . .. ..............46
Disposal.........................................................................................................................................................46
10 Te c h n i c a l d a t a 47
Index 48
JU RA c o n t a c t d e t a i l s / Le g a l i n f o r m a t i o n 52

4
Co n t r o l el e m en t s
Co n t r o l el em en t s
Fi gur e: IM PRESSA X9 Wi n Pl at i num
1 Be a n c o n t a i n e r w i t h c o v e r
2 Cup t ray
3 Power switch and power cable (back of
machine)
4 Dual spout (height adjustable)
5 Milk pipes
6 Coffee grounds container
7 Filler funnel for cleaning t ablet
8 Cover for programming buttons
9 Water tank with cover
10 H o t w a t e r p i p e ( p i v o t i n g )
11 St e a m p i p e ( p i v o t i n g )
12 Cu p p l a t f o r m
13 D r i p t r a y
2
1
9
11
10
13
12
4
8
5
6
3
7
Open t he cover

5
Co n t r o l el e m en t s
1 D i s p l a y
2 Product but tons (st andard product s):
1espressobutton
1coffeebutton
2 coffee button
Milk foam button
Cappu cci no b u t t on
Lat t e macchiat o but t on
Milkcoffeebutton
Milkbutton
(Theproductsareshownonthedisplay.)
3 Programming butt ons:
Q On/off but t on
$ Fi l t er b ut t on
$ Descaling button
9Counterbutton
OPbutton
++button
cRinsebutton
6Milksystemcleaningbutton
7Coffeesystemcleaningbutton
8Combinedcleaningbutton
0Exitbutton
--button
4 m Hot water button
5 nSteambutton
Fr o n t l ef t Fr o n t r i g h t
1
4
2 3
5

6
Important notes
The machine is desi gned and i nt ended for commercial use. It should
only be used to prepare coffee and to heat milk and water. Use for
any ot her purpose will be deemed improper. JURA Elekt roappa-
rate AG cannot accept any responsibility for the consequences of
improper use.
Bef o re usi ng t he m achi ne al ways car ef ul l y r ead and com pl y wi t h
theseinstructions.KeepthismanualclosetotheIMPRESSAandpass
it on to the next user if applicable.
The IMPRESSA may only be operat ed by inst ruct ed persons.
Always read t he following safet y inst ruct i ons carefully.
To p r ev en t p o t en t i al l y f at al el ect r i c sh o ck s:
ZNever use a machine which has been damaged or has a defec-
tivepower cable.
ZFo r i n f o r m at i o n o n w h at t o d o i n case o f d am ag e, f o r ex am p l e
if thereisasmell of burning,unplugthemachineimmediately
from the mainssupply and contact the JURAservicecentre.
ZIf the power cable for this machine is damaged, it must be
repaired either directly by JURA or by a JURA authorised ser-
vice centre.
ZMake sure that the IMPRESSA and the power cable are not
located close to hot surfaces.
ZEn su r e t h at t h e p o wer cab l e i s n o t t r ap p ed i n an y way an d
does not rub against sharp edges.
ZNever open and repair t he machine yourself. Do not modif y
themachineinanywaythat isnot described intheIMPRESSA
Manual. The machine contains live parts. If opened, there is a
danger of serious injury. Repairs may only be carried out by
authorised JURA service centres, using original spare parts
and accessories.
It is possible to scald or burn oneself on the spouts, on the hot water
pipe and steam pipe:
ZPl ace t he m achi ne out of t he reach of chi l dren.
ZDo not touch any hot part s. Use t he handles provided.
Fo r yo u r saf et y
Pr op er u se

7
Important notes
A defect ive machi ne is not safe and could cause injur y or fire. To
avoid damage and any associat ed risk of injury or fire:
ZNever allow t he power cable t o t rail, as someone could t rip
over the power cable and/or it could get damaged.
ZPr ot ect your IMPRESSA f rom envi ronm ent al i n f luences such
as rain, frost and direct sunlight .
ZDo not put t he IMPRESSA, cable or connections in water.
ZNever put t he IMPRESSA or it s component s int o t he dish-
washer.
ZTu r n yo u r I M PRESSA o f f at t h e p o wer sw i t ch b ef o r e cl ean i n g
themachine. Alwayswipeyour IMPRESSAwith adamp cloth
rather than a wet one, and protect it from prolonged water
splash.
ZDo not set up t he IMPRESSA anywhere where a jet of water
may be used.
ZOnly connect t he machine t o a power supply in accordance
with the information on the rating plate. The rating plate is
located on the rear of your IMPRESSA. Further technical data
isgiven in Chapter 10 ‘Technical Data’.
ZUse only original JURA care product s. Use of accessories t hat
are not expli cit ly recommended by JURA could damage t he
IMPRESSA.
ZDo not use any coffee beans treated wit h addit ives or carame-
lised coffee beans.
ZOnl y fill t he wat er t ank wit h fresh, cold wat er.
ZSw i t ch t h e m ach i n e o f f at t h e p o wer sw i t ch i f y o u ar e ab sen t
for long periodsof time.
Using the CLARIS filt er cart ridge safely:
ZKeep t h e f i l t er car t r i d g es o u t o f t h e r each o f ch i l d r en .
ZSt o r e t h e f i l t er car t r i d g es i n a d r y p l ace i n t h e seal ed
package.
ZPr ot ect t h e f i l t er car t r i dges f r om heat and di rect sunl i ght .
ZNever use any damaged filt er cart ridges.
ZNever open filt er cart ridges.

8
The IMPRESSA X9 Wi n Manual
Yo u ar e h o l d i n g t h e m an u al f o r y o u r I M PRESSA X9 Wi n i n y o u r h an d .
It will help you to familiarizeyourself with your IMPRESSAsafely and
quickly and teach you the full range of facilities it offers.
Chap t er 2, ‘ Pr ep ar i ng an d u si n g f or t he f i r st t i m e’ , exp l ai n s st ep - by -
st ep how t o set up and prepare t he IMPRESSA.
Chap t er 3, ‘ Fam i l i ar i si n g yo u r sel f wi t h t h e co n t r ol o p t i o n s’ i s i m por-
tant for you to read as you are familiarising yourself with your
I M PRESSA . I t i n v i t e s y o u t o a c t i v e l y e x p l o r e a l l t h e d i f f e r e n t c o f f e e
experiences t hat it offers.
All t he ot her chapt ers are int ended t o help you when you have a
s p e c i f i c q u e r y .
If you use the IMPRESSA X9 Win, you will become a master at
p r e p a r i n g e x c i t i n g c o f f e e s p e c i a l i t i e s , y o u w i l l b e a Ba r i s t a !
Yo u can d o w n l o ad t h e sh o r t o p er at i n g i n st r u c t i o n s f o r y o u r m ach i n e
from theJURAwebsite (www.jura.com).
The IMPRESSA X9 Wi n Manual
Sy m b o l d escr i p t i o n
War ni ngs
CAUTI ON
Always t ake not e of any informat ion marked wit h t he CAUTION or WARNING symbol.
The si gnal word WARNI NG points out potential risk of serious injury, and the signal
word CAUTI ON potential risk of slight injury.
CAUTI ON The CAUTI ON symbol is used to draw attention to circumstances which could cause
themachineto becomedamaged.
Sy m b o l s u sed
EInformation and tips to make things easier for you as you use your IMPRESSA.
@Ref er en ces t o t h e online JURA website, where you can find interesting further infor-
mation: www.jura.com.
TPr o m p t t o t ak e act i o n . This symbol means that you are being prompted to perform
some act ion.

9
1 I M PRESSA X 9 W i n
Wit h it s elegant design and highest-qualit y mat erials, t his luxur y
machine with its cool Nordic style not only has an appealing exte-
rior, but easily fulfils the most sophisticated coffee wishes of cus-
tomers,guestsandcolleagues.Inadditiontosuchclassicspecialities
such as rist ret t o, espresso and coffee, t he IMPRESSA X9 Wi n also
makes contemporary drinks such as cappuccino or latte macchiato
at t he t ouch of a but t on.
In addition to its unique design and the variety of product options,
the TFTscreen also permitsadScreen advertising. Thisis useful at
the POSwhere eight of ten purchasing decisions are made, or in
seminar cent res, where at t endees can be informed about addit ional
offers. You too can give your customers that decisive impetus, and
motivate your target group to make spontaneous extra purchases.
The IMPRESSA X9 Win i s t remendous for all kinds of appli cat i ons!
ZSi m p l e o p er at i o n w i t h ‘ Sm ar t Lead ’ : ‘Smart Lead’, the inter-
act ive JURA user guidance wit h visual and audio feat ures,
guides personnel through all operating and care steps. This
makes maintenance simple and prevents incorrect interven-
tion. From filling of the water tank through to cleaning –
‘Smart Lead’ demonstrates each step with visual and audio
output. The user is guided through the complete procedure,
which simplifies the process and minimises errors. This pre-
vents unnecessary service costs and loss of turnover caused
by machine errors.
ZCo f f ee sp eci al i t i es: The IMPRESSA X9 Win makes more than
20 coffee specialit ies, all of which can be adapted to suit your
own personal preferences. The3.5 inch TFTdisplay guidesyou
throughtotherequiredcoffeespecialityandoffersyoucoffee
enjoyment at the touch of a butt on. Wit h ristretto, espresso,
regular coffee, milky coffee, coffee in a glass, cappuccino or a
trendy lattemacchiato: Let your tastemakethedecision! Up
to 100 cupscan beprepared each day with ease.
A st yl ish per f or mance
1 I M PRESSA X 9 W i n

10
1 I M PRESSA X 9 W i n
ZPr o gr am m i n g : When t he chrome-plated programming cover
elegant ly slides upwards, it reveals t he programming panel
with the various setting options. The cleaning, rinsing and
descaling programmes are also start ed from here, and the
integrated cup counter can also be activated. Would you like
to restrict the programming options to a specific group of
users?No problem: Simply generate code groups.
ZCu st o m i sab l e: The setting options of the IMPRESSA X9 Win
are just as varied as t he wishes of our customers. The machine
can therefore be equipped with a number of different acces-
sories. These include a permanent wat er connect ion, a wide
range of vending systems, amatching cup warmer or a refrig-
erator for the milk. Request our full-range brochure and con-
tact an authorised dealer for advice.
Vi si t us on t h e Int ernet .
@Atwww.jura.comyouwillfindinterestingandup-to-date
information on your IMPRESSA and on every aspect of
coffee.
JU RA o n t h e I n t e r n e t

11
2 Preparing and using for t he f irst t ime
This chapt er provides you wi t h t he i nformat ion you need t o use your
IMPRESSA without any problems. You will prepare your IMPRESSA
st ep-by-st ep for your first coffee experi ence.
Yo u r I M PRESSA i s su p p l i ed w i t h t h e f o l l o w i n g p r o d u c t s as st an d -
ard:
Z1 e s p r e s s o
Z1 c o f f e e
Z2 coffees
ZMilk foam
ZCap pucci n o
ZLat t e macchiat o
ZMilky coffee
ZMilk
Thefollowing settingscan only bemadeby theJURAservicetechni-
cian:
ZCu st o m i sed p r o d u ct p r o g r am m i n g . Th e st an d ar d p r o d u ct s
can be replaced by:
U2 espressi, 1ristretto, 2 ristretti, small pot, macchiato, milky
coffee, hot water, steam, 2x
UGr i nd er sel ect i on or ri nse b ut t o n (al l but t o ns can be
arranged to preference)
ZBl ocki n g pr oduct s
ZSet t i n g t he f i l t er cap aci t y
ZAssigning code groups: Three code groups can be assigned.
The respect i ve code groups correspond t o dif ferent aut horisa-
tions. It can be defined, for example, that the programming
mode of the maintenance programmesisblocked by a code.
When set t ing up your IMPRESSA, please not e t he following:
ZPl ace t he IMPRESSA on a hori zont al sur f ace t hat i s not sensi -
tiveto water.
ZCh o o se a sp ot f or yo u r IM PRESSA wh i ch i s pr o t ect ed ag ai n st
overheating. Ensure that the ventilation slots are not cov-
ered.
St an d ar d p r o d u c t s
Set t i n g s b y t h e JURA ser v i ce
technician
Set t i n g u p
2 Preparing and using for t he first t ime

12
2 Preparing and using for t he f irst t ime
To en j o y p er f ect co f f ee, w e r eco m m en d ch an g i n g t h e wat er ev er y
day.
Milk, mineral water or other liquids can damage the water tank or
themachine.
TOnly fi ll t he wat er t ank wit h fresh, cold wat er.
TRem o v e t h e co v er o f t h e w at er t an k .
TRem o v e t h e w at er t an k an d r i n se i t w i t h co l d w at er.
TFi l l t he wat er t ank wi t h f resh, col d wat er and r ei nser t . It m ust
snap firml y int o place.
TRep l ace t h e co v er o n t h e w at er t an k .
EYo u can al so f i l l t h e w at er t an k w i t h o u t r e m o v i n g i t . To t h i s
purpose remove the cover of the water tank and use a recep-
tacleto fill thewater tank from abovewith fresh, cold water.
Yo u r I M PRESSA f eat u r es t w o b ean co n t ai n er s. Yo u t h er ef o r e h av e
theoptionof usingtwotypesof coffeebeans.Thecover of thebean
container also actsasan aromapreservation cover. Thiswill ensure
that your coffeebeansretain their aromafor longer.
Cof f ee bean s wh i ch h ave been t r eat ed wi t h addi t i ves (e.g. sug ar ),
pre-ground or freeze-dried coffee will damage the grinder.
TOnly use unt reated coffee beans t o refill t he bean cont ainer.
TRem o v e t h e co v er o f t h e b e an co n t ai n er.
TRem o v e an y d i r t o r f o r ei g n o b j ec t s i n si d e t h e b ean co n -
tainer.
TFi l l t he b ean co nt ai ner wi t h cof f ee beans.
TRep l ace t h e co v er o n t h e b ean co n t ai n er.
If the machine is operated with a defective power cable, there is a
danger of electric shock.
TNever use a machine which has a defect ive power cable.
Pr econ d i t i o n : The water tank and bean container are full.
TInsert the mains plug into a power socket.
Fi l l i n g t h e w at er t an k
CAUTI ON
Fi l l i n g t h e b ean co n -
tainer
CAUTI ON
Fi r st - t i m e u se
WARNI NG

13
2 Preparing and using for t he f irst t ime
3 T Switch on theIMPRESSAusing thepower switch on theback
of the machine.
TOpen t he cover of t he programming but t ons.
Q T Pressthe on/off button to switch theIMPRESSAon.
SPRACHE DEUTSCH ap p ear s o n t h e d i sp l ay.
TPress t he + or - but t on several t i m es unt i l t he desi r ed l an-
guage is displayed. For Example: LANGUAGEENGLISH
O T Pressthe Pbutton to confirm thelanguage.
CONFI RM ED ap p ear s b r i ef l y o n t h e d i sp l ay t o co n f i r m t h e
set t ing.
EYo u h av e n o w set t h e language of the machine. The lan-
guage of the film clipscan be set in programming mode with
theMULTIMEDIALANGUAGEoption.
TIME HOURS --:--
TPress t he + or - but t on several t i m es t o set t he hour s.
TIME HOURS 12:00 (Example)
O T Pressthe Pbutton to confirm thehour setting.
TIME MINUTES 12:00 (Example)
TPress t he + or - but t on t o set t he m i nut es.
TIME MINUTES 12:45 (Example)
O T Pressthe Pbutton to confirm theminute setting.
CONFI RM ED ap p ear s b r i ef l y o n t h e d i sp l ay.
WEEKDAY MONDAY
TPress t he + or - but t on several t i m es t o set t he weekday.
WEEKDAY WEDNESDAY (Example)
O T Pressthe Pbutton to confirm theweekday setting.
CONFI RM ED an d WELCOM E TO JURA ap p ear b r i ef l y o n t h e
display. PRESSRINSEBUTTON is then displayed.
c T Pressthe rinse button.
SYSTEM FI LLS, t h e sy st em i s f i l l ed w i t h wat er. A sm al l am o u n t
of water flowsfrom thehot water spout. Theoperation stops
aut omat ically. Aft er heat ing, PRESS RINSE BUTTON is dis-
played.

14
2 Preparing and using for t he f irst t ime
c T Pressthe rinse button to start the rinse operation.
MACHINEISRINSING, water flowsout of the dual spout. The
operation stops automatically. Your IMPRESSA is ready for
operation.
EAf t er f irst-t i me use do not di sconnect t he IMPRESSA from t he
power supply for 24 hoursto ensure that it is in the optimum
operating condition.
EWhen a cof fee specialit y has been prepared for t he f irst t ime,
it is possible that FILL BEANSis shown on the display as the
grinder has not yet been completely filled with coffee beans.
In this case prepare a different coffee specialit y.
EIf you have not been able to use the machine for the first time
correctlyandfully,contact your JURAservicepartner.Thecon-
tact detailsaregiveninthe‘JURAcontacts’ sectiononthelast
page of these instructions.
Yo u r I M PRESSA n o l o n g er h as t o b e d escal ed i f y o u ar e u si n g t h e
CLARIS f i l t er car t r i dg e.
EThe CLARIS fi lt er cart ridge must be inst alled for t he first t i me
by aservicetechnician. Please contact your JURAservicepart-
ner.
Wat er i s h eat ed i n t he IMPRESSA. Thi s r esul t s i n a bui l d- up of l i m es-
cale over time. The harder t he water, the more frequently t he
machine needs to be descaled. For this reason it is important to
select t he correct set t ing on t he IMPRESSA for t he wat er hardness of
theused water.
The wat er hardness can be adjust ed on a cont inuous scale bet ween
1° d H a n d 3 0 ° d H . T h i s c a n a l s o b e d e a c t i v a t e d , w h i c h m e a n s t h a t
theIMPRESSAwill not let you knowwhen it hasto bedescaled.
EHowever, if you are using t he CLARIS filter cartridge and it is
activated, you will not be able t o adjust t he water hardness.
Inserting and activat-
ing the filter cartridge
Det ermining and
adjust ing t he degree of
water hardness

15
2 Preparing and using for t he f irst t ime
Yo u can f i n d o u t w h at t h e wat er h ar d n ess i s b y u si n g t h e Aq u ad u r ®
test strip supplied asstandard.
THold the test strip briefly (for one second) under flowing
water. Shake off the water.
TWai t f or about one m i nut e.
TYo u w i l l t h en b e ab l e t o r ead t h e d eg r ee o f w at er h ar d n ess
from the discolouration of the Aquadur®test strip and the
description on the packaging.
Yo u can n o w ad j u st t h e w at er h ar d n ess.
Exam p l e: To change the water hardness from 16° dH to 25° dH, pro-
ceed as follows:
Pr econ d i t i o n : Your IMPRESSA is ready for operation.
TOpen t he cover of t he programming but t ons.
O T Press the P button until WATER HARDNESS 16° dH
appears.
O T Pressthe Pbutton to enter the programme item.
WATER HARDNESS 16° dH
TPress t he + but t on several t i m es t o sel ect t he wat er har d -
ness.
WATER HARDNESS 25° d H (exam pl e)
O T Pressthe Pbutton to confirm thesetting.
CONFI RM ED ap p ear s b r i ef l y o n t h e d i sp l ay.
WATER HARDNESS 25° dH
0 T Presstheexit button to exit programming mode.
Yo u r I M PRESSA i s o n ce m o r e r ead y f o r o p er at i o n .
Det ermining t he wat er
hardness
Adj ust i ng t he wat er
hardness

16
2 Preparing and using for t he f irst t ime
Bot h gr i nder s can be adj u st ed on a cont i n uou s scal e t o sui t t he r oast
of the respective coffee blend.
If you adjust the fineness of grind when the grinder is not in opera-
tion, thesetting ring could bedamaged.
TOnly adjust t he f ineness of grind when t he grinder is
running.
The fineness of grind set t i ng is correct if t he cof fee flows regul arl y
from thecoffeespout. In addition, a fine, dense cremaisformed.
Our recommendat ions:
ZSel ect a f i n e set t i n g f o r a l i g h t r o ast .
UIf the fineness of grind is too fine, the coffee only drips from
thecoffeespout.
ZSel ect a co ar se set t i n g f o r a d ar ker r o ast .
UIf the fineness of grind is too coarse, the coffee flows too
quickly from the coffee spout.
Exam p l e: To change the fineness of grind during coffee preparation,
proceed as follows:
Pr econ d i t i o n : Your IMPRESSA is ready for operation.
TPl ace a cu p under t he d ual spout .
TPress t he 1cof f ee but t on.
The gri nder st ar t s and 1COFFEE is displayed.
TSet t h e set t i n g r i n g o n t h e b ean co n t ai n er t o t h e r eq u i r ed
position while the grinder is running.
The coff ee wi ll be prepared and t he fineness of grind i s
adjusted.
Adj ust i ng t he gr i nder
CAUTI ON

17
2 Preparing and using for t he f irst t ime
When t he IMPRESSA is swit ched on, a prompt for t he rinse operat ion
aut omat i cally appears which is init iat ed by pressing t he rinse but-
ton.
This set t ing can be changed in programming mode so t hat t he
machine automatically activatesthe switch-on rinse (see Chapter 5
‘Permanent settingsin programming mode– Switch-on rinse’).
Pr econ d i t i o n : Your IMPRESSA is switched on at the power switch.
TOpen t he cover of t he programming but t ons.
Q T Pressthe on/off button to switch theIMPRESSAon.
WELCOME TO JURA appears brief ly on t he display. Af t er
heating, PRESSRINSEBUTTON is displayed.
c T Pressthe rinse button to start the rinse operation.
MACHINEISRINSING, water flowsout of the dual spout. The
operation stops automatically. Your IMPRESSA is ready for
operation.
When you switch your IMPRESSA off, the spout s wit h which a coffee
specialit y or milk have been prepared are rinsed. If only hot water or
st eam was prepared, t he machine swi t ches off wit hout rinsing.
Pr econ d i t i o n : Your IMPRESSA is ready for operation.
TOpen t he cover of t he programming but t ons.
Q T Pressthe on/off button to switch theIMPRESSAoff.
GOODBYE ap p ear s on t h e di spl ay. Th e m ach i n e i s r i nsed ,
water flows out of the dual spout. The operation stops auto-
matically, the IMPRESSAis switched off (standby).
ETo d i sco n n ect t h e m ach i n e co m p l et el y f r o m t h e m ai n s, sw i t ch
it off with thepower switch on therear of the machine.
Sw i t ch i n g o n
Sw i t ch i n g o f f ( st an d b y )

18
3 Famil iari sing your self wi t h t he cont rol opt ions
Wit h t he IMPRESSA, you can prepare an excellent coffee or milk spe-
cialit y at the t ouch of a but ton. You also have the opt ion of adjusting
thecoffeestrengthandtemperature,aswell astheamount of water
to your personal taste.
This chapt er wil l allow you t o become familiar wit h all cont rol opt ions
with theaid of examples. To familiariseyourself with your IMPRESSA,
we recommend that you make a point of actively trying the facilities
described in this chapter. You will find this is well worthwhile.
Learn how t o perform t he foll owi ng:
ZPr eparat i on at t he t ouch of a but t on
ZPer m anen t set t i ng s i n p rog ram m i ng m o de
EYo u can st o p t h e m ach i n e at an y t i m e w h i l e a co f f ee o r m i l k
specialit y or hot wat er is being prepared. To do this, press any
button.
Prepar e your f avour i t e cof f ee speci al i t y at t he t ouch of a but t on.
All coffee specialit ies are prepared following t his model.
Exam p l e: This is how to prepare one coffee.
Pr econ d i t i o n : Your IMPRESSA is ready for operation.
TPl ace a cu p under t he d ual spout .
TPress t he 1cof f ee but t on.
Cof f ee pr ep ar at i on t hen b egi ns. Yo u can f ol l ow t he cu r r en t
st at us of preparat ion on the progress bar. The pre-set
amount of wat er flows int o t he cup. The operat ion st ops
aut omat i cally.
Yo u r I M PRESSA i s o n ce m o r e r ead y f o r o p er at i o n .
Pr epar at i on at t h e
touch of abutton
Pr epar i ng a cof f ee speci al i t y
at t he t ouch of a but t on
3 Familiarising your self wit h t he cont rol opt ions

19
3 Famil iari sing your self wi t h t he cont rol opt ions
Yo u c an easi l y ad j u st y o u r I M PRESSA t o y o u r p er so n al co f f ee b l en d s
and specialit ies. The permanent set t ing opt ions in programming
mode are shown here:
Per m an en t set t i n g s i n
programming mode
Pr og r am m e i t em Su b i t em Exp l anat i on
WATER HARDNESS
(is only displayed when
thefilter isnot activated)
NOT ACTIVE,
1° d H – 3 0 ° d H
TAdjust t he wat er hardness.
PRODUCT SETTINGS TSel ec t y o u r set t i n g s f o r t h e co f f ee
and milk specialit ies as well as hot
water and steam.
TIME --:--, WEEKDAY TSet t h e t i m e an d week d ay.
TIMER TSet t h e sw i t ch - o n an d sw i t ch - o f f
timesand specify theweekdayson
which IMPRESSA should switch on
and off aut omat i cally.
OFF AFTER OFF AFTER --. HRS,
0.5 HRS– 9 HRS
TSet t h e n u m b er o f h o u r s af t er
which the IMPRESSA should switch
off automatically.
SWI TCH- ON RI NSE MANUAL, AUTOM ATIC TSet w h et h er t h e sw i t ch - o n r i n se
should be st art ed manually or
aut omat i cally.
LANGUAGE DEUTSCH, FRANCAIS, ENGLISH,
ITALIANO, NL
TSel ect y ou r l an g u ag e.
FORM AT UNI T,
TIME FORMAT
TSel ect t h e u n i t o f t h e am o u n t o f
water and the time format.
INFORMATION TKeep t r ack o f al l p r ep ar ed co f f ee
and milk specialit ies and view t he
maintenance status.
MULTIMEDIA VOLUME, BRIGHTNESS,
CONTRAST,
MULTIMEDIA LANGUAGE,
VIDEO PLAYBACK
(INTAKE, ALERT, INSTRUCTION),
VIDEO SOUND
(INTAKE, ALERT, INSTRUCTION)
TSel ect y ou r set t i n g s f o r t h e
display and the explanatory film
clips.

20
3 Famil iari sing your self wi t h t he cont rol opt ions
Set t i n gs i n pr og ram m i n g m o de al ways f ol l o w t h e sam e m o d el .
Exam p l e: Proceed as follows to change the amount of powder for
an espresso.
Pr econ d i t i o n : Your IMPRESSA is ready for operation.
TOpen t he cover of t he programming but t ons.
O T Press the P button until WATERHARDNESS16° dH
appears.
TPress t he + or - but t on several t i m es unt i l PRODUCT
SETTI NGS i s sh o w n .
O T Pressthe Pbutton to enter the programme item.
SELECT PRODUCT an d t h e av ai l ab l e p r o d u ct s ar e d i s-
played.
TPress t he 1espr esso but t on.
1 ESPRESSO / WATER AM O U N T 3 5 M L
TPress t he + but t on several t i m es unt i l 1ESPRESSO / POWDER
AMOUNT is shown.
O T Pressthe Pbutton to enter the programme item.
1 ESPRESSO / PO W D ER A M O U N T
TPress t he + or - but t on several t i m es t o sel ect t he powder
amount .
O T Pressthe Pbutton to confirm thesetting.
CONFI RM ED ap p ear s b r i ef l y o n t h e d i sp l ay.
1 ESPRESSO / PO W D ER A M O U N T
0 T Presstheexit button to exit theprogramming item.
SELECT PRODUCT
0 T Presstheexit button to exit theprogramming item.
PRODUCT SETTINGS
0 T Presstheexit button to exit programming mode.
Yo u r I M PRESSA i s o n ce m o r e r ead y f o r o p er at i o n .
Wit h t he INFORMATION programme it em you can view t he follow-
ing information:
ZNumber of t he prepared coffee and milk specialities and hot
water
ZMaintenancestatusand number of maintenanceprogrammes
performed (cleaning, descaling, filter change, milk system
cleaning)
Vi ew i ng i nf or mat i on
and maint enance
st at us
Other manuals for IMPRESSA X9 Win
1
Table of contents
Other Jura Coffee Maker manuals

Jura
Jura IMPRESSA XF50 Classic User manual

Jura
Jura ENA 7 User manual

Jura
Jura IMPRESSA XF50 Classic User manual

Jura
Jura GIGA W3 Professional Technical specifications

Jura
Jura IMPRESSA XS95 ONE TOUCH User manual

Jura
Jura ENA Micro 90 User manual

Jura
Jura IMPRESSA X7-S User manual

Jura
Jura GIGA X8 Professional Guide

Jura
Jura Z6 User manual

Jura
Jura IMPRESSA C5 User manual