Trejon OPTIMAL 151H Guide

TREJON FÖRSÄLJNINGS AB
Företagsvägen 9
SE-911 35 VÄNNÄSBY
SWEDEN
Tel: + 46 (0)935 39 900
Web: trejon.se
Instruction Manual and
Maintenance Directions
Hydraulically powered snow blower
151H, 191H
Important!
Read the Instruction Manual
thoroughly before use
Issue: 2022-11

Instruction Manual Snow blower 151H - 191H (2211)
trejon.se
2
Mount the
widening wing
inside the
machine
1Introduction....................................................................................................6
1.1 Getting Started ..........................................................................................6
1.2 Description.................................................................................................6
1.3 Working method ........................................................................................6
1.4 Detailed description...................................................................................7
2Safety Instructions........................................................................................9
2.1 Safety Regulations ....................................................................................9
2.2 Safety symbols........................................................................................12
3Using the machine.......................................................................................14
3.1 Assembly.................................................................................................14
3.2 Coupling the machine to the tractor.........................................................15
3.3 Before starting the machine.....................................................................17
3.4 Adjustments.............................................................................................18
3.5 Operating the Machine ............................................................................20
4Service and Maintenance............................................................................21
4.1 General....................................................................................................21
4.2 Maintenance Schedule............................................................................22
4.3 Before season start .................................................................................23
4.4 At End of Season.....................................................................................23
4.5 Checking and changing the oil.................................................................23
5Troubleshooting..........................................................................................24
6Spare parts...................................................................................................25
EC certificate of conformity..............................................................................26

Instruction Manual Snow blower 151H - 191H (2211)
trejon.se
3
Mount the
widening wing
inside the
machine
SAFETY SYMBOLS
NOTE! You will find this general warning symbol throughout this Instruction Manual to make you
aware of safety instructions concerning yourself, your employees and other persons coming into
contact with the machine. Neglecting these instructions may lead to serious injury and even death.
This symbol has the following meaning:
WARNING!
LOOK OUT!
YOU ARE IN DANGER!
Warning Labels
Be aware of the warning text WARNING! and NOTE! (NB) in safety texts. These words have
been chosen based on the following guidelines:
Warning!
Warns of dangerous situations which, unless avoided, could lead to serious injury or even death.
This also includes dangers that can occur when protective equipment and/or protective screens
are removed. Warning labels can also be used to warn of hazardous use.
NB!
Highlight risky situations where slight or minor injuries can result if they are not avoided. Used
also to warn of machine damage that can arise if the directions are not followed.

Instruction Manual Snow blower 151H - 191H (2211)
trejon.se
4
Mount the
widening wing
inside the
machine
Dear customer,
Thank you for choosing an OPTIMAL product –we hope you will be pleased.
Reading this manual and following its recommendations will ensure you get the longest possible
service life and an efficient use of the machine.
We have produced this manual to give you a good overview of how the machine works and what
safety and maintenance directions that must be followed when working with it.
If any questions should arise in its use or when reading this manual, you are always welcome to
contact us.
TREJON AB
Företagsvägen 9
SE-911 35 Vännäsby
Sweden
Tel: + 46 (0)935 399 00
e-mail: in[email protected]
Website: www.trejon.se

Instruction Manual Snow blower 151H - 191H (2211)
trejon.se
5
Mount the
widening wing
inside the
machine
Dear Dealer,
In order for the warranty to come into force and all legal requirements to be met, we would like you
to complete the warranty certificate together with the customer and send it back to TREJON.
The warranty will come into force on the same day as the machine is transferred to the
customer.
Delivery inspection checklist:
Check for any transport damage. Report to carriers
Inspect the equipment thoroughly before use and make sure all packing material
has been removed. Dispose of all packing materials in an environmentally
responsible manner.
Check that the delivery is complete in accordance with the machine order/packing
note.
Make sure the machine has been lubricated as described under “Service and
Maintenance”.
Check the oil level in the gearbox through the lower level plug on the side of the
gearbox.
Make sure the hydraulic motor housing is 50% filled with hydraulic oil before starting.
Check the chain tension. Refer to section 4.2.
With the assistance of the Instruction Manual, run through and explain commissioning,
use and maintenance of the machine with accessories for the customer.
Perform function test
Instruction Manual handed over to customer.
Complete the warranty certificate together with the customer and register on
trejon.se. Available as an appendix to this manual and as a copy at the back.
Enter the serial number of the machine in
the field on the right (machine/gearbox)
S/N:
Enter the hydraulic motor’s serial number in
the field to the right.
S/N:

Instruction Manual Snow blower 151H - 191H (2211)
trejon.se
6
Mount the
widening wing
inside the
machine
1 Introduction
1.1 Getting Started
Thank you for choosing this OPTIMAL snow blower. We have concentrated on making a
powerful, good-quality snow blower that will serve you for many years. As the service life of the
machine does not wholly depend on us, but also you, the user, we have compiled an instruction
manual in which we describe its correct care and use. So read through these directions
thoroughly. Always get in touch with the company where you bought your machine when
ordering spares or other service. When ordering spares, always specify the correct model,
type and serial number found on the name plate on the chassis.
1.2 Description
The machine is designed for clearing snow from flat surfaces such as roads and car parks.
The snow blower is connected to the tractor’s loader or similar via a connection frame. The
snow blower is designed to be powered by the tractor’s existing hydraulics, which can supply
the recommended flow. The tractor’s hydraulic oil flow and working pressure to the snow
blower’s hydraulic motor are the factors that determine what power output the snow blower’s
hydraulic motor will deliver. The hydraulic motor’s power output determines what capacity the
snow blower will have in practice.
TREJON supplies the snow blower with customised hydraulic motor sizes to match the tractor’s
hydraulics, which are specified when ordering a new machine.
The snow blower works best if it is mounted on a tractor that can deliver the recommended oil
flow, regardless of the driving speed. For this reason, tractors with hydrostatic transmission are
particularly well suited for hydraulically powered snow blowers.
To operate the snow blower’s hydraulic motor, the following hydraulic outlets are required on
the tractor:
•One hydraulic outlet that can deliver the recommended flow to the snow blower.
•One hydraulic outlet with depressurised return directly to the tractor’s oil tank for the
hydraulic motor’s return oil.
•One hydraulic outlet with depressurised (max. 4 bar back pressure) return directly to
the tractor’s oil tank for the hydraulic motor’s leak-oil line.
Other functions require:
•One double-acting hydraulic outlet is required to turn the discharge chute.
•If the machine has been additionally equipped with hydraulic flap regulation, an
additional double-acting outlet is required.
1.3 Working method
The machine operates in three stages: 1 - Breaking-up and self-cleaning feeding screw(s)
with cutting action, 2 - Transport to ejection rotor, 3 - The ejection rotor ejects the snow with
considerable force through the discharge chute, which is adjustable both in terms of direction
and throwing distance.

Instruction Manual Snow blower 151H - 191H (2211)
trejon.se
7
Mount the
widening wing
inside the
machine
1.4 Detailed description
1
Chassis
2
Turning unit
3
Twin flap
4
Flap regulation (hydraulic on vehicle = accessory)
5
Discharge chute (short)
6
Roll bar
7
Reversible cutting edge
8
Feeding screws
9
Ejection rotor
10
Gearbox
11
Hydraulic motor
12
Connection for working hydraulics
13
Connection for leak-oil line
14
Break connection, feeding screw
11.
14.
12.
13.
10
.
1.
2.
3.
4.
5.
7.
6.
9.
8.

Instruction Manual Snow blower 151H - 191H (2211)
trejon.se
8
Mount the
widening wing
inside the
machine
Technical specifications
Specifications/Model
151H
191H
Art. no.
431003
431004
Operating width, mm
1570
1870
Chassis height, mm
630
630
Rotary cutters, quantity
1
1
Rotary cutter, mm
340
340
Ejection rotor, mm
450
450
Gearbox operation, type
Hydraulic
Hydraulic
Ejector turning, Std. type
Hydraulic
Hydraulic
Chute flap regulation, Std. type
Mechanical
Mechanical
Weight, base unit, kg
334
340
Connection options*
F –R
F –R
Category 3-point
0+1
0+1
Due to a policy of continuous development, the data specified in our documents is not binding
and may be changed without prior notice.
* F = Front-mounted, R = Reversing

Instruction Manual Snow blower 151H - 191H (2211)
trejon.se
9
Mount the
widening wing
inside the
machine
2 Safety Instructions
2.1 Safety Regulations
Read the manual. All machine operators should read and understand the entire contents of this
manual and the safety regulations so there is no uncertainty as to the use of the machine/tool
before it is taken into service. Get in touch with your dealer if you have any questions.
Use of the machine is strictly forbidden if the operator is not aware of the risks involved in
conjunction with the use of the machine and cannot act correctly if a risk situation should arise.
Read, observe and understand the meaning of all safety, operating, warning and positioning
decals on the machine and in the manual.
Actions may occur when using this equipment that cannot be prevented in its design or with
the use of mechanical parts.
Unfortunately, human carelessness may cancel the function of our integrated safety features.
Accordingly, the prevention of accidents and operating safety features are dependent on the
responsible use of the equipment and its integrated safety features.
Only trained personnel should use this equipment.
The machine is intended for outdoor use only.
Operation. Learn and practise the machine’s working methods and controls before it is used.
Coupling the Machine. Connect the machine in the correct manner and keep away from
the area between the tractor and the machine when coupling.
Make sure the equipment is correctly mounted, adjusted and in working order.
Safe Work Area. Keep unauthorized persons, especially children, away from the working zone
of the machine or when it is being repaired.
Observe the risk of injury from material that can be thrown from the machine while work is in
progress and clear away any stones, twigs and other foreign objects in the work zone that may
cause personal injury or damage to property.
Never aim the snow outlet towards people, animals or buildings.
Moving parts in this tool have been designed and tested to withstand heavy use. However, in
the event of impacts with heavy, solid objects, such as steel railings, concrete supports or rocks,
broken pieces of metal could be ejected at high velocities. In order to avoid any damage to
property, personal injury and even death, make sure never to drive into such obstacles.
The Machine’s Safety Equipment. The machine may only be used if all the manufacturer’s
original safety equipment for moving mechanisms are positioned correctly and in working order.
Ensure all safety and operating decals are in good order and affixed in the correct manner and
replace them if necessary.
New safety and operating stickers can be ordered at no extra cost. Write the model and serial
number when ordering.
Moving Parts. Keep arms, legs and other body parts as well as clothing away from any moving
parts of the machine. Do not wear loose fitting clothes.
Leave the machine to work on its own and do not insert hands or fingers in an attempt to give
assistance.

Instruction Manual Snow blower 151H - 191H (2211)
trejon.se
10
Mount the
widening wing
inside the
machine
Lifting and lowering of the machine.
Be careful when lifting and lowering the machine/machine part.
Stability. The machine must not be operated with a tractor that does not weigh enough over
the front/rear axle so that tractor stability is affected. At least 20% of the tractor weight shall rest
on the front axle to ensure tractor steering and braking ability.
Mount ballast weights if necessary, see tractor instruction manual.
Operating the Machine. Take great care when working on uneven ground conditions, close to
ditches and fences, look out for hidden dangers and adapt your working rate.
Great care should be observed when working on steep slopes:
Try to drive in the same direction as the incline and not across it.
Avoid fast starts and heavy braking when driving the machine up and down inclines.
If it is absolutely necessary to drive across steep inclines then reduce your speed and watch out
for unevenness, avoid sudden turns and be aware of the shift in centre of gravity that occurs
when lifting mounted tools.
Hold onto the steering wheel tightly if the tractor should overturn.
Operating at Night. The work area must be illuminated when working in the dark.
Driver. Operators who are tired, intoxicated, drugged or under the influence in any other way so
that they cannot control their movements must not use the machine.
The machine may only be operated by one person sitting in the tractor, no passengers are allowed.
It is prohibited for people without authorisation to use the machine.
Personal protective equipment. Protective equipment such as helmets, protective goggles,
protective shoes and gloves are recommended for personnel during assembly, operation,
adjustment and maintenance.
Protective Cab. The machine should only be driven by a tractor equipped with an approved
protective cab. Keep doors and windows close while working.
All moving parts, including engine, must be stationary and the handbrake applied before the
tractor driver leaves the cab.
Maintenance. Inspect, adjust and maintain the machine according to the directions.
Regular Inspection. Inspect the entire machine regularly. Locate any loose, worn and damaged
components and leaks.
Safety During Maintenance and Service. The machine must be standing on firm, even ground
for maintenance and adjustment.
The tractor engine must be shut off, all moving parts stationary, the machine lowered to the
ground and the handbrake applied during all cleaning, inspection, adjustment, maintenance and
repair work.
Clean the machine thoroughly before repair and storage.
Bearing and hydraulic components should not the cleaned with high-pressure jets.
If excessively high pressure is used for general cleaning, this may damage the paint.
After cleaning, the machine must be lubricated according to the lubrication schedule and a short
test run carried out.
Vibration. If any vibration should occur in the machine, it must be shut down immediately and
the cause located. Change any damaged parts.

Instruction Manual Snow blower 151H - 191H (2211)
trejon.se
11
Mount the
widening wing
inside the
machine
Emergency stop. Stop the machine immediately if it should hit an obstruction. Shut off the
engine, remove the key, check for and repair any damage before recommencing work.
Make yourself aware of how emergency stops work on the tractor and the tool, and be prepared
of how they work in an emergency situation.
Hydraulic Hoses. Hydraulic hoses on the machine contain oil at very high pressure. Do not
touch hoses and hydraulic components if the system is pressurised. In case of leaks, oil at high
pressure may penetrate the skin and cause serious injury. In the event of an accident, contact a
doctor immediately.
Check the condition of hydraulic hoses with respect to damage. Chafed and leaking hoses
should be replaced immediately with new that meet the manufacturer’s technical requirements.
When changing tractor, always check the length of hoses. Hoses that are too long or too short
may be damaged.
The use of incorrect hydraulic hoses that do not meet with specifications is strictly forbidden.
The hydraulic motor and hoses become extremely hot while in operation, with a risk of burn
injuries. Do not loosen hoses while the oil is hot, wait for it to cool down.
Welding. Protect bearings, hydraulics and electronic components if welding is being carried out.
Before welding commences, electronic components must be disconnected and the welder’s
ground clamp placed as close to the welding site as possible.
Fire Risk. If overheating of machine parts should occur, the cause must be located and the
machine shut down.
Spare Parts. Use only original spare parts on the machine.
If you should have any questions concerning the machine or its function, please get in touch
with your dealer or Trejon AB

Instruction Manual Snow blower 151H - 191H (2211)
trejon.se
12
Mount the
widening wing
inside the
machine
2.2 Safety symbols
The symbol on the right shows the following:
Warning!
Sticker 1: Study the
instruction manual carefully
before use, so that the user
is very familiar with the
machine.
Warning!
Sticker 2: Keep arms or
legs away from the
machine’s moving parts.
Failure to respect this can
result in life-threatening
injuries and even lead to
death.
Warning!
Sticker 3: Flying objects
such as rocks and lumps of
ice can be ejected from the
machine during operation.
Do not remain in the
vicinity of the machine
when it is in operation. At
the same time, the operator
must have a good view of
where the snow is being
blown. Operating in the
vicinity of people, animals
and buildings should be
avoided.

Instruction Manual Snow blower 151H - 191H (2211)
trejon.se
13
Mount the
widening wing
inside the
machine
Warning!
Sticker 4: Keep arms or
legs away from the intake
wings when the machine is
in operation. In the event of
a stoppage, apply the
tractor’s brakes, turn off
the engine, set the thrower
down on the ground and
shut off the hydraulic oil
flow.
Warning!
Sticker 5: Crush risk. Do
not stand between machine
and tractor when coupling.
Always apply the brake on
the tractor when leaving
the cab during all coupling
or uncoupling
Warning!
Sticker 6: Crush risk! When
the ejector tube is lowered,
the tractor and the power
take-off must be turned off.
Never use your arms or
legs to clear the ejector
tube.
Sticker 7: Machine
name plate with
CE marking.
This includes the
machine’s serial
number and model
number.

Instruction Manual Snow blower 151H - 191H (2211)
trejon.se
14
Mount the
widening wing
inside the
machine
3 Using the machine
3.1 Assembly
NOTE!
Ensure no-one is inside the risk area when lifting.
Take care with straps and wires when they are removed as they are tensioned very hard.
They can also be very sharp.
The following steps will be performed when assembling the machine:
Remove all packaging and wrapping material, and dispose of this in an environmentally
friendly way.
Fold out the discharge chute and screw it into place (see section “Adjustments” for options).
Be aware of the risk of pinching injuries that exists during this operation.
The connection frame is bolted to the machine.
Ensure all guards are in place.
Before starting to use the machine, the points under section 3.3 “Before starting the machine”
must be carried out.

Instruction Manual Snow blower 151H - 191H (2211)
trejon.se
15
Mount the
widening wing
inside the
machine
3.2 Coupling the machine to the tractor
Warning!
Crush risk. Do not stand between machine and tractor when coupling. Always apply the
brake on the tractor when leaving the cab during all coupling and uncoupling.
The machine may only be coupled to a tractor with sufficient weight over the front and
rear axles respectively so that steering and brakes function when the machine is
coupled. Use ballast weights as necessary, see the tractor’s instruction manual.
The machine must be coupled on an even and flat surface.
Attach the machine to the tractor’s connection frame.
Stop the tractor and apply the handbrake.
The machine is supplied without hoses to the hydraulic motor. Adapt the hydraulic hoses to
the tractor in terms of their length and suitable quick couplings. The return must be connected
directly to the tank with as little back pressure as possible.
Hydraulic motor connections
The snow blower’s hydraulic motor is available in different sizes to match the tool carrier’s
hydraulics.
This calculation is performed when ordering the machine. If the tool carrier’s flow does not
match the details that have been provided, there is a risk that the snow blower will not deliver
full power. Both the machine’s capacity and its throwing distance will be affected.
Incorrect pressure and flow information that requires the size of the motor to be changed is NOT
covered by any manufacturer’s warranty.
The type of motor is indicated on the motor’s type plate.
The motor is also fitted with an anti-cavitation valve (A).
This valve has two functions: 1. To ensure the correct direction of rotation and provide freewheel.
2. To refill the motor when the flow from the tool carrier ceases.
A

Instruction Manual Snow blower 151H - 191H (2211)
trejon.se
16
Mount the
widening wing
inside the
machine
Port P, Pressure:
Oil to the hydraulic motor’s pressure side is supplied from a suitable outlet on the tractor, which
delivers the recommended oil flow and pressure. The oil flow from the outlet must be able to be
adjusted from the tractor cab. Adjust the length of the hose and install suitable quick couplings
to the tractor.
Port T, Return:
Oil from the hydraulic motor’s return side must be led back to the tractor’s tank via an outlet that
has free flow (low back pressure). Adjust the length of the hose and install suitable quick
couplings to the tractor.
Leak-oil line D:
To lubricate and cool the hydraulic motor’s bearings and components, oil is deliberately supplied
into the hydraulic motor housing during operation. This oil must be led back to the tractor’s tank
through a separate line. If the leak-oil line is not connected to a separate depressurised return
(max. 4 bar back pressure), the shaft seal on the hydraulic motor will fail.
The leak-oil line must NOT be connected together with the return line. If this happens, the shaft
seal or the motor will sustain damage.
The motor has a ½” external adapter for connecting the leak-oil line, after which the leak-oil line
is connected directly to the tractor’s tank. Adjust the length of the hose and install suitable quick
couplings to the tractor.
Connect the hydraulic hoses for operating the discharge chute to double-acting outlets on the
tractor. Clean the couplings thoroughly before connecting. Practice this function so that the
operator is familiar with the directions of movement before putting the machine into service.
Make sure that the machine moves freely from the tractor in all possible work situations.
T = Return connection, directly to the tank
P = Pressure connection
D = Leak-oil line must be connected by a separate
line to the tank, MAX 4 bar back pressure
Warning!
T-Return connection and D-Leak-oil line must NOT
be connected together. If this is done, the shaft seal
and motor will sustain damage. This is NOT covered
by any manufacturer’s warranty.

Instruction Manual Snow blower 151H - 191H (2211)
trejon.se
17
Mount the
widening wing
inside the
machine
3.3 Before starting the machine
Warning!
Hydraulic hoses on the machine contain oil at very high pressure. Do not touch hoses
and hydraulic components if the system is pressurised. Relieve the pressure from the
system first. In case of leaks, oil at high pressure may penetrate the skin and cause
serious injury.
Check no-one is present in the vicinity of the machine during test operation.
Before using the machine, check the following items on the machine:
That all screws and nuts are tightened (see maintenance schedule for subsequent intervals).
Refer to the table in “Service and Maintenance” for correct tightening torques.
Ensure all guards are in place.
Lubricate the machine (refer to “Service and Maintenance”).
Check the oil level in the gearbox. The oil level in the gearbox must reach the level plug on the
side of the gearbox (see “Service and maintenance”). The gearbox is filled with SAE 80W/90
API GL4/GL5 oil, Industrial gear oil ISO VG 220.
Adjust the height of the cutting edge using the support feet, as well as the machine’s incline
using the loader’s tilt function (see section “Adjustments”).
Make sure that no objects have become wrapped around the machine’s moving parts.
Test-start the machine by slowly directing the oil flow to the snow blower with the tractor’s
engine at idle speed, then increase the engine speed until you achieve the recommended oil
flow. Check that the snow blower is rotating in the right direction (by studying the direction of
rotation of the ejection rotor) and that there are no oil leaks.
To turn off the snow blower, perform the above procedure in reverse order:
1. Reduce the engine speed to idling.
2. Stop the oil flow to the machine.
If the ejection rotor is moving in the wrong direction, contact your Trejon centre.

Instruction Manual Snow blower 151H - 191H (2211)
trejon.se
18
Mount the
widening wing
inside the
machine
3.4 Adjustments
Warning!
Never rely on the tractor’s lifting arrangement, support the tool properly on axle stands
or the like so that the machine does not fall down.
Take care when disconnecting the latch hook for the discharge chute’s flap regulation, as
there is a risk of crush injuries.
When any type of adjustment or service has to be carried out on the machine, make sure
that the machine has stopped and the tractor’s engine is turned off. Remove the key from
the ignition switch.
Support feet
The machine’s working depth is adjusted at the rear with the aid of two support feet. The
machine’s angle is adjusted using the tilt function on the tractor’s loader, which affects how well
the equipment follows the variations in the surface. If the machine is tilted forwards, it is easier
for it to cut e.g. hard snow and ice. A suitable basic setting when the machine is resting on its
support feet, is to leave the tip of the cutting edge 10 mm above the ground. Position the
tractor’s loader so that the attachment is in the centre of the oblong holes on the tool frame.
However, always aim to keep the machine level during operation.
Adjust the support feet as the cutting edge becomes worn down. Adjust the support feet
vertically by undoing the mounting screws and then refitting them in a different set of holes.
Screws that have to
be undone when
adjusting the height of
the support feet.

Instruction Manual Snow blower 151H - 191H (2211)
trejon.se
19
Mount the
widening wing
inside the
machine
Discharge chute
You determine where you want the ejected snow to go using the machine’s discharge chute.
The machine is fitted with a hydraulically turned discharge chute as standard.
At the top of the discharge chute is a flap that regulates the distance the snow is thrown. Turn
up the handle that secures the pierced strut, move the strut to the desired position and lock.
Hydraulic (or electric) operation is available as an option, and this function is useful if you need
to change the throwing distance during operation.
Mechanical flap regulation (Std) Hydraulic flap regulation (optional)
The discharge
chute has two
attachment
heights at the
front, which can
be used to further
adjust the snow’s
throwing
distance.
installation heights, which affect the
throwing distance.
Locking handle
for mechanical
flap regulation.

Instruction Manual Snow blower 151H - 191H (2211)
trejon.se
20
Mount the
widening wing
inside the
machine
3.5 Operating the Machine
Warning!
The operator must have a good overview of the work and the area where the ejected
snow lands.
Heavy objects in the snow, such as stones, can be thrown significantly further than
the snow.
Under no circumstances leave the driver’s position before the oil flow has been turned off.
NOTE!
The shear bolt is no guarantee that the snow blower will not sustain damage in the event
of collisions with solid objects.
Do not reverse with the machine lowered in the working position, raise the machine
above the ground before reversing the tractor.
A doubling of the work rate means that the tool is subjected to four times the stress. Do
not operate the machine faster than is absolutely necessary. Damage to the snow blower
caused by the blade having impacted a solid object is not covered by the product warranty.
The operator must have a good overview of the work and the area where the ejected
snow lands.
The temperature of the hydraulic oil must not exceed 75°C during operation of the machine.
Lower the snow blower to the surface that is to be cleared of snow. Start the snow blower by
slowly starting the oil flow with the tractor’s engine at idle speed. Then increase the
tractor’s engine to working revs. To turn off the snow blower, perform the above procedure in
reverse order: 1. Reduce the engine speed to idling, 2. Stop the oil flow to the machine.
We advise you against using the snow blower as a plough: always allow the machine to work its
way through the snow through normal operation. When clearing large volumes of snow, you
should work through the snow in two runs.
When operating in wet and heavy snow, more power is required, so make sure that the machine is
maintaining the recommended revs before it starts working on the snow. In the event the machine
should come to a halt, stop the tractor, raise the equipment and reverse a little, lower the equipment
to the ground and try again. In the event of an obstruction in the discharge chute, the tractor and oil
flow must always be stopped before the machine may be cleaned. Notify anybody in the vicinity that
work is being performed on the machine. Lower the discharge chute and clear the obstruction.
When using the machine for the first time in the cold season, you should make sure that it is
tilted back a little. This ensures that the scraper steel does not pick up loose stones and debris
that can be ejected. Once the road surface has become compacted and hard, you can set the
machine to a more aggressive angle.
Other manuals for OPTIMAL 151H
1
This manual suits for next models
3
Table of contents
Other Trejon Snow Blower manuals
Trejon
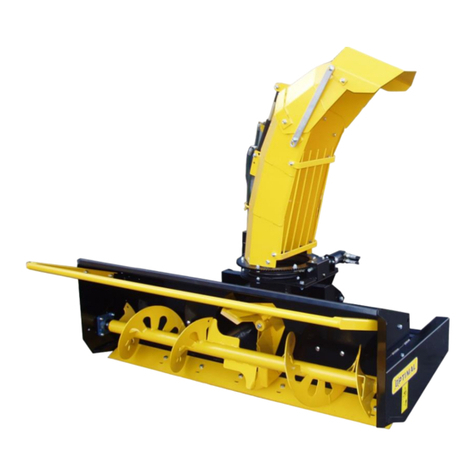
Trejon OPTIMAL 151H Specification sheet

Trejon
Trejon 1800HD Specification sheet

Trejon
Trejon OPTIMAL 2452H Specification sheet

Trejon
Trejon OPTIMAL 2600HD Specification sheet

Trejon
Trejon 1800H Specification sheet

Trejon
Trejon OPTIMAL 2450HD Specification sheet
Trejon
Trejon Optimal Specification sheet
