TREVIDEA Girmi RC30 User manual

IT EN DE FR
Manuale d’uso
User manual
Rinitore viso e corpo 5 in 1
5 in 1 hair clipper
Mod.: RC30
BY TREVIDEA
Technical model: RFC-1311

1
ITA: INDICE
Simbologia………...………………………………………………………………………………………………..…..…………………... p. 2
Avvertenze di sicurezza.………...……………………………………………………………………………………………..….…p. 3
Informazioni d’uso………...……………………………………...………………………………………………………………...….. p. 5
Nomenclatura…………….………………...………………………………………….…………………………………………….….…p. 6
RC30…………...…………………...……………………………………………...…………………………………………….…..……. p. 6
Procedura di ricarica…………….………………...…………………………………………………………………………….…..…p. 6
Collegare gli accessori di taglio…………….………………...………………...……………………………………….….…… p. 7
Consigli per il taglio…………….……………………………….....………………...……………………………………….….…… p. 7
Funzionamento…….……………...………………………………………………...……………….……………………………....…… p. 7
Pulizia………...……………………………………...…………………………………...……………..…….………………………..…….. p. 8
Caratteristiche tecniche………...……………………………………...…………………………………………………….…….…. p. 9
Trattamento dei rifiuti delle apparecchiature elettriche
ed elettroniche………...……………………………………...………………………………….………………………...……………….p. 29
ENG: INDEX
Symbols………...…………………….…………...………………………………………………..…………………………….………….. p. 2
RC30…………...………………….…….………………...……………………………………………...………………………….……. p. 6
Safety instructions………...…….……..…….……………………………………………………………………………….………… p. 9
General information………..….………………………………………………………...…………………………………………….. p. 11
Description of parts…………....…………………...……….………………………………………...………………………….……. p. 12
Charging the unit……………….…………………...…….….………………………………………...………………………….……. p. 12
How to connect the cutting attachments…….............................................……………….……………………….………… p. 12
Tips for cutting…………..…….……………………...………………………………………..…………………………………….……p. 13
Operating the unit…………..…….………………...………………………………………..…………………………………….…… p. 13
Cleaning……..……………………………………...……………………………………...……………..………………………………….. p. 14
Technical features………...……………………………………………...……………….…………………………………….………. p. 14
Waste of electric and electronic equipment (WEEE
Directive)………………..……………………………………...……………………………………...…………………………………….p. 29
DEUTSCH……………….………………………...……………………………………...…………….................................... p. 15
FRANCAIS……………….………………………...……………………………………...…………….................................... p. 21

2
CLASSI DI PROTEZIONE /PROTECTION CLASSES
ATTENZIONE
RISCHIO DI SCOSSE ELETTRICHE
NON ESPORRE A PIOGGIA E UMIDITA’
WARNING
ELECTRIC SHOCK RISK
DO NOT EXPOSE TO RAIN OR MOISTURE
ATTENZIONE: NON APRITE L’APPARECCHIO. ALL’INTERNO NON VI SONO COMANDI
MANIPOLABILI DALL’UTENTE NE’ PARTI DI RICAMBIO. PER TUTTE LE OPERAZIONI DI
SERVIZIO RIVOLGERSI AD UN CENTRO DI ASSISTENZA AUTORIZZATO.
Se l’apparecchio ha impresso i simboli sottostanti, significa che le caratteristiche tecniche sono
corrispondenti al simbolo.
Questo simbolo segnala la presenza all’interno del prodotto di componenti operanti ad alta
tensione; non apritelo in nessun caso.
This symbol warns the user that un-insulated dangerous voltage inside the system may
cause an electrical shock. Do not open the case.
Questo simbolo indica che l’apparecchio appartiene alla CIasse II: ciò significa che
l’apparecchio è a doppio isolamento, quindi, non necessita di spina con messa a terra.
Class II Appliance symbol. The double insulated electrical appliance is one which has been
designed in such a way that it does not require a safety connection to electrical
earth/ground.
Attenzione: questo simbolo indica all’utente istruzioni importanti da leggere e da rispettare
durante l’utilizzo del prodotto.
Caution: this symbol reminds the user to read carefully the important operations and
maintenance instructions in this owner’s guide.

3
AVVERTENZE DI SICUREZZA
Di seguito sono riportate importanti indicazioni
riguardanti l’installazione, l’uso e la manutenzione;
conservare con cura questo libretto per ogni ulteriore
consultazione; utilizzare il prodotto solo nel modo
indicato dal presente libretto di istruzioni; ogni altro uso è
da considerare improprio e pericoloso; perciò il
costruttore non può essere considerato responsabile nel
caso in cui vi siano danni derivanti da usi impropri,
erronei ed irragionevoli.
Prima dell’uso verificare l'integrità dell'apparecchio: in
caso di dubbio non utilizzarlo e rivolgersi all’assistenza.
Non lasciare gli elementi dell'imballaggio (sacchetti in
plastica, polistirolo espanso, chiodi, graffette, ecc.) alla
portata dei bambini in quanto sono potenziali fonti di
pericolo; inoltre, ricordiamo che questi, devono essere
oggetto di raccolta differenziata.
Accertarsi che i dati di targa siano compatibili con quelli
della rete elettrica; l'installazione deve essere effettuata in
base alle istruzioni del costruttore considerando la
potenza massima indicata in targa; un’errata installazione
può causare danni a persone, animali o cose, per i quali il
costruttore non può essere considerato responsabile.
Se fosse necessario l’uso di adattatori, prese multiple e
prolunghe utilizzare quelli conformi alle vigenti norme di
sicurezza; non superare i limiti di assorbimento indicati su
adattatore e/o prolunghe, nonché quello di massima
potenza marcato sull'adattatore multiplo.
Non lasciare l'apparecchio inutilmente inserito; meglio
staccare la spina dalla rete di alimentazione quando
l'apparecchio non viene utilizzato.
Scollegare sempre l’apparecchio dall’alimentazione se
lasciato incustodito.
Le operazioni di pulizia devono essere effettuate dopo
aver staccato la spina.

4
Qualora l’apparecchio sia fuori uso e si sia deciso di non
ripararlo, si raccomanda di renderlo inutilizzabile
tagliando il cavo di alimentazione.
-Non avvicinare il cavo di alimentazione a oggetti
taglienti o a superfici calde e non tirarlo per staccare la
spina. Non lasciarlo penzolare dal piano di lavoro dove
un bambino potrebbe afferrarlo. Non utilizzare il
prodotto in caso di danni al cavo di alimentazione, alla
spina o in caso di cortocircuiti; fare riparare il prodotto
da un centro di assistenza autorizzato.
-Non esporre il prodotto a condizioni atmosferiche
dannose come pioggia, umidità, gelo, ecc. Conservarlo
in luoghi asciutti. Non maneggiare o toccare il prodotto
con mani bagnate o a piedi nudi.
-Questo apparecchio può essere utilizzato da bambini
dagli 8 anni in su e da persone con ridotte capacità
fisiche, sensoriali o mentali o con mancanza di
esperienza o conoscenza se a loro è stata assicurata
un’adeguata sorveglianza oppure se hanno ricevuto
istruzioni circa l’uso in sicurezza dell’apparecchio e
compreso i rischi associati; le operazioni di pulizia e di
manutenzione non devono essere effettuate da bambini a
meno che non abbiano più di 8 anni e siano sorvegliati.
-I bambini non devono giocare con l’apparecchio.
-Tenere il prodotto ed il cavo di alimentazione fuori dalla
portata dei bambini sotto 8 anni.
-Questo apparecchio è progettato per uso domestico o
applicazioni simili come: cucine per il personale in
negozi, uffici o altri luoghi di lavoro, per i clienti in
hotel, motel, bed & breakfast o residence.
Se il cavo di alimentazione è danneggiato, o in caso di
guasto e/o di cattivo funzionamento non manomettere
l'apparecchio. L'eventuale riparazione deve essere
effettuata dal costruttore o dal suo servizio assistenza
tecnica o comunque da una persona con qualifica

5
similare, in modo da prevenire ogni rischio. Il mancato
rispetto di quanto sopra può compromettere la sicurezza
dell'apparecchio e far decadere i termini di garanzia.
-L’apparecchio non è progettato per essere usato
attraverso timer esterni o telecomandi. Prima di ogni
utilizzo svolgere il cavo di alimentazione.
-Non sottoporre il prodotto ad urti, potrebbero
danneggiarlo. Utilizzare solo ricambi ed accessori
originali e compatibili.
-Non utilizzare sotto o accanto a materiali infiammabili
come le tende, fonti di calore, zone fredde e vapore.
INFORMAZIONI D’USO
ATTENZIONE: non utilizzare mai e per alcun
motivo l’apparecchio nella vasca da bagno o sotto
la doccia. Evitare che spruzzi d’acqua entrino
nell’apparecchio. Se accadono questi inconvenienti
fare controllare il regola-capelli da personale
qualificato prima di riutilizzarlo.
-Non immergere l’apparecchio in acqua o in altri liquidi.
-Fare molta attenzione durante l’utilizzo: non usare in
stato di sonnolenza ed eseguire movimenti accorti e
delicati. Non utilizzare su parrucche o cute irritata.
-Per cambiare accessorio spegnere l’apparecchio.
-Caricare l’apparecchio tenendolo spento.
-Pulire e lubrificare con regolarità l’apparecchio per
garantire migliori prestazioni e maggior durata.
-Non lasciare mai incustodito mentre è in funzione.
-L’adattatore di ricarica contiene un trasformatore, si
consiglia di non cambiare il tipo di spina poiché ciò
potrebbe rappresentare una situazione di pericolo per
l’utente durante l’utilizzo dell’apparecchio.
-Temperatura di esercizio 15 –35 °C.
-Usare solamente l’adattatore originale per caricare
l’apparecchio.

6
-Questo apparecchio è stato creato esclusivamente per
tagliare i capelli, accorciare la barba, le basette e i baffi,
tagliare i peli di naso e orecchie; ogni altro utilizzo è da
considerarsi pericoloso. Non utilizzare l’apparecchio se
un accessorio (es: pettine o lama) è danneggiato.
-Non cercare per nessun motivo di spuntare e/o tagliare le
sopracciglia e le ciglia con questo apparecchio.
-Se l’apparecchio è soggetto ad un cambio sostanziale di
temperatura, pressione e umidità, attendere circa 30
minuti prima di usarlo.
NOMENCLATURA RC30
A) Pettine del tagliacapelli (4 pezzi)
B) Lama taglia capelli
C) Rasoio
E) Depilatore igienico per naso/orecchie
F) Regola barba
G) Pettine regola-barba
K) Adattatore di ricarica
J) Spina
M) Pulsante accensione/spegnimento
N) Luce di ricarica
O) Rifinitore di precisione
P) Ingresso per spinotto di ricarica
Q) Pennello di pulizia
R) Base di ricarica
S) Olio lubrificante
RICARICA
Ricaricare completamente l’apparecchio prima di
utilizzarlo o dopo un lungo periodo di inattività.
La carica completa richiede circa 8 ore continuate
e garantisce un’autonomia del prodotto di circa
45 minuti.
ATTENZIONE: durante la fase di ricarica,
assicurarsi che l’apparecchio sia spento.
Ricarica diretta: collegare lo spinotto (K) dell'adattatore all'ingresso di ricarica (P) dell'apparecchio e
collegare l’adattatore ad una presa di corrente compatibile.
La luce rossa di ricarica si accende per indicare che l’apparecchio è in fase di carica.
AVVERTENZE
Scollegare l’adattatore di ricarica dalla presa di corrente quando l’apparecchio è completamente carico (circa
8 ore). Non lasciare l’apparecchio collegato alla presa di corrente per più di 24 ore. Per migliorare le
prestazioni di carica, si consiglia di caricare completamente la batteria 2 volte all’anno, lasciando in funzione
l’apparecchio finchè non si ferma completamente. Quindi procedere con una ricarica completa di 8 ore.

7
COLLEGARE GLI ACCESSORI DI TAGLIO
Tutti gli accessori per il taglio come la lama tagliacapelli (B), il rasoio (C), il depilatore igienico (E), il regola-
barba (F) ed il rifinitore di precisione (O) possono essere collegati e scollegati all’apparecchio nello stesso
modo. Procedere come indicato in seguito:
1. Per connettere l’accessorio di taglio al prodotto, premere l’accessorio all’apparecchio fino all'incastro.
2. Per scollegare l’accessorio di taglio, tirare l’accessorio dalla parte della lama.
CONSIGLI PER IL TAGLIO
-Assicurarsi che l’apparecchio sia completamente carico prima di iniziare la procedura di taglio.
-Usare solo su capelli puliti ed asciutti e non utilizzare mai su capelli bagnati.
-Assicurarsi che la testa della persona a cui vogliamo tagliare i capelli sia all’altezza delle nostre spalle; in
questo modo ogni zona di taglio sarà chiaramente visibile.
-Tagliare i capelli in direzione della crescita (vedi Fig. 5).
-Installare l’accessorio di taglio come descritto nel paragrafo precedente.
FUNZIONAMENTO
1. REGOLA-CAPELLI
-Dopo aver installato la lama (B) sul prodotto, agganciare uno dei 4 pettini di taglio (A) alla lama (B) e
bloccarlo fino al click.
-Senza il pettine l'altezza di taglio può essere regolata su 3 livelli diversi (0.8 - 1.1 - 1.4mm) agendo
sull'apposito selettore posto sull'apparecchio.
-Scegliere il pettine seconda della lunghezza di taglio desiderata, come indicato in tabella:
Pettine
Lunghezza dopo il taglio
Senza pettine
0.8 - 1.1 - 1.4 mm
1
3 mm
2
6 mm
3
9 mm
4
12 mm
Nota: quando si taglia per la prima volta, si consiglia di iniziare con la lunghezza maggiore per prendere
dimestichezza con l’apparecchio.
-Accendere l’apparecchio agendo sull’interruttore di accensione (M).
-Muovere l’apparecchio sui capelli lentamente in direzione della crescita: dal momento che i capelli non
crescono tutti nella stessa direzione, si consiglia di muovere il regolacapelli in varie direzioni. Per ottenere
un buon risultato, assicurarsi che la parte piatta del pettine sia sempre in contatto con lo scalpo.
-Fare diversi passaggi sulla cute per assicurarsi di aver tagliato tutti i capelli in modo ottimale.
-Rimuovere regolarmente i capelli rimasti sul pettine. Se è necessario, spegnere l’apparecchio e staccare il
pettine (A) per rimuovere i capelli sulla lama di taglio.
CONTORNO E RASATURA
L’apparecchio può essere utilizzato anche senza il pettine di taglio (A), per tagliare i capelli molto corti (da
0.8 a 1.4 mm), per il contorno sul collo, intorno alle basette e sfumare vicino alle orecchie.
ATTENZIONE: prestare molta attenzione quando si usa l’apparecchio senza pettine, le lame sono
molto taglienti.
-Estrarre il pettine di taglio (A).
-Prima di rifinire il contorno sulla nuca o intorno alle basette, sfumare i capelli sopra l’orecchio.
-Inclinare l’apparecchio in modo che solo un bordo della lama tocchi i capelli per rifinire le sfumature
intorno all’orecchio.
-Per definire il contorno sulle basette o sul collo, girare l’apparecchio e dare dei colpetti
verso il basso, sempre seguendo il naturale verso di crescita del capello.
2. RIFINITORE DI PRECISIONE
-Inserire il rifinitore di precisione (O) sul prodotto come indicato al paragrafo “Collegare
gli Accessori di taglio”.

8
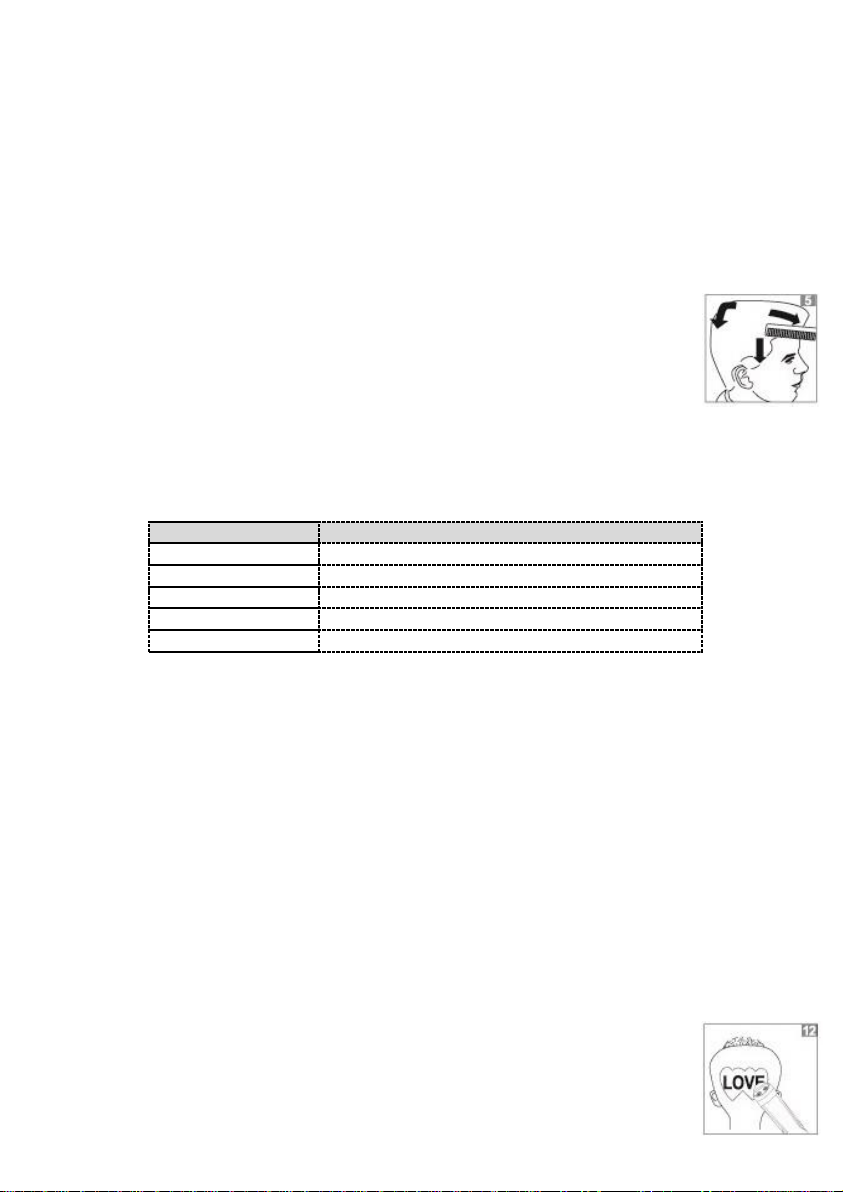
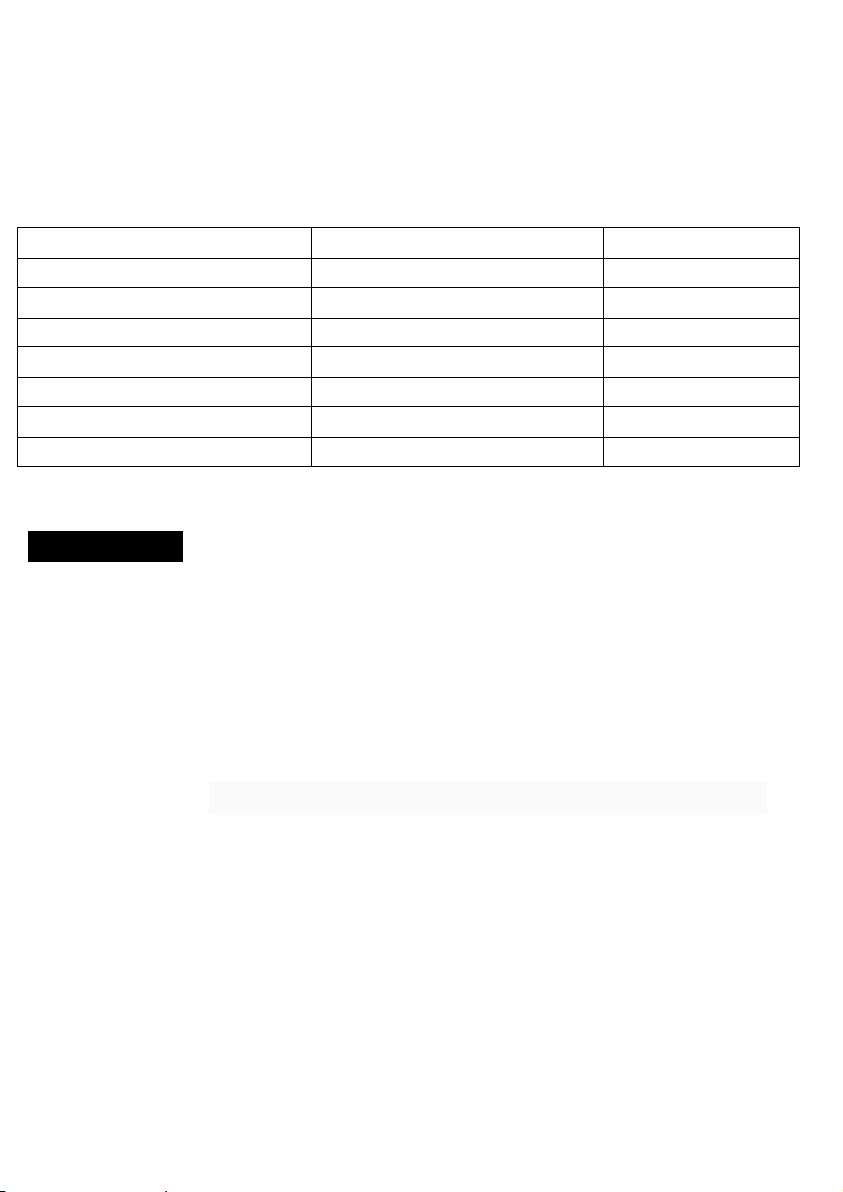
-Utilizzare questo accessorio per definire i baffi, le basette, per rifinire i contorni della barba o per eliminare
i singoli peli o capelli nelle zone più rade. E’ possibile anche utilizzare il rifinitore (O) per creare
acconciature particolari, con disegni e scritte (vedi Figura 12).
-Impugnare l’apparecchio e tenendolo dritto, appoggiare la lama per rifinire l’area desiderata.
3. REGOLA-BARBA
-Agganciare l’accessorio regola-barba (F) all’apparecchio ed inserire il pettine (G)
facendolo scivolare nelle guide fino al completo bloccaggio (Fig. 13).
-Spingere il pettine (G) verso il basso o verso l’alto a seconda della lunghezza di taglio
desiderata (Fig. 14), come indicato nella tabella seguente:
Posizione
Lunghezza dopo il taglio
1
4 mm
2
5 mm
3
6 mm
4
7 mm
Nota: quando si taglia per la prima volta, si consiglia di iniziare con la lunghezza
maggiore (posizione 3-4) per prendere dimestichezza con l’apparecchio.
-Accendere l’apparecchio agendo sull’interruttore di accensione (M).
-Muovere l’apparecchio lentamente sulla barba in direzione della crescita (Fig. 15): dal
momento che la barba non cresce tutta nella stessa direzione, si consiglia di muovere il
regola-barba in varie direzioni.
-Per ottenere un buon risultato, assicurarsi che la parte piatta del pettine sia sempre in
contatto con la pelle.
Rimuovere regolarmente i peli rimasti sul pettine. Se è necessario, spegnere l’apparecchio
e staccare il pettine (G) per rimuovere i peli rimasti sulla lama di taglio.
4. DEPILATORE IGIENICO NASO/ORECCHIE
-Collegare il depilatore igienico (E) al prodotto come indicato al paragrafo “Collegare gli
Accessori di taglio”.
-Accendere l’apparecchio agendo sull’interruttore di accensione (M).
-Per la depilazione nasale, inserire la punta del depilatore nella narice (non più di 0,5 cm)
e muovere lentamente l’apparecchio in piccoli cerchi dentro e fuori dal naso, per tagliare
accuratamente tutti i peli in eccesso (Fig. 19).
-Per la depilazione nella zona delle orecchie, appoggiare la punta del depilatore intorno
alle orecchie e all’interno (non più di 0,5 cm per non danneggiare l’udito) e muovere
lentamente, per tagliare accuratamente tutti i peli in eccesso (Fig. 20).
5. RASOIO
-Usare il rasoio (C) per creare contorni precisi oppure sfumare il taglio della barba.
ATTENZIONE: per evitare eventuali lesioni alla pelle, prima di utilizzare il rasoio (C) controllare che
l’accessorio non sia danneggiato sulla lama; in tal caso, sostituire l’accessorio con uno nuovo prima di
utilizzarlo.
-Inserire il rasoio (E) sul prodotto come indicato al paragrafo “Collegare gli Accessori di taglio”.
-Accendere l’apparecchio agendo sull’interruttore di accensione (M).
-Muovere lentamente l’apparecchio intorno ai bordi che si vogliono radere.
ATTENZIONE: Si consiglia di non premere troppo forte sulla pelle durante la rasatura.
PULIZIA - ATTENZIONE: Staccare la spina dalla presa elettrica prima di effettuare qualsiasi
operazione di manutenzione e pulizia.
Dopo ogni taglio pulire il pettine utilizzato o la lama di taglio del rasoio soffiandovi sopra o utilizzando il
pennellino (Q) in dotazione.
Utilizzare l’olio in dotazione per lubrificare la lama. Sono sufficienti 2-3 gocce se l’operazione viene eseguita
spesso. Utilizzare solo l’olio in dotazione o altri simili, comunque non contenenti acidi. Per la pulizia non
immergere il corpo del prodotto in acqua, ma pulirlo con un panno morbido leggermente umido.

9
CARATTERISTICHE TECNICHE
•Adattatore: AC 100-240V ~ 50-60Hz / DC 3V –1000mA
•Autonomia 45 minuti
•Batteria Ni-Mh 2x600mA
•5 in 1: regola-capelli, regola-barba, rifinitore di precisione, depilatore igienico naso/orecchie e
rasoio elettrico
SCHEDA TECNICA ALIMENTATORE: LW-030100EU
Informazione
Valore
Unità
Tensione d’ingresso
100 - 240
V
Frequenza d’ingresso
50-60
Hz
Tensione di uscita
3.0 a.C.
V
Corrente d’uscita
1.0
A
Potenza d’uscita
3.0
W
Rendimento medio attivo
71.59
%
Potenza assorbita a vuoto
0.05
W
ENGLISH: SAFETY INSTRUCTIONS
The following are important notes on the installation, use
and maintenance; save this instruction manual for future
reference; use the equipment only as specified in this
guide; any other use is considered improper and
dangerous; therefore, the manufacturer cannot be held
responsible in the event of damages caused by improper,
incorrect or unreasonable use.
Before use, ensure the equipment is undamaged; if in
doubt, do not attempt to use it and contact the authorized
service center; do not leave packing materials (i.e. plastic
bags, polystyrene foam, nails, staples, etc.) within the
reach of children as they are potential sources of danger;
always remember that they must be separately collected.
Make sure that the rating information given on the
technical label are compatible with those of the electricity
grid; the installation must be performed according to the
manufacturer's instructions considering the maximum
power of the appliance as shown on the label; an incorrect

10
installation may cause damage to people, animals or
things, for which the manufacturer cannot be considered
responsible thereof.
If it is necessary to use adapters, multiple sockets or
electrical extensions, use only those that comply with
current safety standards; in any case do not exceed the
power consumption limits indicated on the electrical
adapter and / or extensions, as well as the maximum
power shown on multiple adaptor.
Do not leave the unit plugged; better to remove the plug
from the mains when the device is not in use. Always
disconnect from power supply if you leave it unattended.
Cleaning operations should be carried out after
unplugging the unit.
If the unit is out of order and you do not want to fix it, it
must be made inoperable by cutting power cord.
-Do not allow the power cord to get closer to sharp
objects or in contact with hot surfaces; do not pull it to
disconnect the plug.
-Do not use the appliance in the event of damage to the
power cord, plug, or in case of short circuits; to repair
the product only address an authorized service center.
-Do not handle or touch the appliance with wet hands or
bare feet. Do not expose the appliance to harmful
weather conditions such as rain, moisture, frost, etc..
Always store it in a dry place.
-This appliance can be used by children of 8 years and
above and persons with reduced physical, sensory or
mental capabilities or lack of experience and knowledge
if they received supervision or instruction concerning
use of the appliance in a safe way and understand
hazards involved; children shall not play with the
appliance; cleaning and user maintenance shall not be
made by children without supervision.

11
-Children must not play with the appliance.
-Keep the appliance and its cord out of reach of children
less than 8 years.
-This appliance is intended to be used in household and
similar applications such as: staff kitchen areas in shops,
offices and other working environments; by clients in
hotels, motels and other residential type environments;
farm houses, bed and breakfast type environments.
If the power cord is damaged, or in case of failure and / or
malfunction do not tamper with the unit. The reparation
must be done by manufacturer or by service center
authorized by the manufacturer in order to prevent any
risk. Failure to comply with the above may compromise
the unit safety and invalidate the warranty.
-The appliance is not intended to be operated by means
of an external timer or separate remote-control system.
-Before every use, unroll the power cord.
-Use original spare parts and accessories only.
-Do not subject the product to strong impacts, serious
damages may result.
Do not use near or under flammable materials (like
curtains), heat, cold spots and steam.
GENERAL INSTRUCTIONS
-Do not immerse the appliance in water or other liquids.
-Don’t use in state of sleepiness and perform careful and
delicate movement. Do not use on wigs or irritated skin.
-When changing the cut accessories, switch off the
appliance. Do not use the appliance if an accessory (eg
comb or blade) is damaged.
-The unit must be charged only when it is turned off.
Connect device to compatible power socket.
-Clean and lubricate the machine regularly to ensure
better performance and longer life.
-Never leave the appliance unattended while it is running.

12
-The charging adapter contains a power transformer, it is
recommended not to change the type of plug as this
could cause a hazardous situation.
-Operating temperature 15-35 ° C. If the unit is subject to
a major change in temperature, pressure and humidity,
wait about 30 minutes before using it.
-Use only original AC/DC adapter to recharge the device.
-This unit was created for cutting hair, shorten beard,
sideburns and mustache and as a nose/ears trimmer; any
other use is considered dangerous.
-Do not tick and / or cut your eyebrows and eyelashes
with this unit.
WARNING: never use the unit for any reason
inside the bath or in the shower. Avoid any
splashes of water from getting inside the device. If this
happens, the hair clipper must be checked by qualified
personnel before operating it again.
DESCRIPTION OF PARTS RC30
A) Hair clipper comb (4 pieces) B) Hair clipper attachment C) Shaver
E) Nose/ear trimmer F) Beard trimmer G) Beard trimmer comb
K) AC/DC adapter J) Appliance plug M) ON/OFF switch
N) Charging light O) Precision trimmer P) Power socket
Q) Cleaning brush R) Charging stand S) Lubricating oil
CHARGING THE UNIT
Fully charge the unit before using or after a long period of inactivity. The full charge takes about 8 hours and
provides an operating time range of 45 minutes.
CAUTION: When charging, make sure the unit is off.
Direct charging: connect the plug (K) to the power socket on device (P) and plug the adapter into a socket
compatible. The red charging light turns on to indicate that the unit is charging.
-Disconnect the charging adapter from the outlet when the device is fully charged (about 8 hours).
-Do not overcharge the unit by leaving it connected to the power outlet for more than 24 hours.
-To improve the unit performance, we recommend charging the battery twice a year, by letting the motor run
until it stops completely. Then fully recharge it for 8 hours.
HOW TO CONNECT CUTTING ATTACHMENTS
All cutting attachments such as hair-clipper (B), shaver (C), nose trimmer (E), beard trimmer (F), body
trimmer (H) and the precision trimmer (O) can be connected and disconnected to the unit in the same way.
Follow the below steps:
1. To connect the attachment to the unit, press the accessory against the unit until it locks.
2. To disconnect the cutting accessory, pull the attachment from the blade side, and detouch it.

13
TIPS FOR CUTTING
-Make sure that the device is fully charged before starting the cutting process.
-Use only on clean and dry hair and never use it on wet hair.
-Make sure that the head of the person whose hair you want to cut is at the same level as your shoulders; in
this way, each cutting zone will be clearly visible.
-Cut hair in the direction of growth (see Fig. 5).
-Install the cutting attachment as described in the previous paragraph.
OPERATING THE UNIT
1. HAIR CLIPPER
-After having installed the attachment (B) to the unit, connect one of the 4 hair clipper combs (A) to the
attachment (B) and on both sides until it clicks in position.
-Without the comb the cutting height can be set to 3 levels (0.8 - 1.1 - 1.4mm) using the selector on the
upper part of the appliance.
-Choose the comb depending on the desired level, as indicated in the below table:
Comb
Hair length (after clipping)
Without comb
0.8 - 1.1 - 1.4 mm
1
3 mm
2
6 mm
3
9 mm
4
12 mm
Note: when you are trimming for the first time, you may want to start with the longer length to familiarize
yourself with the appliance.
-Turn on the unit by moving the operation switch (M).
-Move the device slowly in the direction of hair growth: since the hair does not grow in the same direction, it
is recommended to move the clipper in various directions.
-For best results, make sure that the flat part of the comb is always in contact with the scalp.
-Make several passes over the head to ensure you cut all the hair you need to.
-Regularly remove remaining hair on the comb. If you need, switch off the appliance to remove the comb
(A) and clean the cutting blade.
CONTOURING WITHOUT THE COMB
The device can also be used without the cutting comb (A), to cut very short hair (0.8-1.4
mm long), to contour the neckline, the sideburns and the area near the ears.
WARNING: Be careful when using device without the comb since the blades are very
sharp.
-Extract the cutting comb (A).
-Before finishing the outline on the neck or around the sideburns, fade hair above the ear.
-Tilt device so that only one edge of the blade touches the hair to finish the nuances
around the ear.
-To contour sideburns or neckline, turn the appliance and make downward strokes,
always following the natural hairline.
2. PRECISION TRIMMER
-Connect the precision trimmer (O) to the unit as described in "How to connect cutting
attachments" paragraph.
-Use this accessory to shape your mustache, sideburns, to contour beard or to remove
single hair.
-You can use the trimmer (O) to design hairstyle with drawings and lettering (see Figure 12). Hold the
device upright and trim the desired area.

14
3. BEARD TRIMMER
-Attach the beard trimmer (F) to the unit and insert the beard trimmer comb (G) by sliding it into the guides
until it snaps in position (see Fig. 13).
-Push the comb (G) downwards or upwards to set the desired level (Fig. 14), as indicated in the following
table:
Setting
Length (after trimming)
1
4 mm
2
5 mm
3
6 mm
4
7 mm
Note: when you are trimming for the first time, you may want to start with the longer length (position 3-4) to
familiarize yourself with the appliance.
-Turn on the unit by moving the operation switch (M).
-Move the device slowly in the direction of hair growth: since the hair does not grow in the same direction, it
is recommended to move the clipper in various directions (see Fig. 15 for reference).
-For best results, make sure that the flat part of the comb is always in contact with your skin.
-Make several passes over the head to ensure you cut all the hair you need to.
-Regularly remove remaining hair on the comb. If you need, switch off the appliance to remove the comb
(G) and clean the cutting blade.
4. NOSE/EAR TRIMMER
-Connect the nose/ear trimmer (E) to the unit as described in "How to connect cutting attachments"
paragraph. Turn on the unit by moving the operation switch (M).
-For the nasal hair removal, insert the tip of the trimmer in the nostril (not more than 0.5 cm) and slowly
move the unit in circles, inside and outside the nose, to accurately cut all the unwanted hair (see Fig. 19 ).
-For removing the hair around the ears, put the tip of the trimmer around the ears and inside (do not insert
the trimmer more than 0.5 cm into the ear as this could damage eardrum), move slowly and carefully cut all
the unwanted hair (Fig . 20).
5. SHAVER
-Use the razor (C) to create smooth and well-defined contours on your beard.
CAUTION: to avoid injury to the skin, before using the shaver (C) check that the attachment is not
damaged on the foil; in this case, replace the shaver with a new one before use.
-Insert the shaver attachment (E) to the unit as described in "How to connect cutting attachments" paragraph.
Turn on the unit by using the power switch (M).
-Slowly move the device around the edges you want to shave.
CAUTION: be careful not to press too hard on your skin while shaving.
CLEANING - CAUTION: disconnect the plug from the electrical power outlet before performing
any maintenance and cleaning on the unit.
After each cut, clean the trimmer or hair-cutting comb, or the shaver attachment by blowing on them or using
the cleaning brush (Q) to remove the hair.
Use the supplied oil to lubricate the blade. 2-3 drops are enough if you are going to perform this operation
quite often. Use only lubricating oil provided, or other similar, but not acid oils. For cleaning the unit, do not
immerse the main body in water or other liquids, but clean it with a soft, damp cloth.
TECHNICAL FEATURES
•Power supply: AC 100-240V ~ 50-60Hz / DC 3V –1000mA
•Operation time 45 mins -2 x 600mA Ni-Mh battery
•5 in 1: hair-clipper, beard trimmer, precision trimmer, ear/nose trimmer and electric shaver

15
TECHNICAL SHEET POWER SUPPLY: LW-030100EU
DEUTSCH: HINWEISE:
Verwenden Sie das Gerät nur nach den Anweisungen in
dieser Bedienungsanleitung. Jede anderweitige
Verwendung gilt als unsachgemäß und gefährlich, und
der Hersteller kann für Schäden haftbar gemacht werden,
die durch eine unsachgemäße, falsche oder unvernünftige
Verwendung verursacht werden. Stellen Sie vor der
Verwendung sicher, dass das Gerät unversehrt ist. Im
Zweifelsfall verwenden Sie es nicht und wenden Sie sich
an den Kundendienst.
Verpackungsmaterial (Plastiktüten, Styropor, Nägel,
Klammern) muss für Kinder unzugänglich aufbewahrt
werden, da es eine potenzielle Gefahrenquelle darstellt.
Wir möchten Sie in diesem Zusammenhang auch daran
erinnern, dass Verpackungsabfall der Mülltrennung
zugeführt werden muss.
Stellen Sie sicher, dass die Angaben auf dem Typenschild
mit denen des Stromnetzes übereinstimmen. Die
Installation muss gemäß den Anweisungen des Herstellers
unter Berücksichtigung der maximal auf dem Typenschild
angegeben Leistung erfolgen. Eine unsachgemäße
Installation kann zu Verletzungen von Personen, Tieren
Information
Value
Unit
Input voltage
100 - 240
V
Input AC frequency
50-60
Hz
Output voltage
3.0 a.C.
V
Output current
1.0
A
Output power
3.0
W
Average active efficiency
71.59
%
Efficiency at low load (10 %)
0.05
%
No-load power consumption
100 - 240
W

16
oder zu Sachschäden führen, für die der Hersteller nicht
haftbar gemacht werden kann.
Wenn Adapter, Mehrfachsteckdosen und
Verlängerungskabel erforderlich sind, verwenden Sie nur
solche, die die geltenden Sicherheitsstandards erfüllen. In
keinem Fall dürfen die am einfachen Adapter und/oder an
den Verlängerungskabeln angegebenen
Verbrauchsgrenzen sowie die maximale Leistung
überschritten werden, die auf dem Mehrfachadapter
angegeben ist.
-Verwenden Sie das Netzkabel nicht in der Nähe von
scharfen Gegenständen oder heißen Oberflächen und
ziehen Sie den Netzstecker nicht am Netzkabel aus der
Steckdose. Lassen Sie es nicht von der Arbeitsplatte
baumeln, wo ein Kind es halten könnte. Verwenden Sie
das Gerät im Falle von Schäden am Netzkabel, Stecker
oder im Falle von Kurzschlüssen nicht und lassen Sie es
in einer Vertragswerkstatt reparieren.
-Setzen Sie das Gerät keinen ungünstigen
Wetterbedingungen, wie z. B. Regen, Feuchtigkeit,
Frost, aus und bewahren Sie es an einem trockenen Ort
auf. Fassen Sie das Gerät nicht mit nassen Händen an
und verwenden Sie es nicht barfuß.
-Dieses Gerät kann von Kindern ab 8 Jahren und von
Personen mit eingeschränkten körperlichen,
sensorischen oder geistigen Fähigkeiten oder
mangelnder Erfahrung und Kenntnissen verwendet
werden, wenn sie beaufsichtigt oder instruiert wurden,
um das Gerät sicher zu verwenden und die damit
verbundenen Gefahren zu verstehen. Kinder dürfen
nicht mit dem Gerät spielen. Reinigung und
Benutzerwartung dürfen nicht von Kindern ohne
Aufsicht durchgeführt werden.
-Kinder dürfen nicht mit dem Gerät spielen.

17
-Bewahren Sie das Gerät und sein Netzanschluss
außerhalb der Reichweite von Kinder unter 8 Jahren.
-Nicht für den gewerblichen Gebrauch bestimmt. Nur
für den Hausgebrauch bestimmt.
Im Falle eines Defekts und/oder von Fehlfunktionen das
Gerät nicht öffnen. Für Reparaturen wenden Sie sich an
eine vom Hersteller autorisierte Werkstatt
(Vertragswerkstatt) und fordern Sie den Einsatz von
Original-Ersatzteilen. Die Nichtbeachtung der obigen
Vorschriften kann die Sicherheit beeinträchtigen und zur
Folge haben, dass die Garantie erlischt.
Dieses Gerät ist nur für den Hausgebrauch oder
gleichwertiges bestimmt, in Situationen wie bspw.:
Kantinen in kleinen Firmen oder ähnliche
Arbeitsumgebungen, von Kunden in Hotels, Motels oder
andere Art von touristische Unterkunft, wie ländlicher
oder Wohn –Tourismus.
Das Gerät darf nicht mit einer Zeitschaltuhr oder mit
einem separaten Fernwirksystem betrieben werden
Führen Sie vor jedem Gebrauch das Netzkabel aus.
Setzen Sie das Produkt keinen Stößen aus, es könnte
beschädigt werden. Verwenden Sie nur originale und
kompatible Teile und Zubehör.
Halten Sie das Gerät fern von brennbaren Materialien,
Wärmequellen, Dampf-und kalte Zonen.
GRBRAUCHSANWEISUNG
-Tauchen Sie das Gerät niemals in Wasser oder andere
Flüssigkeiten. Verwenden Sie es nicht im schläfrigen
Zustand und führen Sie feine und präzise Bewegungen
aus. Nicht auf Perücken oder gereizte Haut verwenden.
-Das Gerät regelmäßig Reinigen für bessere Ergebnisse
und Lebensdauer.
-Lassen Sie das Gerät nie unbewacht, während es in
Betrieb ist. Um schwere Schäden zu vermeiden, das

18
Gerät keine Schläge aussetzen.
-Der Ladeadapter enthält einen Netztransformer, es
empfieht sich, der Steckertyp nicht zu wechseln, da
dies eine Gefährdungsssituation darstellt.
-Betriebstemperatur 15-35 ° C.
-Zum aufladen des Gerätes, benutzen Sie nur den
originalen AC/DC Adapter
-Benutzen Sie das Gerät nicht, wenn ein Zubehörteil (bsp.
Kamm oder Klinge) beschädigt ist.
- Dieses Gerät wurde hergestelt, um Haare zu schneiden,
Bart zu kürzen, und als Backenbart/Koteletten,
Schnurrbart und Nasen/Ohren Trimmer; jede andere
Verwendung wird als gefährlich betrachtet.
Stutzen oder Schneiden Sie nicht Ihre Augenbrauen und
Wimpern mit diesem Gerät.
Wenn das Gerät eine starke Temperaturveränderung
unterliegt, Druck oder Feuchtigkeit, warten Sie etwa 30
Minuten, bevor Sie es verwenden.
ACHTUNG: das Gerät niemals aus irgendeinem
Grund in der Badewanne oder unter der Dusche
benutzen. Falls das Gerät ins Wasser fällt, nicht
anfassen und ziehen Sie sofort der Netzstecker.
Verhindern Sie Wasserspritzen. Wenn solche Vorfälle
auftreten, nehmen Sie das Gerät zu qualifiziertem
Fachpersonal um denselben zu prüfen, bevor Sie es
wieder verwenden.
BESCHREUBUNG RC30
A) Haarschneider Kamm B) Haarschneideraufsatz C) Rasierer
E) Nase/Ohren Trimmer F) Bard Trimmer G) Bard Trimmer Kammaufsatz
K) AC/DC Adaptert J) Gerätstecker M) EIN/AUS Schalter
N) Ladegerät O) Präzisions Trimmer P) Steckdose
Q) Reinigungbürste R) Ladestation S) Schmieröl
AUFLADEN DES GERÄTES
Laden Sie das Gerät vor dem ersten Gebrauch, und wenn Sie es für längere Zeit nicht benutzt haben,
vollständig auf. Die Ladezeit dauert ca.8 Stunden und liefert eine Betriebszeit von 45 Minuten.
ACHTUNG: Beim aufladen, vergewissern Sie sich, dass das Gerät ausgeschaltet ist.

19
Direkte Aufladung: schließen Sie den Stecker (K) direkt am Gerät und stecken Sie den Adapter in eine
Kompatible Steckdose ein.
Die Ladelampe leuchtet und zeigt an, dass das Gerät geladen wird.
ACHTUNG
-Schalten Sie den Adapter von der Steckdose aus, wenn er vollständig geladen ist (ca. 8 Stunden).
-Das Gerät nich überladen, indem Sie es an der Steckdose für mehr als 24 Stunden angesteckt lassen.
-Um die Leistung des Gerätes zu steigern, wird empfohlen die Batterie zweimal pro Jahr zu laden, indem Sie
den Motor laufen lassen bis er vollständig steht. Dann laden Sie es für 8 Stunden vollständig auf.
WIE KANN MAN SCHNEIDEAUFSÄTZE ANBRINGEN
Alle Schneideaufsätze, wie Haarschneider (B), Rasierer (C), Nasen Trimmer (E), Bard Trimmer (F), Körper
Trimmer (H) und Präzisions Trimmer (O) können ans Gerät in der gleichen Weise verbunden und abgestellt
werden. Führen Sie die folgenden Schritte aus:
Um das Gerät an das Gerät anzuschließen, drücken Sie das Zubehörteil gegen das Gerät, bis es einrastet.
Ziehen Sie zum Entfernen des Schneidzubehörs den Aufsatz von der Blattseite und ziehen Sie ihn ab.
TIPPS ZUM SCHNEIDEN
-Stellen Sie sicher, dass das Gerät vollständig aufgeladen ist, bevor Sie mit dem Schneiden anfangen.
-Nur auf sauberen und trockenen Haare verwenden und nie auf nassen Haare verwenden.
-Vergewissern Sie sich, dass der Kopf der Person, deren Haare Sie Schneiden wollen, auf derselben Ebene
wie Ihre Schultern ist; auf diese Weise, ist jede Schneidzone deutlich sichtbar.
-Die Haare in Wachstumsrichtung schneiden (Bild. 5 sehen).
-Setzen Sie den Schneidzubehör an, wie im vorherigen Absatz beschrieben.
INBETRIEBNAHME
1. HAARSCHNEIDER
-Nachdem Sie den Zubehör(B) in das Gerät aufgesetz haben, stecken Sie den Haarschneider Kamm (A) auf
den Zubehör (B) auf beiden Seiten ein, bis es mit einem Klick einrastet.
-Ohne Kamm kann die Schnitthöhe mit dem Wahlschalter auf dem oberen Teil des Gerätes auf 3 Stufen (0,8
- 1,1 - 1,4 mm) eingestellt werden.
-Wählen Sie den Kamm je nach gewünschtem Niveau, wie in der folgenden Tabelle angegeben:
Stufeeinstellung
Haarlänge (nach dem schneiden)
Ohne Kamm
0.8 - 1.1 - 1.4 mm
1
3 mm
2
6 mm
3
9 mm
4
12 mm
Hinweis: wenn Sie zum ersten Mal abschneiden, es kann sein, dass Sie möglicherweise mit der längere
Länge beginnen wollen damit Sie sich an dem Gerät gewöhnen.
-Schalten Sie das Gerät an, indem Sie den Bedienungsschalter (M) bewegen.
-Bewegen Sie das Gerät langsam in die Richtung des Haarwachstums: da das Haar nicht in derselben
Richtung wächst, es ist empfohlen, den Haarschneider in verschiedenen Richtungen zu bewegen.
-Für optimale Ergebnisse, vergewissern Sie sich, dass der flache Teil des Kammaufsatzes immer in Kontakt
mit der Kopfhaut ist.
-Führen Sie mehrere durchgänge über dem Kopf, um sicherzustellen, dass sie alle Haare schneiden.
-Entfernen Sie regelmäßig Haarreste vom Kammaufsatz. Wenn Sie brauchen, schalten Sie das Gerät aus,
damit Sie das Kammaufsatz (A) abnehmen und die Klingen reinigen
KONTUR OHNE KAMMAUFSATZ
Das Gerät kann auch ohne den Schneid-Kammaufsatz (A) benutzt werden, um sehr kurze Haare zu schneiden
(0.8-1.4mm), um den Halsausschnitt, Backenbart/ Koteletten und in der Nähe des Ohrbereiches zu
This manual suits for next models
1
Table of contents
Languages:
Other TREVIDEA Hair Clipper manuals