TRIB airCap PG User manual

airCap
TM
PG Owner’s Manual
TRīB
®
Outdoor Tech © 2021
info@triboutdoor.com
www.triboutdoor.com
Version 20
21
.0
1
airCap G
Thank you for choosing airCap G! As you may have guessed the ‘ G’ stands for ump Gauge.
airCap G is designed to directly replace the mechanical gauge in most pumps. The solar powered
digital display algorithmically smooths the normally cyclical pumping pressure into a smooth easy-
to-read display of pressure. The battery free designs gives the gauge a long, reliable and
maintenance-free life!
The following information will help you get the most out of your purchase. We hope you have a
great experience with airCap G! If you ever have any questions or comments about the product,
please reach out to us directly. We would love to hear from you!
Warning!
The use of inflatable watercraft has inherent risks and should only be attempted by qualified
individuals. It is your responsibility to ensure that your equipment is functioning properly. Only
operate your watercraft when it’s in good operating condition and properly inflated. Frequently
check your watercraft’s inflation pressure with a second calibrated pressure gauge to ensure airCap
is functioning properly. Always wear a suitable personal flotation device when using your inflatable
watercraft.
How It Works
airCap G operates directly from light. To turn it on just place it in a well-lit environment (e.g.
outdoors). It has no batteries, giving it a long life and eliminating the need for charging.
airCap G can also be energized by headlamp or flashlight for night-time operation.
airCap G uses a unique and proprietary technology called EvenFlow
TM
to smooth out cyclical
pumping pressure for an exceedingly easy-to-ready display.

airCap
TM
PG Owner’s Manual
TRīB
®
Outdoor Tech © 2021
info@triboutdoor.com
www.triboutdoor.com
Version 20
21
.0
1
Installation
Inflate Your Watercraft
Inflate your boat or SU to proper pressure as specified by the manufacturer.
airCap will smooth the pumping pressure for a relatively stable pressure measurement.
When you start to approach the desired inflation pressure, slow your pumping stroke speed
to maximize accuracy. This will minimize the pressure derived from the flow of air through the
inflation tube.
Operation
airCap will display the inflation pressure whenever a suitable light source is present.
See “Low Light Conditions” section for more information.
Setting the Units
airCap G can display pressure in either SI, k a or BAR
By default airCap G units are set to “psi”
To change the units follow the procedure below
airCap
TM
PG Owner’s Manual
TRīB
®
Outdoor Tech © 2021
info@triboutdoor.com
www.triboutdoor.com
Version 20
21
.0
1
While setting the units airCap G needs to be in a well lit environment. If there is insufficient
light airCap may display “SUN” to indicate more light is needed.
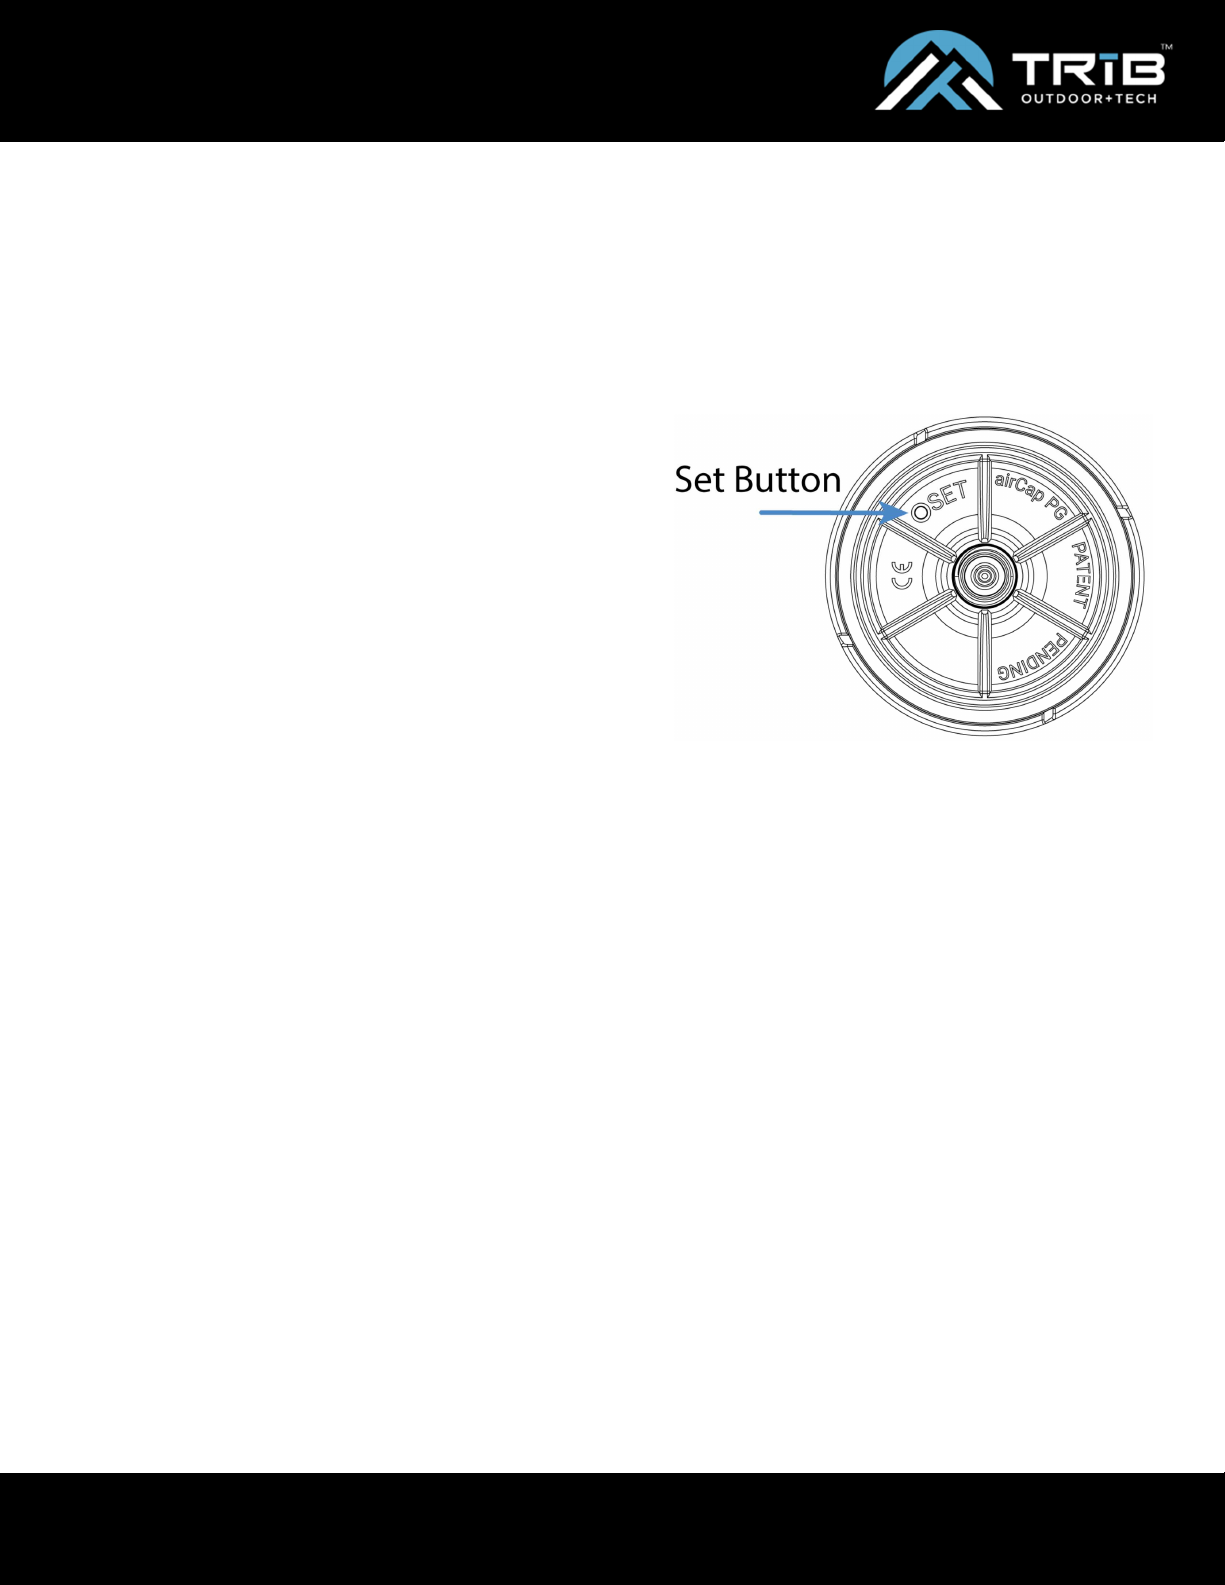
Step 1:
get a tool such as a paper clip or small screw driver to
access the ‘SET’ switch on the bottom side of the airCap G
which is recessed into the reset hole. Do not use a tool which is
sharp.
Step 2:
Start a well-lit environment such as outdoors in sunlight.
Insert the tool into the set hole and face airCap G upward
facing you. airCap G should be on.
Step 3:
cover the LCD well until the airCap LCD display turns off.
Step 4:
depress the button, you should feel it click. Hold the
button in and uncover the solar cell until the LCD display turns
on.
Step 5:
once the display turns on, un-press the button. The
current display units should be flashing.
Step 6:
periodically click the button to cycle through the units
“psi”, “BAR”, “k a”. Then stop on the units you would wish to set.
Step 7:
stop pushing the button for a few seconds. airCap will
automatically save the units. When it saves it will display a dash
screen “---” to indicate the new units have been saved. airCap
will then exit the ‘set’ mode and return to normal pressure display
mode.
Low Light Conditions
airCap will operate in most light conditions, even when it is cloudy or overcast.
If it is necessary to operate airCap after dark, a headlamp or flashlight will provide enough
light to power your airCap.
ressure Range
airCap G will read between pressures of 0.25 psi to 20 psi.
Above 20 psi, airCap G displays “O ” to alert the user that the inflation pressure is above
the display pressure of airCap.
Operation in over pressure condition is not recommended and could cause damage.

airCap
TM
PG Owner’s Manual
TRīB
®
Outdoor Tech © 2021
info@triboutdoor.com
www.triboutdoor.com
Version 20
21
.0
1
Cleaning and Maintenance
airCap G is built with watersports in mind, however it is a precise instrument and should be
treated with care.
Clean your airCap G only with mild soap and water. Do not apply solvents to airCap G.
Note: This document subject to change without notice
Table of contents
Popular Water Pump manuals by other brands

GORMAN-RUPP PUMPS
GORMAN-RUPP PUMPS 82D3-B Installation, operation, and maintenance manual with parts list

Wayne
Wayne ESP15 Operating instructions and parts manual

Seko
Seko MSA Series installation manual

Agitaser
Agitaser Ecolab ELADOS EMP KKS Series user manual

Mitsubishi Heavy Industries
Mitsubishi Heavy Industries HSB60 installation manual

Wilo
Wilo Atmos GIGA-N Installation and operating instructions


