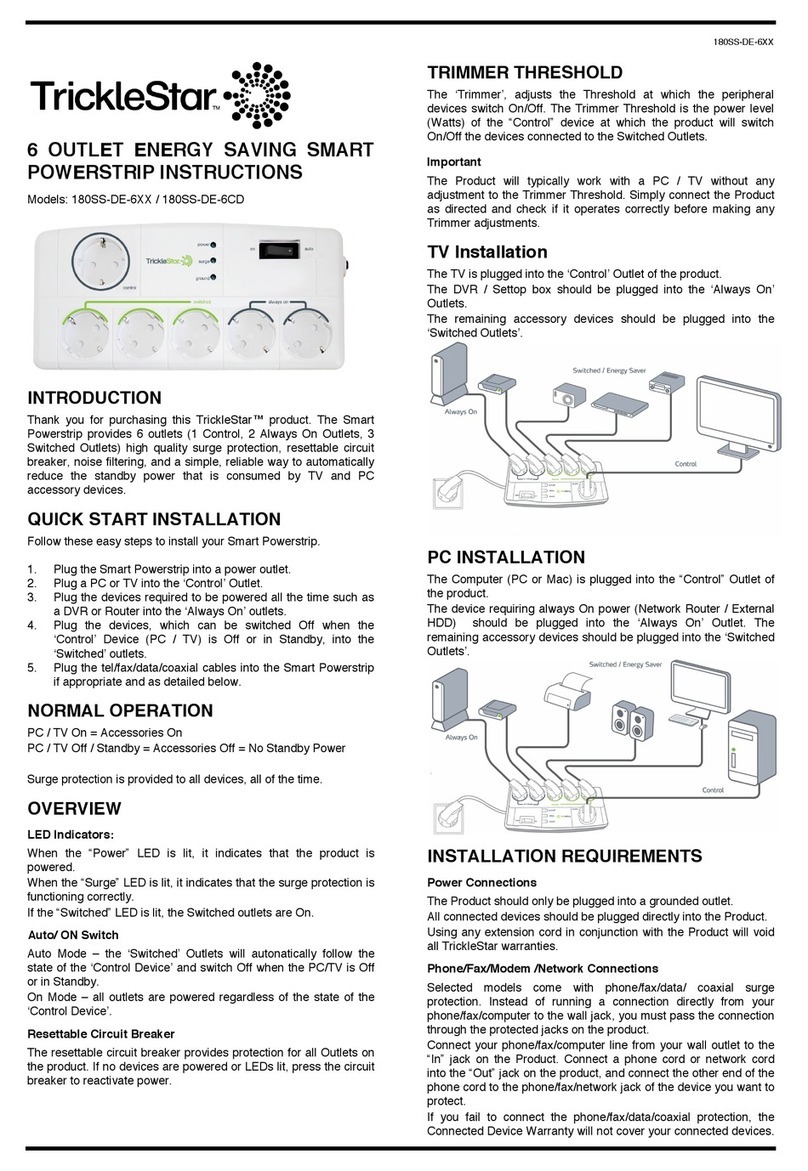
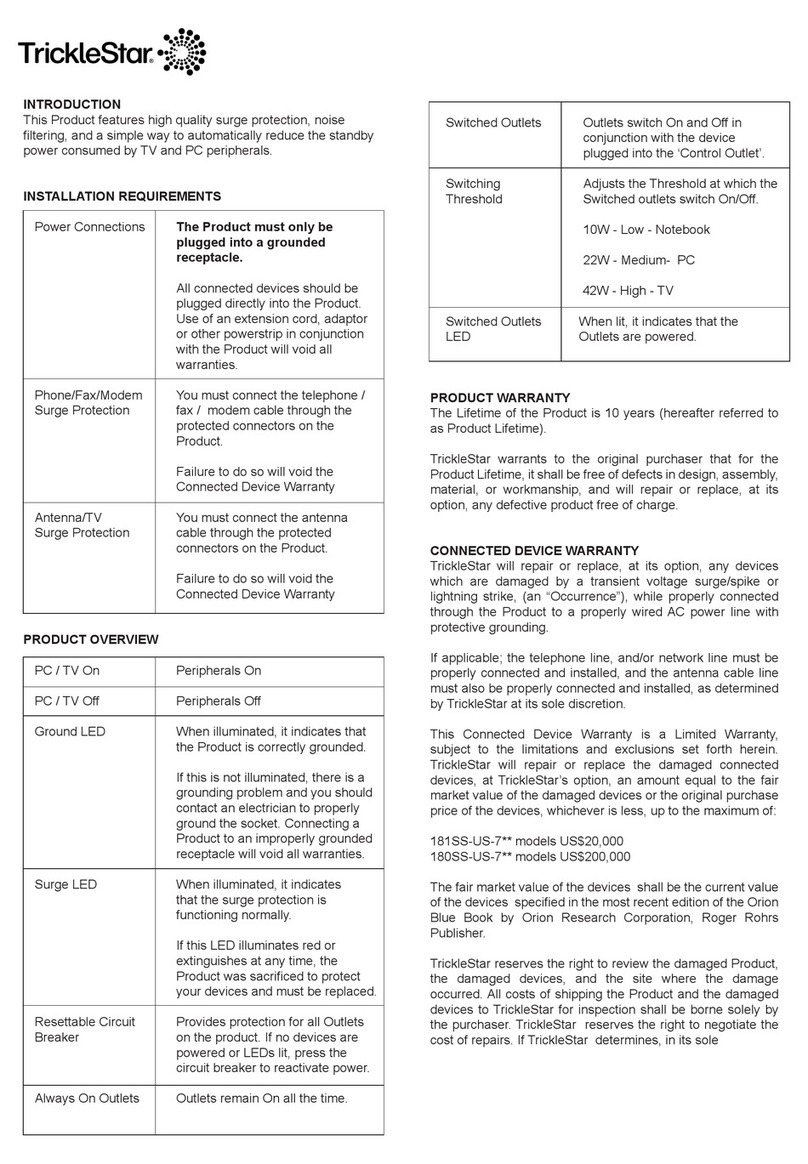
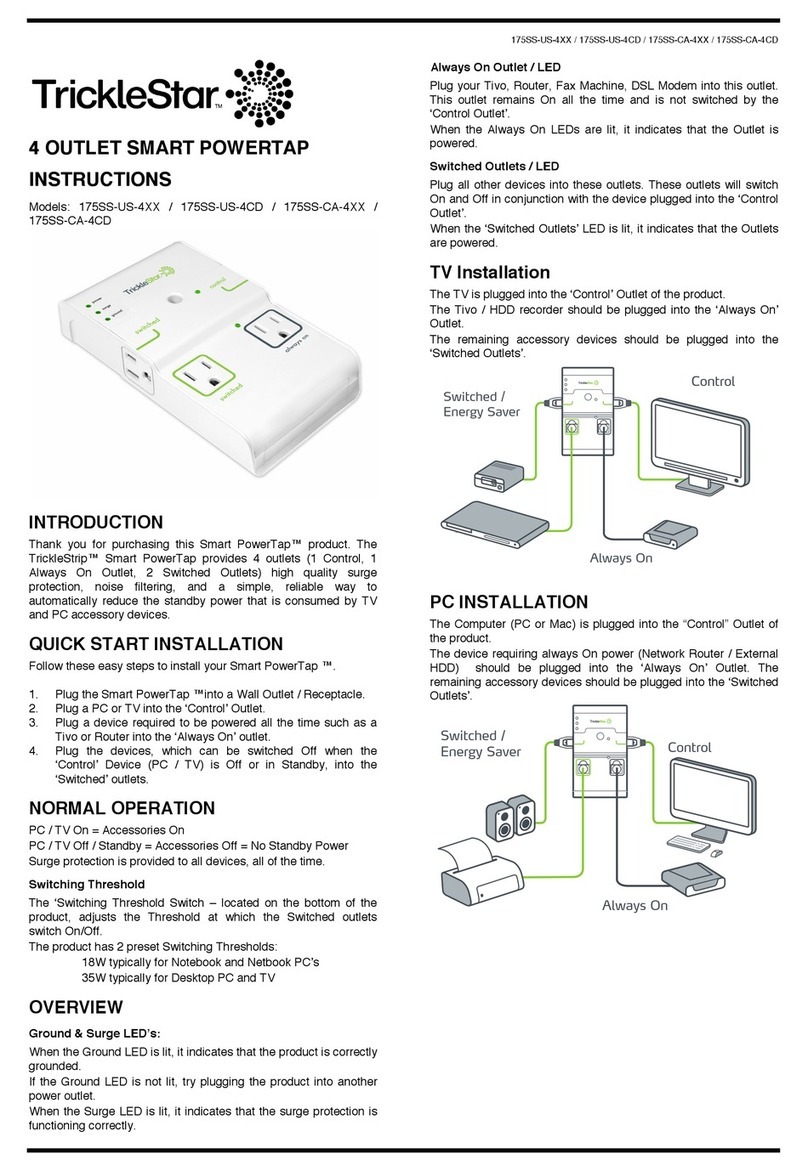
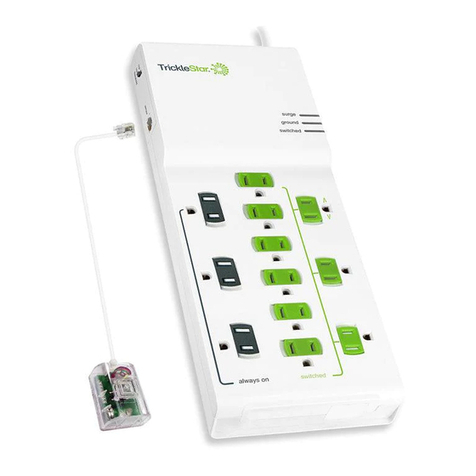
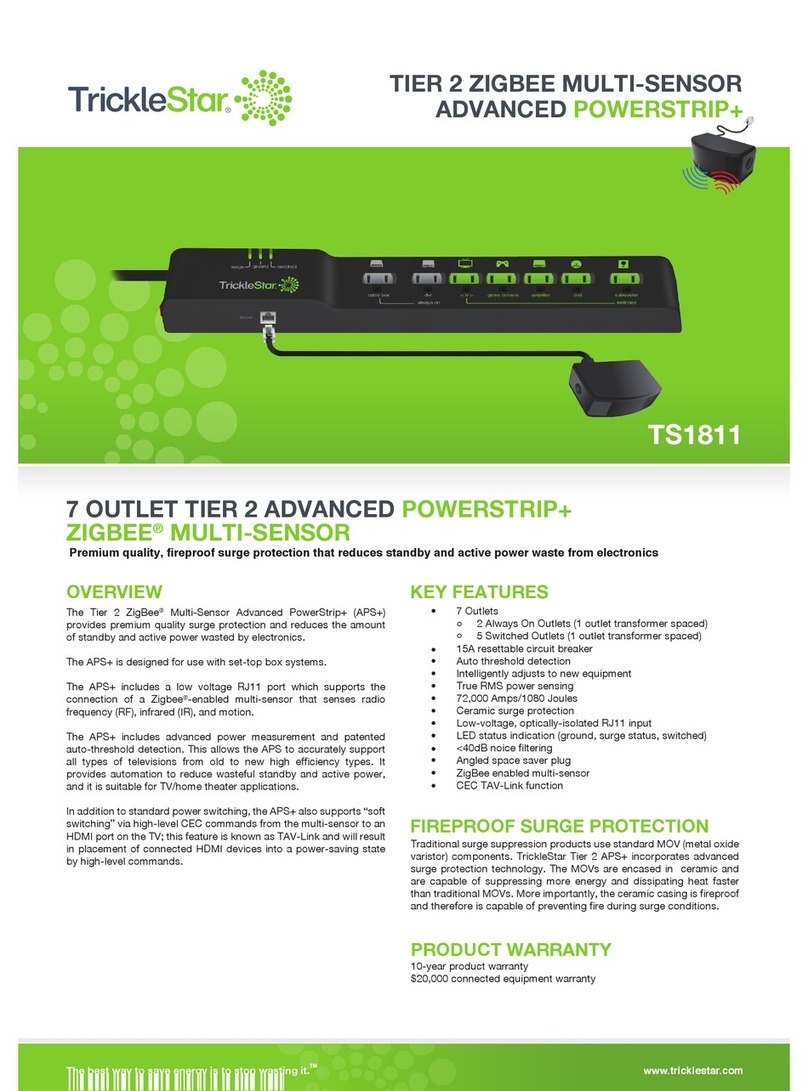
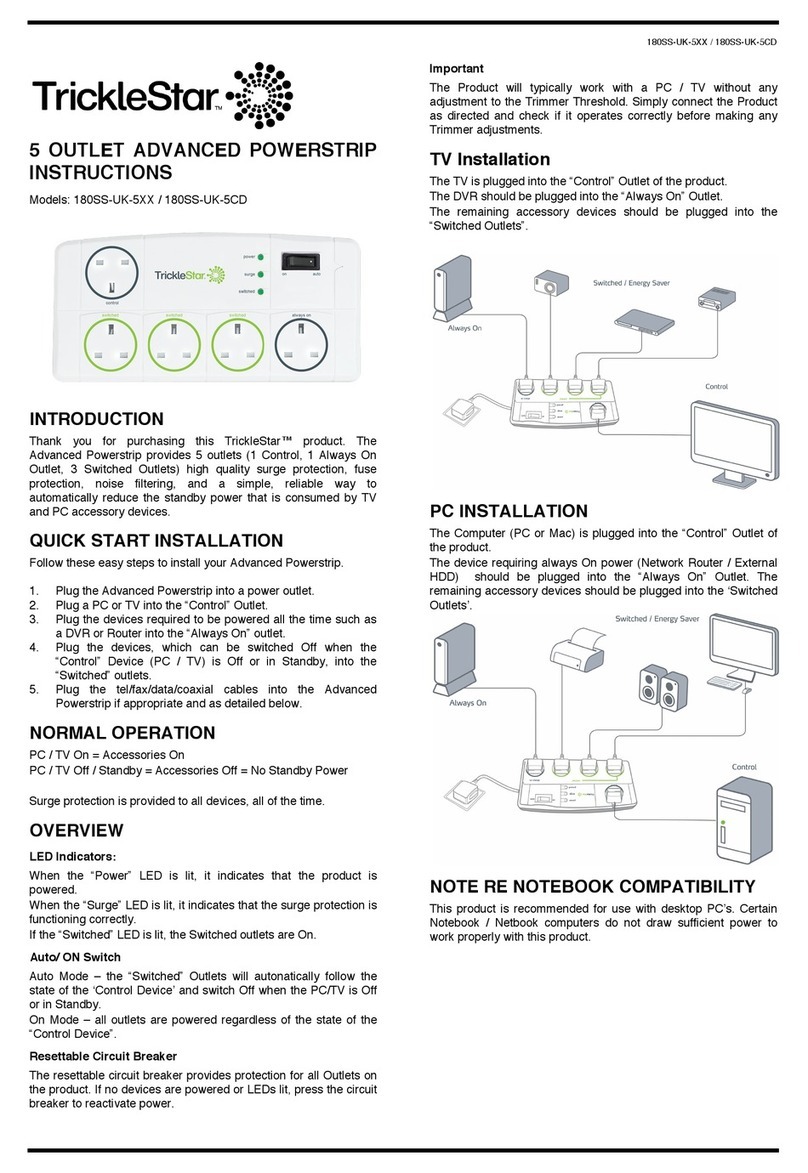
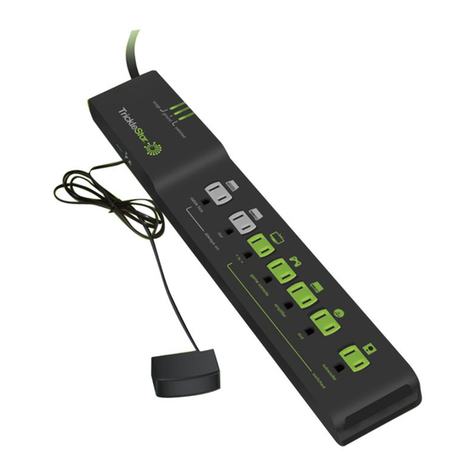
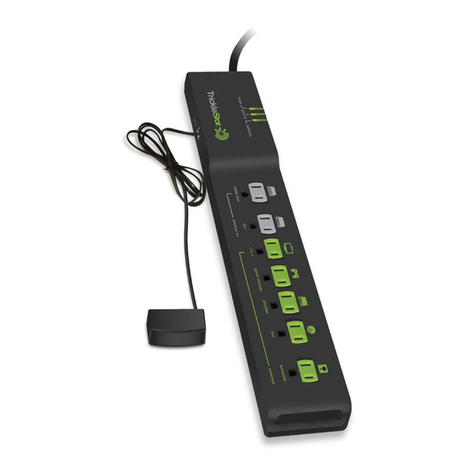
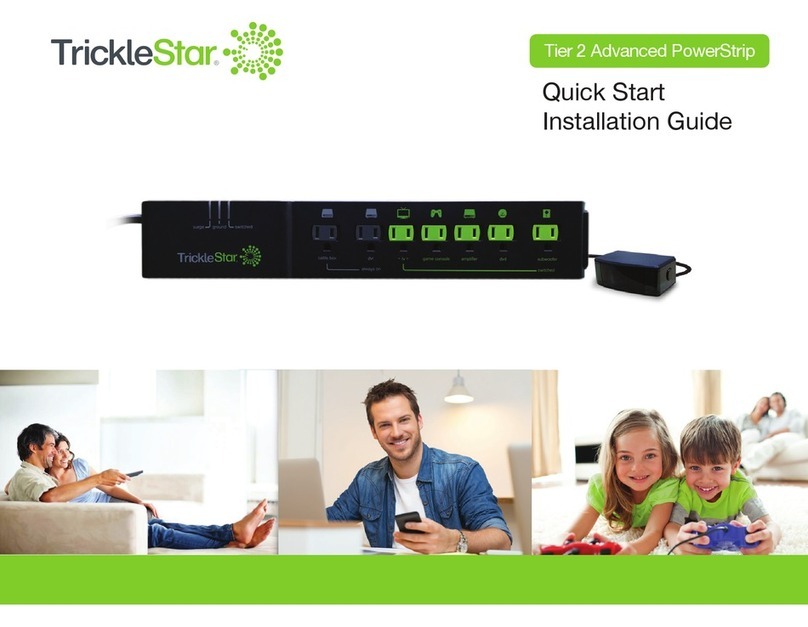
TrickleStar TS1816 User manual

®
The Bluetooth®word mark and logos are registered trademarks owned by the
Bluetooth SIG, Inc. and any use of such marks by TrickleStar Ltd is under license.
Other trademarks and trade names are those of their respective owners.
Patents Pending & Patents
9,665,073 B2
7,193,335 B2
REV 3– 4 May 2018
Bluetooth®AV
Advanced PowerStrip+
®
sensor
www.tricklestar.com
For technical support
go to www.tricklestar.com
or call 1-888-700-1098 Rev 25/4 Oct 2019
PRODUCT INFORMATION
Bluetooth® AV Advanced
PowerStrip+
TS1816
Quick Start Guide &
Instruction Manual

www.tricklestar.com BLUETOOTH® AV ADVANCED POWERSTRIP+
Power connection – The Advanced PowerStrip+ (APS+) must be plugged
into a grounded outlet to be properly surge protected. Use of an extension
cord, adaptor, or other power strip/surge protector in conjunction with the
APS+ will void all warranties.
Resettable circuit breaker – If the surge, ground, and switched LEDs are
not lit and/or connected devices are not receiving power, press the circuit
breaker to activate power.
Operation button – Push the button to enter Bluetooth pairing mode, and
reset product to its factory default.
Bluetooth LED indicator – This LED indicates connection status and pairing
mode.
RJ11 port – Plug the multi-sensor into this port. There will be a soft, audible
“click” when the connector is inserted correctly.
Surge LED – All outlets on the APS+ are surge protected. When lit green,
this LED indicates that the surge protection is functioning. If not lit or goes out
at any time, the APS+ sacrificed itself to protect your electronics and must be
replaced.
Ground LED – When lit green, this LED indicates that the APS+ is correctly
grounded. If not lit, there is a grounding problem, and you must contact an
electrician to properly ground the outlet. Surge protection will not work with an
improperly-grounded outlet.
Switched LED – When lit, it indicates that the switched outlets are receiving
power.
Multi-sensor – The multi-sensor is connected to the powerstrip via the RJ11
port marked “sensor.”
Always-on outlets – Electronics that require continuous power should be
plugged into the always-on outlets. These typically include cable or set-top
boxes, DVRs and gaming consoles with HDDs.
< tv > outlet – The outlet marked < tv > is the control outlet. IMPORTANT:
The TV must be plugged into this outlet.
Switched outlets – If the TV is turned off, or if there is no IR remote activity
or motion detected, these outlets will switch off.
TAV-Link™ cable (optional, not supplied) – TAV-Link will send high-level
CEC commands to HDMI-connected devices, allowing them to safely store
their data and settings prior to powering down.
sensor
Product Overview

TrickleStar TAV-Link functionality will softly switch off (place into an energy-saving mode)
HDMI-connected peripherals capable of receiving Consumer Electronic Control (CEC)
commands if no IR remote control activity or motion is detected.
1.
www.tricklestar.com
Game consoles without hard disk drives (HDDs) should be plugged into a switched outlet.
Those with HDDs can be plugged into an always-on outlet and controlled via TAV-Link.
2.
Installation Diagram
always on
tv game console amplifier dvd subwoofer
switched
cable box dvr
surge ground switched
sensor
Set-top box or DVR
Speakers
DVD
player
AV receiver
Game console
(no HDD)2
TAV-Link™
(CEC function)1
Motion
IR remote
control activity
Multi-sensor
TV
TrickleStar
Energy Portal
Cloud
BLUETOOTH® AV ADVANCED POWERSTRIP+
Smartphone app
for iOS & Android
®

www.tricklestar.com BLUETOOTH® AV ADVANCED POWERSTRIP+
< tv >
< tv >
Plug in devices that require continuous
power, such as a DVR, cable box or
gaming system with a hard drive, into
the always-on outlets.
TAV-Link function (optional): Devices
capable of receiving CEC commands
should be plugged into the always-on
outlets (see step 5).
always on
surge
ground
switched
switched
Plug the TV into the control outlet
marked <tv>.
Note: The TV must be plugged into
this outlet.
Remove the backing from the
double-sided tape on top of the
multi-sensor. Affix the multi-sensor to
the TV near the TV's remote sensor,
and position it facing the TV-watching
area.
TAV-LINK CAPABILITY
–OPTIONAL–
If you have a TAV-Link cable (sold
separately) and a TV with HDMI
inputs, plug the TAV-Link cable into an
open HDMI port on the TV.
TAV-Link functionality will softly switch
off (place into an energy-saving mode)
HDMI-connected peripherals capable
of receiving CEC commands.
TAV-LINK CABLE SOLD SEPARATELY
Plug the power strip into a grounded
outlet. The ground and surge lights on
the power strip will illuminate,
indicating the that power strip is
properly grounded, and that surge
protection is active.
Plug the multi-sensor into the port
on the side of the power strip that
looks like a phone jack and marked
“sensor.”
switched
dvd
cable box
game console amplifier
< tv >
subwoofer
switched
Plug other TV-related electronics into
the switched outlets.
Note: All four switched outlets
operate the same way. The icons
serve only as examples of AV
equipment that can be plugged into
these outlets.
always on
ground
surge
sensor
swiched
Step 3 Step 4Step 1
Step 5 Step 6 Step 7
Step 2
Set Up Instructions

www.tricklestar.com BLUETOOTH® AV ADVANCED POWERSTRIP+
< tv >
Press any button but the power button
on an Infrared (IR) remote. The
multi-sensor should blink red once and
then the switched outlets should have
power.
You'll know the switched outlets have
power when the switched LED at the
top of the APS+ is lit.
Note: Not all remotes are IR. You'll
know your TV remote is an IR remote if
the multi-sensor blinks red when you
press any button on it.
The APS+ features auto-threshold sensing technology. This learns the normal
power draw of your TV, known as a power profile. After set up, you need to
"teach" the APS+ the power profile of your TV.
Turn on your TV. Let it come to full
brightness. Use the IR remote to change
channels and inputs. The sensor should
blink red each time you press your
remote.
Step 1
Turn the TV off. Wait for the switched
outlets to turn off, which should take
about a minute. You'll know they are off
when the green switched LED indicator
at the top of the strip is no longer lit.
While the TV is turning off, the sensor
should blink red and blue.
Now the APS+ has learned the power
profile of your TV and you can use it.
Step 2 Step 3
Before First Use
CHANNEL 1
CHANNEL 2
CHANNEL 3
CHANNEL 4
always on
tv game console amplifier dvd subwoofer
switched
cable box dvr
surge ground switched
sensor

Download and install the Bluetooth AV
Advanced PowerStrip+ app from the
App Store or Google Play by
searching “BT AV APS+”.
Step 3 Step 4Step 2
Step 5 Step 6 Step 7
Open the app. Create a new account
or sign in if you already have an
existing account.
100%12:40 PM
Email
Password
Sign in
Sign in
Remember my password
always on
< >
surge ground switched
sensor
Press and hold the operation button
on the side of the APS+ for about 7
seconds until the LED slowly flashes
blue, indicating that the APS+ is in
pairing mode.
INSTALL
BLUETOOTH AV
ADVANCED POWERSTRIP+
Turn on Bluetooth on your mobile
device.
Step 1
For Android devices: Press and hold
the operation button on the side of the
APS+ for about 20 seconds until the
Bluetooth LED indicator rapidly
flashes blue.
For Apple devices, start at Step 2.
always on
< >
surge ground switched
sensor
www.tricklestar.com
Bluetooth Pairing
Click the "+" icon to search for the
APS+.
Click "Bluetooth AV APS+" when it
appears on the screen.
BLUETOOTH® AV ADVANCED POWERSTRIP+
®
+
Step 8
In the app, select “Bluetooth Pairing”
when it appears on the screen.

If you get a message that a firmware
update is available, click "Ok" and
proceed to Steps 13 and 14.
If you don't need to update your
firmware, pairing is complete and you
can use the APS+ and the app.
Step 10 Step 11 Step 12
Step 9
www.tricklestar.com
Bluetooth Pairing
BLUETOOTH® AV ADVANCED POWERSTRIP+
The app will display a list of Bluetooth
devices within range. Select the device
named “BLUETOOTH AV APS+.”
Give the APS+ a name and click
done.
For Apple devices: Tap "Pair."
For Android devices: Go to Step 11.
From the home screen, tap on the
name of your APS+. Tap "Firmware
Update."
Step 13
Tap "Update Firmware" and then
"Update" to downlaod and install the
latest version of firmware.
Step 14

The Home page displays power consumption
(in real time) and total power usage (displayed
as cost in dollars over the last 30 days). Click
on a menu item to view additional information.
To access the General Settings page, tap the
settings icon ( ) and tap General Settings.
Here you can update your local cost of power
(default is $0.12/kWh), enter the average
number of hours you watch TV on weekdays
and weekend days, and change the currency.
The Real Time page shows the power
consumed in real time. This screen also
displays the status of the switched outlets (on or
off), and if the device is ungrounded/grounded.
The Power Usage page displays your total
power usage (kWh) and total cost. The chart
illustrates your usage over time and can show
today, 7 days, or 30 days of information. Share
your usage via social media, email, or
WhatsApp by clicking the share button ( ).
Home
www.tricklestar.com
Bluetooth®AV APS+ App Features
Real Time (usage) Power Usage
General Settings Firmware Update Firmware Recovery
Projected Cost
BLUETOOTH® AV ADVANCED POWERSTRIP+
The App will alert you when a new version of
firmware is available. The message will stop
popping up when you update it.
This function allows the user to recover the previous
version of firmware if a firmware update fails.
If you need to do a Firmware Recovery, tap Settings
( ) then select "Firmware Recovery." Follow the
on-screen instructions.
The Projected Cost page displays total energy
use and total cost on a weekly, monthly, and
yearly basis.

No illumination indicates that the Bluetooth
device paired with the APS+ is disconnected
or not sufficiently in range.
No LED – Disconnected
always on
< >
surge ground switched
✗
sensor
always on
< >
surge ground switched
Press the operation button once to turn the
switched outlets on or off.
Manually Power Switched Outlets
On/Off
The blue LED indicator on the side of the APS+ provides a visual status notification
of the Bluetooth connection with the paired device. LED indicator states are
explained below.
The LED indicator will slowly flash blue
when the APS+ is in Bluetooth pairing mode.
Slow Flashing Blue LED – Pairing
Mode
always on
< >
surge ground switched
sensor
A continually lit blue LED indicates that the
APS+ is currently connected to a Bluetooth
device, and that the device is in range.
Solid Blue LED – Connected
always on
< >
surge ground switched
✓
In order for perform a reset, you will first need to
unpair the APS+ from your mobile device. Once
the APS+ has been unpaired, press and hold the
operation button on the side of the APS+ for
about 20 seconds until the LED rapidly flashes
blue. This will restore the APS+ to it's factory
default.
Once a reset has been complete, you will need to
re-pair the APS+ with your mobile device, rename
the APS+ and possibly update the firmware.
Reset to Factory Default
The operation button is a small button located on the side of the APS+. Press the
operation button to do the following:
always on
< >
surge ground switched
sensor
always on
< >
surge ground switched
Press and hold the operation button for at
about 7 seconds until the LED slowly flashes
blue to initialize Bluetooth pairing mode.
Initialize Bluetooth Pairing mode
single
press
>5
seconds
>15
seconds
www.tricklestar.com
Operation Button Bluetooth LED Indicator
sensor
A rapidly flashing LED indicates you've reset
the APS+ to it's factory default. You will need
to re-pair and rename the device, and
possibly update the firmware.
Rapidly Flashing Blue LED -
Factory Reset
always on
< >
surge ground switched
sensor
sensor
sensor
®
®
BLUETOOTH® AV ADVANCED POWERSTRIP+

Music Mode
To change the countdown timer, press and hold the button
on the side of the sensor for 10 seconds until the red LED
lights up. Then press:
• Once for 30 minutes (IR + motion sensing)
• Twice for 60 minutes (IR + motion sensing)
• Three times for 120 minutes (IR + motion sensing)
• Four times for 60 minutes (IR-sensing only)
• Five times for 120 minutes (IR-sensing only)
After the countdown timer is set, the LED will flash the
same number of times the button was pressed to indicate
the setting.
The sensor has a default buzzer that will sound at both 10
minutes and 3 minutes prior to shutdown. To disable the
buzzer, press and hold the button on the side of the sensor
for 10 seconds until the red LED illuminates, and then press
the button six times. The red LED will flash six times to
confirm that the buzzer has been disabled.
Press any button but the power button
on any IR remote to turn on the
switched outlets.
Press power on all music-related
devices to turn them on.
always on
tv game console amplifier dvd subwoofer
switched
cable box dvr
surge ground switched
Step 1 Step 2
If the TV is not switched on at any time during Music Mode, all of the switched
outlets will turn off after eight hours. If the TV is turned on during Music Mode, the
APS+ will switch to TV Mode and follow the countdown timer.
Changing the Countdown Timer
Disabling the Buzzer
Note
www.tricklestar.com BLUETOOTH® AV ADVANCED POWERSTRIP+
Press any button but the power button
on an Infrared (IR) remote to turn on
the switched outlets. You will hear a
click as power is supplied to the
switched outlets.
Note: Not all remotes are IR and you
must use an IR remote in this step. If
you're using an IR remote, the sensor
will blink red each time you press a
button.
Press the power on an IR remote to
turn on the TV.
TV Mode
ON
Use peripheral remote controls to
power on other electronics as
needed.
Step 1
Step 3 Step 4
Step 2
When finished watching TV, use the
IR remote to turn it off. All switched
outlets will automatically turn off
within 1 minute.
OFF
Operating Modes and Settings

www.tricklestar.com BLUETOOTH® AV ADVANCED POWERSTRIP+
Sensing Modes
IR-Sensing Mode (IR-only)
Countdown Timer Operation for IR-Sensing (IR only)
For 60/120 minutes - the multi-sensor looks for IR remote activity.
If no IR remote activity is detected during the 60/120 minute countdown period,
the switched outlets and the items plugged into them turn off.
Countdown Timer Operation for Multi-Sensing
For the first 15/30/60 minutes - the multi-sensor looks for IR only.
For the next 15/30/60 minutes - the multi-sensor looks for IR remote activity
and motion.
If no IR remote activity or motion has been sensed during the 30/60/120 minute
countdown period, power supplied to the switched outlets is removed, and the TV
and AV peripheral electronics turn off.
IR + Motion Sensing
surge ground switched
Press a button on an IR remote control to supply power to the
switched outlets
Turn on your TV and AV peripheral electronics
A 15/30/60-minute countdown starts. Did you press a button on an IR
remote and did the sensor detect it (as indicated by a red blink)?
ALERTS START. A continuous red/blue LED flashes for 10 minutes, and an
optional buzzer sounds at 10 min and 3 minutes prior to shutdown.
TV and peripherals turn off.
Yes
No
Yes
No
The next 15/30/60 minute countdown timer starts. IR remote
activity or motion detected?
surge ground switched
Press any button but the power button on an IR remote control
to turn on the switched outlets
Turn on the TV and related electronics
A 60/120-minute countdown starts. Did you press a button on an IR
remote and did the sensor detect it (as indicated by a red blink)?
ALERTS START. A continuous red/blue LED flashes for 10 minutes, and an
optional buzzer sounds at 10 min and 3 minutes prior to shutdown.
TV and peripherals turn off. If installed, TAV-Link sends commands to softly
switch off HDMI-connected peripherals plugged into the always-on outlets.
Yes
No
Sensing Modes
IR-Only Sensing
Countdown Timer Operation for IR-only Sensing
For the 60/120 minutes - the multi-sensor looks for IR remote activity.
If no IR remote activity is detected during the 60/120 minute countdown period,
power supplied to the switched outlets is removed, and the TV and AV
peripheral electronics
turn off
.
Countdown Timer Operation for Multi-Sensing
For the first 15/30/60 minutes - the multi-sensor looks for IR remote activity.
For the next 15/30/60 minutes - the multi-sensor looks for IR remote activity and
motion.
If no IR remote activity or motion is detected during the 30/60/120 minute
countdown period, the switched outlets and the items plugged into them turn off.
Multi-Sensing Mode (IR and motion)
surge ground switched
Press any button but the power button on an IR remote control
to turn on the switched outlets
Turn on the TV and related electronics
A 15/30/60-minute countdown starts. Did you press a button on an IR
remote and did the sensor detect it (as indicated by a red blink)?
ALERTS START. A continuous red/blue LED flashes for 10 minutes, and an
optional buzzer sounds at 10 min and 3 minutes prior to shutdown.
TV and peripherals turn off. If installed, TAV-Link sends commands to softly
switch off HDMI-connected peripherals plugged into the always-on outlets.
Yes
No
Yes
No
The next 15/30/60 minute countdown starts. IR remote activity or
motion detected?
surge ground switched
Press a button on an IR remote control to supply power to the
switched outlets
Turn on your TV and AV peripheral electronics
A 60/120-minute countdown starts. Did you press a button on an IR
remote and did the sensor detect it (as indicated by a red blink)?
ALERTS START. A continuous red/blue LED flashes for 10 minutes, and an
optional buzzer sounds at 10 min and 3 minutes prior to shutdown.
TV and peripherals turn off.
Yes
No

None of the outlets have power.
Press the circuit breaker button on the side of the APS+ to manually turn on all outlets.
The switched outlets don't have power.
The multi-sensor must be connected to the APS+, and the sensor must see a
button press from an Infrared (IR) remote, which is indicated by a red blink.
To manually supply power to the switched outlets, press the button on the
side of the multi-sensor.
The TV peripherals do not switch off when the TV is switched off.
Make sure that the TV is plugged into the outlet labeled <tv> .
Make sure that TV peripherals are connected to the green switched outlets
(except for the TV).
The switched outlets will switch off within one minute of the TV being turned off.
The multi-sensor is blinking on and off every 4 seconds.
This is a notification that no IR remote control activity or motion has been
detected within the countdown period, and that your TV and related
electronics plugged into the switched outlets will turn off within the next 10
minutes.
The TV keeps switching off after 30/60/120 minutes.
The APS+ turns off the TV and related electronics plugged into the switched
outlets after 30/60/120 minutes if no IR remote activity or motion is detected
by the multi-sensor. To reset the timer for another 30/60/120 minutes, press
any button on an IR remote control or move in front of the multi-sensor.
The TV is shutting down within a couple of minutes of being turned on or
going right into Music Mode.
The APS+ didn't properly learn the power profile of your TV. Turn everything
off. Unplug the APS+ from the wall outlet. Unplug the sensor and all devices
from the APS+. Let sit for a few minutes. Plug the devices and sensor back in
to the APS+. Plug the APS+ back into a wall outlet. Follow the "Before First
Use" instructions. This will reset the power profile.
The APS+ won't pair with my mobile device.
If you're having issues pairing the APS+ with your mobile device, please do
the following:
1. Turn off all electronics plugged into the APS+.
2. Unplug the APS+ from the wall outlet. Wait 5 minutes.
3. Plug the APS+ back into the wall outlet.
4. Press and hold the operation button for about 20 seconds until the
Bluetooth Indicator rapidly flashes blue.
5. Reopen the BT AV APS+ mobile app and log in.
6. Hit the "+" button in the bottom right corner to add a device.
7. Follow steps 9-12 of the Bluetooth Pairing instructions to finish pairing
the APS+.
!
!
!
!
!
!
!
www.tricklestar.com
Frequently Asked Questions Troubleshooting
BLUETOOTH® AV ADVANCED POWERSTRIP+
Troubleshooting
None of the outlets have power
The switched outlets don't have
power.
The TV peripherals do not
switch off when the TV is off
The multi-sensor is blinking on
and off every 5 seconds
The TV keeps switching off
after 30/60/120 minutes
The TV is shutting down within
a couple of minutes of being
turned on or going right into
Music Mode.
Press the circuit breaker button on the side
of the APS+ to activate power.
The multi-sensor must be connected to the
APS+ , the TV must be plugged into the
outlet labeled < tv > and IR signal from
any remote must be received to supply
power to the switched outlets.
Alternatively, press the button on the
multi-sensor to switch on switched outlets
manually.
Make sure that the TV is plugged into the
outlet labeled < tv >.
Make sure that the TV peripherals are
connected to the green switched outlets
(except for the one labeled < tv >).
The switched outlets will switch off within
one minute of the TV being turned
off.
This is a notification that your TV and
peripheral electronics plugged into the
switched outlets will shut off in 10 minutes.
The power saving/countdown timer shuts
off the TV and peripherals after 30/60/120
minutes if no IR remote signal or motion is
detected by the sensor. To reset the timer
for another 30/60/120 minutes, press any
button on an IR remote control or move in
front of the multi-sensor.
The APS+ didn't properly learn the power
profile of your TV. Turn everything off.
Unplug the APS+ from the wall outlet.
Unplug the sensor and all devices from the
APS+. Let sit for a few minutes. Plug the
devices and sensor back in to the APS+.
Plug the APS+ back into a wall outlet.
Follow the "Before First Use" instructions.
This will reset the power profile.
Problem Solution
What can I plug into the APS+?
The APS+ is intended to be used with a television and related
electronics.
• Never insert any object other than a plug into the APS+ outlets.
• The APS+ is designed for indoor use only. Do not use it outside.
• Never use the APS+ with appliances, such as refrigerators, electric
kettles, ovens, microwaves, or similar.
• Never use the APS+ with power tools such as power drills, bench saws
or similar.
What TV-related electronics should I plug into the grey always-on
outlets?
Plug in devices that need constant power for recording features, timers
and program guides, such as:
• Set-top boxes
• DVRs
• AV receivers
• Game consoles with HDDs
What TV-related electronics should I plug into the switched outlets?
The TV must be plugged into the green outlet labeled < tv >. Plug in
devices such as the following in to the remaining switched outlets:
• Blu-ray player
• DVD player
• CD player
• Sound bar
• Speakers
• Amplifier
• Game consoles without HDDs
How does the APS+ save energy?
The APS+ saves energy two ways:
1) Eliminates standby power
• After the TV is turned off, the switched outlets and the times
plugged into them turn off within one minute and no longer draw
any power.
2) Monitors activity and powers down unused AV electronics
• In TV Mode, the switched outlets and the items plugged into them
turn off if no IR remote control signal or motion is detected
during the countdown period.
• In Music Mode, switched outlets and the items plugged into them
turn off after eight hours.
• With the optional TAV-Link cable, HDMI-connected peripherals
capable of receiving CEC commands automatically soft-switch off
(or enter a power saving mode) if the TV is turned off, or if there is
no IR remote activity or motion detected during the countdown
period.

The Lifetime of the Product is 10 years (hereafter referred to as Product Warranty).
TrickleStar warrants to the original purchaser that for the Product Warranty it shall be
free of defects in design, assembly, material, or workmanship and will repair or
replace, at its option, any defective product free of charge.
TrickleStar will repair or replace, at its option, any devices which are damaged by a
transient voltage surge/spike or lightning strike (an “Occurrence”) while properly
connected through the Product to a properly-wired AC power line with protective
grounding.
If applicable, the telephone line and/or network line must be properly connected and
installed, and the antenna cable line must also be properly connected and installed
as determined by TrickleStar at its sole discretion.
This Connected Device Warranty is a limited warranty, subject to the limitations and
exclusions set forth herein. TrickleStar will spend to repair or replace the damaged
connected equipment, at TrickleStar’s option, an amount equal to the fair market
value of the damaged equipment or the original purchase price of the equipment,
whichever is less, up to the maximum amount of $100,000.
TrickleStar reserves the right to review the damaged Product, the damaged devices,
and the site where the damage occurred. All costs of shipping the Product and the
damaged devices to TrickleStar for inspection shall be borne solely by the
purchaser. TrickleStar reserves the right to negotiate the cost of repairs. If
TrickleStar determines, in its sole discretion, that it is impractical to ship the
damaged devices to TrickleStar, TrickleStar may designate, in its sole discretion, a
repair facility to inspect and estimate the cost to repair such devices. The cost, if
any, of shipping the devices to and from such repair facility shall be borne solely by
the purchaser.
Damaged Product and connected devices must remain available for inspection until
the claim is finalized. The site or location of damage must remain unchanged and
available for inspection until inspected by TrickleStar or agents of TrickleStar.
Whenever claims are settled, TrickleStar reserves the right to be subrogated under
any existing insurance policies the claimant may have. All above warranties are null
and void if:
• The Product in use during the occurrence was not provided to TrickleStar for
inspection upon TrickleStar’s request at the sole expense of the purchaser.
• TrickleStar determines that the Product has not been installed in accordance
with the Installation Requirements, or altered in any way.
• TrickleStar determines that the damage did not result from the Occurrence, or
that no occurrence in fact took place, or that the repair or replacement of the
damaged devices is covered under a manufacturer’s warranty.
• TrickleStar determines that the connected devices were not used under normal
operating conditions or in accordance with any labels or instructions.
• The Product was not plugged directly into a grounded outlet receptacle.
• The Product is “daisy-chained” together in serial fashion with other power strips,
UPS devices, other surge protectors, or extension cords.
• A three-to-two-prong adapter was used.
• The Product was not used indoors.
Product Warranty
Connected Device Warranty
Making a Warranty Claim
Copyright and Disclaimer
This Product is not for use with aquariums and all other water-related products. Use
only indoors and in dry locations. The Connected Device Warranty only protects
against damage to properly-connected devices where TrickleStar has determined, in
its sole discretion, that the damage resulted from an Occurrence, and does not
protect against acts of God (other than lightning) such as flood, earthquake, war,
vandalism, theft, normal-use wear and tear, erosion, depletion, obsolescence,
abuse, damage due to low voltage disturbances (i.e. brownouts or sags),
non-authorized program, or device modification or alteration. This is the sole
warranty of TrickleStar; there are no other warranties, expressed or, except as
required by law, implied, including the implied warranty or condition of quality,
merchantability or fitness for a particular purpose, and such implied warranties, if
any, are limited in duration to the term of this warranty. Some states do not allow
limitations on how long an implied warranty lasts, so the above limitations may not
apply to you.
In no event shall TrickleStar be liable for incidental, special, direct, indirect,
consequential or multiple damages such as, but not limited to, lost business or
profits arising out of the sale or use of any Product even if advised of the possibility
of such damages. This warranty gives you specific legal rights, and you may also
have other rights, which may vary from state to state. Some states do not allow the
exclusion or limitation of incidental or consequential damage, so the above
limitations may not apply to you.
This warranty is valid only for the original purchaser of the product. All damage
claims against the product must be made within 30 days from the date of the
Occurrence and must be accompanied by a receipt for the damaged devices, or the
warranty is void.
Warranty is valid in the United States and Canada.
Go to www.tricklestar.com, print our warranty claim form, and email it to
warranty@tricklestar.com.
Provide the following information:
• Product part number
• A list of the devices that were connected to the Product at the time of the
occurrence
• A list of the devices that were damaged during the occurrence and the extent of
the damage
• The date of the Occurrence
• When and where you purchased the Product
• A copy of original purchase receipt
A customer service representative will then instruct you on how to forward your
devices, receipt, and product in use during the Occurrence and how to proceed with
your claim.
©2019 TrickleStar, Inc. TrickleStar®is a registered trademark of TrickleStar, Ltd. Any
typographical, clerical or other error or omission in this document or other documents or
information issued by TrickleStar shall be subject to correction without any liability on the part of
TrickleStar without notice.
www.tricklestar.com BLUETOOTH® AV ADVANCED POWERSTRIP+
Warranty Information

FCC Label Compliance Statement:
This device complies with Part 15 of the FCC Rules. Operation is subject to the
following two conditions:
(1) this device may not cause harmful interference, and
(2) this device must accept any interference received, including interference that
may cause undesired operation.
To assure continued FCC compliance:
1. Any changes or modifications not expressly approved by the grantee of this
device could void the user's authority to operate the equipment.
2. This equipment complies with FCC radiation exposure limits set forth for an
uncontrolled environment. This equipment should be installed and operated with
minimum distance 20cm between the radiator & your body.
IC Statement
This device complies with Industry Canada license-exempt RSS standard(s).
Operation is subject to the following two conditions:
(1) this device may not cause interference, and
(2) this device must accept any interference, including interference that may cause
undesired operation of the device.
This equipment complies with IC radiation exposure limits set forth for an
uncontrolled environment. This equipment should be installed and operated with
minimum distance 20cm between the radiator and your body.
Cet appareil radio est conforme au CNR-247d’Industrie Canada. L’utilisation de ce
dispositif est autorisée seulement aux deux conditions suivantes :
(1) il ne doit pas produire de brouillage, et
(2) l’utilisateur du dispositif doit être prêt à accepter tout brouillage radioélectrique
reçu, même si ce brouillage est susceptible de compromettre le fonctionnement
du dispositif.
Cet équipement est conforme aux limites d’exposition aux rayonnements IC établies
pour un environnement non contrôlé. Cet équipement doit être installé et utilisé
avec un minimum de 20 cm de distance entre la source de rayonnement et votre
corps.
CAN ICES-3 (B)/NMB-3(B)
This equipment has been tested and found to comply with the limits for a Class B
digital device, pursuant to Part 15 of the FCC Rules. These limits are designed to
provide reasonable protection against harmful interference in a residential
installation. This equipment generates, uses and can radiate radio frequency energy
and, if not installed and used in accordance with the instructions, may cause
harmful interference to radio communications. However, there is no guarantee that
interference will not occur in a particular installation. If this equipment does cause
harmful interference to radio or television reception, which can be determined by
turning the equipment off and on, the user is encouraged to try to correct the
interference by one or more of the following measures:
-- Reorient or relocate the receiving antenna.
-- Increase the separation between the equipment and receiver.
-- Connect the equipment into an outlet on a circuit different from that to which the
receiver is connected.
-- Consult the dealer or an experienced radio/TV technician for help.
www.tricklestar.com BLUETOOTH® AV ADVANCED POWERSTRIP+
FCC Statement
Table of contents
Other TrickleStar Power Strip manuals

TrickleStar
TrickleStar 180SS-DE-6XX User manual

TrickleStar
TrickleStar Tier 2 User manual

TrickleStar
TrickleStar TS1811 User manual

TrickleStar
TrickleStar SENSORCLICK TS1812LL User manual

TrickleStar
TrickleStar 188LV-US-7XX User manual

TrickleStar
TrickleStar 180SS-UK-5XX User manual

TrickleStar
TrickleStar TS1810 User manual

TrickleStar
TrickleStar PowerStation1500 User manual

TrickleStar
TrickleStar 175SS-US-4 Series User manual

TrickleStar
TrickleStar 180SS-US-7 Series User manual